Author: onlinefoodrecipes

  • Caesar Salad Without Anchovies Recipe: A Classic Twist

    Caesar Salad Without Anchovies Recipe: A Classic Twist

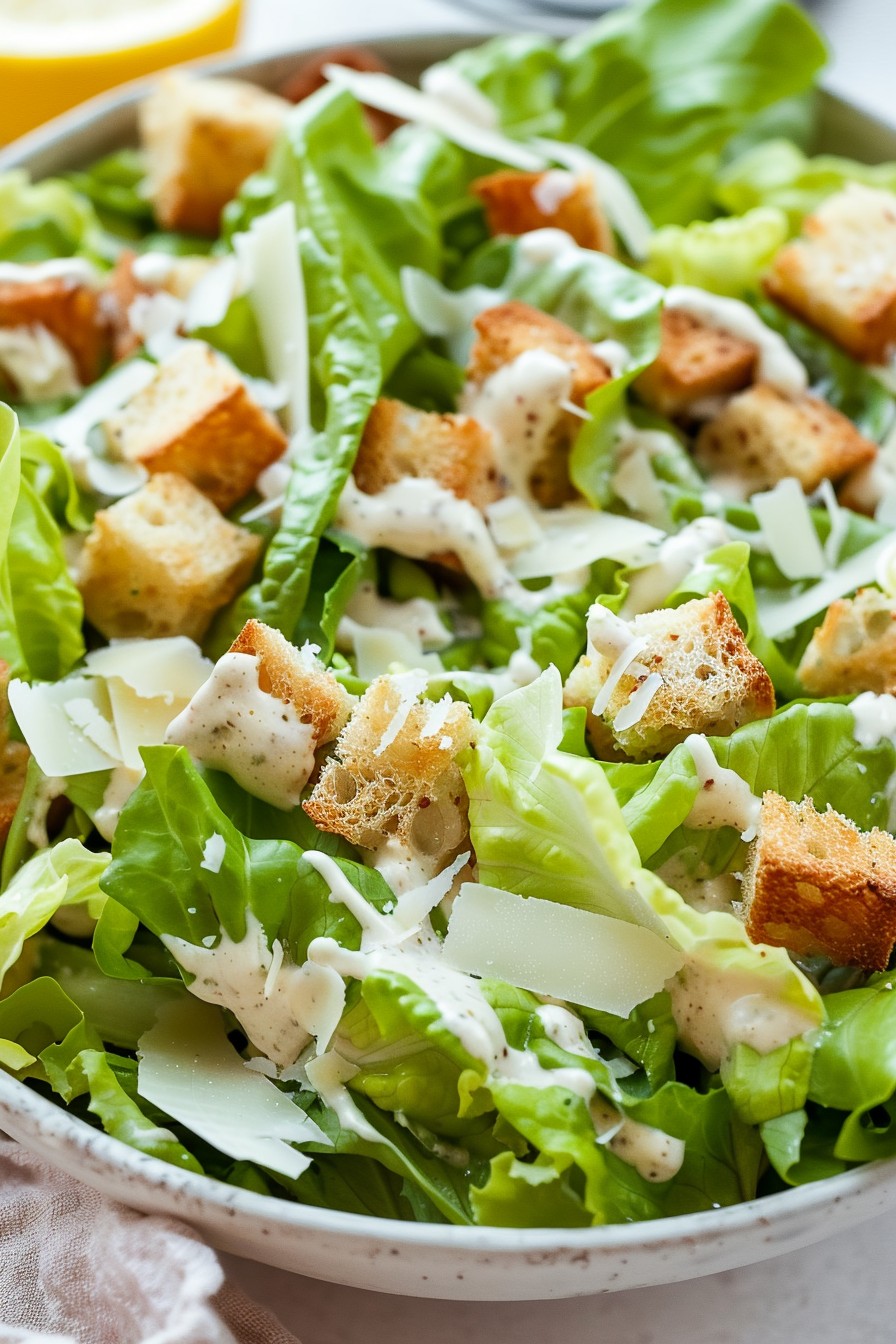
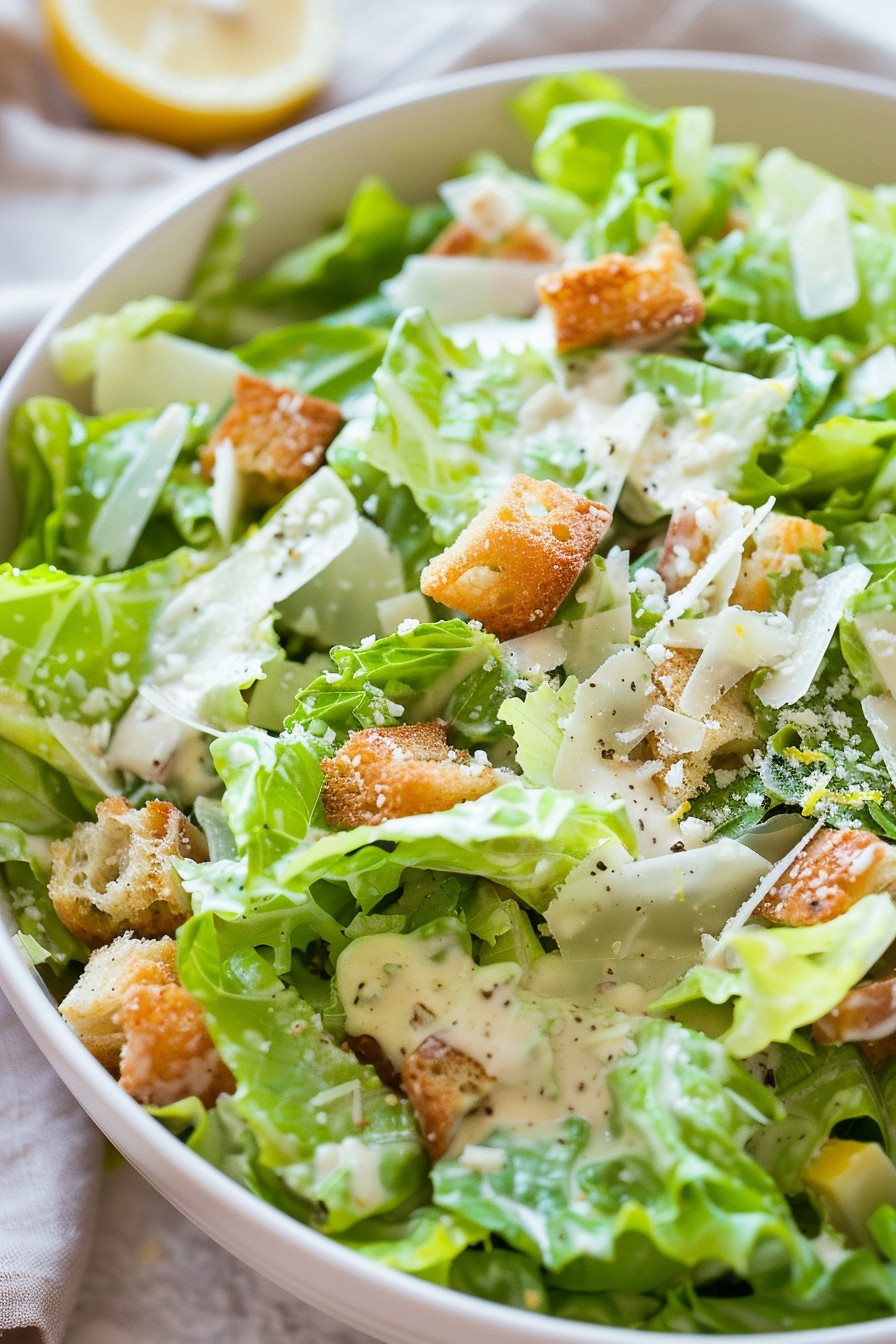
    Never let the absence of anchovies stop you from enjoying a classic Caesar salad. This version keeps all the creamy, garlicky goodness without the fishy business. Perfect for those who prefer their greens without a side of seafood.

    Why This Recipe Works

    • Uses Worcestershire sauce for that umami depth without anchovies.
    • Creamy dressing made with mayonnaise ensures a rich texture.
    • Freshly grated Parmesan adds a nutty, salty flavor that elevates the dish.
    • Homemade croutons provide the perfect crunch.
    • Quick and easy to prepare, making it a great last-minute side or main.

    Ingredients

    • 1 large head romaine lettuce, chopped (about 6 cups)
    • 1/2 cup mayonnaise
    • 2 tablespoons lemon juice
    • 1 teaspoon Worcestershire sauce
    • 1 teaspoon Dijon mustard
    • 2 cloves garlic, minced
    • 1/2 cup freshly grated Parmesan cheese
    • 1 cup croutons
    • Salt and pepper to taste

    Equipment Needed

    • Large salad bowl
    • Small mixing bowl
    • Whisk
    • Measuring cups and spoons
    • Knife and cutting board

    Instructions

    Caesar Salad Without Anchovies Recipe

    Prepare the Dressing

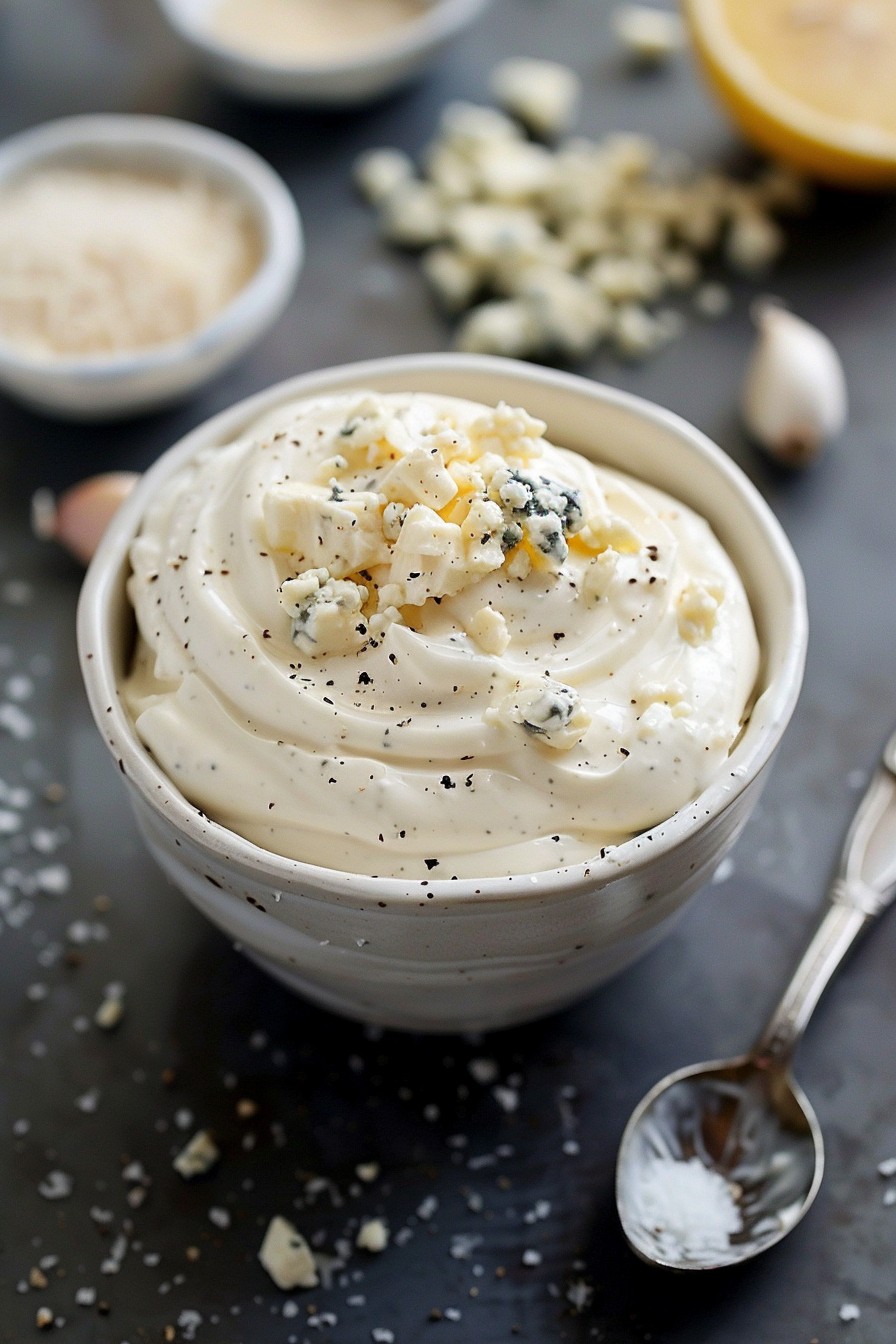
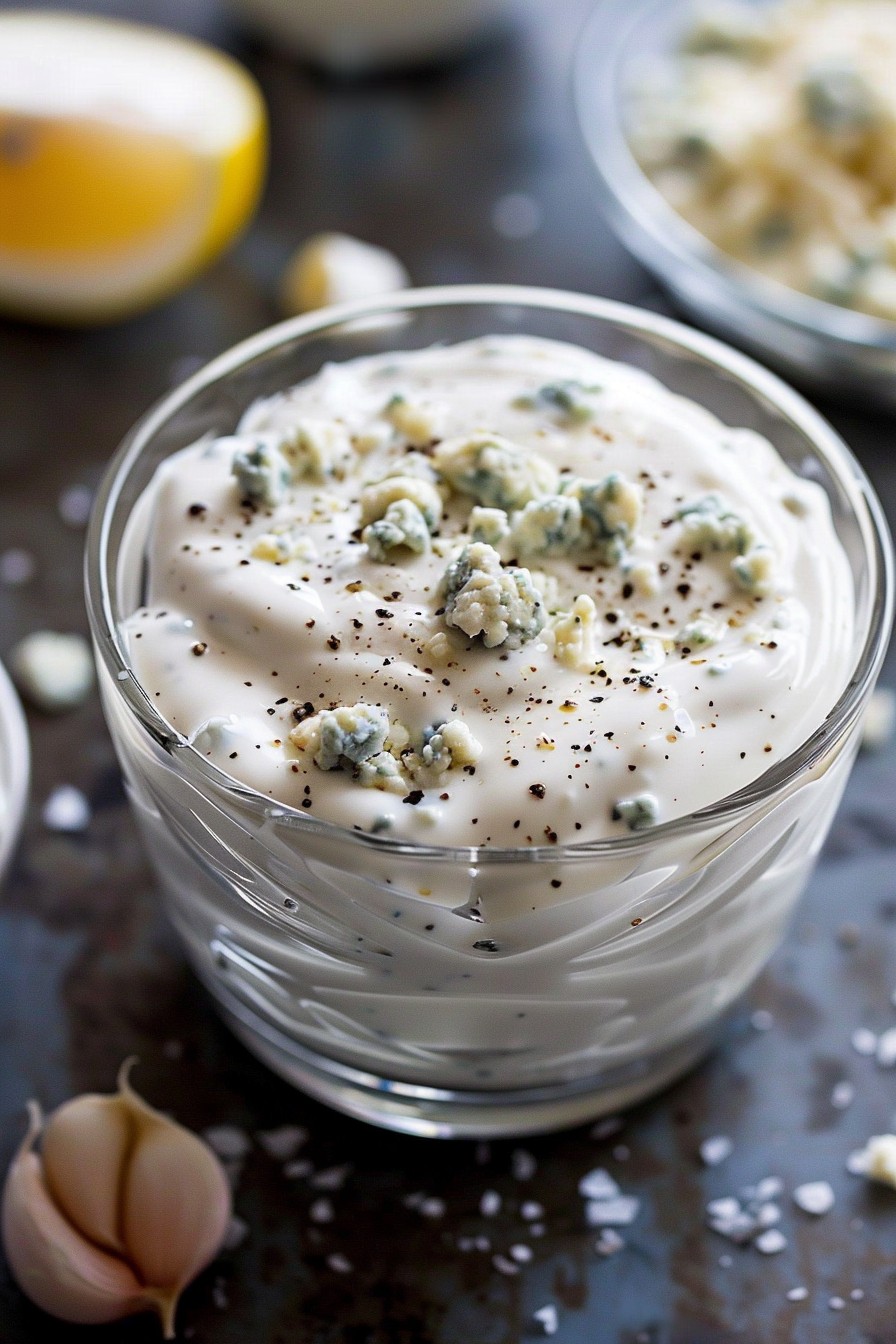
    In a small mixing bowl, whisk together the mayonnaise, lemon juice, Worcestershire sauce, Dijon mustard, and minced garlic until smooth. Season with salt and pepper to taste. This dressing is the heart of your salad, so take your time to ensure it’s well blended.

    Chop the Lettuce

    Wash and dry the romaine lettuce thoroughly, then chop it into bite-sized pieces. Dry lettuce is key to a crisp salad, so don’t skip the drying step. Transfer the lettuce to a large salad bowl.

    Add the Dressing

    Pour the dressing over the chopped lettuce. Use salad tongs or your hands to toss the lettuce until every leaf is evenly coated with the dressing. This ensures every bite is flavorful.

    Top with Parmesan and Croutons

    Sprinkle the freshly grated Parmesan cheese and croutons over the dressed lettuce. Toss lightly to distribute the toppings evenly. The Parmesan adds a salty, nutty flavor, while the croutons bring the crunch.

    Serve Immediately

    For the best texture and flavor, serve the salad right after preparing it. This prevents the croutons from getting soggy and keeps the lettuce crisp.

    Tips and Tricks

    For an extra flavor boost, toast the croutons in a bit of olive oil and garlic before adding them to the salad. If you’re making the salad ahead of time, keep the dressing and croutons separate until just before serving to maintain freshness. For a lighter version, you can substitute Greek yogurt for half of the mayonnaise in the dressing. Always use freshly grated Parmesan for the best flavor; pre-grated cheese often contains anti-caking agents that can affect texture.

    Recipe Variations

    • Add grilled chicken or shrimp for a protein-packed meal.
    • Substitute kale for romaine for a heartier green.
    • Include avocado slices for a creamy texture and healthy fats.
    • Use gluten-free croutons for a gluten-free version.
    • Add a sprinkle of red pepper flakes for a spicy kick.

    Frequently Asked Questions

    Can I make the dressing ahead of time?

    Absolutely! The dressing can be stored in an airtight container in the refrigerator for up to 3 days. Just give it a good stir before using to recombine any separated ingredients.

    What can I use instead of Worcestershire sauce?

    If you don’t have Worcestershire sauce, you can use a splash of soy sauce or tamari for a similar umami flavor. Just adjust the quantity to taste, as these alternatives can be saltier.

    How can I make this salad vegan?

    To make a vegan version, substitute the mayonnaise with a vegan mayo, use nutritional yeast instead of Parmesan, and ensure your Worcestershire sauce is anchovy-free (many brands contain anchovies).

    Summary

    This Caesar salad without anchovies delivers all the classic flavors you love, with a creamy, garlicky dressing and plenty of crunch. It’s versatile, easy to make, and sure to be a hit at any meal.

  • Amish Broccoli Cauliflower Salad Recipe: A Crunchy, Creamy Delight

    Amish Broccoli Cauliflower Salad Recipe: A Crunchy, Creamy Delight

    Delight your taste buds with this Amish-inspired broccoli cauliflower salad that’s bursting with flavors and textures. Perfect for picnics, potlucks, or a healthy side dish, this recipe is a crowd-pleaser.

    Why This Recipe Works

    • The combination of raw broccoli and cauliflower provides a satisfying crunch and is packed with nutrients.
    • A creamy, slightly sweet dressing balances the vegetables’ natural bitterness.
    • Adding bacon and cheese introduces a savory depth that makes this salad irresistible.
    • It’s a make-ahead dish, allowing flavors to meld beautifully in the fridge.
    • Versatile and easy to customize based on what you have in your pantry.

    Ingredients

    • 4 cups broccoli florets, chopped into bite-sized pieces
    • 4 cups cauliflower florets, chopped into bite-sized pieces
    • 1/2 cup red onion, finely diced
    • 1 cup cheddar cheese, shredded
    • 6 strips bacon, cooked and crumbled
    • 1/2 cup mayonnaise
    • 1/4 cup sour cream
    • 2 tablespoons apple cider vinegar
    • 2 tablespoons sugar
    • Salt and pepper to taste

    Equipment Needed

    • Large mixing bowl
    • Whisk
    • Measuring cups and spoons
    • Knife and cutting board

    Instructions

    Amish Broccoli Cauliflower Salad Recipe

    Step 1: Prepare the Vegetables

    Start by washing the broccoli and cauliflower under cold water. Dry them thoroughly to ensure the dressing sticks well. Chop into bite-sized pieces for easy eating. Finely dice the red onion to distribute its flavor evenly throughout the salad.

    Step 2: Make the Dressing

    In a small bowl, whisk together mayonnaise, sour cream, apple cider vinegar, and sugar until smooth. Season with salt and pepper to taste. This creamy dressing will coat the vegetables perfectly, offering a sweet and tangy flavor profile.

    Step 3: Combine Ingredients

    In a large mixing bowl, combine the chopped broccoli, cauliflower, red onion, shredded cheddar cheese, and crumbled bacon. Pour the dressing over the top and gently toss until everything is evenly coated. Tip: Letting the salad sit for an hour before serving enhances the flavors.

    Step 4: Chill Before Serving

    Cover the bowl with plastic wrap and refrigerate for at least 1 hour. This chilling time allows the flavors to meld together and the vegetables to slightly soften, making the salad even more delicious.

    Step 5: Final Touches

    Before serving, give the salad a quick stir to redistribute the dressing. Taste and adjust seasoning if necessary. For an extra crunch, sprinkle some additional bacon crumbles on top.

    Tips and Tricks

    For those looking to elevate this Amish broccoli cauliflower salad, consider roasting the broccoli and cauliflower for a deeper flavor. If you’re short on time, pre-chopped vegetables from the store can be a lifesaver. To make this salad healthier, substitute Greek yogurt for mayonnaise and sour cream. Always taste the dressing before adding it to the salad to ensure the balance of flavors is to your liking. Lastly, for a vegetarian version, simply omit the bacon or use a plant-based alternative.

    Recipe Variations

    • Add sunflower seeds or chopped nuts for an extra crunch.
    • Incorporate dried cranberries or raisins for a sweet contrast.
    • Use a mix of different cheeses like feta or blue cheese for a unique twist.
    • For a lighter version, replace half of the mayonnaise with Greek yogurt.
    • Add diced apples or grapes for a fruity flavor burst.

    Frequently Asked Questions

    Can I make this salad ahead of time?

    Absolutely! This salad actually tastes better after it’s had time to sit in the fridge, allowing the flavors to meld. Just be sure to add any crunchy toppings like nuts or additional bacon right before serving to maintain their texture.

    How long does this salad last in the fridge?

    Stored in an airtight container, this salad can last up to 3 days in the refrigerator. However, it’s best enjoyed within the first 48 hours for optimal freshness and texture.

    Can I freeze this salad?

    Freezing is not recommended as the vegetables will become mushy upon thawing, and the mayonnaise-based dressing may separate, affecting the salad’s texture and flavor.

    Summary

    This Amish broccoli cauliflower salad is a perfect blend of crunchy vegetables, creamy dressing, and savory toppings. It’s easy to make, customizable, and always a hit at gatherings. Give it a try for your next meal or event!

  • Spinach and Kale Salad Recipe: A Leafy Green Delight

    Spinach and Kale Salad Recipe: A Leafy Green Delight

    Ready to dive into a bowl of greens that’s anything but boring? This spinach and kale salad is packed with flavors and textures that will make you forget you’re eating something healthy. Let’s get started!

    Why This Recipe Works

    • The combination of spinach and kale offers a perfect balance of tender and hearty greens.
    • A homemade dressing brings everything together with a zesty kick.
    • Adding nuts and cheese introduces a delightful crunch and creaminess.
    • It’s versatile enough to serve as a side or bulk up for a main dish.
    • Prep is quick and easy, making it perfect for busy weeknights.

    Ingredients

    • 2 cups fresh spinach, washed and dried
    • 2 cups kale, stems removed and leaves torn into bite-sized pieces
    • 1/4 cup olive oil
    • 2 tbsp lemon juice
    • 1 tsp honey
    • 1/2 tsp salt
    • 1/4 tsp black pepper
    • 1/4 cup walnuts, toasted and chopped
    • 1/4 cup feta cheese, crumbled

    Equipment Needed

    • Large salad bowl
    • Small mixing bowl
    • Whisk
    • Measuring cups and spoons
    • Knife and cutting board

    Instructions

    Spinach And Kale Salad Recipe

    Step 1: Prepare the Greens

    Start by washing your spinach and kale under cold water. Dry them thoroughly using a salad spinner or patting them dry with a clean kitchen towel. Tear the kale into bite-sized pieces and place both greens in a large salad bowl. Tip: Massaging the kale with a bit of olive oil can help soften its texture.

    Step 2: Make the Dressing

    In a small mixing bowl, whisk together the olive oil, lemon juice, honey, salt, and black pepper until well combined. Taste and adjust the seasoning if necessary. This dressing is the secret to bringing all the flavors together, so don’t skip it!

    Step 3: Toast the Walnuts

    Heat a small skillet over medium heat. Add the walnuts and toast them for about 3-5 minutes, stirring occasionally, until they’re fragrant and slightly browned. Let them cool before chopping. Tip: Toasting nuts enhances their flavor and adds a nice crunch to the salad.

    Step 4: Assemble the Salad

    Add the toasted walnuts and crumbled feta cheese to the bowl with the greens. Drizzle the dressing over the top and toss everything together until well coated. Serve immediately for the best texture and flavor.

    Tips and Tricks

    For an extra flavor boost, try adding a pinch of garlic powder or a dash of Dijon mustard to the dressing. If you’re not a fan of walnuts, almonds or pecans make great substitutes. To make this salad a meal, add some grilled chicken or shrimp. Remember, the key to a great salad is in the dressing, so don’t be afraid to experiment with different vinegars or citrus juices to find your perfect match.

    Recipe Variations

    • Swap out the feta for goat cheese or blue cheese for a different creamy element.
    • Add some dried cranberries or sliced apples for a sweet contrast to the savory flavors.
    • Include avocado slices for extra creaminess and healthy fats.
    • Try using different nuts like almonds or pecans for a variation in texture and taste.
    • For a vegan version, omit the cheese or use a plant-based alternative.

    Frequently Asked Questions

    Can I make this salad ahead of time?

    Yes, you can prepare the greens and dressing separately up to a day in advance. However, wait to toss everything together until you’re ready to serve to prevent the greens from getting soggy.

    How can I store leftovers?

    Store any leftovers in an airtight container in the refrigerator for up to 2 days. The greens may wilt slightly, but it will still be tasty.

    Is there a substitute for honey in the dressing?

    Absolutely! Maple syrup or agave nectar are great vegan alternatives that will still give you that hint of sweetness.

    Summary

    This spinach and kale salad is a vibrant, flavorful dish that’s as nutritious as it is delicious. With its simple ingredients and easy preparation, it’s sure to become a staple in your recipe collection.

  • Fall Spinach Salad Recipe: A Crunchy, Nutty Delight

    Fall Spinach Salad Recipe: A Crunchy, Nutty Delight

    Unleash the flavors of fall with this vibrant spinach salad that’s packed with texture and taste. Perfect for those who love a hearty yet healthy dish that’s as nutritious as it is delicious.

    Why This Recipe Works

    • The combination of fresh spinach, crunchy nuts, and sweet dried cranberries offers a perfect balance of textures and flavors.
    • A homemade vinaigrette dressing elevates the salad with a tangy and sweet profile that complements the ingredients beautifully.
    • Quick and easy to prepare, this salad is ideal for busy weeknights or as a show-stopping side at your next gathering.

    Ingredients

    • 6 cups fresh spinach, washed and dried
    • 1/2 cup walnuts, toasted and chopped
    • 1/4 cup dried cranberries
    • 1/4 cup crumbled feta cheese
    • 2 tbsp olive oil
    • 1 tbsp balsamic vinegar
    • 1 tsp honey
    • Salt and pepper to taste

    Equipment Needed

    • Large salad bowl
    • Small mixing bowl
    • Whisk
    • Measuring cups and spoons

    Instructions

    Fall Spinach Salad Recipe

    Step 1: Prepare the Dressing

    In a small mixing bowl, whisk together the olive oil, balsamic vinegar, honey, and a pinch of salt and pepper until well combined. Taste and adjust the seasoning if necessary. This dressing is the secret to bringing all the salad components together with its perfect balance of tangy and sweet.

    Step 2: Toast the Walnuts

    Heat a dry skillet over medium heat and add the walnuts. Toast them for about 5 minutes, stirring frequently, until they’re fragrant and slightly golden. Be careful not to burn them, as this can introduce a bitter taste to your salad.

    Step 3: Assemble the Salad

    In a large salad bowl, combine the fresh spinach, toasted walnuts, dried cranberries, and crumbled feta cheese. The key here is to distribute the ingredients evenly so every bite is packed with flavor and texture.

    Step 4: Dress the Salad

    Drizzle the dressing over the salad just before serving. Toss gently to ensure all the ingredients are lightly coated with the dressing. This step is crucial for achieving the perfect flavor balance without making the salad soggy.

    Step 5: Serve Immediately

    Enjoy your fall spinach salad right away to appreciate the crispness of the spinach and the crunch of the walnuts. This salad doesn’t keep well once dressed, so it’s best served fresh.

    Tips and Tricks

    For an extra layer of flavor, consider adding a sprinkle of cinnamon or nutmeg to the dressing. These spices complement the fall theme beautifully. If you’re not a fan of walnuts, pecans or almonds make excellent substitutes. To save time, you can toast the nuts in advance and store them in an airtight container. Always wash and dry the spinach thoroughly to prevent the dressing from diluting. For a vegan version, omit the feta cheese or use a plant-based alternative.

    Recipe Variations

    • Add sliced apples or pears for a fresh, fruity twist.
    • Incorporate quinoa or chickpeas for added protein and heartiness.
    • Swap the balsamic vinegar for apple cider vinegar in the dressing for a different flavor profile.
    • Use goat cheese instead of feta for a creamier texture.
    • Add avocado slices for a boost of healthy fats and creaminess.

    Frequently Asked Questions

    Can I make this salad ahead of time? Yes, you can prepare the ingredients and dressing separately in advance. However, combine them only just before serving to maintain the best texture and freshness.

    What can I use instead of spinach? Kale or mixed greens are great alternatives. Just ensure they’re fresh and properly prepared for the best results.

    How can I make this salad more filling? Adding grilled chicken, salmon, or tofu can turn this salad into a satisfying main course with added protein.

    Summary

    This fall spinach salad is a delightful mix of textures and flavors, featuring fresh spinach, crunchy walnuts, sweet cranberries, and a tangy homemade dressing. It’s quick to prepare, making it perfect for any occasion.

  • Shrimp and Avocado Salad Recipe: A Refreshing Summer Delight

    Shrimp and Avocado Salad Recipe: A Refreshing Summer Delight

    A absolutely delightful dish that combines the creamy texture of avocado with the succulent taste of shrimp, perfect for those warm summer days. This recipe is not only easy to make but also packs a punch of flavors that will leave your taste buds dancing.

    Why This Recipe Works

    • The combination of shrimp and avocado offers a perfect balance of protein and healthy fats, making it a nutritious meal option.
    • With minimal cooking required, this recipe is quick to prepare, ideal for busy weeknights or last-minute gatherings.
    • The lime dressing adds a zesty kick, enhancing the natural flavors of the ingredients without overpowering them.

    Ingredients

    • 1 lb shrimp, peeled and deveined
    • 2 ripe avocados, diced
    • 1 cup cherry tomatoes, halved
    • 1/4 cup red onion, finely chopped
    • 2 tbsp olive oil
    • 1 lime, juiced
    • Salt and pepper to taste

    Equipment Needed

    • Mixing bowl
    • Skillet
    • Knife
    • Cutting board

    Instructions

    Shrimp And Avocado Salad Recipe

    Prepare the Shrimp

    Heat the olive oil in a skillet over medium-high heat. Add the shrimp, seasoning with salt and pepper, and cook for 2-3 minutes on each side until they turn pink and opaque. Remove from heat and let them cool slightly.

    Chop the Vegetables

    While the shrimp are cooling, dice the avocados, halve the cherry tomatoes, and finely chop the red onion. Combine these in a large mixing bowl.

    Make the Dressing

    In a small bowl, whisk together the lime juice, a tablespoon of olive oil, and a pinch of salt and pepper. Adjust the seasoning to your taste.

    Combine Everything

    Add the slightly cooled shrimp to the bowl with the vegetables. Drizzle the dressing over the top and gently toss to combine all the ingredients evenly.

    Serve Immediately

    This salad is best enjoyed fresh. Serve it on its own or with a side of crusty bread for a more filling meal.

    Tips and Tricks

    For the best flavor, use ripe but firm avocados. They should yield slightly to pressure but not be mushy. If you’re not serving the salad immediately, add the avocado last to prevent it from browning. You can also substitute the shrimp with grilled chicken for a different protein option. The dressing can be made ahead of time and stored in the fridge for up to a week.

    Recipe Variations

    • Add a handful of corn kernels for a sweet crunch.
    • Include some diced cucumber for extra freshness.
    • Swap the lime juice with lemon juice for a different citrus note.
    • Add a sprinkle of chili flakes for a spicy kick.
    • Use mango instead of tomatoes for a tropical twist.

    Frequently Asked Questions

    Can I make this salad ahead of time?

    Yes, but for the best texture and flavor, add the avocado and dressing just before serving. The other components can be prepared ahead and stored in the fridge.

    Can I use frozen shrimp?

    Absolutely! Just make sure to thaw them completely and pat them dry before cooking to ensure they sear properly.

    How can I tell if the shrimp are cooked?

    Shrimp are done when they turn pink and opaque. Overcooking can make them rubbery, so keep an eye on them during cooking.

    Summary

    This shrimp and avocado salad is a quick, nutritious, and flavorful dish perfect for any occasion. With simple ingredients and easy steps, it’s sure to become a favorite.

  • Sun-Dried Tomato Dense Bean Salad Recipe: A Flavor Bomb in Every Bite

    Sun-Dried Tomato Dense Bean Salad Recipe: A Flavor Bomb in Every Bite

    Now, let’s dive into a recipe that’s as nutritious as it is delicious. This sun-dried tomato dense bean salad is packed with flavors and textures that will make your taste buds dance. Perfect for picnics, potlucks, or a healthy lunch option, this salad is a crowd-pleaser.

    Why This Recipe Works

    • The combination of creamy beans and tangy sun-dried tomatoes creates a perfect balance of flavors.
    • It’s loaded with protein and fiber, making it a filling meal that’s also good for you.
    • The salad gets better as it sits, making it a great make-ahead dish.
    • It’s versatile and can be customized with whatever ingredients you have on hand.
    • The dressing is simple yet packs a punch, tying all the ingredients together beautifully.

    Ingredients

    • 2 cups cooked dense beans (like cannellini or garbanzo), drained and rinsed
    • 1/2 cup sun-dried tomatoes in oil, drained and chopped
    • 1/4 cup red onion, finely diced
    • 1/4 cup fresh parsley, chopped
    • 2 tbsp olive oil
    • 1 tbsp balsamic vinegar
    • Salt and pepper to taste

    Equipment Needed

    • Mixing bowl
    • Measuring cups and spoons
    • Knife and cutting board
    • Salad spoon

    Instructions

    Sun Dried Tomato Dense Bean Salad Recipe

    Step 1: Prep Your Ingredients

    Start by draining and rinsing your beans to remove any excess sodium or canning liquid. Chop the sun-dried tomatoes into bite-sized pieces if they’re not already pre-chopped. Finely dice the red onion to ensure it distributes evenly throughout the salad. Chop the fresh parsley for a burst of color and freshness. Tip: Soaking the red onion in cold water for 10 minutes can mellow its sharpness.

    Step 2: Make the Dressing

    In a small bowl, whisk together the olive oil and balsamic vinegar until well combined. Season with salt and pepper to taste. This simple dressing will enhance the natural flavors of the salad ingredients without overpowering them. Tip: For an extra flavor boost, add a minced garlic clove to the dressing.

    Step 3: Combine the Salad

    In a large mixing bowl, combine the beans, sun-dried tomatoes, red onion, and parsley. Pour the dressing over the top and gently toss until everything is evenly coated. The salad should be colorful and well-mixed, with each ingredient shining through. Tip: Let the salad sit for at least 30 minutes before serving to allow the flavors to meld.

    Tips and Tricks

    For those looking to elevate their sun-dried tomato dense bean salad, consider roasting your own beans instead of using canned for a deeper flavor. Adding a sprinkle of feta cheese or toasted nuts can introduce a new texture and taste dimension. If you’re meal prepping, this salad keeps well in the fridge for up to 3 days, making it a convenient option for busy weeks. Experiment with different herbs like basil or cilantro for a fresh twist. Lastly, for a creamier texture, mash a small portion of the beans before mixing them in.

    Recipe Variations

    • Add grilled chicken or shrimp for a protein-packed meal.
    • Swap out the dense beans for lentils or chickpeas for a different texture.
    • Incorporate quinoa or farro to make it more filling.
    • Use different types of sun-dried tomatoes, such as those packed with herbs, for added flavor.
    • Add avocado slices for creaminess and healthy fats.

    Frequently Asked Questions

    Can I use dried beans instead of canned? Absolutely! Just be sure to soak and cook them according to package instructions before using in the salad. This might add some prep time but can enhance the salad’s texture and flavor.

    How long does this salad last in the fridge? Stored in an airtight container, the salad will stay fresh for up to 3 days. The flavors will continue to develop, making it even more delicious over time.

    Can I make this salad vegan? Yes, this recipe is naturally vegan as long as you ensure your sun-dried tomatoes and other ingredients don’t contain any animal products.

    Summary

    This sun-dried tomato dense bean salad is a vibrant, flavorful dish that’s as easy to make as it is delicious. Perfect for any occasion, it’s a healthy, protein-packed option that doesn’t skimp on taste.

  • Cucumber Noodle Salad Recipe: A Refreshing Twist on Pasta Salad

    Cucumber Noodle Salad Recipe: A Refreshing Twist on Pasta Salad

    Get ready to spiralize your way into a healthier, crunchier version of pasta salad that’s perfect for those hot summer days or when you’re just craving something light and refreshing. This cucumber noodle salad is not only easy to make but also packed with flavors that will make your taste buds dance.

    Why This Recipe Works

    • It’s a fantastic low-carb alternative to traditional pasta salads, making it ideal for those watching their carb intake.
    • The combination of crisp cucumber noodles with a tangy dressing creates a refreshing dish that’s perfect for summer.
    • It’s incredibly versatile; you can add any of your favorite veggies or proteins to make it your own.
    • Preparation is a breeze, especially if you have a spiralizer, turning what could be a mundane salad into something fun and exciting.
    • It’s a great way to stay hydrated, thanks to the high water content in cucumbers.

    Ingredients

    • 2 large cucumbers, spiralized
    • 1/2 cup cherry tomatoes, halved
    • 1/4 cup red onion, thinly sliced
    • 1/4 cup feta cheese, crumbled
    • 2 tbsp olive oil
    • 1 tbsp lemon juice
    • 1 tsp honey
    • Salt and pepper to taste

    Equipment Needed

    • Spiralizer
    • Mixing bowl
    • Whisk
    • Measuring cups and spoons

    Instructions

    Cucumber Noodle Salad Recipe

    Step 1: Prepare Your Cucumber Noodles

    Start by washing your cucumbers thoroughly. Using a spiralizer, turn your cucumbers into noodles. If you don’t have a spiralizer, a vegetable peeler can work to create thin ribbons. Place your cucumber noodles in a large mixing bowl. Tip: To prevent your salad from becoming watery, let the cucumber noodles sit for a few minutes after spiralizing, then pat them dry with a paper towel.

    Step 2: Add the Veggies and Cheese

    Add the halved cherry tomatoes and thinly sliced red onion to the bowl with the cucumber noodles. Sprinkle the crumbled feta cheese over the top. The combination of these ingredients not only adds a burst of color but also a variety of textures and flavors that complement the cucumber noodles perfectly.

    Step 3: Whisk Together the Dressing

    In a small bowl, whisk together the olive oil, lemon juice, honey, and a pinch of salt and pepper until well combined. This simple dressing brings a tangy and slightly sweet flavor that ties all the ingredients together beautifully. Tip: For an extra flavor boost, let the dressing sit for a few minutes before adding it to the salad to allow the flavors to meld.

    Step 4: Combine and Toss

    Pour the dressing over the cucumber noodles and veggies. Gently toss everything together until the salad is evenly coated with the dressing. Be careful not to overmix, as the cucumber noodles can become mushy if handled too roughly.

    Step 5: Serve and Enjoy

    Transfer the salad to a serving dish and enjoy immediately for the best texture and flavor. If you need to prepare it ahead of time, keep the dressing separate and toss it with the salad just before serving to keep the cucumbers crisp. Tip: For an added crunch, sprinkle some toasted almonds or sunflower seeds on top before serving.

    Tips and Tricks

    To elevate your cucumber noodle salad, consider these advanced tips. First, if you’re serving this salad at a party, consider using a variety of colored cucumbers, like English and Persian, for a more visually appealing dish. Second, for a protein-packed version, add grilled chicken or shrimp. Third, if you’re not a fan of feta, try substituting it with goat cheese or avocado for a different flavor profile. Lastly, for a spicy kick, add a pinch of red pepper flakes to the dressing.

    Recipe Variations

    • Asian-Inspired: Swap the dressing with a mix of soy sauce, sesame oil, and rice vinegar. Add some sliced bell peppers and sprinkle with sesame seeds.
    • Mediterranean Twist: Add kalamata olives, diced cucumbers, and a sprinkle of oregano to the original recipe for a Mediterranean flair.
    • Spicy Thai: Mix in some peanut butter, lime juice, and sriracha into the dressing for a spicy Thai version. Top with chopped peanuts and cilantro.

    Frequently Asked Questions

    Can I make this salad ahead of time?

    Yes, you can prepare the components ahead of time, but it’s best to dress the salad just before serving to maintain the crispness of the cucumber noodles. Store the dressed salad in the refrigerator if not serving immediately, but note that the cucumbers may release some water over time.

    Can I use a different type of cheese?

    Absolutely! While feta cheese adds a nice tangy flavor, feel free to experiment with other cheeses like goat cheese, blue cheese, or even mozzarella pearls for a different taste and texture.

    Is there a substitute for honey in the dressing?

    If you’re looking for a vegan alternative or just don’t have honey on hand, maple syrup or agave nectar are great substitutes that will still give the dressing a slight sweetness.

    Summary

    This cucumber noodle salad is a refreshing, low-carb alternative to traditional pasta salads, perfect for summer gatherings or a light lunch. With its simple ingredients and easy preparation, it’s a versatile dish that can be customized to suit any taste preference.

  • Buttermilk Blue Cheese Salad Dressing Recipe – A Creamy Dream Come True

    Buttermilk Blue Cheese Salad Dressing Recipe – A Creamy Dream Come True

    You’re about to dive into the creamiest, tangiest, most flavor-packed buttermilk blue cheese dressing your taste buds have ever encountered. Perfect for drizzling over a crisp wedge salad or as a dip for buffalo wings, this recipe is a game-changer.

    Why This Recipe Works

    • The combination of buttermilk and sour cream creates a perfectly balanced base that’s both tangy and creamy.
    • Crumbled blue cheese adds a bold, savory depth that elevates any salad or appetizer.
    • A hint of garlic and a splash of lemon juice bring brightness and complexity to the dressing.
    • It’s incredibly versatile, doubling as a dressing or a dip with minimal effort.
    • This recipe comes together in just minutes, making it perfect for last-minute gatherings or weeknight dinners.

    Ingredients

    • 1 cup buttermilk
    • 1/2 cup sour cream
    • 1/2 cup crumbled blue cheese
    • 1 tablespoon lemon juice
    • 1 small garlic clove, minced
    • 1/2 teaspoon salt
    • 1/4 teaspoon black pepper

    Equipment Needed

    • Mixing bowl
    • Whisk
    • Measuring cups and spoons

    Instructions

    Buttermilk Blue Cheese Salad Dressing Recipe

    Step 1: Combine the Base Ingredients

    In a large mixing bowl, whisk together the buttermilk and sour cream until smooth. This combination forms the creamy base of your dressing, so take your time to ensure there are no lumps. Tip: For an extra smooth texture, you can use a blender instead of a whisk.

    Step 2: Add the Flavor Enhancers

    Stir in the minced garlic, lemon juice, salt, and black pepper. These ingredients add the necessary tang and seasoning to balance the richness of the buttermilk and sour cream. Mix well to distribute the flavors evenly throughout the dressing.

    Step 3: Incorporate the Blue Cheese

    Gently fold in the crumbled blue cheese, reserving a small amount for garnish if desired. The blue cheese should be evenly distributed but still maintain some texture for that signature bite. Tip: For a stronger blue cheese flavor, let the dressing sit in the refrigerator for an hour before serving.

    Step 4: Adjust the Consistency

    If the dressing is too thick for your liking, you can thin it out with a little extra buttermilk, one tablespoon at a time, until you reach the desired consistency. This step ensures your dressing is perfectly pourable or dippable, depending on your needs.

    Step 5: Chill and Serve

    Transfer the dressing to an airtight container and refrigerate for at least 30 minutes before serving. This chilling time allows the flavors to meld together beautifully. Serve chilled over your favorite salad or as a dip for vegetables and wings.

    Tips and Tricks

    For those looking to take their buttermilk blue cheese dressing to the next level, consider these advanced tips. First, homemade buttermilk can be made by adding a tablespoon of lemon juice or vinegar to a cup of milk and letting it sit for 10 minutes. This can add a fresher tang to your dressing. Second, experimenting with different types of blue cheese, such as Gorgonzola or Stilton, can introduce new flavor profiles. Lastly, for a herb-infused version, finely chop fresh herbs like chives or parsley and mix them into the dressing for a colorful and flavorful twist.

    Recipe Variations

    • Spicy Kick: Add a teaspoon of hot sauce or a pinch of cayenne pepper for a dressing with a bit of heat.
    • Herb Garden: Mix in fresh herbs like dill, parsley, or chives for a fresh, garden-inspired flavor.
    • Bacon Lover’s: Crumble cooked bacon into the dressing for a smoky, savory addition.
    • Honey Mustard Twist: Stir in a tablespoon of honey and mustard for a sweet and tangy variation.
    • Avocado Cream: Blend in half an avocado for an ultra-creamy, healthy fat-packed version.

    Frequently Asked Questions

    Q: Can I use yogurt instead of sour cream?
    A: Absolutely! Greek yogurt is a great substitute for sour cream, offering a similar tang and creaminess with a bit more protein. Just keep in mind that the flavor might be slightly different, so adjust the seasoning to taste.

    Q: How long does this dressing last in the fridge?
    A: Stored in an airtight container, your buttermilk blue cheese dressing will stay fresh for up to a week. Just give it a good stir before using, as it may separate slightly over time.

    Q: Can I make this dressing vegan?
    A: Yes, you can! Substitute the buttermilk with almond milk mixed with a tablespoon of lemon juice, use vegan sour cream, and opt for a dairy-free blue cheese alternative. The flavor profile will be different but still delicious.

    Summary

    This buttermilk blue cheese dressing is a creamy, tangy, and versatile condiment that’s perfect for salads, dips, and more. With simple ingredients and easy steps, it’s a must-try for any blue cheese lover.

  • Cranberry Salad with Cream Cheese: A Festive Delight

    Cranberry Salad with Cream Cheese: A Festive Delight

    Yummy, tart, and creamy, this cranberry salad with cream cheese is the perfect blend of flavors and textures to brighten up any meal. Whether you’re looking for a refreshing side dish or a unique dessert, this recipe is sure to impress.

    Why This Recipe Works

    • The combination of tart cranberries and smooth cream cheese creates a perfect balance of flavors.
    • It’s incredibly versatile, serving as a side dish or dessert depending on your preference.
    • The recipe is straightforward, requiring no cooking, making it perfect for beginners.
    • It’s a make-ahead dish, allowing flavors to meld beautifully overnight.
    • The vibrant color adds a festive touch to any table setting.

    Ingredients

    • 2 cups fresh cranberries, finely chopped
    • 1 cup granulated sugar
    • 8 oz cream cheese, softened
    • 1 cup heavy whipping cream
    • 1/2 cup powdered sugar
    • 1 tsp vanilla extract
    • 1/2 cup chopped walnuts (optional)

    Equipment Needed

    • Food processor or sharp knife
    • Mixing bowls
    • Electric mixer
    • Spatula
    • Serving dish

    Instructions

    Recipe For Cranberry Salad With Cream Cheese

    Prepare the Cranberries

    Start by finely chopping the fresh cranberries. A food processor works wonders here, but a sharp knife will do the trick if you’re up for a little arm workout. Mix the chopped cranberries with granulated sugar in a bowl, then set aside. This step not only sweetens the cranberries but also draws out their juices, creating a lovely syrup.

    Whip the Cream Cheese Mixture

    In a separate bowl, beat the softened cream cheese until it’s smooth and fluffy. This is where your electric mixer earns its keep. Gradually add the heavy whipping cream, powdered sugar, and vanilla extract, continuing to beat until the mixture is light and airy. The goal is a cloud-like consistency that’ll make your salad irresistibly creamy.

    Combine and Chill

    Gently fold the sweetened cranberries (and any accumulated juice) into the cream cheese mixture. If you’re using walnuts, now’s the time to add them for a crunchy contrast. Transfer the mixture to a serving dish and refrigerate for at least 4 hours, though overnight is better. This chilling time allows the flavors to meld and the salad to set perfectly.

    Tips and Tricks

    For an even smoother cream cheese mixture, ensure your cream cheese is at room temperature before starting. If you’re short on time, you can use frozen cranberries; just thaw and drain them well before chopping. Toasting the walnuts before adding them to the salad can enhance their flavor and add an extra layer of texture. If you prefer a less tart salad, you can reduce the amount of cranberries or increase the sugar slightly. For a decorative touch, reserve a few whole cranberries and walnut halves to garnish the top before serving.

    Recipe Variations

    • For a citrus twist, add the zest of one orange to the cream cheese mixture.
    • Substitute the walnuts with pecans or almonds for a different nutty flavor.
    • Mix in a cup of mini marshmallows for a sweeter, fluffier texture.
    • Use Greek yogurt in place of half the cream cheese for a tangier, lighter version.
    • Add a layer of crushed graham crackers at the bottom for a dessert-like crust.

    Frequently Asked Questions

    Can I use canned cranberry sauce instead of fresh cranberries?

    While you can use canned cranberry sauce in a pinch, the texture and flavor will differ significantly from using fresh cranberries. Fresh cranberries provide a tartness and texture that canned sauce can’t replicate. If you do opt for canned, reduce the added sugar since the sauce is already sweetened.

    How long can I store this salad in the fridge?

    This cranberry salad can be stored in an airtight container in the refrigerator for up to 3 days. The flavors will continue to meld, making it even more delicious over time. However, the texture may become slightly softer the longer it sits.

    Is there a dairy-free alternative to cream cheese?

    Yes, there are several dairy-free cream cheese alternatives available that work well in this recipe. Look for brands that are specifically designed to mimic the texture and flavor of traditional cream cheese for the best results. You can also use coconut cream as a substitute, though the flavor will be slightly different.

    Summary

    This cranberry salad with cream cheese is a delightful combination of tart and sweet, perfect for any occasion. Easy to make and versatile, it’s sure to become a favorite in your recipe collection.

  • Blackened Chicken Caesar Salad Recipe: A Spicy Twist on a Classic

    Blackened Chicken Caesar Salad Recipe: A Spicy Twist on a Classic

    Now, let’s dive into a dish that combines the bold flavors of blackened chicken with the creamy, tangy delight of a Caesar salad. This recipe is perfect for those who love a little heat with their greens.

    Why This Recipe Works

    • The blackening spice adds a smoky, spicy kick that elevates the chicken beyond your average grilled breast.
    • Homemade Caesar dressing beats store-bought any day, offering a fresher, more vibrant flavor.
    • Crunchy croutons and crisp romaine provide the perfect texture contrast to the tender chicken.
    • It’s a balanced meal that’s both satisfying and packed with flavor, proving salads don’t have to be boring.

    Ingredients

    • 2 boneless, skinless chicken breasts
    • 1 tbsp blackening spice
    • 1/2 cup mayonnaise
    • 1 tbsp Dijon mustard
    • 1 garlic clove, minced
    • 1/4 cup grated Parmesan cheese
    • 1 tbsp lemon juice
    • 1 head romaine lettuce, chopped
    • 1 cup croutons

    Equipment Needed

    • Cast iron skillet
    • Mixing bowls
    • Whisk
    • Chef’s knife
    • Cutting board

    Instructions

    Blackened Chicken Caesar Salad Recipe

    Step 1: Prepare the Chicken

    Coat the chicken breasts evenly with the blackening spice. Heat your cast iron skillet over medium-high heat until it’s smoking hot. This is crucial for getting that perfect blackened crust. Cook the chicken for about 5 minutes per side, or until the internal temperature reaches 165°F. Let it rest for 5 minutes before slicing.

    Step 2: Make the Dressing

    In a mixing bowl, whisk together the mayonnaise, Dijon mustard, minced garlic, Parmesan cheese, and lemon juice until smooth. Taste and adjust the seasoning if necessary. This dressing is the soul of your salad, so don’t skimp on the flavor.

    Step 3: Assemble the Salad

    Toss the chopped romaine lettuce with the dressing until evenly coated. Add the croutons and give it another gentle toss. Top with the sliced blackened chicken. For an extra touch of elegance, sprinkle some additional Parmesan cheese on top.

    Tips and Tricks

    For an even more flavorful chicken, marinate it in the blackening spice mixed with a little olive oil for an hour before cooking. If you’re short on time, you can use store-bought blackening spice, but making your own allows you to adjust the heat level to your liking. When making the dressing, use freshly grated Parmesan for the best flavor and texture. Finally, don’t add the dressing to the salad until you’re ready to serve to keep the lettuce crisp.

    Recipe Variations

    • Swap the chicken for shrimp or salmon for a seafood twist.
    • Add avocado slices or cherry tomatoes for extra freshness and color.
    • Use kale or spinach instead of romaine for a different green base.
    • For a low-carb version, skip the croutons and add nuts for crunch.
    • Try adding a sprinkle of bacon bits for a smoky flavor boost.

    Frequently Asked Questions

    Can I make this salad ahead of time?

    Yes, but keep the components separate until you’re ready to serve. The chicken can be cooked and sliced ahead, and the dressing can be made a day in advance. Just store everything in the fridge and assemble when you’re ready to eat.

    How spicy is the blackening spice?

    The heat level can vary depending on the brand or recipe you use. If you’re sensitive to spice, look for a mild version or reduce the amount of cayenne pepper if making your own.

    Can I grill the chicken instead of using a skillet?

    Absolutely! Grilling the chicken will give it a delicious charred flavor. Just make sure to oil the grates well to prevent sticking and cook until the internal temperature reaches 165°F.

    Summary

    This Blackened Chicken Caesar Salad is a fiery take on the classic, featuring smoky, spicy chicken paired with creamy homemade dressing and crisp greens. It’s a meal that’s as satisfying as it is flavorful, proving that salads can be anything but boring.