Author: onlinefoodrecipes

  • Creamy Potato Salad with a Tangy Relish Twist

    Creamy Potato Salad with a Tangy Relish Twist

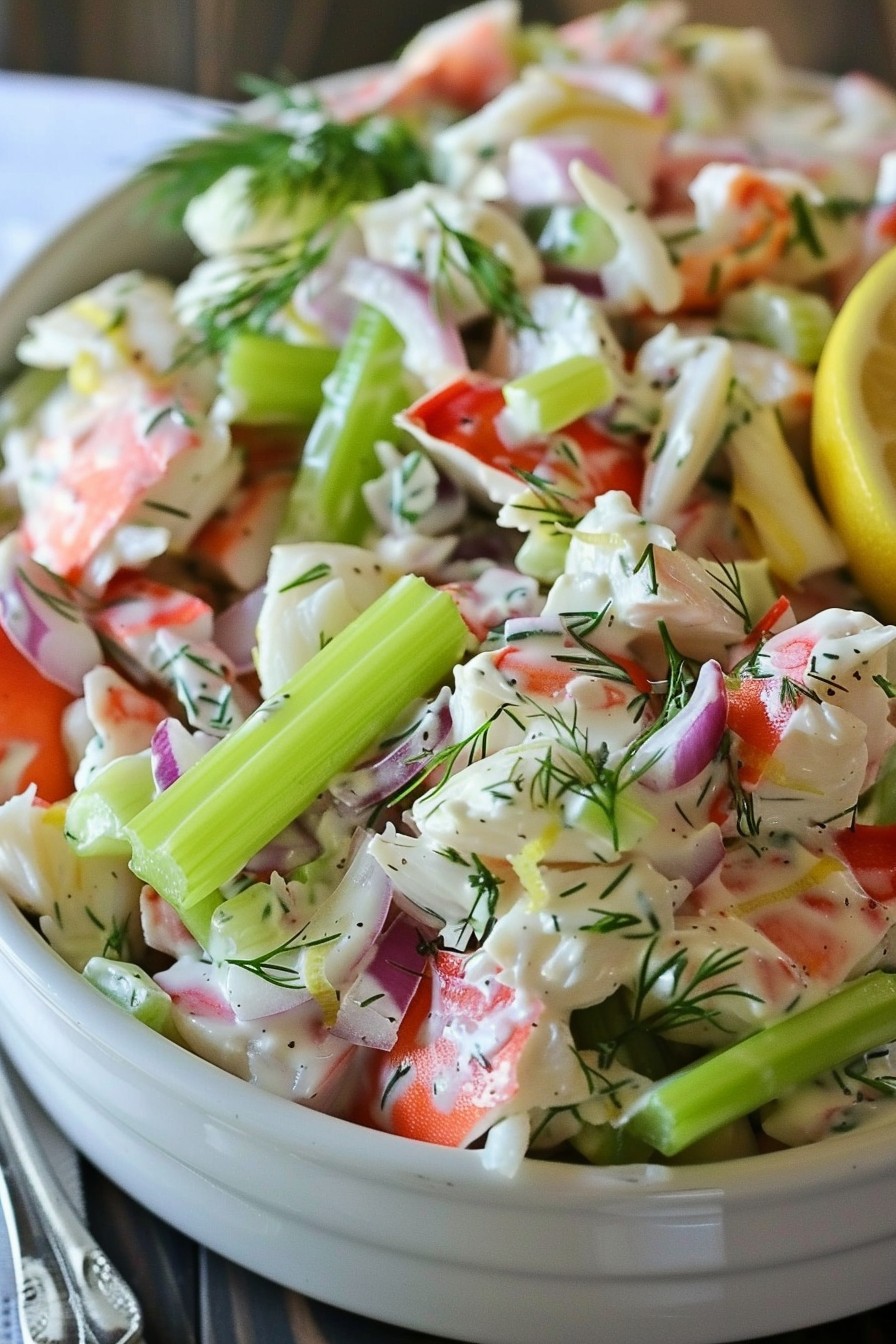
    Just when you thought potato salad couldn’t get any better, we’re throwing in a tangy relish twist that’ll make your taste buds dance. Perfect for picnics, potlucks, or just because, this recipe is a game-changer.

    Why This Recipe Works

    • The combination of creamy mayonnaise and tangy relish creates a perfect balance of flavors.
    • Using Yukon gold potatoes ensures a buttery texture that holds up well in salad.
    • Adding hard-boiled eggs gives it a protein boost and adds to the creaminess.
    • The relish adds a sweet and tangy dimension that elevates the traditional potato salad.
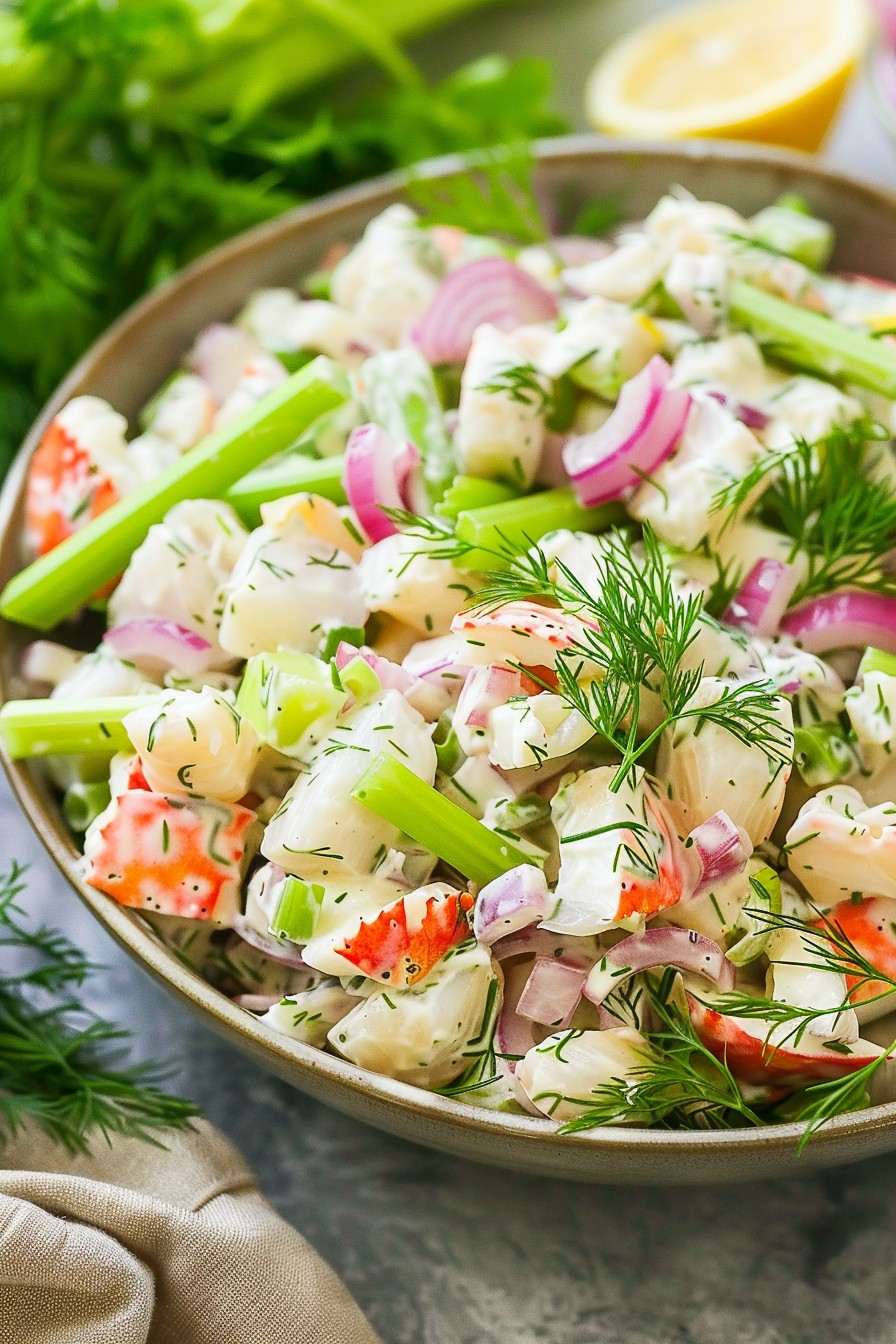
    • It’s customizable with various add-ins like bacon or celery for extra crunch.

    Ingredients

    • 2 pounds Yukon gold potatoes, cubed
    • 1 cup mayonnaise
    • 1/4 cup sweet relish
    • 2 tablespoons mustard
    • 4 hard-boiled eggs, chopped
    • 1/2 cup diced red onion
    • Salt and pepper to taste

    Equipment Needed

    • Large pot
    • Mixing bowl
    • Knife and cutting board
    • Measuring cups and spoons

    Instructions

    Potato Salad Recipe With Relish

    Step 1: Cook the Potatoes

    Fill a large pot with water and bring to a boil. Add the cubed potatoes and cook for about 10-12 minutes, or until they’re fork-tender but not mushy. Drain and let them cool slightly. Tip: For extra flavor, you can boil the potatoes in chicken or vegetable broth instead of water.

    Step 2: Prepare the Dressing

    In a mixing bowl, combine the mayonnaise, sweet relish, and mustard. Stir until well blended. This creamy and tangy dressing is what sets this potato salad apart. Tip: For a lighter version, you can substitute half of the mayonnaise with Greek yogurt.

    Step 3: Combine Ingredients

    Add the slightly cooled potatoes, chopped eggs, and diced red onion to the bowl with the dressing. Gently fold everything together until well coated. Be careful not to overmix to keep the potatoes from breaking apart.

    Step 4: Season to Taste

    Add salt and pepper to taste. Remember, the relish and mayonnaise already add some saltiness, so start with a little and adjust as needed.

    Step 5: Chill Before Serving

    Cover the bowl and refrigerate for at least an hour before serving. This allows the flavors to meld together beautifully. Tip: For best results, let it chill overnight.

    Tips and Tricks

    For an extra crunch, consider adding diced celery or even some chopped pickles. If you’re a fan of bacon, crispy bacon bits can add a smoky flavor and texture contrast. To make it healthier, swap out half the mayo for avocado or Greek yogurt. For a spicy kick, add a dash of hot sauce or some diced jalapeños. Always taste and adjust the seasoning after chilling, as flavors can mellow out in the fridge.

    Recipe Variations

    • Add crispy bacon bits for a smoky flavor.
    • Include diced celery or pickles for extra crunch.
    • Swap half the mayo with Greek yogurt for a healthier version.
    • Add a dash of hot sauce or diced jalapeños for a spicy kick.
    • Use dill relish instead of sweet for a different tangy flavor.

    Frequently Asked Questions

    Can I use a different type of potato?

    Yes, while Yukon gold potatoes are recommended for their buttery texture, you can use red potatoes or even russets. Just keep in mind that russets are more starchy and may break apart more easily.

    How long can I store this potato salad?

    This potato salad can be stored in an airtight container in the refrigerator for up to 3 days. Make sure to give it a good stir before serving again.

    Can I make this recipe ahead of time?

    Absolutely! In fact, making it a day ahead allows the flavors to meld together even more, resulting in a more flavorful salad.

    Summary

    This creamy potato salad with a tangy relish twist is a crowd-pleaser that’s perfect for any occasion. With its balance of flavors and textures, it’s sure to become a staple in your recipe collection.

  • Greek Salad Recipe with Cucumber: A Crispy, Refreshing Delight

    Greek Salad Recipe with Cucumber: A Crispy, Refreshing Delight

    Perfect for those hot summer days or when you’re craving something light yet satisfying, this Greek salad recipe with cucumber is a game-changer. Packed with fresh veggies and a tangy dressing, it’s a dish that promises to refresh your palate and brighten your day.

    Why This Recipe Works

    • The combination of crisp cucumbers and juicy tomatoes offers a refreshing crunch that’s hard to resist.
    • Feta cheese adds a creamy texture and salty tang, balancing the freshness of the vegetables.
    • Olive oil and lemon juice dressing brings all the flavors together with a simple yet vibrant taste.
    • It’s incredibly versatile, allowing for numerous variations to suit any taste or dietary preference.
    • Quick and easy to prepare, making it perfect for last-minute gatherings or a healthy weeknight dinner.

    Ingredients

    • 2 large cucumbers, diced
    • 4 medium tomatoes, chopped
    • 1 red onion, thinly sliced
    • 1 cup Kalamata olives, pitted
    • 1/2 cup feta cheese, crumbled
    • 1/4 cup extra virgin olive oil
    • 2 tbsp lemon juice
    • 1 tsp dried oregano
    • Salt and pepper to taste

    Equipment Needed

    • Large mixing bowl
    • Salad tongs or large spoon
    • Measuring cups and spoons
    • Knife and cutting board

    Instructions

    Greek Salad Recipe Cucumber

    Step 1: Prepare Your Vegetables

    Start by washing all your vegetables thoroughly. Dice the cucumbers into bite-sized pieces, ensuring they’re uniform for even eating. Chop the tomatoes similarly, and thinly slice the red onion to avoid overpowering the salad. Tip: For a milder onion flavor, soak the sliced onions in cold water for 10 minutes before adding them to the salad.

    Step 2: Combine the Base Ingredients

    In your large mixing bowl, combine the diced cucumbers, chopped tomatoes, and sliced red onion. Add the Kalamata olives for that authentic Greek flavor. Gently toss these ingredients together to start building your salad’s foundation. Tip: If you’re not a fan of olives, you can reduce the quantity or substitute them with capers for a different but equally tasty twist.

    Step 3: Make the Dressing

    In a small bowl, whisk together the extra virgin olive oil and lemon juice until well combined. Add the dried oregano, and season with salt and pepper to taste. This simple dressing is key to bringing all the flavors together, so don’t skip it! Tip: For an extra flavor boost, let the dressing sit for a few minutes before adding it to the salad to allow the oregano to infuse.

    Step 4: Dress the Salad

    Pour the dressing over the salad and toss gently to ensure all the vegetables are evenly coated. Be careful not to overmix, as you want to keep the vegetables crisp and intact. This is the moment when your salad starts to come alive with flavor.

    Step 5: Add the Feta Cheese

    Sprinkle the crumbled feta cheese over the top of the salad just before serving. This not only adds a creamy texture but also makes the salad visually appealing. Tip: For a dairy-free version, you can omit the feta or use a vegan cheese alternative.

    Tips and Tricks

    To elevate your Greek salad, consider these advanced tips: Always use the freshest vegetables you can find for the best taste and texture. If you have time, let the salad sit for about 10 minutes after dressing to allow the flavors to meld together. For added protein, toss in some grilled chicken or chickpeas. And remember, the quality of your olive oil can make or break the dressing, so opt for a good extra virgin variety.

    Recipe Variations

    • Add avocado for a creamy texture and healthy fats.
    • Include bell peppers for extra crunch and color.
    • Swap the feta for goat cheese for a different tangy flavor.
    • Add quinoa or farro to make it a more substantial meal.
    • For a spicy kick, include some sliced jalapeños or a dash of red pepper flakes.

    Frequently Asked Questions

    Can I make this salad ahead of time?

    Yes, you can prepare the ingredients ahead of time, but it’s best to dress the salad just before serving to keep the vegetables crisp. If you need to make it ahead, store the dressing separately and combine when ready to eat.

    How long does this salad last in the fridge?

    Properly stored in an airtight container, the salad can last for up to 2 days. However, the vegetables may start to lose their crispness after the first day.

    Can I use a different type of cheese?

    Absolutely! While feta is traditional, you can experiment with other cheeses like mozzarella, halloumi, or even blue cheese for a different flavor profile.

    Summary

    This Greek salad recipe with cucumber is a refreshing, easy-to-make dish that’s perfect for any occasion. With its crisp vegetables, tangy dressing, and creamy feta, it’s a crowd-pleaser that’s as nutritious as it is delicious.

  • Pistachio Pudding Salad Recipe: A Creamy Dream Come True

    Pistachio Pudding Salad Recipe: A Creamy Dream Come True

    Pistachio pudding salad is the unexpected hero of potlucks and family gatherings. Perfectly sweet, delightfully creamy, and with a crunch that’ll have you coming back for seconds, this dish is a crowd-pleaser that’s as easy to make as it is delicious.

    Why This Recipe Works

    • The combination of creamy pistachio pudding and crunchy mix-ins creates a texture that’s irresistibly satisfying.
    • It’s incredibly versatile, allowing for endless variations to suit any taste or occasion.
    • Prep time is minimal, making it perfect for last-minute gatherings or when you need a quick dessert fix.

    Ingredients

    • 1 box (3.4 oz) instant pistachio pudding mix
    • 1 cup cold milk
    • 1 cup crushed pineapple, drained
    • 1 cup mini marshmallows
    • 1/2 cup chopped pecans
    • 1 cup whipped topping, thawed

    Equipment Needed

    • Large mixing bowl
    • Whisk
    • Rubber spatula
    • Measuring cups and spoons

    Instructions

    Pistachio Pudding Salad Recipe

    Step 1: Prepare the Pudding Base

    In a large mixing bowl, whisk together the instant pistachio pudding mix and cold milk until smooth. Let it sit for about 5 minutes to thicken slightly. This is the foundation of your salad, so make sure it’s well mixed.

    Step 2: Add the Fruits and Nuts

    Gently fold in the crushed pineapple, mini marshmallows, and chopped pecans into the pudding mixture. The key here is to fold, not stir, to keep the mixture light and fluffy.

    Step 3: Incorporate the Whipped Topping

    Add the whipped topping to the bowl and fold it into the mixture until everything is evenly combined. This will give your salad its signature creamy texture.

    Step 4: Chill to Perfection

    Cover the bowl with plastic wrap and refrigerate for at least 2 hours before serving. This allows the flavors to meld together beautifully.

    Step 5: Serve and Enjoy

    Give the salad a quick stir before serving to ensure everything is well mixed. Serve chilled for the best taste and texture.

    Tips and Tricks

    For an extra crunch, toast the pecans before adding them to the salad. This will enhance their flavor and add a delightful texture contrast. If you’re serving this salad at a party, consider doubling the recipe—it disappears fast! For a lighter version, you can use low-fat milk and whipped topping. Remember, the salad tastes best when served cold, so don’t skip the chilling step.

    Recipe Variations

    • Add a cup of shredded coconut for a tropical twist.
    • Swap the pecans for walnuts or almonds for a different nutty flavor.
    • Include a cup of diced apples or pears for added freshness and crunch.
    • For a festive touch, mix in a handful of maraschino cherries.
    • Use vanilla pudding mix instead of pistachio for a different flavor profile.

    Frequently Asked Questions

    Can I make this recipe ahead of time?

    Absolutely! This salad actually tastes better after it’s had time to chill and the flavors have melded together. You can make it up to 24 hours in advance.

    Can I use fresh pineapple instead of canned?

    Yes, you can use fresh pineapple, but make sure to drain it well to avoid adding extra liquid to the salad.

    Is there a dairy-free version of this recipe?

    Yes, you can use almond milk or coconut milk instead of regular milk and a dairy-free whipped topping to make this recipe dairy-free.

    Summary

    This pistachio pudding salad is a creamy, crunchy, and utterly delicious dish that’s perfect for any occasion. With minimal prep time and endless variations, it’s sure to become a favorite in your recipe collection.

  • Pear Gorgonzola Salad Recipe: A Sweet and Savory Delight

    Pear Gorgonzola Salad Recipe: A Sweet and Savory Delight

    A absolutely delightful salad that combines the sweetness of pears with the bold flavor of gorgonzola cheese, creating a perfect balance that will tantalize your taste buds. This recipe is not only easy to make but also brings a touch of elegance to any meal.

    Why This Recipe Works

    • The combination of sweet pears and savory gorgonzola cheese creates a perfect flavor balance.
    • Adding walnuts introduces a crunchy texture that contrasts beautifully with the soft ingredients.
    • The homemade vinaigrette dressing enhances the salad’s flavors without overpowering them.
    • It’s a versatile dish that can serve as a refreshing starter or a light main course.
    • This salad is quick to prepare, making it ideal for busy weeknights or last-minute guests.

    Ingredients

    • 2 ripe pears, thinly sliced
    • 4 cups mixed greens
    • 1/2 cup crumbled gorgonzola cheese
    • 1/4 cup walnuts, toasted
    • 2 tbsp olive oil
    • 1 tbsp balsamic vinegar
    • 1 tsp honey
    • Salt and pepper to taste

    Equipment Needed

    • Large salad bowl
    • Small mixing bowl
    • Whisk
    • Knife
    • Cutting board

    Instructions

    Pear Gorgonzola Salad Recipe

    Prepare the Ingredients

    Start by washing and drying the mixed greens thoroughly to ensure they’re clean and crisp. Thinly slice the pears, making sure to remove the cores. Toast the walnuts in a dry pan over medium heat for about 3-5 minutes, until they’re fragrant and slightly browned. Tip: Toasting the walnuts enhances their flavor and adds a nice crunch to the salad.

    Make the Dressing

    In a small mixing bowl, whisk together the olive oil, balsamic vinegar, honey, and a pinch of salt and pepper. The honey will balance the acidity of the vinegar, creating a smooth and flavorful dressing. Tip: Adjust the sweetness or acidity to your liking by adding more honey or vinegar.

    Assemble the Salad

    In a large salad bowl, combine the mixed greens, sliced pears, and toasted walnuts. Drizzle the dressing over the salad and toss gently to coat all the ingredients evenly. The key is to ensure every bite has a bit of everything.

    Add the Gorgonzola

    Sprinkle the crumbled gorgonzola cheese over the top of the salad. The cheese’s bold flavor pairs perfectly with the sweet pears and the nutty walnuts. Tip: For an extra touch of elegance, you can also add a few whole walnuts on top for garnish.

    Serve Immediately

    This salad is best enjoyed fresh, so serve it right away to prevent the greens from wilting and the pears from browning. The crispness of the greens, the sweetness of the pears, and the creaminess of the gorgonzola make for a truly unforgettable dish.

    Tips and Tricks

    For those looking to elevate this salad even further, consider using a mix of different greens like arugula or spinach for added depth of flavor. If you’re not a fan of gorgonzola, blue cheese makes a great substitute. To make this salad more substantial, add grilled chicken or shrimp. When selecting pears, choose ones that are ripe but still firm to ensure they hold up well in the salad. Lastly, if you’re preparing this salad ahead of time, keep the dressing separate and add it just before serving to maintain the greens’ crispness.

    Recipe Variations

    • Swap out the pears for apples or figs for a different sweet element.
    • Use pecans or almonds instead of walnuts for a different crunch.
    • Add dried cranberries or cherries for a pop of color and sweetness.
    • Incorporate some avocado slices for extra creaminess.
    • Try a different dressing, like a maple mustard vinaigrette, for a new flavor profile.

    Frequently Asked Questions

    Can I make this salad ahead of time?

    Yes, you can prepare the ingredients ahead of time, but it’s best to assemble the salad just before serving to keep the greens crisp and the pears from browning. Store the dressing separately and add it at the last minute.

    What type of pears work best for this salad?

    Bartlett or Anjou pears are ideal because they’re sweet and hold their shape well. Make sure they’re ripe but still firm to the touch for the best texture.

    Can I substitute the gorgonzola cheese?

    Absolutely! If gorgonzola is too strong for your taste, try blue cheese or even feta for a milder flavor. The salad will still be delicious.

    Summary

    This Pear Gorgonzola Salad is a perfect blend of sweet and savory flavors, with a delightful crunch from toasted walnuts. It’s easy to make, versatile, and sure to impress at any meal. Whether you’re looking for a light lunch or an elegant starter, this salad is a fantastic choice.

  • Pasta House Co Salad Recipe: A Fresh Twist on a Classic

    Pasta House Co Salad Recipe: A Fresh Twist on a Classic

    Zesty, fresh, and utterly delicious, this Pasta House Co Salad recipe is your ticket to a refreshing meal that’s as easy to make as it is to love. Perfect for those warm summer days or when you’re craving something light yet satisfying.

    Why This Recipe Works

    • The combination of crisp lettuce, tender pasta, and a homemade dressing creates a perfect balance of textures and flavors.
    • It’s versatile enough to serve as a main dish or a side, making it a great addition to any meal.
    • The recipe uses simple, fresh ingredients that are easily accessible, ensuring you can whip it up anytime.

    Ingredients

    • 8 oz pasta, cooked and cooled
    • 4 cups romaine lettuce, chopped
    • 1 cup cherry tomatoes, halved
    • 1/2 cup red onion, thinly sliced
    • 1/2 cup cucumber, diced
    • 1/4 cup olive oil
    • 2 tbsp red wine vinegar
    • 1 tsp Dijon mustard
    • 1 clove garlic, minced
    • Salt and pepper to taste

    Equipment Needed

    • Large mixing bowl
    • Whisk
    • Measuring cups and spoons
    • Pot for boiling pasta

    Instructions

    Pasta House Co Salad Recipe

    Step 1: Prepare the Dressing

    In a small bowl, whisk together the olive oil, red wine vinegar, Dijon mustard, minced garlic, salt, and pepper until well combined. Taste and adjust seasoning as needed. Tip: Let the dressing sit for 10 minutes before using to allow the flavors to meld.

    Step 2: Combine the Salad Ingredients

    In a large mixing bowl, toss together the cooked pasta, romaine lettuce, cherry tomatoes, red onion, and cucumber. Tip: For the best texture, make sure the pasta is completely cooled before adding it to the salad.

    Step 3: Dress the Salad

    Pour the dressing over the salad ingredients and toss gently to coat everything evenly. Tip: Add the dressing just before serving to keep the lettuce crisp.

    Tips and Tricks

    For an extra crunch, consider adding some toasted nuts or seeds to the salad. If you’re making this salad ahead of time, keep the dressing separate until you’re ready to serve to prevent the lettuce from wilting. Experiment with different types of pasta or greens to find your perfect combination.

    Recipe Variations

    • Add grilled chicken or shrimp for a protein boost.
    • Swap the red wine vinegar for balsamic for a sweeter dressing.
    • Include some avocado slices for a creamy texture.
    • Try adding some crumbled feta or grated Parmesan for a cheesy twist.

    Frequently Asked Questions

    Can I make this salad ahead of time?

    Yes, you can prepare the ingredients ahead of time, but it’s best to add the dressing just before serving to keep the salad fresh and crisp.

    What type of pasta works best for this salad?

    Short pasta shapes like fusilli or penne work great because they hold the dressing well and are easy to eat with the other salad ingredients.

    Can I use a different type of vinegar?

    Absolutely! While red wine vinegar gives a nice tang, feel free to experiment with apple cider vinegar or lemon juice for a different flavor profile.

    Summary

    This Pasta House Co Salad recipe is a delightful mix of fresh veggies, pasta, and a homemade dressing that’s sure to please. It’s versatile, easy to make, and perfect for any occasion.

  • Crisp & Tangy Cucumber Salad with White Vinegar: A Summer Staple

    Crisp & Tangy Cucumber Salad with White Vinegar: A Summer Staple

    Kick off your summer meals with this refreshing cucumber salad that’s bursting with flavor. Perfect for picnics, BBQs, or just a light lunch, this recipe is as easy as it is delicious.

    Why This Recipe Works

    • The crispness of fresh cucumbers pairs perfectly with the tangy kick of white vinegar, creating a refreshing side dish.
    • It’s incredibly easy to make, requiring just a few simple ingredients and minimal prep time.
    • This salad is versatile, serving as a great base for additional flavors or ingredients based on your preferences.
    • It’s a healthy option, low in calories but high in flavor, making it a guilt-free addition to any meal.
    • The acidity from the vinegar helps to slightly pickle the cucumbers, enhancing their flavor and texture.

    Ingredients

    • 2 large cucumbers, thinly sliced
    • 1/2 cup white vinegar
    • 1/4 cup water
    • 2 tbsp sugar
    • 1 tsp salt
    • 1/2 tsp black pepper
    • 1/4 red onion, thinly sliced (optional)

    Equipment Needed

    • Mixing bowl
    • Measuring cups and spoons
    • Sharp knife
    • Cutting board

    Instructions

    Cucumber Salad Recipe White Vinegar

    Prepare the Cucumbers

    Start by washing your cucumbers thoroughly under cold water. Using a sharp knife and a cutting board, slice the cucumbers as thinly as possible for the best texture. If you’re adding red onion, slice it thinly as well. Tip: For an extra crisp salad, you can salt the cucumber slices lightly and let them sit for 10 minutes before rinsing and patting dry.

    Mix the Dressing

    In a mixing bowl, combine the white vinegar, water, sugar, salt, and black pepper. Whisk until the sugar and salt are completely dissolved. This creates a perfectly balanced dressing that’s tangy, sweet, and salty all at once. Tip: Adjust the sugar or vinegar to taste if you prefer a sweeter or more tangy salad.

    Combine and Marinate

    Add the sliced cucumbers (and red onion if using) to the bowl with the dressing. Gently toss to ensure all the slices are evenly coated. Cover the bowl and refrigerate for at least 30 minutes to allow the flavors to meld. Tip: For deeper flavor, let the salad marinate for up to 2 hours before serving.

    Serve and Enjoy

    Once marinated, give the salad a quick stir and serve chilled. This cucumber salad is perfect on its own or as a side to grilled meats or sandwiches. Enjoy the crisp, refreshing taste of summer in every bite.

    Tips and Tricks

    For those looking to elevate their cucumber salad game, consider these advanced tips. First, using a mandoline can help achieve uniformly thin cucumber slices for a more professional presentation. Second, adding fresh dill or parsley can introduce a new layer of flavor. Third, for a creamier version, a tablespoon of sour cream or Greek yogurt can be mixed into the dressing. Lastly, letting the salad sit overnight can intensify the flavors, though the cucumbers will lose some of their crispness.

    Recipe Variations

    • Asian-Inspired: Add a splash of soy sauce and a teaspoon of sesame oil to the dressing, and garnish with sesame seeds.
    • Spicy Kick: Include a finely chopped jalapeño or a sprinkle of red pepper flakes for some heat.
    • Herb Garden: Mix in fresh herbs like dill, parsley, or cilantro for a fragrant twist.
    • Creamy Version: Stir in a tablespoon of mayonnaise or Greek yogurt for a richer texture.
    • Fruit Fusion: Add thinly sliced strawberries or watermelon for a sweet and savory combination.

    Frequently Asked Questions

    Can I use apple cider vinegar instead of white vinegar?

    Absolutely! Apple cider vinegar can be a great substitute, offering a slightly sweeter and fruitier flavor profile. The salad will have a different taste, but it will still be delicious. Just keep in mind that the color might be slightly different due to the apple cider vinegar’s natural hue.

    How long can I store the cucumber salad?

    This cucumber salad is best enjoyed within 1-2 days of making it. After that, the cucumbers start to lose their crispness and the salad becomes less fresh. Store it in an airtight container in the refrigerator to maximize its shelf life.

    Can I make this salad without sugar?

    Yes, you can omit the sugar or substitute it with a sugar alternative like honey or agave syrup for a different flavor profile. The salad will be more tangy without the sugar, but some prefer it that way.

    Summary

    This cucumber salad with white vinegar is a crisp, refreshing, and easy-to-make dish that’s perfect for summer. With its tangy dressing and versatile nature, it’s sure to be a hit at any meal. Plus, with so many variations, you can customize it to suit any taste.

  • Cucumber Shrimp Salad Recipe: A Refreshing Summer Delight

    Cucumber Shrimp Salad Recipe: A Refreshing Summer Delight

    Dive into the perfect summer dish with this cucumber shrimp salad recipe. It’s light, refreshing, and packed with flavors that will make your taste buds dance. Plus, it’s incredibly easy to whip up, making it a great option for those busy days when you want something delicious without spending hours in the kitchen.

    Why This Recipe Works

    • The combination of crisp cucumbers and succulent shrimp offers a delightful contrast in textures.
    • A zesty dressing brings all the ingredients together, creating a harmonious blend of flavors.
    • It’s a versatile dish that can serve as a light lunch, a side, or even a fancy appetizer.
    • Quick and easy to prepare, it’s perfect for last-minute gatherings or a healthy meal prep option.

    Ingredients

    • 1 lb shrimp, peeled and deveined
    • 2 large cucumbers, thinly sliced
    • 1/4 cup red onion, finely chopped
    • 1/2 cup cherry tomatoes, halved
    • 1/4 cup fresh dill, chopped
    • 1/4 cup olive oil
    • 2 tbsp lemon juice
    • 1 tbsp honey
    • Salt and pepper to taste

    Equipment Needed

    • Large mixing bowl
    • Small whisk or fork
    • Sharp knife
    • Cutting board

    Instructions

    Cucumber Shrimp Salad Recipe

    Prepare the Shrimp

    Start by boiling a pot of water and cook the shrimp for 2-3 minutes until they turn pink and opaque. Immediately transfer them to a bowl of ice water to stop the cooking process. This ensures your shrimp remain juicy and tender. Once cooled, drain and pat dry with paper towels.

    Slice the Vegetables

    While the shrimp are cooling, take your cucumbers and slice them thinly. A mandoline can make this step quicker and ensure even slices, but a sharp knife works just fine. Chop the red onion and halve the cherry tomatoes, adding them to a large mixing bowl with the cucumbers.

    Make the Dressing

    In a small bowl, whisk together the olive oil, lemon juice, honey, salt, and pepper until well combined. This dressing is the secret to the salad’s refreshing taste, so don’t skip it! Taste and adjust the seasoning as needed.

    Combine All Ingredients

    Add the cooled shrimp to the bowl with the vegetables. Pour the dressing over the top and gently toss everything together to ensure all ingredients are evenly coated. Sprinkle the fresh dill over the salad for an extra burst of flavor.

    Chill Before Serving

    For the best flavor, cover the salad and refrigerate for at least 30 minutes before serving. This allows the flavors to meld together beautifully. Serve chilled for a refreshing summer dish.

    Tips and Tricks

    For an extra crunch, consider adding some sliced almonds or sunflower seeds to the salad. If you’re not a fan of dill, cilantro or parsley makes a great substitute. To make this dish ahead of time, prepare all the ingredients but wait to add the dressing until just before serving to keep the vegetables crisp. For a spicier kick, add a pinch of red pepper flakes to the dressing.

    Recipe Variations

    • Swap the shrimp for grilled chicken or tofu for a different protein option.
    • Add avocado slices for a creamy texture and healthy fats.
    • Incorporate quinoa or couscous to turn this salad into a more substantial meal.
    • Use lime juice instead of lemon for a different citrus note.
    • Mix in some feta or goat cheese for a tangy twist.

    Frequently Asked Questions

    Can I use frozen shrimp?

    Absolutely! Just make sure to thaw them completely before cooking. You can thaw shrimp quickly by placing them in a bowl of cold water for about 15-20 minutes.

    How long does this salad last in the fridge?

    This salad is best enjoyed within 1-2 days of making it. The cucumbers will start to lose their crunch after that, but it will still be safe to eat.

    Can I make this salad vegan?

    Yes! Simply omit the shrimp or substitute it with a plant-based protein like chickpeas or tofu, and ensure your honey is vegan or substitute it with maple syrup.

    Summary

    This cucumber shrimp salad is the epitome of summer freshness. With its crisp vegetables, juicy shrimp, and zesty dressing, it’s a dish that’s as delightful to eat as it is easy to make. Perfect for any occasion, from a quick lunch to a fancy dinner party.

  • Classic Wedge Salad Recipe: A Crisp, Creamy Delight

    Classic Wedge Salad Recipe: A Crisp, Creamy Delight

    Venture into the world of salads with a twist! The classic wedge salad is not just a dish; it’s an experience. With its crisp iceberg lettuce, creamy dressing, and a sprinkle of bacon, it’s a timeless favorite that’s both simple and sophisticated.

    Why This Recipe Works

    • The iceberg lettuce provides a refreshing crunch that’s unmatched by other greens.
    • Homemade blue cheese dressing adds a rich, tangy flavor that elevates the salad.
    • Crispy bacon bits offer a smoky contrast to the cool, creamy elements.
    • It’s incredibly versatile, allowing for endless variations to suit any taste.
    • Perfect for entertaining, it’s as visually appealing as it is delicious.

    Ingredients

    • 1 head iceberg lettuce, cut into 4 wedges
    • 1 cup blue cheese dressing (homemade or store-bought)
    • 1/2 cup crumbled blue cheese
    • 1/2 cup cherry tomatoes, halved
    • 1/4 cup red onion, thinly sliced
    • 6 slices bacon, cooked and crumbled
    • 2 tbsp chives, finely chopped
    • Salt and pepper to taste

    Equipment Needed

    • Sharp knife
    • Cutting board
    • Mixing bowl
    • Whisk
    • Salad plates

    Instructions

    Salad Wedge Recipe

    Prepare the Lettuce Wedges

    Start by removing any outer leaves from the iceberg lettuce that look wilted or damaged. Cut the head of lettuce into four equal wedges, ensuring each piece has a bit of the core to hold it together. Rinse the wedges under cold water and pat them dry with paper towels to ensure the dressing sticks properly.

    Make the Blue Cheese Dressing

    In a mixing bowl, combine 1 cup of mayonnaise, 1/2 cup of sour cream, 1/2 cup of crumbled blue cheese, 2 tablespoons of buttermilk, 1 tablespoon of lemon juice, and a pinch of salt and pepper. Whisk until the mixture is smooth but still has small chunks of blue cheese for texture. Taste and adjust the seasoning as needed.

    Assemble the Salad

    Place each lettuce wedge on a salad plate. Drizzle generously with the blue cheese dressing, ensuring each wedge is well-coated. Sprinkle the crumbled blue cheese, cherry tomatoes, red onion, and bacon bits over the top. Finish with a sprinkle of chives for a pop of color and flavor.

    Serve Immediately

    This salad is best enjoyed fresh, so serve it right after assembling. The contrast between the cold, crisp lettuce and the warm, crispy bacon is part of what makes this dish so special.

    Tips and Tricks

    For an extra crispy lettuce wedge, chill the iceberg lettuce in the refrigerator for an hour before cutting and serving. If you’re not a fan of blue cheese, you can substitute it with ranch or Caesar dressing. To make this salad a meal, add grilled chicken or shrimp on top. Always use a sharp knife to cut the lettuce to prevent bruising the leaves. For a vegetarian version, omit the bacon or use a plant-based alternative.

    Recipe Variations

    • Swap the blue cheese for gorgonzola or feta for a different flavor profile.
    • Add avocado slices or hard-boiled eggs for extra protein and creaminess.
    • Use pancetta instead of bacon for an Italian twist.
    • Incorporate nuts like walnuts or pecans for added crunch.
    • Try a balsamic glaze drizzle for a sweet and tangy finish.

    Frequently Asked Questions

    Can I make the dressing ahead of time?

    Absolutely! The blue cheese dressing can be made up to 3 days in advance and stored in the refrigerator. Just give it a good stir before using to recombine any separated ingredients.

    How do I prevent the lettuce from browning?

    To keep your lettuce wedges looking fresh, avoid cutting them too far in advance and store any unused portions in the fridge wrapped in a damp paper towel.

    Can I use a different type of lettuce?

    While iceberg is traditional for its crisp texture, you can experiment with romaine or butter lettuce for a different take on the classic wedge salad.

    Summary

    The classic wedge salad is a testament to the beauty of simplicity. With its crisp lettuce, creamy dressing, and savory toppings, it’s a dish that’s both elegant and easy to make. Perfect for any occasion, it’s sure to impress.

  • Quinoa Kale Salad Recipe: A Superfood Powerhouse

    Quinoa Kale Salad Recipe: A Superfood Powerhouse

    Let’s dive into a dish that’s as nutritious as it is delicious. This quinoa kale salad is packed with superfoods, offering a perfect blend of textures and flavors that will keep you coming back for more. It’s the ideal meal for anyone looking to eat healthily without sacrificing taste.

    Why This Recipe Works

    • The combination of quinoa and kale provides a powerhouse of nutrients, including protein, fiber, and vitamins.
    • Adding a variety of textures with crunchy vegetables and creamy avocado makes every bite interesting.
    • The homemade lemon tahini dressing adds a bright, tangy flavor that ties all the ingredients together beautifully.
    • It’s versatile and can be easily adapted to include your favorite ingredients or whatever you have on hand.
    • Perfect for meal prep, as it stays fresh and tasty for days in the fridge.

    Ingredients

    • 1 cup quinoa, rinsed
    • 2 cups water
    • 1 bunch kale, stems removed and leaves chopped
    • 1 avocado, diced
    • 1/2 cup cherry tomatoes, halved
    • 1/4 cup red onion, thinly sliced
    • 1/4 cup feta cheese, crumbled
    • 2 tbsp olive oil
    • 1 tbsp lemon juice
    • 1 tbsp tahini
    • Salt and pepper to taste

    Equipment Needed

    • Medium saucepan
    • Mixing bowls
    • Whisk
    • Knife and cutting board
    • Measuring cups and spoons

    Instructions

    Quinoa Kale Salad Recipe

    Cook the Quinoa

    Start by rinsing 1 cup of quinoa under cold water to remove any bitterness. In a medium saucepan, combine the rinsed quinoa with 2 cups of water. Bring to a boil over high heat, then reduce the heat to low, cover, and simmer for about 15 minutes, or until the water is absorbed and the quinoa is fluffy. Remove from heat and let it sit covered for 5 minutes, then fluff with a fork.

    Prepare the Kale

    While the quinoa is cooking, prepare the kale. Remove the stems from 1 bunch of kale and chop the leaves into bite-sized pieces. In a large mixing bowl, massage the kale with 1 tablespoon of olive oil and a pinch of salt for about 2 minutes, until the leaves are tender and have reduced in volume.

    Make the Dressing

    In a small bowl, whisk together 1 tablespoon of olive oil, 1 tablespoon of lemon juice, 1 tablespoon of tahini, and salt and pepper to taste. Adjust the seasoning as needed, adding more lemon juice for tanginess or tahini for creaminess.

    Combine the Salad

    Add the cooked quinoa to the bowl with the massaged kale. Toss to combine. Then, add the diced avocado, halved cherry tomatoes, thinly sliced red onion, and crumbled feta cheese. Drizzle the dressing over the salad and gently toss everything together until well coated.

    Serve and Enjoy

    Divide the salad among plates and serve immediately. For an extra touch, you can sprinkle some additional feta cheese on top or add a few more drops of lemon juice for brightness.

    Tips and Tricks

    To make this quinoa kale salad even more delightful, consider these tips. First, toasting the quinoa before cooking can add a nutty flavor that complements the other ingredients beautifully. Second, if you’re not a fan of raw kale, you can lightly steam it before massaging to soften it further. Third, for a vegan version, simply omit the feta cheese or substitute it with a vegan alternative. Lastly, this salad tastes even better after sitting for a few hours, allowing the flavors to meld together.

    Recipe Variations

    • Add grilled chicken or shrimp for a protein boost.
    • Swap quinoa for brown rice or farro for a different grain base.
    • Include other vegetables like cucumber, bell peppers, or roasted sweet potatoes for added color and nutrition.
    • Try different dressings, such as balsamic vinaigrette or a spicy peanut sauce, to change up the flavor profile.
    • For a sweeter twist, add dried cranberries or sliced apples and pair with a honey mustard dressing.

    Frequently Asked Questions

    Can I make this salad ahead of time?

    Absolutely! This salad is perfect for meal prep. Just store it in an airtight container in the fridge, and it will stay fresh for up to 3 days. If you’re adding avocado, you might want to add it fresh when you’re ready to eat to prevent browning.

    Is there a substitute for tahini in the dressing?

    Yes, if you don’t have tahini or prefer a different flavor, you can use almond butter or Greek yogurt as a substitute. Both will give the dressing a creamy texture, though the flavor will vary slightly.

    How can I make this salad more filling?

    To make the salad more filling, consider adding a protein source like chickpeas, grilled chicken, or tofu. You can also increase the portion size or serve it with a side of whole grain bread.

    Summary

    This quinoa kale salad is a nutrient-packed, flavorful dish that’s perfect for any occasion. With its combination of superfoods, versatile ingredients, and easy preparation, it’s a recipe you’ll want to make again and again.

  • Crab Salad Recipe: A Delightful Summer Dish

    Crab Salad Recipe: A Delightful Summer Dish

    Craving something light, refreshing, and packed with flavor? This crab salad recipe is your go-to for those warm summer days or whenever you need a quick, delicious meal that doesn’t skimp on taste.

    Why This Recipe Works

    • The combination of fresh crab meat with crisp vegetables and a creamy dressing creates a perfect balance of textures and flavors.
    • It’s incredibly versatile, serving as a great sandwich filler, a topping for greens, or a standalone dish.
    • Quick and easy to prepare, making it ideal for last-minute meals or gatherings.
    • Healthy and nutritious, offering a good source of protein and omega-3 fatty acids.

    Ingredients

    • 1 pound fresh crab meat, picked over for shells
    • 1/2 cup mayonnaise
    • 1 tablespoon lemon juice
    • 1/4 cup finely chopped celery
    • 2 tablespoons finely chopped red onion
    • 1 tablespoon chopped fresh dill
    • Salt and pepper to taste

    Equipment Needed

    • Mixing bowl
    • Whisk
    • Measuring cups and spoons
    • Knife and cutting board

    Instructions

    Crab Salad Recipe

    Step 1: Prepare the Dressing

    In a large mixing bowl, whisk together the mayonnaise and lemon juice until smooth. This creates the base of your dressing, ensuring every bite of crab salad is creamy and tangy. Tip: For a lighter version, you can substitute half of the mayonnaise with Greek yogurt.

    Step 2: Combine the Ingredients

    Add the crab meat, celery, red onion, and dill to the bowl with the dressing. Gently fold the ingredients together until everything is evenly coated. Be careful not to overmix to keep the crab meat from breaking apart too much.

    Step 3: Season to Taste

    Season the salad with salt and pepper, adjusting according to your preference. Remember, the crab meat is naturally salty, so you might not need much additional salt.

    Step 4: Chill Before Serving

    Cover the bowl with plastic wrap and refrigerate the crab salad for at least 30 minutes before serving. This allows the flavors to meld together beautifully. Tip: Serving the salad chilled enhances its refreshing qualities, making it perfect for hot days.

    Tips and Tricks

    For the best crab salad, always opt for fresh crab meat when possible. However, if you’re in a pinch, high-quality canned crab meat can work as a substitute. To add a bit of crunch, consider tossing in some diced apples or cucumbers. If you’re serving this as a main dish, a side of avocado slices or a bed of mixed greens complements the flavors wonderfully. For an extra kick, a dash of hot sauce or a sprinkle of Old Bay seasoning can elevate the dish.

    Recipe Variations

    • Add diced avocado for a creamy texture and healthy fats.
    • Incorporate cooked pasta or quinoa to turn the salad into a more substantial meal.
    • Swap the dill for cilantro and add a squeeze of lime for a Mexican twist.
    • Mix in some chopped hard-boiled eggs for added protein.
    • Use Greek yogurt instead of mayonnaise for a lighter, tangier dressing.

    Frequently Asked Questions

    Can I use imitation crab meat?

    Yes, you can use imitation crab meat if you’re looking for a more budget-friendly option. Keep in mind that the flavor and texture will be slightly different from fresh crab meat, but it still makes for a tasty salad.

    How long can I store the crab salad?

    The crab salad can be stored in an airtight container in the refrigerator for up to two days. However, for the best quality and freshness, it’s recommended to consume it within 24 hours.

    Can I freeze crab salad?

    Freezing crab salad is not recommended as the mayonnaise-based dressing and the vegetables will not hold up well, resulting in a watery and unappetizing texture upon thawing.

    Summary

    This crab salad recipe is a simple, flavorful dish that’s perfect for any occasion. With its creamy dressing, fresh ingredients, and versatile serving options, it’s sure to become a favorite in your recipe collection.