Author: onlinefoodrecipes

  • Crab Salad Recipe Imitation: A Seafood Lover’s Dream

    Crab Salad Recipe Imitation: A Seafood Lover’s Dream

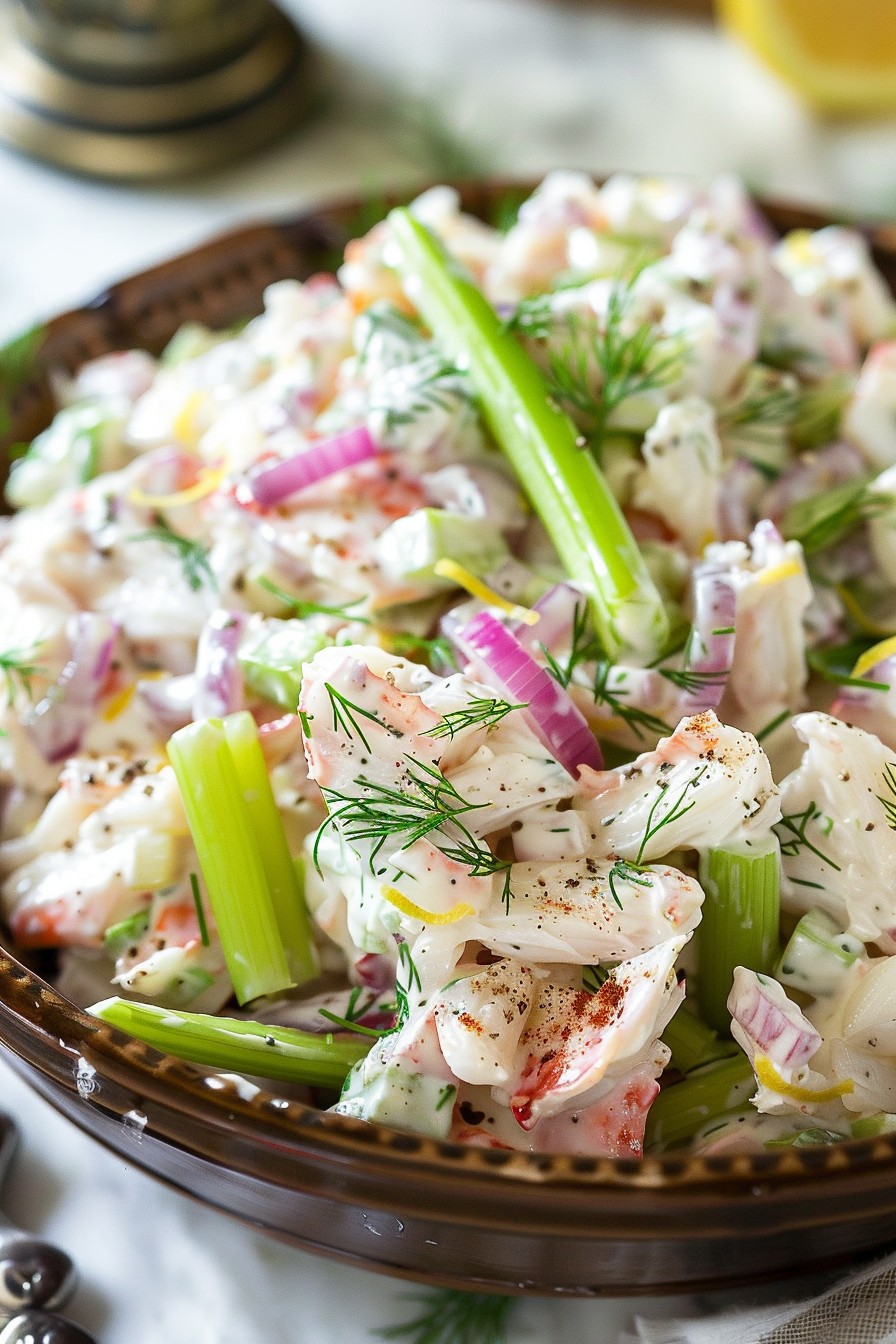
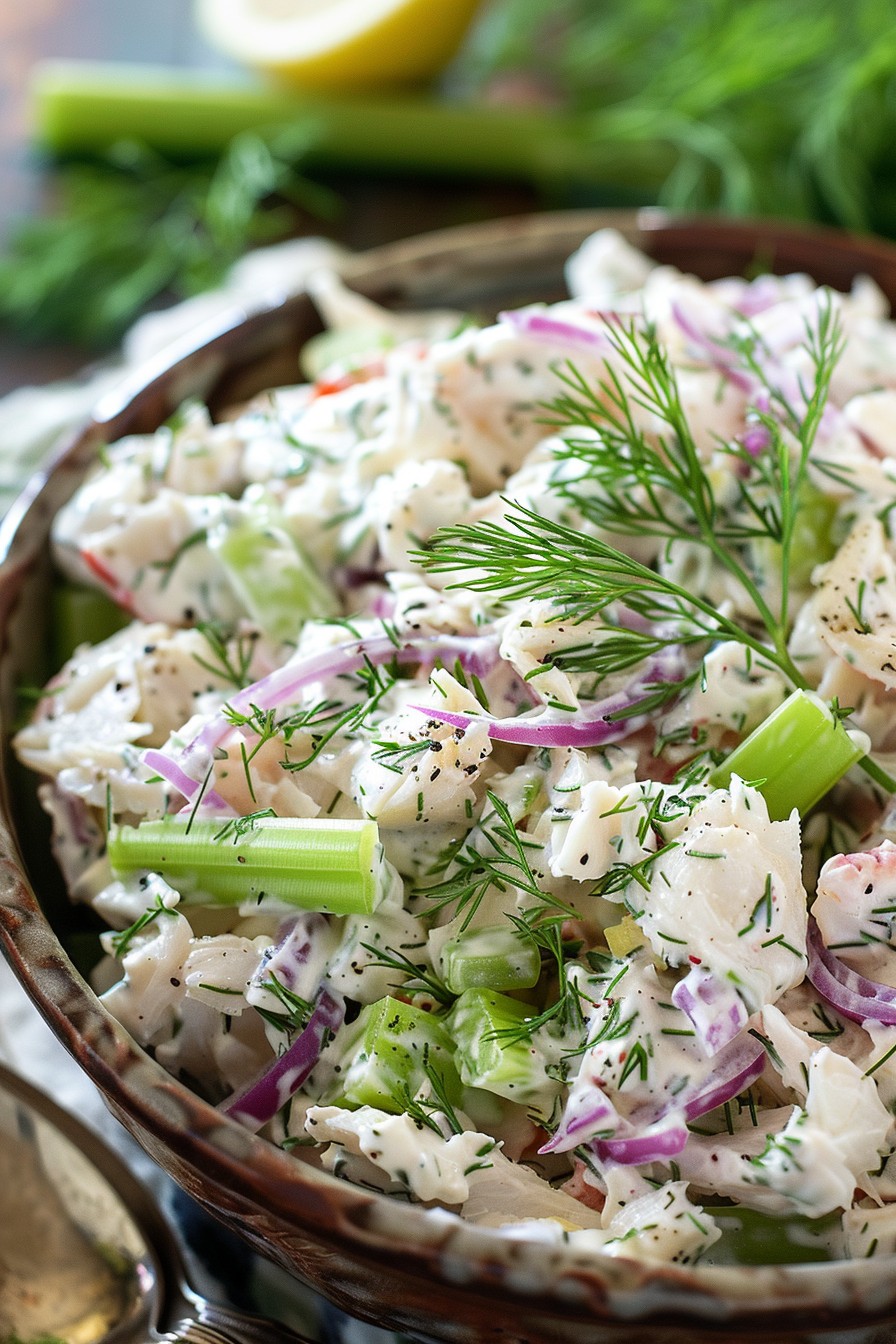
    For those who adore the taste of the ocean but are looking for a budget-friendly alternative, this imitation crab salad recipe is your new best friend. It’s creamy, crunchy, and packed with flavors that mimic the real deal, making it perfect for sandwiches, salads, or a standalone dish.

    Why This Recipe Works

    • Budget-Friendly: Imitation crab offers a similar taste and texture to real crab at a fraction of the cost.
    • Quick and Easy: With no cooking required, this salad comes together in minutes, perfect for last-minute meals.
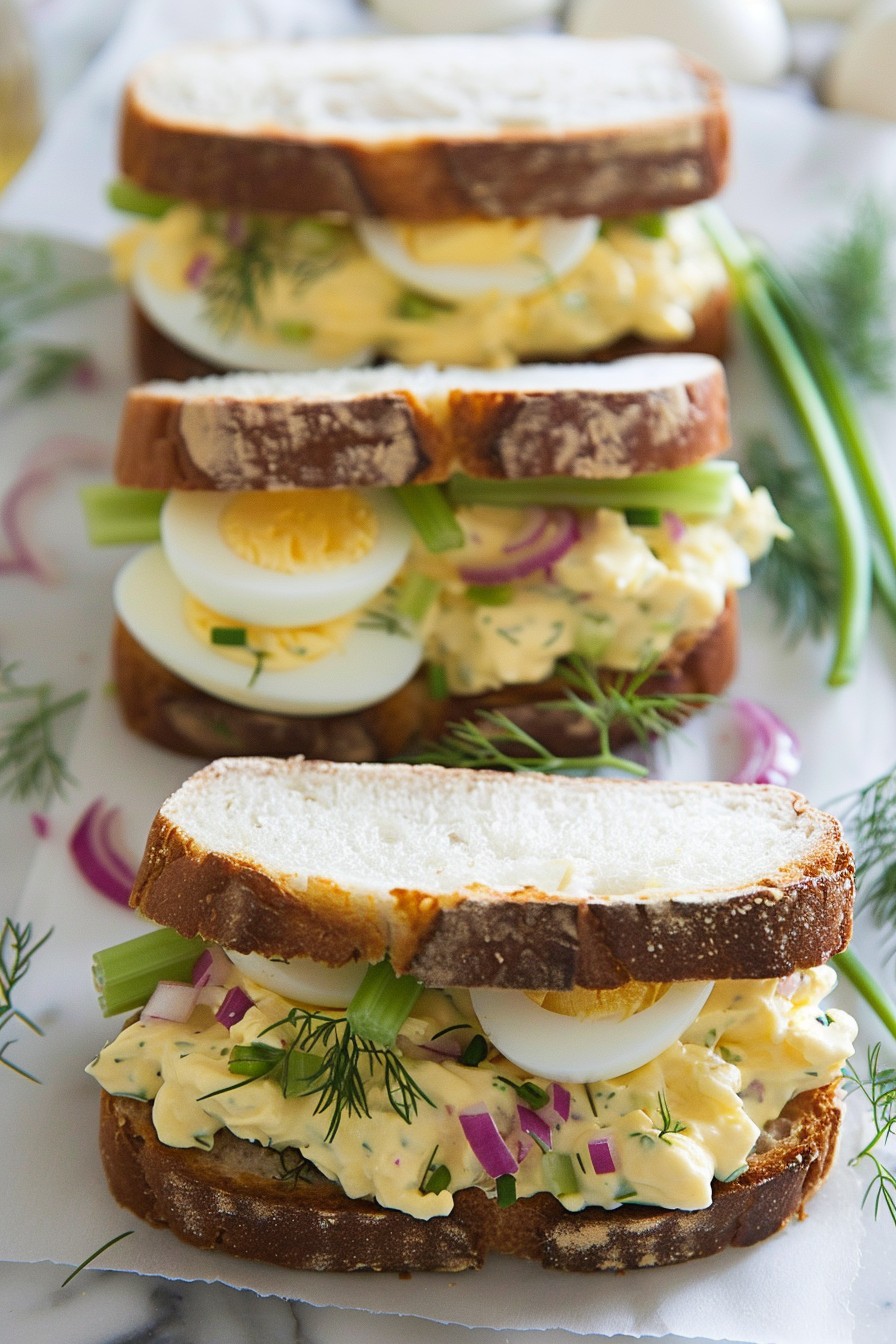
    • Versatile: Serve it on a bed of greens, in a sandwich, or with crackers for a quick snack.
    • Customizable: Easily adjust the ingredients to suit your taste preferences or dietary needs.

    Ingredients

    • 1 pound imitation crab meat, flaked
    • 1/2 cup mayonnaise
    • 1/4 cup sour cream
    • 1 tablespoon lemon juice
    • 1/2 teaspoon garlic powder
    • 1/2 teaspoon onion powder
    • 1/4 teaspoon salt
    • 1/4 teaspoon black pepper
    • 1/2 cup celery, finely diced
    • 1/4 cup red onion, finely diced
    • 2 tablespoons fresh dill, chopped

    Equipment Needed

    • Large mixing bowl
    • Mixing spoon
    • Measuring cups and spoons
    • Knife and cutting board

    Instructions

    Crab Salad Recipe Imitation

    Step 1: Prepare the Ingredients

    Start by flaking the imitation crab meat into bite-sized pieces. Finely dice the celery and red onion, and chop the fresh dill. Having all your ingredients prepped and ready to go makes the assembly process a breeze.

    Step 2: Mix the Dressing

    In a large mixing bowl, combine the mayonnaise, sour cream, lemon juice, garlic powder, onion powder, salt, and black pepper. Whisk together until smooth. This creamy dressing is the secret to the salad’s rich flavor.

    Step 3: Combine the Ingredients

    Add the flaked crab meat, diced celery, red onion, and fresh dill to the bowl with the dressing. Gently fold everything together until well combined. Be careful not to overmix to keep the crab pieces intact.

    Step 4: Chill Before Serving

    Cover the bowl with plastic wrap and refrigerate for at least 30 minutes. This chilling time allows the flavors to meld together beautifully.

    Step 5: Serve and Enjoy

    Once chilled, give the salad a quick stir and serve as desired. Whether it’s on a sandwich, over greens, or with crackers, it’s sure to be a hit.

    Tips and Tricks

    For an extra crunch, consider adding diced apples or cucumbers. If you’re watching your calories, substitute the mayonnaise and sour cream with Greek yogurt. For a spicier kick, add a dash of hot sauce or cayenne pepper. Always taste and adjust the seasoning before serving. Remember, the salad tastes even better the next day as the flavors continue to develop.

    Recipe Variations

    • Avocado Crab Salad: Add diced avocado for a creamy texture and healthy fats.
    • Spicy Crab Salad: Mix in some chopped jalapeños or a sprinkle of cayenne pepper for heat.
    • Asian-Inspired Crab Salad: Substitute the mayonnaise with a mix of soy sauce, sesame oil, and a bit of sugar for an Asian twist.
    • Low-Carb Crab Salad: Serve the salad in lettuce wraps instead of bread for a low-carb option.

    Frequently Asked Questions

    Can I use real crab instead of imitation?

    Absolutely! While this recipe is designed for imitation crab, real crab meat can be used for an even more authentic taste. Just keep in mind that real crab is more delicate, so fold it in gently to avoid breaking it apart.

    How long does the salad last in the fridge?

    Stored in an airtight container, the crab salad will stay fresh for up to 3 days. Beyond that, the vegetables may start to lose their crunch, and the dressing can become watery.

    Can I freeze the crab salad?

    Freezing is not recommended as the mayonnaise-based dressing can separate and become grainy upon thawing, and the vegetables will lose their texture.

    Summary

    This imitation crab salad is a quick, easy, and budget-friendly alternative to real crab salad. Perfect for sandwiches, salads, or snacks, it’s customizable to suit any taste. With simple ingredients and no cooking required, it’s a must-try for seafood lovers.

  • Wake Up to Wow: The Ultimate Breakfast Salad Recipe

    Wake Up to Wow: The Ultimate Breakfast Salad Recipe

    How about starting your day with a burst of freshness and energy? This breakfast salad is not your average greens; it’s a vibrant, nutrient-packed dish that will make you leap out of bed. Perfect for those who think salads are just for lunch or dinner, this recipe is a game-changer.

    Why This Recipe Works

    • It combines the freshness of greens with the heartiness of breakfast staples for a balanced meal.
    • The dressing is a sweet and tangy homemade vinaigrette that wakes up your taste buds.
    • It’s customizable with whatever veggies or proteins you have on hand, making it a versatile start to any day.
    • Quick to prepare, ensuring you have more time to enjoy your morning.
    • Packed with proteins and fibers to keep you full until lunch.

    Ingredients

    • 2 cups mixed greens (washed and dried)
    • 1/2 cup cherry tomatoes (halved)
    • 1/4 cup red onion (thinly sliced)
    • 1 avocado (sliced)
    • 2 eggs (poached or fried)
    • 2 strips bacon (cooked and crumbled)
    • 1 tbsp olive oil
    • 1 tbsp balsamic vinegar
    • 1 tsp honey
    • Salt and pepper to taste

    Equipment Needed

    • Mixing bowl
    • Whisk
    • Skillet
    • Knife and cutting board

    Instructions

    Breakfast Salad Recipe

    Prepare the Dressing

    In a small bowl, whisk together the olive oil, balsamic vinegar, honey, and a pinch of salt and pepper until well combined. Taste and adjust the seasoning if necessary. This dressing is the secret to tying all the flavors together, so don’t skip it!

    Assemble the Salad

    In a large mixing bowl, combine the mixed greens, cherry tomatoes, and red onion. Drizzle the dressing over the top and toss gently to coat all the ingredients evenly. The key here is to ensure every leaf gets a little love from the dressing.

    Add the Toppings

    Arrange the avocado slices, poached or fried eggs, and crumbled bacon on top of the dressed greens. The eggs add a creamy texture that contrasts beautifully with the crisp greens, while the bacon brings a smoky crunch.

    Serve Immediately

    This salad is best enjoyed fresh, so serve it right away. The warmth of the eggs and bacon slightly wilts the greens, creating a delightful texture contrast that’s simply irresistible.

    Tips and Tricks

    For an extra flavor boost, try adding a sprinkle of feta or goat cheese. If you’re not a fan of bacon, substitute it with smoked salmon or grilled chicken for a different protein option. To make the salad even more filling, add a handful of nuts or seeds for crunch. Always dress the salad just before serving to keep the greens crisp. If you’re meal prepping, keep the dressing separate and add it when you’re ready to eat.

    Recipe Variations

    • Swap the balsamic vinegar for lemon juice and olive oil for a lighter dressing.
    • Add quinoa or farro for a grain-based version that’s even more filling.
    • Use sweet potatoes or butternut squash as a base for a warmer, autumn-inspired salad.
    • Incorporate different greens like spinach or arugula for a peppery twist.
    • For a vegan version, omit the eggs and bacon and add tofu scramble and tempeh bacon.

    Frequently Asked Questions

    Can I make this salad ahead of time?

    Yes, but with a few precautions. Prepare all the ingredients and store them separately. Combine and add the dressing just before serving to prevent the greens from getting soggy. This way, you can enjoy a fresh and crisp salad even on busy mornings.

    What other dressings work well with this salad?

    This salad is versatile when it comes to dressings. A creamy avocado or yogurt-based dressing can add richness, while a citrus vinaigrette can brighten up the flavors. Experiment with different dressings to find your favorite combination.

    How can I make this salad more kid-friendly?

    Kids might be skeptical of greens first thing in the morning, so try adding more familiar ingredients like cheese, croutons, or their favorite fruits. You can also cut the ingredients into fun shapes or serve the dressing on the side for dipping.

    Summary

    This breakfast salad is a refreshing and nutritious way to start your day. With its combination of fresh greens, creamy avocado, crispy bacon, and perfectly cooked eggs, it’s a meal that will keep you satisfied and energized. Plus, it’s fully customizable to suit your taste preferences and dietary needs.

  • Quinoa and Lentil Salad Recipe: A Protein-Packed Delight

    Quinoa and Lentil Salad Recipe: A Protein-Packed Delight

    Now, let’s dive into a dish that’s as nutritious as it is delicious. This quinoa and lentil salad is the perfect blend of textures and flavors, making it a hit for any meal of the day.

    Why This Recipe Works

    • It’s a complete protein source, combining quinoa and lentils for all essential amino acids.
    • The salad is packed with fiber, aiding digestion and keeping you full longer.
    • It’s versatile, allowing for endless variations based on your taste preferences.
    • Prep is a breeze, making it perfect for meal prep or a quick lunch.
    • The dressing adds a zesty kick, elevating the flavors of the salad.

    Ingredients

    • 1 cup quinoa, rinsed
    • 1 cup green lentils, rinsed
    • 2 cups water
    • 1 cucumber, diced
    • 1 red bell pepper, diced
    • 1/4 cup red onion, finely chopped
    • 1/4 cup olive oil
    • 2 tbsp lemon juice
    • 1 tsp salt
    • 1/2 tsp black pepper
    • 1/4 cup fresh parsley, chopped

    Equipment Needed

    • Medium saucepan
    • Mixing bowls
    • Whisk
    • Knife and cutting board
    • Measuring cups and spoons

    Instructions

    Quinoa And Lentil Salad Recipe

    Step 1: Cook the Quinoa and Lentils

    In a medium saucepan, bring 2 cups of water to a boil. Add the quinoa and lentils, reduce heat to low, cover, and simmer for 15 minutes, or until the water is absorbed and the quinoa is fluffy. Remove from heat and let it sit covered for 5 minutes. Tip: Fluff with a fork to prevent clumping.

    Step 2: Prepare the Vegetables

    While the quinoa and lentils are cooking, dice the cucumber and red bell pepper, and finely chop the red onion. Place them in a large mixing bowl. Tip: For a milder onion flavor, soak the chopped red onion in cold water for 10 minutes, then drain.

    Step 3: Make the Dressing

    In a small bowl, whisk together the olive oil, lemon juice, salt, and black pepper until well combined. Taste and adjust seasoning as needed.

    Step 4: Combine Everything

    Add the cooked quinoa and lentils to the bowl with the vegetables. Pour the dressing over the top and toss gently to combine. Stir in the chopped parsley last for a fresh burst of flavor. Tip: Let the salad sit for 10 minutes before serving to allow the flavors to meld.

    Step 5: Serve and Enjoy

    Serve the salad at room temperature or chilled. It’s perfect on its own or as a side dish with grilled chicken or fish.

    Tips and Tricks

    For an extra crunch, add some toasted almonds or walnuts. If you’re not a fan of parsley, cilantro or mint makes a great substitute. To make this salad ahead, keep the dressing separate and add it just before serving to keep the vegetables crisp. For a creamier texture, mash half an avocado and mix it into the salad. And remember, the longer the salad sits, the more the flavors develop, so it’s even better the next day!

    Recipe Variations

    • Add feta cheese or goat cheese for a creamy, tangy twist.
    • Swap the lemon juice for balsamic vinegar for a deeper flavor profile.
    • Include roasted sweet potatoes or butternut squash for a hearty, autumnal version.
    • For a Mediterranean flair, add kalamata olives and sun-dried tomatoes.
    • Spice it up with a pinch of cumin or smoked paprika in the dressing.

    Frequently Asked Questions

    Can I use red quinoa instead of white?

    Absolutely! Red quinoa has a slightly nuttier flavor and holds its shape a bit better, making it a great choice for salads. Just keep in mind that the cooking time might vary slightly, so check the package instructions.

    How long does this salad keep in the fridge?

    This salad will stay fresh in an airtight container in the fridge for up to 5 days. The flavors actually improve over time, making it a fantastic make-ahead meal.

    Can I freeze this salad?

    While you can freeze it, the texture of the vegetables and quinoa may change upon thawing, becoming a bit mushy. It’s best enjoyed fresh or stored in the fridge.

    Summary

    This quinoa and lentil salad is a nutritious, flavorful, and versatile dish that’s perfect for any occasion. With its high protein and fiber content, it’s as satisfying as it is delicious. Plus, it’s easy to customize based on your preferences or what you have on hand.

  • Seafood Noodle Salad Recipe: A Refreshing Summer Delight

    Seafood Noodle Salad Recipe: A Refreshing Summer Delight

    Today’s the perfect day to whip up something light, refreshing, and utterly delicious. This seafood noodle salad is your ticket to a flavorful journey that’s as easy to make as it is to love. Let’s dive into the recipe that’s about to become your summer staple.

    Why This Recipe Works

    • It’s a perfect balance of flavors, combining the freshness of seafood with the tanginess of the dressing.
    • The recipe is versatile, allowing you to use whatever seafood is fresh and available.
    • It’s quick to prepare, making it ideal for last-minute dinners or potlucks.
    • The combination of textures from the noodles, seafood, and veggies makes every bite interesting.
    • It’s a healthy option that doesn’t skimp on taste, perfect for those watching their diet.

    Ingredients

    • 8 oz rice noodles
    • 1 lb mixed seafood (shrimp, squid, and scallops), cleaned and prepared
    • 2 cups mixed vegetables (bell peppers, carrots, and cucumbers), julienned
    • 1/4 cup fresh cilantro, chopped
    • 1/4 cup fresh mint, chopped
    • 3 tbsp fish sauce
    • 2 tbsp lime juice
    • 1 tbsp sugar
    • 1 garlic clove, minced
    • 1 red chili, sliced (optional)

    Equipment Needed

    • Large pot
    • Mixing bowls
    • Whisk
    • Colander
    • Knife and cutting board

    Instructions

    Seafood Noodle Salad Recipe

    Step 1: Prepare the Noodles

    Bring a large pot of water to a boil. Add the rice noodles and cook according to package instructions, usually about 3-5 minutes. Drain and rinse under cold water to stop the cooking process. Tip: To prevent sticking, toss the noodles with a little oil after rinsing.

    Step 2: Cook the Seafood

    In the same pot, bring water to a simmer and cook the seafood until just done, about 2-3 minutes depending on size. Drain and set aside to cool. Tip: Overcooking seafood makes it tough, so keep an eye on it.

    Step 3: Make the Dressing

    In a mixing bowl, whisk together fish sauce, lime juice, sugar, garlic, and chili until the sugar is dissolved. Taste and adjust the seasoning as needed.

    Step 4: Combine Everything

    In a large bowl, combine the noodles, seafood, vegetables, and herbs. Pour the dressing over and toss gently to combine. Tip: Let the salad sit for 10 minutes before serving to allow the flavors to meld.

    Step 5: Serve and Enjoy

    Divide the salad among plates and garnish with extra herbs and chili if desired. Serve immediately for the best texture and flavor.

    Tips and Tricks

    For an extra crunch, add some crushed peanuts or toasted sesame seeds on top. If you’re not a fan of spicy food, you can omit the chili or serve it on the side. For a more substantial meal, add some avocado slices or serve with a side of crusty bread. Remember, the key to a great salad is fresh ingredients, so don’t skimp on quality.

    Recipe Variations

    • Swap the rice noodles for soba or udon noodles for a different texture.
    • Use chicken or tofu instead of seafood for a vegetarian or poultry version.
    • Add mango or pineapple for a sweet and tangy twist.
    • Incorporate different herbs like basil or dill for a unique flavor profile.
    • Try a different dressing, such as a peanut or soy-ginger vinaigrette, for a completely new taste.

    Frequently Asked Questions

    Can I make this salad ahead of time?

    Yes, you can prepare the components ahead, but it’s best to combine them just before serving to maintain the best texture. The noodles can become soggy, and the seafood can overcook if left in the dressing too long.

    What other seafood can I use?

    Feel free to use any seafood you like or have on hand. Crab, mussels, or even cooked fish fillets would work beautifully in this recipe.

    Is there a substitute for fish sauce?

    If you’re not a fan of fish sauce, you can use soy sauce or tamari for a different but equally delicious flavor. Just adjust the quantity to taste.

    Summary

    This seafood noodle salad is a light, flavorful, and versatile dish perfect for any occasion. With its balance of textures and tastes, it’s sure to be a hit. Plus, it’s easy to customize based on your preferences or what you have in the fridge. Give it a try and enjoy a taste of summer anytime!

  • Tortellini Greek Salad Recipe: A Twist on a Classic

    Tortellini Greek Salad Recipe: A Twist on a Classic

    Now here’s a dish that’ll make your taste buds dance the Zorba! Combining the hearty comfort of tortellini with the fresh, vibrant flavors of a traditional Greek salad, this recipe is a match made in culinary heaven. Perfect for those who love a little pasta with their veggies.

    Why This Recipe Works

    • The cheese-filled tortellini adds a creamy texture that contrasts beautifully with the crisp vegetables.
    • Olive oil and lemon juice dressing brings a light, tangy flavor that ties all the ingredients together.
    • It’s a versatile dish that can serve as a main course or a side, perfect for any occasion.
    • Quick and easy to prepare, making it ideal for busy weeknights or last-minute gatherings.
    • The combination of flavors and textures makes this dish a crowd-pleaser every time.

    Ingredients

    • 1 package (20 oz) cheese tortellini
    • 2 cups cherry tomatoes, halved
    • 1 cucumber, diced
    • 1/2 red onion, thinly sliced
    • 1 cup Kalamata olives, pitted and halved
    • 1/2 cup feta cheese, crumbled
    • 1/4 cup extra virgin olive oil
    • 2 tbsp lemon juice
    • 1 tsp dried oregano
    • Salt and pepper to taste

    Equipment Needed

    • Large pot
    • Colander
    • Large mixing bowl
    • Whisk
    • Measuring cups and spoons

    Instructions

    Tortellini Greek Salad Recipe

    Step 1: Cook the Tortellini

    Bring a large pot of salted water to a boil. Add the tortellini and cook according to the package instructions, usually about 7-9 minutes, until they float to the top and are tender. Drain in a colander and rinse under cold water to stop the cooking process. Tip: Adding a splash of olive oil to the water can prevent the tortellini from sticking together.

    Step 2: Prepare the Vegetables

    While the tortellini cooks, halve the cherry tomatoes, dice the cucumber, and thinly slice the red onion. Place them in a large mixing bowl. Add the Kalamata olives and crumbled feta cheese. Tip: For an extra burst of flavor, let the vegetables marinate in the dressing for 10 minutes before adding the tortellini.

    Step 3: Make the Dressing

    In a small bowl, whisk together the extra virgin olive oil, lemon juice, dried oregano, and a pinch of salt and pepper. Taste and adjust the seasoning as needed. The dressing should be tangy and herbaceous.

    Step 4: Combine Everything

    Add the cooled tortellini to the bowl with the vegetables. Pour the dressing over the top and gently toss everything together until well combined. Make sure every piece is coated with the dressing for maximum flavor.

    Step 5: Serve and Enjoy

    Transfer the salad to a serving dish or individual plates. For the best flavor, let it sit for about 10 minutes before serving to allow the flavors to meld together. Serve at room temperature for the most refreshing taste.

    Tips and Tricks

    For those looking to elevate this dish even further, consider roasting the cherry tomatoes before adding them to the salad. This concentrates their sweetness and adds a depth of flavor. Another tip is to use fresh oregano instead of dried if you have it on hand; the flavor is more vibrant. Lastly, for a creamier texture, you can add a dollop of Greek yogurt to the dressing. These small tweaks can make a big difference in the overall taste and presentation of the dish.

    Recipe Variations

    • Add grilled chicken or shrimp for a protein-packed version.
    • Swap the tortellini for whole wheat or gluten-free pasta to cater to dietary restrictions.
    • Incorporate different vegetables like bell peppers or artichoke hearts for added color and texture.
    • Use a different cheese, such as goat cheese or mozzarella, for a twist on the classic feta.
    • Add a handful of fresh herbs like basil or mint for an extra layer of flavor.

    Frequently Asked Questions

    Can I make this salad ahead of time?

    Absolutely! This salad can be prepared up to a day in advance. Just keep the dressing separate and toss it with the salad before serving to keep the vegetables crisp and the tortellini from getting soggy.

    What’s the best way to store leftovers?

    Store any leftovers in an airtight container in the refrigerator for up to 3 days. The flavors will continue to meld, making it even more delicious the next day.

    Can I use a different type of pasta?

    Yes, while tortellini adds a unique texture and flavor, you can substitute it with any pasta you prefer. Just adjust the cooking time according to the package instructions.

    Summary

    This Tortellini Greek Salad is a delightful fusion of Italian and Greek cuisines, offering a perfect balance of flavors and textures. It’s easy to make, versatile, and sure to impress at any table. Whether you’re looking for a quick weeknight dinner or a dish to bring to your next potluck, this recipe has you covered.

  • Crispy Chicken Strip Salad: A Crunchy, Healthy Delight

    Crispy Chicken Strip Salad: A Crunchy, Healthy Delight

    A amazing way to enjoy your favorite crispy chicken strips in a lighter, salad form. This recipe combines the best of both worlds for a meal that’s both satisfying and nutritious.

    Why This Recipe Works

    • The combination of crispy chicken strips with fresh greens offers a perfect balance of textures and flavors.
    • It’s a versatile recipe that can be customized with your favorite salad toppings and dressings.
    • Quick and easy to make, it’s perfect for a weeknight dinner or a healthy lunch option.
    • The chicken strips add a protein punch, making the salad more filling and satisfying.
    • It’s a great way to sneak in those veggies without feeling like you’re missing out on something delicious.

    Ingredients

    • 1 lb chicken breast, cut into strips
    • 1 cup breadcrumbs
    • 2 eggs, beaten
    • 1/2 cup flour
    • Salt and pepper to taste
    • 4 cups mixed greens
    • 1 cup cherry tomatoes, halved
    • 1/2 cucumber, sliced
    • 1/4 cup red onion, thinly sliced
    • 1/2 cup ranch dressing

    Equipment Needed

    • Mixing bowls
    • Baking sheet
    • Parchment paper
    • Knife and cutting board
    • Measuring cups and spoons

    Instructions

    Chicken Strip Salad Recipe

    Prep the Chicken Strips

    Start by preheating your oven to 400°F. Season the chicken strips with salt and pepper. Dredge each strip in flour, dip in beaten eggs, and then coat with breadcrumbs. Place them on a parchment-lined baking sheet. Bake for 20 minutes, flipping halfway through, until golden and crispy.

    Prepare the Salad Base

    While the chicken is baking, wash and dry the mixed greens. Slice the cherry tomatoes, cucumber, and red onion. Combine all the vegetables in a large salad bowl.

    Assemble the Salad

    Once the chicken strips are done, let them cool for a few minutes. Slice them into bite-sized pieces if desired. Add the chicken to the salad bowl. Drizzle with ranch dressing and toss gently to combine.

    Serve and Enjoy

    Divide the salad among plates. Serve immediately for the best texture and flavor. Enjoy your crunchy, healthy delight!

    Tips and Tricks

    For an extra crispy coating, you can double-dip the chicken strips in the egg and breadcrumb mixture. If you’re short on time, use pre-cooked chicken strips from the store. To make the salad more filling, add some avocado slices or hard-boiled eggs. For a lighter dressing option, try a vinaigrette instead of ranch. Always let the chicken rest for a few minutes after baking to keep it juicy.

    Recipe Variations

    • Swap the ranch dressing for blue cheese or honey mustard for a different flavor profile.
    • Add some crumbled bacon or shredded cheese for extra richness.
    • Use panko breadcrumbs for an even crispier chicken coating.
    • Incorporate different veggies like bell peppers or carrots for added color and nutrition.
    • Make it a wrap by placing the salad in a large tortilla with some extra dressing.

    Frequently Asked Questions

    Can I make this salad ahead of time?

    Yes, you can prep the components ahead, but keep the dressing and chicken separate until ready to serve to maintain the crispiness of the chicken and freshness of the greens.

    Can I use a different type of meat?

    Absolutely! This recipe works great with turkey or even tofu for a vegetarian option. Just adjust the cooking time accordingly.

    How can I make this recipe gluten-free?

    Use gluten-free breadcrumbs and flour for the chicken strips, and ensure your dressing is gluten-free. The rest of the ingredients are naturally gluten-free.

    Summary

    This Crispy Chicken Strip Salad is a delightful mix of textures and flavors, perfect for a quick and healthy meal. Customizable and easy to make, it’s sure to become a favorite.

  • Carrot Beetroot Salad Recipe: A Colorful Twist on a Classic

    Carrot Beetroot Salad Recipe: A Colorful Twist on a Classic

    Delight your taste buds with this vibrant and nutritious carrot beetroot salad. Perfect for any season, this recipe combines the earthy sweetness of beets with the crisp freshness of carrots, all tossed in a zesty dressing that’ll have you coming back for seconds.

    Why This Recipe Works

    • The combination of raw carrots and beets offers a delightful crunch and a burst of natural sweetness.
    • A simple yet flavorful dressing made with olive oil, lemon juice, and honey enhances the vegetables’ flavors without overpowering them.
    • This salad is packed with vitamins and antioxidants, making it as healthy as it is delicious.
    • It’s incredibly versatile; serve it as a side dish, a main course with added protein, or even as a topping for toast.
    • Preparation is a breeze, requiring no cooking and just a few minutes of your time.

    Ingredients

    • 2 cups grated carrots
    • 2 cups grated beetroot
    • 1/4 cup olive oil
    • 2 tbsp lemon juice
    • 1 tbsp honey
    • Salt and pepper to taste
    • 1/4 cup chopped walnuts (optional)
    • 1/4 cup crumbled feta cheese (optional)

    Equipment Needed

    • Grater
    • Large mixing bowl
    • Small whisk or fork
    • Measuring cups and spoons

    Instructions

    Carrot Beetroot Salad Recipe

    Step 1: Prepare the Vegetables

    Start by washing and peeling the carrots and beetroot. Using a grater, grate both vegetables into a large mixing bowl. For a finer texture, you can use the small holes of the grater, but the larger holes will give a more satisfying crunch. Tip: Wear gloves when handling beetroot to avoid staining your hands.

    Step 2: Make the Dressing

    In a small bowl, whisk together the olive oil, lemon juice, honey, salt, and pepper until well combined. The honey should be fully dissolved into the mixture, creating a smooth and slightly thick dressing. Tip: Adjust the amount of lemon juice and honey based on your preference for sweetness or tanginess.

    Step 3: Combine and Toss

    Pour the dressing over the grated carrots and beetroot. Using a large spoon or your hands, gently toss the vegetables until they are evenly coated with the dressing. This is the perfect time to add any optional ingredients like walnuts or feta cheese for extra texture and flavor.

    Step 4: Let It Marinate

    Allow the salad to sit for at least 10 minutes before serving. This resting period lets the flavors meld together beautifully. If you’re preparing the salad ahead of time, cover it and refrigerate for up to 24 hours. Tip: The salad tastes even better the next day as the flavors continue to develop.

    Step 5: Serve and Enjoy

    Give the salad a final toss before serving to redistribute the dressing. Serve it chilled or at room temperature, garnished with additional walnuts or feta cheese if desired. This salad pairs wonderfully with grilled meats or as a standalone light meal.

    Tips and Tricks

    For those looking to elevate their carrot beetroot salad, consider roasting the beets before adding them to the salad for a deeper, sweeter flavor. If you’re short on time, pre-grated carrots and beetroot from the store can be a great time-saver. To add a spicy kick, include a pinch of cayenne pepper or some finely chopped jalapeños in the dressing. For a creamier texture, mix in a tablespoon of Greek yogurt or mayonnaise into the dressing. Lastly, if you’re serving this salad at a party, consider serving it in individual cups for a stylish and practical presentation.

    Recipe Variations

    • Add diced apples or pears for a fruity twist that complements the earthiness of the beets.
    • Incorporate quinoa or chickpeas to turn this side dish into a protein-packed main course.
    • Swap the honey in the dressing for maple syrup or agave nectar for a vegan version.
    • Use different nuts like almonds or pecans instead of walnuts for varied texture and flavor.
    • Experiment with herbs like dill, parsley, or mint to add a fresh, aromatic element to the salad.

    Frequently Asked Questions

    Can I make this salad ahead of time?

    Absolutely! This salad actually benefits from being made ahead as it allows the flavors to meld together. Just be sure to store it in an airtight container in the refrigerator and give it a good stir before serving. The salad will keep well for up to 2 days, though the texture of the vegetables may soften slightly over time.

    Is there a way to prevent the beetroot from staining everything?

    Beetroot is notorious for its staining power, but there are a few tricks to minimize the mess. Wearing gloves while handling the beetroot can prevent your hands from turning pink. Additionally, adding a bit of acid, like lemon juice or vinegar, to the salad can help set the color and reduce bleeding. Using a plastic or glass bowl instead of a porous material like wood can also help prevent staining.

    Can I use cooked beets instead of raw?

    Yes, cooked beets can be used in this recipe, though the texture and flavor will be slightly different. Roasted or boiled beets will be softer and sweeter than raw beets. If using cooked beets, you may want to reduce the amount of honey in the dressing since the beets will already be quite sweet. Also, consider adding the beets last to prevent them from turning the entire salad pink too quickly.

    Summary

    This carrot beetroot salad is a vibrant, nutritious, and delicious dish that’s perfect for any occasion. With its simple preparation, customizable ingredients, and flavorful dressing, it’s sure to become a staple in your recipe collection. Whether you’re looking for a healthy side dish or a light main course, this salad delivers on taste and texture.

  • Cool as a Cucumber: The Ultimate Yogurt Cucumber Salad Recipe

    Cool as a Cucumber: The Ultimate Yogurt Cucumber Salad Recipe

    Zesty, refreshing, and downright delicious, this yogurt cucumber salad is the perfect side dish for any meal. Whether you’re looking to cool down on a hot summer day or just want a healthy, tasty option, this recipe has got you covered.

    Why This Recipe Works

    • It’s incredibly refreshing, thanks to the crisp cucumbers and creamy yogurt.
    • The combination of herbs and spices adds a depth of flavor that’s hard to resist.
    • It’s versatile enough to serve as a side dish or a light main course.
    • Prep time is minimal, making it perfect for last-minute gatherings.
    • It’s a healthy option that doesn’t skimp on taste.

    Ingredients

    • 2 large cucumbers, thinly sliced
    • 1 cup plain Greek yogurt
    • 2 tbsp fresh dill, chopped
    • 1 tbsp lemon juice
    • 1 garlic clove, minced
    • Salt and pepper to taste

    Equipment Needed

    • Mixing bowl
    • Whisk
    • Knife
    • Cutting board
    • Measuring spoons

    Instructions

    Cucumber Salad Recipe Yogurt

    Prepare the Cucumbers

    Start by washing your cucumbers thoroughly. Thinly slice them using a sharp knife or a mandoline for even slices. For an extra crisp texture, you can salt the slices lightly and let them sit for 10 minutes, then rinse and pat dry. This step removes excess water, ensuring your salad isn’t watery.

    Mix the Yogurt Dressing

    In a large mixing bowl, combine the Greek yogurt, chopped dill, lemon juice, and minced garlic. Whisk together until the mixture is smooth and well combined. Season with salt and pepper to taste. The yogurt dressing should be creamy and flavorful, with a tangy kick from the lemon juice.

    Combine and Chill

    Add the sliced cucumbers to the bowl with the yogurt dressing. Gently toss until the cucumbers are evenly coated. For the best flavor, cover the bowl and refrigerate for at least 30 minutes before serving. This allows the flavors to meld together beautifully.

    Tips and Tricks

    For an even more refreshing salad, try using English cucumbers, which have fewer seeds and a thinner skin. If you’re short on time, you can serve the salad immediately, but chilling it really enhances the flavors. For a creamier texture, you can add a tablespoon of olive oil to the yogurt dressing. Experiment with different herbs like mint or parsley for a new twist on the classic recipe.

    Recipe Variations

    • Add diced tomatoes and red onions for a Greek-inspired version.
    • Mix in some chopped walnuts or almonds for added crunch.
    • For a spicy kick, add a pinch of cayenne pepper or some diced jalapeños.
    • Swap the dill for mint and add some chopped cucumber for a Middle Eastern twist.
    • Use sour cream instead of yogurt for a richer flavor.

    Frequently Asked Questions

    Can I make this salad ahead of time?

    Absolutely! This salad actually tastes better after it’s had some time to chill in the fridge. Just be sure to give it a good stir before serving to redistribute the dressing.

    Is there a dairy-free alternative to yogurt?

    Yes, you can use coconut yogurt or any other plant-based yogurt alternative. Just keep in mind that the flavor and texture might vary slightly.

    How long will this salad keep in the fridge?

    Stored in an airtight container, this salad will keep for up to 2 days. After that, the cucumbers may start to lose their crispness.

    Summary

    This yogurt cucumber salad is a refreshing, healthy, and versatile dish that’s perfect for any occasion. With minimal prep time and maximum flavor, it’s sure to become a staple in your recipe collection.

  • Blue Cheese and Pear Salad Recipe: A Symphony of Flavors

    Blue Cheese and Pear Salad Recipe: A Symphony of Flavors

    A absolutely delightful dish that combines the creamy tang of blue cheese with the sweet, juicy freshness of pears. This salad is not just a treat for your taste buds but also a feast for your eyes, making it perfect for any occasion, from a casual lunch to a fancy dinner party.

    Why This Recipe Works

    • The combination of sweet pears and tangy blue cheese creates a perfect balance of flavors.
    • Adding walnuts introduces a crunchy texture that contrasts beautifully with the softness of the pears and cheese.
    • A simple honey mustard dressing enhances the natural flavors without overpowering them.
    • This salad is incredibly versatile and can be served as a starter, side, or even a main dish with some added protein.
    • It’s quick and easy to prepare, requiring no cooking, just assembly.

    Ingredients

    • 2 ripe pears, thinly sliced
    • 4 cups mixed greens
    • 1/2 cup crumbled blue cheese
    • 1/4 cup walnuts, roughly chopped
    • 2 tbsp olive oil
    • 1 tbsp honey
    • 1 tbsp Dijon mustard
    • Salt and pepper to taste

    Equipment Needed

    • Large salad bowl
    • Small mixing bowl
    • Whisk
    • Knife
    • Cutting board

    Instructions

    Blue Cheese And Pear Salad Recipe

    Prepare the Dressing

    In a small mixing bowl, whisk together the olive oil, honey, Dijon mustard, salt, and pepper until well combined. This dressing is the secret to bringing all the flavors together, so make sure it’s thoroughly mixed.

    Assemble the Salad

    In a large salad bowl, toss the mixed greens with half of the dressing. This ensures every leaf is lightly coated, providing a flavorful base for the toppings.

    Add the Pears and Blue Cheese

    Arrange the thinly sliced pears on top of the greens, then sprinkle the crumbled blue cheese over them. The pears add a sweet freshness, while the blue cheese brings a creamy tang.

    Top with Walnuts

    Scatter the roughly chopped walnuts over the salad. They add a delightful crunch and nutty flavor that complements the other ingredients perfectly.

    Drizzle with Remaining Dressing

    Finish the salad by drizzling the remaining dressing over the top. This adds an extra layer of flavor and ensures every bite is as delicious as the last.

    Tips and Tricks

    For the best flavor, choose pears that are ripe but still firm. Overripe pears can make the salad too mushy. If you’re not a fan of blue cheese, goat cheese makes a great substitute, offering a similar creamy texture but with a milder flavor. Toasting the walnuts before adding them to the salad can enhance their nutty flavor and add an extra crunch. If you’re preparing this salad ahead of time, keep the dressing separate and add it just before serving to prevent the greens from wilting.

    Recipe Variations

    • Add grilled chicken or shrimp for a protein-packed main dish.
    • Swap the pears for apples or figs for a different sweet element.
    • Use pecans or almonds instead of walnuts for a different crunch.
    • Incorporate dried cranberries or cherries for a pop of color and sweetness.
    • Try a balsamic vinaigrette instead of honey mustard for a tangier dressing.

    Frequently Asked Questions

    Can I make this salad ahead of time?

    Yes, you can prepare the components ahead of time, but it’s best to assemble the salad and add the dressing just before serving to keep the greens fresh and crisp.

    What type of pears work best for this salad?

    Bartlett or Anjou pears are ideal because they’re sweet and hold their shape well when sliced. Just make sure they’re ripe but still firm to the touch.

    Can I use a different type of cheese?

    Absolutely! If blue cheese isn’t your thing, goat cheese, feta, or even gorgonzola can be great alternatives, each offering a unique flavor profile to the salad.

    Summary

    This Blue Cheese and Pear Salad is a delightful mix of sweet, tangy, and crunchy, making it a perfect dish for any occasion. It’s easy to prepare, versatile, and sure to impress your guests.

  • Egg Salad Tea Sandwich Recipe: A Delightful Bite for Any Occasion

    Egg Salad Tea Sandwich Recipe: A Delightful Bite for Any Occasion

    You’re about to discover the secret to making the most irresistible egg salad tea sandwiches that will steal the show at your next gathering. Perfectly creamy, with just the right amount of crunch, these sandwiches are a testament to the beauty of simplicity.

    Why This Recipe Works

    • The combination of creamy mayonnaise and tangy mustard creates a balanced flavor profile that elevates the humble egg.
    • Adding a crunch with finely diced celery and onions introduces a delightful texture contrast.
    • Using fresh herbs like dill or chives adds a burst of freshness that brightens the entire dish.
    • The tea sandwich format makes these bites perfectly portioned for elegant gatherings or a quick snack.
    • This recipe is incredibly versatile, allowing for numerous variations to suit any taste.

    Ingredients

    • 6 large eggs, hard-boiled and peeled
    • 1/4 cup mayonnaise
    • 1 tablespoon Dijon mustard
    • 1/4 cup finely diced celery
    • 2 tablespoons finely diced red onion
    • 1 tablespoon chopped fresh dill or chives
    • Salt and pepper to taste
    • 8 slices of white or whole wheat bread, crusts removed

    Equipment Needed

    • Medium mixing bowl
    • Fork or potato masher
    • Sharp knife
    • Cutting board
    • Measuring spoons and cups

    Instructions

    Egg Salad Tea Sandwich Recipe

    Step 1: Prepare the Eggs

    Start by placing your hard-boiled eggs in a medium mixing bowl. Using a fork or potato masher, gently mash the eggs to your desired consistency. Some prefer a chunkier texture, while others like it smooth. Remember, the key is to keep it consistent for even distribution in every bite.

    Step 2: Mix the Ingredients

    Add the mayonnaise, Dijon mustard, diced celery, red onion, and fresh herbs to the mashed eggs. Stir until everything is well combined. Season with salt and pepper to taste. Tip: For an extra flavor boost, let the mixture sit in the fridge for an hour before assembling the sandwiches.

    Step 3: Assemble the Sandwiches

    Lay out your bread slices on a clean surface. Evenly distribute the egg salad mixture onto half of the slices, then top with the remaining slices. Press down gently to adhere. Tip: For a more elegant presentation, cut the sandwiches into triangles or rectangles before serving.

    Step 4: Serve and Enjoy

    Arrange your tea sandwiches on a platter and serve immediately. If you’re preparing them ahead of time, cover with a damp paper towel and plastic wrap to keep them fresh. Tip: These sandwiches pair beautifully with a light, floral tea or a crisp white wine.

    Tips and Tricks

    For those looking to elevate their egg salad tea sandwiches, consider these advanced tips. First, experimenting with different types of mustard can add a unique twist; try whole grain or honey mustard for a change. Second, incorporating avocado into the egg salad can introduce a creamy texture and healthy fats. Lastly, toasting the bread lightly before assembling can add a delightful crunch and prevent sogginess.

    Recipe Variations

    • Add crispy bacon bits for a smoky flavor.
    • Swap mayonnaise with Greek yogurt for a lighter version.
    • Include a teaspoon of curry powder for an exotic twist.
    • Use croissants instead of bread for a richer, buttery taste.
    • Top with microgreens or arugula for a peppery finish.

    Frequently Asked Questions

    Can I make the egg salad ahead of time?

    Absolutely! The egg salad can be prepared up to two days in advance and stored in an airtight container in the refrigerator. Just give it a good stir before assembling your sandwiches to redistribute any liquids that may have separated.

    How do I prevent my sandwiches from getting soggy?

    To avoid sogginess, assemble the sandwiches no more than a few hours before serving. If you must prepare them earlier, store the egg salad and bread separately and assemble just before serving. Lightly toasting the bread can also help create a barrier against moisture.

    Can I use something other than bread?

    Certainly! This egg salad is versatile and can be served in lettuce wraps, on crackers, or even as a topping for a green salad. Feel free to get creative with how you serve it.

    Summary

    This egg salad tea sandwich recipe is a classic for a reason. It’s simple, delicious, and endlessly adaptable, making it perfect for any occasion. Whether you’re hosting a fancy tea party or just looking for a quick and tasty snack, these sandwiches are sure to please.