Author: onlinefoodrecipes

  • Spam-tastic Macaroni Salad: A Comfort Food Classic

    Spam-tastic Macaroni Salad: A Comfort Food Classic

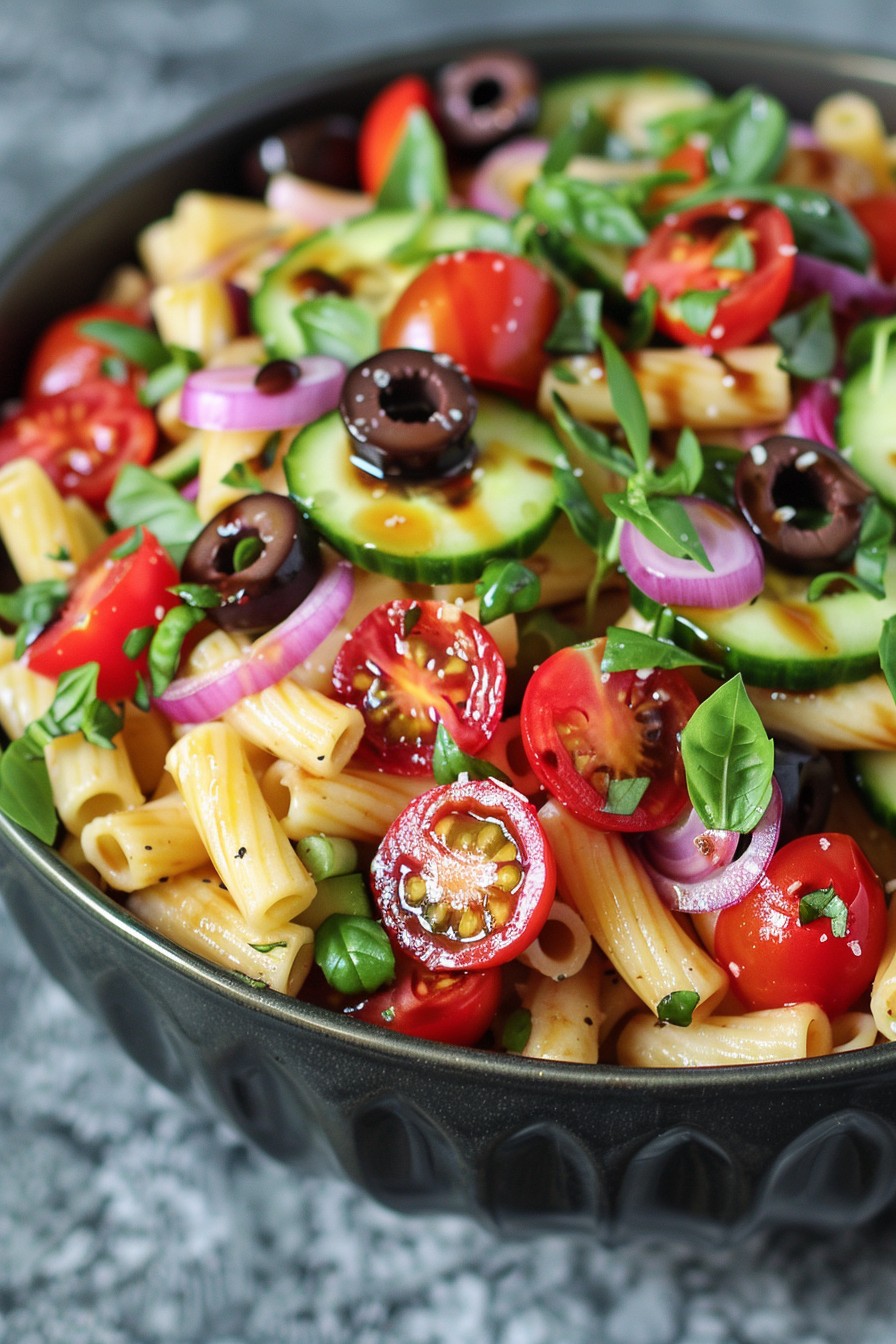
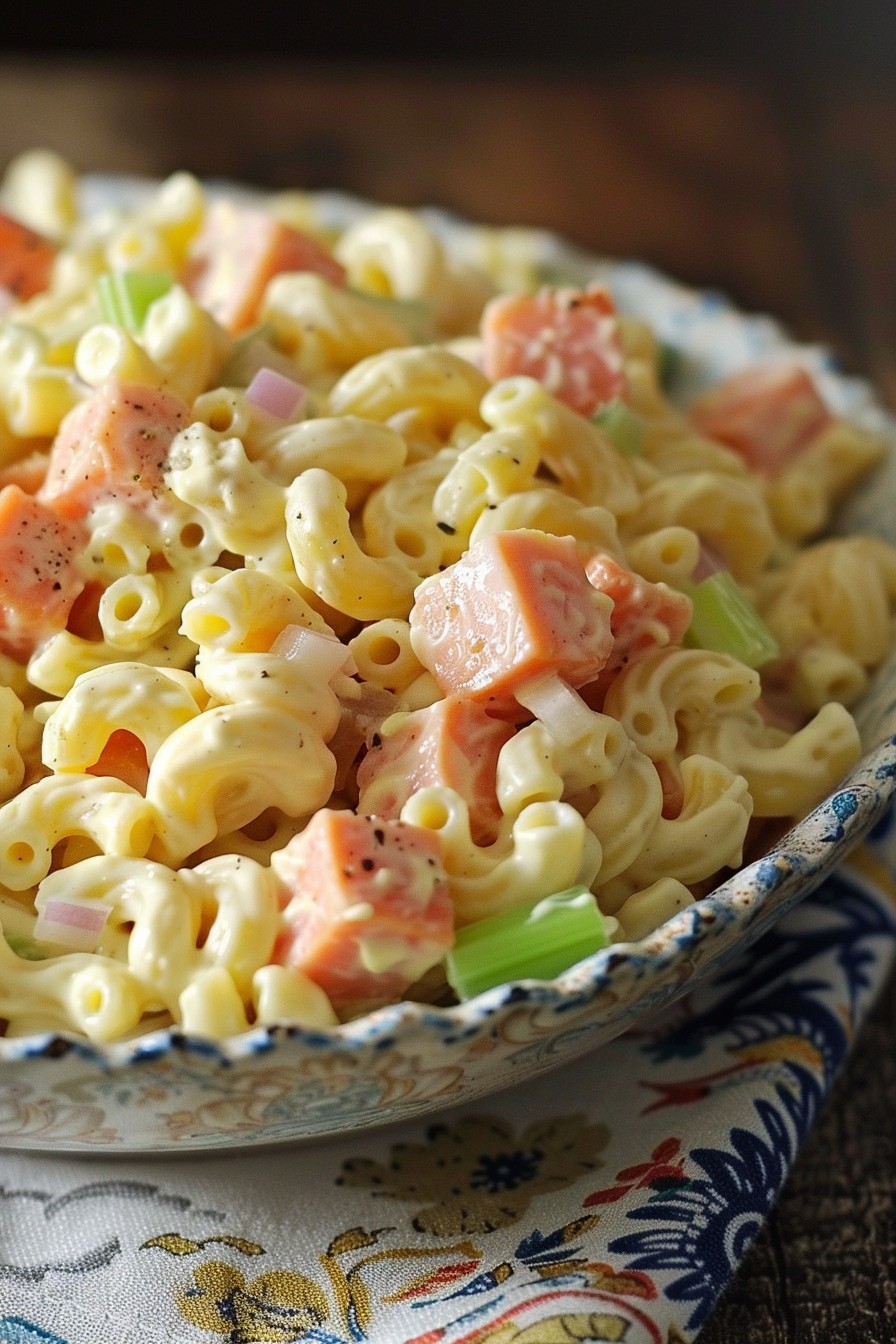
    Today’s the day to spice up your picnic or potluck with a dish that’s sure to be a hit. This macaroni salad with Spam is a delightful twist on the traditional recipe, offering a perfect blend of creamy, tangy, and savory flavors that will have everyone asking for seconds.

    Why This Recipe Works

    • The combination of creamy mayonnaise and tangy mustard creates a dressing that’s rich in flavor but not overpowering.
    • Spam adds a unique, savory depth that elevates the salad beyond the ordinary.
    • The crunch of celery and onions provides a refreshing contrast to the soft macaroni and Spam.
    • It’s incredibly versatile, allowing for numerous variations to suit any taste.
    • Perfect for making ahead, as the flavors meld beautifully overnight.

    Ingredients

    • 2 cups elbow macaroni, uncooked
    • 1 can (12 oz) Spam, diced into small cubes
    • 1/2 cup mayonnaise
    • 2 tablespoons mustard
    • 1/2 cup celery, finely chopped
    • 1/4 cup onion, finely chopped
    • 1 tablespoon apple cider vinegar
    • 1 teaspoon sugar
    • Salt and pepper to taste

    Equipment Needed

    • Large pot
    • Colander
    • Large mixing bowl
    • Measuring cups and spoons
    • Knife and cutting board

    Instructions

    Macaroni Salad Recipe With Spam

    Step 1: Cook the Macaroni

    Bring a large pot of salted water to a rolling boil. Add the elbow macaroni and cook according to package instructions until al dente, about 8 minutes. Drain in a colander and rinse under cold water to stop the cooking process. Let it cool completely.

    Step 2: Prepare the Spam

    While the macaroni is cooling, dice the Spam into small, bite-sized cubes. For a fun twist, you can lightly pan-fry the Spam cubes until golden for extra flavor and texture.

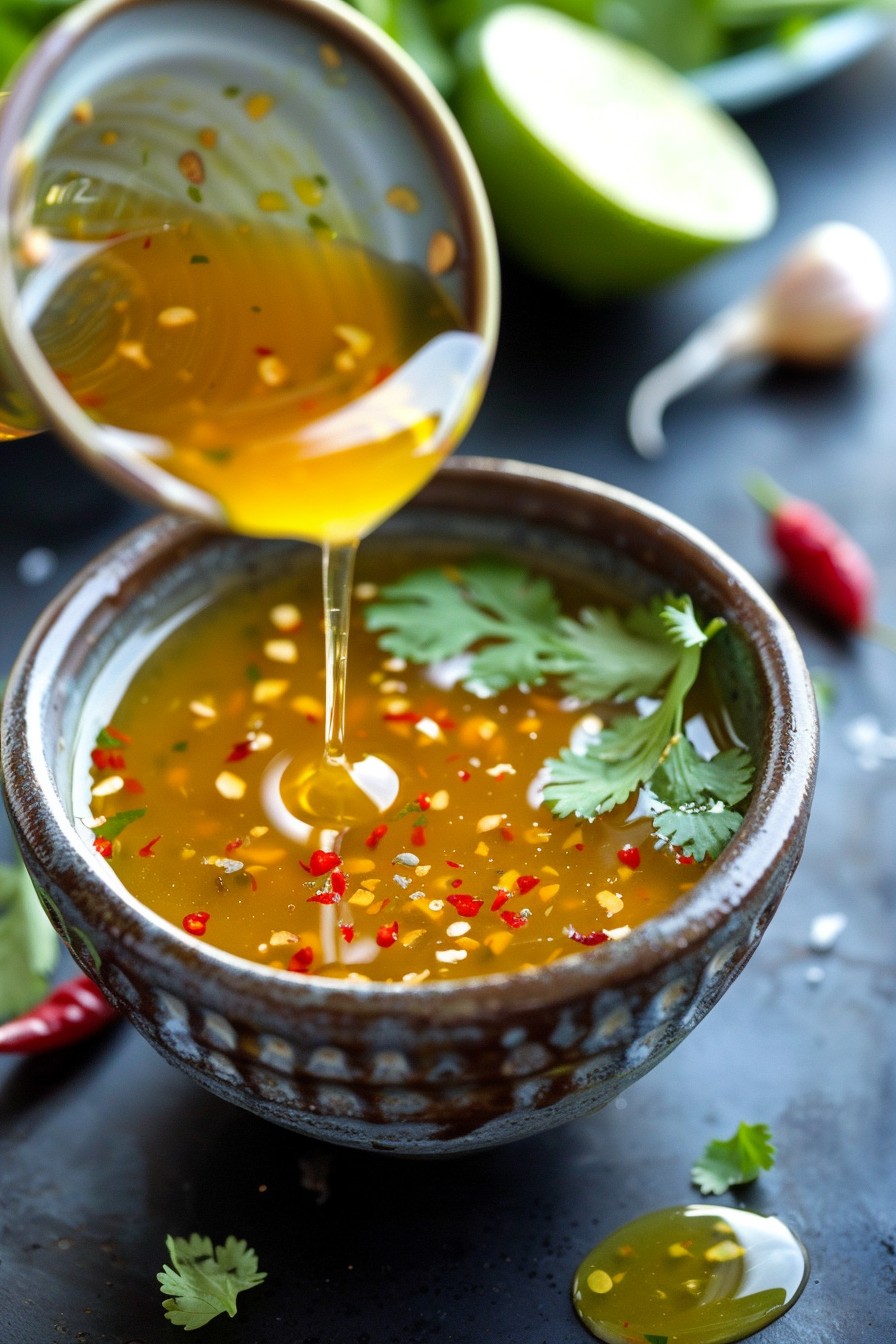
    Step 3: Mix the Dressing

    In a large mixing bowl, whisk together the mayonnaise, mustard, apple cider vinegar, and sugar until smooth. Season with salt and pepper to taste. This creamy, tangy dressing is the secret to the salad’s irresistible flavor.

    Step 4: Combine All Ingredients

    Add the cooled macaroni, diced Spam, chopped celery, and onion to the bowl with the dressing. Gently toss until everything is evenly coated. Be careful not to overmix to keep the macaroni from becoming mushy.

    Step 5: Chill and Serve

    Cover the bowl with plastic wrap and refrigerate for at least 1 hour before serving. This allows the flavors to meld together beautifully. Serve chilled, garnished with a sprinkle of paprika or fresh parsley if desired.

    Tips and Tricks

    For an even creamier salad, you can add a tablespoon or two of sour cream to the dressing. If you’re serving this at a picnic, keep it chilled in a cooler until ready to serve to ensure food safety. For a lighter version, substitute half of the mayonnaise with Greek yogurt. Don’t skip the chilling step; it’s crucial for the flavors to develop fully. Lastly, feel free to adjust the amount of mustard and vinegar to suit your taste preferences.

    Recipe Variations

    • Add diced pickles or relish for a tangy crunch.
    • Swap out Spam for cooked chicken or turkey for a different protein option.
    • Stir in some shredded cheddar cheese for a cheesy twist.
    • For a spicy kick, add a dash of hot sauce or some diced jalapeños.
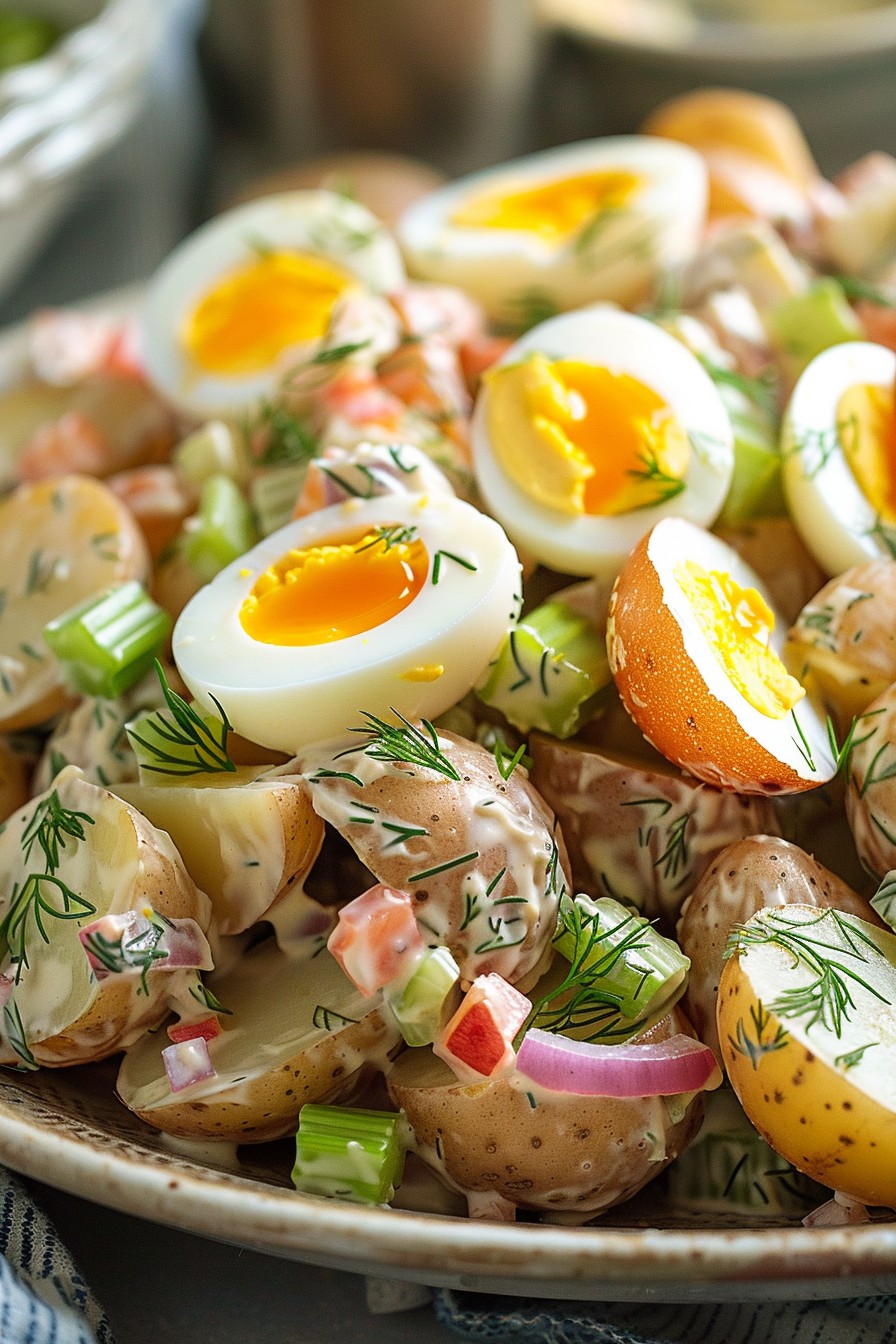
    • Include hard-boiled eggs for extra protein and richness.

    Frequently Asked Questions

    Can I make this salad ahead of time?

    Absolutely! This macaroni salad tastes even better the next day as the flavors have more time to meld. Just be sure to store it in an airtight container in the refrigerator.

    How long will this salad keep in the fridge?

    Properly stored, this salad will stay fresh for up to 3 days in the refrigerator. After that, the texture of the macaroni may start to change.

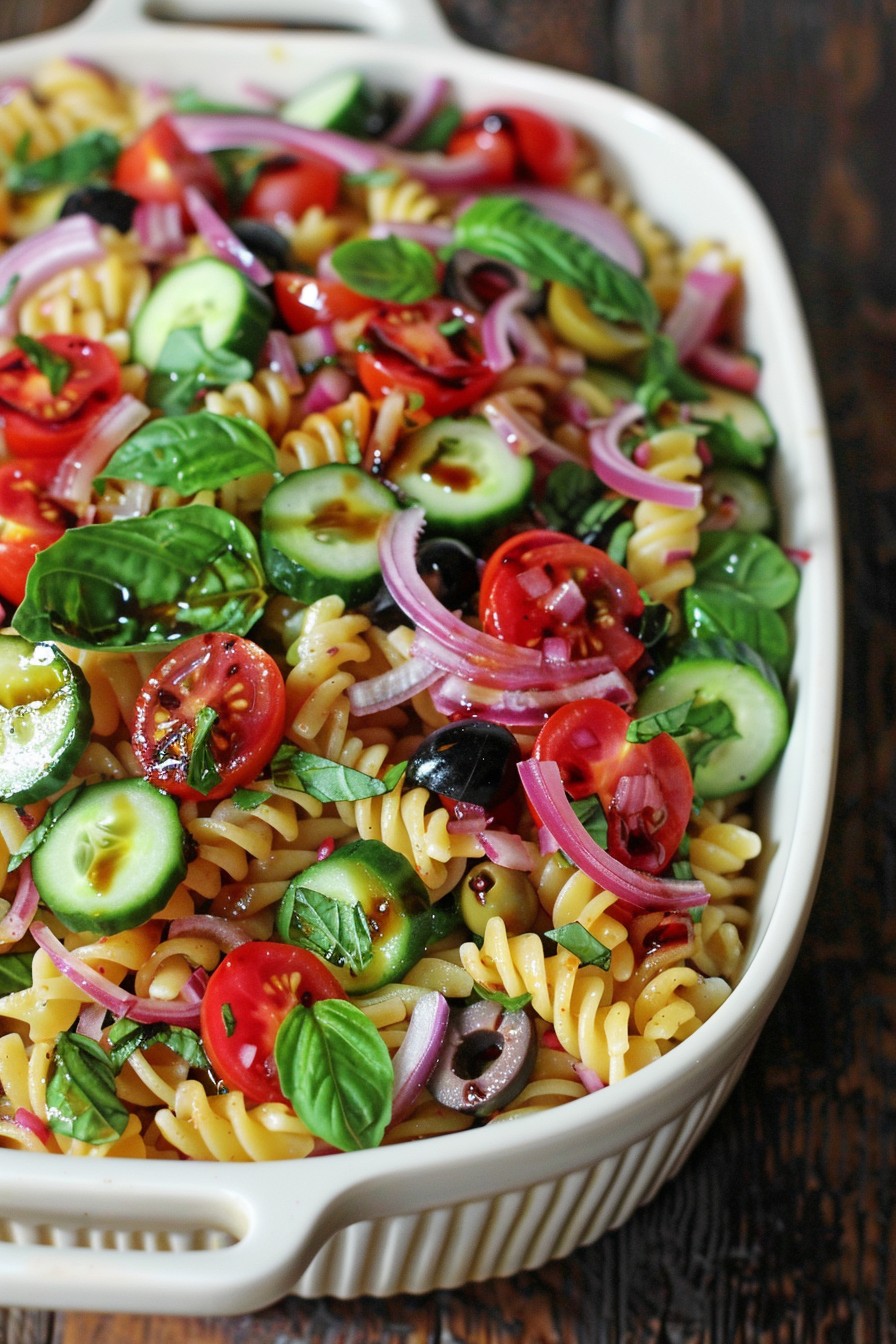
    Can I use a different type of pasta?

    Yes, you can use any small pasta shape you like. Just be sure to adjust the cooking time according to the package instructions to ensure the pasta is cooked al dente.

    Summary

    This Spam-tastic Macaroni Salad is a creamy, tangy, and savory dish that’s perfect for any occasion. Easy to make and even easier to love, it’s sure to become a new favorite in your recipe collection.

  • Papaya Salad Thailand Recipe: A Burst of Tropical Flavors

    Papaya Salad Thailand Recipe: A Burst of Tropical Flavors

    Get ready to transport your taste buds straight to the bustling streets of Bangkok with this authentic Papaya Salad Thailand recipe. Green papaya, crunchy peanuts, and a tangy dressing come together in a dish that’s as vibrant as it is delicious.

    Why This Recipe Works

    • The combination of sweet, sour, salty, and spicy flavors creates a perfectly balanced dish.
    • Green papaya provides a unique texture that’s both crunchy and refreshing.
    • It’s a versatile recipe that can be adjusted to suit your heat preference.
    • Quick to prepare, making it an ideal choice for a weeknight dinner or a last-minute party dish.
    • Packed with nutrients, offering a healthy yet satisfying meal option.

    Ingredients

    • 1 medium green papaya, shredded (about 4 cups)
    • 2 cloves garlic, minced
    • 2-3 Thai chilies, finely chopped (adjust to taste)
    • 1 tbsp palm sugar (or brown sugar)
    • 2 tbsp fish sauce
    • 2 tbsp lime juice
    • 1 cup cherry tomatoes, halved
    • 1/2 cup green beans, cut into 1-inch pieces
    • 1/4 cup roasted peanuts, roughly chopped
    • 2 tbsp dried shrimp (optional)

    Equipment Needed

    • Mortar and pestle
    • Large mixing bowl
    • Sharp knife
    • Cutting board
    • Measuring spoons and cups

    Instructions

    Papaya Salad Thailand Recipe

    Prepare the Dressing

    In a mortar, combine the minced garlic and Thai chilies. Pound until they form a coarse paste. Add the palm sugar, fish sauce, and lime juice, stirring until the sugar dissolves. Taste and adjust the seasoning if necessary. This dressing is the soul of the dish, so don’t skimp on the taste test!

    Prep the Vegetables

    Shred the green papaya using a julienne peeler or a sharp knife. The goal is thin, uniform strips that will soak up the dressing beautifully. Halve the cherry tomatoes and cut the green beans into bite-sized pieces. Having all your veggies prepped and ready makes the assembly a breeze.

    Combine and Toss

    In a large mixing bowl, combine the shredded papaya, tomatoes, and green beans. Pour the dressing over the top and toss everything together until well coated. The salad should be evenly dressed, with every bite promising a burst of flavor.

    Add the Finishing Touches

    Sprinkle the chopped peanuts and dried shrimp (if using) over the top of the salad. Give it one final gentle toss to distribute these ingredients throughout the salad. The peanuts add a delightful crunch, while the dried shrimp offers a hint of umami.

    Serve Immediately

    Papaya salad is best enjoyed fresh, so serve it right away. The longer it sits, the more the papaya will soften, so dig in while the textures are at their peak. Enjoy this vibrant dish as a standalone meal or as a side to grilled meats.

    Tips and Tricks

    For those who love a bit of extra crunch, consider adding some shredded carrots or cucumber to the mix. If you’re not a fan of too much heat, start with one chili and add more as needed. Remember, you can always add more spice, but you can’t take it away! For a vegetarian version, simply omit the fish sauce and dried shrimp, substituting with soy sauce or a vegetarian fish sauce alternative. And don’t forget, the key to a great papaya salad is in the balance of flavors, so take the time to adjust the dressing to your liking.

    Recipe Variations

    • Seafood Lover’s Delight: Add cooked shrimp or squid to the salad for a protein-packed version.
    • Fruity Twist: Incorporate slices of mango or pineapple for a sweeter, fruitier salad.
    • Extra Veggies: Bulk it up with additional vegetables like bell peppers or cabbage for more color and nutrients.
    • Spice It Up: For those who can handle the heat, add extra chilies or a dash of chili oil.
    • Nut-Free Option: Replace peanuts with toasted sunflower seeds for a nut-free alternative.

    Frequently Asked Questions

    Can I use ripe papaya instead of green papaya?

    While green papaya is traditional for its crisp texture and mild flavor, ripe papaya can be used for a sweeter version of the salad. Just keep in mind that the texture and taste will be significantly different, so it’s more of a variation than a substitute.

    How do I store leftover papaya salad?

    Leftover papaya salad can be stored in an airtight container in the refrigerator for up to a day. However, be aware that the papaya will soften and the flavors will intensify over time, so it’s best enjoyed fresh.

    Is there a substitute for fish sauce?

    For a vegetarian or vegan version, you can use soy sauce or tamari as a substitute for fish sauce. There are also vegetarian fish sauce alternatives available in some specialty stores that mimic the umami flavor of traditional fish sauce.

    Summary

    This Papaya Salad Thailand recipe is a vibrant, flavorful dish that’s perfect for anyone looking to add a little tropical flair to their meal rotation. With its perfect balance of sweet, sour, salty, and spicy, it’s a dish that’s sure to impress.

  • Fruit Salad Recipe with Pudding: A Delightful Twist on a Classic

    Fruit Salad Recipe with Pudding: A Delightful Twist on a Classic

    Zesty and refreshing, this fruit salad with pudding is the perfect blend of sweet and creamy. It’s a versatile dish that can serve as a dessert, a side, or even a light breakfast. With the addition of pudding, it takes the traditional fruit salad to a whole new level of deliciousness.

    Why This Recipe Works

    • The combination of fresh fruits and creamy pudding creates a perfect balance of textures and flavors.
    • It’s incredibly easy to make, requiring no cooking, just mixing and chilling.
    • The recipe is highly customizable, allowing you to use your favorite fruits or whatever is in season.
    • Pudding adds a rich and creamy element that makes this dish stand out from traditional fruit salads.
    • It’s a great make-ahead dish, as the flavors meld and improve when chilled overnight.

    Ingredients

    • 2 cups of mixed fresh fruits (such as strawberries, bananas, grapes, and kiwi), chopped
    • 1 package (3.4 oz) of instant vanilla pudding mix
    • 1 cup of cold milk
    • 1/2 cup of sour cream
    • 1 tbsp of honey (optional)
    • 1/2 tsp of vanilla extract

    Equipment Needed

    • Large mixing bowl
    • Whisk
    • Measuring cups and spoons
    • Serving bowl

    Instructions

    Fruit Salad Recipe With Pudding

    Step 1: Prepare the Fruits

    Wash all the fruits thoroughly under cold water. Peel and chop the bananas and kiwi into bite-sized pieces. Hull the strawberries and cut them into quarters. If using grapes, halve them. Combine all the fruits in a large mixing bowl. Tip: To prevent the bananas from browning, you can toss them with a little lemon juice before adding to the salad.

    Step 2: Make the Pudding Mixture

    In a separate bowl, whisk together the instant vanilla pudding mix and cold milk until the mixture begins to thicken, about 2 minutes. Add the sour cream, honey (if using), and vanilla extract, and whisk until smooth and creamy. Tip: For a lighter version, you can substitute Greek yogurt for the sour cream.

    Step 3: Combine Fruits and Pudding

    Pour the pudding mixture over the prepared fruits. Gently fold the fruits into the pudding until they are evenly coated. Be careful not to mash the fruits. Tip: For an extra touch of elegance, reserve a few pieces of fruit to garnish the top before serving.

    Step 4: Chill the Salad

    Cover the bowl with plastic wrap and refrigerate for at least 1 hour before serving. This allows the flavors to meld together and the pudding to set slightly. For best results, chill overnight.

    Step 5: Serve and Enjoy

    Give the salad a gentle stir before serving to redistribute the pudding. Serve chilled in individual bowls or a large serving dish. Enjoy the creamy, fruity goodness!

    Tips and Tricks

    For a tropical twist, add some diced mango or pineapple to the fruit mix. If you’re serving this salad at a party, consider serving it in hollowed-out fruit shells for a fun presentation. To make it even more indulgent, sprinkle some toasted coconut or chopped nuts on top before serving. If you’re short on time, you can use pre-cut fruit from the store, but fresh is always best for flavor and texture. For a dairy-free version, use coconut milk and a dairy-free pudding mix.

    Recipe Variations

    • Chocolate Lovers: Use chocolate pudding instead of vanilla and add some chocolate chips for extra decadence.
    • Berry Bliss: Focus on berries like strawberries, blueberries, raspberries, and blackberries for a antioxidant-rich version.
    • Citrus Splash: Incorporate segments of oranges, grapefruits, and a splash of lime juice for a tangy twist.
    • Autumn Harvest: Use apples, pears, and a sprinkle of cinnamon for a fall-inspired salad.
    • Exotic Escape: Add fruits like dragon fruit, star fruit, and passion fruit for an exotic flavor profile.

    Frequently Asked Questions

    Can I use fresh pudding instead of instant?

    Yes, you can definitely use homemade pudding if you prefer. Just make sure it’s cooled completely before mixing it with the fruits to prevent them from becoming mushy. The consistency should be similar to that of the instant pudding for the best results.

    How long can I store this fruit salad?

    This fruit salad is best enjoyed within 24 hours of preparation, as the fruits can start to release their juices and become soggy. However, if you’re using firmer fruits like apples and grapes, it can last up to 2 days in the refrigerator.

    Can I make this recipe vegan?

    Absolutely! Use a plant-based milk and pudding mix, and substitute the sour cream with coconut cream or a vegan yogurt. Just ensure all your ingredients are vegan-friendly, and you’re good to go.

    Summary

    This fruit salad with pudding is a creamy, dreamy twist on the classic that’s sure to please any crowd. Easy to make and endlessly customizable, it’s the perfect dish for any occasion. Whether you’re looking for a light dessert, a side dish, or a sweet breakfast option, this recipe has you covered.

  • Ultimate 5 lbs Potato Salad Recipe: A Crowd-Pleasing Classic

    Ultimate 5 lbs Potato Salad Recipe: A Crowd-Pleasing Classic

    Potato salad is the unsung hero of picnics and potlucks, and this recipe is here to steal the show. Perfectly creamy, tangy, and packed with flavor, it’s the side dish that might just outshine the main.

    Why This Recipe Works

    • The secret blend of mayonnaise and mustard creates a creamy yet tangy dressing that coats every potato piece perfectly.
    • Using a mix of potato types ensures a variety of textures, from creamy to slightly firm, making every bite interesting.
    • Fresh herbs and a splash of vinegar brighten the flavors, cutting through the richness for a balanced dish.

    Ingredients

    • 5 lbs mixed potatoes (Yukon Gold and red potatoes), peeled and cubed
    • 1 1/2 cups mayonnaise
    • 1/4 cup yellow mustard
    • 2 tbsp apple cider vinegar
    • 1 cup finely chopped celery
    • 1/2 cup finely chopped red onion
    • 4 hard-boiled eggs, chopped
    • 1/4 cup fresh dill, chopped
    • Salt and pepper to taste

    Equipment Needed

    • Large pot
    • Mixing bowl
    • Knife and cutting board
    • Measuring cups and spoons

    Instructions

    Recipe For 5 Lbs Of Potato Salad

    Step 1: Cook the Potatoes

    Fill a large pot with water and bring to a boil. Add the cubed potatoes and cook for 10-12 minutes, or until they are just tender. You want them to hold their shape for the salad. Drain and let cool slightly.

    Step 2: Prepare the Dressing

    In a large mixing bowl, whisk together the mayonnaise, mustard, and apple cider vinegar until smooth. This is the base of your dressing, and the vinegar adds a nice tang that balances the creaminess.

    Step 3: Combine Ingredients

    Add the slightly cooled potatoes to the dressing along with the celery, red onion, hard-boiled eggs, and dill. Gently fold everything together to avoid mashing the potatoes. Season with salt and pepper to taste.

    Step 4: Chill Before Serving

    Cover the bowl with plastic wrap and refrigerate for at least 2 hours. This allows the flavors to meld together beautifully. Serve chilled for the best taste experience.

    Tips and Tricks

    For an extra flavor boost, try adding a teaspoon of garlic powder or smoked paprika to the dressing. If you’re short on time, you can serve the salad immediately, but the flavors won’t be as developed. For a lighter version, substitute half of the mayonnaise with Greek yogurt. Always taste and adjust the seasoning before serving, as potatoes can absorb a lot of salt.

    Recipe Variations

    • Add crispy bacon bits for a smoky flavor and extra crunch.
    • Swap the dill for parsley or cilantro for a different herbal note.
    • Include a diced apple or grapes for a sweet contrast to the tangy dressing.
    • For a spicy kick, mix in a diced jalapeño or a dash of hot sauce.

    Frequently Asked Questions

    Can I make this potato salad ahead of time?

    Absolutely! In fact, making it a day ahead allows the flavors to develop more fully. Just keep it refrigerated until you’re ready to serve.

    What’s the best way to store leftovers?

    Store any leftovers in an airtight container in the refrigerator. They should keep well for up to 3 days. After that, the texture might start to change.

    Can I use sweet potatoes instead?

    Yes, but the flavor profile will be quite different. Sweet potatoes pair well with a dressing that’s a bit sweeter and spicier, so consider adjusting the ingredients accordingly.

    Summary

    This 5 lbs potato salad recipe is a guaranteed hit at any gathering, combining creamy, tangy, and fresh flavors in every bite. With simple ingredients and easy steps, it’s a foolproof dish that’s as enjoyable to make as it is to eat.

  • Salad Supreme Pasta Recipe: A Fresh Twist on a Classic

    Salad Supreme Pasta Recipe: A Fresh Twist on a Classic

    How about we turn the mundane into something spectacular? Today, we’re diving into a Salad Supreme Pasta recipe that’s bound to refresh your palate and impress your dinner guests. It’s the perfect blend of crisp veggies, al dente pasta, and a dressing that sings with flavor.

    Why This Recipe Works

    • The combination of fresh vegetables and pasta offers a satisfying crunch and chewiness that’s hard to resist.
    • Our homemade dressing is a breeze to whip up and packs a punch with its balanced acidity and sweetness.
    • This dish is versatile, serving as a hearty main or a standout side at any gathering.
    • It’s a make-ahead dream, tasting even better as the flavors meld overnight.
    • Perfect for those seeking a lighter option without sacrificing flavor or satisfaction.

    Ingredients

    • 8 oz pasta (your choice), cooked al dente
    • 1 cup cherry tomatoes, halved
    • 1 cucumber, diced
    • 1/2 red onion, thinly sliced
    • 1/2 cup black olives, sliced
    • 1/4 cup fresh basil, chopped
    • 1/4 cup olive oil
    • 2 tbsp balsamic vinegar
    • 1 tsp honey
    • Salt and pepper to taste

    Equipment Needed

    • Large pot
    • Colander
    • Large mixing bowl
    • Whisk
    • Measuring cups and spoons

    Instructions

    Salad Supreme Pasta Recipe

    Step 1: Cook the Pasta to Perfection

    Bring a large pot of salted water to a rolling boil. Add your pasta of choice and cook according to package instructions until al dente. Remember, we’re aiming for a bit of bite here, not mush. Drain and rinse under cold water to stop the cooking process. Tip: A splash of olive oil in the water prevents sticking without affecting the taste.

    Step 2: Chop and Prepare Your Veggies

    While the pasta cooks, halve the cherry tomatoes, dice the cucumber, thinly slice the red onion, and slice the black olives. The key here is uniformity for that perfect bite every time. Toss them into a large mixing bowl with the cooled pasta. Tip: Soaking the sliced onions in cold water for 10 minutes can mellow their sharpness.

    Step 3: Whisk Up the Dressing

    In a small bowl, whisk together the olive oil, balsamic vinegar, honey, salt, and pepper until well combined. The honey not only adds a touch of sweetness but also helps emulsify the dressing. Taste and adjust the seasoning as needed. Tip: For a creamier dressing, a teaspoon of Dijon mustard works wonders.

    Step 4: Combine and Toss

    Pour the dressing over the pasta and veggies. Add the chopped fresh basil for that herby freshness. Gently toss everything together until evenly coated. The goal is to ensure every piece is dressed but not drowned. Let it sit for at least 10 minutes before serving to let the flavors marry.

    Step 5: Serve and Enjoy

    Transfer your Salad Supreme Pasta to a serving dish. Garnish with extra basil leaves if you’re feeling fancy. This dish shines at room temperature, making it a stress-free option for any occasion. Dig in and enjoy the burst of flavors and textures!

    Tips and Tricks

    For those looking to elevate this dish further, consider roasting the cherry tomatoes to deepen their flavor. Adding a protein like grilled chicken or shrimp can turn this side into a satisfying main. If you’re short on time, store-bought rotisserie chicken is a great shortcut. For a nuttier flavor, toast some pine nuts or walnuts and sprinkle them on top. Lastly, if balsamic isn’t your thing, a lemon vinaigrette makes a bright alternative.

    Recipe Variations

    • Mediterranean Twist: Add feta cheese and swap the black olives for Kalamata.
    • Protein Packed: Mix in grilled chicken, shrimp, or chickpeas for a heartier meal.
    • Veggie Delight: Throw in bell peppers, avocado, or artichoke hearts for extra veggies.
    • Cheesy Goodness: Stir in mozzarella pearls or grated Parmesan for a cheesy version.
    • Spicy Kick: Add red pepper flakes or diced jalapeños for some heat.

    Frequently Asked Questions

    Can I make this pasta salad ahead of time?

    Absolutely! In fact, it tastes better the next day as the flavors have more time to meld. Just hold off on adding any delicate greens or fresh herbs until you’re ready to serve to keep them vibrant.

    What’s the best pasta to use for this recipe?

    Short pastas like fusilli, penne, or farfalle work best as they hold the dressing and veggies well. However, feel free to use whatever you have on hand or prefer.

    How long will this pasta salad last in the fridge?

    Stored in an airtight container, it’ll keep for up to 3 days. Just give it a quick stir before serving to refresh the flavors.

    Summary

    This Salad Supreme Pasta recipe is a vibrant, flavorful dish that’s as versatile as it is delicious. Perfect for picnics, potlucks, or a quick weeknight dinner, it’s sure to become a go-to in your recipe collection.

  • Thai Salad Dressing Recipe: A Zesty Twist to Your Greens

    Thai Salad Dressing Recipe: A Zesty Twist to Your Greens

    Bringing the vibrant flavors of Thailand to your kitchen, this Thai salad dressing is a game-changer for your salads. Bold, tangy, and slightly sweet, it’s the perfect way to dress up any bowl of greens.

    Why This Recipe Works

    • The combination of lime juice and fish sauce brings an authentic Thai flavor that’s hard to resist.
    • Using honey as a sweetener balances the acidity and adds a smooth texture.
    • Garlic and chili peppers add a kick that elevates the dressing from good to unforgettable.
    • It’s versatile enough to pair with any salad, from simple greens to more elaborate Thai-inspired dishes.
    • Quick and easy to make, it’s a fuss-free way to add excitement to your meals.

    Ingredients

    • 1/4 cup lime juice (freshly squeezed)
    • 2 tbsp fish sauce
    • 2 tbsp honey
    • 1 garlic clove (minced)
    • 1 small red chili pepper (finely chopped)
    • 1/4 cup olive oil

    Equipment Needed

    • Small mixing bowl
    • Whisk
    • Measuring spoons and cups

    Instructions

    Thailand Salad Dressing Recipe

    Step 1: Combine the Base Ingredients

    In a small mixing bowl, whisk together the lime juice, fish sauce, and honey until the honey is fully dissolved. This creates a balanced base for your dressing, combining sweet, sour, and salty flavors. Tip: For a smoother consistency, warm the honey slightly before adding it to the mixture.

    Step 2: Add the Aromatics

    Stir in the minced garlic and finely chopped red chili pepper. These ingredients add depth and heat to the dressing. Make sure to mix well to distribute the flavors evenly.

    Step 3: Emulsify with Olive Oil

    Slowly drizzle in the olive oil while continuously whisking the mixture. This step is crucial for creating a smooth, emulsified dressing that clings to your salad greens. Tip: For an extra smooth texture, you can use a blender or food processor for this step.

    Step 4: Taste and Adjust

    Give your dressing a taste and adjust the flavors as needed. If it’s too tangy, add a bit more honey. If it’s too sweet, a splash more lime juice will balance it out.

    Step 5: Serve or Store

    Use the dressing immediately, or store it in an airtight container in the refrigerator for up to a week. Tip: Let the dressing sit for at least 30 minutes before serving to allow the flavors to meld together beautifully.

    Tips and Tricks

    For those looking to take their Thai salad dressing to the next level, consider these advanced tips. First, toasting the garlic lightly before mincing can add a deeper, more complex flavor. Second, experimenting with different types of chili peppers can vary the heat level to suit your preference. Finally, adding a teaspoon of grated ginger can introduce a warm, spicy note that complements the other flavors wonderfully.

    Recipe Variations

    • For a vegetarian version, substitute the fish sauce with soy sauce or tamari.
    • Add a tablespoon of peanut butter for a creamy, nutty twist.
    • Incorporate a splash of coconut milk for a richer, smoother dressing.
    • Use agave syrup instead of honey for a vegan-friendly option.
    • Add chopped cilantro or mint for a fresh herbal note.

    Frequently Asked Questions

    Can I make this dressing without fish sauce?

    Absolutely! While fish sauce adds an authentic Thai flavor, you can easily substitute it with soy sauce or tamari for a vegetarian version. The dressing will still be delicious, with a slightly different but equally appealing flavor profile.

    How long can I store this dressing?

    This dressing can be stored in an airtight container in the refrigerator for up to a week. The flavors may even improve after a day or two as they meld together. Just give it a good shake or stir before using.

    Is there a way to reduce the heat for a milder dressing?

    Yes, you can reduce the amount of chili pepper or remove the seeds for a milder version. Alternatively, you can use a milder pepper variety or omit it altogether if you prefer no heat.

    Summary

    This Thai salad dressing is a vibrant, flavorful addition to any salad, combining sweet, sour, salty, and spicy elements in perfect harmony. Easy to make and customizable, it’s sure to become a staple in your kitchen.

  • Oreo Cookie Salad Recipe: A Dessert That’s Unbelievably Easy and Delicious

    Oreo Cookie Salad Recipe: A Dessert That’s Unbelievably Easy and Delicious

    Just when you thought Oreos couldn’t get any better, here comes a recipe that turns them into a salad. Yes, you heard that right. A salad. But not the kind you’re thinking of. This is a dessert salad that’s creamy, crunchy, and utterly irresistible. Perfect for potlucks, parties, or when you need a sweet pick-me-up.

    Why This Recipe Works

    • It combines the classic taste of Oreos with a creamy, dreamy dressing for a dessert that’s both familiar and exciting.
    • The recipe is incredibly easy to make, requiring no baking and just a few simple steps.
    • It’s versatile, allowing for numerous variations to suit any taste or occasion.
    • The contrast between the crunchy cookies and the smooth dressing creates a delightful texture.
    • It’s a crowd-pleaser, guaranteed to be a hit with both kids and adults.

    Ingredients

    • 1 package (14.3 oz) Oreo cookies, crushed
    • 1 cup heavy whipping cream
    • 1/2 cup powdered sugar
    • 1 tsp vanilla extract
    • 1 package (3.4 oz) instant vanilla pudding mix
    • 1 1/2 cups milk
    • 1 can (8 oz) crushed pineapple, drained

    Equipment Needed

    • Large mixing bowl
    • Electric mixer
    • Rubber spatula
    • Measuring cups and spoons

    Instructions

    Oreo Cookie Salad Recipe

    Step 1: Prepare the Creamy Base

    In a large mixing bowl, combine the heavy whipping cream, powdered sugar, and vanilla extract. Use an electric mixer to beat the mixture on high speed until stiff peaks form, about 3 minutes. This will be the fluffy base of your salad, so make sure it’s nice and thick.

    Step 2: Mix in the Pudding

    In a separate bowl, whisk together the instant vanilla pudding mix and milk until smooth. Let it sit for about 2 minutes to thicken slightly. Then, gently fold the pudding mixture into the whipped cream using a rubber spatula until fully incorporated.

    Step 3: Add the Pineapple

    Fold in the drained crushed pineapple into the creamy mixture. The pineapple adds a subtle tanginess that balances the sweetness of the other ingredients. Make sure it’s well distributed for even flavor in every bite.

    Step 4: Incorporate the Oreos

    Reserve a handful of crushed Oreos for garnish. Gently fold the remaining crushed Oreos into the salad. The goal is to maintain some texture, so don’t overmix. You want to see bits of Oreo throughout.

    Step 5: Chill and Serve

    Cover the bowl with plastic wrap and refrigerate for at least 1 hour before serving. This allows the flavors to meld together. When ready to serve, sprinkle the reserved crushed Oreos on top for an extra crunch.

    Tips and Tricks

    For an even richer flavor, try using chocolate pudding mix instead of vanilla. If you’re serving this at a party, consider making individual servings in clear cups for a fun presentation. To add a bit of color and freshness, mix in some mini marshmallows or maraschino cherries. For a lighter version, substitute the heavy whipping cream with whipped topping. Always crush the Oreos to different sizes for varied texture in every bite.

    Recipe Variations

    • Chocolate Lover’s Delight: Use chocolate Oreos and chocolate pudding mix for a double chocolate version.
    • Fruity Twist: Add in some diced strawberries or bananas for a fruity flavor.
    • Nutty Crunch: Mix in some chopped peanuts or pecans for an added crunch.
    • Minty Fresh: Use mint Oreos and a dash of peppermint extract for a refreshing twist.
    • Seasonal Special: Incorporate seasonal fruits or flavors, like pumpkin spice in the fall.

    Frequently Asked Questions

    Can I make this recipe ahead of time?

    Absolutely! This salad actually tastes better after it’s had some time to chill in the fridge, making it a perfect make-ahead dessert for parties. Just add the final Oreo garnish right before serving to keep them crunchy.

    Can I use a different type of cookie?

    Yes, you can experiment with different cookies, but keep in mind that the flavor and texture will change. Golden Oreos or even chocolate chip cookies could be interesting alternatives.

    Is there a way to make this recipe dairy-free?

    For a dairy-free version, substitute the heavy whipping cream with coconut cream and use a dairy-free milk alternative. Just ensure your pudding mix and Oreos are also dairy-free.

    Summary

    This Oreo Cookie Salad is a fun, easy, and delicious dessert that’s perfect for any occasion. With its creamy texture, crunchy Oreo bits, and endless variations, it’s sure to become a favorite. Whether you’re a seasoned chef or a kitchen newbie, this recipe is a breeze to make and a joy to eat.

  • Crispy & Crunchy Canned Corn Salad: A Summer Delight

    Crispy & Crunchy Canned Corn Salad: A Summer Delight

    Let’s face it, summer salads should be easy, refreshing, and packed with flavor. This canned corn salad is all that and more, offering a perfect blend of sweetness and crunch that’ll make your taste buds dance.

    Why This Recipe Works

    • Using canned corn saves time without sacrificing taste or texture, making this recipe a breeze to whip up.
    • The combination of fresh vegetables and a zesty dressing brings a burst of flavors that complement the sweetness of the corn.
    • It’s incredibly versatile, serving as a perfect side dish for BBQs, picnics, or a light lunch.

    Ingredients

    • 2 cans (15 oz each) of whole kernel corn, drained
    • 1 cup diced red bell pepper
    • 1/2 cup finely chopped red onion
    • 1/4 cup chopped fresh cilantro
    • 2 tbsp olive oil
    • 1 tbsp lime juice
    • 1 tsp salt
    • 1/2 tsp black pepper

    Equipment Needed

    • Large mixing bowl
    • Measuring cups and spoons
    • Sharp knife
    • Cutting board

    Instructions

    Recipe For Corn Salad Using Canned Corn

    Step 1: Prep Your Vegetables

    Start by draining the canned corn thoroughly to remove any excess liquid. Dice the red bell pepper into small, bite-sized pieces to ensure every forkful has a bit of crunch. Finely chop the red onion to distribute its sharp flavor evenly throughout the salad. Tip: Soaking the chopped onion in cold water for 10 minutes can mellow its bite.

    Step 2: Combine the Base Ingredients

    In a large mixing bowl, add the drained corn, diced red bell pepper, and chopped red onion. Gently toss these ingredients together to start building the foundation of your salad. The colors should start to pop, making the dish as visually appealing as it is tasty.

    Step 3: Add Freshness with Herbs

    Chop the fresh cilantro and sprinkle it over the mixed vegetables. Cilantro adds a fresh, herby note that brightens the entire dish. If you’re not a fan of cilantro, parsley makes a great substitute. Tip: Always chop herbs just before adding them to preserve their flavor and color.

    Step 4: Whisk Together the Dressing

    In a small bowl, whisk together the olive oil, lime juice, salt, and black pepper until well combined. The dressing should be slightly tangy with a smooth consistency. Drizzle it over the salad and toss gently to coat every piece evenly. Tip: Let the salad sit for 10 minutes before serving to allow the flavors to meld.

    Step 5: Serve and Enjoy

    Transfer the salad to a serving dish and enjoy immediately for the best texture. The salad can also be refrigerated for up to two days, making it a great make-ahead option for busy weeknights.

    Tips and Tricks

    For an extra layer of flavor, consider adding a pinch of smoked paprika or cumin to the dressing. If you prefer a creamier texture, a dollop of Greek yogurt or mayonnaise can be mixed into the dressing. Always taste and adjust the seasoning before serving, as the saltiness can vary depending on the canned corn used. For a spicy kick, add a finely chopped jalapeño or a dash of hot sauce. Lastly, serving the salad on a bed of lettuce can turn it into a more substantial meal.

    Recipe Variations

    • Add diced avocado for a creamy texture and healthy fats.
    • Include black beans and a squeeze of orange juice for a tropical twist.
    • Swap the cilantro with basil and add cherry tomatoes for an Italian-inspired version.
    • Mix in crumbled feta or cotija cheese for a salty, tangy element.
    • For a heartier salad, add cooked quinoa or farro.

    Frequently Asked Questions

    Can I use frozen corn instead of canned?

    Absolutely! Frozen corn can be a great substitute for canned. Just make sure to thaw and drain it well to avoid adding extra moisture to the salad. You might even find that frozen corn offers a slightly sweeter taste and firmer texture.

    How long does this salad last in the fridge?

    This corn salad can be stored in an airtight container in the refrigerator for up to 3 days. However, the vegetables may start to lose their crunch after the first day, so it’s best enjoyed fresh.

    Can I make this salad ahead of time?

    Yes, this salad is perfect for making ahead. Just wait to add the dressing until you’re ready to serve to keep the vegetables as crisp as possible. The flavors will continue to develop as it sits, making it even more delicious.

    Summary

    This canned corn salad is a quick, easy, and flavorful dish that’s perfect for any summer occasion. With its vibrant colors and refreshing taste, it’s sure to be a hit at your next gathering.

  • Ranch Chicken Salad Recipe: A Creamy Dream Come True

    Ranch Chicken Salad Recipe: A Creamy Dream Come True

    Forget the same old chicken salad; this ranch version is a game-changer. Packed with flavor, easy to make, and perfect for any occasion, it’s about to become your new favorite.

    Why This Recipe Works

    • The combination of creamy ranch dressing and tender chicken creates a mouthwatering texture and taste.
    • It’s incredibly versatile, serving as a sandwich filler, salad topper, or standalone dish.
    • Prep time is minimal, making it ideal for quick lunches or last-minute gatherings.
    • Customizable with your favorite add-ins for a personal touch.

    Ingredients

    • 2 cups cooked chicken, shredded
    • 1/2 cup ranch dressing
    • 1/4 cup celery, finely chopped
    • 1/4 cup red onion, finely diced
    • 1 tbsp fresh dill, chopped
    • Salt and pepper to taste

    Equipment Needed

    • Mixing bowl
    • Measuring cups and spoons
    • Knife and cutting board

    Instructions

    Ranch Chicken Salad Recipe

    Step 1: Prepare Your Ingredients

    Start by ensuring your chicken is cooked and shredded into bite-sized pieces. Finely chop the celery and red onion, and chop the fresh dill. Having all your ingredients prepped and ready to go makes the assembly process a breeze.

    Step 2: Mix the Dressing

    In a large mixing bowl, combine the ranch dressing with the chopped dill. This step infuses the dressing with an extra layer of flavor that elevates the entire dish.

    Step 3: Combine Ingredients

    Add the shredded chicken, celery, and red onion to the bowl with the dressing. Gently toss until all the ingredients are evenly coated with the ranch dressing. Season with salt and pepper to taste.

    Step 4: Chill Before Serving

    For the best flavor, cover the bowl and refrigerate the salad for at least 30 minutes before serving. This allows the flavors to meld together beautifully.

    Tips and Tricks

    For an even creamier texture, you can add a tablespoon of Greek yogurt to the ranch dressing. If you’re short on time, using a rotisserie chicken is a great shortcut. For a crunchier texture, consider adding chopped walnuts or almonds. Always taste and adjust the seasoning before serving, as the flavors can develop over time.

    Recipe Variations

    • Add grapes or apples for a sweet twist.
    • Incorporate bacon bits for a smoky flavor.
    • Swap ranch dressing for blue cheese dressing for a tangier taste.
    • Use turkey instead of chicken for a different protein option.

    Frequently Asked Questions

    Can I make this salad ahead of time?

    Absolutely! This salad actually tastes better after it’s had time to chill in the fridge, making it a perfect make-ahead meal for busy weeks.

    How long does it last in the fridge?

    Stored in an airtight container, the salad will stay fresh for up to 3 days. Just give it a quick stir before serving.

    Can I use canned chicken?

    While you can use canned chicken in a pinch, for the best texture and flavor, we recommend using freshly cooked or rotisserie chicken.

    Summary

    This ranch chicken salad is a creamy, flavorful twist on the classic, perfect for sandwiches, salads, or snacking. Easy to make and endlessly customizable, it’s sure to be a hit.

  • Beef Brisket Salad Recipe: A Hearty Twist on Greens

    Beef Brisket Salad Recipe: A Hearty Twist on Greens

    Craving something that’s both hearty and refreshing? This beef brisket salad combines the rich flavors of slow-cooked brisket with the crispness of fresh greens for a meal that’s sure to satisfy. Perfect for those who think salads can’t be filling!

    Why This Recipe Works

    • The slow-cooked beef brisket adds a depth of flavor that’s unmatched by quicker cooking methods.
    • Combining warm brisket with cool greens creates a delightful contrast in temperatures and textures.
    • The homemade dressing ties all the components together with a perfect balance of tangy and sweet.
    • It’s a versatile dish that can serve as a main course or a substantial side.
    • Leftovers? No problem. This salad is just as delicious the next day.

    Ingredients

    • 2 lbs beef brisket, trimmed
    • 1 tbsp olive oil
    • 1 tsp salt
    • 1 tsp black pepper
    • 2 cups mixed greens
    • 1/2 cup cherry tomatoes, halved
    • 1/4 cup red onion, thinly sliced
    • 1/4 cup blue cheese, crumbled
    • 1/4 cup balsamic vinaigrette

    Equipment Needed

    • Slow cooker
    • Chef’s knife
    • Cutting board
    • Mixing bowls
    • Salad spinner

    Instructions

    Beef Brisket Salad Recipe

    Step 1: Season and Sear the Brisket

    Start by seasoning your 2 lbs of beef brisket with 1 tsp each of salt and black pepper. Heat 1 tbsp of olive oil in a pan over medium-high heat. Sear the brisket on all sides until it’s beautifully browned, about 3-4 minutes per side. This step locks in the flavors and adds a delicious crust to the meat.

    Step 2: Slow Cook to Perfection

    Transfer the seared brisket to your slow cooker. Cover and cook on low for 8 hours, or until the meat is tender and falls apart easily. The low and slow method ensures the brisket is juicy and full of flavor.

    Step 3: Prepare the Salad Base

    While the brisket is cooking, wash and dry 2 cups of mixed greens using a salad spinner. This ensures your greens are crisp and free of excess water. Slice 1/2 cup of cherry tomatoes in half and thinly slice 1/4 cup of red onion for a sharp contrast to the sweet brisket.

    Step 4: Assemble Your Salad

    Once the brisket is done, let it rest for 10 minutes before slicing against the grain. Arrange the mixed greens on a plate, top with sliced brisket, cherry tomatoes, red onion, and 1/4 cup of crumbled blue cheese. Drizzle with 1/4 cup of balsamic vinaigrette to bring all the flavors together.

    Step 5: Serve and Enjoy

    Serve your beef brisket salad immediately while the brisket is still warm. The combination of warm meat and cool greens is a game-changer. Enjoy the burst of flavors and textures in every bite!

    Tips and Tricks

    For an even more flavorful brisket, consider marinating it overnight in your favorite spices and a bit of vinegar to tenderize the meat further. When searing, make sure your pan is hot enough to create a good crust without cooking the meat too much. For the salad, adding nuts like walnuts or pecans can introduce a nice crunch and extra protein. If you’re not a fan of blue cheese, feta or goat cheese makes a great substitute. Lastly, the dressing can be made ahead of time and stored in the fridge for up to a week.

    Recipe Variations

    • Swap the balsamic vinaigrette for a honey mustard dressing for a sweeter profile.
    • Add avocado slices for a creamy texture and healthy fats.
    • Use arugula instead of mixed greens for a peppery kick.
    • Incorporate grilled vegetables like zucchini or bell peppers for added smokiness.
    • For a low-carb version, skip the greens and serve the brisket over cauliflower rice.

    Frequently Asked Questions

    Can I cook the brisket in an oven instead of a slow cooker?

    Absolutely! Preheat your oven to 300°F and place the seared brisket in a roasting pan. Cover tightly with foil and cook for about 3-4 hours, or until tender. The key is low and slow, regardless of the cooking method.

    How can I make this salad ahead of time?

    You can prepare the brisket and dressing up to two days in advance. Store them separately in the fridge. Assemble the salad just before serving to keep the greens crisp and fresh.

    What’s the best way to slice brisket?

    Always slice brisket against the grain. This means cutting perpendicular to the muscle fibers, which makes the meat more tender and easier to chew. Look for the direction of the fibers and slice accordingly.

    Summary

    This beef brisket salad is a perfect blend of hearty and refreshing, making it ideal for any meal. With tender slow-cooked brisket, crisp greens, and a tangy dressing, it’s a dish that’s sure to impress.