Author: onlinefoodrecipes

  • Autumn Apple Salad Recipe: A Crisp, Crunchy Delight

    Autumn Apple Salad Recipe: A Crisp, Crunchy Delight

    Crisp autumn days call for a salad that’s as vibrant and refreshing as the season itself. Combining the sweetness of apples with the crunch of nuts and the tang of cheese, this autumn apple salad is a symphony of flavors and textures that will brighten any meal.

    Why This Recipe Works

    • The combination of sweet and tart apples provides a perfect balance of flavors.
    • Toasted nuts add a delightful crunch and depth of flavor.
    • A simple, homemade dressing enhances the natural flavors without overpowering them.
    • This salad is incredibly versatile, making it perfect for any occasion.
    • It’s a quick and easy recipe that doesn’t skimp on taste or presentation.
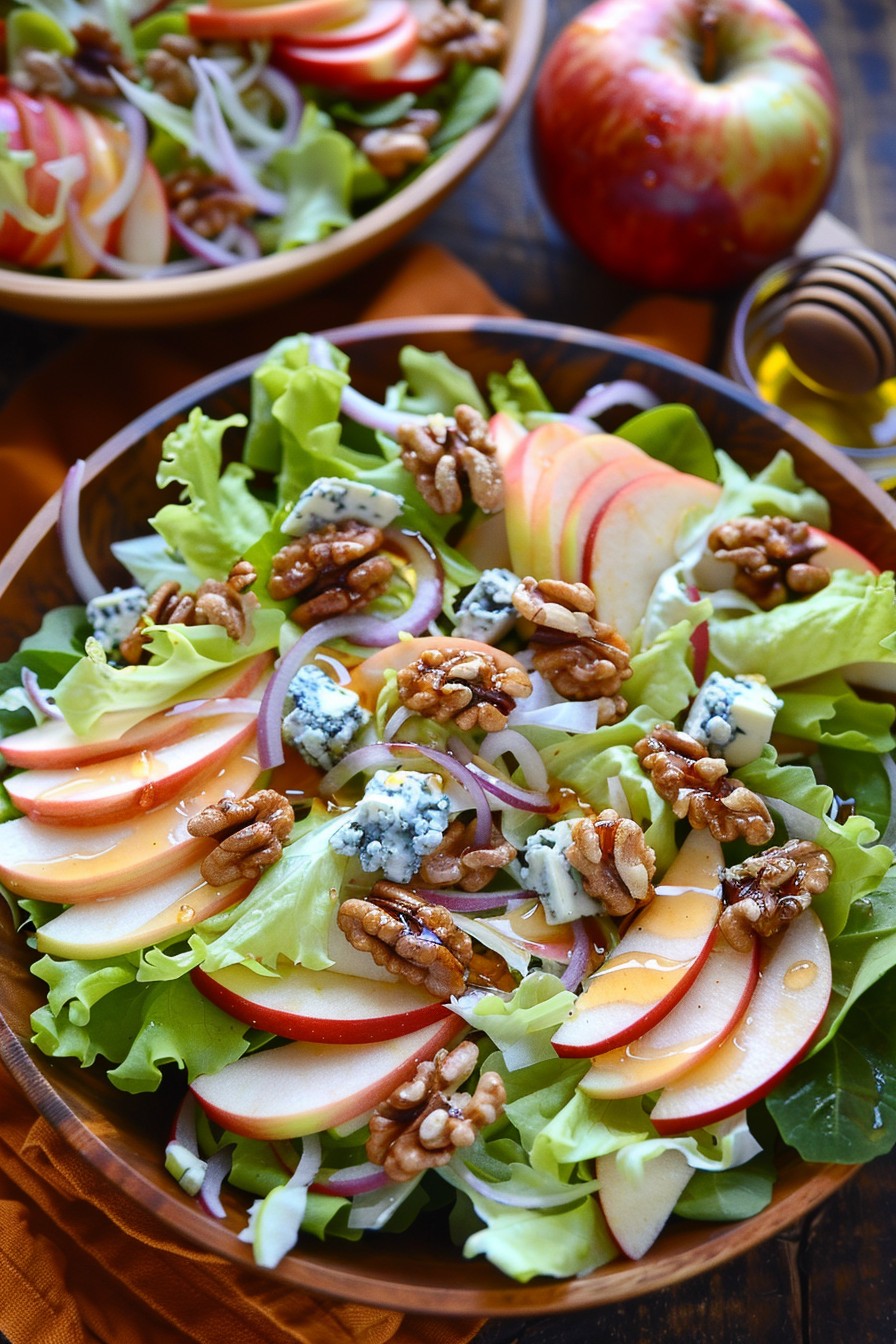
    Ingredients

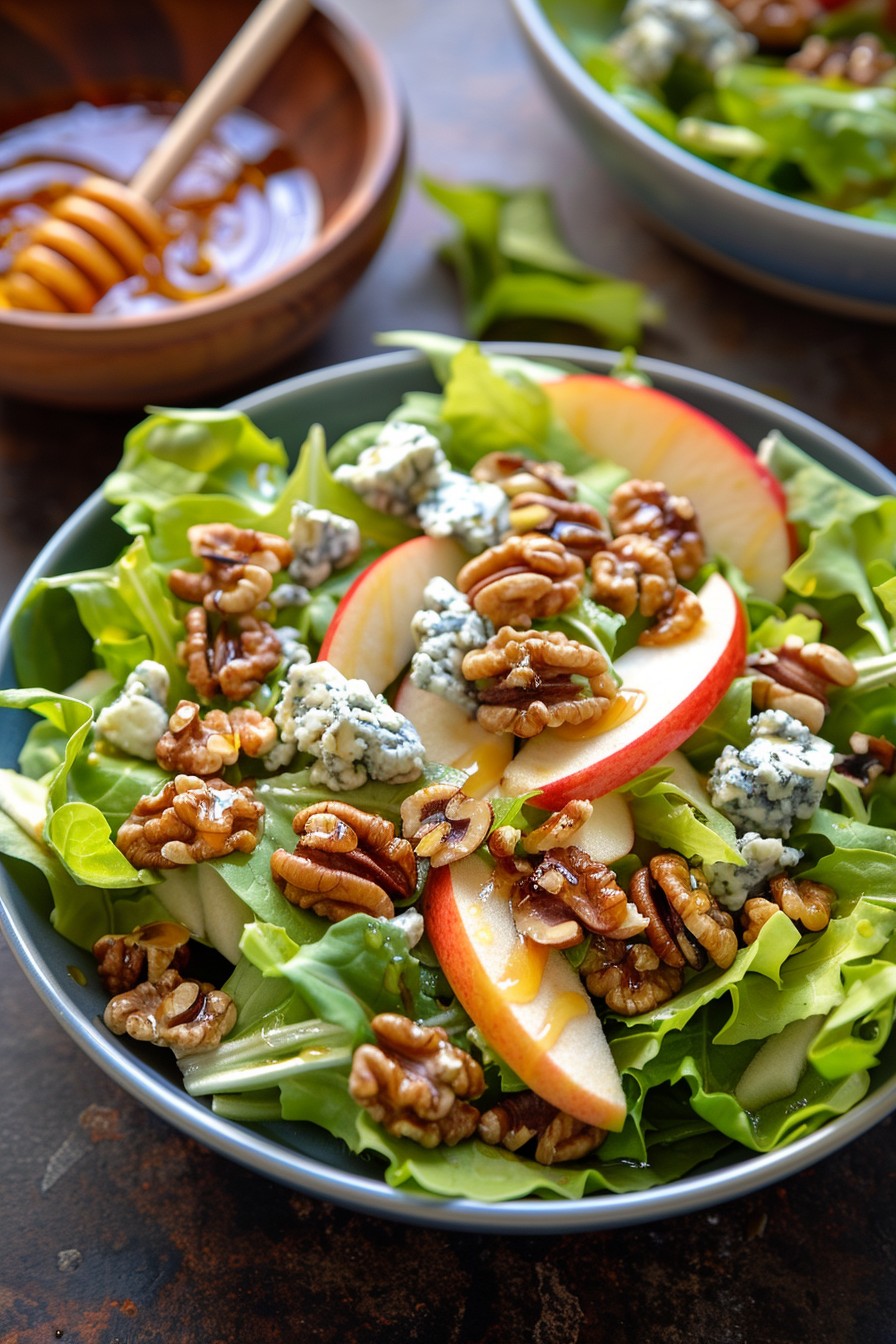
    • 2 cups mixed salad greens
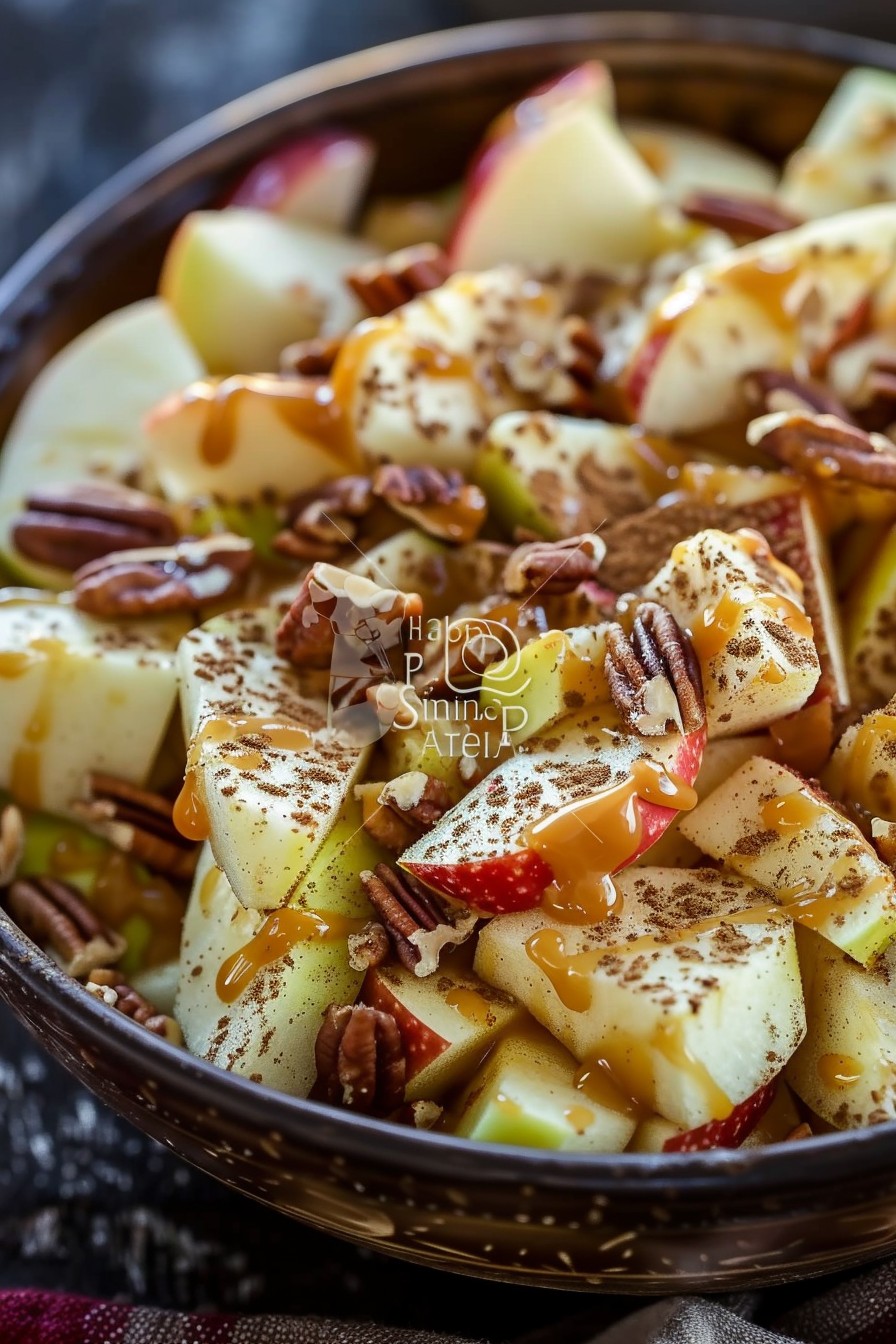
    • 1 large apple, thinly sliced
    • 1/2 cup walnuts, toasted
    • 1/4 cup crumbled blue cheese
    • 2 tbsp olive oil
    • 1 tbsp apple cider vinegar
    • 1 tsp honey
    • Salt and pepper to taste

    Equipment Needed

    • Large salad bowl
    • Small mixing bowl
    • Whisk
    • Knife
    • Cutting board

    Instructions

    Autumn Apple Salad Recipe

    Step 1: Prepare the Dressing

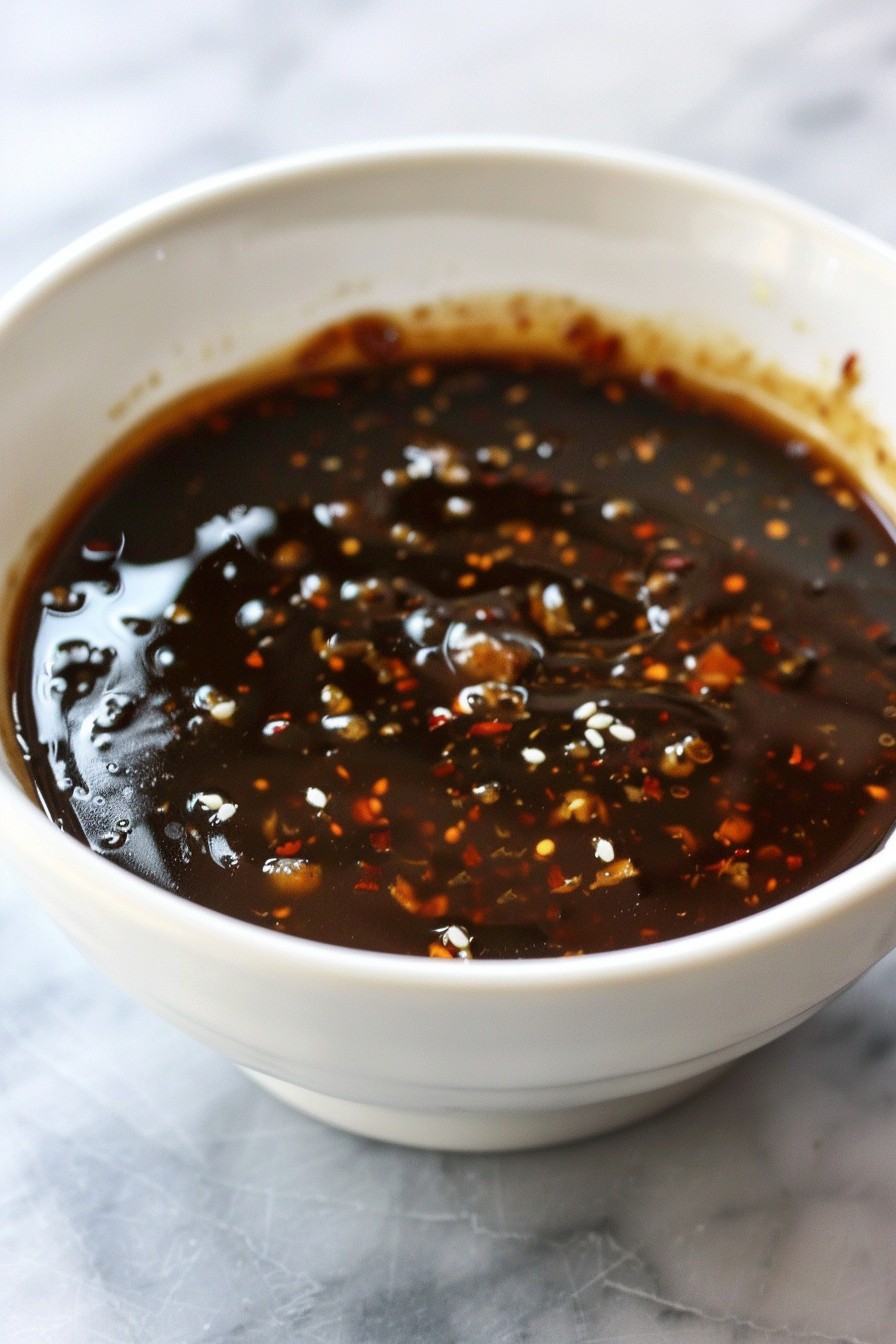
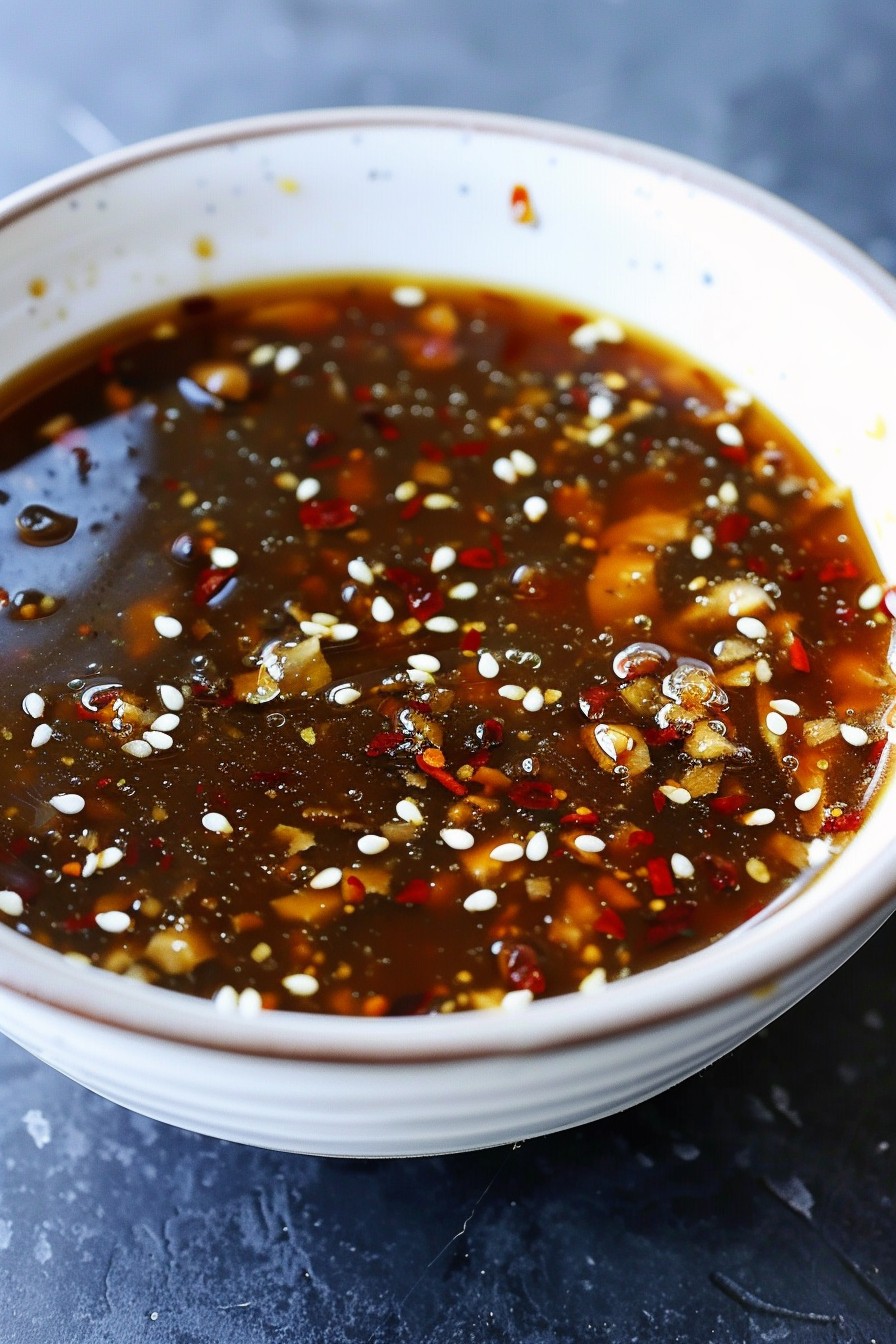
    In a small mixing bowl, whisk together the olive oil, apple cider vinegar, honey, salt, and pepper until well combined. This simple dressing will bring all the flavors of the salad together beautifully.

    Step 2: Toast the Walnuts

    Heat a dry skillet over medium heat and add the walnuts. Toast them for about 5 minutes, stirring occasionally, until they’re fragrant and slightly browned. This step enhances their flavor and adds a wonderful crunch to the salad.

    Step 3: Assemble the Salad

    In a large salad bowl, combine the mixed greens, sliced apple, toasted walnuts, and crumbled blue cheese. Toss gently to mix the ingredients evenly.

    Step 4: Dress the Salad

    Drizzle the dressing over the salad and toss again to ensure everything is lightly and evenly coated. Be careful not to overdress the salad; you want to enhance the flavors, not drown them.

    Step 5: Serve Immediately

    This salad is best enjoyed fresh, so serve it right away to enjoy the crispness of the apples and the crunch of the walnuts at their best.

    Tips and Tricks

    For an extra burst of flavor, consider adding a sprinkle of cinnamon or a handful of dried cranberries to the salad. If you’re not a fan of blue cheese, feta or goat cheese would make excellent substitutes. To save time, you can toast the walnuts ahead of time and store them in an airtight container. When selecting apples, choose a variety that’s both sweet and tart for the best flavor balance. Finally, if you’re preparing this salad in advance, wait to add the dressing until just before serving to keep the greens crisp.

    Recipe Variations

    • Swap the walnuts for pecans or almonds for a different nutty flavor.
    • Add grilled chicken or shrimp to turn this salad into a hearty main dish.
    • Incorporate pears or grapes for additional sweetness and texture.
    • Use a balsamic vinaigrette instead of the apple cider vinegar dressing for a deeper flavor profile.
    • For a vegan version, omit the cheese or use a plant-based alternative.

    Frequently Asked Questions

    Can I make this salad ahead of time?

    Yes, you can prepare the components of the salad ahead of time, but it’s best to assemble and dress it just before serving to maintain the freshness and crispness of the ingredients.

    What type of apple works best in this salad?

    Apples that are both sweet and tart, such as Honeycrisp or Granny Smith, work wonderfully in this salad. The key is to choose an apple that holds its shape well when sliced.

    Can I use a different type of nut?

    Absolutely! While walnuts are recommended for their flavor and texture, feel free to substitute with your favorite nuts or seeds for a different twist.

    Summary

    This autumn apple salad is a perfect blend of sweet, tart, and crunchy, making it an ideal dish for the season. Easy to prepare and versatile, it’s sure to be a hit at any table.

  • Creamy Macaroni Salad Dressing Recipe: The Ultimate Summer Side Dish

    Creamy Macaroni Salad Dressing Recipe: The Ultimate Summer Side Dish

    Every summer gathering needs a standout side, and this creamy macaroni salad dressing is here to steal the show. Easy to whip up and packed with flavor, it’s the perfect companion to your favorite pasta.

    Why This Recipe Works

    • The combination of mayonnaise and sour cream creates a rich, creamy base that clings perfectly to every noodle.
    • A splash of apple cider vinegar adds just the right amount of tanginess to balance the creaminess.
    • Finely chopped celery and onions provide a satisfying crunch and freshness.
    • Simple seasonings like salt, pepper, and a pinch of sugar enhance all the flavors without overpowering them.

    Ingredients

    • 1 cup mayonnaise
    • 1/2 cup sour cream
    • 2 tablespoons apple cider vinegar
    • 1/4 cup finely chopped celery
    • 1/4 cup finely chopped onion
    • 1 teaspoon salt
    • 1/2 teaspoon black pepper
    • 1 teaspoon sugar

    Equipment Needed

    • Mixing bowl
    • Whisk
    • Measuring cups and spoons
    • Chopping board and knife

    Instructions

    Macaroni Salad Dressing Recipe

    Step 1: Combine the Base Ingredients

    In a large mixing bowl, whisk together the mayonnaise and sour cream until smooth. This combination is the foundation of your dressing, so make sure it’s well blended to avoid any lumps.

    Step 2: Add the Vinegar and Seasonings

    Stir in the apple cider vinegar, salt, black pepper, and sugar. The vinegar not only adds tang but also helps to thin the dressing slightly for easier mixing with the macaroni.

    Step 3: Incorporate the Vegetables

    Fold in the finely chopped celery and onion. These add a necessary crunch and freshness to the dressing, making every bite interesting.

    Step 4: Taste and Adjust

    Give your dressing a taste and adjust the seasonings as needed. Sometimes a little extra salt or vinegar can make all the difference.

    Step 5: Chill Before Serving

    For the best flavor, cover and refrigerate the dressing for at least an hour before tossing it with cooked macaroni. This allows the flavors to meld together beautifully.

    Tips and Tricks

    For an even creamier dressing, you can substitute Greek yogurt for the sour cream. It adds a similar tanginess but with a thicker consistency. If you’re short on time, you can use the dressing immediately, but chilling it really does enhance the flavors. For a smoother dressing, you can blend the onions and celery into the mayonnaise mixture using a food processor. This is especially helpful if you’re serving picky eaters who might object to chunks in their salad.

    Recipe Variations

    • Add a tablespoon of mustard for a tangy twist.
    • Mix in some diced pickles or relish for a sweet and sour flavor.
    • For a healthier version, replace half of the mayonnaise with Greek yogurt.
    • Spice it up with a dash of paprika or cayenne pepper.
    • Include hard-boiled eggs for a protein boost and extra creaminess.

    Frequently Asked Questions

    Can I make this dressing ahead of time?

    Absolutely! This dressing can be made up to 3 days in advance and stored in the refrigerator. In fact, making it ahead allows the flavors to develop more fully, resulting in a tastier salad.

    How long will the dressed macaroni salad last in the fridge?

    When stored properly in an airtight container, the dressed macaroni salad will last for 3 to 5 days in the refrigerator. Just give it a good stir before serving to redistribute the dressing.

    Can I freeze the macaroni salad?

    Freezing is not recommended as the mayonnaise-based dressing can separate and become watery when thawed, affecting the texture of the salad.

    Summary

    This creamy macaroni salad dressing is a must-try for any summer picnic or barbecue. With its perfect balance of creaminess, tang, and crunch, it’s sure to be a hit. Plus, it’s incredibly versatile, allowing you to customize it to your taste.

  • Crock Pot Chicken Salad Recipe: The Easiest, Most Flavorful Meal You’ll Make This Week

    Crock Pot Chicken Salad Recipe: The Easiest, Most Flavorful Meal You’ll Make This Week

    Today’s the day you fall in love with your crock pot all over again. This chicken salad recipe is not just easy; it’s a game-changer for busy weeknights or lazy weekends. Trust me, your taste buds will thank you.

    Why This Recipe Works

    • It’s hands-off cooking at its finest—just set it and forget it until mealtime.
    • The slow cooking process ensures the chicken is incredibly tender and full of flavor.
    • It’s versatile—eat it as is, on a sandwich, or over greens for a lighter option.
    • Perfect for meal prep—make a big batch and enjoy it all week.
    • Customizable to your taste with endless add-ins and variations.

    Ingredients

    • 2 lbs boneless, skinless chicken breasts
    • 1 cup mayonnaise
    • 1/2 cup Greek yogurt
    • 1 tbsp Dijon mustard
    • 1 tsp garlic powder
    • 1 tsp onion powder
    • Salt and pepper to taste
    • 1/2 cup diced celery
    • 1/4 cup diced red onion
    • 1/4 cup chopped parsley

    Equipment Needed

    • Crock pot
    • Mixing bowl
    • Measuring cups and spoons
    • Knife and cutting board

    Instructions

    Crock Pot Chicken Salad Recipe

    Step 1: Prepare the Chicken

    Place the chicken breasts in the crock pot. Season with salt, pepper, garlic powder, and onion powder. Add enough water to just cover the chicken. Cook on low for 6 hours or high for 3 hours, until the chicken is tender and easily shreds with a fork.

    Step 2: Shred the Chicken

    Once cooked, remove the chicken from the crock pot and let it cool slightly. Using two forks, shred the chicken into bite-sized pieces. Tip: For extra flavor, reserve a few tablespoons of the cooking liquid to mix back into the salad.

    Step 3: Mix the Dressing

    In a large mixing bowl, combine the mayonnaise, Greek yogurt, and Dijon mustard. Whisk until smooth. This combo gives the salad a creamy texture with a tangy kick. Tip: For a healthier version, you can adjust the ratio of mayo to yogurt to your liking.

    Step 4: Combine Everything

    Add the shredded chicken, diced celery, red onion, and chopped parsley to the bowl with the dressing. Gently mix until everything is evenly coated. Tip: Let the salad chill in the fridge for at least an hour before serving to let the flavors meld together beautifully.

    Step 5: Serve and Enjoy

    Serve your chicken salad on a bed of greens, between two slices of your favorite bread, or with crackers for a quick snack. It’s delicious any way you choose!

    Tips and Tricks

    For those looking to elevate their chicken salad game, here are some pro tips. First, consider roasting the chicken instead of boiling or slow cooking for a deeper flavor. Second, add-ins like grapes, apples, or nuts can add a delightful crunch and sweetness. Third, experimenting with different herbs and spices can completely transform the dish. Lastly, for a dairy-free version, skip the Greek yogurt and use all mayo or a dairy-free alternative.

    Recipe Variations

    • Add 1/2 cup of halved grapes and 1/4 cup of chopped walnuts for a sweet and crunchy twist.
    • Mix in 1 diced avocado and a squeeze of lime juice for a creamy, zesty version.
    • Stir in 1/2 cup of dried cranberries and 1/4 cup of sliced almonds for a festive take.
    • For a spicy kick, add 1/4 cup of diced jalapeños and a dash of cayenne pepper.
    • Swap the parsley for cilantro and add 1 tsp of cumin for a Southwestern flair.

    Frequently Asked Questions

    Can I use chicken thighs instead of breasts?

    Absolutely! Chicken thighs will give the salad a richer flavor and even more tenderness. Just be sure to adjust the cooking time as thighs may cook a bit faster than breasts.

    How long can I store the chicken salad?

    Stored in an airtight container in the fridge, your chicken salad will stay fresh for up to 3 days. It’s perfect for meal prep or leftovers.

    Can I make this recipe dairy-free?

    Yes, simply omit the Greek yogurt or use a dairy-free alternative. The mayonnaise provides enough creaminess on its own, so you won’t miss the yogurt.

    Summary

    This crock pot chicken salad recipe is a foolproof way to enjoy a delicious, versatile meal with minimal effort. Perfect for sandwiches, salads, or snacking, it’s a must-try for anyone looking to simplify their cooking without sacrificing flavor.

  • Taco Layer Salad Recipe: A Fiesta in Every Bite

    Taco Layer Salad Recipe: A Fiesta in Every Bite

    Just when you thought tacos couldn’t get any better, we’ve turned them into a salad that’s as fun to make as it is to eat. This taco layer salad is packed with all your favorite taco flavors, layered for maximum enjoyment, and perfect for any gathering or a hearty weeknight dinner.

    Why This Recipe Works

    • Layers of flavor ensure every bite is as delicious as the last.
    • Customizable to suit any dietary preference or taste.
    • Perfect for meal prep, as the flavors meld beautifully overnight.
    • A great way to incorporate more veggies into your diet without sacrificing taste.
    • The combination of textures from crunchy lettuce to creamy avocado is unbeatable.

    Ingredients

    • 1 lb ground beef (or turkey for a lighter option)
    • 1 packet taco seasoning
    • 1 head iceberg lettuce, chopped
    • 1 cup cherry tomatoes, halved
    • 1 avocado, diced
    • 1/2 cup shredded cheddar cheese
    • 1/2 cup sour cream
    • 1/4 cup sliced black olives
    • 1/4 cup chopped green onions
    • 1 cup crushed tortilla chips

    Equipment Needed

    • Large skillet
    • Mixing bowls
    • Chef’s knife
    • Cutting board
    • Measuring cups and spoons

    Instructions

    Taco Layer Salad Recipe

    Step 1: Brown the Meat

    Heat a large skillet over medium-high heat and add the ground beef. Cook until no pink remains, about 5-7 minutes, breaking it apart with a spoon as it cooks. Drain any excess fat, then stir in the taco seasoning and 1/4 cup water. Simmer for 5 minutes until the mixture thickens. Tip: For extra flavor, toast the taco seasoning in the skillet before adding the meat.

    Step 2: Prepare the Layers

    While the meat cooks, chop the lettuce, halve the cherry tomatoes, dice the avocado, and slice the green onions. Arrange these ingredients in separate bowls for easy assembly. Tip: To prevent the avocado from browning, toss it with a little lime juice.

    Step 3: Assemble the Salad

    In a large clear bowl, start with a layer of chopped lettuce. Top with the cooked taco meat, followed by cherry tomatoes, avocado, cheese, black olives, and green onions. Repeat the layers until all ingredients are used, ending with a layer of lettuce. Tip: For a stunning presentation, press the layers down slightly after each addition.

    Step 4: Add the Finishing Touches

    Dollop the sour cream over the top layer of lettuce, then sprinkle with crushed tortilla chips for crunch. Serve immediately, or cover and refrigerate until ready to serve.

    Step 5: Serve and Enjoy

    To serve, scoop down to the bottom of the bowl to get all the layers in each serving. Offer additional toppings like hot sauce or extra cheese on the side for those who want to customize their plate.

    Tips and Tricks

    For a lighter version, substitute Greek yogurt for the sour cream. If you’re making this salad ahead of time, keep the tortilla chips separate until just before serving to maintain their crunch. For a vegetarian version, replace the ground beef with a plant-based alternative or black beans. To add a smoky flavor, char the tomatoes under the broiler for a few minutes before adding them to the salad. Lastly, for a more colorful presentation, use a mix of red and green lettuce.

    Recipe Variations

    • Swap the ground beef for shredded chicken or pork for a different protein option.
    • Add a layer of cooked quinoa or rice for extra heartiness.
    • Include a layer of corn or black beans for additional texture and flavor.
    • Use a different type of cheese, such as pepper jack or cotija, for a twist on the classic.
    • For a low-carb version, omit the tortilla chips and add more avocado for creaminess.

    Frequently Asked Questions

    Q: Can I make this salad ahead of time?
    A: Absolutely! You can assemble the salad up to a day in advance, just wait to add the sour cream and tortilla chips until you’re ready to serve to keep everything fresh and crunchy.

    Q: How can I make this recipe vegetarian?
    A: Easily swap the ground beef for a plant-based meat alternative or use black beans for a protein-packed vegetarian option. Just be sure to season well to keep all the bold taco flavors.

    Q: What’s the best way to serve this salad?
    A: This salad is best served in a clear bowl to show off all the beautiful layers. Make sure to scoop all the way down to the bottom to get a bit of every layer in each serving.

    Summary

    This taco layer salad is a fun, flavorful twist on traditional tacos that’s perfect for any occasion. With layers of seasoned meat, fresh veggies, and creamy toppings, it’s a dish that’s as enjoyable to make as it is to eat. Customizable and great for ahead-of-time prep, it’s sure to be a hit at your next gathering.

  • Korean Salad Recipe: A Crunchy, Tangy Delight

    Korean Salad Recipe: A Crunchy, Tangy Delight

    How about adding a zesty twist to your salad game? This Korean salad recipe is not just a bowl of greens; it’s a vibrant mix of textures and flavors that will make your taste buds dance. Perfect for a quick lunch or a side dish that steals the show.

    Why This Recipe Works

    • The combination of crisp vegetables and a tangy, slightly sweet dressing creates a perfect balance of flavors.
    • It’s incredibly versatile, allowing you to mix and match ingredients based on what’s in your fridge.
    • Quick and easy to prepare, making it ideal for busy weeknights or last-minute gatherings.
    • The salad dressing can be made ahead of time, saving you precious minutes when you’re in a rush.
    • It’s a great way to incorporate more vegetables into your diet in a delicious way.

    Ingredients

    • 4 cups mixed greens (spinach, lettuce, and arugula)
    • 1 cup thinly sliced cucumber
    • 1 cup shredded carrots
    • 1/2 cup thinly sliced red bell pepper
    • 1/4 cup chopped green onions
    • 1 tbsp sesame seeds
    • For the dressing: 2 tbsp soy sauce, 1 tbsp sesame oil, 1 tbsp honey, 1 tbsp rice vinegar, 1 tsp minced garlic, 1 tsp grated ginger

    Equipment Needed

    • Large mixing bowl
    • Whisk
    • Measuring cups and spoons
    • Knife and cutting board

    Instructions

    Korean Salad Recipe

    Prepare the Vegetables

    Start by washing all your vegetables thoroughly under cold water. Pat them dry with a clean towel to ensure the dressing sticks well. Slice the cucumber and red bell pepper into thin strips for that perfect crunch. Shred the carrots using a grater or a knife, and chop the green onions finely. Toss all the vegetables into a large mixing bowl.

    Make the Dressing

    In a small bowl, whisk together the soy sauce, sesame oil, honey, rice vinegar, minced garlic, and grated ginger until well combined. Taste and adjust the seasoning if necessary. This dressing is the heart of the salad, so take your time to get the balance right.

    Combine and Toss

    Pour the dressing over the prepared vegetables in the mixing bowl. Using clean hands or salad tongs, gently toss the salad to ensure every piece is coated with the dressing. Be careful not to overmix, as this can make the greens wilt.

    Garnish and Serve

    Sprinkle the sesame seeds over the top of the salad for an added nutty flavor and a bit of crunch. Serve immediately to enjoy the salad at its freshest. If you’re not serving right away, keep the dressing separate and add it just before serving.

    Tips and Tricks

    For an extra crunch, add some toasted nuts or seeds like almonds or sunflower seeds. If you prefer a spicier kick, a dash of chili flakes or a spoonful of gochujang (Korean chili paste) can be mixed into the dressing. To make this salad more filling, add some grilled chicken or tofu. Always taste your dressing before adding it to the salad; you might want to adjust the sweetness or tanginess to your preference. Lastly, for the best texture, chop all your vegetables uniformly.

    Recipe Variations

    • Add some sliced avocado for a creamy texture and healthy fats.
    • Include some cooked soba noodles or quinoa to turn this salad into a hearty meal.
    • Swap the honey in the dressing for maple syrup to make it vegan.
    • Add some kimchi for an authentic Korean flavor and probiotic benefits.
    • Use different vegetables like radishes or snap peas for variety.

    Frequently Asked Questions

    Can I make this salad ahead of time?

    Yes, you can prepare the vegetables and the dressing separately a day in advance. However, it’s best to combine them just before serving to prevent the greens from getting soggy. Store the dressing in an airtight container in the fridge and the prepared vegetables in a separate container with a paper towel to absorb excess moisture.

    Is there a substitute for sesame oil?

    While sesame oil adds a unique flavor to the dressing, you can use olive oil as a substitute if you’re in a pinch. Keep in mind that the taste will be slightly different, so you might want to add a bit more garlic or ginger to compensate for the lack of sesame flavor.

    How can I make this salad more protein-rich?

    Adding grilled chicken, tofu, or even some hard-boiled eggs can boost the protein content of this salad. For a seafood twist, some cooked shrimp or thinly sliced beef would also work wonderfully with the flavors of the dressing.

    Summary

    This Korean salad is a refreshing, flavorful dish that’s easy to make and customizable to your taste. With its crunchy vegetables and tangy dressing, it’s sure to become a favorite in your recipe collection.

  • Taco Salad Recipe: A Crunchy, Flavorful Fiesta in a Bowl

    Taco Salad Recipe: A Crunchy, Flavorful Fiesta in a Bowl

    Zesty, vibrant, and packed with textures, this taco salad is your ticket to a quick and satisfying meal. Perfect for busy weeknights or lazy weekends, it’s a crowd-pleaser that combines the best of tacos and salads in one delicious bowl.

    Why This Recipe Works

    • It’s a perfect balance of crunchy and creamy textures, thanks to the fresh veggies and smooth avocado.
    • The homemade taco seasoning adds a depth of flavor that store-bought versions can’t match.
    • It’s customizable, allowing everyone to tweak the ingredients to their liking.
    • Quick to prepare, making it ideal for last-minute dinners.
    • Packed with protein and fiber, it’s as nutritious as it is delicious.

    Ingredients

    • 1 lb ground beef (or turkey for a lighter option)
    • 1 tbsp homemade taco seasoning
    • 1 head romaine lettuce, chopped
    • 1 cup cherry tomatoes, halved
    • 1 avocado, diced
    • 1/2 cup shredded cheddar cheese
    • 1/2 cup sour cream
    • 1/2 cup salsa
    • 1 cup tortilla chips, crushed

    Equipment Needed

    • Large skillet
    • Mixing bowls
    • Chopping board and knife
    • Measuring cups and spoons

    Instructions

    Taco Salad Recipe

    Step 1: Brown the Meat

    Heat a large skillet over medium heat and add the ground beef. Cook until no pink remains, about 5-7 minutes. Drain excess fat, then stir in the taco seasoning and 1/4 cup water. Simmer for 2 minutes until the mixture thickens. Tip: For extra flavor, toast the taco seasoning in a dry pan before adding it to the meat.

    Step 2: Prep the Veggies

    While the meat cooks, chop the romaine lettuce, halve the cherry tomatoes, and dice the avocado. Place them in a large mixing bowl. Tip: For the crispiest salad, chill the chopped lettuce in ice water for 10 minutes, then pat dry.

    Step 3: Assemble the Salad

    Add the cooked meat to the bowl with the veggies. Top with shredded cheese, sour cream, salsa, and crushed tortilla chips. Toss gently to combine, or layer the ingredients for a prettier presentation. Tip: Add the tortilla chips last to keep them crunchy.

    Step 4: Serve Immediately

    Divide the salad among plates and serve right away. The warmth of the meat contrasts beautifully with the cool, crisp veggies, making every bite a delight.

    Tips and Tricks

    For a lighter version, substitute Greek yogurt for sour cream and use baked tortilla chips. If you’re meal prepping, keep the dressing and chips separate until serving to maintain texture. For an extra kick, add jalapeños or a dash of hot sauce. To make it vegetarian, swap the meat for black beans or quinoa. Always taste and adjust the seasoning before serving.

    Recipe Variations

    • Swap the ground beef for chicken or shrimp for a different protein option.
    • Use kale or spinach instead of romaine for a nutrient boost.
    • Add corn, black olives, or red onions for extra flavor and color.
    • Try a lime vinaigrette instead of salsa and sour cream for a tangier twist.
    • For a low-carb version, skip the tortilla chips and add more veggies.

    Frequently Asked Questions

    Can I make this salad ahead of time? Yes, but keep the wet ingredients separate until serving to prevent sogginess. The meat can be cooked and stored in the fridge for up to 3 days.

    What’s the best way to store leftovers? In an airtight container in the fridge for up to 2 days. Note that the chips will soften over time.

    Can I use store-bought taco seasoning? Absolutely, but homemade allows you to control the salt and spice levels. If using store-bought, opt for a low-sodium version.

    Summary

    This taco salad is a versatile, flavorful dish that’s easy to make and customizable to suit any taste. Perfect for a quick dinner or a fun meal with friends, it’s sure to become a staple in your recipe rotation.

  • Chinese Chicken Salad Dressing Recipe: A Zesty Twist on a Classic

    Chinese Chicken Salad Dressing Recipe: A Zesty Twist on a Classic

    Venture into the world of homemade dressings with this irresistibly tangy and sweet Chinese chicken salad dressing. Perfect for drizzling over your favorite greens or as a marinade, this recipe is a game-changer for salad lovers.

    Why This Recipe Works

    • The perfect balance of sweet and tangy flavors makes every bite unforgettable.
    • Uses simple, pantry-staple ingredients for an easy whip-up.
    • Versatile enough to double as a marinade for chicken or tofu.
    • No preservatives or artificial flavors, just pure, delicious goodness.
    • Quick to make, taking only minutes from prep to pour.

    Ingredients

    • 1/2 cup soy sauce
    • 1/4 cup rice vinegar
    • 2 tablespoons sesame oil
    • 1 tablespoon honey
    • 1 teaspoon grated ginger
    • 1 clove garlic, minced
    • 1/4 teaspoon red pepper flakes
    • 2 tablespoons water

    Equipment Needed

    • Mixing bowl
    • Whisk
    • Measuring cups and spoons
    • Jar with lid for storage

    Instructions

    Chinese Chicken Salad Dressing Recipe

    Step 1: Combine the Base Ingredients

    In a medium mixing bowl, whisk together the soy sauce, rice vinegar, and sesame oil until well combined. This trio forms the foundation of your dressing, so make sure they’re thoroughly mixed to create a smooth base.

    Step 2: Sweeten the Deal

    Add the honey to the mixture, whisking continuously until it’s fully dissolved. The honey not only adds sweetness but also helps to balance the acidity of the vinegar.

    Step 3: Spice It Up

    Stir in the grated ginger, minced garlic, and red pepper flakes. These ingredients introduce a warm, spicy depth to the dressing, elevating it from good to great.

    Step 4: Adjust the Consistency

    If the dressing is too thick for your liking, gradually add water, one tablespoon at a time, until you reach your desired consistency. Remember, it’s easier to add more liquid than to fix an overly watery dressing.

    Step 5: Taste and Tweak

    Give your dressing a taste test. Feel free to adjust the ingredients to suit your palate—more honey for sweetness, more vinegar for tang, or more pepper flakes for heat.

    Tips and Tricks

    For an even more flavorful dressing, let it sit in the refrigerator for at least an hour before serving. This allows the flavors to meld together beautifully. If you’re using the dressing as a marinade, reserve a portion before adding it to raw meat to use as a salad dressing later. Always store your dressing in an airtight container in the fridge, where it will keep for up to a week. Shake well before each use as the ingredients may separate over time.

    Recipe Variations

    • For a gluten-free version, substitute the soy sauce with tamari or coconut aminos.
    • Add a tablespoon of peanut butter for a creamy, nutty twist.
    • Include a splash of orange juice for a citrusy note.
    • Swap honey with maple syrup for a vegan-friendly alternative.
    • For extra umami, mix in a teaspoon of miso paste.

    Frequently Asked Questions

    Can I make this dressing ahead of time?

    Absolutely! This dressing actually tastes better after the flavors have had time to meld. Prepare it up to a week in advance and store it in the refrigerator. Just give it a good shake or stir before using.

    Is there a substitute for rice vinegar?

    If you don’t have rice vinegar on hand, apple cider vinegar or white wine vinegar can be used as substitutes. Keep in mind that this may slightly alter the taste, so adjust the other ingredients accordingly.

    How can I reduce the sodium content?

    To lower the sodium, opt for low-sodium soy sauce or dilute the dressing with a bit more water or vinegar. You can also balance the saltiness by adding a touch more honey.

    Summary

    This Chinese chicken salad dressing is a versatile, flavorful addition to any meal. With its perfect blend of sweet, tangy, and spicy notes, it’s sure to become a staple in your kitchen. Easy to make and customizable, it’s the perfect way to elevate your salads, marinades, and more.

  • Apple Caramel Salad Recipe: A Sweet & Crunchy Delight

    Apple Caramel Salad Recipe: A Sweet & Crunchy Delight

    Overtime, I’ve discovered that the best recipes are those that combine simplicity with a dash of creativity. This Apple Caramel Salad is no exception. It’s a perfect blend of crisp apples, luscious caramel, and a hint of cinnamon, creating a dessert that’s both refreshing and indulgent. Whether you’re looking for a quick snack or a show-stopping side dish, this recipe has got you covered.

    Why This Recipe Works

    • The combination of crisp apples and smooth caramel offers a delightful contrast in textures.
    • A touch of cinnamon adds warmth and depth to the flavor profile.
    • It’s incredibly versatile, serving as a dessert, snack, or even a side dish.
    • Prep time is minimal, making it perfect for last-minute gatherings.
    • The recipe is easily customizable to suit different taste preferences.

    Ingredients

    • 4 large apples, cored and diced (about 4 cups)
    • 1/2 cup caramel sauce
    • 1/2 teaspoon ground cinnamon
    • 1/4 cup chopped pecans (optional)
    • 1 tablespoon lemon juice (to prevent browning)

    Equipment Needed

    • Large mixing bowl
    • Measuring cups and spoons
    • Knife and cutting board
    • Spoon for stirring

    Instructions

    Apple Caramel Salad Recipe

    Step 1: Prepare the Apples

    Start by washing and drying your apples thoroughly. Core them and dice into bite-sized pieces. Immediately toss the diced apples in lemon juice to prevent browning. This step ensures your salad stays fresh and vibrant.

    Step 2: Mix the Ingredients

    In a large mixing bowl, combine the diced apples with caramel sauce and ground cinnamon. Stir gently until all the apple pieces are evenly coated. The caramel should cling to the apples, creating a glossy finish.

    Step 3: Add the Pecans

    If you’re using pecans, now’s the time to add them. Fold them into the apple mixture for an extra crunch. The nuts add a lovely texture contrast to the soft apples and smooth caramel.

    Step 4: Chill Before Serving

    Cover the bowl with plastic wrap and refrigerate for at least 30 minutes. Chilling allows the flavors to meld together beautifully. Serve cold for the best taste experience.

    Tips and Tricks

    For an extra layer of flavor, consider toasting the pecans before adding them to the salad. This enhances their nuttiness and adds a slight crunch. If you’re not a fan of pecans, walnuts or almonds make great substitutes. To make the salad ahead of time, prepare the apples and toss them with lemon juice, but wait to add the caramel and other ingredients until just before serving to prevent sogginess. For a healthier version, opt for a low-fat caramel sauce or make your own at home with less sugar.

    Recipe Variations

    • Add a scoop of vanilla ice cream on top for a decadent dessert.
    • Incorporate dried cranberries or raisins for a chewy texture and a burst of sweetness.
    • Swap out the apples for pears for a different but equally delicious fruit base.
    • Drizzle with chocolate sauce in addition to caramel for a chocolate-caramel apple salad.
    • Use coconut flakes instead of nuts for a tropical twist.

    Frequently Asked Questions

    Can I make this recipe ahead of time?

    Yes, you can prepare the components ahead of time, but it’s best to combine them just before serving to maintain the best texture and freshness. The apples can be diced and stored in lemon juice in the fridge, and the caramel sauce can be prepared or warmed up when ready to use.

    What are the best apples to use for this salad?

    Crisp and slightly tart apples like Granny Smith or Honeycrisp work wonderfully in this recipe as they hold their shape well and balance the sweetness of the caramel. However, feel free to use your favorite variety.

    Can I use store-bought caramel sauce?

    Absolutely! Store-bought caramel sauce is a convenient option and works just fine. However, if you have the time, homemade caramel sauce can elevate the dish with its richer flavor.

    Summary

    This Apple Caramel Salad is a simple yet irresistible treat that combines the crispness of apples with the smooth sweetness of caramel, all spiced up with a hint of cinnamon. It’s quick to prepare, versatile, and sure to please any crowd.

  • Macaroni and Egg Salad Recipe: A Creamy Dream Come True

    Macaroni and Egg Salad Recipe: A Creamy Dream Come True

    Just when you thought macaroni salad couldn’t get any better, we threw eggs into the mix. This macaroni and egg salad recipe is the perfect blend of creamy, tangy, and downright delicious. Whether you’re prepping for a picnic or just craving some comfort food, this dish is sure to hit the spot.

    Why This Recipe Works

    • The combination of creamy mayonnaise and tangy mustard creates a dressing that’s rich in flavor but not overpowering.
    • Adding hard-boiled eggs introduces a protein-packed element that makes the salad more filling and nutritious.
    • The crunch from the celery and onions adds a refreshing contrast to the soft macaroni and eggs.
    • It’s a versatile recipe that can be customized with your favorite add-ins or spices.
    • Perfect for making ahead, as the flavors meld together beautifully overnight.

    Ingredients

    • 2 cups elbow macaroni, uncooked
    • 4 large eggs
    • 1/2 cup mayonnaise
    • 2 tablespoons mustard
    • 1/2 cup celery, finely chopped
    • 1/4 cup onion, finely chopped
    • Salt and pepper to taste

    Equipment Needed

    • Large pot
    • Mixing bowl
    • Whisk
    • Knife
    • Cutting board

    Instructions

    Macaroni And Egg Salad Recipe

    Step 1: Cook the Macaroni

    Bring a large pot of salted water to a boil. Add the macaroni and cook according to package instructions until al dente, about 8 minutes. Drain and rinse under cold water to stop the cooking process. Tip: Adding salt to the water enhances the pasta’s flavor.

    Step 2: Boil the Eggs

    Place the eggs in a saucepan and cover with water. Bring to a boil, then cover and remove from heat. Let stand for 12 minutes. Transfer to an ice bath to cool before peeling and chopping. Tip: The ice bath makes peeling the eggs much easier.

    Step 3: Prepare the Dressing

    In a large mixing bowl, whisk together the mayonnaise and mustard until smooth. Season with salt and pepper to taste. This creamy dressing is the heart of the salad, so don’t skimp on the flavor!

    Step 4: Combine Ingredients

    Add the cooled macaroni, chopped eggs, celery, and onion to the bowl with the dressing. Gently toss until everything is evenly coated. Tip: For the best flavor, let the salad chill in the fridge for at least an hour before serving.

    Step 5: Serve and Enjoy

    Give the salad a final stir before serving. Adjust seasoning if necessary. This dish is perfect on its own or as a side to your favorite summer BBQ items.

    Tips and Tricks

    For an extra creamy texture, consider adding a tablespoon of sour cream or Greek yogurt to the dressing. If you’re not a fan of raw onion, try soaking the chopped onions in cold water for 10 minutes to mellow their bite. For a bit of color and extra nutrition, throw in some diced red bell pepper or peas. Always taste and adjust the seasoning after the salad has chilled, as flavors can dull in the fridge.

    Recipe Variations

    • Add diced pickles or relish for a tangy twist.
    • Incorporate cooked, crumbled bacon for a smoky flavor.
    • Swap out the mustard for curry powder for an exotic touch.
    • Use Greek yogurt in place of mayonnaise for a lighter version.
    • Add a dash of hot sauce or cayenne pepper for some heat.

    Frequently Asked Questions

    Can I make this salad ahead of time?

    Absolutely! This salad actually tastes better after it’s had time to chill and the flavors have melded together. Just be sure to give it a good stir before serving.

    How long will it last in the fridge?

    Stored in an airtight container, the salad will keep for up to 3 days. After that, the texture of the macaroni may start to change.

    Can I use a different type of pasta?

    Yes, feel free to use any small pasta shape you like. Just keep in mind that cooking times may vary.

    Summary

    This macaroni and egg salad is a creamy, dreamy dish that’s perfect for any occasion. Easy to make and even easier to love, it’s sure to become a staple in your recipe collection.

  • Crunchy Fritos Taco Salad: A Tex-Mex Twist You’ll Love

    Crunchy Fritos Taco Salad: A Tex-Mex Twist You’ll Love

    Unleash your inner chef with this irresistibly crunchy taco salad that combines the bold flavors of Tex-Mex with the satisfying crunch of Fritos. Perfect for a quick dinner or a fun party dish, this recipe is sure to become a favorite.

    Why This Recipe Works

    • The combination of crispy Fritos and fresh salad ingredients creates a perfect texture contrast.
    • It’s incredibly versatile, allowing for endless customization based on your taste preferences.
    • Quick and easy to prepare, making it ideal for busy weeknights.
    • The dressing doubles as a marinade, infusing the meat with flavor before cooking.
    • It’s a crowd-pleaser, perfect for gatherings and potlucks.

    Ingredients

    • 1 lb ground beef
    • 1 packet taco seasoning
    • 1 head iceberg lettuce, chopped
    • 1 cup cherry tomatoes, halved
    • 1/2 cup red onion, diced
    • 1 cup cheddar cheese, shredded
    • 1 cup Fritos corn chips
    • 1/2 cup sour cream
    • 1/4 cup salsa
    • 1 avocado, diced

    Equipment Needed

    • Large skillet
    • Mixing bowls
    • Salad spinner
    • Chef’s knife
    • Cutting board

    Instructions

    Taco Salad Recipe With Fritos

    Brown the Ground Beef

    Heat a large skillet over medium-high heat. Add the ground beef, breaking it apart with a spoon, and cook until no longer pink, about 5-7 minutes. Drain any excess fat, then stir in the taco seasoning and 1/4 cup of water. Simmer for 5 minutes until the mixture thickens. Tip: For extra flavor, brown the beef with a diced onion before adding the seasoning.

    Prepare the Salad Base

    In a large mixing bowl, combine the chopped lettuce, cherry tomatoes, red onion, and avocado. Toss gently to mix. Tip: For a crisper salad, chill the lettuce in ice water for 10 minutes before chopping.

    Mix the Dressing

    In a small bowl, whisk together the sour cream and salsa until smooth. This will serve as both the salad dressing and a drizzle for the finished dish.

    Assemble the Salad

    Add the warm taco meat to the salad base, followed by the shredded cheese and Fritos. Drizzle with the dressing and toss lightly to combine. Tip: Add the Fritos just before serving to maintain their crunch.

    Serve Immediately

    Divide the salad among plates and serve immediately for the best texture and flavor. Enjoy the crunch and flavors of this delightful Tex-Mex inspired dish.

    Tips and Tricks

    For those looking to elevate their taco salad game, consider these advanced tips. First, try making your own taco seasoning from scratch for a fresher, more customizable flavor profile. Second, experiment with different types of lettuce, such as romaine or butter lettuce, for varied textures. Third, for a healthier version, substitute Greek yogurt for sour cream in the dressing. Lastly, consider adding a squeeze of lime juice over the assembled salad for a bright, acidic contrast to the rich flavors.

    Recipe Variations

    • Swap ground beef for ground turkey or chicken for a lighter version.
    • Use crushed tortilla chips instead of Fritos for a different crunch.
    • Add black beans or corn for extra fiber and sweetness.
    • Top with pickled jalapeños for a spicy kick.
    • For a vegetarian version, omit the meat and double up on beans and veggies.

    Frequently Asked Questions

    Can I make this salad ahead of time?

    Yes, you can prepare the components ahead of time, but assemble the salad just before serving to keep the Fritos crunchy. Store the dressing, meat, and salad base separately in the fridge.

    What can I use instead of Fritos?

    Any corn-based chip will work, such as tortilla chips or even Doritos for a different flavor profile. The key is to use something that will add a satisfying crunch.

    How can I make this recipe gluten-free?

    Ensure that your taco seasoning and chips are gluten-free. Most Fritos are gluten-free, but always check the packaging to be sure.

    Summary

    This Crunchy Fritos Taco Salad is a fun, flavorful twist on the classic taco salad, perfect for any occasion. With its easy preparation and customizable options, it’s sure to please everyone at the table.