Author: onlinefoodrecipes

  • Egg Salad Recipe with Cottage Cheese: A Creamy Twist on a Classic

    Egg Salad Recipe with Cottage Cheese: A Creamy Twist on a Classic

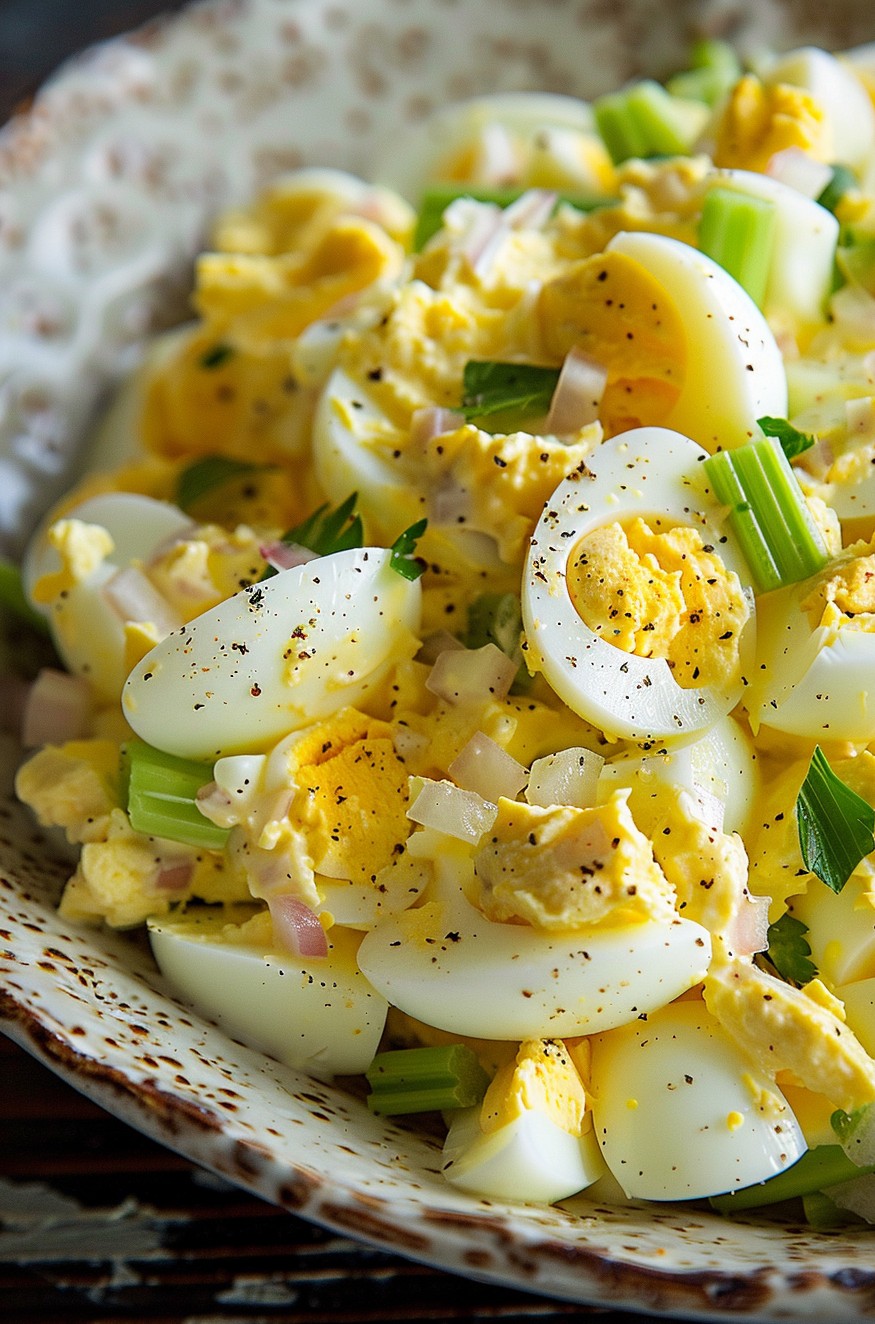
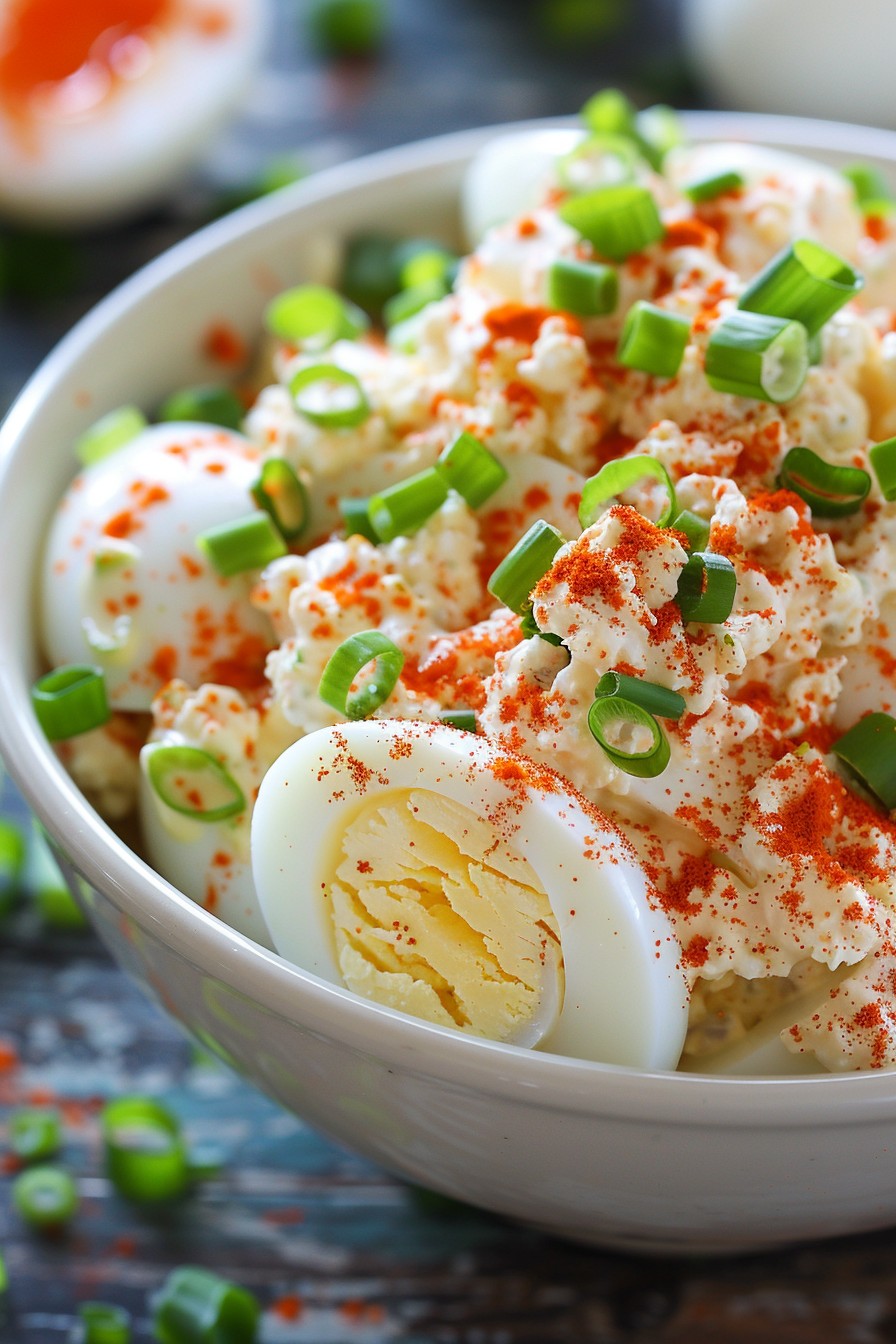
    Bold flavors and creamy textures come together in this egg salad recipe with cottage cheese. Perfect for sandwiches, wraps, or a standalone dish, this recipe is a game-changer for egg salad lovers looking for a healthier, protein-packed option.

    Why This Recipe Works

    • The cottage cheese adds a creamy texture without the need for excessive mayonnaise, making it a healthier option.
    • Hard-boiled eggs provide a rich, protein-packed base that’s both satisfying and nutritious.
    • A dash of mustard and a sprinkle of paprika bring a subtle kick and depth of flavor that elevates the dish.
    • It’s versatile—perfect for meal prep, picnics, or a quick lunch.
    • The recipe is easy to customize with your favorite herbs and spices.

    Ingredients

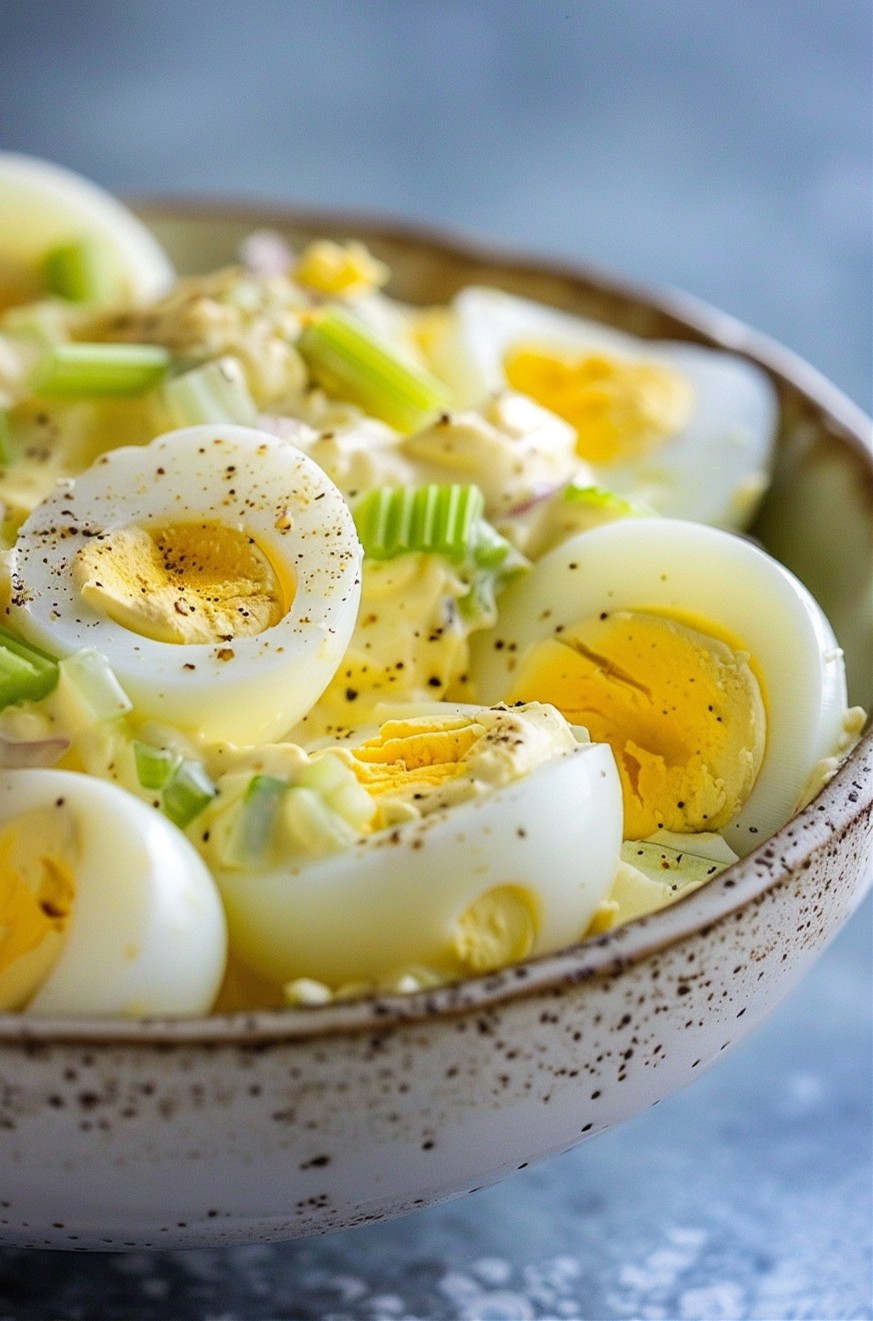
    • 6 large eggs, hard-boiled and chopped
    • 1 cup cottage cheese
    • 2 tbsp mayonnaise
    • 1 tsp mustard
    • 1/4 tsp paprika
    • Salt and pepper to taste
    • 2 green onions, finely chopped

    Equipment Needed

    • Mixing bowl
    • Whisk or fork
    • Measuring cups and spoons
    • Knife and cutting board

    Instructions

    Egg Salad Recipe Cottage Cheese

    Step 1: Prepare the Eggs

    Start by boiling your eggs to perfection. Place them in a pot, cover with water, and bring to a boil. Once boiling, cover and remove from heat, letting them sit for 12 minutes. Then, cool in ice water before peeling and chopping. Tip: Older eggs peel easier than fresh ones.

    Step 2: Mix the Base

    In a large mixing bowl, combine the cottage cheese, mayonnaise, and mustard. Whisk until the mixture is smooth and creamy. This creates the perfect base for your egg salad, ensuring every bite is flavorful.

    Step 3: Combine Ingredients

    Add the chopped eggs and green onions to the bowl. Gently fold them into the cottage cheese mixture until everything is evenly coated. Be careful not to overmix to keep some texture in the eggs.

    Step 4: Season to Taste

    Sprinkle in the paprika, salt, and pepper. Adjust the seasoning according to your preference. Tip: Taste as you go to ensure the perfect balance of flavors.

    Step 5: Chill and Serve

    For the best flavor, cover and refrigerate the egg salad for at least 30 minutes before serving. This allows the flavors to meld together beautifully. Serve on bread, crackers, or enjoy it straight from the bowl.

    Tips and Tricks

    For an even creamier texture, you can blend the cottage cheese before adding it to the mixture. If you’re watching your calorie intake, opt for low-fat cottage cheese and light mayonnaise. Adding a pinch of curry powder can give the salad an exotic twist. For a crunchier texture, include diced celery or pickles. Always use fresh eggs for boiling to ensure they hold their shape better when chopped.

    Recipe Variations

    • Spicy Version: Add diced jalapeños or a dash of hot sauce for a fiery kick.
    • Herb Lover’s Delight: Mix in fresh dill, parsley, or chives for a garden-fresh flavor.
    • Avocado Egg Salad: Substitute half the cottage cheese with mashed avocado for a creamy, healthy fat boost.
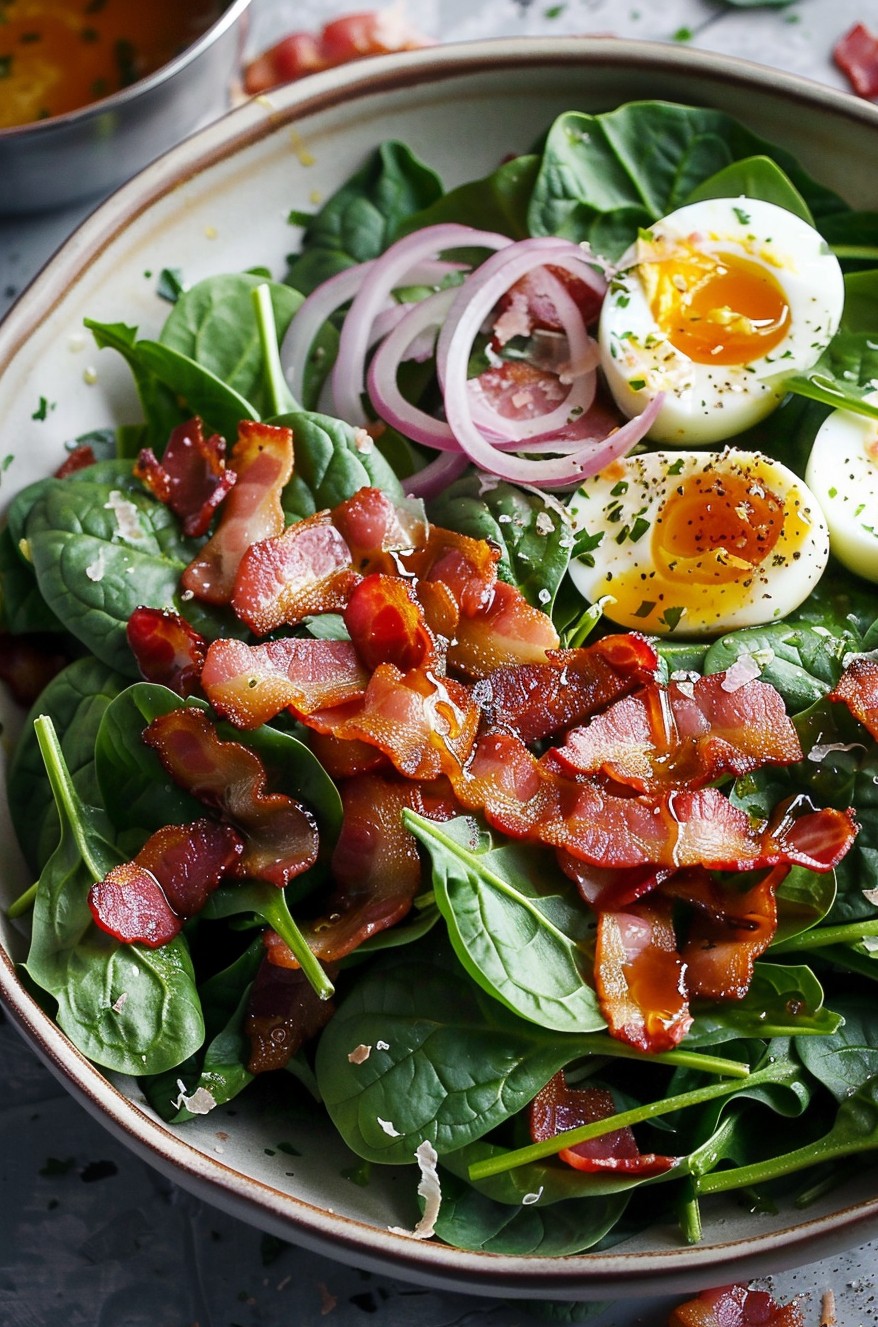
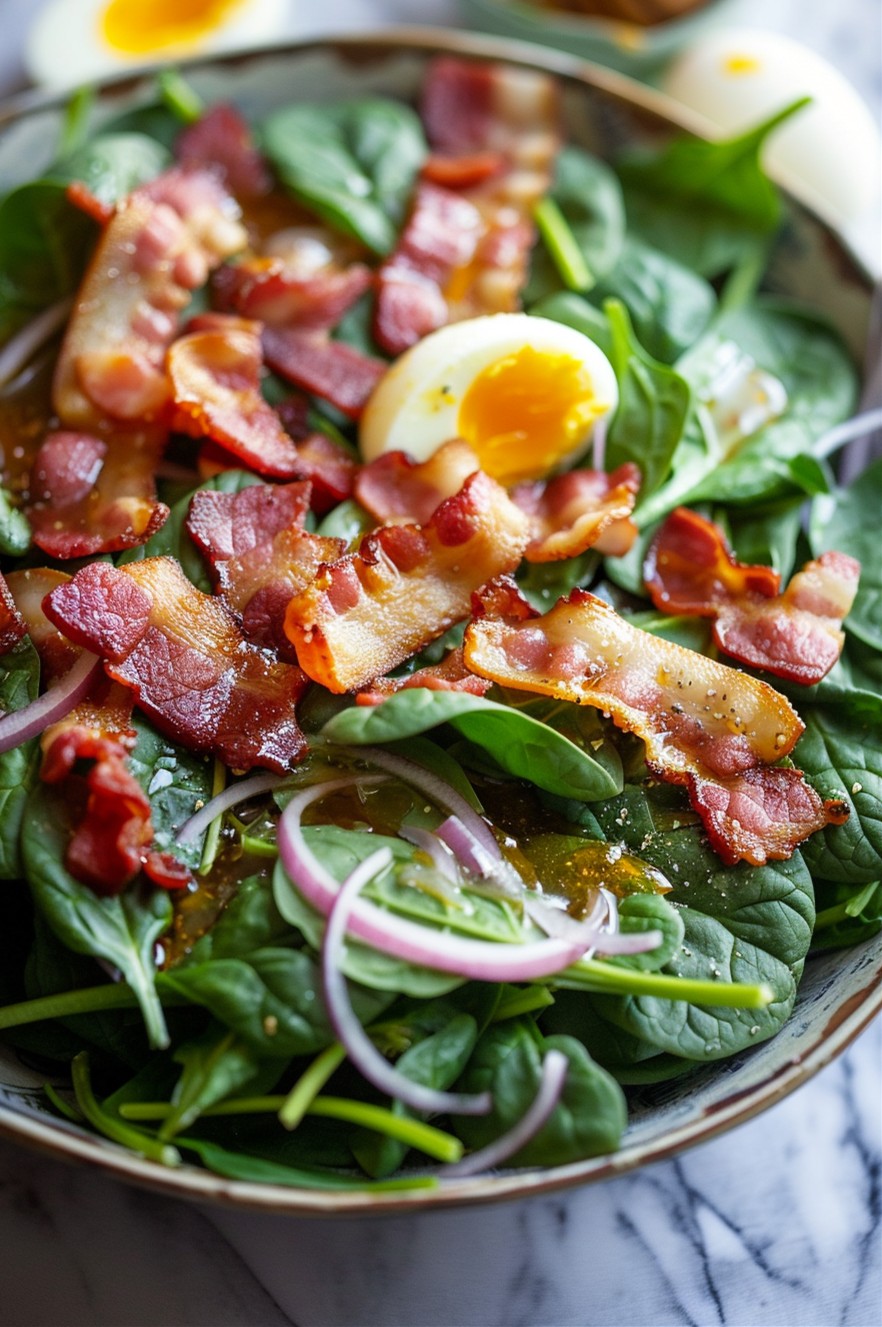
    • Bacon Bit Crunch: Stir in crispy bacon bits for a smoky, savory addition.
    • Mediterranean Twist: Add chopped olives, feta cheese, and a sprinkle of oregano for a Mediterranean flair.

    Frequently Asked Questions

    Can I make this recipe ahead of time?

    Absolutely! This egg salad can be made up to 2 days in advance. Just store it in an airtight container in the refrigerator. The flavors will continue to develop, making it even more delicious.

    Is there a substitute for cottage cheese?

    Yes, if you’re not a fan of cottage cheese, you can use Greek yogurt for a similar texture and protein boost. Just adjust the seasoning to taste as Greek yogurt can be tangier.

    How can I serve this egg salad?

    This egg salad is incredibly versatile. Serve it on whole grain bread for a sandwich, atop a bed of greens for a salad, or with crackers for a light snack. It’s also great stuffed in tomatoes or avocados for a low-carb option.

    Summary

    This egg salad recipe with cottage cheese is a creamy, protein-packed twist on the classic. It’s easy to make, customizable, and perfect for any occasion. Whether you’re looking for a quick lunch or a healthy snack, this recipe has you covered.

  • Bay Shrimp Salad Recipe: A Light and Flavorful Delight

    Bay Shrimp Salad Recipe: A Light and Flavorful Delight

    Let’s dive into a dish that’s as refreshing as a sea breeze on a hot summer day. This bay shrimp salad is not only packed with flavor but also comes together in no time, making it the perfect quick lunch or elegant appetizer.

    Why This Recipe Works

    • The combination of fresh bay shrimp and crisp vegetables offers a delightful contrast in textures.
    • A zesty lemon dressing brightens up the dish, enhancing the natural sweetness of the shrimp.
    • It’s incredibly versatile, allowing for numerous variations to suit any taste or dietary preference.
    • Quick and easy to prepare, this salad is perfect for busy weeknights or last-minute gatherings.
    • Light yet satisfying, it’s a great option for those looking for a healthy meal without sacrificing flavor.

    Ingredients

    • 1 pound bay shrimp, cooked and peeled
    • 2 cups mixed greens, washed and dried
    • 1 cucumber, diced
    • 1 avocado, sliced
    • 1/4 cup red onion, thinly sliced
    • 2 tablespoons olive oil
    • 1 tablespoon lemon juice
    • Salt and pepper to taste

    Equipment Needed

    • Large mixing bowl
    • Small whisk or fork
    • Measuring cups and spoons
    • Chef’s knife
    • Cutting board

    Instructions

    Bay Shrimp Salad Recipe

    Prepare the Dressing

    In a small bowl, whisk together the olive oil and lemon juice until well combined. Season with salt and pepper to taste. This simple dressing will bring all the flavors of the salad together beautifully.

    Combine the Salad Ingredients

    In a large mixing bowl, gently toss the mixed greens, cucumber, avocado, and red onion. The key here is to be gentle to avoid bruising the greens or mashing the avocado.

    Add the Shrimp

    Add the bay shrimp to the bowl with the salad ingredients. The shrimp should be evenly distributed throughout the salad for the perfect bite every time.

    Dress the Salad

    Drizzle the dressing over the salad and toss lightly to coat. Be sure not to overdress the salad; you want just enough to enhance the flavors without overwhelming them.

    Serve Immediately

    This salad is best enjoyed fresh, so serve it right away. If you need to prepare it in advance, keep the dressing separate until just before serving to maintain the crispness of the vegetables.

    Tips and Tricks

    For an extra burst of flavor, consider adding a pinch of garlic powder or a dash of hot sauce to the dressing. If you’re not a fan of red onion, green onions make a great substitute with a milder flavor. To make this salad more filling, add a handful of quinoa or chickpeas. Always use the freshest ingredients possible for the best taste and texture. Lastly, if you’re serving this salad at a gathering, consider presenting it in a large, clear bowl to showcase the vibrant colors.

    Recipe Variations

    • For a Mediterranean twist, add feta cheese, olives, and a sprinkle of oregano.
    • Turn it into a taco salad by serving it in a crispy tortilla bowl with a dollop of sour cream.
    • Make it a citrus delight by adding segments of orange or grapefruit for a sweet and tangy flavor.
    • For a low-carb option, replace the mixed greens with spiralized zucchini or cucumber noodles.
    • Add a crunchy element with toasted almonds or walnuts for extra texture and a nutty flavor.

    Frequently Asked Questions

    Can I use frozen shrimp for this recipe?

    Absolutely! Just make sure to thaw the shrimp completely and pat them dry before adding to the salad to prevent any excess moisture from diluting the dressing.

    How long can I store this salad in the fridge?

    This salad is best enjoyed the day it’s made, but you can store it in an airtight container in the fridge for up to one day. Keep the dressing separate if possible to maintain freshness.

    Can I make this salad vegan?

    Yes! Simply omit the shrimp and add more vegetables or a plant-based protein like tofu or tempeh. The dressing is already vegan-friendly.

    Summary

    This bay shrimp salad is a light, flavorful, and versatile dish that’s perfect for any occasion. With its simple ingredients and easy preparation, it’s sure to become a favorite in your recipe collection.

  • Warm Spinach Salad with Bacon Dressing: A Flavor Bomb You Can’t Resist

    Warm Spinach Salad with Bacon Dressing: A Flavor Bomb You Can’t Resist

    Very few salads can boast the perfect balance of warmth, crispiness, and a smoky dressing like this one. It’s a dish that turns the humble spinach into a star, with bacon playing the perfect supporting role. Let’s dive into making this unforgettable salad.

    Why This Recipe Works

    • The warmth of the salad gently wilts the spinach, making it more palatable and flavorful.
    • Bacon dressing adds a smoky, savory depth that’s irresistible.
    • It’s a versatile dish that can serve as a side or a main with a few additions.
    • Quick to prepare, it’s perfect for weeknight dinners or impressing guests.
    • The combination of textures from crispy bacon to soft spinach is divine.

    Ingredients

    • 6 cups fresh spinach, washed and dried
    • 6 slices bacon, chopped
    • 1/4 cup red onion, thinly sliced
    • 2 tbsp apple cider vinegar
    • 1 tbsp honey
    • 1 tsp Dijon mustard
    • Salt and pepper to taste
    • 2 eggs, hard-boiled and sliced (optional)

    Equipment Needed

    • Large skillet
    • Mixing bowl
    • Whisk
    • Measuring spoons and cups
    • Knife and cutting board

    Instructions

    Recipe For Warm Spinach Salad With Bacon Dressing

    Step 1: Cook the Bacon

    In a large skillet over medium heat, cook the chopped bacon until it’s crispy and golden brown, about 8-10 minutes. Use a slotted spoon to transfer the bacon to a paper towel-lined plate, leaving the drippings in the skillet. Tip: Save a bit of bacon for garnishing at the end for an extra crunch.

    Step 2: Prepare the Dressing

    To the bacon drippings in the skillet, add the red onion and sauté for about 2 minutes until softened. Whisk in the apple cider vinegar, honey, and Dijon mustard, scraping up any browned bits from the bottom of the pan. Season with salt and pepper to taste. Tip: The dressing should be slightly tangy and sweet; adjust the honey or vinegar to your liking.

    Step 3: Combine Salad and Dressing

    Place the spinach in a large mixing bowl. Pour the warm dressing over the spinach and toss gently until the spinach is evenly coated and begins to wilt slightly. Tip: For the best texture, add the dressing while it’s still warm but not scalding hot.

    Step 4: Add the Bacon

    Sprinkle the cooked bacon over the dressed spinach and toss lightly to combine. The heat from the dressing and bacon will continue to wilt the spinach slightly, creating a perfect texture.

    Step 5: Serve Immediately

    Divide the salad among plates. If using, top with sliced hard-boiled eggs for extra protein. Serve immediately while the salad is still warm for the best flavor and texture.

    Tips and Tricks

    For those looking to elevate their warm spinach salad with bacon dressing, consider these advanced tips. First, try using thick-cut bacon for a meatier texture and richer flavor. Second, for a more complex dressing, add a pinch of smoked paprika or a splash of bourbon to the skillet when preparing the dressing. Third, if you’re serving this salad as a main, consider adding grilled chicken or shrimp for extra protein. Lastly, for a vegetarian version, substitute the bacon with smoked almonds or tempeh bacon, and use olive oil in place of bacon drippings for the dressing.

    Recipe Variations

    • Add sliced mushrooms or cherry tomatoes for extra veggies.
    • Swap spinach with kale or arugula for a different green base.
    • Include crumbled blue cheese or goat cheese for a creamy element.
    • Top with toasted nuts or seeds for added crunch.
    • Use balsamic vinegar instead of apple cider vinegar for a deeper flavor.

    Frequently Asked Questions

    Can I make this salad ahead of time?

    While you can prep the ingredients ahead, it’s best assembled just before serving to prevent the spinach from wilting too much. The dressing can be made in advance and reheated gently before tossing with the spinach.

    Is there a substitute for bacon drippings?

    If you’re looking for a lighter version, olive oil or butter can be used in place of bacon drippings, though the flavor profile will change slightly.

    Can I use frozen spinach?

    Fresh spinach is recommended for its texture and flavor, but if you must use frozen, ensure it’s thoroughly drained and squeezed dry to prevent a watery salad.

    Summary

    This warm spinach salad with bacon dressing is a delightful mix of flavors and textures, perfect for any occasion. Quick to make and endlessly customizable, it’s sure to become a favorite.

  • Breaded Chicken Salad Recipe: A Crunchy Twist on a Classic

    Breaded Chicken Salad Recipe: A Crunchy Twist on a Classic

    Some salads are just too boring, but not this one. Our breaded chicken salad brings the crunch and the flavor, making it a meal you’ll actually look forward to eating. Let’s dive into how to make this delicious dish that’s perfect for any day of the week.

    Why This Recipe Works

    • The combination of crispy breaded chicken with fresh greens creates a perfect texture contrast.
    • It’s a versatile recipe that can be customized with your favorite salad toppings.
    • The homemade breading adds a depth of flavor that store-bought can’t match.
    • It’s a balanced meal with protein, veggies, and carbs all in one bowl.
    • Perfect for meal prep, as the chicken stays crispy when stored properly.

    Ingredients

    • 2 boneless, skinless chicken breasts, cut into strips
    • 1 cup all-purpose flour
    • 2 eggs, beaten
    • 1 cup breadcrumbs
    • 1 tsp garlic powder
    • 1 tsp paprika
    • Salt and pepper to taste
    • 4 cups mixed salad greens
    • 1 cup cherry tomatoes, halved
    • 1/2 cucumber, sliced
    • 1/4 cup red onion, thinly sliced
    • Your favorite salad dressing

    Equipment Needed

    • Mixing bowls
    • Shallow dishes for breading
    • Baking sheet
    • Parchment paper
    • Meat thermometer

    Instructions

    Breaded Chicken Salad Recipe

    Step 1: Prep Your Chicken

    Start by preheating your oven to 375°F and lining a baking sheet with parchment paper. Season your chicken strips with salt, pepper, garlic powder, and paprika. This ensures every bite is packed with flavor. Tip: Let the chicken sit with the seasonings for at least 10 minutes to enhance the taste.

    Step 2: Bread the Chicken

    Set up your breading station with three shallow dishes: one with flour, one with beaten eggs, and one with breadcrumbs. Dredge each chicken strip in flour, dip in egg, then coat with breadcrumbs. Place on the prepared baking sheet. Tip: For extra crunch, press the breadcrumbs firmly onto the chicken.

    Step 3: Bake to Perfection

    Bake the chicken for 20-25 minutes, or until the internal temperature reaches 165°F and the coating is golden brown. No flipping required! This method ensures even cooking and maximum crispiness.

    Step 4: Assemble Your Salad

    While the chicken bakes, toss your salad greens, cherry tomatoes, cucumber, and red onion in a large bowl. Tip: For a more vibrant salad, add a handful of colorful veggies like bell peppers or carrots.

    Step 5: Serve and Enjoy

    Once the chicken is done, let it cool for a few minutes before slicing. Top your salad with the breaded chicken strips and drizzle with your favorite dressing. Serve immediately for the best texture contrast.

    Tips and Tricks

    For those looking to elevate their breaded chicken salad, consider these advanced tips. First, marinate the chicken in buttermilk for a few hours before breading to ensure it’s juicy and tender. Second, experiment with different breadcrumb mixtures, like adding grated Parmesan or herbs for extra flavor. Third, if you’re short on time, air fry the chicken for a quicker, equally crispy result. Lastly, for a gluten-free version, use almond flour and gluten-free breadcrumbs. These small tweaks can make a big difference in the final dish.

    Recipe Variations

    • Swap the chicken for shrimp or tofu for a different protein option.
    • Add fruits like apples or strawberries for a sweet and savory twist.
    • Use different greens like kale or spinach for varied textures and nutrients.
    • Try a spicy breading by adding cayenne pepper or chili flakes to the mix.
    • For a low-carb version, skip the breadcrumbs and use crushed pork rinds or almond flour instead.

    Frequently Asked Questions

    Can I make this recipe ahead of time?

    Absolutely! You can bread the chicken and store it in the fridge for up to 24 hours before baking. Just make sure to let it sit at room temperature for about 10 minutes before cooking to ensure even baking.

    How do I keep the breading from falling off?

    The key is in the breading process. Make sure to shake off excess flour before dipping in egg, and press the breadcrumbs firmly onto the chicken. Also, avoid moving the chicken too much while baking.

    Can I fry the chicken instead of baking?

    Yes, you can pan-fry or deep-fry the chicken for a different texture. Just be mindful of the oil temperature to prevent the breading from burning before the chicken cooks through.

    Summary

    This breaded chicken salad recipe is a delightful mix of textures and flavors, perfect for a satisfying meal. With crispy chicken, fresh veggies, and endless customization options, it’s a dish that never gets old. Give it a try and enjoy the crunch!

  • Tuna Salad Recipe with Cottage Cheese: A Creamy Twist on a Classic

    Tuna Salad Recipe with Cottage Cheese: A Creamy Twist on a Classic

    Today, we’re diving into a refreshing take on the traditional tuna salad by introducing cottage cheese into the mix. This recipe is not only easy to whip up but also packs a protein punch that’ll keep you satisfied for hours. Let’s get started!

    Why This Recipe Works

    • Cottage cheese adds a creamy texture and boosts the protein content, making this salad more filling.
    • The combination of crunchy vegetables and smooth cottage cheese creates a delightful contrast in every bite.
    • It’s versatile! Enjoy it as a sandwich filler, on crackers, or straight out of the bowl.
    • This recipe is quick to prepare, perfect for those busy days when you need a nutritious meal in a pinch.
    • It’s customizable with your favorite add-ins, making it a recipe you’ll come back to again and again.

    Ingredients

    • 2 cans (5 oz each) tuna in water, drained
    • 1 cup cottage cheese
    • 1/2 cup diced celery
    • 1/4 cup diced red onion
    • 1 tbsp lemon juice
    • 1/2 tsp salt
    • 1/4 tsp black pepper
    • 1/4 cup chopped fresh dill

    Equipment Needed

    • Mixing bowl
    • Measuring cups and spoons
    • Knife and cutting board
    • Can opener

    Instructions

    Tuna Salad Recipe With Cottage Cheese

    Step 1: Prepare Your Ingredients

    Start by draining the tuna well to remove any excess water. This ensures your salad isn’t watery. Dice the celery and red onion into small, uniform pieces for even distribution throughout the salad. If you’re not a fan of raw onion’s bite, you can soak the diced onion in cold water for 10 minutes to mellow the flavor.

    Step 2: Combine the Base Ingredients

    In a large mixing bowl, flake the drained tuna with a fork. Add the cottage cheese, diced celery, and red onion. The cottage cheese should be at room temperature to mix more easily. Stir gently to combine, ensuring you don’t mash the cottage cheese too much unless you prefer a smoother texture.

    Step 3: Season the Salad

    Add the lemon juice, salt, and black pepper to the bowl. The lemon juice not only adds a fresh zing but also helps to brighten the flavors of the other ingredients. Taste as you go and adjust the seasoning to your preference. Remember, you can always add more, but you can’t take it away!

    Step 4: Add the Fresh Herbs

    Fold in the chopped fresh dill. Dill pairs wonderfully with tuna and cottage cheese, offering a burst of freshness. If you’re not a dill fan, parsley or chives make great substitutes. This is also the time to add any other extras you like, such as capers or diced pickles, for an extra flavor dimension.

    Step 5: Chill and Serve

    For the best flavor, cover the bowl and refrigerate the salad for at least 30 minutes before serving. This allows the flavors to meld together beautifully. Serve chilled on your choice of bread, crackers, or over a bed of greens for a low-carb option.

    Tips and Tricks

    For a smoother texture, you can blend the cottage cheese before adding it to the salad. This is especially helpful if you’re serving it to kids or prefer a less chunky consistency. If you’re watching your sodium intake, opt for low-sodium tuna and cottage cheese. To add a bit of crunch, consider tossing in some sunflower seeds or chopped almonds. For a dairy-free version, substitute the cottage cheese with mashed avocado or a dairy-free yogurt alternative. Always taste and adjust the seasoning after chilling, as flavors can dull in the fridge.

    Recipe Variations

    • Spicy Tuna Salad: Add a diced jalapeño or a dash of hot sauce for some heat.
    • Mediterranean Twist: Incorporate chopped olives, sun-dried tomatoes, and a sprinkle of feta cheese.
    • Avocado Tuna Salad: Replace cottage cheese with mashed avocado for a creamy, healthy fat boost.
    • Egg and Tuna Salad: Hard-boiled eggs add extra protein and a different texture.
    • Curried Tuna Salad: A teaspoon of curry powder can transform the flavor profile entirely.

    Frequently Asked Questions

    Can I use Greek yogurt instead of cottage cheese?

    Absolutely! Greek yogurt is a great substitute for cottage cheese if you’re looking for a similar texture with a tangier flavor. Just be mindful of the consistency; you might need to adjust the amount to achieve the desired creaminess.

    How long can I store this tuna salad?

    This tuna salad can be stored in an airtight container in the refrigerator for up to 3 days. However, it’s best enjoyed within the first 24 hours when the textures are at their peak.

    Can I make this recipe ahead of time?

    Yes, this recipe is perfect for meal prep. Just hold off on adding the fresh herbs until you’re ready to serve to maintain their brightness and color.

    Summary

    This tuna salad with cottage cheese is a creamy, protein-packed twist on the classic. It’s easy to make, customizable, and perfect for a quick lunch or snack. Give it a try and see how it becomes a staple in your recipe rotation!

  • Corn Pasta Salad Recipe: A Summer Delight

    Corn Pasta Salad Recipe: A Summer Delight

    Summer is the perfect time to whip up this refreshing corn pasta salad. Packed with flavors and easy to make, it’s a crowd-pleaser that’ll have everyone asking for seconds.

    Why This Recipe Works

    • The sweetness of the corn pairs perfectly with the tangy dressing, creating a balanced flavor profile.
    • It’s versatile; serve it as a side or add protein to make it a main dish.
    • The recipe is quick and easy, requiring minimal cooking and prep time.
    • It’s a great way to use seasonal produce, making it fresh and flavorful.
    • The pasta salad can be made ahead, allowing flavors to meld together beautifully.

    Ingredients

    • 8 oz pasta (any shape you like)
    • 2 cups fresh corn kernels (about 3 ears)
    • 1/2 cup mayonnaise
    • 2 tbsp apple cider vinegar
    • 1 tsp sugar
    • 1/2 tsp salt
    • 1/4 tsp black pepper
    • 1/2 cup diced red bell pepper
    • 1/4 cup chopped fresh basil

    Equipment Needed

    • Large pot
    • Colander
    • Mixing bowls
    • Whisk
    • Knife and cutting board

    Instructions

    Corn Pasta Salad Recipe

    Step 1: Cook the Pasta

    Bring a large pot of salted water to a boil. Add the pasta and cook according to package instructions until al dente, about 8-10 minutes. Drain the pasta in a colander and rinse under cold water to stop the cooking process. Tip: Salting the water enhances the pasta’s flavor.

    Step 2: Prepare the Corn

    While the pasta cooks, heat a skillet over medium heat. Add the corn kernels and cook, stirring occasionally, until slightly charred, about 5 minutes. This adds a smoky flavor to the salad. Let the corn cool slightly before adding it to the salad.

    Step 3: Make the Dressing

    In a small bowl, whisk together the mayonnaise, apple cider vinegar, sugar, salt, and black pepper until smooth. This dressing is the secret to the salad’s tangy and sweet flavor profile.

    Step 4: Combine Ingredients

    In a large mixing bowl, combine the cooled pasta, charred corn, diced red bell pepper, and chopped basil. Pour the dressing over the salad and toss gently to coat all the ingredients evenly. Tip: Letting the salad chill for an hour before serving enhances the flavors.

    Step 5: Serve and Enjoy

    Transfer the salad to a serving dish. You can serve it immediately or refrigerate it for later. This salad is perfect for picnics, potlucks, or a quick weekday meal.

    Tips and Tricks

    For an extra crunch, add some diced celery or cucumber to the salad. If you’re short on time, you can use frozen corn instead of fresh; just make sure to thaw and drain it well before using. To make the salad healthier, substitute Greek yogurt for half of the mayonnaise. For a spicy kick, add a pinch of cayenne pepper or some diced jalapeños to the dressing. Always taste and adjust the seasoning before serving, as flavors can vary based on the ingredients used.

    Recipe Variations

    • Add grilled chicken or shrimp for a protein-packed meal.
    • Swap the mayonnaise for a vinaigrette for a lighter version.
    • Include other vegetables like cherry tomatoes or avocado for added color and nutrition.
    • Use whole wheat or gluten-free pasta to cater to dietary needs.
    • Add cheese like feta or cheddar for a creamy texture.

    Frequently Asked Questions

    Can I make this salad ahead of time? Absolutely! This salad actually tastes better after it’s been chilled for a few hours, making it perfect for meal prep or parties.

    How long does it last in the fridge? Stored in an airtight container, the salad will keep for up to 3 days. Just give it a good stir before serving.

    Can I use canned corn? Yes, but fresh or frozen corn will give you the best flavor and texture. If using canned, make sure to drain and rinse it well.

    Summary

    This corn pasta salad is a refreshing, easy-to-make dish that’s perfect for summer gatherings. With its sweet and tangy flavors, it’s sure to be a hit.

  • Italian Salad Dressing Recipe Mix: A Zesty Twist on a Classic

    Italian Salad Dressing Recipe Mix: A Zesty Twist on a Classic

    Now, let’s dive into the world of homemade Italian salad dressing. Nothing beats the fresh, vibrant flavors of a dressing made from scratch, and this recipe is your ticket to elevating any salad from mundane to magnificent.

    Why This Recipe Works

    • It combines the perfect balance of tangy, sweet, and savory flavors for a dressing that’s anything but boring.
    • Using fresh herbs and high-quality olive oil ensures a depth of flavor that store-bought versions can’t match.
    • It’s incredibly versatile, doubling as a marinade for meats or a drizzle for roasted vegetables.
    • The recipe is quick and easy, requiring just a few minutes and simple ingredients you likely already have.
    • Customizable to taste, allowing you to adjust the acidity, sweetness, or herbiness to your preference.

    Ingredients

    • 1/2 cup extra virgin olive oil
    • 1/4 cup red wine vinegar
    • 1 tablespoon lemon juice, freshly squeezed
    • 1 teaspoon honey
    • 1 teaspoon Dijon mustard
    • 1 clove garlic, minced
    • 1/2 teaspoon dried oregano
    • 1/2 teaspoon dried basil
    • 1/4 teaspoon dried thyme
    • 1/4 teaspoon red pepper flakes (optional)
    • Salt and freshly ground black pepper to taste

    Equipment Needed

    • Measuring cups and spoons
    • A small mixing bowl
    • A whisk or fork for mixing
    • A jar with a tight-fitting lid for storage

    Instructions

    Italian Salad Dressing Recipe Mix

    Step 1: Combine the Wet Ingredients

    In your small mixing bowl, whisk together the red wine vinegar, lemon juice, honey, and Dijon mustard until the honey is fully dissolved. This creates the base of your dressing, ensuring a smooth, emulsified final product. Tip: If your honey is too thick, warm it slightly to make mixing easier.

    Step 2: Add the Aromatics and Herbs

    Stir in the minced garlic, dried oregano, dried basil, dried thyme, and red pepper flakes if using. These ingredients infuse the dressing with its signature Italian flavor profile. Tip: For a fresher taste, you can substitute dried herbs with fresh ones, just triple the amount.

    Step 3: Slowly Incorporate the Olive Oil

    Gradually whisk in the extra virgin olive oil until the dressing is well combined and slightly thickened. This method helps to emulsify the dressing, preventing separation. Tip: For an even smoother dressing, you can blend all the ingredients together in a blender for a few seconds.

    Step 4: Season to Taste

    Add salt and freshly ground black pepper to your liking. Remember, the flavors will meld and intensify as the dressing sits, so it’s okay if it tastes a bit mild at this stage.

    Step 5: Store and Serve

    Transfer the dressing to a jar with a tight-fitting lid and refrigerate for at least 30 minutes before serving to allow the flavors to meld. Shake well before each use. Tip: This dressing can be stored in the refrigerator for up to a week.

    Tips and Tricks

    For those looking to take their Italian salad dressing to the next level, consider these advanced tips. First, toasting the dried herbs lightly in a dry skillet before adding them to the dressing can unlock deeper flavors. Second, using a high-quality, fruity olive oil can dramatically enhance the taste of your dressing. Third, if you prefer a creamier dressing, adding a teaspoon of mayonnaise can give it a richer texture without overpowering the other flavors. Lastly, for a more complex acidity, mix different types of vinegar, such as balsamic with the red wine vinegar.

    Recipe Variations

    • Creamy Italian Dressing: Add 1/4 cup of mayonnaise or Greek yogurt to the mix for a creamier version.
    • Spicy Italian Dressing: Increase the red pepper flakes to 1/2 teaspoon or add a dash of hot sauce for extra heat.
    • Herb-Infused Italian Dressing: Use fresh herbs instead of dried, and consider adding rosemary or parsley for additional layers of flavor.
    • Sweet Italian Dressing: Double the honey or add a tablespoon of maple syrup for a sweeter profile.
    • Garlic Lover’s Italian Dressing: Increase the garlic to 2 or 3 cloves for a more pronounced garlic flavor.

    Frequently Asked Questions

    Can I make this dressing without honey?

    Absolutely! If you’re avoiding honey, you can substitute it with maple syrup, agave nectar, or even sugar dissolved in a bit of warm water. The key is to balance the acidity of the vinegar with a touch of sweetness, so feel free to adjust to your taste.

    How long does homemade Italian dressing last?

    When stored properly in an airtight container in the refrigerator, this dressing can last up to a week. The olive oil may solidify slightly when chilled, but simply let it sit at room temperature for a few minutes and give it a good shake before using.

    Can I use fresh herbs instead of dried?

    Yes, fresh herbs can be used in place of dried. Since fresh herbs are less concentrated, you’ll need to use about three times the amount called for in the recipe. This swap will give your dressing a brighter, more vibrant flavor profile.

    Summary

    This homemade Italian salad dressing recipe mix is a game-changer for anyone looking to add a burst of flavor to their salads. With its perfect balance of tangy, sweet, and savory notes, it’s sure to become a staple in your kitchen. Plus, it’s incredibly versatile, easy to make, and customizable to suit any taste preference.

  • Polish Potato Salad: A Creamy Dreamy Side Dish

    Polish Potato Salad: A Creamy Dreamy Side Dish

    Ready to dive into a bowl of comfort? This Polish Potato Salad is the creamy, dreamy side dish that’ll steal the show at any gathering. Rich, tangy, and packed with textures, it’s a recipe passed down through generations, now shared with you.

    Why This Recipe Works

    • The combination of creamy mayo and tangy mustard creates a balanced dressing that coats every ingredient perfectly.
    • Boiling the potatoes just right ensures they’re tender but not mushy, holding their shape in the salad.
    • Adding pickles and onions introduces a crunch and a bite that contrasts beautifully with the soft potatoes.
    • It’s a make-ahead dish that tastes even better the next day, as the flavors meld together.

    Ingredients

    • 2 pounds of potatoes, peeled and cubed
    • 1 cup mayonnaise
    • 2 tablespoons mustard
    • 1/2 cup pickles, diced
    • 1/4 cup onion, finely chopped
    • Salt and pepper to taste

    Equipment Needed

    • Large pot
    • Mixing bowl
    • Knife
    • Cutting board
    • Measuring cups and spoons

    Instructions

    Recipe For Polish Potato Salad

    Step 1: Boil the Potatoes

    Fill a large pot with water and bring it to a boil. Add the peeled and cubed potatoes, cooking them for about 15 minutes or until they’re fork-tender but not falling apart. Drain them well and let them cool slightly. Tip: Start checking the potatoes at the 12-minute mark to avoid overcooking.

    Step 2: Prepare the Dressing

    In a mixing bowl, whisk together the mayonnaise and mustard until smooth. This will be the base of your dressing, so make sure it’s well combined. The mustard adds a nice tang that cuts through the richness of the mayo.

    Step 3: Combine the Ingredients

    Add the slightly cooled potatoes to the dressing, along with the diced pickles and chopped onions. Gently fold everything together to ensure the potatoes don’t break apart. Season with salt and pepper to taste. Tip: Letting the salad sit for an hour before serving allows the flavors to meld.

    Step 4: Chill and Serve

    Cover the salad and refrigerate for at least an hour before serving. This chilling time helps the flavors to develop and the salad to set. Serve chilled for the best taste and texture.

    Tips and Tricks

    For an extra layer of flavor, consider adding a teaspoon of pickle juice to the dressing. It enhances the tanginess without overpowering the other ingredients. If you’re short on time, you can serve the salad immediately, but the flavors won’t be as developed. For a lighter version, substitute half of the mayonnaise with Greek yogurt. Always taste and adjust the seasoning before serving, as potatoes can absorb a lot of salt.

    Recipe Variations

    • Add hard-boiled eggs for a protein boost and extra creaminess.
    • Mix in some diced apples for a sweet crunch that contrasts with the savory elements.
    • For a smoky flavor, include some diced cooked bacon.
    • Swap the mustard for horseradish for a spicier kick.
    • Use sweet potatoes instead of regular potatoes for a different flavor profile and a boost of vitamins.

    Frequently Asked Questions

    Can I make this salad vegan?

    Absolutely! Just swap the mayonnaise for a vegan alternative and ensure your mustard is vegan-friendly. The rest of the ingredients are naturally plant-based, making it an easy adjustment.

    How long does this salad last in the fridge?

    Stored in an airtight container, this salad will keep for up to 3 days. The flavors continue to develop, making it even more delicious on the second day.

    Can I freeze Polish Potato Salad?

    Freezing is not recommended, as the mayonnaise can separate and the potatoes may become watery upon thawing, affecting the texture and taste.

    Summary

    This Polish Potato Salad is a creamy, tangy, and crunchy side dish that’s perfect for any occasion. Easy to make and even better the next day, it’s a crowd-pleaser that’ll have everyone asking for seconds.

  • Old Fashioned Egg Salad Recipe: A Classic Comfort Food

    Old Fashioned Egg Salad Recipe: A Classic Comfort Food

    Kickstart your culinary journey with this timeless old fashioned egg salad recipe that promises to deliver comfort in every bite. Perfect for sandwiches, wraps, or a standalone dish, this recipe is a testament to simplicity and flavor.

    Why This Recipe Works

    • The combination of creamy mayonnaise and tangy mustard creates a perfect balance of flavors.
    • Freshly chopped celery and onions add a delightful crunch and freshness.
    • Hard-boiled eggs are the star, providing a rich and satisfying texture.
    • Simple seasoning with salt and pepper enhances the natural flavors without overpowering them.
    • This recipe is versatile, allowing for easy customization based on personal preferences.

    Ingredients

    • 6 large eggs
    • 1/4 cup mayonnaise
    • 1 tablespoon yellow mustard
    • 1/4 cup finely chopped celery
    • 2 tablespoons finely chopped onion
    • Salt and pepper to taste

    Equipment Needed

    • Medium saucepan
    • Mixing bowl
    • Knife
    • Cutting board
    • Measuring cups and spoons

    Instructions

    Old Fashioned Egg Salad Recipe

    Step 1: Boil the Eggs

    Place the eggs in a medium saucepan and cover with water by about an inch. Bring to a boil over high heat, then cover and remove from heat. Let sit for 12 minutes for perfectly hard-boiled eggs. Tip: Adding a pinch of salt to the water can make peeling easier.

    Step 2: Cool and Peel the Eggs

    After boiling, transfer the eggs to a bowl of ice water to cool for about 5 minutes. Peel the eggs under running water to help remove the shells smoothly. Tip: Older eggs peel more easily than fresh ones.

    Step 3: Chop the Eggs

    Once peeled, chop the eggs into small, even pieces. You can use an egg slicer for uniformity or a knife for a more rustic texture. The size of the chop affects the salad’s texture, so choose based on your preference.

    Step 4: Mix the Ingredients

    In a mixing bowl, combine the chopped eggs with mayonnaise, mustard, celery, and onion. Stir gently until all ingredients are well incorporated. Season with salt and pepper to taste. Tip: For a creamier texture, mash some of the egg yolks before mixing.

    Step 5: Chill and Serve

    Cover the bowl and refrigerate the egg salad for at least 30 minutes to allow the flavors to meld. Serve chilled on bread, crackers, or lettuce leaves for a refreshing meal.

    Tips and Tricks

    For those looking to elevate their egg salad, consider these advanced tips. First, experiment with different types of mustard, such as Dijon or whole grain, for a unique flavor profile. Second, adding a dash of paprika or curry powder can introduce a subtle warmth and complexity. Lastly, for a healthier version, substitute Greek yogurt for half of the mayonnaise to reduce calories while maintaining creaminess.

    Recipe Variations

    • Add diced pickles or relish for a tangy twist.
    • Incorporate crispy bacon bits for a smoky flavor and extra crunch.
    • Mix in avocado for a creamy, healthy fat addition.
    • Use fresh herbs like dill or chives for a burst of freshness.
    • For a spicy kick, add a few drops of hot sauce or diced jalapeños.

    Frequently Asked Questions

    Can I make egg salad ahead of time?

    Absolutely! Egg salad can be made up to 2 days in advance. Just be sure to store it in an airtight container in the refrigerator. The flavors actually improve over time, making it a great make-ahead option for meals.

    How long does egg salad last in the fridge?

    Properly stored in an airtight container, egg salad will last for 3 to 5 days in the refrigerator. Always check for any off smells or flavors before consuming to ensure freshness.

    Can I freeze egg salad?

    Freezing egg salad is not recommended as the texture of the eggs and mayonnaise can become grainy and separated upon thawing, resulting in a less than desirable consistency.

    Summary

    This old fashioned egg salad recipe is a classic dish that’s both simple to make and delicious. With its creamy texture, crunchy vegetables, and rich flavor, it’s perfect for any occasion. Whether you stick to the traditional recipe or experiment with variations, it’s sure to become a favorite.

  • Mexican Street Corn Salad Recipe: A Fiesta in Every Bite

    Mexican Street Corn Salad Recipe: A Fiesta in Every Bite

    Craving something that packs a punch of flavor and brings the vibrant streets of Mexico to your kitchen? This Mexican Street Corn Salad is your ticket to a culinary adventure, combining smoky, sweet, and tangy flavors in every forkful.

    Why This Recipe Works

    • It’s a perfect balance of smoky grilled corn, creamy mayo, tangy lime, and spicy chili powder.
    • Great for meal prep, as it tastes even better the next day.
    • Versatile enough to serve as a side, salad, or even a dip.
    • Quick and easy to make, with minimal cooking required.
    • Bursting with colors and textures that make it as visually appealing as it is delicious.

    Ingredients

    • 4 cups corn kernels (fresh or frozen)
    • 1/2 cup mayonnaise
    • 1/2 cup sour cream
    • 1/2 cup crumbled cotija cheese
    • 1/4 cup finely chopped cilantro
    • 2 tablespoons lime juice
    • 1 teaspoon chili powder
    • 1/2 teaspoon smoked paprika
    • Salt to taste

    Equipment Needed

    • Large mixing bowl
    • Grill or grill pan (for fresh corn)
    • Mixing spoon
    • Measuring cups and spoons

    Instructions

    Mexican Street Corn Salad Recipe

    Step 1: Grill the Corn

    If using fresh corn, preheat your grill to medium-high heat (about 400°F). Grill the corn, turning occasionally, until charred in spots, about 10 minutes. Let cool slightly before cutting the kernels off the cob.

    Step 2: Mix the Dressing

    In a large bowl, whisk together the mayonnaise, sour cream, lime juice, chili powder, and smoked paprika until smooth. This creamy dressing is the secret to the salad’s irresistible flavor.

    Step 3: Combine Ingredients

    Add the grilled corn kernels to the bowl with the dressing. Gently fold in the cotija cheese and chopped cilantro until everything is evenly coated. Season with salt to taste.

    Step 4: Chill Before Serving

    For the best flavor, cover the salad and refrigerate for at least 30 minutes before serving. This allows the flavors to meld together beautifully.

    Step 5: Garnish and Serve

    Just before serving, give the salad a quick stir and sprinkle with a little extra cotija cheese and chili powder for a pop of color and flavor.

    Tips and Tricks

    For an extra smoky flavor, try using smoked paprika instead of regular. If you’re short on time, frozen corn works just as well as fresh; just be sure to thaw and pat it dry before using. To make this salad spicier, add a diced jalapeño or a pinch of cayenne pepper to the dressing. For a lighter version, substitute Greek yogurt for the sour cream. Always taste and adjust the seasoning before serving, as the saltiness of cotija cheese can vary.

    Recipe Variations

    • Add diced avocado for a creamy texture and healthy fats.
    • Mix in black beans and diced tomatoes for a heartier salad.
    • Use queso fresco instead of cotija for a milder flavor.
    • Top with grilled shrimp or chicken to turn it into a main dish.
    • For a vegan version, use vegan mayo and omit the cheese or use a dairy-free alternative.

    Frequently Asked Questions

    Can I make this salad ahead of time?

    Absolutely! This salad actually tastes better after it’s had time to chill in the fridge, making it perfect for meal prep or parties. Just be sure to give it a good stir before serving to redistribute the dressing.

    What can I use instead of cotija cheese?

    If you can’t find cotija, feta cheese is a great substitute. It has a similar salty and tangy flavor that works well in this recipe.

    How long will this salad keep in the fridge?

    Stored in an airtight container, this salad will keep for up to 3 days in the refrigerator. The lime juice helps keep the flavors fresh and vibrant.

    Summary

    This Mexican Street Corn Salad is a vibrant, flavorful dish that’s perfect for any occasion. Easy to make and endlessly customizable, it’s sure to become a favorite in your recipe rotation.