Author: onlinefoodrecipes

  • Cranberry Jello Salad Recipe with Apples: A Festive Delight

    Cranberry Jello Salad Recipe with Apples: A Festive Delight

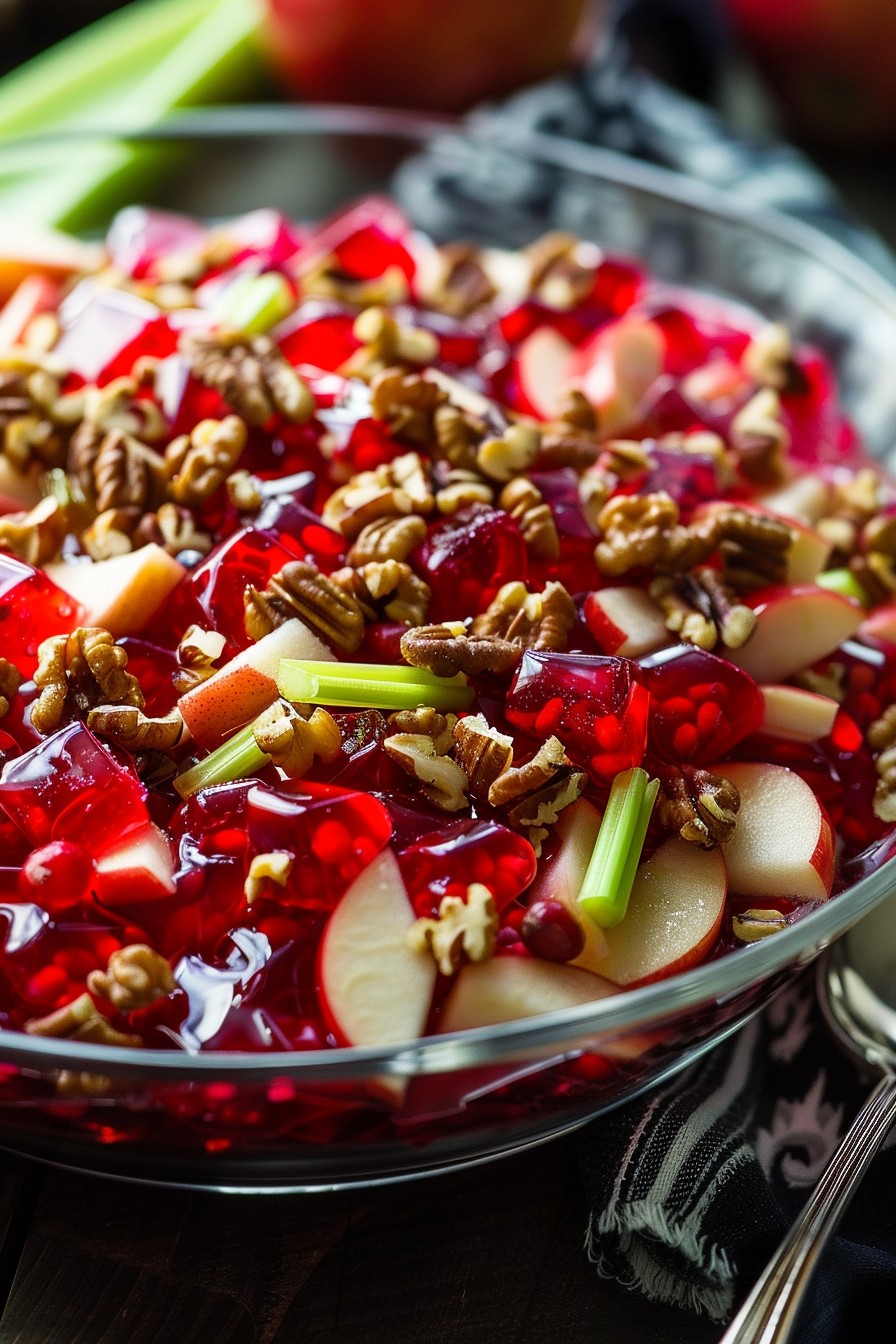
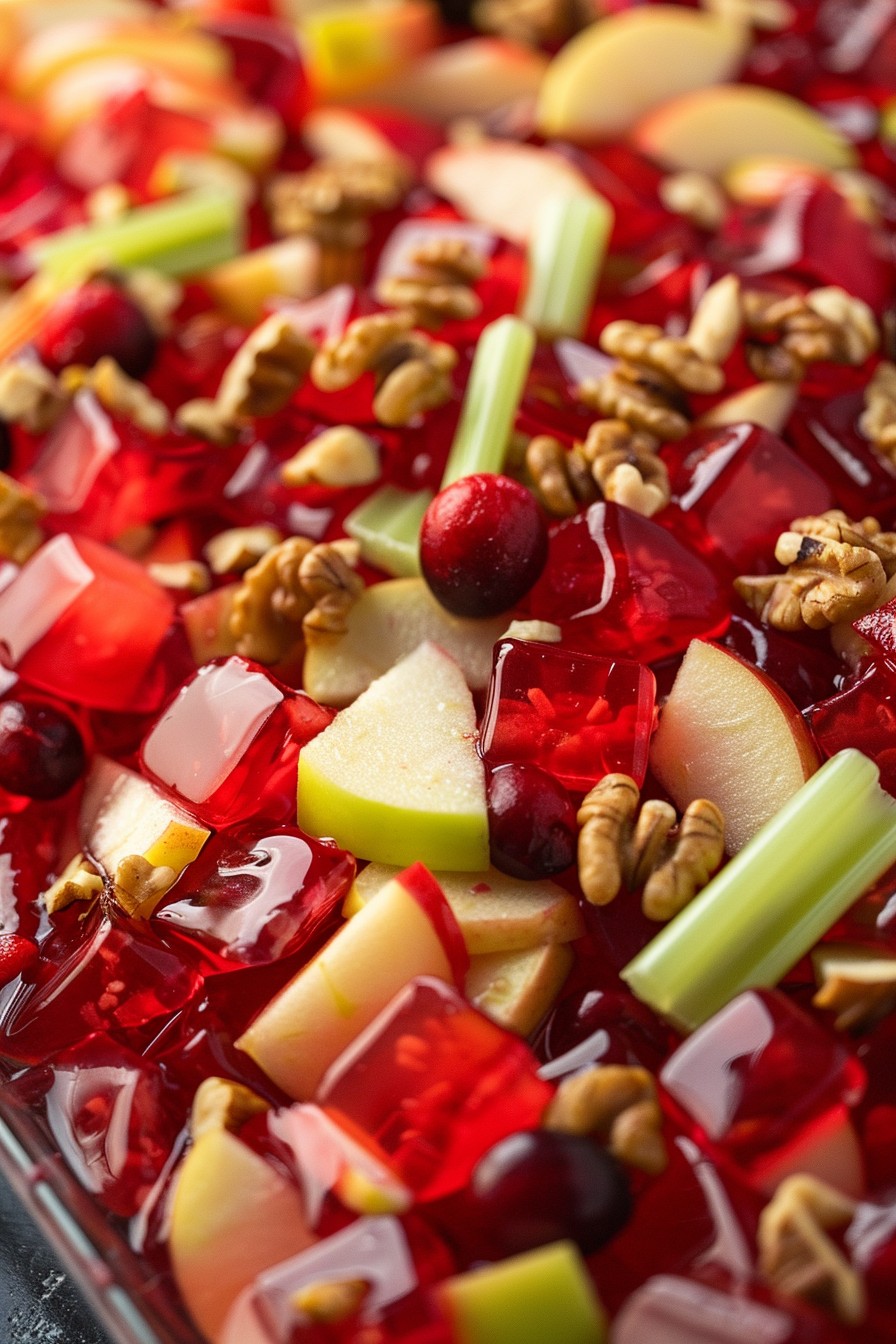
    Let’s dive into a recipe that’s as fun to make as it is to eat! This cranberry jello salad with apples is the perfect blend of sweet and tart, with a crunchy texture that’ll have everyone asking for seconds. It’s a festive dish that’s sure to brighten up any table.

    Why This Recipe Works

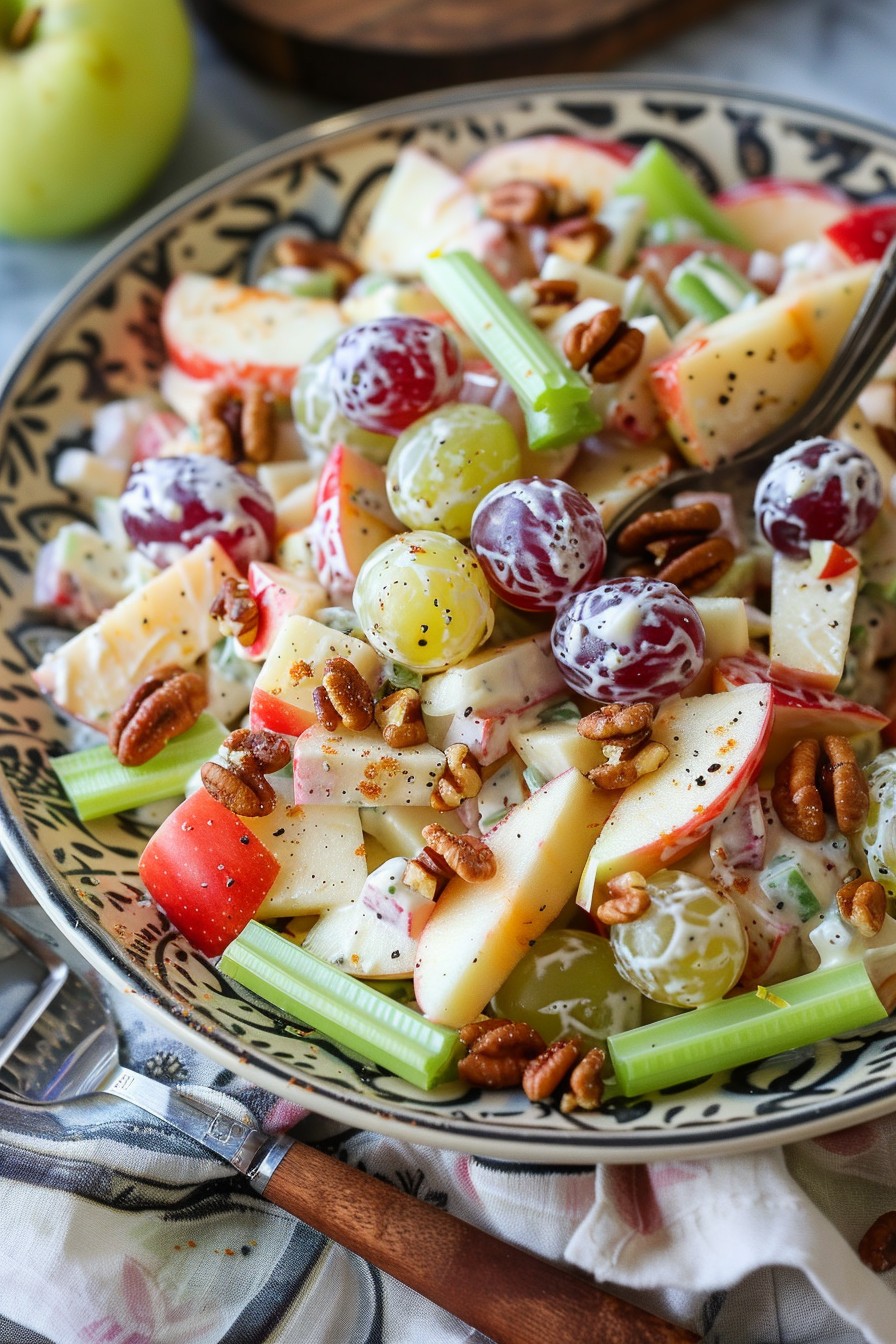
    • The combination of cranberry and apple offers a perfect balance of tart and sweet flavors.
    • Adding nuts provides a delightful crunch that contrasts beautifully with the smooth jello.
    • It’s a make-ahead dish, saving you time on the day of your event.
    • The vibrant red color makes it a showstopper on any holiday table.
    • It’s versatile, allowing for numerous variations to suit any taste.

    Ingredients

    • 2 cups cranberry juice
    • 1 cup sugar
    • 2 packages (3 oz each) raspberry jello
    • 2 cups boiling water
    • 1 cup cold water
    • 2 medium apples, diced
    • 1/2 cup chopped walnuts
    • 1/2 cup celery, finely chopped

    Equipment Needed

    • Large mixing bowl
    • Whisk
    • Measuring cups and spoons
    • Knife and cutting board
    • Jello mold or serving dish

    Instructions

    Cranberry Jello Salad Recipe With Apples

    Step 1: Dissolve the Jello

    In a large mixing bowl, combine the raspberry jello with 2 cups of boiling water. Whisk until the jello is completely dissolved. This ensures a smooth base for your salad. Tip: For a clearer jello, let the mixture sit for a minute after whisking to allow any bubbles to settle.

    Step 2: Add the Cranberry Juice and Sugar

    Stir in the cranberry juice and sugar until the sugar is fully dissolved. The cranberry juice adds a depth of flavor that’s unmatched. Then, add 1 cup of cold water to cool the mixture down before adding the other ingredients.

    Step 3: Incorporate the Fruits and Nuts

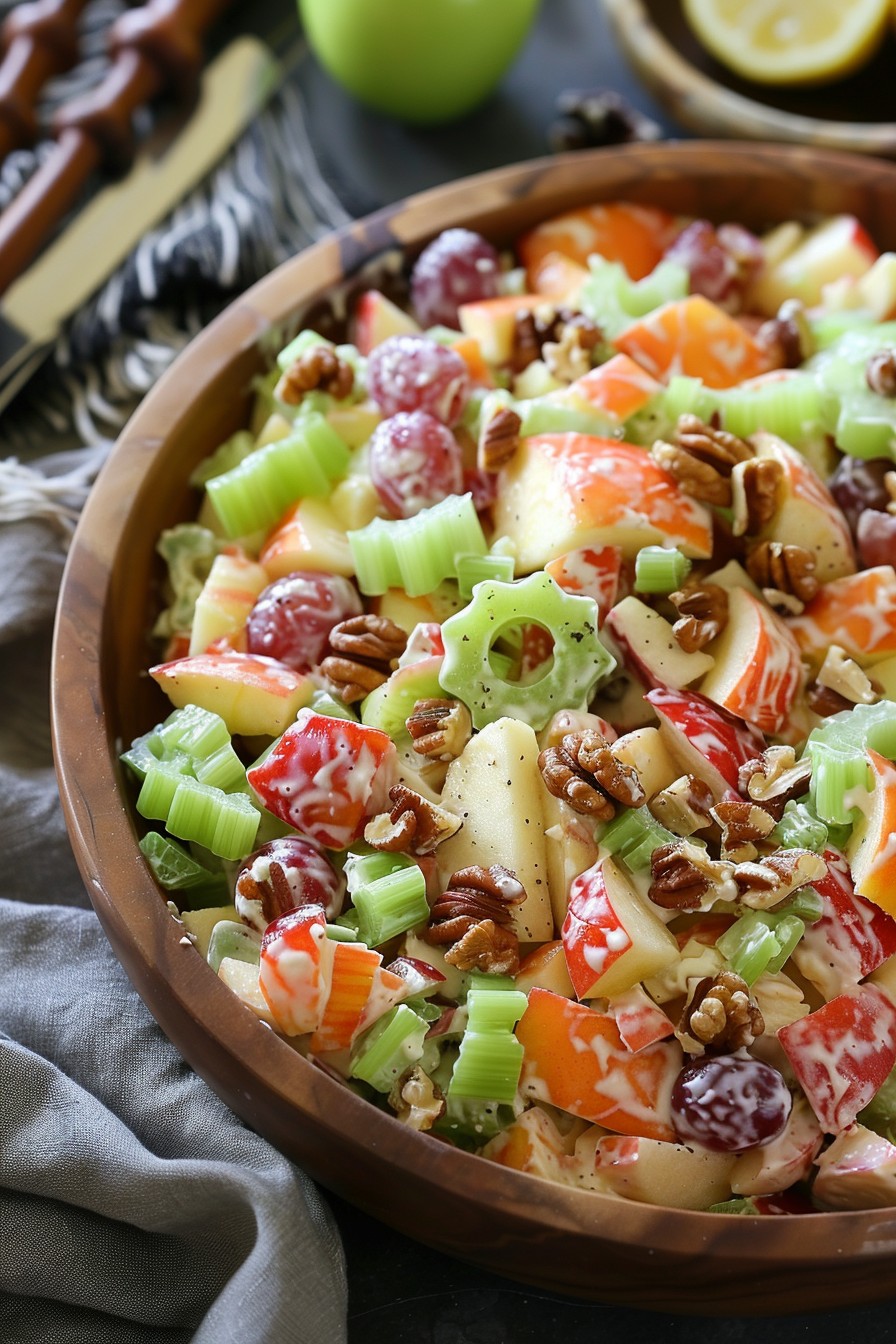
    Gently fold in the diced apples, chopped walnuts, and celery. The key here is to distribute the ingredients evenly without crushing the apples. Tip: For an extra crunch, toast the walnuts before adding them to the mix.

    Step 4: Chill to Set

    Pour the mixture into a jello mold or serving dish and refrigerate for at least 4 hours, or until fully set. The longer it chills, the firmer it will be. Tip: Cover the dish with plastic wrap to prevent any fridge odors from seeping in.

    Step 5: Serve and Enjoy

    Once set, unmold the jello salad onto a serving plate or serve directly from the dish. The vibrant colors and textures make it a feast for the eyes as well as the palate.

    Tips and Tricks

    For those looking to elevate their cranberry jello salad, consider these advanced tips. First, using freshly squeezed cranberry juice can intensify the flavor. Second, incorporating a layer of cream cheese mixed with whipped cream can add a luxurious texture. Third, for a more sophisticated presentation, layer different colors of jello with the fruit and nuts in between. Lastly, experimenting with different types of nuts or adding dried fruits can introduce new flavors and textures.

    Recipe Variations

    • Swap out apples for pears for a different kind of sweetness.
    • Use pecans instead of walnuts for a Southern twist.
    • Add orange zest to the jello mixture for a citrusy kick.
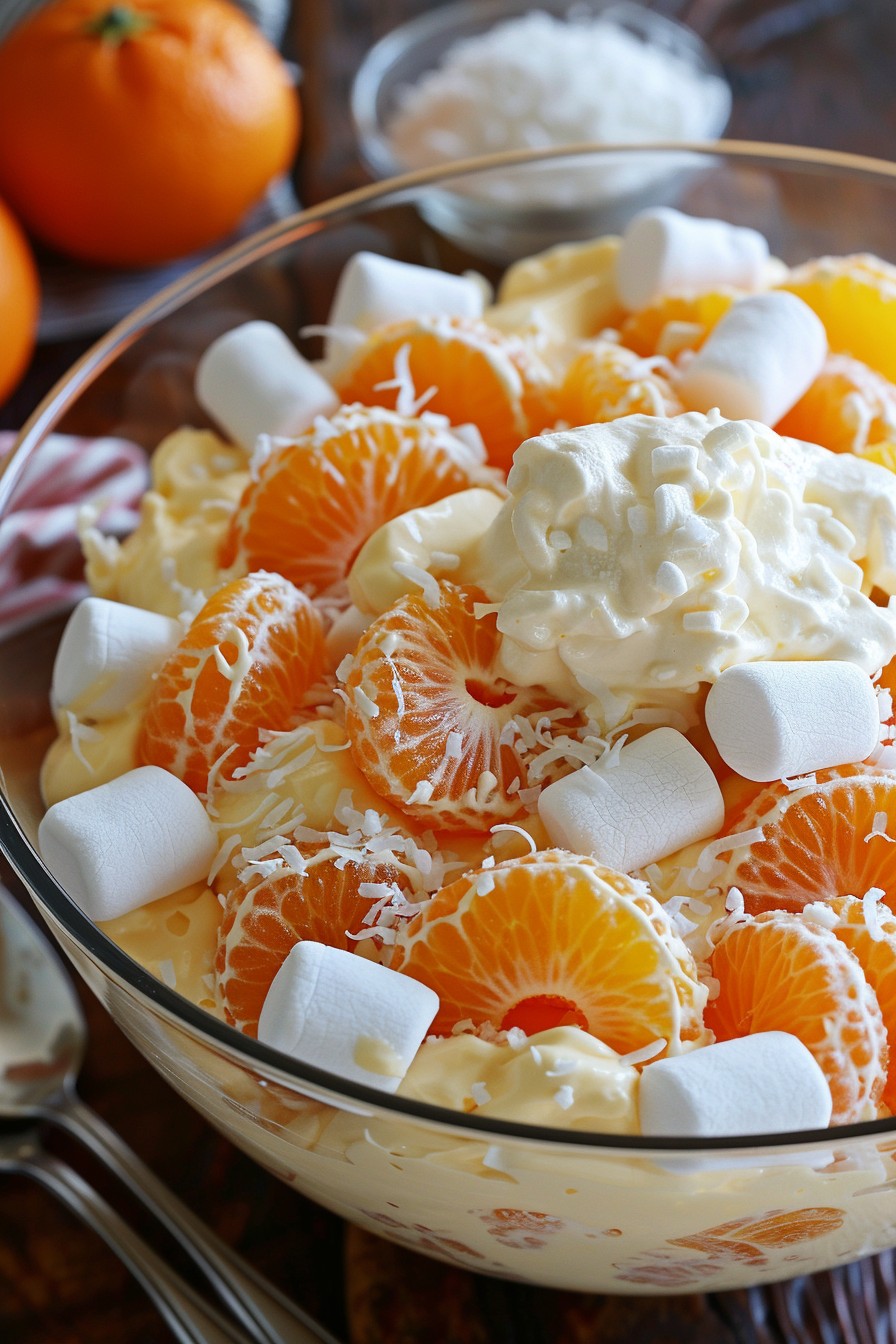
    • Incorporate mini marshmallows for a sweeter, fluffier texture.
    • Try using cherry jello instead of raspberry for a deeper red color.

    Frequently Asked Questions

    Can I make this recipe without nuts?

    Absolutely! If you’re serving this to guests with nut allergies or simply prefer not to use nuts, you can omit them entirely or substitute with seeds like sunflower or pumpkin for a similar crunch.

    How far in advance can I make this salad?

    This salad can be made up to 2 days in advance. Just keep it covered in the refrigerator until you’re ready to serve. The flavors actually meld and improve over time.

    Can I use fresh cranberries instead of juice?

    Yes, but you’ll need to cook them down with sugar and water to make a cranberry sauce first. Then, you can use that in place of the cranberry juice for a more intense cranberry flavor.

    Summary

    This cranberry jello salad with apples is a delightful combination of flavors and textures, perfect for any festive occasion. Easy to make and versatile, it’s sure to become a favorite.

  • Italian Creamy Pasta Salad Recipe: A Delightful Twist on a Classic

    Italian Creamy Pasta Salad Recipe: A Delightful Twist on a Classic

    How about we dive into a bowl of creamy, dreamy pasta salad that’s bursting with Italian flavors? This recipe is your ticket to a side dish that steals the show, perfect for picnics, potlucks, or just because. Let’s get cooking!

    Why This Recipe Works

    • The creamy dressing is a harmonious blend of mayonnaise, sour cream, and Italian seasonings, offering a rich and tangy flavor profile.
    • Al dente pasta provides the perfect texture, holding up well against the creamy dressing and crunchy vegetables.
    • Fresh vegetables add a burst of color and crunch, making every bite interesting.
    • It’s a make-ahead dish, allowing flavors to meld beautifully in the fridge.
    • Versatile and customizable, you can easily tweak it to suit your taste or what’s in your pantry.

    Ingredients

    • 1 lb rotini pasta
    • 1 cup mayonnaise
    • 1/2 cup sour cream
    • 2 tbsp Italian seasoning
    • 1 cup cherry tomatoes, halved
    • 1 cup cucumber, diced
    • 1/2 cup red onion, finely chopped
    • 1/2 cup black olives, sliced
    • 1 cup mozzarella cheese, cubed
    • Salt and pepper to taste

    Equipment Needed

    • Large pot
    • Colander
    • Large mixing bowl
    • Whisk
    • Measuring cups and spoons
    • Knife and cutting board

    Instructions

    Italian Creamy Pasta Salad Recipe

    Boil the Pasta to Perfection

    Fill your large pot with water and bring it to a rolling boil. Add a generous pinch of salt to the water – this is your only chance to season the pasta itself. Cook the rotini according to the package instructions for al dente, usually about 8-10 minutes. Drain the pasta in a colander and rinse under cold water to stop the cooking process. Tip: Don’t skip the rinsing step; it prevents the pasta from sticking together.

    Whisk Together the Creamy Dressing

    In your large mixing bowl, combine the mayonnaise, sour cream, and Italian seasoning. Whisk until smooth and well incorporated. This dressing is the heart of the dish, so take a moment to taste and adjust the seasoning with salt and pepper if needed. Tip: For an extra zing, add a tablespoon of lemon juice or vinegar to the dressing.

    Combine Pasta and Vegetables

    Add the cooled pasta to the bowl with the dressing. Toss to coat evenly. Then, gently fold in the cherry tomatoes, cucumber, red onion, black olives, and mozzarella cheese. The key here is to mix gently to keep the vegetables crisp and the cheese cubes intact. Tip: If you’re making this ahead of time, hold back on adding the tomatoes until serving to keep them from getting too soft.

    Chill to Let Flavors Meld

    Cover the bowl with plastic wrap or a lid and refrigerate for at least 2 hours, though overnight is better. This chilling time allows the pasta to absorb the dressing and the flavors to come together beautifully. Remember, patience is a virtue, especially when it comes to pasta salad.

    Serve and Enjoy

    Give the pasta salad a good stir before serving to redistribute the dressing. Taste and adjust the seasoning if necessary. Serve chilled, straight from the fridge, for the best texture and flavor. This dish is a crowd-pleaser, so be prepared for compliments and recipe requests.

    Tips and Tricks

    For those looking to elevate their pasta salad game, consider these advanced tips. First, toasting the Italian seasoning in a dry pan for a minute before adding it to the dressing can unlock deeper flavors. Second, using a mix of pasta shapes can add visual interest and varying textures. Third, incorporating grilled vegetables like zucchini or bell peppers can add a smoky dimension. Lastly, for a lighter version, substitute half of the mayonnaise with Greek yogurt. These small tweaks can make a big difference in the final dish.

    Recipe Variations

    • Protein Power: Add grilled chicken, shrimp, or chickpeas for a protein boost.
    • Cheese Swap: Try feta or Parmesan instead of mozzarella for a different flavor profile.
    • Veggie Delight: Incorporate roasted red peppers, artichokes, or sun-dried tomatoes for extra Mediterranean flair.
    • Pasta Alternatives: Use gluten-free or whole wheat pasta to suit dietary needs.
    • Dressing Twist: Experiment with pesto or a balsamic vinaigrette for a different take on the creamy dressing.

    Frequently Asked Questions

    Can I make this pasta salad vegan? Absolutely! Swap the mayonnaise for a vegan mayo, use a plant-based sour cream, and omit the cheese or use a vegan alternative. You’ll still get that creamy, delicious texture without any animal products.

    How long does this pasta salad last in the fridge? Stored in an airtight container, it should keep well for up to 5 days. Just give it a stir before serving to refresh the flavors.

    Can I freeze this pasta salad? Freezing is not recommended as the mayonnaise-based dressing and vegetables may separate and become watery upon thawing, affecting the texture and flavor.

    Summary

    This Italian Creamy Pasta Salad is a versatile, make-ahead dish that’s perfect for any occasion. With its rich dressing, al dente pasta, and crisp vegetables, it’s sure to be a hit. Customize it to your liking and enjoy the compliments that come your way!

  • Crunchy & Fresh Raw Broccoli Salad Recipe: A Veggie Delight!

    Crunchy & Fresh Raw Broccoli Salad Recipe: A Veggie Delight!

    Great news for all the veggie lovers out there! This raw broccoli salad is not only packed with nutrients but also bursting with flavors and textures that will make you forget you’re eating something so healthy. Perfect for picnics, potlucks, or just a refreshing side dish at home.

    Why This Recipe Works

    • The combination of raw broccoli with a creamy dressing creates a perfect balance of crunch and smoothness.
    • Adding nuts and dried fruits introduces a sweet and savory element that elevates the dish.
    • It’s incredibly versatile; you can easily swap out ingredients based on what you have in your pantry.
    • This salad gets better as it sits, making it a great make-ahead option for busy days.
    • It’s a crowd-pleaser that even the pickiest eaters will enjoy.

    Ingredients

    • 4 cups raw broccoli florets, chopped into bite-sized pieces
    • 1/2 cup red onion, finely diced
    • 1/2 cup dried cranberries
    • 1/2 cup sunflower seeds
    • 1/2 cup mayonnaise
    • 2 tablespoons apple cider vinegar
    • 1 tablespoon honey
    • Salt and pepper to taste

    Equipment Needed

    • Large mixing bowl
    • Whisk
    • Measuring cups and spoons
    • Knife and cutting board

    Instructions

    Raw Broccoli Salad Recipe

    Prepare the Broccoli

    Start by washing the broccoli florets under cold water. Pat them dry with a clean towel to remove any excess moisture. Chop the florets into bite-sized pieces, ensuring they’re small enough to be easily eaten but large enough to retain their crunch. Place the chopped broccoli in a large mixing bowl.

    Mix the Dressing

    In a small bowl, whisk together the mayonnaise, apple cider vinegar, and honey until smooth. The honey adds a touch of sweetness that balances the tanginess of the vinegar. Season with salt and pepper to taste. Tip: For a lighter version, you can substitute Greek yogurt for half of the mayonnaise.

    Combine the Ingredients

    Add the finely diced red onion, dried cranberries, and sunflower seeds to the bowl with the broccoli. Pour the dressing over the top and toss everything together until well coated. Tip: Letting the salad sit for at least 30 minutes before serving allows the flavors to meld together beautifully.

    Chill Before Serving

    Cover the bowl with plastic wrap and refrigerate the salad for at least 30 minutes. This step is crucial as it helps the broccoli soften slightly and absorb the dressing, making every bite flavorful. Tip: For an extra crunch, add the sunflower seeds just before serving to keep them from getting soggy.

    Serve and Enjoy

    Give the salad a final toss before serving to redistribute the dressing. Serve chilled as a refreshing side dish or a light main course. This salad pairs wonderfully with grilled meats or can stand alone as a healthy lunch option.

    Tips and Tricks

    For those looking to take this salad to the next level, consider roasting the sunflower seeds before adding them to the salad for an enhanced nutty flavor. If you’re not a fan of mayonnaise, avocado makes a great creamy substitute that adds healthy fats. To add a bit of heat, a pinch of red pepper flakes can give this salad a nice kick. For a more colorful presentation, mix in some shredded purple cabbage or carrot strips. Lastly, if you’re preparing this salad ahead of time, hold off on adding the dressing until just before serving to keep the broccoli as crisp as possible.

    Recipe Variations

    • Swap out the dried cranberries for raisins or chopped apricots for a different kind of sweetness.
    • Use almonds or walnuts instead of sunflower seeds for a different texture and flavor profile.
    • Add crumbled bacon or diced chicken for a protein-packed version that can serve as a main dish.
    • Incorporate some grated Parmesan or feta cheese for a salty, umami element.
    • For a vegan version, replace the honey with maple syrup and use vegan mayonnaise.

    Frequently Asked Questions

    Can I use frozen broccoli for this salad?

    While you can use frozen broccoli, it’s not recommended for this recipe. Frozen broccoli tends to be softer and more watery once thawed, which can make the salad soggy. Fresh broccoli provides the best crunch and texture for this dish.

    How long can I store this salad in the fridge?

    This salad can be stored in an airtight container in the refrigerator for up to 3 days. However, the longer it sits, the softer the broccoli will become. If you prefer a crunchier texture, it’s best enjoyed within the first 24 hours.

    Can I make this salad dairy-free?

    Absolutely! The recipe as written is already dairy-free, as it doesn’t call for any dairy products. Just ensure that your mayonnaise is dairy-free if you’re strictly avoiding dairy.

    Summary

    This raw broccoli salad is a crunchy, flavorful, and nutritious dish that’s perfect for any occasion. With its simple ingredients and easy preparation, it’s a versatile recipe that can be customized to suit any taste. Whether you’re looking for a healthy side dish or a light main course, this salad is sure to impress.

  • Chimichurri Salad Dressing Recipe: A Zesty Twist to Your Greens

    Chimichurri Salad Dressing Recipe: A Zesty Twist to Your Greens

    Craving something fresh, herby, and packed with flavor? This chimichurri salad dressing is your ticket to transforming any bland salad into a vibrant, mouthwatering dish. Perfect for those who love a little zest in their life!

    Why This Recipe Works

    • It’s incredibly versatile, pairing well with almost any salad.
    • The combination of fresh herbs and acidic components creates a balanced flavor profile.
    • It’s quick to make, requiring no cooking, just blending or chopping.
    • Healthy and full of antioxidants from the fresh herbs and olive oil.
    • Customizable to taste, allowing for adjustments in acidity, spice, and herbiness.

    Ingredients

    • 1 cup fresh parsley, tightly packed
    • 1/4 cup fresh cilantro, tightly packed
    • 3 garlic cloves, minced
    • 1/2 cup olive oil
    • 1/4 cup red wine vinegar
    • 1 teaspoon salt
    • 1/2 teaspoon crushed red pepper flakes
    • 1/4 teaspoon black pepper

    Equipment Needed

    • Food processor or blender
    • Measuring cups and spoons
    • Knife and cutting board
    • Mixing bowl
    • Whisk

    Instructions

    Chimichurri Salad Dressing Recipe

    Step 1: Prep Your Herbs

    Start by washing your parsley and cilantro under cold water. Shake off excess water and pat dry with a paper towel. Roughly chop the herbs to make them easier to blend. This ensures your dressing has a smooth consistency without large chunks of herbs.

    Step 2: Combine Ingredients

    In your food processor or blender, add the chopped herbs, minced garlic, olive oil, red wine vinegar, salt, red pepper flakes, and black pepper. Pulse a few times to start breaking down the herbs, then blend until smooth. If you prefer a chunkier texture, blend for less time.

    Step 3: Taste and Adjust

    Give your dressing a taste. Need more tang? Add a splash more vinegar. Want it spicier? A pinch more red pepper flakes will do the trick. This is your chance to make the dressing perfectly suited to your palate.

    Step 4: Let It Marinate

    Transfer the dressing to a bowl or jar and let it sit for at least 30 minutes before serving. This allows the flavors to meld together beautifully. The longer it sits, the more flavorful it becomes!

    Step 5: Serve and Enjoy

    Drizzle your chimichurri dressing over your favorite salad, grilled meats, or even roasted vegetables. Store any leftovers in an airtight container in the fridge for up to a week.

    Tips and Tricks

    For an even smoother dressing, you can remove the stems from your herbs before blending. If you’re out of red wine vinegar, apple cider vinegar makes a great substitute. To make your dressing last longer, ensure all your utensils and containers are clean and dry before use. For a creamier version, try adding a tablespoon of Greek yogurt or mayonnaise. Always use fresh herbs for the best flavor; dried herbs just don’t pack the same punch.

    Recipe Variations

    • Add a teaspoon of honey for a touch of sweetness.
    • Incorporate a handful of fresh mint leaves for a refreshing twist.
    • Swap out the red wine vinegar for lime juice for a citrusy flavor.
    • Add a ripe avocado for a creamy, rich texture.
    • For a nutty flavor, toast some cumin seeds and blend them into the dressing.

    Frequently Asked Questions

    Can I make this dressing without a food processor?

    Absolutely! You can finely chop all the ingredients by hand and whisk them together in a bowl. It might take a bit more elbow grease, but the result will be just as delicious.

    How long does chimichurri dressing last in the fridge?

    Stored properly in an airtight container, your dressing should stay fresh for up to a week. The olive oil might solidify a bit in the fridge, so let it sit at room temperature for a few minutes before using.

    Can I freeze chimichurri dressing?

    Yes, you can freeze it for up to 3 months. Thaw in the refrigerator overnight and give it a good stir before using. The texture might change slightly, but the flavor will still be great.

    Summary

    This chimichurri salad dressing is a quick, flavorful way to elevate any dish. With its fresh herbs, zesty vinegar, and customizable spice level, it’s sure to become a staple in your kitchen. Easy to make and even easier to love!

  • Summer Pasta Salad Recipe: A Refreshing Twist on a Classic

    Summer Pasta Salad Recipe: A Refreshing Twist on a Classic

    Perfect for those sweltering summer days when you crave something light yet satisfying, this summer pasta salad is a vibrant mix of flavors and textures. Packed with fresh veggies, tender pasta, and a zesty dressing, it’s sure to be a hit at your next barbecue or picnic.

    Why This Recipe Works

    • The combination of al dente pasta and crisp vegetables offers a delightful contrast in textures.
    • A homemade dressing with lemon juice and olive oil brings a bright, tangy flavor that enhances the fresh ingredients.
    • It’s incredibly versatile, allowing for endless variations based on what’s in season or your personal preferences.
    • This salad can be made ahead of time, making it a convenient option for busy days or entertaining.
    • It’s a crowd-pleaser that appeals to both adults and kids alike.

    Ingredients

    • 8 oz rotini pasta
    • 1 cup cherry tomatoes, halved
    • 1 cucumber, diced
    • 1/2 red onion, thinly sliced
    • 1/4 cup black olives, sliced
    • 1/4 cup feta cheese, crumbled
    • 2 tbsp olive oil
    • 1 tbsp lemon juice
    • 1 tsp dried oregano
    • Salt and pepper to taste

    Equipment Needed

    • Large pot
    • Colander
    • Large mixing bowl
    • Whisk
    • Measuring cups and spoons

    Instructions

    Summer Pasta Salad Recipe

    Step 1: Cook the Pasta

    Bring a large pot of salted water to a boil. Add the rotini pasta and cook according to package instructions until al dente, usually about 8-10 minutes. Drain the pasta in a colander and rinse under cold water to stop the cooking process. Tip: Salting the water enhances the pasta’s flavor, so don’t skip this step!

    Step 2: Prepare the Vegetables

    While the pasta is cooking, halve the cherry tomatoes, dice the cucumber, and thinly slice the red onion. Adding these vegetables raw ensures they retain their crunch and freshness in the salad.

    Step 3: Make the Dressing

    In a small bowl, whisk together the olive oil, lemon juice, dried oregano, and a pinch of salt and pepper. This simple dressing packs a punch of flavor that ties the salad together beautifully.

    Step 4: Combine Everything

    In a large mixing bowl, combine the cooled pasta, prepared vegetables, black olives, and crumbled feta cheese. Drizzle the dressing over the top and toss gently to coat everything evenly. Tip: Letting the salad sit for 10 minutes before serving allows the flavors to meld together.

    Step 5: Serve and Enjoy

    Transfer the salad to a serving dish and garnish with additional feta cheese and a sprinkle of oregano if desired. This salad is best enjoyed chilled, making it the perfect make-ahead dish for summer gatherings.

    Tips and Tricks

    For an extra burst of flavor, consider adding fresh herbs like basil or parsley to the salad. If you’re preparing this dish ahead of time, hold off on adding the dressing until just before serving to keep the vegetables crisp. For a protein boost, grilled chicken or shrimp make excellent additions. Always taste and adjust the seasoning before serving, as the flavors can settle over time. Lastly, experimenting with different types of pasta can give this salad a whole new texture and appearance.

    Recipe Variations

    • Swap the rotini for bowtie or penne pasta for a different look and texture.
    • Add avocado for creaminess or artichoke hearts for a tangy twist.
    • For a vegan version, omit the feta cheese or use a plant-based alternative.
    • Incorporate grilled vegetables like zucchini or bell peppers for a smoky flavor.
    • Use a balsamic vinaigrette instead of the lemon-olive oil dressing for a sweeter taste.

    Frequently Asked Questions

    Can I make this salad gluten-free?

    Absolutely! Simply substitute the regular pasta with your favorite gluten-free pasta. Just be sure to check the cooking time, as gluten-free pasta can vary. Also, ensure all other ingredients, like the dressing, are gluten-free to keep the dish safe for those with sensitivities.

    How long does this pasta salad last in the fridge?

    When stored in an airtight container, this pasta salad can last up to 3 days in the refrigerator. However, the vegetables may lose some of their crunch over time, so it’s best enjoyed within the first day or two.

    Can I add meat to this salad?

    Definitely! Grilled chicken, shrimp, or even salami can be great additions for those looking to add more protein. Just be sure to cook any meat thoroughly and add it cooled to the salad to prevent wilting the vegetables.

    Summary

    This summer pasta salad is a refreshing, versatile dish perfect for hot days. With its mix of crisp vegetables, tender pasta, and zesty dressing, it’s a guaranteed crowd-pleaser that’s as easy to make as it is delicious.

  • Orange Creamsicle Salad Recipe: A Nostalgic Summer Delight

    Orange Creamsicle Salad Recipe: A Nostalgic Summer Delight

    A amazing twist on a classic summer treat, this Orange Creamsicle Salad combines the creamy, dreamy flavors of a creamsicle with the refreshing zest of oranges. Perfect for picnics, potlucks, or just because, this recipe is sure to transport you back to those carefree summer days of your childhood.

    Why This Recipe Works

    • The combination of creamy pudding and whipped topping mimics the iconic creamsicle texture.
    • Fresh oranges add a burst of juicy, citrusy flavor that balances the sweetness.
    • It’s incredibly easy to make, requiring no baking and just a few simple steps.
    • The salad is versatile, serving as a dessert or a sweet side dish.
    • It’s a crowd-pleaser, appealing to both kids and adults alike.

    Ingredients

    • 1 package (3.4 oz) instant vanilla pudding mix
    • 1 cup cold milk
    • 1 cup whipped topping, thawed
    • 2 cups mandarin oranges, drained
    • 1/2 cup mini marshmallows
    • 1/4 cup shredded coconut (optional)

    Equipment Needed

    • Large mixing bowl
    • Whisk
    • Spatula
    • Measuring cups and spoons

    Instructions

    Orange Creamsicle Salad Recipe

    Step 1: Prepare the Pudding Base

    In a large mixing bowl, whisk together the instant vanilla pudding mix and cold milk until smooth. Let it sit for about 2 minutes to thicken slightly. This is the foundation of your creamsicle flavor, so make sure it’s well mixed.

    Step 2: Fold in the Whipped Topping

    Gently fold the whipped topping into the pudding mixture until fully incorporated. This will lighten the texture and add that creamy, dreamy quality reminiscent of a creamsicle.

    Step 3: Add the Oranges and Marshmallows

    Carefully stir in the mandarin oranges and mini marshmallows. The oranges provide a fresh, citrusy contrast to the sweetness, while the marshmallows add a fun, chewy texture.

    Step 4: Chill to Perfection

    Cover the bowl with plastic wrap and refrigerate for at least 1 hour. This allows the flavors to meld together and the salad to set to the perfect consistency.

    Step 5: Serve and Enjoy

    Give the salad a gentle stir before serving. If desired, sprinkle with shredded coconut for an extra touch of sweetness and texture. Serve chilled for the best experience.

    Tips and Tricks

    For an even creamier texture, you can substitute half of the milk with orange juice. This not only enhances the creamsicle flavor but also adds a subtle tanginess. If you’re serving this salad at an outdoor event, consider keeping it in a cooler to maintain its chilled temperature. For a more adult version, a splash of orange liqueur can be added to the pudding mixture for an extra kick.

    Recipe Variations

    • Swap out the mandarin oranges for fresh orange segments for a more vibrant flavor and texture.
    • Add a layer of crushed graham crackers at the bottom of your serving dish for a crust-like base.
    • Incorporate other citrus fruits like grapefruit or tangerines for a different twist on the classic.
    • For a tropical version, mix in some diced pineapple and a sprinkle of toasted coconut.
    • Use lemon pudding mix instead of vanilla for a tangier variation.

    Frequently Asked Questions

    Can I make this recipe ahead of time?

    Absolutely! This salad actually tastes better after it’s had time to chill and the flavors have melded together. You can make it up to 24 hours in advance, just keep it covered in the refrigerator until you’re ready to serve.

    Can I use fresh whipped cream instead of whipped topping?

    Yes, you can substitute the whipped topping with an equal amount of freshly whipped cream. Just be sure to sweeten it lightly with powdered sugar and vanilla extract to match the flavor profile of the recipe.

    Is there a way to make this recipe dairy-free?

    For a dairy-free version, use almond milk or coconut milk in place of the regular milk, and opt for a dairy-free whipped topping. The texture and flavor will be slightly different but still delicious.

    Summary

    This Orange Creamsicle Salad is a delightful throwback to the classic summer treat, with a creamy, dreamy texture and a refreshing citrus flavor. Easy to make and versatile, it’s perfect for any occasion. Whether you stick to the classic recipe or try one of the variations, it’s sure to be a hit.

  • Waldorf Salad Original Recipe: A Crunchy Classic Reimagined

    Waldorf Salad Original Recipe: A Crunchy Classic Reimagined

    Back in the day, the Waldorf Salad was the talk of the town, and guess what? It still is! This timeless dish combines crisp apples, crunchy celery, and juicy grapes in a creamy dressing that’s simply irresistible. Let’s dive into how you can whip up this classic with a twist that’ll have everyone asking for seconds.

    Why This Recipe Works

    • The combination of sweet and savory flavors creates a perfect balance that’s hard to resist.
    • Crunchy textures from fresh apples and celery add a satisfying bite to every forkful.
    • The creamy dressing ties all the ingredients together without overpowering their natural flavors.
    • It’s incredibly versatile, allowing for numerous variations to suit any palate.
    • This salad is as easy to make as it is delicious, requiring no cooking and just a few minutes of prep time.

    Ingredients

    • 2 cups diced apples (preferably a mix of sweet and tart varieties)
    • 1 cup thinly sliced celery
    • 1 cup seedless grapes, halved
    • 1/2 cup chopped walnuts
    • 1/2 cup mayonnaise
    • 1 tablespoon lemon juice
    • 1 teaspoon sugar
    • Salt and pepper to taste

    Equipment Needed

    • Large mixing bowl
    • Measuring cups and spoons
    • Sharp knife
    • Cutting board

    Instructions

    Waldorf Salad Original Recipe

    Step 1: Prep Your Fruits and Veggies

    Start by washing all your produce thoroughly. Dice the apples into bite-sized pieces, ensuring you leave the skin on for extra color and nutrients. Thinly slice the celery to add that signature crunch. Halve the grapes to make them easier to eat and to distribute their sweetness evenly throughout the salad.

    Step 2: Toast the Walnuts

    Heat a small skillet over medium heat and add the chopped walnuts. Toast them for about 5 minutes, stirring occasionally, until they’re fragrant and slightly golden. This step enhances their flavor and adds an extra layer of texture to the salad.

    Step 3: Whisk Together the Dressing

    In a small bowl, combine the mayonnaise, lemon juice, and sugar. Whisk until the mixture is smooth and the sugar is fully dissolved. The lemon juice not only adds a bright flavor but also helps prevent the apples from browning.

    Step 4: Combine All Ingredients

    In your large mixing bowl, toss together the diced apples, sliced celery, halved grapes, and toasted walnuts. Pour the dressing over the top and gently mix until everything is evenly coated. Season with salt and pepper to taste.

    Step 5: Chill Before Serving

    Cover the bowl with plastic wrap and refrigerate the salad for at least 30 minutes before serving. This chilling time allows the flavors to meld together beautifully and the salad to reach the perfect temperature.

    Tips and Tricks

    For an extra touch of elegance, serve the Waldorf Salad on a bed of lettuce or in individual cups. If you’re preparing this salad ahead of time, wait to add the walnuts until just before serving to keep them crunchy. For a lighter version, you can substitute Greek yogurt for half of the mayonnaise. Always taste and adjust the seasoning after chilling, as flavors can mellow in the fridge.

    Recipe Variations

    • Add diced chicken or turkey to turn this salad into a hearty main dish.
    • Swap out the walnuts for pecans or almonds for a different nutty flavor.
    • Incorporate dried cranberries or raisins for an extra pop of sweetness.
    • Use a mix of different apple varieties to vary the texture and taste.
    • For a dairy-free version, use avocado or coconut milk-based mayonnaise.

    Frequently Asked Questions

    Can I make Waldorf Salad ahead of time?

    Absolutely! You can prepare the salad up to a day in advance, but hold off on adding the walnuts until you’re ready to serve to maintain their crunch. The dressing may cause the apples to soften slightly over time, but the flavors will only get better as they meld.

    What are the best apples to use for Waldorf Salad?

    A mix of sweet and tart apples works best for this recipe. Try using Honeycrisp or Fuji for sweetness and Granny Smith for a tart contrast. The variety not only adds complexity to the flavor but also makes the salad more visually appealing.

    Can I add meat to this salad?

    Yes, adding diced chicken or turkey can transform this side dish into a satisfying main course. Just ensure the meat is cooked and cooled before mixing it in with the other ingredients to prevent the salad from becoming too warm.

    Summary

    The Waldorf Salad is a classic dish that’s stood the test of time for good reason. Its perfect balance of flavors and textures makes it a hit at any gathering. With this recipe, you can enjoy a timeless favorite that’s both easy to make and endlessly adaptable.

  • Avocado Corn Salad: A Summer Delight You Can’t Resist

    Avocado Corn Salad: A Summer Delight You Can’t Resist

    Crisp, creamy, and bursting with flavors, this avocado corn salad is your go-to summer dish. Combining the buttery texture of avocados with the sweet crunch of corn, it’s a refreshing side that pairs perfectly with any barbecue or picnic. Let’s dive into making this colorful and nutritious salad that’s as easy to prepare as it is delicious.

    Why This Recipe Works

    • The combination of creamy avocado and sweet corn creates a perfect balance of textures and flavors.
    • Fresh lime juice adds a zesty kick, enhancing the overall taste and preventing the avocado from browning.
    • It’s incredibly versatile, allowing for numerous variations to suit any palate or dietary preference.
    • Quick and easy to prepare, making it ideal for last-minute gatherings or a healthy weekday lunch.
    • Packed with nutrients, offering a good source of healthy fats, fiber, and vitamins.

    Ingredients

    • 2 ripe avocados, diced
    • 2 cups fresh corn kernels (about 3 ears)
    • 1/4 cup red onion, finely chopped
    • 1 jalapeño, seeded and minced (optional)
    • 1/4 cup cilantro, chopped
    • 2 tbsp lime juice
    • 1 tbsp olive oil
    • Salt and pepper to taste

    Equipment Needed

    • Mixing bowl
    • Sharp knife
    • Cutting board
    • Measuring spoons and cups

    Instructions

    Recipe For Avocado Corn Salad

    Prepare Your Ingredients

    Start by dicing the avocados into bite-sized pieces and place them in a large mixing bowl. Add the fresh corn kernels, finely chopped red onion, and minced jalapeño for a bit of heat. Tip: To easily remove corn kernels, stand the ear of corn upright in the bowl and slice downward with a sharp knife.

    Add the Flavors

    Sprinkle the chopped cilantro over the salad for a fresh, herby flavor. Drizzle with lime juice and olive oil, then season with salt and pepper to taste. Tip: The lime juice not only adds flavor but also helps keep the avocados from turning brown.

    Mix Gently

    Using a large spoon, gently toss all the ingredients together until well combined. Be careful not to mash the avocados too much; you want to maintain some of their texture. Tip: For best results, let the salad sit for about 10 minutes before serving to allow the flavors to meld together.

    Serve and Enjoy

    Transfer the salad to a serving dish and enjoy immediately. This salad is best served fresh but can be stored in the refrigerator for up to a day. Just give it a quick stir before serving again.

    Tips and Tricks

    For an extra layer of flavor, consider grilling the corn before cutting off the kernels. This adds a smoky depth that pairs beautifully with the creamy avocado. If you’re short on time, frozen corn can be a quick substitute; just thaw and drain it well before using. To make this salad ahead of time, prepare all the ingredients except the avocado. Add the avocado just before serving to keep it fresh and green. For a creamier texture, mash one avocado and dice the other, then mix as directed. This variation offers a richer consistency while still maintaining some chunks for texture.

    Recipe Variations

    • Add diced tomatoes or cucumbers for extra freshness and crunch.
    • Incorporate black beans or quinoa for a protein-packed version.
    • Swap the jalapeño for bell peppers if you prefer a milder flavor.
    • Use lemon juice instead of lime for a slightly different citrus note.
    • Top with crumbled feta or cotija cheese for a salty, tangy finish.

    Frequently Asked Questions

    Can I make this salad ahead of time?

    Yes, but for the best texture and color, add the avocado just before serving. You can prepare the other ingredients a day in advance and store them in the refrigerator. The lime juice will help keep the flavors fresh.

    Is there a substitute for fresh corn?

    Absolutely! Frozen or canned corn can be used in a pinch. If using canned, be sure to drain and rinse it well to remove any excess sodium or canning liquid. Frozen corn should be thawed and drained before adding to the salad.

    How can I make this salad spicier?

    For those who love heat, consider leaving the seeds in the jalapeño or adding a pinch of cayenne pepper. You could also incorporate diced serrano peppers for an extra kick.

    Summary

    This avocado corn salad is a vibrant, flavorful dish that’s perfect for summer gatherings. Easy to make and customizable, it’s a healthy option that doesn’t skimp on taste. Whether you’re looking for a side dish or a light lunch, this salad is sure to impress.

  • Creamy Red Potato Salad No Mayonnaise Recipe: A Lighter Twist on a Classic

    Creamy Red Potato Salad No Mayonnaise Recipe: A Lighter Twist on a Classic

    Just when you thought potato salad couldn’t get any better, here comes a version that skips the mayo but keeps all the creamy goodness. Perfect for picnics, potlucks, or just because you deserve something delicious today.

    Why This Recipe Works

    • Uses Greek yogurt and mustard for a creamy, tangy dressing without mayonnaise.
    • Red potatoes hold their shape well, offering the perfect bite every time.
    • Fresh herbs and a squeeze of lemon juice brighten up the flavors.
    • It’s a healthier alternative that doesn’t sacrifice taste.
    • Easy to make ahead, flavors deepen as it chills.

    Ingredients

    • 2 pounds red potatoes, washed and cut into 1-inch pieces
    • 1/2 cup plain Greek yogurt
    • 2 tablespoons Dijon mustard
    • 1 tablespoon olive oil
    • 1 tablespoon lemon juice
    • 1/2 teaspoon salt
    • 1/4 teaspoon black pepper
    • 1/4 cup chopped fresh dill
    • 1/4 cup chopped green onions
    • 2 hard-boiled eggs, chopped (optional)

    Equipment Needed

    • Large pot
    • Mixing bowls
    • Whisk
    • Knife and cutting board
    • Measuring cups and spoons

    Instructions

    Red Potato Salad No Mayonnaise Recipe

    Step 1: Cook the Potatoes

    Place the cut potatoes in a large pot and cover with cold water. Bring to a boil over high heat, then reduce to a simmer. Cook for 10-12 minutes, or until the potatoes are tender but still firm. Drain and let cool slightly.

    Step 2: Prepare the Dressing

    In a large mixing bowl, whisk together the Greek yogurt, Dijon mustard, olive oil, lemon juice, salt, and pepper until smooth. Taste and adjust seasoning as needed.

    Step 3: Combine Potatoes and Dressing

    Add the slightly cooled potatoes to the dressing along with the chopped dill and green onions. Gently toss until the potatoes are evenly coated. If using, fold in the chopped hard-boiled eggs.

    Step 4: Chill Before Serving

    Cover the bowl with plastic wrap and refrigerate for at least 1 hour to allow the flavors to meld. Serve chilled or at room temperature.

    Tips and Tricks

    For an extra flavor boost, try roasting the potatoes instead of boiling them. Just toss with a bit of olive oil, salt, and pepper, and roast at 400°F for about 25 minutes. Also, if you’re not a fan of dill, parsley or chives make great substitutes. Lastly, for a bit of crunch, add some diced celery or radishes to the salad.

    Recipe Variations

    • Add crispy bacon bits for a smoky flavor.
    • Swap Greek yogurt for sour cream for a richer taste.
    • Include a teaspoon of curry powder in the dressing for an exotic twist.
    • Mix in some avocado chunks for creaminess and healthy fats.
    • Use sweet potatoes instead of red potatoes for a different flavor profile.

    Frequently Asked Questions

    Can I make this potato salad ahead of time?

    Absolutely! This potato salad actually tastes better after it’s had time to chill in the fridge for a few hours. Just make sure to give it a good stir before serving to redistribute the dressing.

    Is there a dairy-free alternative to Greek yogurt?

    Yes, you can use a dairy-free yogurt alternative made from coconut or almond milk. Just make sure it’s unsweetened and plain to keep the flavors balanced.

    How long will this potato salad keep in the fridge?

    Stored in an airtight container, this potato salad will keep for up to 3 days in the refrigerator. After that, the potatoes may start to lose their texture.

    Summary

    This creamy red potato salad without mayonnaise is a lighter, tangier take on the classic dish. It’s easy to make, packed with flavor, and perfect for any occasion. Give it a try and see how delicious healthy can be!

  • Crab Salad Sushi Recipe: A Delightful Twist on Classic Sushi

    Crab Salad Sushi Recipe: A Delightful Twist on Classic Sushi

    Crab salad sushi combines the creamy, tangy flavors of crab salad with the delicate texture of sushi rice, all wrapped up in a nori sheet. It’s a fusion dish that’s surprisingly easy to make at home, offering a fresh take on traditional sushi that’s perfect for any occasion.

    Why This Recipe Works

    • The combination of creamy crab salad with sushi rice offers a perfect balance of textures and flavors.
    • Using imitation crab makes this recipe affordable and accessible without sacrificing taste.
    • It’s a versatile dish that can be customized with your favorite sushi ingredients.
    • Perfect for sushi beginners, as it doesn’t require raw fish.
    • Great for parties or as a unique lunch option.

    Ingredients

    • 2 cups sushi rice, cooked and seasoned
    • 1 lb imitation crab meat, shredded
    • 1/4 cup mayonnaise
    • 1 tbsp sriracha sauce
    • 1 tsp sesame oil
    • 1/2 cucumber, julienned
    • 4 nori sheets
    • 1 avocado, sliced
    • 1 tbsp sesame seeds

    Equipment Needed

    • Bamboo sushi mat
    • Sharp knife
    • Mixing bowls
    • Plastic wrap

    Instructions

    Crab Salad Recipe Sushi

    Prepare the Crab Salad

    In a mixing bowl, combine the shredded imitation crab meat with mayonnaise, sriracha sauce, and sesame oil. Mix until well combined. This creamy and slightly spicy crab salad will be the star of your sushi rolls.

    Assemble Your Sushi

    Lay a nori sheet on the bamboo mat covered with plastic wrap. Spread a thin layer of sushi rice over the nori, leaving a small margin at the top. Arrange the crab salad, cucumber, and avocado slices in a line along the bottom edge of the rice.

    Roll It Up

    Using the bamboo mat, tightly roll the sushi away from you, applying gentle pressure to ensure it holds its shape. The plastic wrap helps prevent sticking and makes rolling easier.

    Slice and Serve

    With a sharp knife, slice the roll into 6-8 pieces. Wipe the knife with a damp cloth between cuts for cleaner slices. Sprinkle with sesame seeds for an extra crunch and flavor.

    Enjoy Your Creation

    Serve your crab salad sushi with soy sauce, pickled ginger, and wasabi on the side. Enjoy the creamy, tangy, and slightly spicy flavors that make this dish a standout.

    Tips and Tricks

    • For a smoother rolling process, slightly wet your hands when handling the sushi rice to prevent sticking.
    • If you’re new to rolling sushi, practice with the bamboo mat to get the tightness just right. It’s all about the pressure.
    • Experiment with the amount of sriracha in the crab salad to adjust the heat level to your liking.
    • Letting the rolled sushi sit for a few minutes before slicing can help it hold its shape better.
    • For an extra flavor boost, lightly toast the sesame seeds before sprinkling them on the sushi.

    Recipe Variations

    • Spicy Mayo Drizzle: Add a drizzle of spicy mayo on top for an extra kick.
    • Vegetarian Version: Substitute the crab with mashed avocado or tofu for a vegetarian twist.
    • Extra Crunch: Include tempura flakes inside the roll for added texture.
    • Different Proteins: Try using real crab meat or shrimp instead of imitation crab.
    • Colorful Rolls: Add strips of bell pepper or carrot for a pop of color and crunch.

    Frequently Asked Questions

    Can I use real crab meat instead of imitation?

    Absolutely! Real crab meat will give your sushi a more authentic and luxurious flavor. Just ensure it’s fresh and properly cleaned before using.

    How do I store leftover sushi?

    Sushi is best enjoyed fresh, but if you must store it, wrap it tightly in plastic wrap and refrigerate for up to 24 hours. The rice may harden, so it’s not ideal, but it’s still edible.

    Can I make this recipe gluten-free?

    Yes, by using gluten-free soy sauce and ensuring all other ingredients, like the imitation crab, are gluten-free. Always check labels to be safe.

    What’s the best way to slice sushi rolls?

    Use a very sharp knife and wet it with water or vinegar between cuts. This prevents sticking and ensures clean, beautiful slices every time.

    Can I add other vegetables to the roll?

    Definitely! Feel free to add any vegetables you like, such as bell peppers, carrots, or asparagus. Just make sure they’re cut into thin strips for easy rolling.

    Summary

    This crab salad sushi recipe is a fun and easy way to enjoy sushi at home. With its creamy crab salad center and customizable fillings, it’s sure to be a hit. Perfect for beginners and sushi lovers alike.