Author: onlinefoodrecipes

  • Creamy Macaroni Salad with Fresh Dill: A Summer Picnic Must-Have

    Creamy Macaroni Salad with Fresh Dill: A Summer Picnic Must-Have

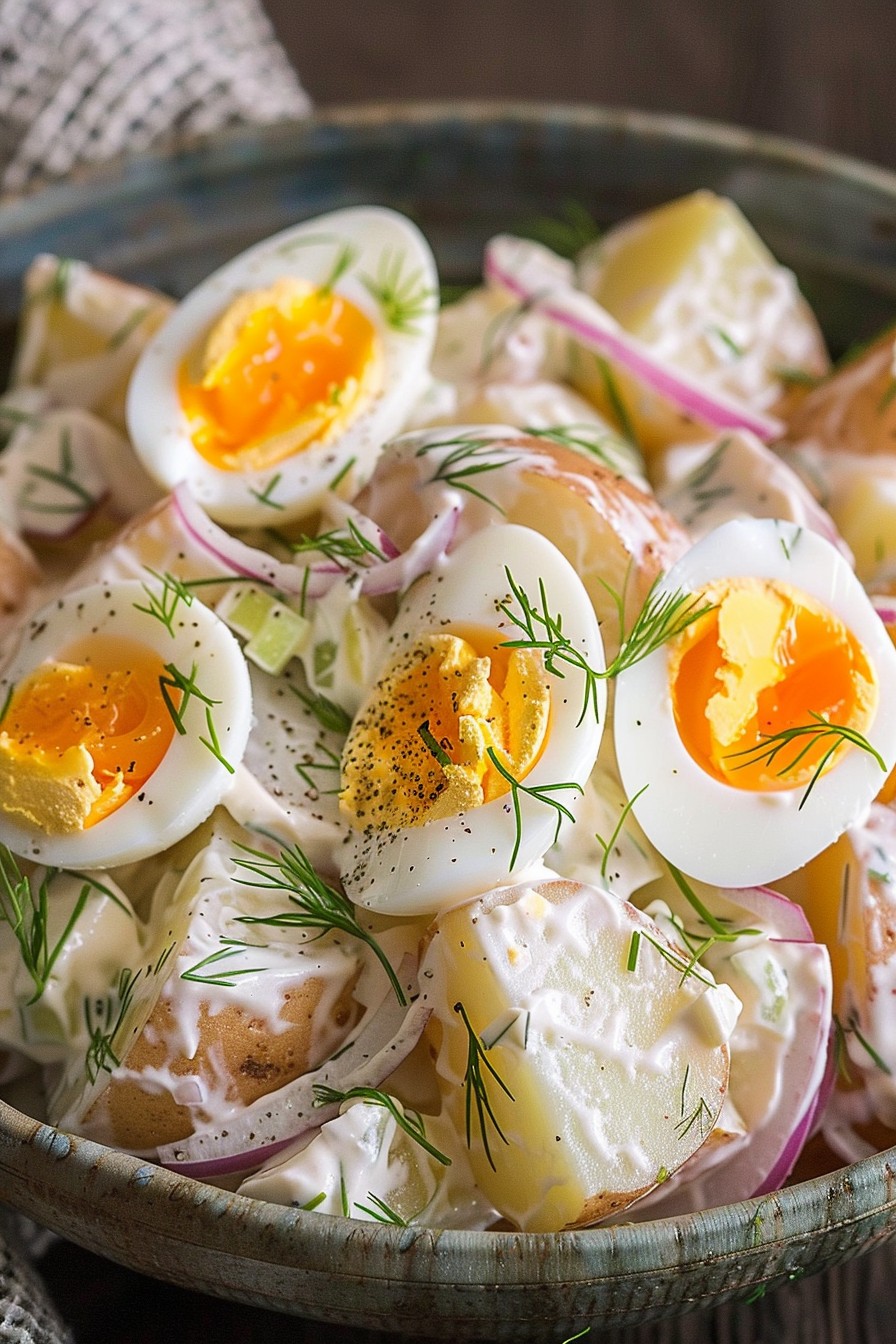
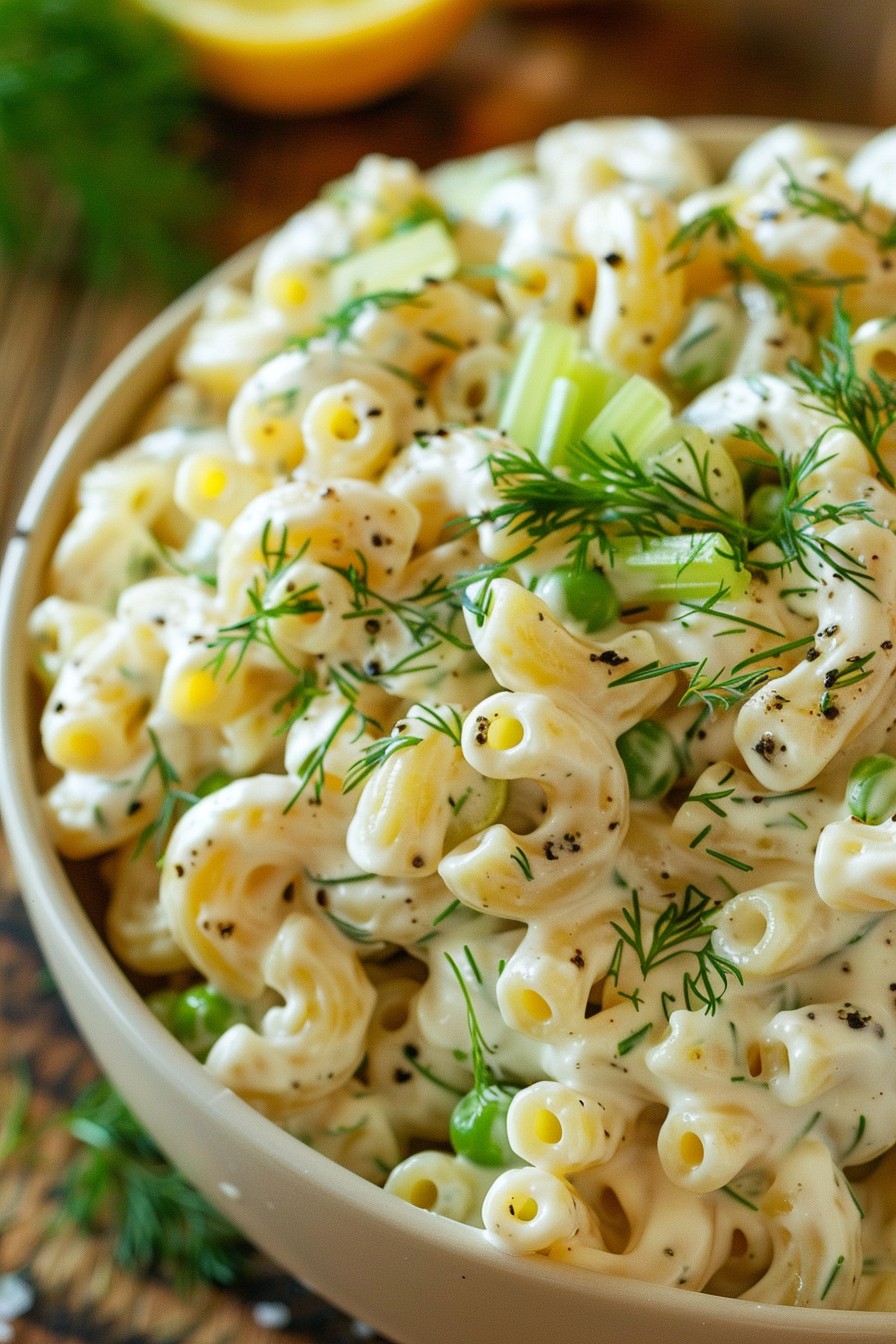
    Perfect for those sunny days when only a cold, creamy pasta salad will do, this macaroni salad with dill is a crowd-pleaser. Packed with flavor and easy to whip up, it’s the side dish that might just steal the show at your next barbecue or potluck.

    Why This Recipe Works

    • The combination of creamy mayonnaise and tangy sour cream creates a perfectly balanced dressing that coats every noodle.
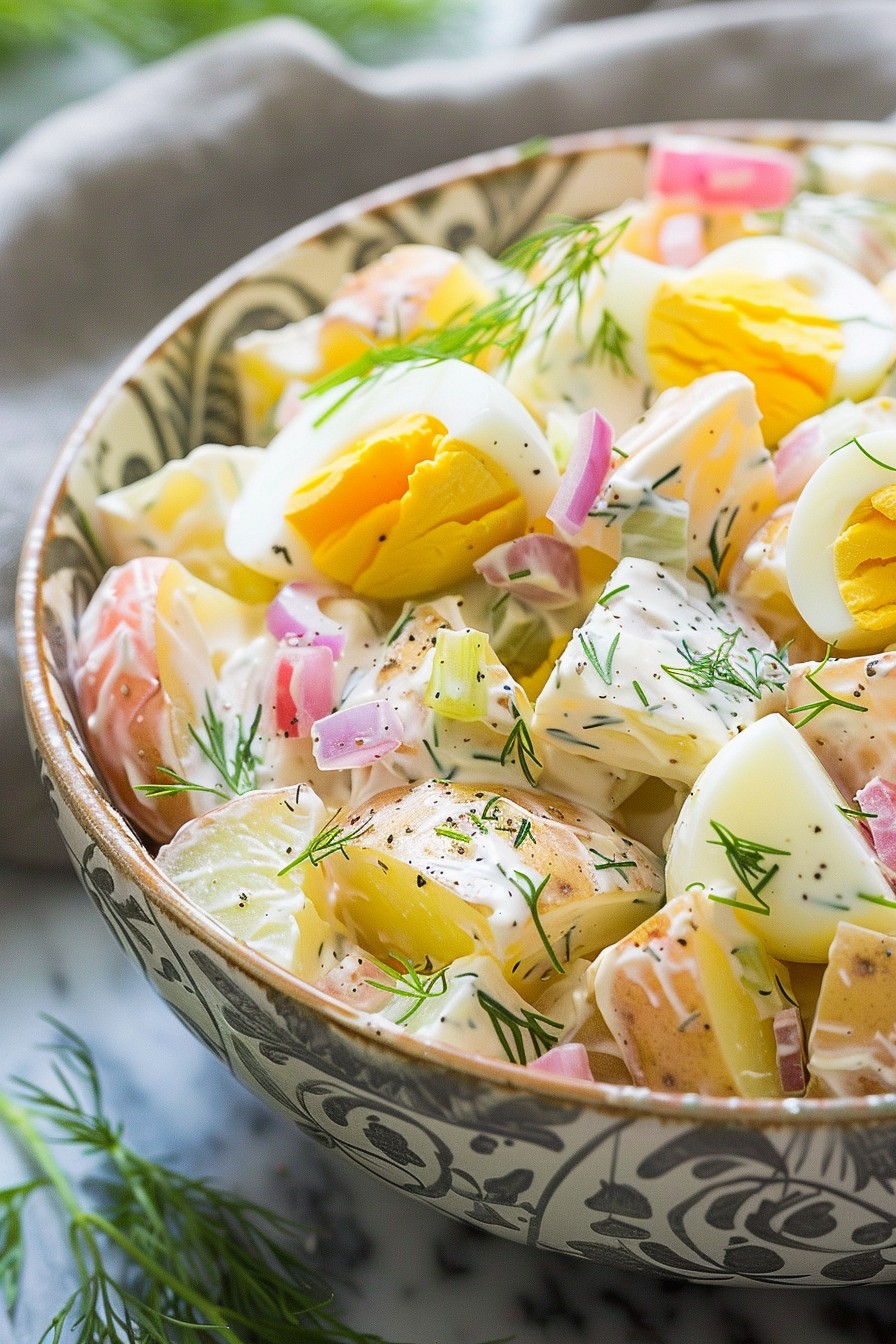
    • Fresh dill adds a burst of herby freshness that elevates the salad from good to unforgettable.
    • Crunchy celery and sweet peas add texture and color, making every bite interesting.
    • It’s make-ahead friendly, tasting even better after the flavors have had time to meld in the fridge.

    Ingredients

    • 2 cups elbow macaroni, uncooked
    • 1/2 cup mayonnaise
    • 1/4 cup sour cream
    • 2 tablespoons fresh dill, chopped
    • 1/2 cup celery, finely diced
    • 1/2 cup frozen peas, thawed
    • 1 tablespoon lemon juice
    • 1/2 teaspoon salt
    • 1/4 teaspoon black pepper

    Equipment Needed

    • Large pot
    • Colander
    • Large mixing bowl
    • Measuring cups and spoons
    • Mixing spoon

    Instructions

    Macaroni Salad Recipe With Dill

    Boil the Macaroni to Perfection

    Fill a large pot with water and bring it to a rolling boil over high heat. Add the elbow macaroni and cook according to the package instructions, usually about 7-8 minutes, until al dente. Drain the macaroni in a colander and rinse under cold water to stop the cooking process. Let it cool completely.

    Mix the Dressing

    In a large mixing bowl, whisk together the mayonnaise, sour cream, fresh dill, lemon juice, salt, and black pepper until smooth. This creamy dressing is the heart of the salad, so make sure it’s well combined.

    Combine and Chill

    Add the cooled macaroni, diced celery, and thawed peas to the bowl with the dressing. Gently toss everything together until the macaroni and veggies are evenly coated. Cover the bowl and refrigerate for at least 1 hour before serving to allow the flavors to meld.

    Tips and Tricks

    For an extra crunch, consider adding some diced red onion or chopped pickles to the salad. If you’re not a fan of peas, try substituting with diced red bell pepper for a pop of color and sweetness. To make the salad even creamier, you can increase the amount of mayonnaise or sour cream according to your taste. Always taste and adjust the seasoning before serving, as chilling can mute flavors slightly.

    Recipe Variations

    • For a healthier twist, substitute Greek yogurt for half of the mayonnaise.
    • Add some protein by mixing in chopped hard-boiled eggs or diced ham.
    • Spice it up with a pinch of cayenne pepper or a dash of hot sauce.
    • For a different herb profile, try using basil or parsley instead of dill.
    • Make it vegan by using vegan mayonnaise and omitting the sour cream.

    Frequently Asked Questions

    Can I make this salad ahead of time?

    Absolutely! This macaroni salad actually tastes better after it’s had time to chill in the fridge for a few hours or even overnight. Just give it a good stir before serving to redistribute the dressing.

    How long will it last in the fridge?

    Stored in an airtight container, this salad will keep well in the refrigerator for up to 3 days. After that, the pasta may start to soften too much.

    Can I use dried dill instead of fresh?

    While fresh dill is recommended for its bright flavor, you can use dried dill in a pinch. Use about 1 teaspoon of dried dill for every tablespoon of fresh called for in the recipe.
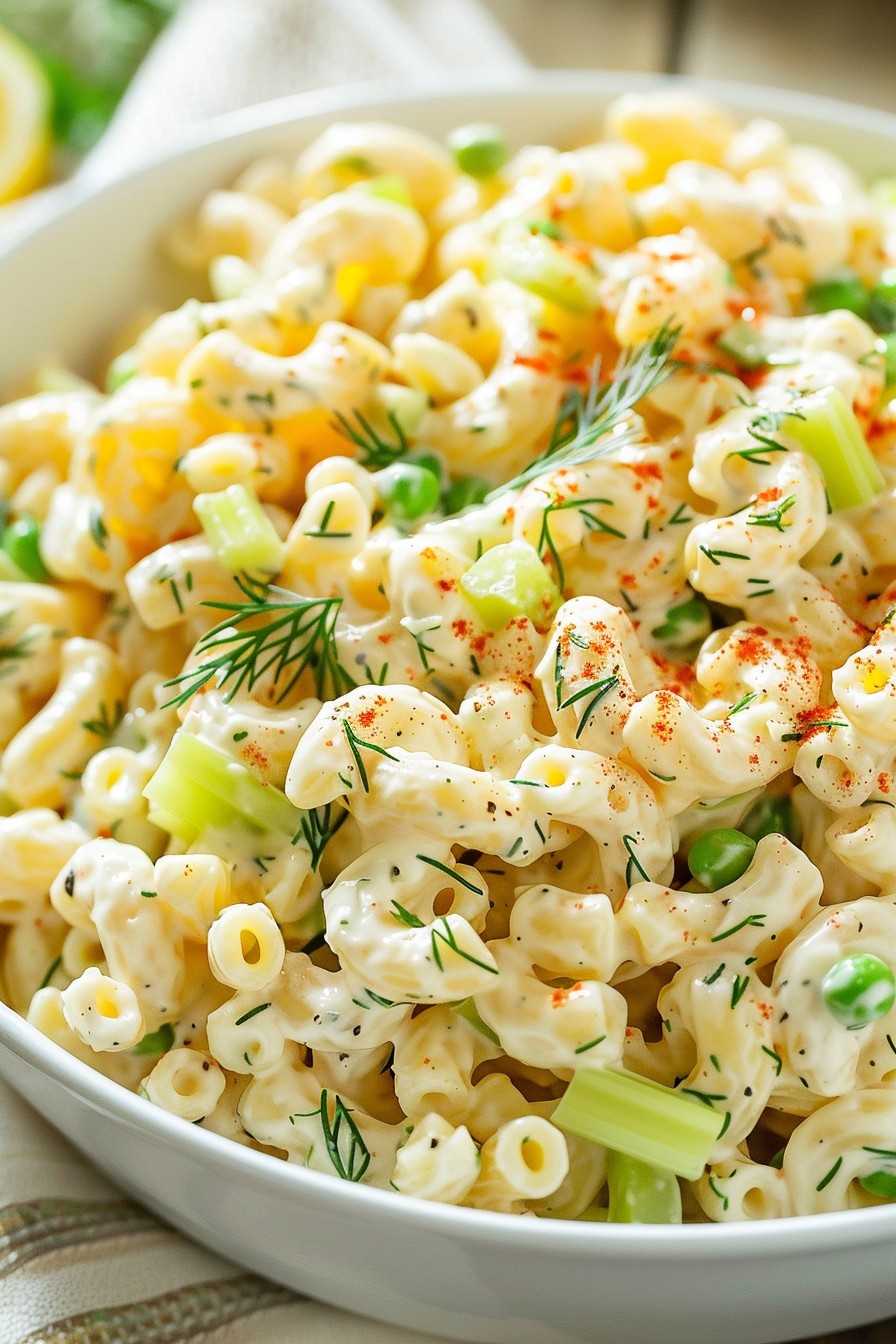
    Summary

    This creamy macaroni salad with fresh dill is the perfect side dish for any summer gathering. Easy to make and packed with flavor, it’s sure to be a hit with everyone at the table.

  • Canned Fruit Salad Recipe: A Quick & Delightful Treat

    Canned Fruit Salad Recipe: A Quick & Delightful Treat

    Welcome to a world where convenience meets deliciousness with our canned fruit salad recipe. Whether you’re in a pinch for time or just craving something sweet and refreshing, this recipe is your go-to solution.

    Why This Recipe Works

    • It’s incredibly easy to make, requiring minimal prep time and no cooking skills.
    • The combination of canned fruits offers a variety of textures and flavors that please any palate.
    • It’s versatile, allowing for endless variations based on what you have in your pantry.
    • Perfect for any occasion, from a quick snack to a potluck contribution.
    • It’s a great way to enjoy fruit year-round, regardless of seasonality.

    Ingredients

    • 1 can (15 oz) peach slices, drained
    • 1 can (15 oz) pear slices, drained
    • 1 can (20 oz) pineapple chunks, drained
    • 1 can (11 oz) mandarin oranges, drained
    • 1 cup mini marshmallows
    • 1/2 cup shredded coconut
    • 1/2 cup whipped topping

    Equipment Needed

    • Large mixing bowl
    • Mixing spoon
    • Measuring cups
    • Can opener

    Instructions

    Canned Fruit Salad Recipe

    Step 1: Prepare Your Fruits

    Start by opening all your canned fruits and draining them well. You want to remove as much liquid as possible to prevent your salad from becoming soggy. Tip: Give the fruits a gentle press with a clean towel to remove excess moisture.

    Step 2: Combine the Fruits

    In your large mixing bowl, combine the peach slices, pear slices, pineapple chunks, and mandarin oranges. Stir them gently to mix without breaking the fruit pieces. This is where the magic starts to happen as the colors and textures come together.

    Step 3: Add the Extras

    Fold in the mini marshmallows and shredded coconut. These ingredients add a delightful sweetness and texture contrast to the soft fruits. Tip: For an extra flavor boost, toast the coconut before adding it to the salad.

    Step 4: Incorporate the Whipped Topping

    Add the whipped topping to the bowl and gently fold it into the fruit mixture until everything is evenly coated. The whipped topping acts as a creamy binder that brings all the elements together beautifully.

    Step 5: Chill and Serve

    Cover the bowl and refrigerate the salad for at least 1 hour before serving. This chilling time allows the flavors to meld together and the marshmallows to soften slightly. Tip: For best results, serve the salad within 24 hours of making it.

    Tips and Tricks

    For those looking to elevate their canned fruit salad, consider these advanced tips. First, adding a splash of citrus juice, like lemon or lime, can brighten the flavors and prevent browning. Second, experimenting with different canned fruits, such as adding cherries or grapes, can introduce new flavors and textures. Lastly, for a healthier version, substitute the whipped topping with Greek yogurt. This not only reduces the sugar content but also adds a protein boost.

    Recipe Variations

    • Tropical Twist: Add canned mango and papaya for a tropical flavor profile.
    • Berry Delight: Mix in canned berries or fresh berries when in season for a burst of color and antioxidants.
    • Nutty Crunch: Stir in chopped nuts like almonds or walnuts for added crunch and healthy fats.
    • Creamy Dream: Use vanilla pudding mix instead of whipped topping for a denser, creamier texture.
    • Spiced Up: A dash of cinnamon or nutmeg can add warmth and depth to the salad.

    Frequently Asked Questions

    Can I use fresh fruit instead of canned?

    Absolutely! Fresh fruit can be a great substitute for canned, especially when in season. Just keep in mind that fresh fruit may not have the same shelf life as canned, so the salad might not last as long in the fridge.

    How long can I store the fruit salad?

    This salad is best enjoyed within 24 hours of preparation, as the fruits can start to release more liquid and the marshmallows may become too soft. However, it can last up to 2 days if stored properly in an airtight container.

    Can I make this recipe vegan?

    Yes, you can easily make this recipe vegan by using a plant-based whipped topping and ensuring that your marshmallows are vegan-friendly. Many brands now offer gelatin-free marshmallows that are perfect for vegan diets.

    Summary

    This canned fruit salad recipe is a quick, easy, and versatile dish that’s perfect for any occasion. With minimal prep time and endless variation possibilities, it’s sure to become a favorite in your recipe collection.

  • Crab Salad Recipe with Cream Cheese: A Creamy Dream Come True

    Crab Salad Recipe with Cream Cheese: A Creamy Dream Come True

    You’re about to dive into the creamiest, dreamiest crab salad you’ve ever tasted. Perfect for sandwiches, dips, or just eating straight out of the bowl, this recipe is a game-changer.

    Why This Recipe Works

    • The cream cheese adds a rich, velvety texture that pairs perfectly with the delicate flavor of crab.
    • It’s incredibly versatile—serve it as a dip, a sandwich filling, or a standalone salad.
    • Quick and easy to make, it’s perfect for last-minute gatherings or a fancy lunch at home.

    Ingredients

    • 1 cup lump crab meat, carefully picked over for shells
    • 8 oz cream cheese, softened to room temperature
    • 1/4 cup mayonnaise
    • 2 tbsp lemon juice, freshly squeezed
    • 1/4 cup finely chopped celery
    • 2 tbsp finely chopped green onions
    • 1 tsp Old Bay seasoning
    • Salt and pepper to taste

    Equipment Needed

    • Mixing bowl
    • Rubber spatula
    • Measuring cups and spoons

    Instructions

    Crab Salad Recipe With Cream Cheese

    Step 1: Prepare Your Ingredients

    Start by ensuring your cream cheese is softened to room temperature for easy mixing. Chop your celery and green onions finely to ensure every bite has a bit of crunch and flavor. Carefully pick through your crab meat to remove any shells, because nobody likes a surprise crunch that isn’t supposed to be there.

    Step 2: Mix the Cream Cheese and Mayonnaise

    In your mixing bowl, combine the softened cream cheese and mayonnaise. Use your rubber spatula to blend them together until the mixture is smooth and uniform. This is the base of your salad, so make sure it’s well combined.

    Step 3: Add the Flavors

    Now, stir in the lemon juice, Old Bay seasoning, and a pinch of salt and pepper. The lemon juice adds a bright acidity that cuts through the richness of the cream cheese, while the Old Bay gives it that classic seafood seasoning flavor.

    Step 4: Fold in the Crab and Veggies

    Gently fold in the crab meat, celery, and green onions. Be careful not to overmix—you want to keep those lovely lumps of crab intact for texture. Taste and adjust the seasoning if necessary.

    Step 5: Chill and Serve

    Cover the bowl with plastic wrap and refrigerate for at least an hour before serving. This allows the flavors to meld together beautifully. Serve chilled with crackers, on a sandwich, or as part of a salad.

    Tips and Tricks

    For an extra touch of luxury, consider adding a tablespoon of finely chopped fresh dill or a teaspoon of Worcestershire sauce to the mix. If you’re serving this as a dip, a sprinkle of paprika on top adds color and a slight smokiness. Always use fresh lemon juice rather than bottled for the best flavor. And remember, the quality of your crab meat will make or break this dish—splurge on the good stuff if you can.

    Recipe Variations

    • Swap out the crab for cooked shrimp or lobster for a different seafood twist.
    • Add a diced avocado for extra creaminess and a boost of healthy fats.
    • For a spicy kick, mix in a tablespoon of sriracha or some diced jalapeños.
    • Turn it into a pasta salad by folding in cooked pasta shells and some extra mayonnaise.
    • Make it a wrap by spreading it on a tortilla with some lettuce and tomato.

    Frequently Asked Questions

    Can I use imitation crab meat?

    Yes, you can use imitation crab meat if you’re on a budget or prefer its flavor. Just keep in mind that the texture and taste will be slightly different from real crab meat.

    How long does this crab salad last in the fridge?

    Properly stored in an airtight container, this crab salad will last for up to 3 days in the refrigerator. After that, the quality starts to decline.

    Can I freeze crab salad?

    Freezing is not recommended, as the cream cheese and mayonnaise can separate and become grainy upon thawing, and the texture of the crab will suffer.

    Summary

    This crab salad with cream cheese is a creamy, dreamy delight that’s perfect for any occasion. Easy to make and endlessly versatile, it’s sure to become a favorite.

  • Jicama Salad Recipe: A Crunchy, Refreshing Delight

    Jicama Salad Recipe: A Crunchy, Refreshing Delight

    Bursting with freshness and crunch, this jicama salad is your go-to dish for a light, healthy, and utterly satisfying meal. Perfect for those hot summer days or when you’re craving something crisp and flavorful, this recipe is a game-changer.

    Why This Recipe Works

    • The combination of crunchy jicama with sweet and tangy dressing creates a perfect balance of flavors.
    • It’s incredibly versatile, allowing you to add your favorite fruits or veggies for extra nutrition and taste.
    • Quick and easy to prepare, making it ideal for last-minute gatherings or a healthy snack.
    • Low in calories but high in fiber, supporting your digestive health and keeping you full longer.

    Ingredients

    • 1 medium jicama, peeled and julienned
    • 1 cup cucumber, diced
    • 1/2 cup red bell pepper, thinly sliced
    • 1/4 cup fresh lime juice
    • 2 tbsp honey
    • 1 tsp chili powder
    • Salt to taste
    • 1/4 cup fresh cilantro, chopped

    Equipment Needed

    • Sharp knife
    • Cutting board
    • Large mixing bowl
    • Measuring cups and spoons
    • Whisk

    Instructions

    Jicama Salad Recipe

    Step 1: Prepare the Jicama

    Start by peeling the jicama to remove its tough outer skin. Then, using a sharp knife, julienne the jicama into thin, matchstick-like pieces. This not only makes the salad easier to eat but also allows the dressing to coat each piece evenly. Tip: For extra crunch, soak the julienned jicama in ice water for 10 minutes before draining.

    Step 2: Chop the Veggies

    Dice the cucumber and thinly slice the red bell pepper. The cucumber adds a refreshing element, while the bell pepper introduces a sweet crunch. Ensure all pieces are uniform in size for a consistent texture throughout the salad.

    Step 3: Make the Dressing

    In a small bowl, whisk together fresh lime juice, honey, chili powder, and a pinch of salt. The lime juice provides a tangy base, while the honey balances it with sweetness. Adjust the chili powder according to your spice preference. Tip: Let the dressing sit for 5 minutes to allow the flavors to meld.

    Step 4: Combine Everything

    In a large mixing bowl, toss the jicama, cucumber, and red bell pepper with the dressing until everything is well coated. The key is to ensure each piece is lightly dressed, not drenched, to maintain the salad’s crispness.

    Step 5: Garnish and Serve

    Sprinkle the chopped cilantro over the salad for a fresh, herby finish. Serve immediately, or chill in the refrigerator for 30 minutes to enhance the flavors. Tip: For an extra kick, add a sprinkle of Tajín seasoning before serving.

    Tips and Tricks

    For those looking to elevate their jicama salad, consider these advanced tips. First, toasting the chili powder lightly before adding it to the dressing can deepen its flavor. Second, incorporating fruits like mango or pineapple can add a tropical twist. Lastly, for a creamier texture, a dollop of Greek yogurt can be mixed into the dressing. Remember, the quality of your ingredients significantly impacts the final dish, so opt for fresh, organic produce whenever possible.

    Recipe Variations

    • Add diced avocado for a creamy texture and healthy fats.
    • Include orange segments for a citrusy punch.
    • Swap honey with agave syrup for a vegan version.
    • Mix in some cooked shrimp or chicken for a protein boost.
    • Use mint instead of cilantro for a different herbal note.

    Frequently Asked Questions

    Can I make this salad ahead of time?

    Absolutely! You can prepare the jicama and veggies up to a day in advance, but wait to add the dressing until you’re ready to serve to keep everything crisp. The dressing can also be made ahead and stored separately in the fridge.

    How do I store leftovers?

    Store any leftover salad in an airtight container in the refrigerator for up to 2 days. Note that the jicama may lose some of its crunch over time, so it’s best enjoyed fresh.

    Can I use a different type of vinegar instead of lime juice?

    Yes, apple cider vinegar or rice vinegar can be used as substitutes for lime juice, though they will alter the flavor profile slightly. Adjust the sweetness accordingly to balance the acidity.

    Summary

    This jicama salad is a crunchy, refreshing dish that’s perfect for any occasion. With its simple ingredients and easy preparation, it’s a healthy option that doesn’t skimp on flavor. Customize it with your favorite add-ins for a personalized touch.

  • Crunchy & Fresh Raw Carrot Salad Recipe: A Veggie Delight

    Crunchy & Fresh Raw Carrot Salad Recipe: A Veggie Delight

    Brighten up your meal with this vibrant raw carrot salad that’s as nutritious as it is delicious. Perfect for a quick lunch or a side dish that steals the show.

    Why This Recipe Works

    • It’s packed with vitamins and fiber, making it a healthy choice that doesn’t skimp on flavor.
    • The combination of sweet and tangy dressing brings out the natural sweetness of the carrots.
    • It’s incredibly versatile, allowing for endless variations to suit any taste.
    • Preparation is a breeze, requiring no cooking and minimal cleanup.
    • The crunch factor is unbeatable, adding a satisfying texture to any meal.

    Ingredients

    • 4 cups grated carrots (about 6 medium carrots)
    • 1/4 cup raisins
    • 1/4 cup chopped walnuts
    • 2 tbsp olive oil
    • 1 tbsp lemon juice
    • 1 tbsp honey
    • 1/2 tsp ground cinnamon
    • Salt and pepper to taste

    Equipment Needed

    • Box grater or food processor with grating attachment
    • Large mixing bowl
    • Small whisk or fork
    • Measuring cups and spoons

    Instructions

    Raw Carrot Salad Recipe

    Step 1: Prepare Your Carrots

    Start by washing and peeling your carrots. Using a box grater or food processor, grate the carrots into a large mixing bowl. For a finer texture, you can use the smaller holes on your grater. Tip: For extra crunch, chill your carrots in the fridge before grating.

    Step 2: Mix the Dressing

    In a small bowl, whisk together the olive oil, lemon juice, honey, and ground cinnamon until well combined. The honey should be fully dissolved into the mixture to ensure even sweetness throughout the salad.

    Step 3: Combine Ingredients

    Add the raisins and chopped walnuts to the grated carrots. Pour the dressing over the top and toss everything together until the carrots are evenly coated. Tip: Let the salad sit for 10 minutes before serving to allow the flavors to meld.

    Step 4: Season to Taste

    Give your salad a taste and adjust the seasoning with salt and pepper as needed. Remember, the flavors will develop more as the salad sits, so go easy on the salt at first.

    Step 5: Serve and Enjoy

    Transfer the salad to a serving dish and enjoy immediately, or cover and refrigerate for up to 2 days. The salad is best served cold, making it a perfect make-ahead dish for busy weeks.

    Tips and Tricks

    For an extra burst of flavor, consider adding a pinch of cumin or coriander to the dressing. If you’re not a fan of walnuts, sunflower seeds or almonds make great substitutes. To make the salad more filling, add a can of drained and rinsed chickpeas. For a sweeter version, increase the honey to 2 tbsp and add a diced apple. Always use fresh, high-quality carrots for the best taste and texture.

    Recipe Variations

    • Spicy Kick: Add a diced jalapeño or a sprinkle of red pepper flakes for heat.
    • Asian Twist: Substitute the dressing with a mix of soy sauce, sesame oil, and rice vinegar.
    • Mediterranean Style: Add crumbled feta cheese and olives for a salty, tangy flavor.
    • Fruit Fusion: Mix in diced pineapple or mango for a tropical touch.
    • Herbaceous: Fresh cilantro or parsley can add a bright, fresh flavor.

    Frequently Asked Questions

    Can I make this salad ahead of time?

    Absolutely! This salad actually tastes better after it’s had some time to sit in the fridge, allowing the flavors to meld together. Just be sure to give it a good stir before serving.

    What can I use instead of honey?

    If you’re looking for a vegan option or just don’t have honey on hand, maple syrup or agave nectar are great substitutes that will still give you that desired sweetness.

    How long will this salad last in the fridge?

    Stored in an airtight container, this salad will stay fresh for up to 2 days. After that, the carrots may start to lose their crunch, and the raisins could become too soft.

    Summary

    This raw carrot salad is a crunchy, sweet, and tangy dish that’s as easy to make as it is delicious. With endless variations, it’s a versatile recipe that can be tailored to any taste or occasion.

  • Creamy Dreamy Potato Salad Without Celery – A Celery-Free Delight

    Creamy Dreamy Potato Salad Without Celery – A Celery-Free Delight

    Back in the kitchen with a twist on the classic potato salad that skips the celery but keeps all the flavor. Perfect for picnics, potlucks, or just because you deserve something delicious today.

    Why This Recipe Works

    • No celery means no bitter aftertaste, making it a hit with even the pickiest eaters.
    • The creamy dressing is a perfect blend of tangy and sweet, coating every potato piece evenly.
    • Simple ingredients come together for a dish that’s both comforting and refreshing.
    • It’s versatile – serve it chilled or at room temperature, and it’s always a crowd-pleaser.

    Ingredients

    • 2 pounds of russet potatoes, peeled and cubed
    • 1 cup mayonnaise
    • 2 tablespoons yellow mustard
    • 1 tablespoon apple cider vinegar
    • 1 teaspoon sugar
    • 1/2 teaspoon salt
    • 1/4 teaspoon black pepper
    • 1/2 cup finely chopped red onion
    • 2 hard-boiled eggs, chopped
    • 1/4 cup chopped fresh dill

    Equipment Needed

    • Large pot
    • Mixing bowls
    • Whisk
    • Knife and cutting board
    • Measuring cups and spoons

    Instructions

    Potato Salad Recipe Without Celery

    Step 1: Cook the Potatoes

    Place the cubed potatoes in a large pot and cover with cold water by about an inch. Bring to a boil over high heat, then reduce to a simmer and cook until the potatoes are tender but not mushy, about 10-12 minutes. Drain well and let cool slightly.

    Step 2: Prepare the Dressing

    In a large mixing bowl, whisk together the mayonnaise, mustard, apple cider vinegar, sugar, salt, and pepper until smooth. Taste and adjust seasoning if necessary.

    Step 3: Combine Ingredients

    Add the slightly cooled potatoes, red onion, chopped eggs, and dill to the bowl with the dressing. Gently fold everything together until the potatoes are evenly coated with the dressing.

    Step 4: Chill the Salad

    Cover the bowl with plastic wrap and refrigerate for at least 1 hour to allow the flavors to meld together. This step is crucial for the best taste and texture.

    Step 5: Serve and Enjoy

    Give the salad a gentle stir before serving. Adjust seasoning if needed, and serve chilled or at room temperature. Enjoy your celery-free potato salad!

    Tips and Tricks

    For an extra creamy texture, mash a few of the potato pieces before adding the dressing. If you’re short on time, you can serve the salad immediately, but chilling it really enhances the flavors. For a lighter version, substitute half of the mayonnaise with Greek yogurt. Always taste and adjust the seasoning after chilling, as flavors can mellow out in the fridge.

    Recipe Variations

    • Add crispy bacon bits for a smoky flavor.
    • Swap the dill for parsley or chives for a different herbal note.
    • Include a teaspoon of paprika or curry powder for a spicy twist.
    • For a crunchier texture, add some chopped pickles or capers.
    • Make it vegan by using vegan mayonnaise and omitting the eggs.

    Frequently Asked Questions

    Can I use a different type of potato?

    Yes, you can use Yukon Gold or red potatoes for a different texture and flavor. Just keep in mind that cooking times may vary slightly depending on the type of potato you choose.

    How long can I store this potato salad?

    This potato salad can be stored in an airtight container in the refrigerator for up to 3 days. Make sure to give it a good stir before serving again.

    Can I make this recipe ahead of time?

    Absolutely! In fact, making it ahead of time allows the flavors to develop more fully. Just keep it refrigerated until you’re ready to serve.

    Summary

    This celery-free potato salad is creamy, tangy, and full of flavor. It’s easy to make and can be customized to suit your taste. Perfect for any occasion, it’s sure to become a favorite in your recipe collection.

  • Cornbread Panzanella Salad Recipe: A Southern Twist on a Classic

    Cornbread Panzanella Salad Recipe: A Southern Twist on a Classic

    Oodles of flavor await in this cornbread panzanella salad, a delightful mashup of Southern cornbread and Italian panzanella. Perfect for summer picnics or a hearty side, this recipe brings crunch, zest, and a whole lot of love to your table.

    Why This Recipe Works

    • The sweetness of cornbread pairs perfectly with the tangy vinaigrette, creating a balance of flavors that’s hard to resist.
    • Stale cornbread soaks up the dressing without falling apart, ensuring every bite is packed with flavor.
    • It’s a versatile dish that can be served as a side or main, making it perfect for any occasion.
    • The addition of fresh vegetables adds a refreshing crunch that contrasts beautifully with the soft cornbread.
    • This recipe is a great way to use up leftover cornbread, reducing food waste while creating something delicious.

    Ingredients

    • 4 cups stale cornbread, cubed
    • 1 cup cherry tomatoes, halved
    • 1 cucumber, diced
    • 1/2 red onion, thinly sliced
    • 1/4 cup fresh basil, chopped
    • 1/4 cup olive oil
    • 2 tbsp red wine vinegar
    • 1 tsp honey
    • Salt and pepper to taste

    Equipment Needed

    • Large mixing bowl
    • Whisk
    • Measuring cups and spoons
    • Knife and cutting board

    Instructions

    Cornbread Panzanella Salad Recipe

    Step 1: Prepare the Vegetables

    Start by washing and preparing your vegetables. Halve the cherry tomatoes, dice the cucumber, and thinly slice the red onion. The key here is to ensure all pieces are bite-sized for easy eating. Toss them gently in a large mixing bowl to combine.

    Step 2: Make the Dressing

    In a small bowl, whisk together the olive oil, red wine vinegar, honey, and a pinch of salt and pepper. The honey adds a subtle sweetness that complements the cornbread beautifully. Taste and adjust the seasoning as needed.

    Step 3: Combine Cornbread and Vegetables

    Add the cubed stale cornbread to the bowl with the vegetables. The cornbread should be slightly dry to absorb the dressing without becoming mushy. Gently toss to combine, ensuring the cornbread doesn’t break apart too much.

    Step 4: Add the Dressing

    Pour the dressing over the cornbread and vegetable mixture. Using a large spoon, gently fold everything together until the dressing is evenly distributed. Let the salad sit for about 10 minutes to allow the flavors to meld together.

    Step 5: Garnish and Serve

    Just before serving, sprinkle the chopped fresh basil over the top for a pop of color and flavor. Serve immediately to enjoy the contrast of textures at its best.

    Tips and Tricks

    For the best results, use cornbread that’s a day or two old. Fresh cornbread is too soft and will turn mushy when mixed with the dressing. If you’re in a pinch, you can dry out fresh cornbread in a low oven for about 10 minutes. Also, feel free to customize the vegetables based on what’s in season or what you have on hand. The dressing can also be adjusted to taste—add more vinegar for extra tang or more honey for sweetness.

    Recipe Variations

    • Add crumbled bacon or diced avocado for extra richness.
    • Swap the red wine vinegar for balsamic for a deeper flavor.
    • Include some crumbled feta or goat cheese for a creamy element.
    • For a spicy kick, add some diced jalapeños or a dash of hot sauce to the dressing.
    • Use gluten-free cornbread to make this dish gluten-free.

    Frequently Asked Questions

    Can I make this salad ahead of time?

    Yes, but for the best texture, add the cornbread and dressing no more than an hour before serving. The vegetables can be prepped ahead of time and stored in the fridge.

    What can I use instead of cornbread?

    If you don’t have cornbread, any sturdy bread like ciabatta or sourdough will work. Just make sure it’s stale or toasted to hold up to the dressing.

    How long does leftovers last?

    This salad is best eaten the day it’s made, as the cornbread will continue to soften. However, any leftovers can be stored in the fridge for up to a day.

    Summary

    This cornbread panzanella salad is a delightful twist on the classic, combining the sweetness of cornbread with a tangy vinaigrette and fresh vegetables. It’s perfect for summer gatherings or as a unique side dish.

  • Pulled Chicken Salad Recipe: A Flavor Fiesta in Every Bite

    Pulled Chicken Salad Recipe: A Flavor Fiesta in Every Bite

    Now, let’s dive into a dish that’s as fun to make as it is to eat. This pulled chicken salad is a perfect blend of juicy, flavorful chicken and crisp, fresh veggies, all tossed in a creamy, tangy dressing that’ll have your taste buds dancing. It’s the ultimate meal prep hero or a show-stopping party dish.

    Why This Recipe Works

    • The chicken is slow-cooked to perfection, ensuring it’s tender and packed with flavor.
    • A mix of crunchy vegetables adds texture and freshness, balancing the richness of the chicken.
    • The homemade dressing is a game-changer, with just the right amount of tang and creaminess.
    • It’s incredibly versatile, serving as a sandwich filler, a salad topper, or a standalone dish.
    • Perfect for meal prep, as it tastes even better the next day.

    Ingredients

    • 2 lbs chicken breast, boneless and skinless
    • 1 cup mayonnaise
    • 1/4 cup sour cream
    • 2 tbsp lemon juice
    • 1 tsp garlic powder
    • 1 tsp onion powder
    • Salt and pepper to taste
    • 1 cup celery, finely chopped
    • 1/2 cup red onion, finely diced
    • 1/2 cup carrots, shredded

    Equipment Needed

    • Slow cooker
    • Mixing bowls
    • Measuring cups and spoons
    • Knife and cutting board
    • Whisk

    Instructions

    Pulled Chicken Salad Recipe

    Step 1: Slow Cook the Chicken

    Place the chicken breasts in the slow cooker and season with salt and pepper. Cook on low for 6-7 hours or until the chicken is tender enough to shred easily with a fork. This low and slow method ensures the chicken is juicy and full of flavor.

    Step 2: Prepare the Dressing

    In a large mixing bowl, whisk together the mayonnaise, sour cream, lemon juice, garlic powder, and onion powder until smooth. This creamy dressing is the secret to the salad’s irresistible flavor.

    Step 3: Shred the Chicken

    Once the chicken is cooked, remove it from the slow cooker and let it cool slightly. Using two forks, shred the chicken into bite-sized pieces. The finer you shred, the better the dressing coats every piece.

    Step 4: Mix It All Together

    Add the shredded chicken, celery, red onion, and carrots to the bowl with the dressing. Gently toss until everything is evenly coated. The combination of textures and flavors here is what makes this salad a standout.

    Step 5: Chill and Serve

    Cover the bowl and refrigerate the salad for at least an hour before serving. This chilling time allows the flavors to meld together beautifully. Serve chilled for the best taste experience.

    Tips and Tricks

    For an extra flavor boost, consider adding a tablespoon of Dijon mustard or a dash of hot sauce to the dressing. If you’re short on time, using a store-bought rotisserie chicken is a great shortcut. For a healthier version, swap half the mayonnaise for Greek yogurt. Always taste and adjust the seasoning before serving, as flavors can mellow in the fridge.

    Recipe Variations

    • Add grapes or apples for a sweet crunch.
    • Swap the chicken for turkey or even chickpeas for a vegetarian twist.
    • Incorporate nuts like almonds or walnuts for added texture and protein.
    • Use avocado instead of mayonnaise for a healthier, creamy dressing.
    • Spice it up with curry powder or paprika for a different flavor profile.

    Frequently Asked Questions

    Can I make this salad ahead of time?

    Absolutely! This salad actually tastes better after it’s had time to chill in the fridge, making it perfect for meal prep or parties. Just be sure to store it in an airtight container to keep it fresh.

    How long does it last in the fridge?

    Stored properly, this pulled chicken salad will stay fresh for up to 3-4 days in the refrigerator. Beyond that, the texture of the vegetables may start to soften.

    Can I freeze this salad?

    Freezing is not recommended, as the mayonnaise-based dressing can separate and the vegetables will become mushy upon thawing. It’s best enjoyed fresh or refrigerated for a few days.

    Summary

    This pulled chicken salad is a versatile, flavorful dish that’s perfect for any occasion. With its tender chicken, crisp veggies, and creamy dressing, it’s sure to be a hit. Plus, it’s easy to customize based on your preferences or what you have on hand.

  • Snicker Salad Recipe with Vanilla Pudding: A Sweet Twist on a Classic

    Snicker Salad Recipe with Vanilla Pudding: A Sweet Twist on a Classic

    Snicker salad is the dessert salad you never knew you needed. Combining the crunch of Snickers bars with the creamy goodness of vanilla pudding, this recipe is a guaranteed crowd-pleaser. Perfect for potlucks, family gatherings, or when you just need a sweet treat, this salad is as fun to make as it is to eat.

    Why This Recipe Works

    • The combination of creamy vanilla pudding and crunchy Snickers bars creates a delightful texture contrast.
    • It’s incredibly easy to make, requiring no baking and just a few simple steps.
    • This recipe is versatile, allowing for numerous variations to suit any taste.
    • It’s a great way to use up leftover Snickers bars from Halloween or other holidays.
    • The salad can be made ahead of time, making it perfect for busy schedules.

    Ingredients

    • 1 package (3.4 oz) instant vanilla pudding mix
    • 1 cup cold milk
    • 1 cup whipped topping, thawed
    • 4 Snickers bars, chopped into bite-sized pieces
    • 2 apples, cored and diced

    Equipment Needed

    • Large mixing bowl
    • Whisk
    • Measuring cups and spoons
    • Knife and cutting board

    Instructions

    Snicker Salad Recipe With Vanilla Pudding

    Step 1: Prepare the Pudding

    In a large mixing bowl, whisk together the instant vanilla pudding mix and cold milk until smooth. Let it sit for about 5 minutes to thicken. This is the base of your salad, so make sure it’s well mixed. Tip: For an extra creamy texture, you can use half-and-half instead of milk.

    Step 2: Fold in the Whipped Topping

    Gently fold the whipped topping into the pudding mixture until fully incorporated. This will lighten the texture of the salad, making it fluffy and airy. Be careful not to overmix, as this can deflate the whipped topping.

    Step 3: Add the Snickers and Apples

    Add the chopped Snickers bars and diced apples to the bowl. Stir gently to combine, ensuring all pieces are evenly distributed throughout the mixture. The apples add a fresh crunch that contrasts beautifully with the creamy pudding and chewy Snickers.

    Step 4: Chill the Salad

    Cover the bowl with plastic wrap and refrigerate for at least 1 hour before serving. This allows the flavors to meld together and the salad to set properly. Tip: For best results, chill overnight.

    Step 5: Serve and Enjoy

    Give the salad a quick stir before serving to ensure everything is well mixed. Serve in individual bowls or as part of a larger dessert spread. This salad is best enjoyed cold, so keep it refrigerated until ready to serve.

    Tips and Tricks

    For a lighter version of this salad, you can use sugar-free pudding mix and light whipped topping. If you’re not a fan of apples, try substituting pears or bananas for a different flavor profile. To add a bit of crunch, consider mixing in some chopped peanuts or pecans. For a more decadent version, drizzle with caramel sauce before serving. Remember, the key to a great Snicker salad is balancing the textures and flavors, so feel free to experiment with different combinations.

    Recipe Variations

    • Chocolate Lover’s Version: Use chocolate pudding instead of vanilla and add mini chocolate chips.
    • Nutty Delight: Mix in a variety of chopped nuts like almonds, walnuts, and pecans for extra crunch.
    • Fruity Twist: Add different fruits such as grapes, strawberries, or bananas for a fresher taste.
    • Caramel Drizzle: Top the salad with a generous drizzle of caramel sauce for an extra sweet touch.
    • Peanut Butter Swirl: Swirl in some peanut butter for a rich, nutty flavor that pairs perfectly with the Snickers.

    Frequently Asked Questions

    Can I make this salad ahead of time? Absolutely! This salad actually tastes better after it’s had time to chill and the flavors have melded together. Just be sure to keep it refrigerated until you’re ready to serve.

    Can I use homemade whipped cream instead of whipped topping? Yes, you can. However, keep in mind that homemade whipped cream may not hold up as well over time, so it’s best to add it just before serving.

    How long will this salad keep in the fridge? This salad will keep for up to 3 days in the refrigerator, though it’s best enjoyed within the first 24 hours for optimal texture.

    Summary

    This Snicker salad with vanilla pudding is a delightful dessert that’s easy to make and sure to impress. With its perfect balance of creamy, crunchy, and chewy textures, it’s a treat that everyone will love. Whether you stick to the classic recipe or try one of the many variations, this salad is a sweet addition to any meal.

  • Fruit Salad Recipe for Kids: A Rainbow on a Plate

    Fruit Salad Recipe for Kids: A Rainbow on a Plate

    Out of all the recipes in the world, a fruit salad might just be the simplest, yet most versatile dish you can whip up for your little ones. Not only is it a breeze to make, but it’s also a fantastic way to sneak in those essential vitamins and minerals, all while keeping the flavors fun and exciting.

    Why This Recipe Works

    • Colorful and Fun: Kids eat with their eyes first, and this fruit salad is a feast of colors that’ll grab their attention.
    • Nutritious: Packed with vitamins, fiber, and antioxidants, it’s a healthy snack that doesn’t compromise on taste.
    • Easy to Make: With no cooking involved, it’s a quick fix for busy parents.
    • Customizable: Easily adaptable to include your child’s favorite fruits or whatever’s in season.

    Ingredients

    • 1 cup strawberries, hulled and quartered
    • 1 cup blueberries, washed
    • 1 cup grapes, halved
    • 1 banana, sliced
    • 1 apple, diced
    • 1/2 cup orange juice
    • 1 tbsp honey (optional)

    Equipment Needed

    • Large mixing bowl
    • Knife
    • Cutting board
    • Measuring cups and spoons

    Instructions

    Fruit Salad Recipe For Kids

    Step 1: Prep Your Fruits

    Start by washing all your fruits under cold water. Then, proceed to hull and quarter the strawberries, halve the grapes, slice the banana, and dice the apple. Remember, the smaller the pieces, the easier it is for little kids to eat. Tip: To prevent the banana and apple from browning, toss them in a little lemon juice.

    Step 2: Combine the Fruits

    In a large mixing bowl, gently combine the strawberries, blueberries, grapes, banana, and apple. The key here is to be gentle to avoid bruising the softer fruits. This is where the rainbow starts to come together, so take a moment to admire your work!

    Step 3: Add the Dressing

    Drizzle the orange juice over the fruit mixture. If you’re using honey, now’s the time to add it. Gently toss the salad to ensure every piece of fruit is lightly coated. The orange juice not only adds flavor but also keeps the fruits from oxidizing too quickly.

    Step 4: Chill Before Serving

    Cover the bowl with plastic wrap and let the fruit salad chill in the refrigerator for at least 30 minutes. This step allows the flavors to meld together beautifully. Plus, a chilled fruit salad is incredibly refreshing on a warm day.

    Step 5: Serve and Enjoy

    Once chilled, give the salad a final gentle toss and serve it in colorful bowls or cups to make it even more appealing to the kids. Watch as they dive into this healthy, delicious treat!

    Tips and Tricks

    Creating the perfect fruit salad for kids is all about the details. Here are some extra tips to ensure your fruit salad is a hit: Always use ripe, in-season fruits for the best flavor and texture. If you’re preparing the salad ahead of time, add the bananas just before serving to prevent them from getting mushy. For an extra fun twist, use cookie cutters to shape some of the firmer fruits like apples and melons into stars or hearts. And remember, the more colorful the salad, the more enticing it will be to kids.

    Recipe Variations

    • Tropical Twist: Swap out some of the fruits for mango, pineapple, and kiwi for a tropical flavor explosion.
    • Berry Medley: Focus on berries by adding raspberries and blackberries, perfect for berry-loving kids.
    • Creamy Delight: Mix in a little yogurt or whipped cream for a creamy version that feels like a dessert.
    • Granola Topped: Sprinkle some granola on top for added crunch and a boost of energy.

    Frequently Asked Questions

    Can I make this fruit salad ahead of time? Yes, you can prepare this fruit salad a few hours in advance. Just hold off on adding the bananas until you’re ready to serve to keep them from turning brown and mushy.

    What other dressings can I use? Besides orange juice, you can use lime juice, lemon juice, or even a little maple syrup for a different flavor profile. The key is to use something that will complement the fruits without overpowering them.

    How can I make this salad more appealing to picky eaters? Try involving your kids in the preparation process. Let them pick out the fruits at the store or help with the mixing. Kids are more likely to eat something they’ve had a hand in making.

    Summary

    This fruit salad recipe is a simple, nutritious, and fun way to get kids excited about eating their fruits. With its vibrant colors and sweet flavors, it’s sure to be a hit at any meal or snack time.