Author: onlinefoodrecipes

  • Fruit Salad and Yogurt Recipe: A Refreshing Summer Delight

    Fruit Salad and Yogurt Recipe: A Refreshing Summer Delight

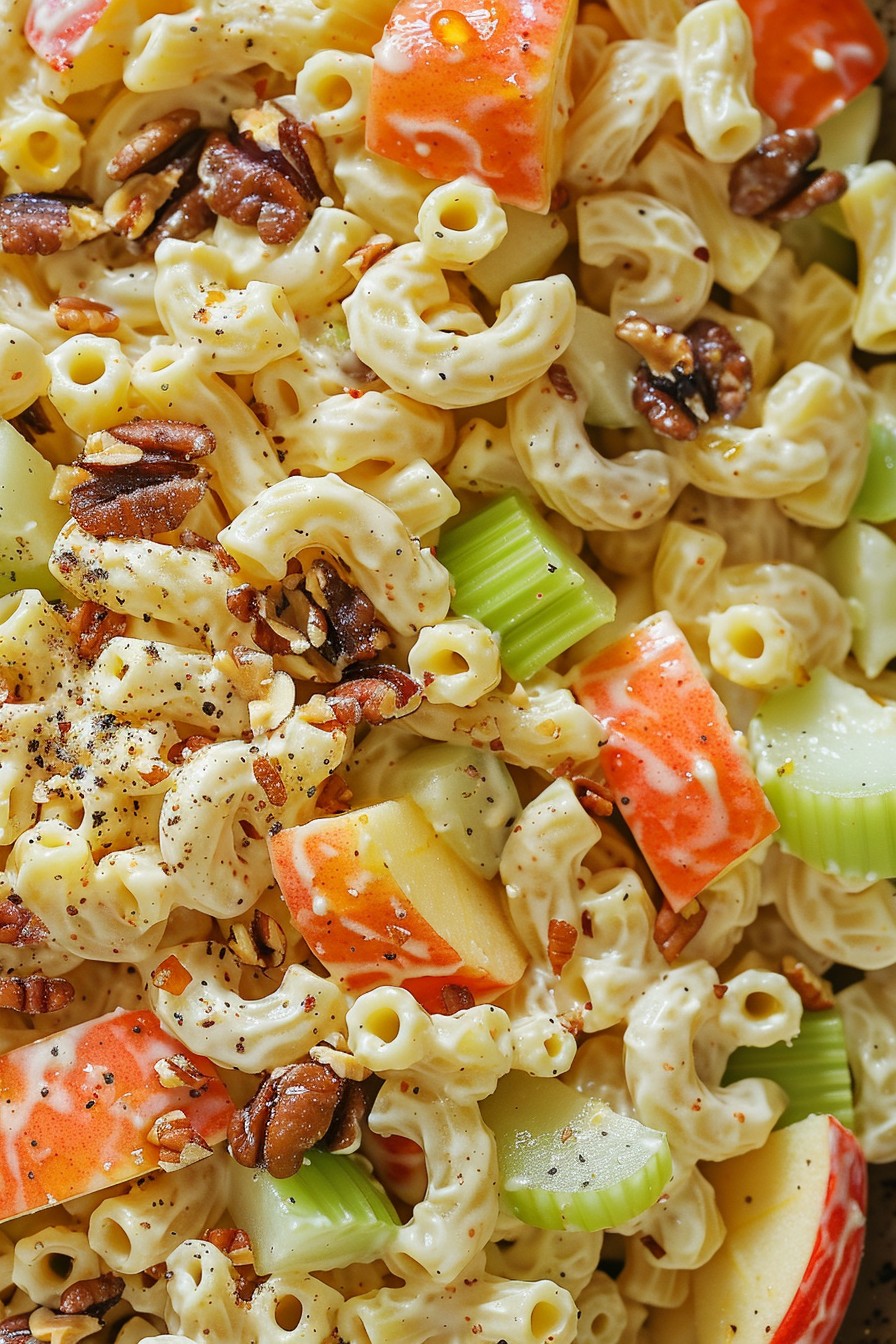
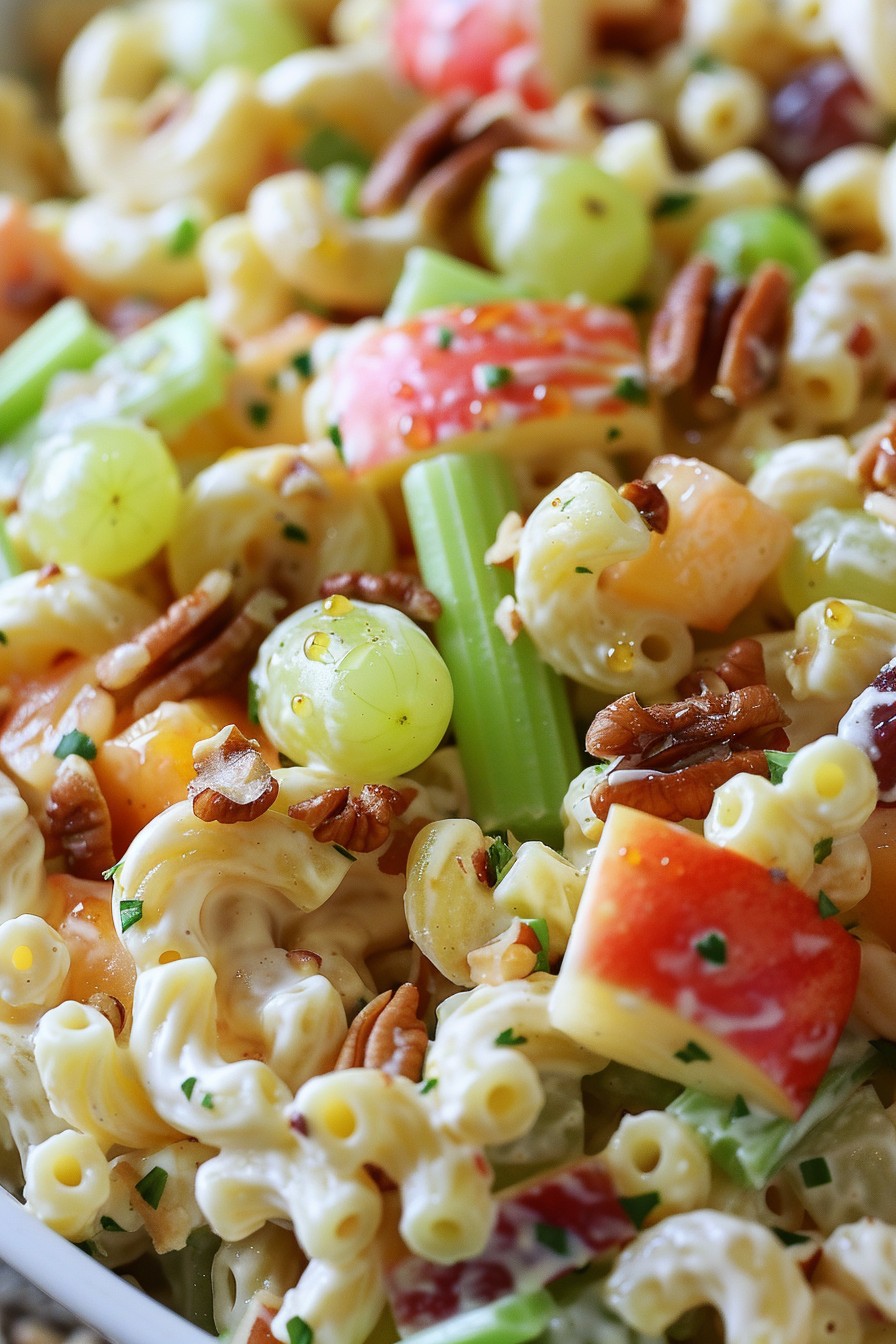
    Very few things scream summer like a vibrant fruit salad paired with creamy yogurt. This recipe is not just a treat for your taste buds but also a feast for your eyes, making it the perfect dish for any summer gathering or a healthy snack to beat the heat.

    Why This Recipe Works

    • It combines the natural sweetness of fresh fruits with the tanginess of yogurt for a balanced flavor profile.
    • The variety of textures from crunchy nuts to soft fruits adds an exciting eating experience.
    • It’s incredibly versatile, allowing for endless variations based on seasonal fruits or personal preferences.
    • Quick and easy to prepare, making it ideal for last-minute gatherings or a healthy snack.
    • Packed with vitamins, minerals, and probiotics, it’s as nutritious as it is delicious.

    Ingredients

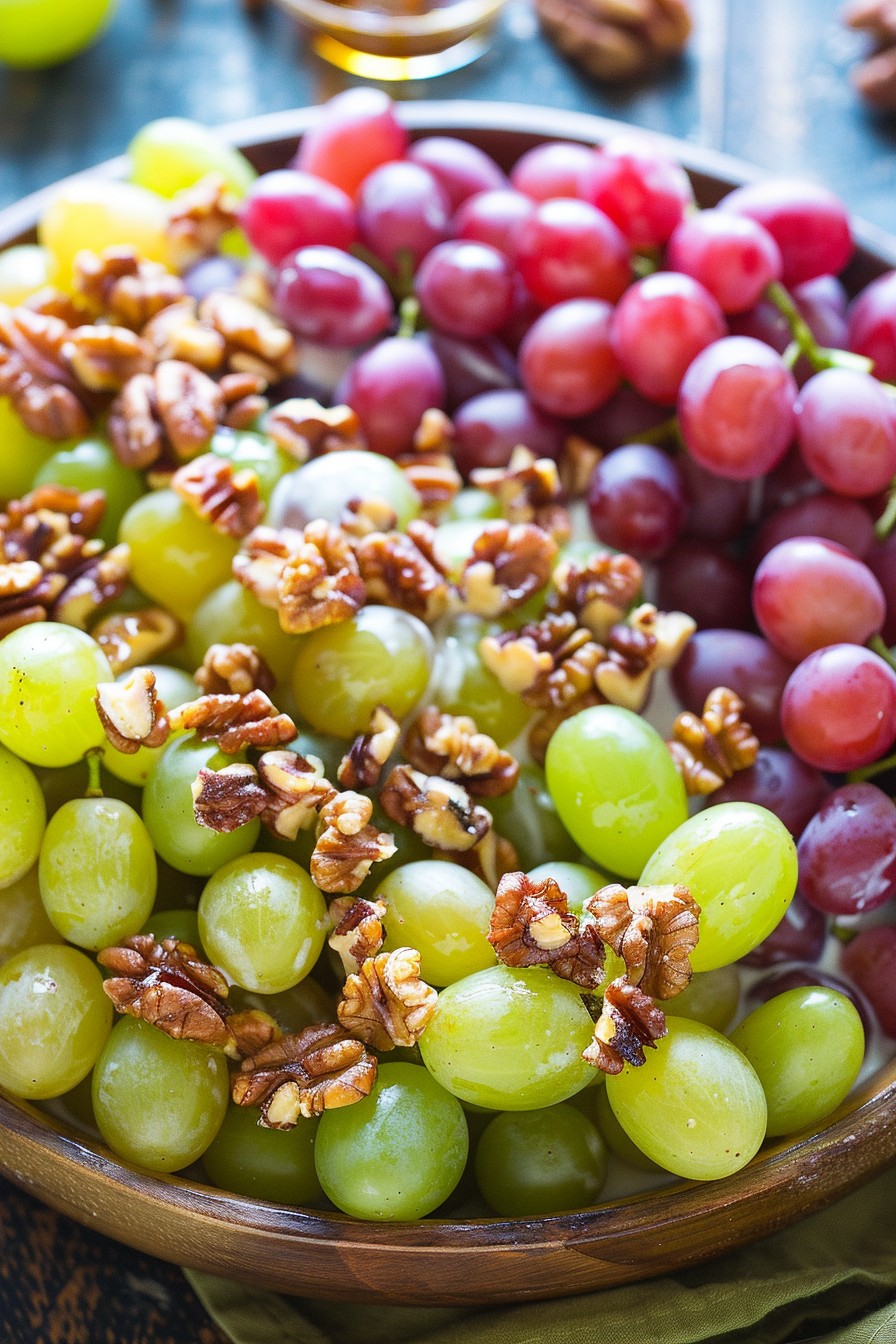
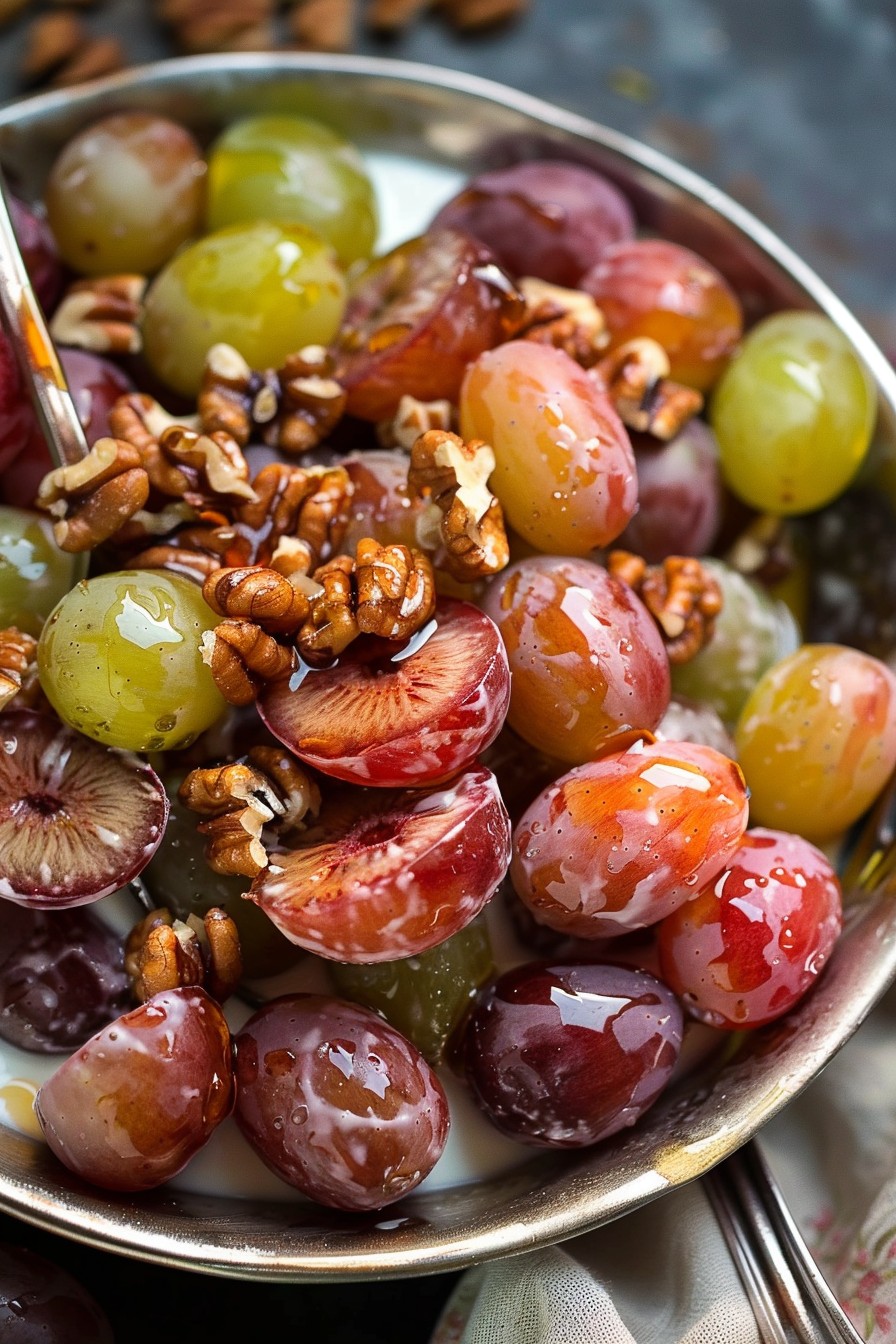
    • 2 cups mixed fresh fruits (such as strawberries, blueberries, kiwi, and mango), diced
    • 1 cup Greek yogurt
    • 2 tbsp honey
    • 1/4 cup granola
    • 1 tbsp fresh mint leaves, chopped

    Equipment Needed

    • Mixing bowl
    • Measuring cups and spoons
    • Knife and cutting board
    • Serving bowls

    Instructions

    Fruit Salad And Yogurt Recipe

    Step 1: Prepare the Fruits

    Wash all the fruits thoroughly under cold water. Dice them into bite-sized pieces to ensure every spoonful has a mix of flavors. This step is crucial for achieving the perfect texture and taste balance in your fruit salad.

    Step 2: Mix the Yogurt and Honey

    In a mixing bowl, combine the Greek yogurt and honey. Whisk them together until the mixture is smooth and the honey is fully incorporated. This will serve as the creamy base of your dish, adding a sweet and tangy flavor.

    Step 3: Combine Fruits and Yogurt Mixture

    Gently fold the diced fruits into the yogurt mixture, ensuring each piece is evenly coated. Be careful not to overmix to prevent the fruits from becoming mushy. This step brings all the flavors together beautifully.

    Step 4: Add the Final Touches

    Sprinkle the granola and chopped mint leaves over the top for added crunch and freshness. These toppings not only enhance the texture but also add a pop of color, making the dish even more appealing.

    Step 5: Serve Immediately or Chill

    You can serve the fruit salad and yogurt immediately for a fresh taste, or chill it in the refrigerator for about 30 minutes to let the flavors meld together. Either way, it’s delicious.

    Tips and Tricks

    For the best results, use fresh, in-season fruits as they are sweeter and more flavorful. If you’re preparing the salad ahead of time, add the granola just before serving to maintain its crunchiness. Experiment with different types of yogurt, such as coconut or almond yogurt, for a dairy-free version. To make the dish more indulgent, a drizzle of chocolate syrup or a sprinkle of coconut flakes can be delightful additions.

    Recipe Variations

    • For a tropical twist, use fruits like pineapple, papaya, and banana, and top with toasted coconut flakes.
    • Add a scoop of protein powder to the yogurt mixture for a post-workout snack.
    • Incorporate spices like cinnamon or nutmeg for a warm, comforting flavor profile.
    • Use flavored yogurts, such as vanilla or strawberry, to add another layer of taste without extra work.
    • For a dessert version, mix in a tablespoon of cocoa powder into the yogurt and top with dark chocolate shavings.

    Frequently Asked Questions

    Can I use frozen fruits instead of fresh?

    Yes, you can use frozen fruits, but make sure to thaw and drain them well to avoid excess water in your salad. Frozen fruits are a great option when fresh ones are out of season, though they may be slightly softer once thawed.

    How long can I store the fruit salad and yogurt in the fridge?

    It’s best enjoyed within 24 hours as the fruits may start to release water and become soggy. If you plan to store it, keep the granola separate and add it just before serving to maintain its texture.

    Is there a dairy-free alternative to Greek yogurt?

    Absolutely! Coconut yogurt, almond yogurt, or any plant-based yogurt can be used as a substitute. These alternatives offer a similar creamy texture and can be just as delicious when paired with fresh fruits and honey.

    Summary

    This fruit salad and yogurt recipe is a simple, nutritious, and delicious way to enjoy the bounty of summer fruits. With its perfect balance of flavors and textures, it’s sure to be a hit at any gathering or as a refreshing snack. Plus, it’s endlessly customizable to suit your taste preferences or dietary needs.

  • Macaroni and Fruit Salad Recipe: A Sweet & Savory Delight

    Macaroni and Fruit Salad Recipe: A Sweet & Savory Delight

    You’re about to embark on a culinary adventure that combines the best of both worlds: the comforting chew of macaroni with the fresh, juicy burst of fruit. This isn’t your grandma’s macaroni salad—unless your grandma was into wildly innovative flavor combinations.

    Why This Recipe Works

    • Unexpected Flavor Pairing: The sweetness of the fruit contrasts beautifully with the savory notes of the macaroni and dressing, creating a dish that’s both refreshing and satisfying.
    • Texture Heaven: Creamy dressing, al dente pasta, and crisp fruit come together for a mouthfeel that’s anything but boring.
    • Versatility: Perfect as a side dish, potluck contribution, or even a light main course, this recipe adapts to your needs.
    • Easy to Make: With simple ingredients and straightforward steps, this dish is accessible to cooks of all levels.

    Ingredients

    • 2 cups elbow macaroni, uncooked
    • 1 cup mayonnaise
    • 1/4 cup honey
    • 2 tbsp apple cider vinegar
    • 1 cup diced apples
    • 1 cup seedless grapes, halved
    • 1/2 cup diced celery
    • 1/4 cup chopped walnuts
    • Salt and pepper to taste

    Equipment Needed

    • Large pot
    • Colander
    • Mixing bowls
    • Whisk
    • Measuring cups and spoons

    Instructions

    Macaroni And Fruit Salad Recipe

    Step 1: Cook the Macaroni

    Bring a large pot of salted water to a rolling boil. Add the macaroni and cook according to package instructions until al dente, usually about 8 minutes. Drain in a colander and rinse under cold water to stop the cooking process. Tip: Adding a splash of olive oil to the boiling water can prevent the pasta from sticking together.

    Step 2: Prepare the Dressing

    In a large mixing bowl, whisk together the mayonnaise, honey, and apple cider vinegar until smooth. Season with salt and pepper to taste. This creamy, sweet, and tangy dressing is the glue that holds our salad together.

    Step 3: Combine Ingredients

    Add the cooled macaroni, diced apples, halved grapes, diced celery, and chopped walnuts to the bowl with the dressing. Gently toss until everything is evenly coated. Tip: For the best flavor, let the salad chill in the refrigerator for at least an hour before serving.

    Step 4: Serve and Enjoy

    Give the salad a final toss before serving to redistribute the dressing. Serve chilled for the most refreshing experience. This dish is perfect for picnics, potlucks, or as a unique side dish at your next barbecue.

    Tips and Tricks

    For those looking to elevate their macaroni and fruit salad, consider toasting the walnuts beforehand to bring out their nutty flavor. If you’re serving the salad outdoors, keep it in a cooler or on ice to maintain freshness. For a lighter version, substitute Greek yogurt for half of the mayonnaise. Experiment with different fruits based on the season—pears, peaches, or berries can offer delightful variations. Lastly, if you’re preparing this salad ahead of time, add the apples last to prevent them from browning.

    Recipe Variations

    • Tropical Twist: Swap the apples and grapes for mango, pineapple, and coconut flakes for a tropical vibe.
    • Berry Bliss: Use strawberries, blueberries, and raspberries for a berry-packed version that’s perfect for summer.
    • Savory Option: Omit the honey and add diced chicken or turkey for a more savory, protein-rich meal.
    • Nut-Free: Replace walnuts with sunflower seeds or omit nuts altogether for allergy-friendly options.

    Frequently Asked Questions

    Can I use a different type of pasta?

    Absolutely! While elbow macaroni is traditional, feel free to experiment with shells, rotini, or any small pasta shape that catches your fancy. Just be sure to adjust cooking times accordingly.

    How long does this salad keep in the fridge?

    Stored in an airtight container, your macaroni and fruit salad will stay fresh for up to 3 days. However, the fruits may soften over time, so it’s best enjoyed within the first 24 hours.

    Can I make this recipe vegan?

    Yes! Simply use vegan mayonnaise and ensure your honey substitute is plant-based, like maple syrup or agave nectar. The rest of the ingredients are naturally vegan-friendly.

    Summary

    This macaroni and fruit salad recipe is a delightful twist on classic pasta salad, offering a perfect balance of sweet and savory flavors. Easy to make and versatile, it’s sure to be a hit at any gathering.

  • Savory Chicken Salad Recipe: A Flavorful Twist on a Classic

    Savory Chicken Salad Recipe: A Flavorful Twist on a Classic

    Sometimes, the simplest dishes bring the most joy, and this savory chicken salad is no exception. Packed with flavors and textures that dance on your palate, it’s a recipe that promises to elevate your lunch game.

    Why This Recipe Works

    • The combination of tender chicken and crisp vegetables offers a satisfying crunch in every bite.
    • A creamy, tangy dressing binds all the ingredients together without overpowering their natural flavors.
    • It’s versatile enough to serve as a sandwich filler, on a bed of greens, or straight out of the bowl.
    • Perfect for meal prep, as it tastes even better the next day when the flavors have melded.
    • Quick and easy to make, requiring no fancy ingredients or techniques.

    Ingredients

    • 2 cups cooked chicken, shredded or diced
    • 1/2 cup mayonnaise
    • 1/4 cup sour cream
    • 1 tbsp Dijon mustard
    • 1 celery stalk, finely chopped
    • 1/4 cup red onion, finely diced
    • 1/4 cup dried cranberries
    • 1/4 cup walnuts, chopped
    • Salt and pepper to taste

    Equipment Needed

    • Mixing bowl
    • Whisk
    • Measuring cups and spoons
    • Knife and cutting board

    Instructions

    Savory Chicken Salad Recipe

    Step 1: Prepare the Dressing

    In a large mixing bowl, whisk together the mayonnaise, sour cream, and Dijon mustard until smooth. This creamy base will coat every ingredient evenly, ensuring no bite is left undressed. Tip: For a lighter version, you can substitute Greek yogurt for the sour cream.

    Step 2: Add the Chicken

    Add the shredded or diced chicken to the bowl with the dressing. Gently fold the chicken into the dressing until each piece is well coated. The chicken is the star of the show, so make sure it’s evenly distributed for maximum flavor in every serving.

    Step 3: Incorporate the Vegetables and Fruits

    Add the finely chopped celery, diced red onion, and dried cranberries to the bowl. These ingredients add a delightful crunch and a burst of sweetness that contrasts beautifully with the savory chicken. Tip: Soaking the red onion in cold water for 10 minutes before adding can mellow its sharpness.

    Step 4: Add the Nuts

    Sprinkle in the chopped walnuts for an added layer of texture and a nutty flavor that complements the other ingredients perfectly. If you’re not a fan of walnuts, feel free to skip this step or substitute with your preferred nut.

    Step 5: Season to Taste

    Finally, season the salad with salt and pepper to taste. Give everything one last gentle mix to ensure all the flavors are well combined. Tip: Letting the salad chill in the refrigerator for at least an hour before serving allows the flavors to meld together beautifully.

    Tips and Tricks

    For those looking to take their chicken salad to the next level, consider these advanced tips. First, roasting your own chicken instead of using store-bought can add a deeper flavor. Second, toasting the walnuts before adding them to the salad can enhance their nuttiness. Third, adding a splash of lemon juice or vinegar can brighten up the flavors. Fourth, for a creamier texture, you can blend half of the salad in a food processor before mixing it back in. Lastly, experimenting with different herbs and spices can personalize the salad to your taste preferences.

    Recipe Variations

    • For a tropical twist, add diced pineapple and substitute macadamia nuts for walnuts.
    • For a more savory version, include crispy bacon bits and blue cheese crumbles.
    • For a spicy kick, mix in some diced jalapeños or a dash of hot sauce.
    • For a healthier option, replace the mayonnaise with avocado mash.
    • For a different texture, use grilled chicken instead of boiled or roasted.

    Frequently Asked Questions

    Can I make this salad ahead of time?

    Absolutely! This chicken salad actually tastes better after it’s had time to sit in the fridge for a few hours or overnight. The flavors meld together, and the texture becomes even more cohesive. Just be sure to store it in an airtight container to keep it fresh.

    What’s the best way to serve this chicken salad?

    This salad is incredibly versatile. Serve it on a bed of greens for a light meal, between two slices of bread for a classic sandwich, or with crackers for a quick snack. It’s also great stuffed into a tomato or avocado for a low-carb option.

    Can I use canned chicken?

    While you can use canned chicken in a pinch, the texture and flavor won’t be as good as using freshly cooked chicken. If you do use canned chicken, be sure to drain it well and consider giving it a quick rinse to remove any excess sodium.

    Summary

    This savory chicken salad recipe is a delightful mix of textures and flavors, perfect for any occasion. Whether you’re looking for a quick lunch option or a dish to impress at your next gathering, this recipe is sure to please. With its simple ingredients and easy preparation, it’s a no-fuss dish that delivers on taste every time.

  • Red Skin Potato Salad Recipe: A Summer Picnic Must-Have

    Red Skin Potato Salad Recipe: A Summer Picnic Must-Have

    Zesty, creamy, and utterly delicious, this red skin potato salad is the perfect side dish for your summer gatherings. Packed with flavor and texture, it’s a crowd-pleaser that’s as easy to make as it is to love.

    Why This Recipe Works

    • The red skin potatoes hold their shape well after cooking, providing a perfect bite every time.
    • A creamy dressing with just the right amount of tanginess complements the potatoes without overpowering them.
    • Fresh herbs and crisp vegetables add layers of flavor and texture, making each forkful interesting.
    • It’s versatile enough to serve at a barbecue, picnic, or as a hearty side for weeknight dinners.
    • This recipe strikes the perfect balance between indulgent and refreshing, making it a hit with all ages.

    Ingredients

    • 2 pounds red skin potatoes, washed and quartered
    • 1 cup mayonnaise
    • 2 tablespoons Dijon mustard
    • 1 tablespoon apple cider vinegar
    • 1/2 cup red onion, finely diced
    • 1/2 cup celery, finely diced
    • 1/4 cup fresh dill, chopped
    • Salt and pepper to taste

    Equipment Needed

    • Large pot
    • Mixing bowls
    • Whisk
    • Knife and cutting board
    • Measuring cups and spoons

    Instructions

    Red Skin Potato Salad Recipe

    Step 1: Cook the Potatoes

    Place the quartered red skin potatoes in a large pot and cover with cold water. Bring to a boil over high heat, then reduce to a simmer. Cook for 10-15 minutes, or until the potatoes are tender but still firm. Drain and let cool slightly. Tip: For extra flavor, cook the potatoes in vegetable or chicken broth instead of water.

    Step 2: Prepare the Dressing

    In a large mixing bowl, whisk together the mayonnaise, Dijon mustard, and apple cider vinegar until smooth. Season with salt and pepper to taste. This creamy dressing is the secret to the salad’s irresistible flavor.

    Step 3: Combine the Ingredients

    Add the slightly cooled potatoes to the dressing along with the red onion, celery, and fresh dill. Gently toss until all the ingredients are evenly coated. Tip: For best results, let the salad chill in the refrigerator for at least an hour before serving to allow the flavors to meld.

    Step 4: Final Seasoning

    Before serving, give the salad a final taste and adjust the seasoning if necessary. Sometimes a little extra salt or a squeeze of lemon juice can brighten up the flavors even more.

    Tips and Tricks

    For those looking to elevate their red skin potato salad, consider roasting the potatoes instead of boiling them for a deeper flavor. Adding crispy bacon bits or hard-boiled eggs can introduce new textures and tastes. If you’re short on time, using pre-cooked potatoes from the grocery store can be a time-saver. Remember, the key to a great potato salad is balancing the creaminess of the dressing with the freshness of the herbs and vegetables.

    Recipe Variations

    • Add crispy bacon or pancetta for a smoky flavor.
    • Incorporate hard-boiled eggs for extra protein and texture.
    • Swap the dill for parsley or cilantro for a different herbal note.
    • Use Greek yogurt in place of half the mayonnaise for a lighter version.
    • Add a teaspoon of smoked paprika for a subtle heat and depth.

    Frequently Asked Questions

    Can I make this potato salad ahead of time?

    Absolutely! In fact, making it a day ahead allows the flavors to develop more fully. Just be sure to store it in an airtight container in the refrigerator and give it a good stir before serving.

    How long does red skin potato salad last in the fridge?

    When stored properly, it can last up to 3-4 days. However, it’s best enjoyed within the first two days for optimal texture and freshness.

    Can I use other types of potatoes?

    While red skin potatoes are ideal for their texture and color, Yukon gold or even russet potatoes can be used as substitutes. Just keep in mind that the texture and cooking time may vary slightly.

    Summary

    This red skin potato salad is a creamy, tangy, and flavorful side dish that’s perfect for any occasion. Easy to make and customizable, it’s sure to become a staple in your recipe collection.

  • Crunchy Veggie Delight: A Vegetable Salad Recipe That’s Anything But Boring

    Crunchy Veggie Delight: A Vegetable Salad Recipe That’s Anything But Boring

    Delight in the freshness of summer with this vibrant vegetable salad that packs a punch of flavor and texture. Perfect for picnics, potlucks, or a light lunch, this recipe is a testament to how simple ingredients can create something truly spectacular.

    Why This Recipe Works

    • The combination of crisp vegetables and a tangy dressing creates a perfect balance of flavors and textures.
    • It’s incredibly versatile, allowing you to swap in whatever veggies you have on hand.
    • Prepping the vegetables ahead of time makes this salad a quick and easy option for busy weeknights.
    • The dressing is light yet flavorful, enhancing the natural tastes of the vegetables without overpowering them.
    • This salad is not only delicious but also packed with nutrients, making it a healthy choice for any meal.

    Ingredients

    • 2 cups chopped romaine lettuce
    • 1 cup cherry tomatoes, halved
    • 1 cucumber, sliced
    • 1 bell pepper, diced
    • 1/2 red onion, thinly sliced
    • 1/4 cup olive oil
    • 2 tbsp apple cider vinegar
    • 1 tsp honey
    • Salt and pepper to taste

    Equipment Needed

    • Large mixing bowl
    • Whisk
    • Measuring cups and spoons
    • Knife and cutting board

    Instructions

    Vegetable Salad Recipe

    Step 1: Prep Your Vegetables

    Start by washing all your vegetables thoroughly under cold water. Chop the romaine lettuce into bite-sized pieces, halve the cherry tomatoes, slice the cucumber, dice the bell pepper, and thinly slice the red onion. Place all the prepared vegetables in a large mixing bowl. Tip: For extra crispness, you can soak the sliced onions in cold water for about 10 minutes to mellow their sharpness.

    Step 2: Make the Dressing

    In a small bowl, whisk together the olive oil, apple cider vinegar, honey, salt, and pepper until well combined. Taste and adjust the seasoning if necessary. The dressing should have a nice balance of tanginess and sweetness.

    Step 3: Combine and Toss

    Pour the dressing over the prepared vegetables in the mixing bowl. Gently toss everything together until all the vegetables are evenly coated with the dressing. Be careful not to overmix to keep the vegetables crisp.

    Step 4: Let It Marinate

    Allow the salad to sit for about 5 minutes before serving. This short marinating time lets the flavors meld together beautifully. Tip: If you’re making this salad ahead of time, keep the dressing separate and toss it in just before serving to maintain the vegetables’ crunch.

    Step 5: Serve and Enjoy

    Transfer the salad to a serving dish or individual plates. Serve immediately for the best texture and flavor. This salad pairs wonderfully with grilled meats or can stand proudly on its own as a light meal.

    Tips and Tricks

    For those looking to elevate their vegetable salad game, consider these advanced tips. First, toasting nuts or seeds and adding them to the salad can introduce a delightful crunch and nutty flavor. Second, incorporating fresh herbs like basil or cilantro can add a fresh, aromatic dimension to the dish. Lastly, experimenting with different types of vinegar in the dressing, such as balsamic or red wine vinegar, can offer new flavor profiles to explore.

    Recipe Variations

    • Add protein: Toss in some grilled chicken, shrimp, or tofu to make the salad more filling.
    • Go Mediterranean: Include olives, feta cheese, and a sprinkle of oregano for a Greek twist.
    • Make it creamy: Swap the vinaigrette for a creamy avocado or yogurt-based dressing.
    • Add grains: Mix in cooked quinoa or farro for a hearty, grain-based salad.
    • Seasonal twist: Use seasonal vegetables to keep the salad fresh and exciting all year round.

    Frequently Asked Questions

    Can I make this salad ahead of time?

    Yes, you can prep the vegetables and the dressing separately a day in advance. However, to maintain the best texture, combine them just before serving. This way, the vegetables stay crisp and the salad remains fresh.

    How can I make this salad more kid-friendly?

    Kids might prefer milder flavors, so you can reduce the amount of onion or omit it altogether. Adding sweeter vegetables like corn or carrots can also make the salad more appealing to younger palates.

    What’s the best way to store leftovers?

    Store any leftover salad in an airtight container in the refrigerator. It’s best consumed within a day as the vegetables will start to lose their crispness over time.

    Summary

    This vegetable salad is a celebration of freshness, offering a perfect blend of crisp vegetables and a tangy-sweet dressing. It’s versatile, healthy, and downright delicious, making it a must-try for anyone looking to add more veggies to their diet.

  • Grape Salad Recipe Without Sour Cream: A Refreshing Twist

    Grape Salad Recipe Without Sour Cream: A Refreshing Twist

    Yes, you heard it right! A grape salad that skips the sour cream but doesn’t skimp on flavor. Perfect for those who are looking for a lighter version or just ran out of sour cream. This recipe is a game-changer with its creamy texture and sweet, tangy flavors that will have everyone asking for seconds.

    Why This Recipe Works

    • Uses Greek yogurt as a healthier, protein-packed alternative to sour cream, adding a creamy texture without the guilt.
    • The combination of red and green grapes offers a beautiful color contrast and a mix of sweet and tart flavors.
    • Walnuts add a crunchy texture, making every bite interesting.
    • Honey brings a natural sweetness that complements the grapes perfectly.
    • Quick and easy to prepare, making it a great last-minute dish for any occasion.

    Ingredients

    • 2 cups red seedless grapes, halved
    • 2 cups green seedless grapes, halved
    • 1 cup Greek yogurt
    • 1/4 cup honey
    • 1/2 cup chopped walnuts
    • 1 tsp vanilla extract

    Equipment Needed

    • Mixing bowl
    • Measuring cups and spoons
    • Knife and cutting board
    • Spatula

    Instructions

    Grape Salad Recipe Without Sour Cream

    Step 1: Prepare the Grapes

    Start by washing your red and green grapes thoroughly under cold water. Pat them dry with a clean towel to remove any excess moisture. Then, halve each grape using a sharp knife and a cutting board. This step ensures that every bite of your salad is easy to eat and perfectly sized. Tip: For an extra burst of flavor, let the grapes sit in the fridge for an hour before preparing the salad.

    Step 2: Mix the Dressing

    In a large mixing bowl, combine the Greek yogurt, honey, and vanilla extract. Whisk them together until the mixture is smooth and well incorporated. This creamy dressing is the secret to the salad’s irresistible flavor, offering a perfect balance between sweet and tangy. Tip: If the dressing is too thick, you can thin it out with a tablespoon of milk or water.

    Step 3: Combine Grapes and Dressing

    Add the halved grapes to the bowl with the dressing. Gently fold them in using a spatula until all the grapes are evenly coated. Be careful not to crush the grapes as you mix. This step is all about ensuring that every grape is enveloped in the creamy dressing for maximum flavor in every bite.

    Step 4: Add the Crunch

    Sprinkle the chopped walnuts over the grape mixture and fold them in gently. The walnuts add a delightful crunch and a nutty flavor that contrasts beautifully with the sweetness of the grapes and the creaminess of the dressing. Tip: Toast the walnuts beforehand for an even deeper flavor.

    Step 5: Chill and Serve

    Cover the bowl with plastic wrap and refrigerate the salad for at least 30 minutes before serving. This chilling time allows the flavors to meld together beautifully. Serve the salad cold, and watch as it disappears in no time at your next gathering.

    Tips and Tricks

    For those looking to elevate their grape salad game, here are some advanced tips. First, consider using flavored Greek yogurt, such as vanilla or honey, for an extra layer of taste. Second, if you’re serving the salad at a party, prepare it a day in advance to let the flavors develop even more. Third, for a festive touch, sprinkle some pomegranate seeds on top before serving for added color and a burst of tartness. Lastly, if you’re not a fan of walnuts, pecans or almonds make great substitutes, offering their own unique flavors and textures.

    Recipe Variations

    • Add a handful of mini marshmallows for a fun, sweet twist that kids will love.
    • Incorporate some diced apples or pears for additional fruitiness and texture.
    • Swap out the walnuts for pecans or almonds for a different nutty flavor.
    • Mix in a sprinkle of cinnamon or nutmeg for a warm, spicy note.
    • For a more decadent version, drizzle with caramel sauce before serving.

    Frequently Asked Questions

    Can I use frozen grapes for this recipe? While fresh grapes are recommended for the best texture and flavor, you can use frozen grapes if you’re in a pinch. Just make sure to thaw them completely and pat them dry to avoid watering down the dressing.

    How long can I store this grape salad? This salad can be stored in an airtight container in the refrigerator for up to 3 days. However, it’s best enjoyed within the first 24 hours when the grapes are at their freshest.

    Is there a vegan alternative to Greek yogurt? Absolutely! You can use coconut yogurt or any plant-based yogurt as a substitute for Greek yogurt to make this recipe vegan-friendly. Just adjust the sweetness as needed since plant-based yogurts can vary in taste.

    Summary

    This grape salad without sour cream is a refreshing, easy-to-make dish that’s perfect for any occasion. With its creamy Greek yogurt dressing, sweet grapes, and crunchy walnuts, it’s a crowd-pleaser that’s as nutritious as it is delicious. Give it a try and see how quickly it becomes a favorite!

  • Crispy Rice Salad Recipe: A Crunchy Twist on a Classic

    Crispy Rice Salad Recipe: A Crunchy Twist on a Classic

    Unleash the power of texture with this crispy rice salad recipe that’s sure to become your new favorite. Perfect for picnics, potlucks, or a refreshing weeknight dinner, this dish combines the satisfying crunch of crispy rice with fresh, vibrant veggies and a tangy dressing.

    Why This Recipe Works

    • The contrast between the crispy rice and fresh vegetables creates a delightful texture that’s hard to resist.
    • It’s incredibly versatile, allowing you to use whatever veggies you have on hand.
    • The dressing is a simple yet flavorful combination that ties all the ingredients together perfectly.
    • It’s a great way to use up leftover rice, reducing food waste.
    • This salad is as visually appealing as it is delicious, making it a hit at any gathering.

    Ingredients

    • 2 cups cooked rice, cooled
    • 1 tbsp olive oil
    • 1 cup diced cucumbers
    • 1 cup diced tomatoes
    • 1/2 cup diced red onion
    • 1/4 cup chopped fresh cilantro
    • 2 tbsp lime juice
    • 1 tbsp soy sauce
    • 1 tsp honey
    • Salt and pepper to taste

    Equipment Needed

    • Large mixing bowl
    • Small mixing bowl
    • Whisk
    • Baking sheet
    • Parchment paper

    Instructions

    Crispy Rice Salad Recipe

    Step 1: Crisp the Rice

    Preheat your oven to 375°F. Spread the cooled rice on a parchment-lined baking sheet in an even layer. Drizzle with olive oil and season with salt. Bake for 20-25 minutes, stirring halfway through, until the rice is golden and crispy. Tip: For extra crispiness, let the rice cool on the baking sheet after baking.

    Step 2: Prepare the Vegetables

    While the rice is crisping, dice the cucumbers, tomatoes, and red onion. Chop the cilantro. Combine all in a large mixing bowl. Tip: For a milder onion flavor, soak the diced red onion in cold water for 10 minutes, then drain.

    Step 3: Make the Dressing

    In a small bowl, whisk together the lime juice, soy sauce, honey, and a pinch of salt and pepper until well combined. Taste and adjust seasoning as needed. Tip: For a spicier dressing, add a pinch of red pepper flakes.

    Step 4: Combine Everything

    Once the rice is crispy and cooled slightly, add it to the bowl with the vegetables. Pour the dressing over the top and gently toss to combine. Serve immediately for the best texture.

    Tips and Tricks

    For the crispiest rice, make sure it’s spread in a thin, even layer on the baking sheet. Don’t skip the stirring halfway through baking to ensure even browning. If you’re short on time, you can use day-old rice straight from the fridge—it actually crisps up better than freshly cooked rice. For added protein, toss in some cooked chickpeas or shredded chicken. And remember, the dressing is key, so don’t be shy with the lime juice and soy sauce for that perfect balance of tangy and savory.

    Recipe Variations

    • Add avocado for a creamy texture and healthy fats.
    • Swap the cilantro for basil or mint for a different herbal note.
    • Include some diced mango or pineapple for a sweet and tangy twist.
    • For a heartier salad, add quinoa or farro along with the crispy rice.
    • Top with toasted nuts or seeds for extra crunch and nutrition.

    Frequently Asked Questions

    Can I make this salad ahead of time?

    Yes, but for the best texture, keep the crispy rice separate until just before serving. You can prepare all the other components ahead of time and combine them when ready to eat.

    What type of rice works best?

    Any type of cooked rice will work, but jasmine or basmati rice adds a nice fragrance. Just make sure it’s cooled before crisping in the oven.

    Can I use a different dressing?

    Absolutely! Feel free to experiment with your favorite vinaigrette or even a creamy dressing like ranch or tahini-based.

    Summary

    This crispy rice salad is a textural delight, combining crunchy rice with fresh veggies and a tangy dressing. It’s versatile, easy to make, and perfect for any occasion.

  • Greek Chicken Salad Recipe: A Mediterranean Delight

    Greek Chicken Salad Recipe: A Mediterranean Delight

    Now, let’s dive into a dish that’s as vibrant as a Greek sunset. This Greek Chicken Salad is not just a meal; it’s a ticket to the Mediterranean without leaving your kitchen. Packed with flavors, colors, and textures, it’s a perfect blend of health and taste.

    Why This Recipe Works

    • The combination of juicy chicken and crisp vegetables offers a satisfying crunch in every bite.
    • Feta cheese and Kalamata olives add a salty, tangy depth that’s unmistakably Greek.
    • A homemade Greek dressing ties all the ingredients together with its herby, lemony goodness.
    • It’s versatile enough for a quick lunch or a fancy dinner party.
    • Prep ahead options make it a busy weeknight lifesaver.

    Ingredients

    • 2 cups cooked chicken, shredded
    • 1 cup cucumber, diced
    • 1 cup cherry tomatoes, halved
    • 1/2 cup red onion, thinly sliced
    • 1/2 cup Kalamata olives, pitted and halved
    • 1/2 cup feta cheese, crumbled
    • 1/4 cup olive oil
    • 2 tbsp lemon juice
    • 1 tsp dried oregano
    • Salt and pepper to taste

    Equipment Needed

    • Large mixing bowl
    • Whisk
    • Measuring cups and spoons
    • Knife and cutting board

    Instructions

    Greek Chicken Salad Recipe

    Step 1: Prep Your Ingredients

    Start by ensuring all your vegetables are washed and prepped. Dice the cucumber into bite-sized pieces, halve the cherry tomatoes, and thinly slice the red onion. If you’re using whole olives, now’s the time to pit and halve them. Having everything ready to go makes the assembly process a breeze.

    Step 2: Make the Dressing

    In a small bowl, whisk together the olive oil, lemon juice, dried oregano, and a pinch of salt and pepper. Taste and adjust the seasoning as needed. This dressing is the soul of your salad, so don’t skimp on the flavor.

    Step 3: Combine the Salad

    In a large mixing bowl, combine the shredded chicken, cucumber, cherry tomatoes, red onion, and Kalamata olives. Drizzle the dressing over the top and gently toss to ensure everything is evenly coated. The key here is to be gentle to keep all the ingredients intact.

    Step 4: Add the Feta

    Sprinkle the crumbled feta cheese over the top of the salad. Feta is salty and tangy, so a little goes a long way. However, feel free to adjust the amount based on your preference.

    Step 5: Serve and Enjoy

    Your Greek Chicken Salad is ready to serve! For the best experience, let it sit for about 10 minutes before serving to allow the flavors to meld together. Serve it on its own, over a bed of greens, or with some warm pita bread on the side.

    Tips and Tricks

    For an even more flavorful salad, marinate the chicken in a bit of the dressing before shredding it. If you’re prepping ahead, keep the dressing separate until just before serving to maintain the crispness of the vegetables. And for a bit of extra crunch, consider adding some toasted pine nuts or slivered almonds.

    Recipe Variations

    • Swap the chicken for grilled shrimp or chickpeas for a vegetarian twist.
    • Add some avocado for extra creaminess and healthy fats.
    • Incorporate some quinoa or farro to make it more filling.
    • Use mint or dill in the dressing for a different herby flavor.
    • For a spicy kick, add some chopped jalapeños or a dash of red pepper flakes.

    Frequently Asked Questions

    Can I make this salad ahead of time?

    Absolutely! You can prep all the ingredients and keep them separate until you’re ready to serve. The dressing can be made up to 3 days in advance and stored in the fridge. Just give it a good shake or whisk before using.

    What’s the best way to cook the chicken?

    You can grill, bake, or poach the chicken. For maximum flavor, season it with a bit of salt, pepper, and oregano before cooking. Let it rest for a few minutes after cooking to retain its juices before shredding.

    Can I use a different type of cheese?

    While feta is traditional, you can substitute it with goat cheese for a creamier texture or Parmesan for a sharper taste. Just keep in mind that the flavor profile will change slightly.

    Summary

    This Greek Chicken Salad is a refreshing, flavorful dish that’s perfect for any occasion. With its combination of juicy chicken, crisp vegetables, and tangy feta, it’s a Mediterranean masterpiece that’s easy to make and even easier to love.

  • 5 Bean Salad Recipe: A Colorful and Crunchy Delight

    5 Bean Salad Recipe: A Colorful and Crunchy Delight

    Delight your taste buds with this vibrant and nutritious 5 bean salad. Perfect for picnics, potlucks, or a quick weeknight side, this recipe is as easy to make as it is delicious. Packed with protein and fiber, it’s a healthy choice that doesn’t skimp on flavor.

    Why This Recipe Works

    • Combines five different beans for a variety of textures and flavors.
    • Uses a simple, tangy dressing that enhances the natural taste of the beans.
    • Quick to prepare with no cooking required, making it a great last-minute dish.
    • Versatile recipe that can be easily customized with additional ingredients.
    • Keeps well in the fridge, making it perfect for meal prep.

    Ingredients

    • 1 can (15 oz) black beans, drained and rinsed
    • 1 can (15 oz) kidney beans, drained and rinsed
    • 1 can (15 oz) garbanzo beans, drained and rinsed
    • 1 can (15 oz) pinto beans, drained and rinsed
    • 1 can (15 oz) green beans, drained
    • 1/2 cup red onion, finely diced
    • 1/2 cup green bell pepper, diced
    • 1/4 cup olive oil
    • 1/4 cup apple cider vinegar
    • 2 tablespoons honey
    • 1 teaspoon salt
    • 1/2 teaspoon black pepper
    • 1 teaspoon dried oregano

    Equipment Needed

    • Large mixing bowl
    • Whisk
    • Measuring cups and spoons
    • Can opener
    • Colander

    Instructions

    5 Bean Salad Recipe

    Step 1: Prepare the Beans

    Start by draining and rinsing the black beans, kidney beans, garbanzo beans, and pinto beans under cold water to remove any excess sodium. Drain the green beans but there’s no need to rinse them. Transfer all the beans to a large mixing bowl. Tip: Rinsing the beans helps reduce the sodium content and prevents the salad from being too salty.

    Step 2: Add the Vegetables

    Finely dice the red onion and green bell pepper. Add them to the bowl with the beans. The crunch of the fresh vegetables adds a nice contrast to the soft beans. Tip: Soaking the diced onion in cold water for 10 minutes before adding can help mellow its sharpness.

    Step 3: Make the Dressing

    In a small bowl, whisk together the olive oil, apple cider vinegar, honey, salt, black pepper, and dried oregano until well combined. The honey balances the acidity of the vinegar, creating a perfectly tangy dressing. Tip: For a smoother dressing, you can warm the honey slightly before mixing.

    Step 4: Combine Everything

    Pour the dressing over the bean and vegetable mixture. Gently toss everything together until well coated. Be careful not to mash the beans while mixing. The salad should be colorful and well-dressed but not soggy.

    Step 5: Chill and Serve

    Cover the bowl and refrigerate the salad for at least 1 hour before serving. This allows the flavors to meld together. Serve chilled for the best taste and texture. The salad can be stored in the refrigerator for up to 3 days.

    Tips and Tricks

    For an extra crunch, consider adding some chopped celery or cucumber to the salad. If you’re not a fan of honey, maple syrup makes a great substitute in the dressing. To add some heat, a diced jalapeno or a sprinkle of red pepper flakes can spice things up. For a creamier texture, mix in some avocado right before serving. Remember, the longer the salad sits, the more the flavors will develop, so making it a day ahead can actually enhance its taste.

    Recipe Variations

    • Mediterranean Twist: Add some feta cheese, kalamata olives, and swap the dressing for a lemon and olive oil mixture.
    • Southwestern Style: Include corn, diced avocado, and a dressing made with lime juice and cilantro.
    • Asian Inspired: Mix in some edamame, shredded carrots, and a dressing with sesame oil and rice vinegar.
    • Protein Boost: Add some grilled chicken or shrimp to turn the salad into a hearty main dish.
    • Sweet and Spicy: Incorporate some diced mango and a dash of cayenne pepper for a sweet and spicy version.

    Frequently Asked Questions

    Can I use dried beans instead of canned?

    Yes, you can use dried beans, but they will need to be soaked and cooked according to package instructions before using in the salad. This will add significant prep time to the recipe, so canned beans are recommended for convenience.

    How long does the salad last in the fridge?

    The salad can be stored in an airtight container in the refrigerator for up to 3 days. The flavors will continue to meld and develop over time, making it even more delicious the next day.

    Can I freeze the bean salad?

    Freezing is not recommended as the texture of the beans and vegetables will change upon thawing, resulting in a mushy salad. It’s best enjoyed fresh or stored in the fridge for a few days.

    Summary

    This 5 bean salad is a quick, nutritious, and versatile dish that’s perfect for any occasion. With its colorful presentation and delicious flavors, it’s sure to be a hit. Plus, it’s easy to customize based on your preferences or what you have on hand.

  • Michigan Salad Recipe: A Crunchy, Creamy Delight

    Michigan Salad Recipe: A Crunchy, Creamy Delight

    Prepare to fall in love with the Michigan Salad, a dish that combines crisp greens, juicy fruits, and a creamy dressing for a perfect balance of flavors and textures. Perfect for picnics, potlucks, or a refreshing weeknight dinner.

    Why This Recipe Works

    • The combination of sweet and savory ingredients creates a harmonious flavor profile that’s hard to resist.
    • Crunchy nuts and fresh greens add a satisfying texture that makes every bite interesting.
    • The creamy dressing ties all the components together without overpowering the fresh ingredients.

    Ingredients

    • 6 cups mixed greens (washed and dried)
    • 1 cup dried cherries (chopped)
    • 1/2 cup walnuts (toasted and chopped)
    • 1/4 cup blue cheese (crumbled)
    • 1/4 cup mayonnaise
    • 2 tbsp apple cider vinegar
    • 1 tbsp honey
    • Salt and pepper to taste

    Equipment Needed

    • Large salad bowl
    • Small mixing bowl
    • Whisk
    • Measuring cups and spoons

    Instructions

    Michigan Salad Recipe

    Step 1: Prepare the Dressing

    In a small mixing bowl, whisk together the mayonnaise, apple cider vinegar, and honey until smooth. Season with salt and pepper to taste. Tip: For a lighter dressing, you can substitute half of the mayonnaise with Greek yogurt.

    Step 2: Toast the Walnuts

    Spread the walnuts in a single layer on a baking sheet and toast in a preheated 350°F oven for 5-7 minutes, or until fragrant. Let them cool before chopping. Tip: Keep an eye on the walnuts to prevent burning, as they can go from toasted to burnt quickly.

    Step 3: Assemble the Salad

    In a large salad bowl, combine the mixed greens, dried cherries, toasted walnuts, and blue cheese. Drizzle the dressing over the salad and toss gently to coat. Tip: Add the dressing just before serving to keep the greens crisp.

    Tips and Tricks

    For an extra burst of flavor, consider adding a sprinkle of orange zest to the dressing. If you’re not a fan of blue cheese, feta or goat cheese make excellent substitutes. To make this salad a meal, add grilled chicken or shrimp. Always taste your dressing before adding it to the salad to ensure the balance of flavors is to your liking.

    Recipe Variations

    • Swap the dried cherries for cranberries or raisins for a different sweet note.
    • Use pecans or almonds instead of walnuts for a variation in crunch.
    • Add sliced apples or pears for extra freshness and a juicy bite.
    • For a nut-free version, substitute seeds like sunflower or pumpkin seeds.

    Frequently Asked Questions

    Can I make this salad ahead of time?

    Yes, you can prepare the ingredients ahead of time, but it’s best to add the dressing just before serving to prevent the greens from wilting. Store the dressing separately in the refrigerator.

    What can I use instead of mayonnaise?

    Greek yogurt or sour cream can be used as a substitute for mayonnaise to lighten up the dressing. Adjust the consistency with a little milk if needed.

    How long will the leftovers last?

    Leftovers can be stored in an airtight container in the refrigerator for up to 2 days. Note that the greens may become less crisp over time.

    Summary

    The Michigan Salad is a versatile dish that’s as nutritious as it is delicious. With its mix of sweet, savory, and crunchy elements, it’s sure to be a hit at any gathering.