Author: onlinefoodrecipes

  • Creamy Greek Yogurt Salad Dressing Recipe: A Tangy Twist for Your Greens

    Creamy Greek Yogurt Salad Dressing Recipe: A Tangy Twist for Your Greens

    Perfect for those who love a creamy yet healthy dressing, this Greek yogurt-based recipe is a game-changer. Packed with protein and probiotics, it’s not just delicious but also good for your gut.

    Why This Recipe Works

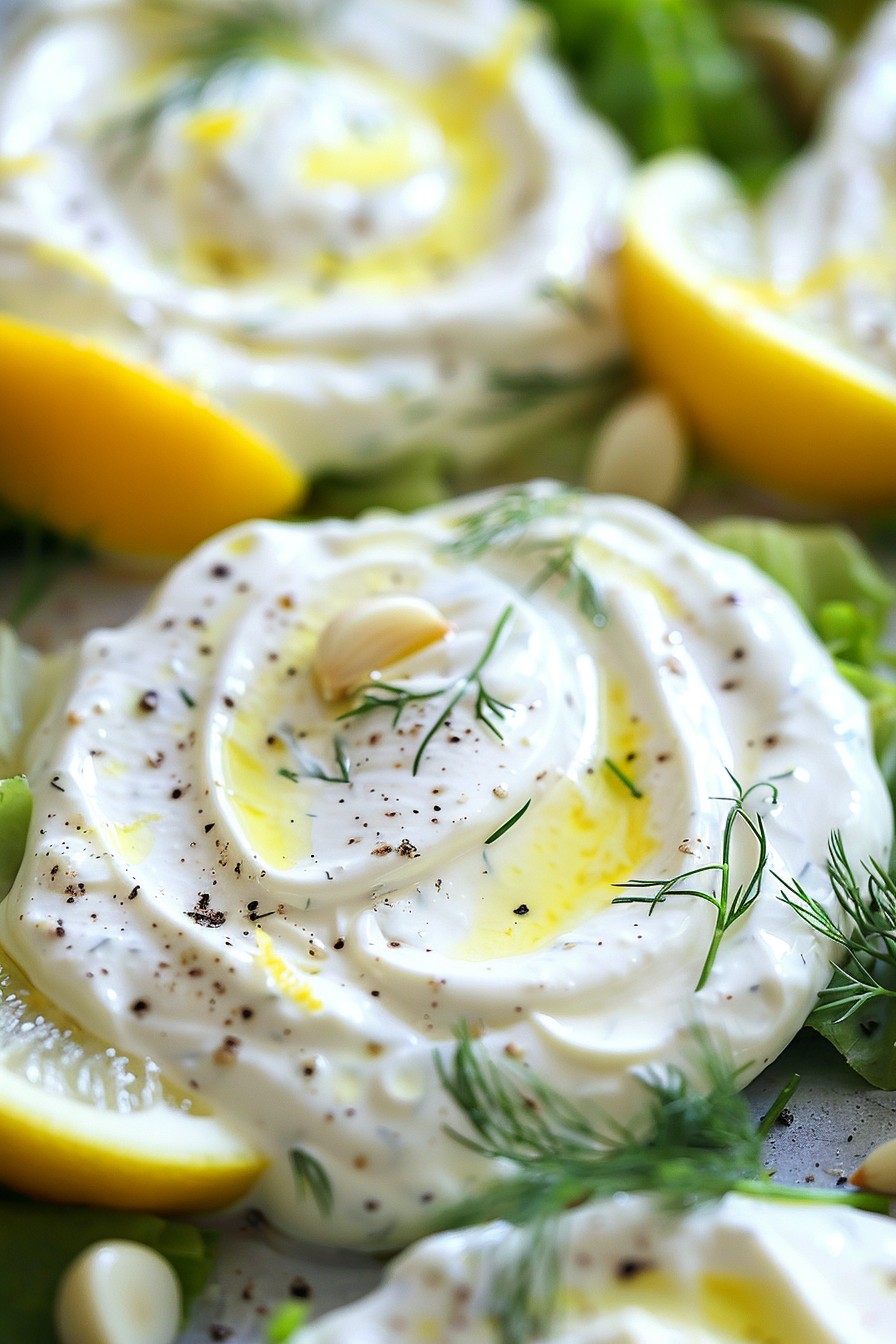
    • Greek yogurt provides a creamy base without the heaviness of mayonnaise or sour cream.
    • The addition of lemon juice and garlic adds a fresh, tangy flavor that elevates any salad.
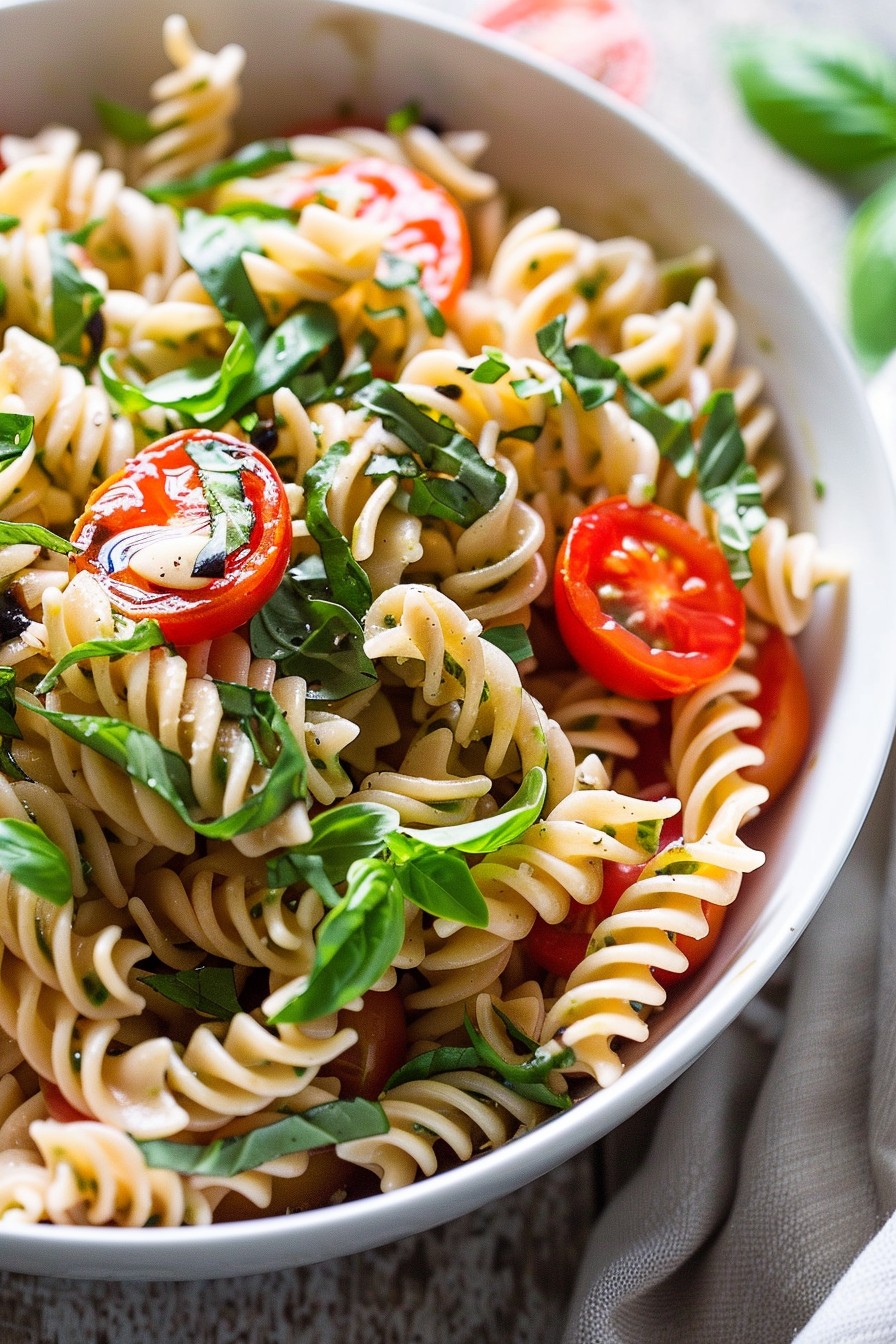
    • It’s versatile enough to pair with a wide range of salads, from leafy greens to pasta salads.
    • This dressing is quick to make, requiring just a few minutes and simple ingredients.
    • It’s a healthier alternative to store-bought dressings, which often contain preservatives and added sugars.

    Ingredients

    • 1 cup plain Greek yogurt
    • 2 tablespoons olive oil
    • 1 tablespoon lemon juice
    • 1 garlic clove, minced
    • 1/2 teaspoon salt
    • 1/4 teaspoon black pepper
    • 1 tablespoon fresh dill, chopped

    Equipment Needed

    • Mixing bowl
    • Whisk
    • Measuring cups and spoons

    Instructions

    Greek Yogurt Salad Dressing Recipe

    Step 1: Combine the Base Ingredients

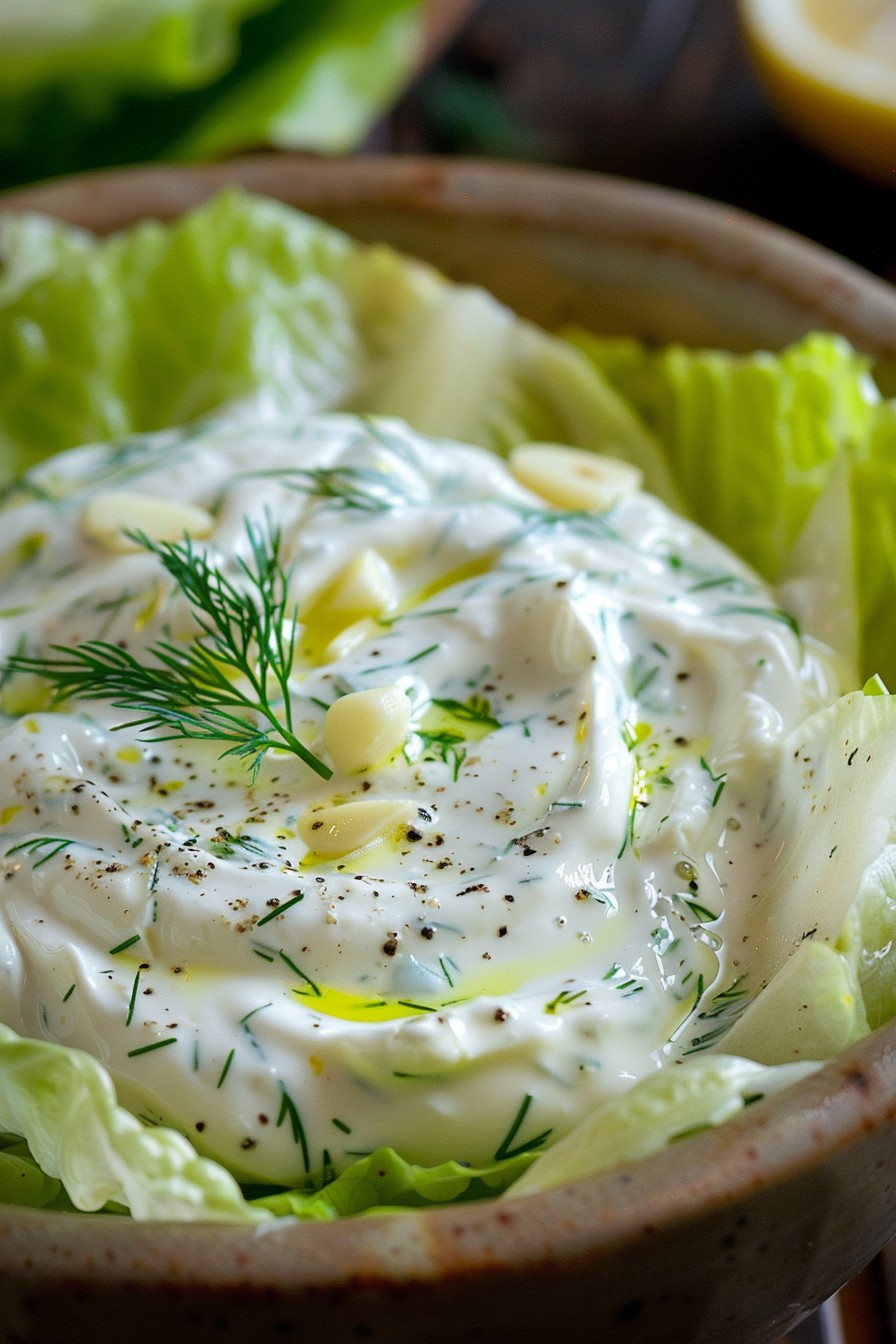
    In a mixing bowl, whisk together the Greek yogurt, olive oil, and lemon juice until smooth. This combination forms the creamy base of your dressing, with the lemon juice adding a bright, tangy flavor.

    Step 2: Add the Flavor Enhancers

    Stir in the minced garlic, salt, and black pepper. The garlic adds a punch of flavor, while the salt and pepper enhance all the other tastes in the dressing.

    Step 3: Incorporate the Fresh Herbs

    Fold in the fresh dill for a herby freshness that complements the tanginess of the yogurt and lemon. If you’re not a fan of dill, you can substitute it with parsley or chives.

    Step 4: Adjust the Consistency

    If the dressing is too thick, you can thin it out with a tablespoon of water or more lemon juice, depending on your preference for tanginess.

    Step 5: Let It Rest

    Cover the bowl and let the dressing sit in the refrigerator for at least 30 minutes before serving. This allows the flavors to meld together beautifully.

    Tips and Tricks

    For an even smoother dressing, you can blend all the ingredients in a food processor. If you prefer a sweeter dressing, a teaspoon of honey can be a great addition. Always taste and adjust the seasoning before serving, as the flavors can develop over time. For a dairy-free version, coconut yogurt can be used as a substitute for Greek yogurt, though the flavor profile will change slightly.

    Recipe Variations

    • Add a teaspoon of mustard for a spicy kick.
    • Incorporate avocado for an even creamier texture and a boost of healthy fats.
    • Mix in some cucumber and mint for a tzatziki-inspired version.
    • For a cheesy flavor, sprinkle in some grated Parmesan or feta cheese.
    • Blend in roasted red peppers for a smoky, sweet variation.

    Frequently Asked Questions

    Can I use regular yogurt instead of Greek yogurt?

    Yes, but the dressing will be thinner. You might need to strain the regular yogurt or reduce the amount of liquid added to achieve the desired consistency.

    How long can I store this dressing?

    It can be stored in an airtight container in the refrigerator for up to 5 days. Give it a good stir before using it again.

    Is this dressing suitable for vegans?

    As is, no, because Greek yogurt is dairy-based. However, you can use a plant-based yogurt alternative to make it vegan-friendly.

    Summary

    This Greek yogurt salad dressing is a creamy, tangy, and healthy alternative to store-bought options. Easy to make and customizable, it’s perfect for elevating your salads.

  • Fresh Basil Pasta Salad Recipe: A Summer Delight

    Fresh Basil Pasta Salad Recipe: A Summer Delight

    Craving something light, refreshing, and bursting with flavor? This fresh basil pasta salad is your go-to summer dish, combining the aromatic punch of basil with the satisfying chew of pasta.

    Why This Recipe Works

    • The combination of fresh basil and cherry tomatoes brings a vibrant, garden-fresh flavor that’s hard to resist.
    • Using fusilli pasta ensures every bite is packed with the dressing and ingredients, thanks to its spiral shape.
    • A simple, homemade dressing elevates the dish without overpowering the fresh ingredients.

    Ingredients

    • 8 oz fusilli pasta
    • 1 cup fresh basil leaves, chopped
    • 1 cup cherry tomatoes, halved
    • 1/2 cup olive oil
    • 2 tbsp balsamic vinegar
    • 1 clove garlic, minced
    • Salt and pepper to taste

    Equipment Needed

    • Large pot
    • Colander
    • Mixing bowl
    • Whisk

    Instructions

    Fresh Basil Pasta Salad Recipe

    Boil the Pasta to Perfection

    Fill a large pot with water and bring it to a rolling boil. Add a generous pinch of salt to the water. Cook the fusilli pasta according to the package instructions, usually about 8-10 minutes, until al dente. Drain the pasta in a colander and rinse under cold water to stop the cooking process.

    Prepare the Dressing

    In a mixing bowl, whisk together the olive oil, balsamic vinegar, minced garlic, salt, and pepper until well combined. This dressing is the secret to the salad’s irresistible flavor, so take your time to emulsify it properly.

    Combine All Ingredients

    In a large mixing bowl, toss the cooled pasta with the chopped basil and halved cherry tomatoes. Drizzle the dressing over the salad and toss gently to ensure every piece is coated. The key here is to be gentle to keep the tomatoes intact.

    Tips and Tricks

    For an extra flavor boost, let the salad sit in the fridge for an hour before serving. This allows the flavors to meld together beautifully. If you’re short on time, using pre-cooked pasta can be a time-saver, but make sure it’s cooled before mixing. Always taste and adjust the seasoning before serving; sometimes a little extra salt or pepper can make all the difference.

    Recipe Variations

    • Add grilled chicken or shrimp for a protein-packed version.
    • Swap cherry tomatoes for sun-dried tomatoes for a deeper flavor.
    • Incorporate mozzarella balls or feta cheese for a creamy texture.

    Frequently Asked Questions

    Can I use dried basil instead of fresh?

    While dried basil is more convenient, fresh basil is recommended for this recipe to achieve that bright, aromatic flavor that dried basil can’t replicate. If you must use dried, reduce the quantity by half since dried herbs are more concentrated.

    How long can I store this pasta salad?

    This pasta salad can be stored in an airtight container in the refrigerator for up to 3 days. However, the basil may start to wilt after the first day, so it’s best enjoyed fresh.

    Can I make this recipe gluten-free?

    Absolutely! Just substitute the fusilli pasta with your favorite gluten-free pasta. The rest of the ingredients are naturally gluten-free, making this an easy swap.

    Summary

    This fresh basil pasta salad is a simple, flavorful dish perfect for summer gatherings or a quick weekday meal. With its vibrant colors and refreshing taste, it’s sure to be a hit.

  • Carrot Ginger Salad Dressing Recipe: A Zesty Twist to Your Greens

    Carrot Ginger Salad Dressing Recipe: A Zesty Twist to Your Greens

    Fresh, vibrant, and packed with flavor, this carrot ginger salad dressing is about to become your new favorite. Perfect for drizzling over greens or using as a marinade, it’s a game-changer for any meal.

    Why This Recipe Works

    • The combination of sweet carrots and spicy ginger creates a balanced flavor profile that elevates any salad.
    • Using fresh ingredients ensures a bright, vibrant dressing that’s far superior to store-bought versions.
    • It’s incredibly versatile, doubling as a marinade for proteins or a dip for fresh veggies.
    • The recipe is naturally vegan and can be easily adjusted for dietary preferences.
    • Prep time is minimal, making it perfect for quick, healthy meals.

    Ingredients

    • 2 cups peeled and chopped carrots
    • 1/4 cup peeled and chopped fresh ginger
    • 1/4 cup rice vinegar
    • 2 tablespoons soy sauce
    • 1 tablespoon honey
    • 1/2 cup olive oil
    • 1 clove garlic, minced
    • Salt and pepper to taste

    Equipment Needed

    • Blender or food processor
    • Measuring cups and spoons
    • Knife and cutting board
    • Peeler

    Instructions

    Carrot Ginger Salad Dressing Recipe

    Step 1: Prep Your Ingredients

    Start by peeling and chopping your carrots and ginger into small pieces to ensure they blend smoothly. Mince the garlic clove finely. Having all your ingredients prepped and ready to go makes the blending process a breeze.

    Step 2: Blend the Base

    Add the chopped carrots, ginger, rice vinegar, soy sauce, honey, and minced garlic to your blender or food processor. Blend on high until the mixture is completely smooth, about 1-2 minutes. Scrape down the sides as needed to incorporate all the ingredients.

    Step 3: Emulsify with Oil

    With the blender running on low, slowly drizzle in the olive oil to create a smooth, emulsified dressing. This step is crucial for achieving the perfect consistency, so take your time. The dressing should be thick but pourable.

    Step 4: Season to Taste

    Once emulsified, taste your dressing and adjust the seasoning with salt and pepper as needed. Remember, the soy sauce adds saltiness, so you may not need much additional salt.

    Step 5: Serve or Store

    Your carrot ginger salad dressing is ready to use immediately, or you can store it in an airtight container in the refrigerator for up to a week. Shake well before each use as separation is natural.

    Tips and Tricks

    For a smoother dressing, strain it through a fine mesh sieve after blending to remove any fibrous bits. If you prefer a thinner consistency, add a tablespoon of water at a time until desired thickness is reached. For an extra kick, add a pinch of red pepper flakes or a splash of sriracha. To enhance the sweetness, roast the carrots before blending. Always use fresh ginger for the best flavor; powdered ginger won’t give the same zesty punch.

    Recipe Variations

    • For a creamier version, add 1/4 cup of mayonnaise or Greek yogurt to the blender.
    • Substitute maple syrup for honey to make the recipe vegan.
    • Add a tablespoon of miso paste for a deeper umami flavor.
    • Incorporate a handful of cilantro or parsley for a fresh herb twist.
    • Use apple cider vinegar in place of rice vinegar for a different tang.

    Frequently Asked Questions

    Can I make this dressing without a blender? Yes, but you’ll need to grate the carrots and ginger very finely and whisk everything together vigorously. The texture will be more rustic, but the flavor will still be great.

    How long does this dressing last in the fridge? Stored properly in an airtight container, it will last up to a week. The flavors may even deepen over time.

    Can I freeze this dressing? Freezing is not recommended as the texture may change upon thawing, affecting the emulsion.

    Summary

    This carrot ginger salad dressing is a vibrant, flavorful addition to any meal, easy to make, and customizable to suit your taste. Perfect for salads, marinades, or dips, it’s a must-try for anyone looking to add a zesty twist to their dishes.

  • Pea Salad Recipe with Egg and Mayonnaise: A Creamy Dream Come True

    Pea Salad Recipe with Egg and Mayonnaise: A Creamy Dream Come True

    Spring has sprung, and so has our craving for something fresh yet comforting. This pea salad recipe with egg and mayonnaise is the perfect blend of creamy, crunchy, and utterly delicious. It’s a side dish that steals the show every time.

    Why This Recipe Works

    • The combination of sweet peas and creamy mayonnaise creates a delightful contrast in textures and flavors.
    • Hard-boiled eggs add a rich, protein-packed element that makes the salad more satisfying.
    • It’s incredibly versatile, serving as a perfect side for barbecues, picnics, or a simple family dinner.
    • This recipe is a breeze to make, requiring minimal prep and cooking time.
    • It’s a crowd-pleaser, appealing to both kids and adults alike.

    Ingredients

    • 2 cups frozen peas, thawed
    • 3 hard-boiled eggs, chopped
    • 1/2 cup mayonnaise
    • 1/4 cup diced red onion
    • 1 tbsp apple cider vinegar
    • 1 tsp sugar
    • Salt and pepper to taste

    Equipment Needed

    • Mixing bowl
    • Measuring cups and spoons
    • Knife and cutting board
    • Pot for boiling eggs

    Instructions

    Pea Salad Recipe With Egg And Mayonnaise

    Step 1: Prepare the Eggs

    Start by boiling your eggs to perfection. Place them in a pot, cover with water, and bring to a boil. Once boiling, cover and remove from heat. Let them sit for 12 minutes for hard-boiled eggs. Then, cool them in ice water before peeling and chopping.

    Step 2: Mix the Dressing

    In a mixing bowl, whisk together the mayonnaise, apple cider vinegar, and sugar until smooth. This creates a tangy and slightly sweet dressing that coats the peas and eggs beautifully.

    Step 3: Combine the Ingredients

    Add the thawed peas, chopped eggs, and diced red onion to the bowl with the dressing. Gently toss everything together until well combined. Season with salt and pepper to taste.

    Step 4: Chill Before Serving

    For the best flavor, cover the salad and refrigerate for at least an hour before serving. This allows the flavors to meld together beautifully.

    Tips and Tricks

    For an extra crunch, consider adding some crispy bacon bits or toasted almonds. If you’re short on time, you can use pre-cooked hard-boiled eggs from the store. To make the salad healthier, swap out half of the mayonnaise for Greek yogurt. Always taste and adjust the seasoning before serving, as the flavors can develop over time.

    Recipe Variations

    • Add diced ham or chicken for a protein boost.
    • Mix in some shredded cheddar cheese for a cheesy twist.
    • For a bit of heat, sprinkle in some diced jalapeños or a dash of hot sauce.
    • Swap the peas for edamame for a different texture and flavor profile.
    • Use avocado mayonnaise for a healthier, dairy-free version.

    Frequently Asked Questions

    Can I use fresh peas instead of frozen?

    Absolutely! Fresh peas can be a great substitute. Just blanch them in boiling water for a couple of minutes, then cool them in ice water before adding to the salad.

    How long can I store this salad?

    This salad can be stored in an airtight container in the refrigerator for up to 3 days. Just give it a good stir before serving again.

    Can I make this salad ahead of time?

    Yes, making it ahead of time actually allows the flavors to meld together better. Just keep it refrigerated until you’re ready to serve.

    Summary

    This pea salad with egg and mayonnaise is a simple, delicious, and versatile dish that’s perfect for any occasion. With its creamy texture and sweet flavor, it’s sure to be a hit with everyone at the table.

  • Salmon Avocado Salad Recipe: A Fresh Twist on Summer Salads

    Salmon Avocado Salad Recipe: A Fresh Twist on Summer Salads

    Summer is the perfect time to lighten up your meals with fresh, flavorful ingredients. This salmon avocado salad combines the richness of salmon with the creamy texture of avocado for a dish that’s both satisfying and refreshing.

    Why This Recipe Works

    • The combination of omega-3 rich salmon and heart-healthy avocado makes this salad not only delicious but also packed with nutrients.
    • It’s incredibly versatile, serving as a perfect lunch, dinner, or even a fancy brunch option.
    • The recipe is quick and easy, requiring minimal cooking and preparation time.

    Ingredients

    • 1 lb fresh salmon fillet, skin removed
    • 2 ripe avocados, diced
    • 4 cups mixed greens
    • 1/2 cup cherry tomatoes, halved
    • 1/4 cup red onion, thinly sliced
    • 2 tbsp olive oil
    • 1 tbsp lemon juice
    • Salt and pepper to taste

    Equipment Needed

    • Mixing bowl
    • Salad spinner
    • Chef’s knife
    • Cutting board
    • Measuring spoons

    Instructions

    Salmon Avocado Salad Recipe

    Step 1: Prepare the Salmon

    Preheat your oven to 375°F. Season the salmon fillet with salt and pepper, then drizzle with 1 tbsp of olive oil. Bake for 12-15 minutes, or until the salmon flakes easily with a fork. Let it cool slightly before breaking it into chunks.

    Step 2: Assemble the Salad Base

    In a large mixing bowl, combine the mixed greens, cherry tomatoes, and red onion. Toss gently to mix. Tip: For extra crispness, spin your greens in a salad spinner before adding them to the bowl.

    Step 3: Add the Avocado and Salmon

    Gently fold in the diced avocado and salmon chunks into the salad base. Be careful not to mash the avocado too much to maintain its texture.

    Step 4: Dress the Salad

    In a small bowl, whisk together the remaining olive oil and lemon juice. Drizzle over the salad and toss lightly to coat. Tip: Add the dressing just before serving to keep the greens fresh.

    Step 5: Final Touches

    Season with additional salt and pepper if needed. Serve immediately for the best flavor and texture.

    Tips and Tricks

    For an extra flavor boost, consider adding a sprinkle of crushed red pepper flakes or a dash of your favorite hot sauce. If you’re meal prepping, keep the dressing separate until you’re ready to eat to prevent the salad from getting soggy. For a more substantial meal, add a handful of quinoa or farro to the salad.

    Recipe Variations

    • Swap the salmon for grilled chicken or shrimp for a different protein option.
    • Add crumbled feta or goat cheese for a creamy, tangy twist.
    • Incorporate different greens like arugula or spinach for varied flavors and textures.
    • For a nutty crunch, sprinkle toasted almonds or walnuts on top.

    Frequently Asked Questions

    Can I use canned salmon instead of fresh?

    Absolutely! Canned salmon is a great pantry staple that works well in this recipe. Just make sure to drain it well and remove any bones or skin before adding it to the salad.

    How long will this salad keep in the fridge?

    Without the dressing, the salad components can be stored separately in the fridge for up to 2 days. Once dressed, it’s best eaten immediately as the greens will start to wilt.

    Can I make this salad vegan?

    Yes! Simply omit the salmon and add more avocado or a plant-based protein like chickpeas or tofu to keep it hearty and satisfying.

    Summary

    This salmon avocado salad is a quick, nutritious, and delicious option for any meal. With its simple ingredients and easy preparation, it’s sure to become a staple in your summer recipe rotation.

  • Olivie Salad Recipe: A Creamy, Dreamy Delight

    Olivie Salad Recipe: A Creamy, Dreamy Delight

    Let’s dive into the world of Olivie Salad, a dish that’s as fun to make as it is to eat. This creamy, dreamy delight is a staple at gatherings, and once you try this recipe, you’ll understand why. Perfect for potlucks, family dinners, or just because, this salad is a crowd-pleaser.

    Why This Recipe Works

    • The combination of boiled vegetables and creamy dressing creates a perfect balance of textures and flavors.
    • Using fresh, high-quality ingredients ensures the salad is bursting with flavor.
    • This recipe is customizable, allowing you to adjust ingredients based on your preferences or dietary needs.
    • It’s a make-ahead dish, meaning the flavors have time to meld together beautifully in the fridge.
    • Perfect for any occasion, from casual dinners to festive celebrations.

    Ingredients

    • 2 cups diced potatoes, boiled and peeled
    • 1 cup diced carrots, boiled
    • 1 cup peas, cooked
    • 1/2 cup diced pickles
    • 1/2 cup diced ham or bologna
    • 3 hard-boiled eggs, diced
    • 1/2 cup mayonnaise
    • 1 tbsp mustard
    • Salt and pepper to taste

    Equipment Needed

    • Large mixing bowl
    • Pot for boiling vegetables and eggs
    • Knife and cutting board
    • Measuring cups and spoons

    Instructions

    Olivie Salad Recipe

    Step 1: Prepare the Vegetables

    Start by boiling the potatoes and carrots until they’re tender but still firm, about 15 minutes. Drain and let them cool before peeling and dicing into small, bite-sized pieces. This ensures every forkful has a bit of everything. Tip: For extra flavor, you can boil the vegetables in chicken or vegetable broth instead of water.

    Step 2: Cook the Peas

    If using fresh peas, boil them for about 3 minutes until bright green and tender. Frozen peas can be thawed under running water. Drain well to avoid a watery salad. The peas add a sweet pop of flavor and color to the dish.

    Step 3: Dice the Add-ins

    Dice the pickles, ham or bologna, and hard-boiled eggs into small pieces. Uniformity is key here for the perfect texture in every bite. Tip: For a vegetarian version, skip the ham and add more eggs or a plant-based protein.

    Step 4: Mix the Dressing

    In a small bowl, whisk together the mayonnaise and mustard until smooth. This dressing is the glue that holds all the delicious components together, adding a tangy creaminess that’s irresistible.

    Step 5: Combine Everything

    In a large mixing bowl, gently fold all the prepared ingredients together with the dressing. Season with salt and pepper to taste. Chill for at least an hour before serving to let the flavors meld. Tip: Garnish with fresh dill or parsley for a colorful finish.

    Tips and Tricks

    For the best Olivie Salad, consider these advanced tips: Always cool your boiled vegetables and eggs completely before mixing to prevent the salad from becoming soggy. If you’re making this salad ahead of time, hold off on adding the dressing until just before serving to keep everything crisp. For a lighter version, substitute half the mayonnaise with Greek yogurt. And remember, the key to a great Olivie Salad is in the balance of flavors, so taste as you go and adjust the seasoning accordingly.

    Recipe Variations

    • For a seafood twist, replace the ham with cooked shrimp or crab meat.
    • Add diced apples for a sweet crunch and a hint of freshness.
    • Incorporate avocado for a creamy texture and healthy fats.
    • Use sweet potatoes instead of regular potatoes for a nutrient-rich alternative.
    • For a spicy kick, mix in a dash of hot sauce or diced jalapeños to the dressing.

    Frequently Asked Questions

    Can I make Olivie Salad ahead of time?

    Absolutely! In fact, making it a day ahead allows the flavors to develop more fully. Just keep it refrigerated and add any fresh herbs or garnishes right before serving.

    How long does Olivie Salad last in the fridge?

    When stored properly in an airtight container, Olivie Salad can last up to 3 days in the refrigerator. However, it’s best enjoyed within the first 48 hours for optimal texture and flavor.

    Can I freeze Olivie Salad?

    Freezing is not recommended as the mayonnaise-based dressing and the vegetables’ texture will change upon thawing, resulting in a less desirable consistency.

    Summary

    Olivie Salad is a versatile, creamy dish perfect for any occasion. With its balance of flavors and textures, it’s sure to be a hit. Customize it to your liking and enjoy the delicious results!

  • Tuna Salad with Egg: A Classic Twist You’ll Love

    Tuna Salad with Egg: A Classic Twist You’ll Love

    Today, we’re diving into a timeless favorite with a protein-packed punch. This tuna salad recipe with egg is not just any ordinary dish; it’s a creamy, crunchy, and utterly satisfying meal that’s perfect for any day of the week.

    Why This Recipe Works

    • The combination of tuna and hard-boiled eggs provides a double dose of protein, making it a filling option for lunch or dinner.
    • Adding crisp celery and red onion introduces a refreshing crunch that contrasts beautifully with the creamy mayonnaise.
    • A squeeze of lemon juice brightens the entire dish, cutting through the richness for a balanced flavor profile.

    Ingredients

    • 2 cans (5 oz each) tuna in water, drained
    • 3 hard-boiled eggs, chopped
    • 1/2 cup mayonnaise
    • 1/4 cup celery, finely diced
    • 2 tbsp red onion, minced
    • 1 tbsp lemon juice
    • Salt and pepper to taste

    Equipment Needed

    • Mixing bowl
    • Knife
    • Cutting board
    • Measuring cups and spoons

    Instructions

    Tuna Salad Recipe Egg

    Step 1: Prepare Your Ingredients

    Start by draining the tuna thoroughly to avoid a watery salad. Chop the hard-boiled eggs into small, bite-sized pieces. Finely dice the celery and mince the red onion to ensure every bite has a bit of crunch and flavor. Tip: For an extra flavor boost, let the chopped red onion sit in lemon juice for a few minutes before adding it to the salad.

    Step 2: Combine the Tuna and Eggs

    In a large mixing bowl, flake the drained tuna with a fork. Add the chopped eggs to the bowl. Gently mix them together to start building the base of your salad. This is where the protein power of your meal comes together.

    Step 3: Add the Vegetables and Mayo

    Now, add the diced celery and the red onion (with lemon juice) to the bowl. Spoon in the mayonnaise, starting with 1/2 cup. Mix everything until well combined. If the salad seems too dry, add a little more mayonnaise to reach your desired consistency. Tip: For a healthier twist, you can substitute half of the mayonnaise with Greek yogurt.

    Step 4: Season to Perfection

    Season the salad with salt and pepper to taste. Remember, the tuna and mayonnaise already contain some salt, so start with a little and adjust as needed. A final squeeze of lemon juice can brighten the flavors even more.

    Step 5: Chill and Serve

    For the best flavor, cover the salad and refrigerate for at least 30 minutes before serving. This allows the flavors to meld together beautifully. Serve on a bed of greens, between slices of your favorite bread, or with crackers for a satisfying meal.

    Tips and Tricks

    For those looking to elevate their tuna salad game, consider these advanced tips. First, using high-quality tuna can make a significant difference in flavor. Look for tuna packed in olive oil for a richer taste. Second, adding a teaspoon of Dijon mustard can introduce a subtle tanginess that complements the mayonnaise. Lastly, for an extra crunch, throw in some chopped walnuts or almonds. These small tweaks can transform your tuna salad from good to gourmet.

    Recipe Variations

    • Avocado Tuna Salad: Replace half of the mayonnaise with mashed avocado for a creamy, healthy fat alternative.
    • Spicy Tuna Salad: Add a dash of hot sauce or some chopped jalapeños for a kick.
    • Mediterranean Tuna Salad: Mix in some chopped Kalamata olives and feta cheese for a Greek-inspired twist.
    • Apple and Walnut Tuna Salad: Incorporate diced apples and walnuts for a sweet and crunchy variation.

    Frequently Asked Questions

    Can I make this recipe ahead of time?

    Absolutely! This tuna salad with egg can be made up to two days in advance. Just be sure to store it in an airtight container in the refrigerator. The flavors will continue to develop, making it even more delicious the next day.

    Is there a substitute for mayonnaise?

    Yes, if you’re not a fan of mayonnaise, you can use Greek yogurt, avocado, or even hummus as a healthier alternative. Each option will give the salad a different texture and flavor profile, so choose based on your preference.

    How can I serve this tuna salad?

    This versatile salad can be served in so many ways! Enjoy it as a sandwich filling, atop a bed of greens for a low-carb option, or with crackers for a quick snack. It’s also great stuffed into tomatoes or avocado halves for a fancy presentation.

    Summary

    This tuna salad with egg is a classic dish that’s both nutritious and delicious. With its creamy texture, crunchy vegetables, and protein-packed ingredients, it’s a meal that’s sure to satisfy. Whether you’re looking for a quick lunch or a light dinner, this recipe is a winner.

  • Yellow Potato Salad Recipe: A Summer Picnic Must-Have

    Yellow Potato Salad Recipe: A Summer Picnic Must-Have

    Very few dishes scream summer like a hearty, creamy yellow potato salad. Perfect for picnics, potlucks, or just a cozy night in, this recipe is a crowd-pleaser that combines simplicity with deliciousness. Let’s dive into making this classic dish that’s bound to become a staple in your recipe collection.

    Why This Recipe Works

    • The use of yellow potatoes offers a buttery texture and rich flavor that stands up well to dressing.
    • A perfect balance of creamy and tangy dressing coats every bite without overwhelming the potatoes.
    • Simple ingredients come together to create a complex flavor profile that’s both comforting and refreshing.
    • It’s versatile enough to serve as a side or a main dish, depending on your mood.
    • The recipe is easy to customize with your favorite add-ins or spices.

    Ingredients

    • 2 pounds yellow potatoes, washed and cut into 1-inch cubes
    • 1 cup mayonnaise
    • 2 tablespoons Dijon mustard
    • 1 tablespoon apple cider vinegar
    • 1/2 cup finely chopped red onion
    • 2 stalks celery, finely chopped
    • 2 hard-boiled eggs, chopped
    • Salt and pepper to taste
    • 1/4 cup chopped fresh parsley

    Equipment Needed

    • Large pot
    • Mixing bowls
    • Knife and cutting board
    • Measuring cups and spoons
    • Potato masher (optional)

    Instructions

    Yellow Potato Salad Recipe

    Step 1: Cook the Potatoes

    Place the cubed potatoes in a large pot and cover with cold water by about an inch. Bring to a boil over high heat, then reduce to a simmer and cook until the potatoes are tender but still hold their shape, about 10-12 minutes. Tip: Start checking at 10 minutes to avoid overcooking. Drain well and let cool slightly.

    Step 2: Prepare the Dressing

    In a large mixing bowl, whisk together the mayonnaise, Dijon mustard, and apple cider vinegar until smooth. Season with salt and pepper to taste. This creamy, tangy dressing is the secret to the salad’s irresistible flavor.

    Step 3: Combine the Ingredients

    Add the slightly cooled potatoes to the dressing along with the red onion, celery, and hard-boiled eggs. Gently fold everything together until the potatoes are evenly coated. Tip: For a chunkier salad, leave some potato pieces larger; for a creamier texture, lightly mash a few pieces.

    Step 4: Chill and Serve

    Cover the salad and refrigerate for at least 1 hour to allow the flavors to meld. Before serving, sprinkle with chopped fresh parsley for a pop of color and freshness. Tip: The salad tastes even better the next day, making it a great make-ahead dish.

    Tips and Tricks

    For those looking to elevate their yellow potato salad, consider these advanced tips. First, roasting the potatoes instead of boiling can add a deeper flavor and firmer texture. Second, incorporating crispy bacon or smoked paprika can introduce a smoky dimension that’s utterly addictive. Lastly, for a lighter version, substitute half the mayonnaise with Greek yogurt. These tweaks can transform the dish while keeping its soul intact.

    Recipe Variations

    • Add diced pickles or capers for a briny twist.
    • Mix in some diced avocado for creaminess and healthy fats.
    • For a spicy kick, include a dash of hot sauce or diced jalapeños.
    • Swap the parsley for dill or chives for a different herbal note.
    • Include some crumbled feta or blue cheese for a tangy, salty punch.

    Frequently Asked Questions

    Can I use a different type of potato?

    Absolutely! While yellow potatoes are ideal for their texture and flavor, red or Yukon gold potatoes can also work well. Just avoid russet potatoes as they tend to fall apart more easily.

    How long can I store the potato salad?

    Stored in an airtight container in the refrigerator, the salad will keep for up to 3 days. Be sure to give it a good stir before serving again to redistribute the dressing.

    Can I make this recipe vegan?

    Yes, by substituting the mayonnaise with a vegan alternative and omitting the eggs. You might also add some diced tofu or chickpeas for extra protein.

    Summary

    This yellow potato salad recipe is a versatile, flavorful dish that’s perfect for any occasion. With its creamy dressing, tender potatoes, and customizable add-ins, it’s sure to be a hit. Whether you’re a novice or a seasoned cook, this recipe is straightforward and rewarding.

  • Hot Chicken Salad Casserole Recipe: A Comfort Food Classic

    Hot Chicken Salad Casserole Recipe: A Comfort Food Classic

    You’re about to dive into the ultimate comfort food experience with this hot chicken salad casserole. Perfect for those chilly evenings or when you’re craving something hearty and delicious.

    Why This Recipe Works

    • The combination of tender chicken, creamy sauce, and crispy topping creates a perfect texture contrast.
    • It’s a versatile dish that can be adapted to include your favorite ingredients.
    • Easy to make ahead, making it perfect for busy weeknights or potlucks.
    • The recipe uses simple, pantry-staple ingredients for a fuss-free cooking experience.
    • It’s a crowd-pleaser that appeals to both kids and adults alike.

    Ingredients

    • 2 cups cooked chicken, shredded
    • 1 cup mayonnaise
    • 1 cup sour cream
    • 1/2 cup celery, finely chopped
    • 1/2 cup onion, finely chopped
    • 1 cup cheddar cheese, shredded
    • 1/2 cup slivered almonds
    • 1 cup crushed potato chips
    • Salt and pepper to taste

    Equipment Needed

    • 9×13 inch baking dish
    • Mixing bowls
    • Measuring cups and spoons
    • Wooden spoon or spatula

    Instructions

    Hot Chicken Salad Casserole Recipe

    Preheat and Prepare

    Preheat your oven to 350°F. Lightly grease your baking dish to prevent sticking. This ensures your casserole comes out perfectly every time.

    Mix the Base

    In a large mixing bowl, combine the shredded chicken, mayonnaise, sour cream, celery, onion, and half of the cheddar cheese. Season with salt and pepper to taste. Mix until everything is well incorporated.

    Add the Crunch

    Fold in the slivered almonds for an extra crunch. Transfer the mixture to the prepared baking dish, spreading it out evenly.

    Top It Off

    Sprinkle the remaining cheddar cheese and crushed potato chips over the top. This will create a deliciously crispy topping as it bakes.

    Bake to Perfection

    Bake in the preheated oven for 25-30 minutes, or until the top is golden brown and the casserole is bubbly around the edges.

    Tips and Tricks

    For an even more flavorful casserole, consider adding a teaspoon of garlic powder or paprika to the chicken mixture. If you’re short on time, using rotisserie chicken is a great shortcut. For a lighter version, you can substitute Greek yogurt for the sour cream. Always let the casserole sit for a few minutes after baking to set, making it easier to serve.

    Recipe Variations

    • Swap the cheddar cheese for mozzarella or pepper jack for a different flavor profile.
    • Add a cup of frozen peas or carrots for extra veggies.
    • Use crushed crackers or breadcrumbs instead of potato chips for the topping.
    • Incorporate a can of cream of chicken soup for an even creamier texture.
    • For a spicy kick, add diced jalapeños or a dash of hot sauce to the mix.

    Frequently Asked Questions

    Can I make this casserole ahead of time?

    Absolutely! You can assemble the casserole up to a day in advance and refrigerate it. Just add the topping right before baking to keep it crispy.

    Can I freeze the casserole?

    Yes, this casserole freezes well. Bake it first, then cool completely before freezing. Reheat in the oven until warmed through.

    What can I serve with this casserole?

    This casserole pairs wonderfully with a simple green salad or steamed vegetables for a complete meal.

    Summary

    This hot chicken salad casserole is the epitome of comfort food, combining creamy, crunchy, and cheesy elements for a dish that’s sure to please. Easy to make and adaptable to your tastes, it’s a recipe you’ll come back to again and again.

  • Southern Macaroni Salad Recipe: A Creamy Dream Come True

    Southern Macaroni Salad Recipe: A Creamy Dream Come True

    Very few dishes scream summer picnic like a Southern Macaroni Salad. This recipe is a creamy, tangy, and slightly sweet masterpiece that will have your guests begging for seconds. Perfect for potlucks, BBQs, or just because you deserve it.

    Why This Recipe Works

    • The combination of creamy mayonnaise and tangy mustard creates a dressing that’s rich yet balanced.
    • Adding sweet relish and a touch of sugar brings a delightful sweetness that contrasts beautifully with the savory elements.
    • The crunch from the celery and onions adds texture, making every bite interesting.
    • It’s make-ahead friendly, allowing the flavors to meld together beautifully in the fridge.
    • Simple ingredients come together to create a dish that’s greater than the sum of its parts.

    Ingredients

    • 2 cups elbow macaroni, uncooked
    • 1/2 cup mayonnaise
    • 2 tablespoons yellow mustard
    • 1 tablespoon apple cider vinegar
    • 1 tablespoon sugar
    • 1/4 cup sweet pickle relish
    • 1/2 cup finely chopped celery
    • 1/4 cup finely chopped red onion
    • Salt and pepper to taste

    Equipment Needed

    • Large pot
    • Colander
    • Large mixing bowl
    • Whisk
    • Measuring cups and spoons

    Instructions

    Southern Macaroni Salad Recipe

    Step 1: Cook the Macaroni

    Bring a large pot of salted water to a rolling boil. Add the elbow macaroni and cook according to package instructions until al dente, about 8 minutes. Drain in a colander and rinse under cold water to stop the cooking process. Tip: Salting the water well ensures your pasta is flavorful from the inside out.

    Step 2: Prepare the Dressing

    In a large mixing bowl, whisk together the mayonnaise, yellow mustard, apple cider vinegar, and sugar until smooth. This combination will give your salad that signature Southern tang with a hint of sweetness. Tip: For an extra smooth dressing, let the sugar dissolve in the vinegar before adding the other ingredients.

    Step 3: Combine Ingredients

    Add the cooled macaroni, sweet pickle relish, chopped celery, and red onion to the bowl with the dressing. Gently fold everything together until the macaroni is evenly coated. Season with salt and pepper to taste. Tip: Letting the salad chill for at least an hour before serving allows the flavors to meld together beautifully.

    Tips and Tricks

    For those looking to elevate their Southern Macaroni Salad, consider these advanced tips. First, toasting the macaroni in a dry pan before boiling can add a nutty depth to the dish. Second, substituting half the mayonnaise with Greek yogurt can lighten the salad without sacrificing creaminess. Lastly, adding a pinch of smoked paprika can introduce a subtle smokiness that complements the sweetness and tang perfectly.

    Recipe Variations

    • Add diced hard-boiled eggs for a protein boost and extra richness.
    • Mix in some diced bell peppers for additional crunch and color.
    • Swap the sweet pickle relish for dill pickle relish for a tangier twist.
    • Include a handful of shredded cheddar cheese for a cheesy version.
    • For a spicy kick, add a dash of hot sauce or some diced jalapeños.

    Frequently Asked Questions

    Can I make this salad ahead of time? Absolutely! In fact, it tastes better after chilling for a few hours as the flavors have time to meld together. Just give it a good stir before serving.

    How long will it last in the fridge? Stored in an airtight container, your Southern Macaroni Salad will stay fresh and delicious for up to 3 days.

    Can I use a different type of pasta? While elbow macaroni is traditional, feel free to experiment with other small pasta shapes like shells or rotini for a fun twist.

    Summary

    This Southern Macaroni Salad is a creamy, tangy, and slightly sweet dish that’s perfect for any occasion. With simple ingredients and easy steps, it’s a foolproof recipe that’s sure to impress.