Category: Fruit Salad Recipes

  • Carrot Pineapple Raisin Salad Recipe: A Tropical Twist on a Classic

    Carrot Pineapple Raisin Salad Recipe: A Tropical Twist on a Classic

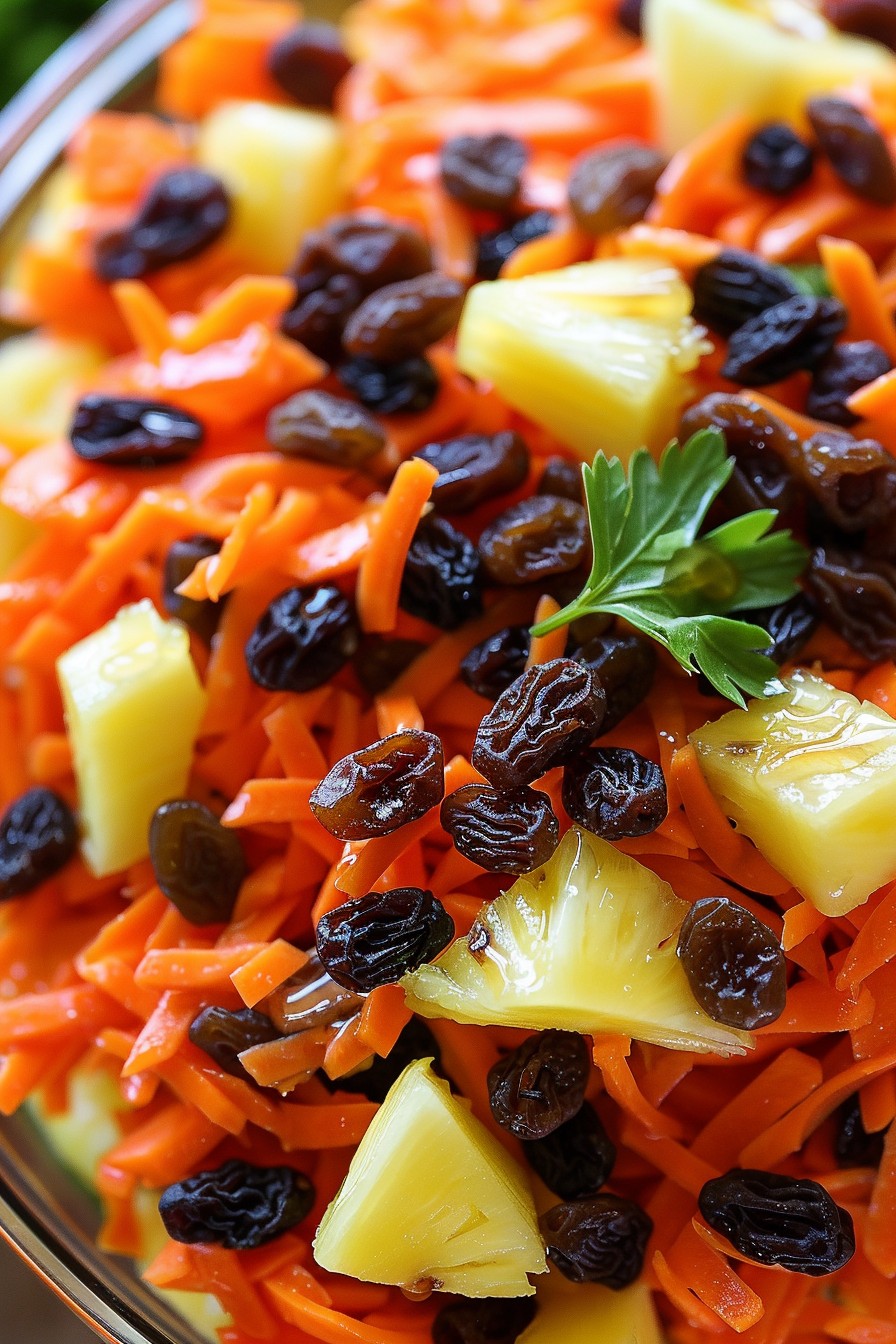
    Crisp, sweet, and bursting with tropical flavors, this Carrot Pineapple Raisin Salad is the perfect side dish to brighten up any meal. Combining the crunch of fresh carrots with the juicy sweetness of pineapple and the chewy texture of raisins, this salad is a delightful contrast of flavors and textures that will have everyone asking for seconds.

    Why This Recipe Works

    • The combination of sweet pineapple and raisins with the earthy crunch of carrots creates a perfect balance of flavors and textures.
    • It’s incredibly versatile, serving as a refreshing side dish, a healthy snack, or even a light dessert.
    • This salad is a breeze to make, requiring no cooking and just a few minutes of prep time.
    • It’s packed with vitamins and fiber, making it as nutritious as it is delicious.
    • The recipe is easily customizable, allowing you to adjust the sweetness or add other fruits and nuts for extra texture.

    Ingredients

    • 2 cups grated carrots
    • 1 cup diced pineapple (fresh or canned)
    • 1/2 cup raisins
    • 1/4 cup mayonnaise
    • 1 tablespoon honey
    • 1 teaspoon lemon juice
    • 1/4 teaspoon salt

    Equipment Needed

    • Grater
    • Mixing bowl
    • Measuring cups and spoons
    • Knife and cutting board

    Instructions

    Carrot Pineapple Raisin Salad Recipe

    Step 1: Prepare the Carrots

    Start by washing and peeling the carrots. Using a grater, grate the carrots into a large mixing bowl. For the best texture, aim for medium-sized shreds that are not too fine or too thick. This ensures the carrots will hold up well against the other ingredients without becoming mushy.

    Step 2: Add the Pineapple and Raisins

    Dice the pineapple into small, bite-sized pieces if you’re using fresh pineapple. If using canned pineapple, make sure to drain it well to avoid adding excess liquid to the salad. Add the pineapple and raisins to the bowl with the grated carrots. The sweetness of the pineapple and raisins complements the earthy flavor of the carrots beautifully.

    Step 3: Mix the Dressing

    In a small bowl, whisk together the mayonnaise, honey, lemon juice, and salt until smooth. The honey adds a natural sweetness that enhances the tropical flavors, while the lemon juice provides a subtle tanginess to balance the sweetness.

    Step 4: Combine Everything

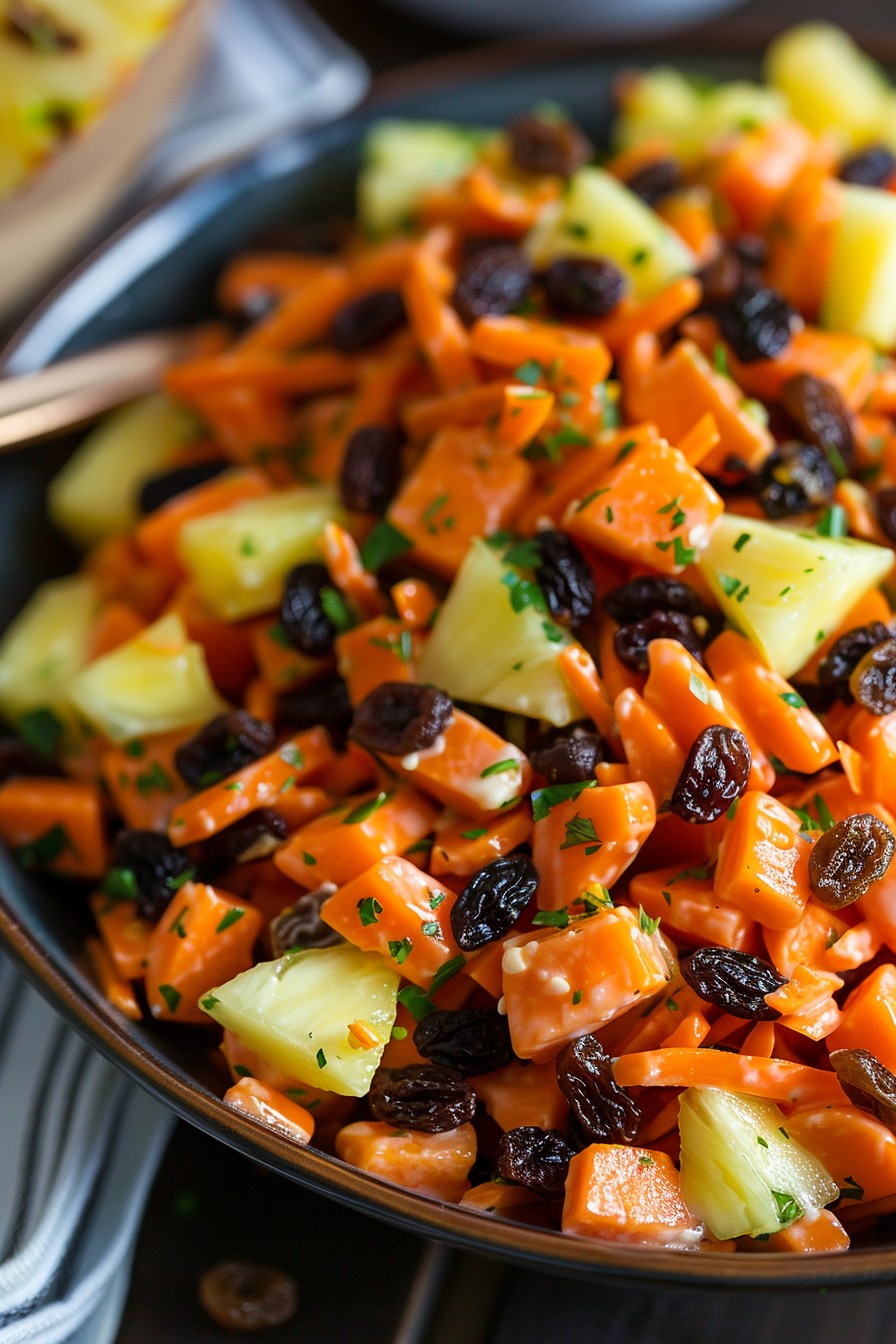
    Pour the dressing over the carrot, pineapple, and raisin mixture. Gently toss everything together until the ingredients are evenly coated with the dressing. Be careful not to overmix, as this can cause the salad to become soggy.

    Step 5: Chill and Serve

    Cover the bowl with plastic wrap and refrigerate the salad for at least 30 minutes before serving. This chilling time allows the flavors to meld together and the salad to reach the perfect temperature for serving.

    Tips and Tricks

    For an extra crunch, consider adding chopped nuts like walnuts or pecans to the salad. If you’re looking for a lighter version, you can substitute Greek yogurt for the mayonnaise. To make the salad ahead of time, prepare the ingredients and store them separately, then mix them together with the dressing just before serving to maintain the best texture.

    Recipe Variations

    • Add shredded coconut for an extra tropical flavor.
    • Include diced apples or pears for additional sweetness and crunch.
    • Swap out the raisins for dried cranberries or chopped dates for a different kind of sweetness.
    • For a spicy kick, add a pinch of cinnamon or nutmeg to the dressing.
    • Use lime juice instead of lemon juice for a different citrus note.

    Frequently Asked Questions

    Can I use pre-shredded carrots?

    Yes, you can use pre-shredded carrots to save time. However, freshly grated carrots tend to have a better texture and more vibrant flavor. If you do opt for pre-shredded, make sure they’re fresh and not dried out.

    How long does this salad last in the fridge?

    This salad is best enjoyed within 2-3 days when stored in an airtight container in the refrigerator. The longer it sits, the more the carrots will soften and the dressing will thin out.

    Can I make this salad vegan?

    Absolutely! Simply substitute the mayonnaise with a vegan alternative and use maple syrup instead of honey to keep it plant-based.

    Summary

    This Carrot Pineapple Raisin Salad is a refreshing, easy-to-make dish that’s perfect for any occasion. With its delightful mix of textures and flavors, it’s sure to be a hit with everyone. Plus, it’s customizable to suit your taste preferences and dietary needs.

  • Wake Up to Wow: The Ultimate Breakfast Salad Recipe

    Wake Up to Wow: The Ultimate Breakfast Salad Recipe

    How about starting your day with a burst of freshness and energy? This breakfast salad is not your average greens; it’s a vibrant, nutrient-packed dish that will make you leap out of bed. Perfect for those who think salads are just for lunch or dinner, this recipe is a game-changer.

    Why This Recipe Works

    • It combines the freshness of greens with the heartiness of breakfast staples for a balanced meal.
    • The dressing is a sweet and tangy homemade vinaigrette that wakes up your taste buds.
    • It’s customizable with whatever veggies or proteins you have on hand, making it a versatile start to any day.
    • Quick to prepare, ensuring you have more time to enjoy your morning.
    • Packed with proteins and fibers to keep you full until lunch.

    Ingredients

    • 2 cups mixed greens (washed and dried)
    • 1/2 cup cherry tomatoes (halved)
    • 1/4 cup red onion (thinly sliced)
    • 1 avocado (sliced)
    • 2 eggs (poached or fried)
    • 2 strips bacon (cooked and crumbled)
    • 1 tbsp olive oil
    • 1 tbsp balsamic vinegar
    • 1 tsp honey
    • Salt and pepper to taste

    Equipment Needed

    • Mixing bowl
    • Whisk
    • Skillet
    • Knife and cutting board

    Instructions

    Breakfast Salad Recipe

    Prepare the Dressing

    In a small bowl, whisk together the olive oil, balsamic vinegar, honey, and a pinch of salt and pepper until well combined. Taste and adjust the seasoning if necessary. This dressing is the secret to tying all the flavors together, so don’t skip it!

    Assemble the Salad

    In a large mixing bowl, combine the mixed greens, cherry tomatoes, and red onion. Drizzle the dressing over the top and toss gently to coat all the ingredients evenly. The key here is to ensure every leaf gets a little love from the dressing.

    Add the Toppings

    Arrange the avocado slices, poached or fried eggs, and crumbled bacon on top of the dressed greens. The eggs add a creamy texture that contrasts beautifully with the crisp greens, while the bacon brings a smoky crunch.

    Serve Immediately

    This salad is best enjoyed fresh, so serve it right away. The warmth of the eggs and bacon slightly wilts the greens, creating a delightful texture contrast that’s simply irresistible.

    Tips and Tricks

    For an extra flavor boost, try adding a sprinkle of feta or goat cheese. If you’re not a fan of bacon, substitute it with smoked salmon or grilled chicken for a different protein option. To make the salad even more filling, add a handful of nuts or seeds for crunch. Always dress the salad just before serving to keep the greens crisp. If you’re meal prepping, keep the dressing separate and add it when you’re ready to eat.

    Recipe Variations

    • Swap the balsamic vinegar for lemon juice and olive oil for a lighter dressing.
    • Add quinoa or farro for a grain-based version that’s even more filling.
    • Use sweet potatoes or butternut squash as a base for a warmer, autumn-inspired salad.
    • Incorporate different greens like spinach or arugula for a peppery twist.
    • For a vegan version, omit the eggs and bacon and add tofu scramble and tempeh bacon.

    Frequently Asked Questions

    Can I make this salad ahead of time?

    Yes, but with a few precautions. Prepare all the ingredients and store them separately. Combine and add the dressing just before serving to prevent the greens from getting soggy. This way, you can enjoy a fresh and crisp salad even on busy mornings.

    What other dressings work well with this salad?

    This salad is versatile when it comes to dressings. A creamy avocado or yogurt-based dressing can add richness, while a citrus vinaigrette can brighten up the flavors. Experiment with different dressings to find your favorite combination.

    How can I make this salad more kid-friendly?

    Kids might be skeptical of greens first thing in the morning, so try adding more familiar ingredients like cheese, croutons, or their favorite fruits. You can also cut the ingredients into fun shapes or serve the dressing on the side for dipping.

    Summary

    This breakfast salad is a refreshing and nutritious way to start your day. With its combination of fresh greens, creamy avocado, crispy bacon, and perfectly cooked eggs, it’s a meal that will keep you satisfied and energized. Plus, it’s fully customizable to suit your taste preferences and dietary needs.

  • Blue Cheese and Pear Salad Recipe: A Symphony of Flavors

    Blue Cheese and Pear Salad Recipe: A Symphony of Flavors

    A absolutely delightful dish that combines the creamy tang of blue cheese with the sweet, juicy freshness of pears. This salad is not just a treat for your taste buds but also a feast for your eyes, making it perfect for any occasion, from a casual lunch to a fancy dinner party.

    Why This Recipe Works

    • The combination of sweet pears and tangy blue cheese creates a perfect balance of flavors.
    • Adding walnuts introduces a crunchy texture that contrasts beautifully with the softness of the pears and cheese.
    • A simple honey mustard dressing enhances the natural flavors without overpowering them.
    • This salad is incredibly versatile and can be served as a starter, side, or even a main dish with some added protein.
    • It’s quick and easy to prepare, requiring no cooking, just assembly.

    Ingredients

    • 2 ripe pears, thinly sliced
    • 4 cups mixed greens
    • 1/2 cup crumbled blue cheese
    • 1/4 cup walnuts, roughly chopped
    • 2 tbsp olive oil
    • 1 tbsp honey
    • 1 tbsp Dijon mustard
    • Salt and pepper to taste

    Equipment Needed

    • Large salad bowl
    • Small mixing bowl
    • Whisk
    • Knife
    • Cutting board

    Instructions

    Blue Cheese And Pear Salad Recipe

    Prepare the Dressing

    In a small mixing bowl, whisk together the olive oil, honey, Dijon mustard, salt, and pepper until well combined. This dressing is the secret to bringing all the flavors together, so make sure it’s thoroughly mixed.

    Assemble the Salad

    In a large salad bowl, toss the mixed greens with half of the dressing. This ensures every leaf is lightly coated, providing a flavorful base for the toppings.

    Add the Pears and Blue Cheese

    Arrange the thinly sliced pears on top of the greens, then sprinkle the crumbled blue cheese over them. The pears add a sweet freshness, while the blue cheese brings a creamy tang.

    Top with Walnuts

    Scatter the roughly chopped walnuts over the salad. They add a delightful crunch and nutty flavor that complements the other ingredients perfectly.

    Drizzle with Remaining Dressing

    Finish the salad by drizzling the remaining dressing over the top. This adds an extra layer of flavor and ensures every bite is as delicious as the last.

    Tips and Tricks

    For the best flavor, choose pears that are ripe but still firm. Overripe pears can make the salad too mushy. If you’re not a fan of blue cheese, goat cheese makes a great substitute, offering a similar creamy texture but with a milder flavor. Toasting the walnuts before adding them to the salad can enhance their nutty flavor and add an extra crunch. If you’re preparing this salad ahead of time, keep the dressing separate and add it just before serving to prevent the greens from wilting.

    Recipe Variations

    • Add grilled chicken or shrimp for a protein-packed main dish.
    • Swap the pears for apples or figs for a different sweet element.
    • Use pecans or almonds instead of walnuts for a different crunch.
    • Incorporate dried cranberries or cherries for a pop of color and sweetness.
    • Try a balsamic vinaigrette instead of honey mustard for a tangier dressing.

    Frequently Asked Questions

    Can I make this salad ahead of time?

    Yes, you can prepare the components ahead of time, but it’s best to assemble the salad and add the dressing just before serving to keep the greens fresh and crisp.

    What type of pears work best for this salad?

    Bartlett or Anjou pears are ideal because they’re sweet and hold their shape well when sliced. Just make sure they’re ripe but still firm to the touch.

    Can I use a different type of cheese?

    Absolutely! If blue cheese isn’t your thing, goat cheese, feta, or even gorgonzola can be great alternatives, each offering a unique flavor profile to the salad.

    Summary

    This Blue Cheese and Pear Salad is a delightful mix of sweet, tangy, and crunchy, making it a perfect dish for any occasion. It’s easy to prepare, versatile, and sure to impress your guests.

  • Papaya Salad Thailand Recipe: A Burst of Tropical Flavors

    Papaya Salad Thailand Recipe: A Burst of Tropical Flavors

    Get ready to transport your taste buds straight to the bustling streets of Bangkok with this authentic Papaya Salad Thailand recipe. Green papaya, crunchy peanuts, and a tangy dressing come together in a dish that’s as vibrant as it is delicious.

    Why This Recipe Works

    • The combination of sweet, sour, salty, and spicy flavors creates a perfectly balanced dish.
    • Green papaya provides a unique texture that’s both crunchy and refreshing.
    • It’s a versatile recipe that can be adjusted to suit your heat preference.
    • Quick to prepare, making it an ideal choice for a weeknight dinner or a last-minute party dish.
    • Packed with nutrients, offering a healthy yet satisfying meal option.

    Ingredients

    • 1 medium green papaya, shredded (about 4 cups)
    • 2 cloves garlic, minced
    • 2-3 Thai chilies, finely chopped (adjust to taste)
    • 1 tbsp palm sugar (or brown sugar)
    • 2 tbsp fish sauce
    • 2 tbsp lime juice
    • 1 cup cherry tomatoes, halved
    • 1/2 cup green beans, cut into 1-inch pieces
    • 1/4 cup roasted peanuts, roughly chopped
    • 2 tbsp dried shrimp (optional)

    Equipment Needed

    • Mortar and pestle
    • Large mixing bowl
    • Sharp knife
    • Cutting board
    • Measuring spoons and cups

    Instructions

    Papaya Salad Thailand Recipe

    Prepare the Dressing

    In a mortar, combine the minced garlic and Thai chilies. Pound until they form a coarse paste. Add the palm sugar, fish sauce, and lime juice, stirring until the sugar dissolves. Taste and adjust the seasoning if necessary. This dressing is the soul of the dish, so don’t skimp on the taste test!

    Prep the Vegetables

    Shred the green papaya using a julienne peeler or a sharp knife. The goal is thin, uniform strips that will soak up the dressing beautifully. Halve the cherry tomatoes and cut the green beans into bite-sized pieces. Having all your veggies prepped and ready makes the assembly a breeze.

    Combine and Toss

    In a large mixing bowl, combine the shredded papaya, tomatoes, and green beans. Pour the dressing over the top and toss everything together until well coated. The salad should be evenly dressed, with every bite promising a burst of flavor.

    Add the Finishing Touches

    Sprinkle the chopped peanuts and dried shrimp (if using) over the top of the salad. Give it one final gentle toss to distribute these ingredients throughout the salad. The peanuts add a delightful crunch, while the dried shrimp offers a hint of umami.

    Serve Immediately

    Papaya salad is best enjoyed fresh, so serve it right away. The longer it sits, the more the papaya will soften, so dig in while the textures are at their peak. Enjoy this vibrant dish as a standalone meal or as a side to grilled meats.

    Tips and Tricks

    For those who love a bit of extra crunch, consider adding some shredded carrots or cucumber to the mix. If you’re not a fan of too much heat, start with one chili and add more as needed. Remember, you can always add more spice, but you can’t take it away! For a vegetarian version, simply omit the fish sauce and dried shrimp, substituting with soy sauce or a vegetarian fish sauce alternative. And don’t forget, the key to a great papaya salad is in the balance of flavors, so take the time to adjust the dressing to your liking.

    Recipe Variations

    • Seafood Lover’s Delight: Add cooked shrimp or squid to the salad for a protein-packed version.
    • Fruity Twist: Incorporate slices of mango or pineapple for a sweeter, fruitier salad.
    • Extra Veggies: Bulk it up with additional vegetables like bell peppers or cabbage for more color and nutrients.
    • Spice It Up: For those who can handle the heat, add extra chilies or a dash of chili oil.
    • Nut-Free Option: Replace peanuts with toasted sunflower seeds for a nut-free alternative.

    Frequently Asked Questions

    Can I use ripe papaya instead of green papaya?

    While green papaya is traditional for its crisp texture and mild flavor, ripe papaya can be used for a sweeter version of the salad. Just keep in mind that the texture and taste will be significantly different, so it’s more of a variation than a substitute.

    How do I store leftover papaya salad?

    Leftover papaya salad can be stored in an airtight container in the refrigerator for up to a day. However, be aware that the papaya will soften and the flavors will intensify over time, so it’s best enjoyed fresh.

    Is there a substitute for fish sauce?

    For a vegetarian or vegan version, you can use soy sauce or tamari as a substitute for fish sauce. There are also vegetarian fish sauce alternatives available in some specialty stores that mimic the umami flavor of traditional fish sauce.

    Summary

    This Papaya Salad Thailand recipe is a vibrant, flavorful dish that’s perfect for anyone looking to add a little tropical flair to their meal rotation. With its perfect balance of sweet, sour, salty, and spicy, it’s a dish that’s sure to impress.

  • Fruit Salad Recipe with Pudding: A Delightful Twist on a Classic

    Fruit Salad Recipe with Pudding: A Delightful Twist on a Classic

    Zesty and refreshing, this fruit salad with pudding is the perfect blend of sweet and creamy. It’s a versatile dish that can serve as a dessert, a side, or even a light breakfast. With the addition of pudding, it takes the traditional fruit salad to a whole new level of deliciousness.

    Why This Recipe Works

    • The combination of fresh fruits and creamy pudding creates a perfect balance of textures and flavors.
    • It’s incredibly easy to make, requiring no cooking, just mixing and chilling.
    • The recipe is highly customizable, allowing you to use your favorite fruits or whatever is in season.
    • Pudding adds a rich and creamy element that makes this dish stand out from traditional fruit salads.
    • It’s a great make-ahead dish, as the flavors meld and improve when chilled overnight.

    Ingredients

    • 2 cups of mixed fresh fruits (such as strawberries, bananas, grapes, and kiwi), chopped
    • 1 package (3.4 oz) of instant vanilla pudding mix
    • 1 cup of cold milk
    • 1/2 cup of sour cream
    • 1 tbsp of honey (optional)
    • 1/2 tsp of vanilla extract

    Equipment Needed

    • Large mixing bowl
    • Whisk
    • Measuring cups and spoons
    • Serving bowl

    Instructions

    Fruit Salad Recipe With Pudding

    Step 1: Prepare the Fruits

    Wash all the fruits thoroughly under cold water. Peel and chop the bananas and kiwi into bite-sized pieces. Hull the strawberries and cut them into quarters. If using grapes, halve them. Combine all the fruits in a large mixing bowl. Tip: To prevent the bananas from browning, you can toss them with a little lemon juice before adding to the salad.

    Step 2: Make the Pudding Mixture

    In a separate bowl, whisk together the instant vanilla pudding mix and cold milk until the mixture begins to thicken, about 2 minutes. Add the sour cream, honey (if using), and vanilla extract, and whisk until smooth and creamy. Tip: For a lighter version, you can substitute Greek yogurt for the sour cream.

    Step 3: Combine Fruits and Pudding

    Pour the pudding mixture over the prepared fruits. Gently fold the fruits into the pudding until they are evenly coated. Be careful not to mash the fruits. Tip: For an extra touch of elegance, reserve a few pieces of fruit to garnish the top before serving.

    Step 4: Chill the Salad

    Cover the bowl with plastic wrap and refrigerate for at least 1 hour before serving. This allows the flavors to meld together and the pudding to set slightly. For best results, chill overnight.

    Step 5: Serve and Enjoy

    Give the salad a gentle stir before serving to redistribute the pudding. Serve chilled in individual bowls or a large serving dish. Enjoy the creamy, fruity goodness!

    Tips and Tricks

    For a tropical twist, add some diced mango or pineapple to the fruit mix. If you’re serving this salad at a party, consider serving it in hollowed-out fruit shells for a fun presentation. To make it even more indulgent, sprinkle some toasted coconut or chopped nuts on top before serving. If you’re short on time, you can use pre-cut fruit from the store, but fresh is always best for flavor and texture. For a dairy-free version, use coconut milk and a dairy-free pudding mix.

    Recipe Variations

    • Chocolate Lovers: Use chocolate pudding instead of vanilla and add some chocolate chips for extra decadence.
    • Berry Bliss: Focus on berries like strawberries, blueberries, raspberries, and blackberries for a antioxidant-rich version.
    • Citrus Splash: Incorporate segments of oranges, grapefruits, and a splash of lime juice for a tangy twist.
    • Autumn Harvest: Use apples, pears, and a sprinkle of cinnamon for a fall-inspired salad.
    • Exotic Escape: Add fruits like dragon fruit, star fruit, and passion fruit for an exotic flavor profile.

    Frequently Asked Questions

    Can I use fresh pudding instead of instant?

    Yes, you can definitely use homemade pudding if you prefer. Just make sure it’s cooled completely before mixing it with the fruits to prevent them from becoming mushy. The consistency should be similar to that of the instant pudding for the best results.

    How long can I store this fruit salad?

    This fruit salad is best enjoyed within 24 hours of preparation, as the fruits can start to release their juices and become soggy. However, if you’re using firmer fruits like apples and grapes, it can last up to 2 days in the refrigerator.

    Can I make this recipe vegan?

    Absolutely! Use a plant-based milk and pudding mix, and substitute the sour cream with coconut cream or a vegan yogurt. Just ensure all your ingredients are vegan-friendly, and you’re good to go.

    Summary

    This fruit salad with pudding is a creamy, dreamy twist on the classic that’s sure to please any crowd. Easy to make and endlessly customizable, it’s the perfect dish for any occasion. Whether you’re looking for a light dessert, a side dish, or a sweet breakfast option, this recipe has you covered.

  • Oreo Cookie Salad Recipe: A Dessert That’s Unbelievably Easy and Delicious

    Oreo Cookie Salad Recipe: A Dessert That’s Unbelievably Easy and Delicious

    Just when you thought Oreos couldn’t get any better, here comes a recipe that turns them into a salad. Yes, you heard that right. A salad. But not the kind you’re thinking of. This is a dessert salad that’s creamy, crunchy, and utterly irresistible. Perfect for potlucks, parties, or when you need a sweet pick-me-up.

    Why This Recipe Works

    • It combines the classic taste of Oreos with a creamy, dreamy dressing for a dessert that’s both familiar and exciting.
    • The recipe is incredibly easy to make, requiring no baking and just a few simple steps.
    • It’s versatile, allowing for numerous variations to suit any taste or occasion.
    • The contrast between the crunchy cookies and the smooth dressing creates a delightful texture.
    • It’s a crowd-pleaser, guaranteed to be a hit with both kids and adults.

    Ingredients

    • 1 package (14.3 oz) Oreo cookies, crushed
    • 1 cup heavy whipping cream
    • 1/2 cup powdered sugar
    • 1 tsp vanilla extract
    • 1 package (3.4 oz) instant vanilla pudding mix
    • 1 1/2 cups milk
    • 1 can (8 oz) crushed pineapple, drained

    Equipment Needed

    • Large mixing bowl
    • Electric mixer
    • Rubber spatula
    • Measuring cups and spoons

    Instructions

    Oreo Cookie Salad Recipe

    Step 1: Prepare the Creamy Base

    In a large mixing bowl, combine the heavy whipping cream, powdered sugar, and vanilla extract. Use an electric mixer to beat the mixture on high speed until stiff peaks form, about 3 minutes. This will be the fluffy base of your salad, so make sure it’s nice and thick.

    Step 2: Mix in the Pudding

    In a separate bowl, whisk together the instant vanilla pudding mix and milk until smooth. Let it sit for about 2 minutes to thicken slightly. Then, gently fold the pudding mixture into the whipped cream using a rubber spatula until fully incorporated.

    Step 3: Add the Pineapple

    Fold in the drained crushed pineapple into the creamy mixture. The pineapple adds a subtle tanginess that balances the sweetness of the other ingredients. Make sure it’s well distributed for even flavor in every bite.

    Step 4: Incorporate the Oreos

    Reserve a handful of crushed Oreos for garnish. Gently fold the remaining crushed Oreos into the salad. The goal is to maintain some texture, so don’t overmix. You want to see bits of Oreo throughout.

    Step 5: Chill and Serve

    Cover the bowl with plastic wrap and refrigerate for at least 1 hour before serving. This allows the flavors to meld together. When ready to serve, sprinkle the reserved crushed Oreos on top for an extra crunch.

    Tips and Tricks

    For an even richer flavor, try using chocolate pudding mix instead of vanilla. If you’re serving this at a party, consider making individual servings in clear cups for a fun presentation. To add a bit of color and freshness, mix in some mini marshmallows or maraschino cherries. For a lighter version, substitute the heavy whipping cream with whipped topping. Always crush the Oreos to different sizes for varied texture in every bite.

    Recipe Variations

    • Chocolate Lover’s Delight: Use chocolate Oreos and chocolate pudding mix for a double chocolate version.
    • Fruity Twist: Add in some diced strawberries or bananas for a fruity flavor.
    • Nutty Crunch: Mix in some chopped peanuts or pecans for an added crunch.
    • Minty Fresh: Use mint Oreos and a dash of peppermint extract for a refreshing twist.
    • Seasonal Special: Incorporate seasonal fruits or flavors, like pumpkin spice in the fall.

    Frequently Asked Questions

    Can I make this recipe ahead of time?

    Absolutely! This salad actually tastes better after it’s had some time to chill in the fridge, making it a perfect make-ahead dessert for parties. Just add the final Oreo garnish right before serving to keep them crunchy.

    Can I use a different type of cookie?

    Yes, you can experiment with different cookies, but keep in mind that the flavor and texture will change. Golden Oreos or even chocolate chip cookies could be interesting alternatives.

    Is there a way to make this recipe dairy-free?

    For a dairy-free version, substitute the heavy whipping cream with coconut cream and use a dairy-free milk alternative. Just ensure your pudding mix and Oreos are also dairy-free.

    Summary

    This Oreo Cookie Salad is a fun, easy, and delicious dessert that’s perfect for any occasion. With its creamy texture, crunchy Oreo bits, and endless variations, it’s sure to become a favorite. Whether you’re a seasoned chef or a kitchen newbie, this recipe is a breeze to make and a joy to eat.

  • Autumn Apple Salad Recipe: A Crisp, Crunchy Delight

    Autumn Apple Salad Recipe: A Crisp, Crunchy Delight

    Crisp autumn days call for a salad that’s as vibrant and refreshing as the season itself. Combining the sweetness of apples with the crunch of nuts and the tang of cheese, this autumn apple salad is a symphony of flavors and textures that will brighten any meal.

    Why This Recipe Works

    • The combination of sweet and tart apples provides a perfect balance of flavors.
    • Toasted nuts add a delightful crunch and depth of flavor.
    • A simple, homemade dressing enhances the natural flavors without overpowering them.
    • This salad is incredibly versatile, making it perfect for any occasion.
    • It’s a quick and easy recipe that doesn’t skimp on taste or presentation.

    Ingredients

    • 2 cups mixed salad greens
    • 1 large apple, thinly sliced
    • 1/2 cup walnuts, toasted
    • 1/4 cup crumbled blue cheese
    • 2 tbsp olive oil
    • 1 tbsp apple cider vinegar
    • 1 tsp honey
    • Salt and pepper to taste

    Equipment Needed

    • Large salad bowl
    • Small mixing bowl
    • Whisk
    • Knife
    • Cutting board

    Instructions

    Autumn Apple Salad Recipe

    Step 1: Prepare the Dressing

    In a small mixing bowl, whisk together the olive oil, apple cider vinegar, honey, salt, and pepper until well combined. This simple dressing will bring all the flavors of the salad together beautifully.

    Step 2: Toast the Walnuts

    Heat a dry skillet over medium heat and add the walnuts. Toast them for about 5 minutes, stirring occasionally, until they’re fragrant and slightly browned. This step enhances their flavor and adds a wonderful crunch to the salad.

    Step 3: Assemble the Salad

    In a large salad bowl, combine the mixed greens, sliced apple, toasted walnuts, and crumbled blue cheese. Toss gently to mix the ingredients evenly.

    Step 4: Dress the Salad

    Drizzle the dressing over the salad and toss again to ensure everything is lightly and evenly coated. Be careful not to overdress the salad; you want to enhance the flavors, not drown them.

    Step 5: Serve Immediately

    This salad is best enjoyed fresh, so serve it right away to enjoy the crispness of the apples and the crunch of the walnuts at their best.

    Tips and Tricks

    For an extra burst of flavor, consider adding a sprinkle of cinnamon or a handful of dried cranberries to the salad. If you’re not a fan of blue cheese, feta or goat cheese would make excellent substitutes. To save time, you can toast the walnuts ahead of time and store them in an airtight container. When selecting apples, choose a variety that’s both sweet and tart for the best flavor balance. Finally, if you’re preparing this salad in advance, wait to add the dressing until just before serving to keep the greens crisp.

    Recipe Variations

    • Swap the walnuts for pecans or almonds for a different nutty flavor.
    • Add grilled chicken or shrimp to turn this salad into a hearty main dish.
    • Incorporate pears or grapes for additional sweetness and texture.
    • Use a balsamic vinaigrette instead of the apple cider vinegar dressing for a deeper flavor profile.
    • For a vegan version, omit the cheese or use a plant-based alternative.

    Frequently Asked Questions

    Can I make this salad ahead of time?

    Yes, you can prepare the components of the salad ahead of time, but it’s best to assemble and dress it just before serving to maintain the freshness and crispness of the ingredients.

    What type of apple works best in this salad?

    Apples that are both sweet and tart, such as Honeycrisp or Granny Smith, work wonderfully in this salad. The key is to choose an apple that holds its shape well when sliced.

    Can I use a different type of nut?

    Absolutely! While walnuts are recommended for their flavor and texture, feel free to substitute with your favorite nuts or seeds for a different twist.

    Summary

    This autumn apple salad is a perfect blend of sweet, tart, and crunchy, making it an ideal dish for the season. Easy to prepare and versatile, it’s sure to be a hit at any table.

  • Apple Caramel Salad Recipe: A Sweet & Crunchy Delight

    Apple Caramel Salad Recipe: A Sweet & Crunchy Delight

    Overtime, I’ve discovered that the best recipes are those that combine simplicity with a dash of creativity. This Apple Caramel Salad is no exception. It’s a perfect blend of crisp apples, luscious caramel, and a hint of cinnamon, creating a dessert that’s both refreshing and indulgent. Whether you’re looking for a quick snack or a show-stopping side dish, this recipe has got you covered.

    Why This Recipe Works

    • The combination of crisp apples and smooth caramel offers a delightful contrast in textures.
    • A touch of cinnamon adds warmth and depth to the flavor profile.
    • It’s incredibly versatile, serving as a dessert, snack, or even a side dish.
    • Prep time is minimal, making it perfect for last-minute gatherings.
    • The recipe is easily customizable to suit different taste preferences.

    Ingredients

    • 4 large apples, cored and diced (about 4 cups)
    • 1/2 cup caramel sauce
    • 1/2 teaspoon ground cinnamon
    • 1/4 cup chopped pecans (optional)
    • 1 tablespoon lemon juice (to prevent browning)

    Equipment Needed

    • Large mixing bowl
    • Measuring cups and spoons
    • Knife and cutting board
    • Spoon for stirring

    Instructions

    Apple Caramel Salad Recipe

    Step 1: Prepare the Apples

    Start by washing and drying your apples thoroughly. Core them and dice into bite-sized pieces. Immediately toss the diced apples in lemon juice to prevent browning. This step ensures your salad stays fresh and vibrant.

    Step 2: Mix the Ingredients

    In a large mixing bowl, combine the diced apples with caramel sauce and ground cinnamon. Stir gently until all the apple pieces are evenly coated. The caramel should cling to the apples, creating a glossy finish.

    Step 3: Add the Pecans

    If you’re using pecans, now’s the time to add them. Fold them into the apple mixture for an extra crunch. The nuts add a lovely texture contrast to the soft apples and smooth caramel.

    Step 4: Chill Before Serving

    Cover the bowl with plastic wrap and refrigerate for at least 30 minutes. Chilling allows the flavors to meld together beautifully. Serve cold for the best taste experience.

    Tips and Tricks

    For an extra layer of flavor, consider toasting the pecans before adding them to the salad. This enhances their nuttiness and adds a slight crunch. If you’re not a fan of pecans, walnuts or almonds make great substitutes. To make the salad ahead of time, prepare the apples and toss them with lemon juice, but wait to add the caramel and other ingredients until just before serving to prevent sogginess. For a healthier version, opt for a low-fat caramel sauce or make your own at home with less sugar.

    Recipe Variations

    • Add a scoop of vanilla ice cream on top for a decadent dessert.
    • Incorporate dried cranberries or raisins for a chewy texture and a burst of sweetness.
    • Swap out the apples for pears for a different but equally delicious fruit base.
    • Drizzle with chocolate sauce in addition to caramel for a chocolate-caramel apple salad.
    • Use coconut flakes instead of nuts for a tropical twist.

    Frequently Asked Questions

    Can I make this recipe ahead of time?

    Yes, you can prepare the components ahead of time, but it’s best to combine them just before serving to maintain the best texture and freshness. The apples can be diced and stored in lemon juice in the fridge, and the caramel sauce can be prepared or warmed up when ready to use.

    What are the best apples to use for this salad?

    Crisp and slightly tart apples like Granny Smith or Honeycrisp work wonderfully in this recipe as they hold their shape well and balance the sweetness of the caramel. However, feel free to use your favorite variety.

    Can I use store-bought caramel sauce?

    Absolutely! Store-bought caramel sauce is a convenient option and works just fine. However, if you have the time, homemade caramel sauce can elevate the dish with its richer flavor.

    Summary

    This Apple Caramel Salad is a simple yet irresistible treat that combines the crispness of apples with the smooth sweetness of caramel, all spiced up with a hint of cinnamon. It’s quick to prepare, versatile, and sure to please any crowd.

  • Cranberry Salad Recipe with Celery: A Crunchy, Tangy Delight

    Cranberry Salad Recipe with Celery: A Crunchy, Tangy Delight

    Oh, the joys of a salad that brings both crunch and tang to your table! This cranberry salad with celery is not just a side dish; it’s a conversation starter, packed with flavors and textures that will have everyone asking for seconds.

    Why This Recipe Works

    • The combination of sweet cranberries and crisp celery creates a perfect balance of flavors and textures.
    • It’s incredibly versatile, serving as a refreshing side or a standalone snack.
    • Prep time is minimal, making it ideal for last-minute gatherings.
    • The salad’s vibrant colors make it a festive addition to any meal.
    • It’s a great way to incorporate fruits and vegetables into your diet in a delicious way.

    Ingredients

    • 2 cups fresh cranberries, finely chopped
    • 1 cup celery, thinly sliced
    • 1/2 cup sugar
    • 1/4 cup orange juice
    • 1/2 cup walnuts, chopped
    • 1 cup whipped cream

    Equipment Needed

    • Mixing bowl
    • Sharp knife
    • Cutting board
    • Measuring cups and spoons

    Instructions

    Cranberry Salad Recipe With Celery

    Prepare the Cranberries and Celery

    Start by finely chopping the fresh cranberries and thinly slicing the celery. The key here is uniformity in size to ensure every bite is packed with flavor. Combine these in a large mixing bowl.

    Sweeten the Mix

    Sprinkle the sugar over the cranberries and celery, then pour in the orange juice. Stir gently to coat every piece evenly. Let this mixture sit for about 10 minutes to allow the flavors to meld together beautifully.

    Add the Crunch

    Fold in the chopped walnuts for that irresistible crunch. This not only adds texture but also a nutty flavor that complements the tartness of the cranberries.

    Incorporate the Cream

    Gently fold the whipped cream into the salad until everything is well combined. Be careful not to overmix to keep the salad light and fluffy.

    Chill and Serve

    Refrigerate the salad for at least an hour before serving. This chilling time allows the flavors to deepen and the salad to set, making it even more delicious.

    Tips and Tricks

    For an extra zing, consider adding a teaspoon of orange zest to the mix. If you’re preparing this salad ahead of time, hold off on adding the whipped cream until just before serving to maintain its texture. For a healthier version, substitute the sugar with honey or maple syrup and use Greek yogurt instead of whipped cream.

    Recipe Variations

    • Add diced apples for an extra layer of sweetness and crunch.
    • Incorporate a handful of mini marshmallows for a fun, sweet twist.
    • Swap walnuts for pecans or almonds for a different nutty flavor.
    • Mix in some shredded coconut for a tropical vibe.
    • For a savory version, reduce the sugar and add a dash of black pepper and some diced onions.

    Frequently Asked Questions

    Can I use frozen cranberries?

    Yes, you can use frozen cranberries, but make sure to thaw and drain them well before chopping to avoid excess moisture in the salad.

    How long can I store this salad?

    This salad is best enjoyed within 24 hours of preparation. However, if stored properly in an airtight container in the refrigerator, it can last up to 2 days.

    Can I make this salad dairy-free?

    Absolutely! Substitute the whipped cream with coconut whipped cream or any dairy-free alternative to suit your dietary needs.

    Summary

    This cranberry salad with celery is a delightful mix of sweet, tangy, and crunchy, perfect for any occasion. Easy to make and versatile, it’s sure to become a favorite.

  • Pretzel Salad Recipe with Frozen Strawberries: A Sweet & Salty Delight

    Pretzel Salad Recipe with Frozen Strawberries: A Sweet & Salty Delight

    Forget everything you thought you knew about salads because this pretzel salad is here to redefine the game. Combining the crunch of pretzels with the sweetness of frozen strawberries, this dish is a crowd-pleaser that’s as fun to make as it is to eat.

    Why This Recipe Works

    • The salty pretzel crust perfectly balances the sweet and tangy strawberry layer, creating a harmonious flavor profile.
    • Using frozen strawberries ensures the recipe can be enjoyed year-round, not just during strawberry season.
    • The creamy middle layer adds a luxurious texture that ties the crunchy bottom and fruity top together.
    • It’s incredibly versatile, allowing for numerous variations to suit any taste or occasion.
    • This no-bake recipe is straightforward, making it accessible to cooks of all skill levels.

    Ingredients

    • 2 cups crushed pretzels
    • 3/4 cup melted butter
    • 3 tablespoons sugar
    • 1 (8 oz) package cream cheese, softened
    • 1 cup sugar
    • 1 (8 oz) container whipped topping
    • 2 cups frozen strawberries, thawed
    • 1 (6 oz) package strawberry gelatin
    • 2 cups boiling water

    Equipment Needed

    • 9×13 inch baking dish
    • Mixing bowls
    • Electric mixer
    • Measuring cups and spoons
    • Spatula

    Instructions

    Pretzel Salad Recipe With Frozen Strawberries

    Step 1: Prepare the Pretzel Crust

    Start by preheating your oven to 350°F. In a mixing bowl, combine the crushed pretzels, melted butter, and 3 tablespoons of sugar. Press this mixture firmly into the bottom of your 9×13 inch baking dish. Bake for 10 minutes, then let it cool completely. This crust is the foundation of your salad, so take your time to ensure it’s evenly pressed and baked to golden perfection.

    Step 2: Whip Up the Creamy Layer

    In another bowl, use an electric mixer to blend the softened cream cheese and 1 cup of sugar until smooth. Gently fold in the whipped topping until the mixture is uniform. Spread this over the cooled pretzel crust, creating a smooth, even layer. Chill this in the refrigerator while you prepare the strawberry layer to keep everything firm and delicious.

    Step 3: Create the Strawberry Topping

    Dissolve the strawberry gelatin in 2 cups of boiling water, stirring until completely clear. Add the thawed frozen strawberries to the gelatin, mixing well. Carefully pour this over the cream cheese layer. The key here is to pour slowly to prevent the layers from mixing. Return the dish to the refrigerator and chill for at least 4 hours, or until the gelatin is fully set.

    Step 4: Serve and Enjoy

    Once set, cut the salad into squares and serve chilled. The contrast between the salty pretzel crust, creamy middle, and sweet strawberry topping is what makes this dish a memorable treat. For the best experience, serve it the same day it’s made to maintain the perfect texture contrast.

    Tips and Tricks

    For an extra crunchy crust, consider using pretzel sticks instead of crushed pretzels. They provide a more substantial bite and add an interesting texture. If you’re short on time, you can speed up the cooling process by placing the dish in the freezer for a short period, but keep an eye on it to prevent the layers from freezing. For a more decadent version, drizzle melted chocolate over the top before serving. This adds a rich flavor that complements the strawberries beautifully.

    Recipe Variations

    • Swap out the strawberries for other frozen fruits like raspberries or peaches for a different flavor profile.
    • Add a layer of sliced bananas between the cream cheese and strawberry layers for a tropical twist.
    • Use chocolate or caramel flavored gelatin for a dessert that’s reminiscent of your favorite candy bars.
    • Incorporate nuts into the pretzel crust for added texture and flavor.
    • For a lighter version, substitute the whipped topping with Greek yogurt and reduce the sugar in the cream cheese layer.

    Frequently Asked Questions

    Can I use fresh strawberries instead of frozen?

    Absolutely! Fresh strawberries can be used in place of frozen. Just make sure to chop them finely and adjust the sugar to taste, as fresh berries may be less sweet than their frozen counterparts. The texture will be slightly different, but the flavor will be just as delightful.

    How long can I store the pretzel salad?

    This salad is best enjoyed within 24 hours of making it, as the pretzel crust can start to soften over time. If you need to store it, keep it covered in the refrigerator and try to consume it within two days for the best quality.

    Can I make this recipe gluten-free?

    Yes, by substituting the pretzels with a gluten-free alternative and ensuring all other ingredients are gluten-free, you can easily adapt this recipe. There are many gluten-free pretzel options available that work wonderfully in this dish.

    Summary

    This pretzel salad with frozen strawberries is a delightful mix of sweet and salty, with layers of texture that make every bite interesting. Easy to make and even easier to love, it’s a perfect dish for any occasion.