Category: Fruit Salad Recipes

  • Snicker Salad Recipe with Vanilla Pudding: A Sweet Twist on a Classic

    Snicker Salad Recipe with Vanilla Pudding: A Sweet Twist on a Classic

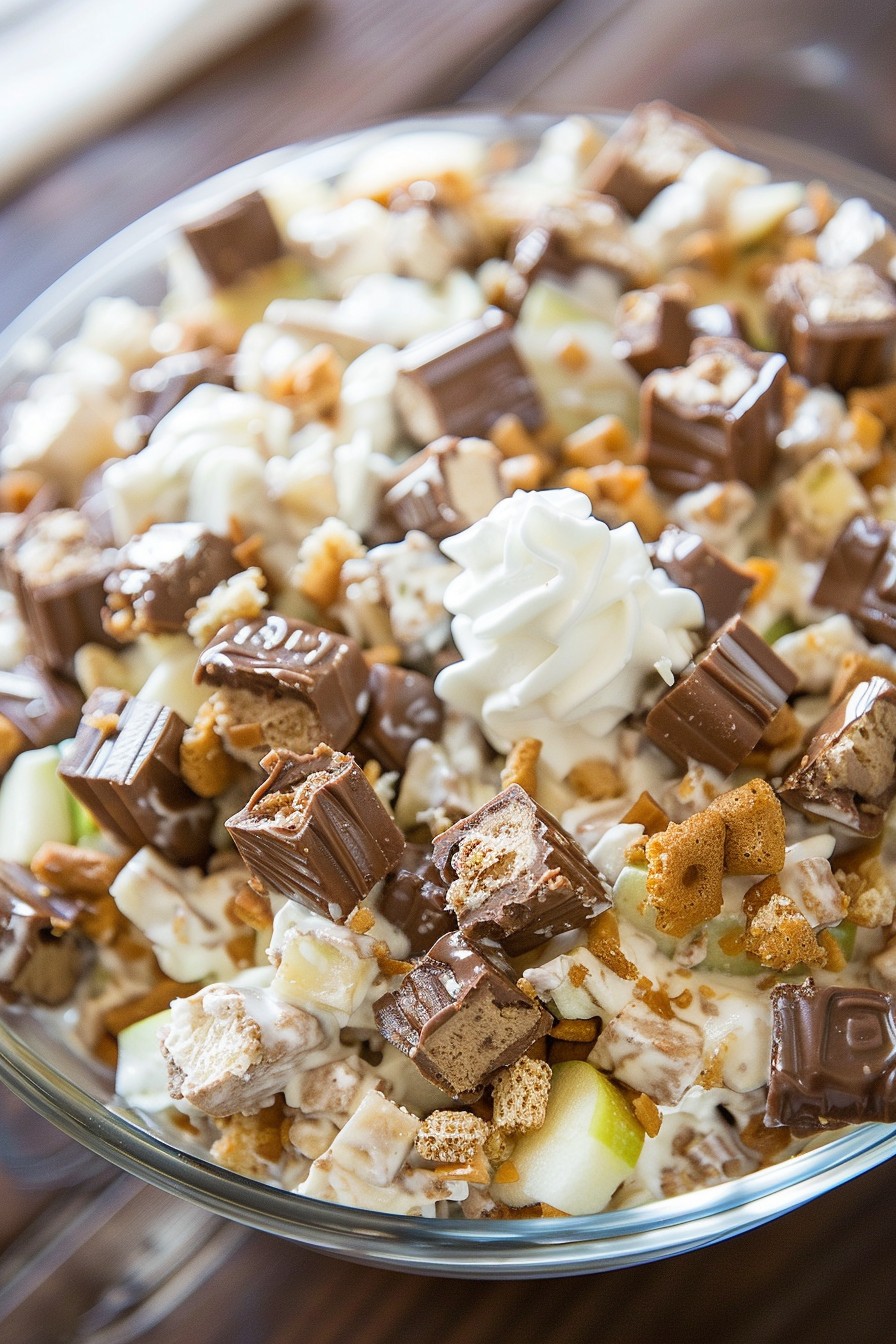
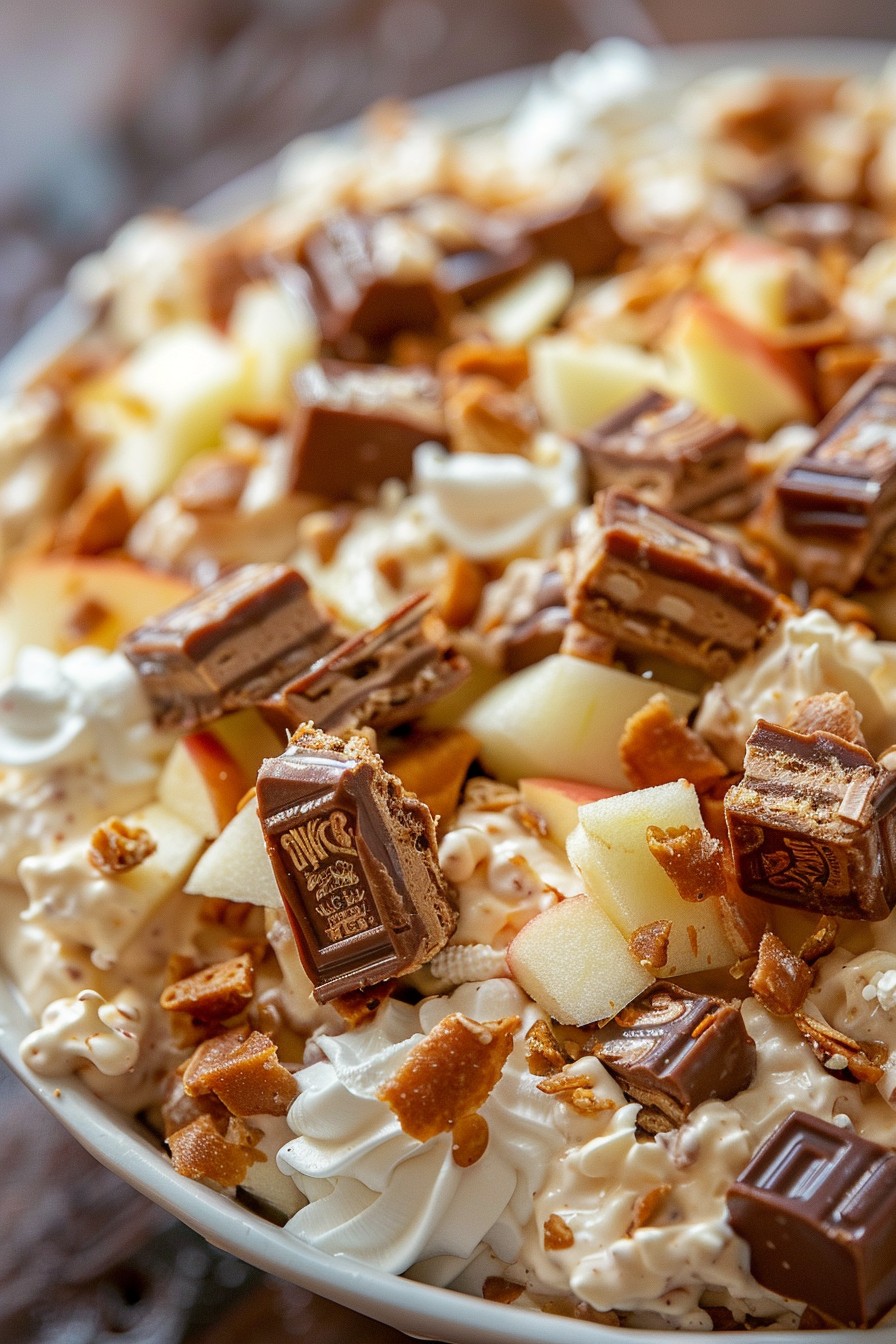
    Snicker salad is the dessert salad you never knew you needed. Combining the crunch of Snickers bars with the creamy goodness of vanilla pudding, this recipe is a guaranteed crowd-pleaser. Perfect for potlucks, family gatherings, or when you just need a sweet treat, this salad is as fun to make as it is to eat.

    Why This Recipe Works

    • The combination of creamy vanilla pudding and crunchy Snickers bars creates a delightful texture contrast.
    • It’s incredibly easy to make, requiring no baking and just a few simple steps.
    • This recipe is versatile, allowing for numerous variations to suit any taste.
    • It’s a great way to use up leftover Snickers bars from Halloween or other holidays.
    • The salad can be made ahead of time, making it perfect for busy schedules.

    Ingredients

    • 1 package (3.4 oz) instant vanilla pudding mix
    • 1 cup cold milk
    • 1 cup whipped topping, thawed
    • 4 Snickers bars, chopped into bite-sized pieces
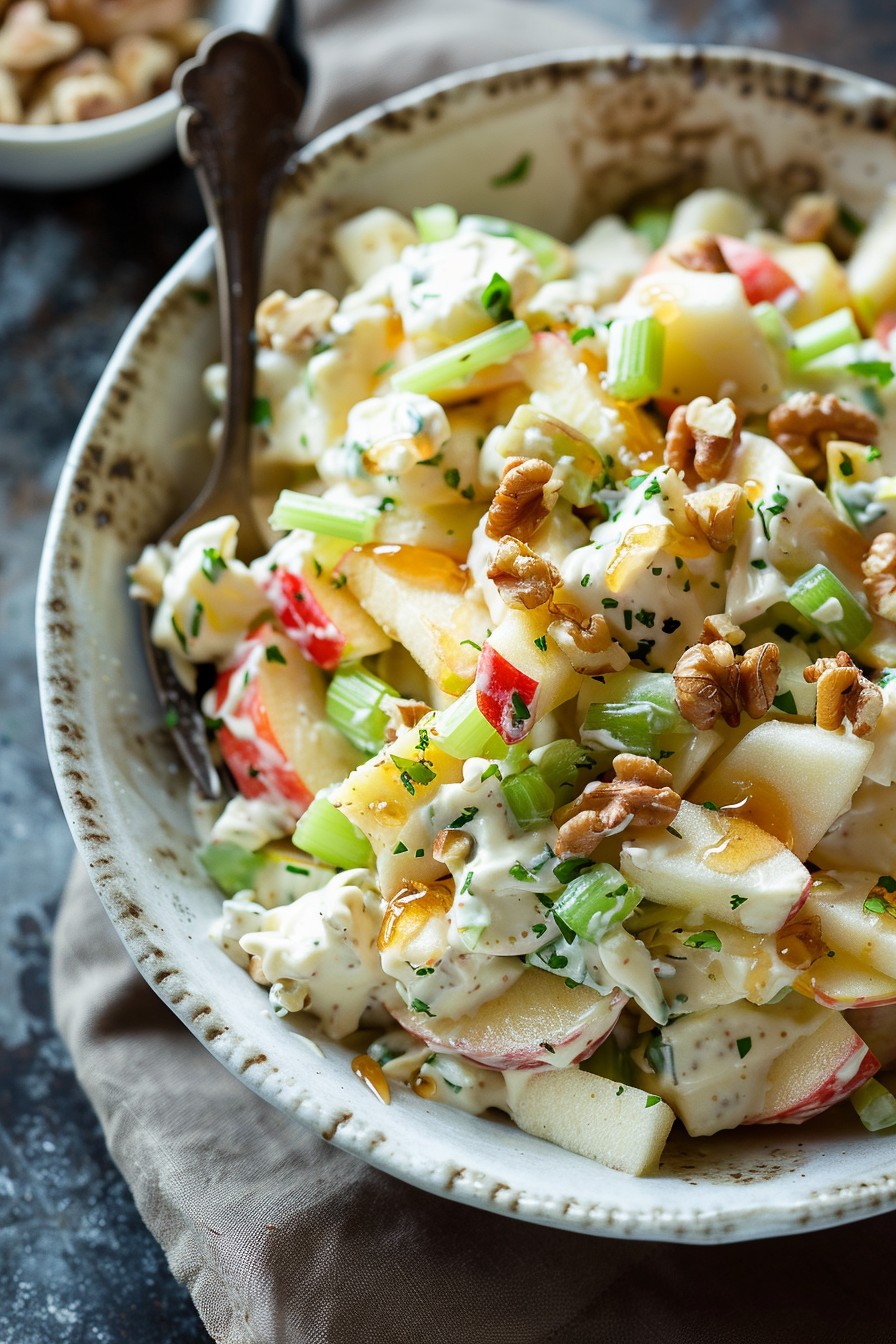
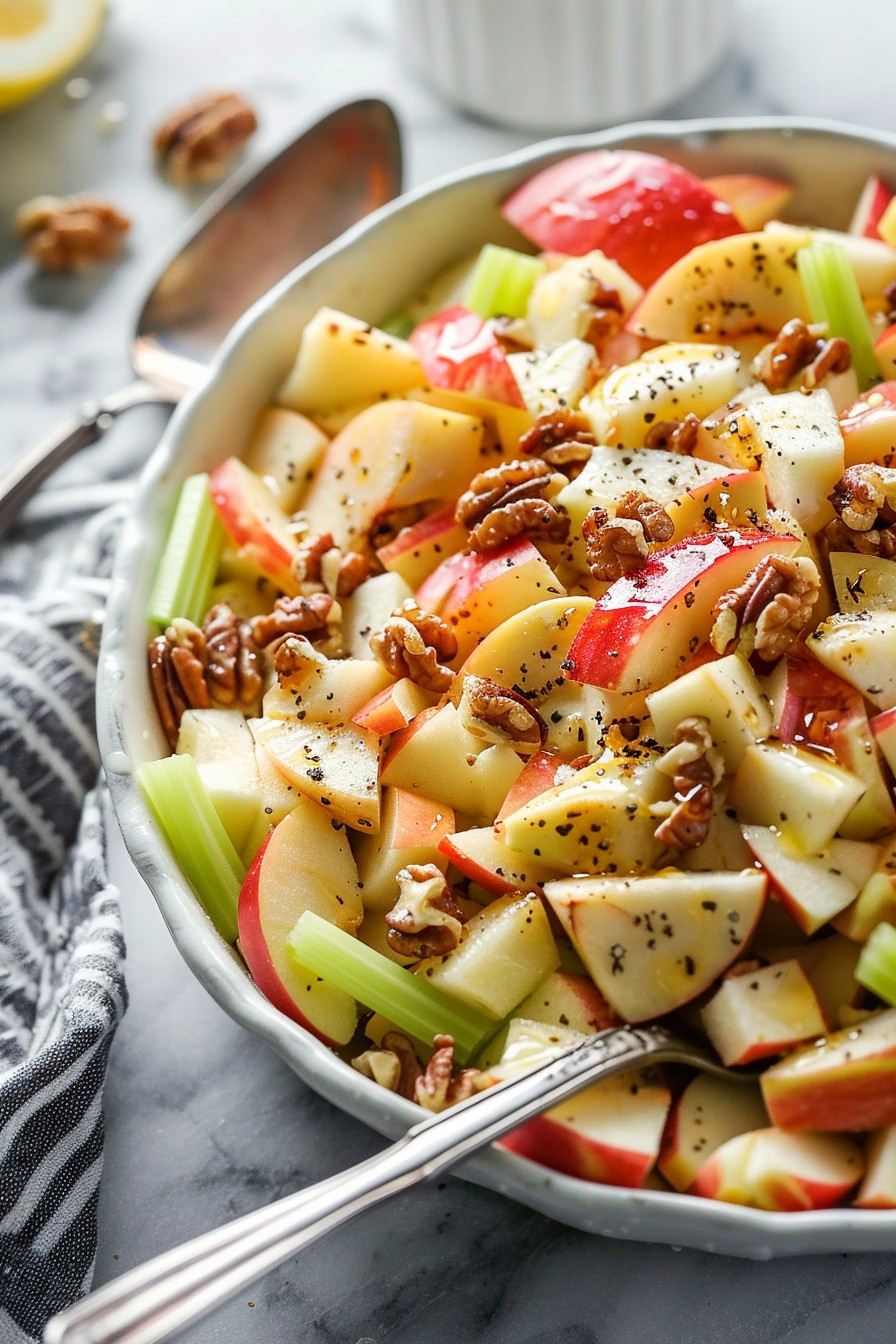
    • 2 apples, cored and diced

    Equipment Needed

    • Large mixing bowl
    • Whisk
    • Measuring cups and spoons
    • Knife and cutting board

    Instructions

    Snicker Salad Recipe With Vanilla Pudding

    Step 1: Prepare the Pudding

    In a large mixing bowl, whisk together the instant vanilla pudding mix and cold milk until smooth. Let it sit for about 5 minutes to thicken. This is the base of your salad, so make sure it’s well mixed. Tip: For an extra creamy texture, you can use half-and-half instead of milk.

    Step 2: Fold in the Whipped Topping

    Gently fold the whipped topping into the pudding mixture until fully incorporated. This will lighten the texture of the salad, making it fluffy and airy. Be careful not to overmix, as this can deflate the whipped topping.

    Step 3: Add the Snickers and Apples

    Add the chopped Snickers bars and diced apples to the bowl. Stir gently to combine, ensuring all pieces are evenly distributed throughout the mixture. The apples add a fresh crunch that contrasts beautifully with the creamy pudding and chewy Snickers.

    Step 4: Chill the Salad

    Cover the bowl with plastic wrap and refrigerate for at least 1 hour before serving. This allows the flavors to meld together and the salad to set properly. Tip: For best results, chill overnight.

    Step 5: Serve and Enjoy

    Give the salad a quick stir before serving to ensure everything is well mixed. Serve in individual bowls or as part of a larger dessert spread. This salad is best enjoyed cold, so keep it refrigerated until ready to serve.

    Tips and Tricks

    For a lighter version of this salad, you can use sugar-free pudding mix and light whipped topping. If you’re not a fan of apples, try substituting pears or bananas for a different flavor profile. To add a bit of crunch, consider mixing in some chopped peanuts or pecans. For a more decadent version, drizzle with caramel sauce before serving. Remember, the key to a great Snicker salad is balancing the textures and flavors, so feel free to experiment with different combinations.

    Recipe Variations

    • Chocolate Lover’s Version: Use chocolate pudding instead of vanilla and add mini chocolate chips.
    • Nutty Delight: Mix in a variety of chopped nuts like almonds, walnuts, and pecans for extra crunch.
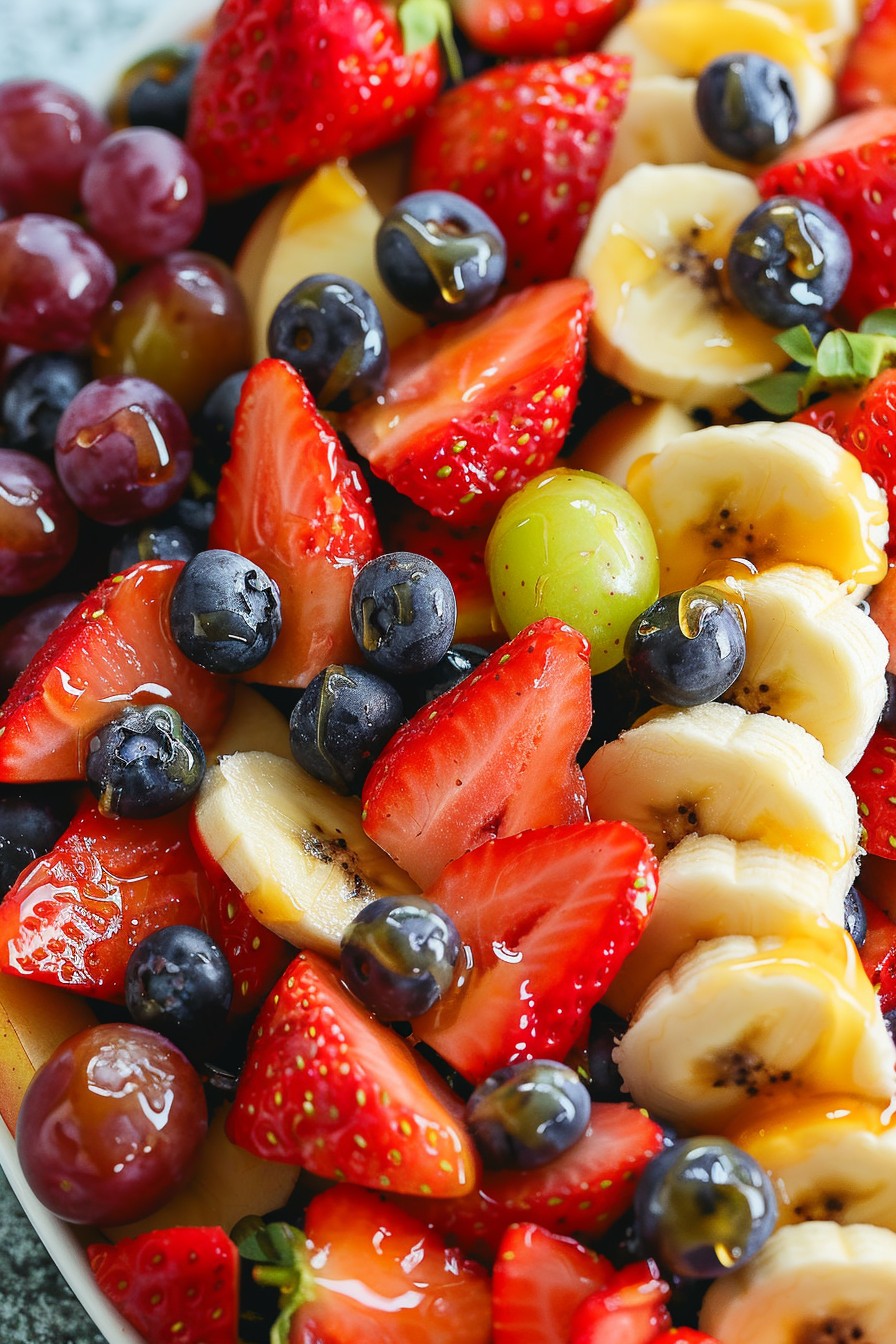
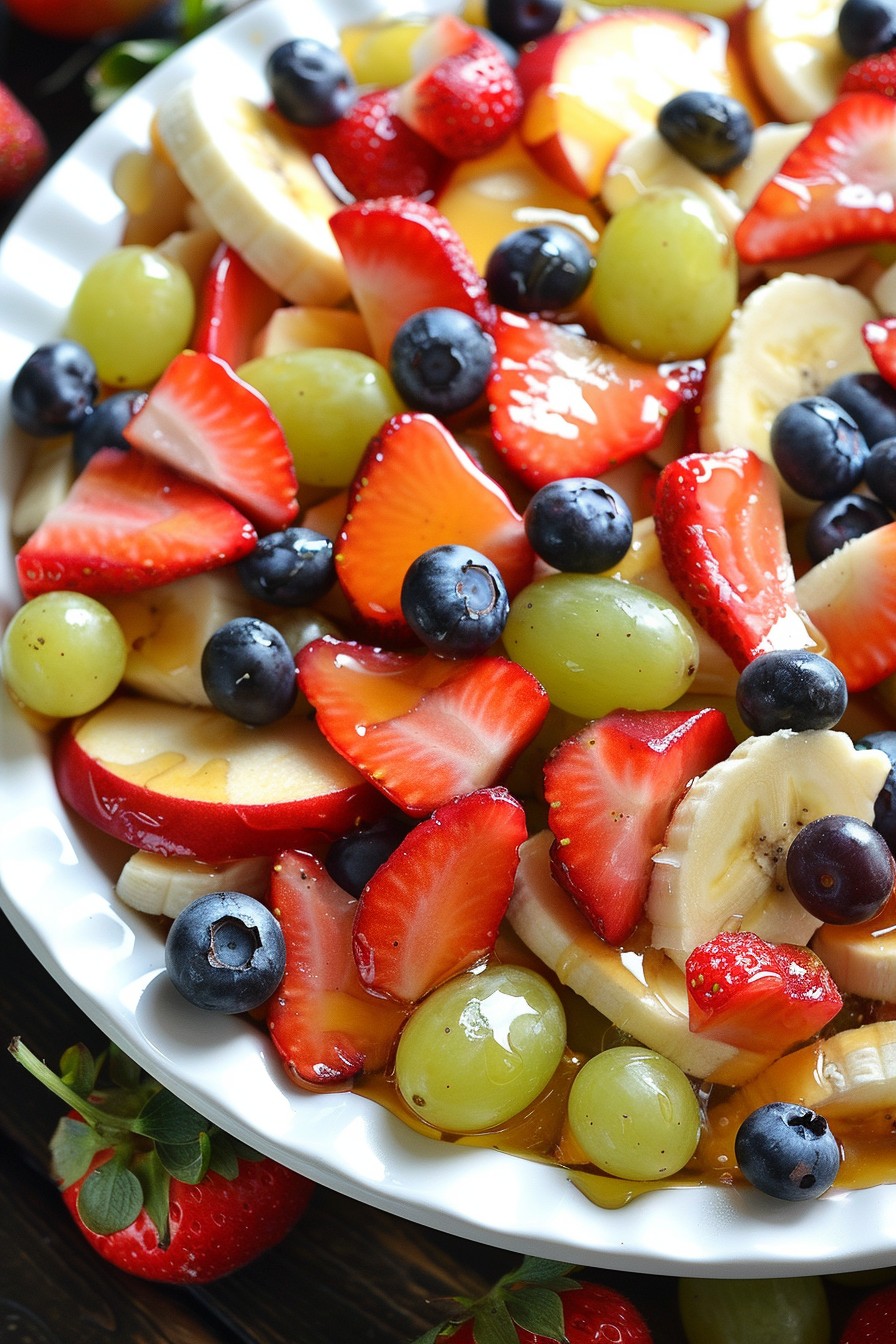
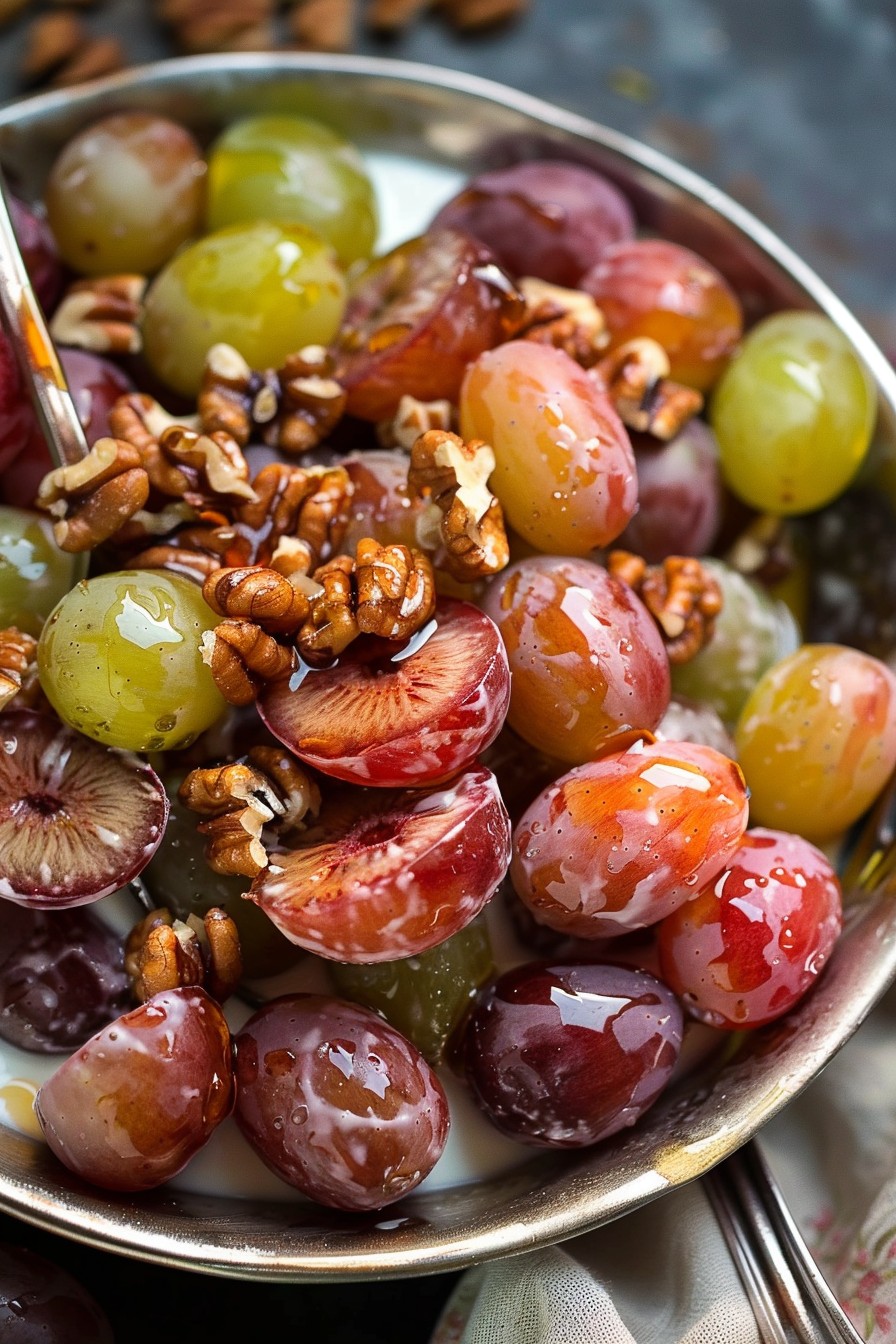
    • Fruity Twist: Add different fruits such as grapes, strawberries, or bananas for a fresher taste.
    • Caramel Drizzle: Top the salad with a generous drizzle of caramel sauce for an extra sweet touch.
    • Peanut Butter Swirl: Swirl in some peanut butter for a rich, nutty flavor that pairs perfectly with the Snickers.

    Frequently Asked Questions

    Can I make this salad ahead of time? Absolutely! This salad actually tastes better after it’s had time to chill and the flavors have melded together. Just be sure to keep it refrigerated until you’re ready to serve.

    Can I use homemade whipped cream instead of whipped topping? Yes, you can. However, keep in mind that homemade whipped cream may not hold up as well over time, so it’s best to add it just before serving.

    How long will this salad keep in the fridge? This salad will keep for up to 3 days in the refrigerator, though it’s best enjoyed within the first 24 hours for optimal texture.

    Summary

    This Snicker salad with vanilla pudding is a delightful dessert that’s easy to make and sure to impress. With its perfect balance of creamy, crunchy, and chewy textures, it’s a treat that everyone will love. Whether you stick to the classic recipe or try one of the many variations, this salad is a sweet addition to any meal.

  • Fruit Salad Recipe for Kids: A Rainbow on a Plate

    Fruit Salad Recipe for Kids: A Rainbow on a Plate

    Out of all the recipes in the world, a fruit salad might just be the simplest, yet most versatile dish you can whip up for your little ones. Not only is it a breeze to make, but it’s also a fantastic way to sneak in those essential vitamins and minerals, all while keeping the flavors fun and exciting.

    Why This Recipe Works

    • Colorful and Fun: Kids eat with their eyes first, and this fruit salad is a feast of colors that’ll grab their attention.
    • Nutritious: Packed with vitamins, fiber, and antioxidants, it’s a healthy snack that doesn’t compromise on taste.
    • Easy to Make: With no cooking involved, it’s a quick fix for busy parents.
    • Customizable: Easily adaptable to include your child’s favorite fruits or whatever’s in season.

    Ingredients

    • 1 cup strawberries, hulled and quartered
    • 1 cup blueberries, washed
    • 1 cup grapes, halved
    • 1 banana, sliced
    • 1 apple, diced
    • 1/2 cup orange juice
    • 1 tbsp honey (optional)

    Equipment Needed

    • Large mixing bowl
    • Knife
    • Cutting board
    • Measuring cups and spoons

    Instructions

    Fruit Salad Recipe For Kids

    Step 1: Prep Your Fruits

    Start by washing all your fruits under cold water. Then, proceed to hull and quarter the strawberries, halve the grapes, slice the banana, and dice the apple. Remember, the smaller the pieces, the easier it is for little kids to eat. Tip: To prevent the banana and apple from browning, toss them in a little lemon juice.

    Step 2: Combine the Fruits

    In a large mixing bowl, gently combine the strawberries, blueberries, grapes, banana, and apple. The key here is to be gentle to avoid bruising the softer fruits. This is where the rainbow starts to come together, so take a moment to admire your work!

    Step 3: Add the Dressing

    Drizzle the orange juice over the fruit mixture. If you’re using honey, now’s the time to add it. Gently toss the salad to ensure every piece of fruit is lightly coated. The orange juice not only adds flavor but also keeps the fruits from oxidizing too quickly.

    Step 4: Chill Before Serving

    Cover the bowl with plastic wrap and let the fruit salad chill in the refrigerator for at least 30 minutes. This step allows the flavors to meld together beautifully. Plus, a chilled fruit salad is incredibly refreshing on a warm day.

    Step 5: Serve and Enjoy

    Once chilled, give the salad a final gentle toss and serve it in colorful bowls or cups to make it even more appealing to the kids. Watch as they dive into this healthy, delicious treat!

    Tips and Tricks

    Creating the perfect fruit salad for kids is all about the details. Here are some extra tips to ensure your fruit salad is a hit: Always use ripe, in-season fruits for the best flavor and texture. If you’re preparing the salad ahead of time, add the bananas just before serving to prevent them from getting mushy. For an extra fun twist, use cookie cutters to shape some of the firmer fruits like apples and melons into stars or hearts. And remember, the more colorful the salad, the more enticing it will be to kids.

    Recipe Variations

    • Tropical Twist: Swap out some of the fruits for mango, pineapple, and kiwi for a tropical flavor explosion.
    • Berry Medley: Focus on berries by adding raspberries and blackberries, perfect for berry-loving kids.
    • Creamy Delight: Mix in a little yogurt or whipped cream for a creamy version that feels like a dessert.
    • Granola Topped: Sprinkle some granola on top for added crunch and a boost of energy.

    Frequently Asked Questions

    Can I make this fruit salad ahead of time? Yes, you can prepare this fruit salad a few hours in advance. Just hold off on adding the bananas until you’re ready to serve to keep them from turning brown and mushy.

    What other dressings can I use? Besides orange juice, you can use lime juice, lemon juice, or even a little maple syrup for a different flavor profile. The key is to use something that will complement the fruits without overpowering them.

    How can I make this salad more appealing to picky eaters? Try involving your kids in the preparation process. Let them pick out the fruits at the store or help with the mixing. Kids are more likely to eat something they’ve had a hand in making.

    Summary

    This fruit salad recipe is a simple, nutritious, and fun way to get kids excited about eating their fruits. With its vibrant colors and sweet flavors, it’s sure to be a hit at any meal or snack time.

  • Waldorf Apple Salad: A Crunchy, Creamy Delight

    Waldorf Apple Salad: A Crunchy, Creamy Delight

    Kickstart your culinary adventure with this timeless Waldorf Apple Salad recipe that combines crisp apples, crunchy walnuts, and a creamy dressing for a dish that’s as delightful to eat as it is to prepare. Perfect for picnics, potlucks, or a refreshing side, this salad is a crowd-pleaser.

    Why This Recipe Works

    • The combination of sweet and tart apples provides a perfect balance of flavors.
    • Crunchy walnuts add a delightful texture contrast to the creamy dressing.
    • It’s a versatile recipe that can be easily adapted to include your favorite ingredients.
    • Quick to prepare, making it ideal for last-minute gatherings.
    • The creamy dressing binds all the ingredients together for a harmonious bite every time.

    Ingredients

    • 2 cups diced apples (a mix of sweet and tart varieties)
    • 1 cup chopped celery
    • 1/2 cup walnuts, toasted and chopped
    • 1/2 cup mayonnaise
    • 1 tablespoon lemon juice
    • 1 tablespoon honey
    • Salt and pepper to taste

    Equipment Needed

    • Mixing bowl
    • Knife and cutting board
    • Measuring cups and spoons
    • Toaster or oven for toasting walnuts

    Instructions

    Recipe For Waldorf Apple Salad

    Step 1: Prepare the Apples

    Start by washing and drying your apples. Dice them into bite-sized pieces, leaving the skin on for extra color and nutrients. Toss the diced apples with lemon juice in a large mixing bowl to prevent browning. Tip: For a more vibrant salad, use a mix of red and green apples.

    Step 2: Toast the Walnuts

    Spread the walnuts on a baking sheet and toast in a preheated 350°F oven for about 5 minutes, or until fragrant. Let them cool before chopping. This step enhances the nuts’ flavor and adds a crunchier texture to your salad.

    Step 3: Mix the Dressing

    In a small bowl, whisk together mayonnaise, honey, a pinch of salt, and pepper. Adjust the sweetness or seasoning according to your taste. This creamy dressing is what gives the Waldorf salad its signature taste.

    Step 4: Combine All Ingredients

    Add the chopped celery and toasted walnuts to the bowl with the apples. Pour the dressing over the top and gently toss until everything is evenly coated. Tip: For best results, let the salad chill in the refrigerator for at least 30 minutes before serving to allow the flavors to meld.

    Step 5: Serve and Enjoy

    Transfer the salad to a serving dish. Garnish with additional walnuts or apple slices if desired. Serve chilled for a refreshing taste. Tip: This salad is best enjoyed the day it’s made but can be stored in the refrigerator for up to two days.

    Tips and Tricks

    For an extra layer of flavor, consider adding a dash of cinnamon or nutmeg to the dressing. If you’re not a fan of mayonnaise, Greek yogurt makes a great substitute for a lighter version. Toasting the walnuts is a step you shouldn’t skip; it brings out their natural oils and enhances the salad’s overall taste. For a more elegant presentation, serve the salad on a bed of lettuce or in individual cups. Lastly, if you’re preparing this salad ahead of time, add the walnuts just before serving to maintain their crunch.

    Recipe Variations

    • Add grapes or raisins for a sweeter twist.
    • Incorporate chicken or turkey to turn this side dish into a hearty main course.
    • Swap walnuts for pecans or almonds for a different nutty flavor.
    • Use avocado instead of mayonnaise for a healthier, creamy dressing option.
    • Add a bit of blue cheese or feta for a tangy kick.

    Frequently Asked Questions

    Can I make Waldorf Apple Salad ahead of time?

    Yes, you can prepare the salad a few hours in advance. However, for the best texture, add the walnuts just before serving to keep them crunchy. The apples may soften slightly over time, but the lemon juice helps slow down the browning process.

    What are the best apples to use for Waldorf salad?

    A mix of sweet and tart apples works best for this recipe. Honeycrisp, Fuji, or Gala apples provide sweetness, while Granny Smith apples add a nice tartness. The variety not only enhances the flavor but also adds a beautiful color contrast to the salad.

    Can I use a different type of nut?

    Absolutely! While walnuts are traditional, feel free to use pecans, almonds, or even pistachios for a different flavor and texture. Just make sure to toast them first to bring out their best qualities.

    Summary

    This Waldorf Apple Salad is a perfect blend of crunchy, creamy, sweet, and tart flavors, making it a versatile dish for any occasion. Easy to prepare and customizable, it’s sure to become a favorite in your recipe collection.

  • Fruit Salad and Yogurt Recipe: A Refreshing Summer Delight

    Fruit Salad and Yogurt Recipe: A Refreshing Summer Delight

    Very few things scream summer like a vibrant fruit salad paired with creamy yogurt. This recipe is not just a treat for your taste buds but also a feast for your eyes, making it the perfect dish for any summer gathering or a healthy snack to beat the heat.

    Why This Recipe Works

    • It combines the natural sweetness of fresh fruits with the tanginess of yogurt for a balanced flavor profile.
    • The variety of textures from crunchy nuts to soft fruits adds an exciting eating experience.
    • It’s incredibly versatile, allowing for endless variations based on seasonal fruits or personal preferences.
    • Quick and easy to prepare, making it ideal for last-minute gatherings or a healthy snack.
    • Packed with vitamins, minerals, and probiotics, it’s as nutritious as it is delicious.

    Ingredients

    • 2 cups mixed fresh fruits (such as strawberries, blueberries, kiwi, and mango), diced
    • 1 cup Greek yogurt
    • 2 tbsp honey
    • 1/4 cup granola
    • 1 tbsp fresh mint leaves, chopped

    Equipment Needed

    • Mixing bowl
    • Measuring cups and spoons
    • Knife and cutting board
    • Serving bowls

    Instructions

    Fruit Salad And Yogurt Recipe

    Step 1: Prepare the Fruits

    Wash all the fruits thoroughly under cold water. Dice them into bite-sized pieces to ensure every spoonful has a mix of flavors. This step is crucial for achieving the perfect texture and taste balance in your fruit salad.

    Step 2: Mix the Yogurt and Honey

    In a mixing bowl, combine the Greek yogurt and honey. Whisk them together until the mixture is smooth and the honey is fully incorporated. This will serve as the creamy base of your dish, adding a sweet and tangy flavor.

    Step 3: Combine Fruits and Yogurt Mixture

    Gently fold the diced fruits into the yogurt mixture, ensuring each piece is evenly coated. Be careful not to overmix to prevent the fruits from becoming mushy. This step brings all the flavors together beautifully.

    Step 4: Add the Final Touches

    Sprinkle the granola and chopped mint leaves over the top for added crunch and freshness. These toppings not only enhance the texture but also add a pop of color, making the dish even more appealing.

    Step 5: Serve Immediately or Chill

    You can serve the fruit salad and yogurt immediately for a fresh taste, or chill it in the refrigerator for about 30 minutes to let the flavors meld together. Either way, it’s delicious.

    Tips and Tricks

    For the best results, use fresh, in-season fruits as they are sweeter and more flavorful. If you’re preparing the salad ahead of time, add the granola just before serving to maintain its crunchiness. Experiment with different types of yogurt, such as coconut or almond yogurt, for a dairy-free version. To make the dish more indulgent, a drizzle of chocolate syrup or a sprinkle of coconut flakes can be delightful additions.

    Recipe Variations

    • For a tropical twist, use fruits like pineapple, papaya, and banana, and top with toasted coconut flakes.
    • Add a scoop of protein powder to the yogurt mixture for a post-workout snack.
    • Incorporate spices like cinnamon or nutmeg for a warm, comforting flavor profile.
    • Use flavored yogurts, such as vanilla or strawberry, to add another layer of taste without extra work.
    • For a dessert version, mix in a tablespoon of cocoa powder into the yogurt and top with dark chocolate shavings.

    Frequently Asked Questions

    Can I use frozen fruits instead of fresh?

    Yes, you can use frozen fruits, but make sure to thaw and drain them well to avoid excess water in your salad. Frozen fruits are a great option when fresh ones are out of season, though they may be slightly softer once thawed.

    How long can I store the fruit salad and yogurt in the fridge?

    It’s best enjoyed within 24 hours as the fruits may start to release water and become soggy. If you plan to store it, keep the granola separate and add it just before serving to maintain its texture.

    Is there a dairy-free alternative to Greek yogurt?

    Absolutely! Coconut yogurt, almond yogurt, or any plant-based yogurt can be used as a substitute. These alternatives offer a similar creamy texture and can be just as delicious when paired with fresh fruits and honey.

    Summary

    This fruit salad and yogurt recipe is a simple, nutritious, and delicious way to enjoy the bounty of summer fruits. With its perfect balance of flavors and textures, it’s sure to be a hit at any gathering or as a refreshing snack. Plus, it’s endlessly customizable to suit your taste preferences or dietary needs.

  • Macaroni and Fruit Salad Recipe: A Sweet & Savory Delight

    Macaroni and Fruit Salad Recipe: A Sweet & Savory Delight

    You’re about to embark on a culinary adventure that combines the best of both worlds: the comforting chew of macaroni with the fresh, juicy burst of fruit. This isn’t your grandma’s macaroni salad—unless your grandma was into wildly innovative flavor combinations.

    Why This Recipe Works

    • Unexpected Flavor Pairing: The sweetness of the fruit contrasts beautifully with the savory notes of the macaroni and dressing, creating a dish that’s both refreshing and satisfying.
    • Texture Heaven: Creamy dressing, al dente pasta, and crisp fruit come together for a mouthfeel that’s anything but boring.
    • Versatility: Perfect as a side dish, potluck contribution, or even a light main course, this recipe adapts to your needs.
    • Easy to Make: With simple ingredients and straightforward steps, this dish is accessible to cooks of all levels.

    Ingredients

    • 2 cups elbow macaroni, uncooked
    • 1 cup mayonnaise
    • 1/4 cup honey
    • 2 tbsp apple cider vinegar
    • 1 cup diced apples
    • 1 cup seedless grapes, halved
    • 1/2 cup diced celery
    • 1/4 cup chopped walnuts
    • Salt and pepper to taste

    Equipment Needed

    • Large pot
    • Colander
    • Mixing bowls
    • Whisk
    • Measuring cups and spoons

    Instructions

    Macaroni And Fruit Salad Recipe

    Step 1: Cook the Macaroni

    Bring a large pot of salted water to a rolling boil. Add the macaroni and cook according to package instructions until al dente, usually about 8 minutes. Drain in a colander and rinse under cold water to stop the cooking process. Tip: Adding a splash of olive oil to the boiling water can prevent the pasta from sticking together.

    Step 2: Prepare the Dressing

    In a large mixing bowl, whisk together the mayonnaise, honey, and apple cider vinegar until smooth. Season with salt and pepper to taste. This creamy, sweet, and tangy dressing is the glue that holds our salad together.

    Step 3: Combine Ingredients

    Add the cooled macaroni, diced apples, halved grapes, diced celery, and chopped walnuts to the bowl with the dressing. Gently toss until everything is evenly coated. Tip: For the best flavor, let the salad chill in the refrigerator for at least an hour before serving.

    Step 4: Serve and Enjoy

    Give the salad a final toss before serving to redistribute the dressing. Serve chilled for the most refreshing experience. This dish is perfect for picnics, potlucks, or as a unique side dish at your next barbecue.

    Tips and Tricks

    For those looking to elevate their macaroni and fruit salad, consider toasting the walnuts beforehand to bring out their nutty flavor. If you’re serving the salad outdoors, keep it in a cooler or on ice to maintain freshness. For a lighter version, substitute Greek yogurt for half of the mayonnaise. Experiment with different fruits based on the season—pears, peaches, or berries can offer delightful variations. Lastly, if you’re preparing this salad ahead of time, add the apples last to prevent them from browning.

    Recipe Variations

    • Tropical Twist: Swap the apples and grapes for mango, pineapple, and coconut flakes for a tropical vibe.
    • Berry Bliss: Use strawberries, blueberries, and raspberries for a berry-packed version that’s perfect for summer.
    • Savory Option: Omit the honey and add diced chicken or turkey for a more savory, protein-rich meal.
    • Nut-Free: Replace walnuts with sunflower seeds or omit nuts altogether for allergy-friendly options.

    Frequently Asked Questions

    Can I use a different type of pasta?

    Absolutely! While elbow macaroni is traditional, feel free to experiment with shells, rotini, or any small pasta shape that catches your fancy. Just be sure to adjust cooking times accordingly.

    How long does this salad keep in the fridge?

    Stored in an airtight container, your macaroni and fruit salad will stay fresh for up to 3 days. However, the fruits may soften over time, so it’s best enjoyed within the first 24 hours.

    Can I make this recipe vegan?

    Yes! Simply use vegan mayonnaise and ensure your honey substitute is plant-based, like maple syrup or agave nectar. The rest of the ingredients are naturally vegan-friendly.

    Summary

    This macaroni and fruit salad recipe is a delightful twist on classic pasta salad, offering a perfect balance of sweet and savory flavors. Easy to make and versatile, it’s sure to be a hit at any gathering.

  • Grape Salad Recipe Without Sour Cream: A Refreshing Twist

    Grape Salad Recipe Without Sour Cream: A Refreshing Twist

    Yes, you heard it right! A grape salad that skips the sour cream but doesn’t skimp on flavor. Perfect for those who are looking for a lighter version or just ran out of sour cream. This recipe is a game-changer with its creamy texture and sweet, tangy flavors that will have everyone asking for seconds.

    Why This Recipe Works

    • Uses Greek yogurt as a healthier, protein-packed alternative to sour cream, adding a creamy texture without the guilt.
    • The combination of red and green grapes offers a beautiful color contrast and a mix of sweet and tart flavors.
    • Walnuts add a crunchy texture, making every bite interesting.
    • Honey brings a natural sweetness that complements the grapes perfectly.
    • Quick and easy to prepare, making it a great last-minute dish for any occasion.

    Ingredients

    • 2 cups red seedless grapes, halved
    • 2 cups green seedless grapes, halved
    • 1 cup Greek yogurt
    • 1/4 cup honey
    • 1/2 cup chopped walnuts
    • 1 tsp vanilla extract

    Equipment Needed

    • Mixing bowl
    • Measuring cups and spoons
    • Knife and cutting board
    • Spatula

    Instructions

    Grape Salad Recipe Without Sour Cream

    Step 1: Prepare the Grapes

    Start by washing your red and green grapes thoroughly under cold water. Pat them dry with a clean towel to remove any excess moisture. Then, halve each grape using a sharp knife and a cutting board. This step ensures that every bite of your salad is easy to eat and perfectly sized. Tip: For an extra burst of flavor, let the grapes sit in the fridge for an hour before preparing the salad.

    Step 2: Mix the Dressing

    In a large mixing bowl, combine the Greek yogurt, honey, and vanilla extract. Whisk them together until the mixture is smooth and well incorporated. This creamy dressing is the secret to the salad’s irresistible flavor, offering a perfect balance between sweet and tangy. Tip: If the dressing is too thick, you can thin it out with a tablespoon of milk or water.

    Step 3: Combine Grapes and Dressing

    Add the halved grapes to the bowl with the dressing. Gently fold them in using a spatula until all the grapes are evenly coated. Be careful not to crush the grapes as you mix. This step is all about ensuring that every grape is enveloped in the creamy dressing for maximum flavor in every bite.

    Step 4: Add the Crunch

    Sprinkle the chopped walnuts over the grape mixture and fold them in gently. The walnuts add a delightful crunch and a nutty flavor that contrasts beautifully with the sweetness of the grapes and the creaminess of the dressing. Tip: Toast the walnuts beforehand for an even deeper flavor.

    Step 5: Chill and Serve

    Cover the bowl with plastic wrap and refrigerate the salad for at least 30 minutes before serving. This chilling time allows the flavors to meld together beautifully. Serve the salad cold, and watch as it disappears in no time at your next gathering.

    Tips and Tricks

    For those looking to elevate their grape salad game, here are some advanced tips. First, consider using flavored Greek yogurt, such as vanilla or honey, for an extra layer of taste. Second, if you’re serving the salad at a party, prepare it a day in advance to let the flavors develop even more. Third, for a festive touch, sprinkle some pomegranate seeds on top before serving for added color and a burst of tartness. Lastly, if you’re not a fan of walnuts, pecans or almonds make great substitutes, offering their own unique flavors and textures.

    Recipe Variations

    • Add a handful of mini marshmallows for a fun, sweet twist that kids will love.
    • Incorporate some diced apples or pears for additional fruitiness and texture.
    • Swap out the walnuts for pecans or almonds for a different nutty flavor.
    • Mix in a sprinkle of cinnamon or nutmeg for a warm, spicy note.
    • For a more decadent version, drizzle with caramel sauce before serving.

    Frequently Asked Questions

    Can I use frozen grapes for this recipe? While fresh grapes are recommended for the best texture and flavor, you can use frozen grapes if you’re in a pinch. Just make sure to thaw them completely and pat them dry to avoid watering down the dressing.

    How long can I store this grape salad? This salad can be stored in an airtight container in the refrigerator for up to 3 days. However, it’s best enjoyed within the first 24 hours when the grapes are at their freshest.

    Is there a vegan alternative to Greek yogurt? Absolutely! You can use coconut yogurt or any plant-based yogurt as a substitute for Greek yogurt to make this recipe vegan-friendly. Just adjust the sweetness as needed since plant-based yogurts can vary in taste.

    Summary

    This grape salad without sour cream is a refreshing, easy-to-make dish that’s perfect for any occasion. With its creamy Greek yogurt dressing, sweet grapes, and crunchy walnuts, it’s a crowd-pleaser that’s as nutritious as it is delicious. Give it a try and see how quickly it becomes a favorite!