Category: Meat and Protein Salad Recipes

  • Warm Spinach Salad with Bacon Dressing: A Flavor Bomb You Can’t Resist

    Warm Spinach Salad with Bacon Dressing: A Flavor Bomb You Can’t Resist

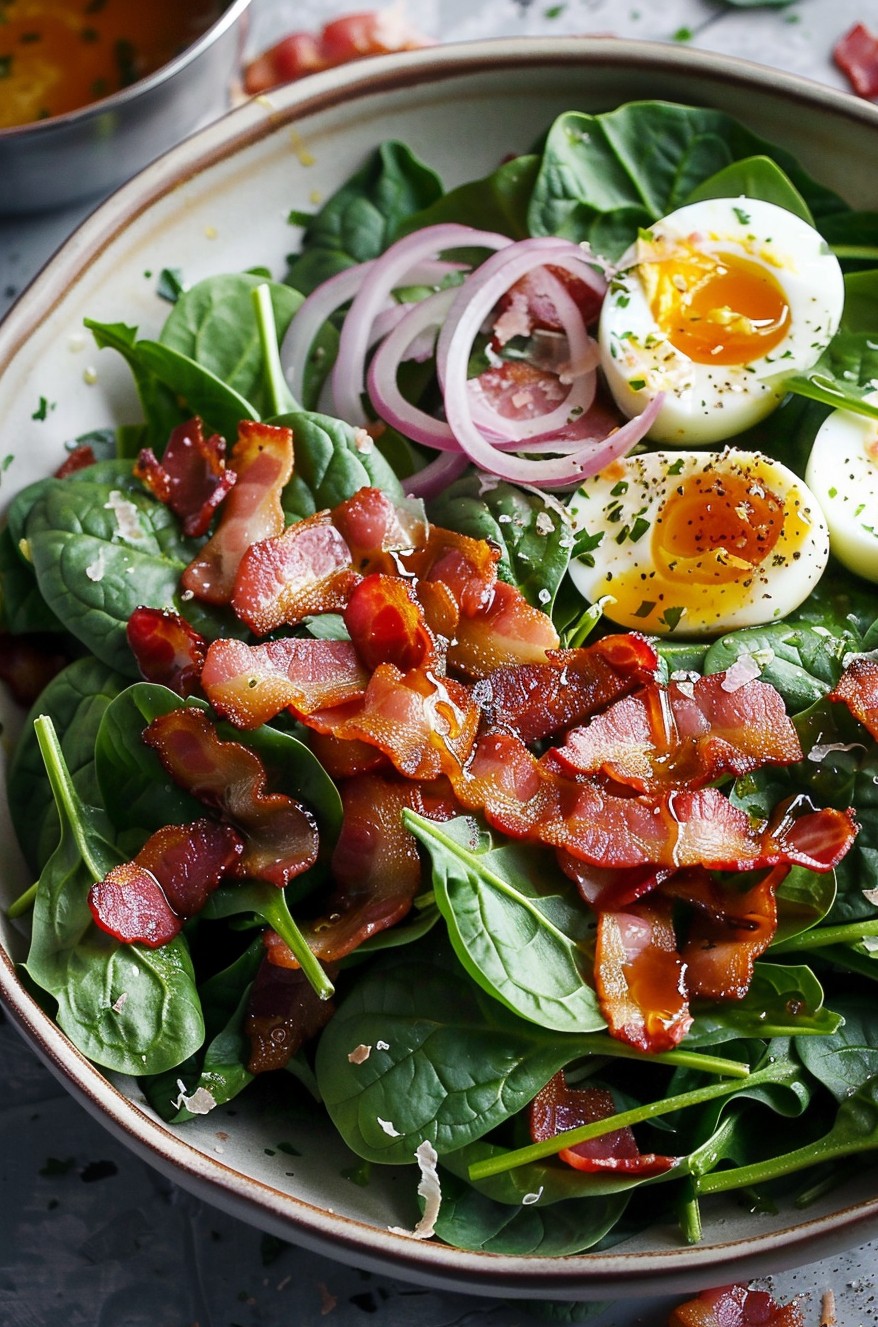
    Very few salads can boast the perfect balance of warmth, crispiness, and a smoky dressing like this one. It’s a dish that turns the humble spinach into a star, with bacon playing the perfect supporting role. Let’s dive into making this unforgettable salad.

    Why This Recipe Works

    • The warmth of the salad gently wilts the spinach, making it more palatable and flavorful.
    • Bacon dressing adds a smoky, savory depth that’s irresistible.
    • It’s a versatile dish that can serve as a side or a main with a few additions.
    • Quick to prepare, it’s perfect for weeknight dinners or impressing guests.
    • The combination of textures from crispy bacon to soft spinach is divine.

    Ingredients

    • 6 cups fresh spinach, washed and dried
    • 6 slices bacon, chopped
    • 1/4 cup red onion, thinly sliced
    • 2 tbsp apple cider vinegar
    • 1 tbsp honey
    • 1 tsp Dijon mustard
    • Salt and pepper to taste
    • 2 eggs, hard-boiled and sliced (optional)

    Equipment Needed

    • Large skillet
    • Mixing bowl
    • Whisk
    • Measuring spoons and cups
    • Knife and cutting board

    Instructions

    Recipe For Warm Spinach Salad With Bacon Dressing

    Step 1: Cook the Bacon

    In a large skillet over medium heat, cook the chopped bacon until it’s crispy and golden brown, about 8-10 minutes. Use a slotted spoon to transfer the bacon to a paper towel-lined plate, leaving the drippings in the skillet. Tip: Save a bit of bacon for garnishing at the end for an extra crunch.

    Step 2: Prepare the Dressing

    To the bacon drippings in the skillet, add the red onion and sauté for about 2 minutes until softened. Whisk in the apple cider vinegar, honey, and Dijon mustard, scraping up any browned bits from the bottom of the pan. Season with salt and pepper to taste. Tip: The dressing should be slightly tangy and sweet; adjust the honey or vinegar to your liking.

    Step 3: Combine Salad and Dressing

    Place the spinach in a large mixing bowl. Pour the warm dressing over the spinach and toss gently until the spinach is evenly coated and begins to wilt slightly. Tip: For the best texture, add the dressing while it’s still warm but not scalding hot.

    Step 4: Add the Bacon

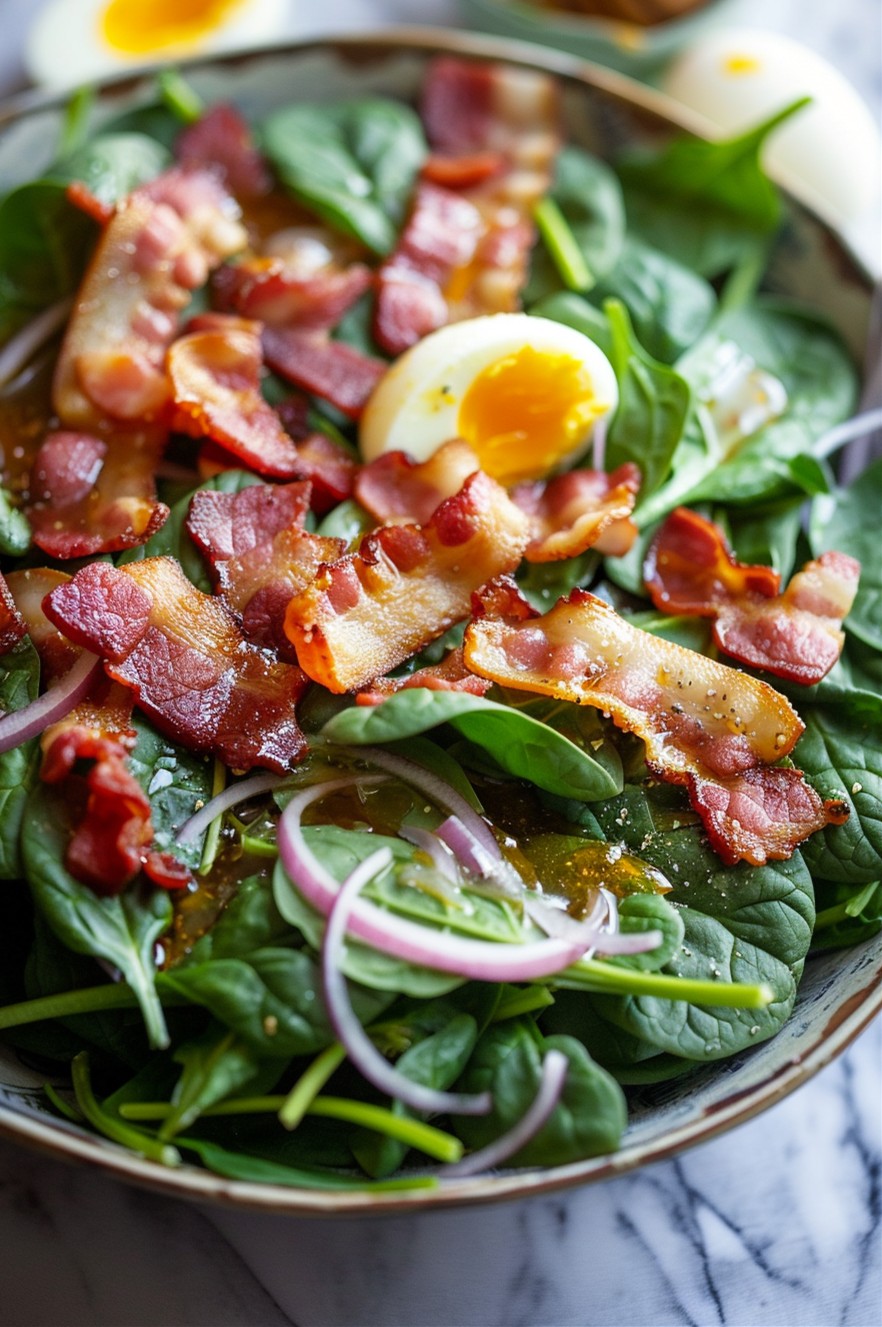
    Sprinkle the cooked bacon over the dressed spinach and toss lightly to combine. The heat from the dressing and bacon will continue to wilt the spinach slightly, creating a perfect texture.

    Step 5: Serve Immediately

    Divide the salad among plates. If using, top with sliced hard-boiled eggs for extra protein. Serve immediately while the salad is still warm for the best flavor and texture.

    Tips and Tricks

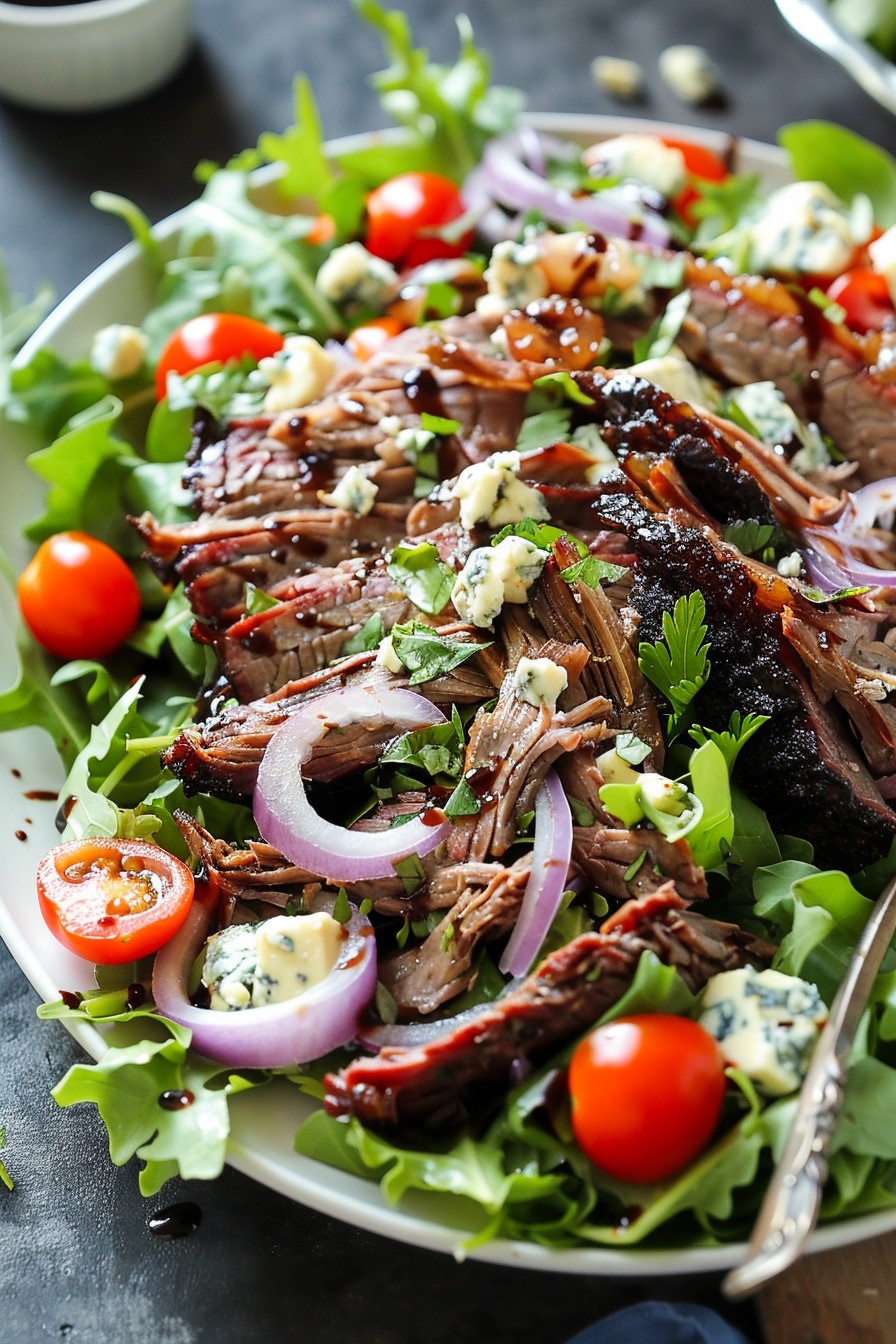
    For those looking to elevate their warm spinach salad with bacon dressing, consider these advanced tips. First, try using thick-cut bacon for a meatier texture and richer flavor. Second, for a more complex dressing, add a pinch of smoked paprika or a splash of bourbon to the skillet when preparing the dressing. Third, if you’re serving this salad as a main, consider adding grilled chicken or shrimp for extra protein. Lastly, for a vegetarian version, substitute the bacon with smoked almonds or tempeh bacon, and use olive oil in place of bacon drippings for the dressing.

    Recipe Variations

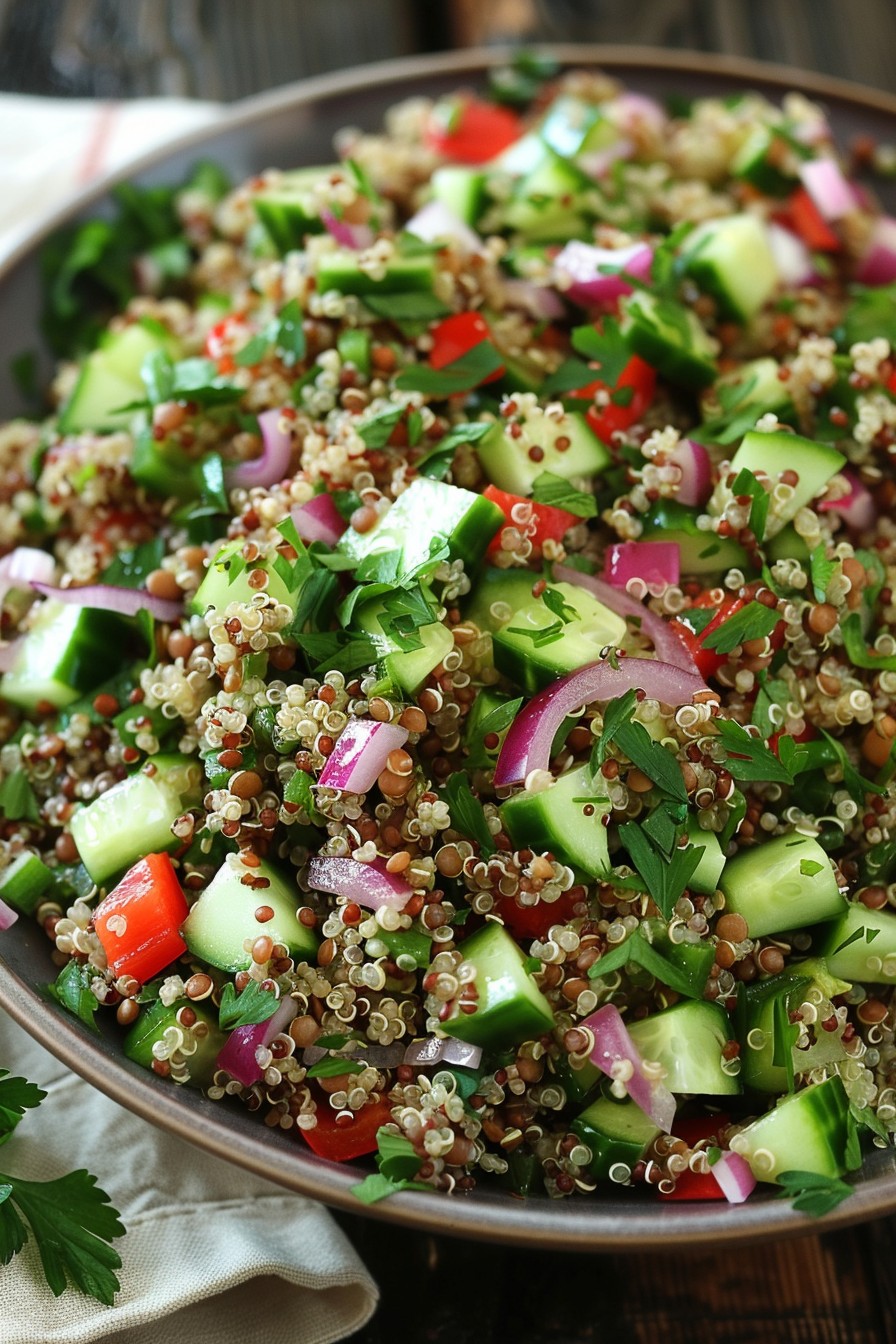
    • Add sliced mushrooms or cherry tomatoes for extra veggies.
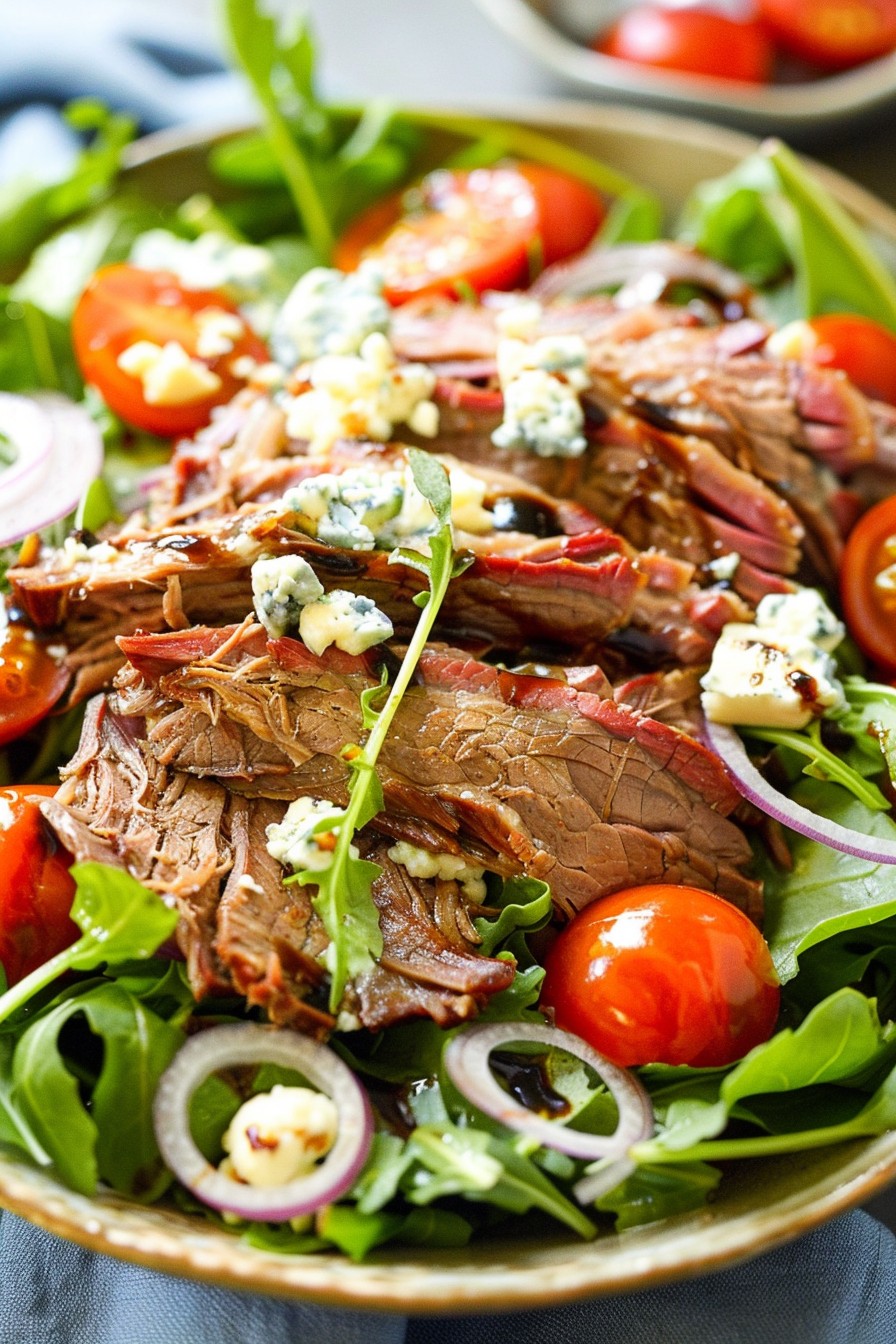
    • Swap spinach with kale or arugula for a different green base.
    • Include crumbled blue cheese or goat cheese for a creamy element.
    • Top with toasted nuts or seeds for added crunch.
    • Use balsamic vinegar instead of apple cider vinegar for a deeper flavor.

    Frequently Asked Questions

    Can I make this salad ahead of time?

    While you can prep the ingredients ahead, it’s best assembled just before serving to prevent the spinach from wilting too much. The dressing can be made in advance and reheated gently before tossing with the spinach.

    Is there a substitute for bacon drippings?

    If you’re looking for a lighter version, olive oil or butter can be used in place of bacon drippings, though the flavor profile will change slightly.

    Can I use frozen spinach?

    Fresh spinach is recommended for its texture and flavor, but if you must use frozen, ensure it’s thoroughly drained and squeezed dry to prevent a watery salad.

    Summary

    This warm spinach salad with bacon dressing is a delightful mix of flavors and textures, perfect for any occasion. Quick to make and endlessly customizable, it’s sure to become a favorite.

  • Bologna Ham Salad Recipe: A Delightfully Easy Dish

    Bologna Ham Salad Recipe: A Delightfully Easy Dish

    Craving something quick, delicious, and a bit nostalgic? This bologna ham salad recipe is your ticket to a flavorful meal that’s as easy to make as it is to love. Perfect for sandwiches, crackers, or just by the spoonful, this dish is a crowd-pleaser.

    Why This Recipe Works

    • It’s incredibly versatile, serving as a perfect sandwich filler, salad topper, or standalone snack.
    • The combination of creamy and tangy ingredients creates a balanced flavor profile that’s hard to resist.
    • Prep time is minimal, making it ideal for last-minute meals or snacks.
    • It’s a great way to use up leftover bologna, reducing food waste.
    • Customizable to suit your taste preferences with various add-ins and spices.

    Ingredients

    • 1 pound bologna, finely diced
    • 1/2 cup mayonnaise
    • 2 tablespoons sweet pickle relish
    • 1 tablespoon yellow mustard
    • 1/4 cup finely diced onion
    • 1/4 cup finely diced celery
    • Salt and pepper to taste

    Equipment Needed

    • Large mixing bowl
    • Sharp knife
    • Cutting board
    • Measuring cups and spoons
    • Rubber spatula

    Instructions

    Bologna Ham Salad Recipe

    Step 1: Prepare Your Ingredients

    Start by finely dicing your bologna into small, bite-sized pieces. The smaller the pieces, the better the texture of your salad. Next, dice the onion and celery into equally small pieces to ensure every bite is packed with flavor. Tip: For an extra crunch, you can add a bit more celery than the recipe calls for.

    Step 2: Mix the Wet Ingredients

    In a large mixing bowl, combine the mayonnaise, sweet pickle relish, and yellow mustard. Stir these together until they’re fully blended. This mixture will serve as the creamy base of your salad, so make sure it’s well mixed. Tip: If you prefer a tangier taste, you can add a bit more mustard to the mix.

    Step 3: Combine All Ingredients

    Add the diced bologna, onion, and celery to the bowl with your wet ingredients. Gently fold everything together until the bologna and vegetables are evenly coated with the mayonnaise mixture. Be careful not to overmix, as this can make the salad too mushy. Tip: For best results, let the salad chill in the refrigerator for at least an hour before serving to allow the flavors to meld.

    Step 4: Season to Taste

    Once everything is combined, taste your salad and add salt and pepper as needed. Remember, the bologna and mayonnaise already contain salt, so you might not need much. Adjust the seasoning until it’s just right for your palate.

    Step 5: Serve and Enjoy

    Your bologna ham salad is now ready to enjoy! Serve it on bread for a sandwich, with crackers, or as a side dish. It’s delicious any way you choose to eat it.

    Tips and Tricks

    For those looking to elevate their bologna ham salad, consider these advanced tips. First, try using homemade mayonnaise for a richer flavor. Second, adding a dash of paprika or cayenne pepper can give the salad a nice kick. Third, for a healthier version, substitute Greek yogurt for half of the mayonnaise. Lastly, letting the salad sit overnight in the fridge will deepen the flavors, making it even more delicious the next day.

    Recipe Variations

    • Add hard-boiled eggs for extra protein and texture.
    • Mix in some diced apples or grapes for a sweet contrast.
    • For a spicy version, include diced jalapeños or a splash of hot sauce.
    • Swap out the bologna for ham or turkey for a different flavor profile.
    • Incorporate different herbs like dill or parsley for a fresh twist.

    Frequently Asked Questions

    Can I make this salad ahead of time?

    Absolutely! In fact, making it ahead allows the flavors to meld together beautifully. Just store it in an airtight container in the refrigerator for up to 3 days. Give it a quick stir before serving to refresh the texture.

    Is there a substitute for sweet pickle relish?

    Yes, if you’re not a fan of sweet pickle relish, you can use dill pickle relish instead for a tangier flavor. Alternatively, finely chopped pickles can also work in a pinch.

    Can I freeze bologna ham salad?

    Freezing is not recommended as the mayonnaise can separate when thawed, resulting in a watery texture. It’s best enjoyed fresh or stored in the fridge for a few days.

    Summary

    This bologna ham salad recipe is a quick, versatile, and delicious option for any meal. With simple ingredients and easy steps, it’s perfect for busy days or when you’re craving something comforting. Customize it to your liking and enjoy it in various ways!

  • Power-Packed Protein Salad: A Muscle-Building Marvel

    Power-Packed Protein Salad: A Muscle-Building Marvel

    Today’s the day to fuel your body with a salad that’s as nutritious as it is delicious. This protein-packed marvel is your ticket to a satisfying meal that keeps you full and energized.

    Why This Recipe Works

    • High-quality protein sources like chicken and quinoa keep you full and support muscle repair.
    • Fresh veggies add crunch and a rainbow of nutrients.
    • A homemade dressing brings it all together with zesty flavors without the added sugars of store-bought versions.

    Ingredients

    • 2 cups cooked quinoa, cooled
    • 1 lb grilled chicken breast, diced
    • 1 cup cherry tomatoes, halved
    • 1 cucumber, diced
    • 1/2 red onion, thinly sliced
    • 1/4 cup olive oil
    • 2 tbsp lemon juice
    • 1 tsp Dijon mustard
    • Salt and pepper to taste

    Equipment Needed

    • Large mixing bowl
    • Whisk
    • Measuring cups and spoons
    • Knife and cutting board

    Instructions

    Recipe Of Protein Salad

    Step 1: Prep Your Proteins

    Start by ensuring your quinoa and chicken are ready to go. If you’re cooking quinoa from scratch, let it cool to room temperature to avoid wilting the veggies. Dice your grilled chicken into bite-sized pieces for easy eating.

    Step 2: Chop Your Veggies

    Halve the cherry tomatoes, dice the cucumber, and thinly slice the red onion. Uniform pieces ensure every bite is packed with flavor and texture.

    Step 3: Whisk Together the Dressing

    In a small bowl, whisk together olive oil, lemon juice, Dijon mustard, salt, and pepper. Taste and adjust seasoning as needed. This dressing is simple but packs a punch.

    Step 4: Combine All Ingredients

    In a large mixing bowl, combine the quinoa, chicken, tomatoes, cucumber, and red onion. Drizzle the dressing over the top and toss gently to coat everything evenly.

    Step 5: Serve and Enjoy

    Divide the salad among plates or containers if meal prepping. This salad is best enjoyed fresh but can be stored in the fridge for up to 3 days.

    Tips and Tricks

    For an extra protein boost, add a handful of chickpeas or black beans. If you’re not a fan of quinoa, brown rice or farro make great substitutes. To save time, use rotisserie chicken instead of grilling your own. For a creamier dressing, add a tablespoon of Greek yogurt. Always taste your dressing before adding it to the salad to ensure the flavors are balanced.

    Recipe Variations

    • Swap chicken for grilled shrimp or tofu for a different protein source.
    • Add avocado for healthy fats and creaminess.
    • Include nuts or seeds for added crunch and nutrients.
    • Use different herbs like cilantro or basil to change up the flavor profile.
    • Try a different dressing, such as balsamic vinaigrette or tahini lemon.

    Frequently Asked Questions

    Can I make this salad ahead of time?

    Absolutely! This salad holds up well in the fridge for up to 3 days. Just wait to add the dressing until you’re ready to eat to keep the veggies crisp.

    Is this salad keto-friendly?

    While quinoa is not keto-friendly, you can substitute it with cauliflower rice to make this salad fit a keto diet.

    Can I use a different protein?

    Yes, feel free to use any protein you like. Grilled shrimp, tofu, or even hard-boiled eggs would work great in this salad.

    Summary

    This Power-Packed Protein Salad is a versatile, nutritious meal that’s perfect for lunch, dinner, or meal prep. With simple ingredients and easy steps, it’s a foolproof way to enjoy a healthy, protein-rich dish.

  • Thai Meat Salad Recipe: A Flavor Explosion in Every Bite

    Thai Meat Salad Recipe: A Flavor Explosion in Every Bite

    Now, let’s dive into a dish that’s as vibrant as it is delicious. This Thai Meat Salad is a perfect blend of spicy, sweet, and tangy flavors that will transport your taste buds straight to the streets of Bangkok. It’s quick, easy, and packed with fresh ingredients that make it a standout meal.

    Why This Recipe Works

    • The combination of fresh herbs and spices creates a depth of flavor that’s hard to beat.
    • It’s incredibly versatile, allowing you to adjust the heat level to your liking.
    • The salad is a great way to use up leftover meat, making it both economical and delicious.
    • It’s a healthy option that doesn’t skimp on taste, perfect for those looking to eat clean without sacrificing flavor.
    • The quick preparation time means you can have a gourmet meal on the table in no time.

    Ingredients

    • 1 lb cooked meat (chicken, beef, or pork), thinly sliced
    • 2 cups mixed greens
    • 1/2 cup mint leaves, chopped
    • 1/2 cup cilantro, chopped
    • 1/4 cup green onions, sliced
    • 1 tbsp fish sauce
    • 2 tbsp lime juice
    • 1 tbsp sugar
    • 1 tsp chili flakes
    • 1/2 cup cherry tomatoes, halved
    • 1/4 cup roasted peanuts, crushed

    Equipment Needed

    • Large mixing bowl
    • Small bowl for dressing
    • Whisk
    • Knife and cutting board

    Instructions

    Thai Meat Salad Recipe

    Step 1: Prepare the Dressing

    In a small bowl, whisk together the fish sauce, lime juice, sugar, and chili flakes until the sugar is completely dissolved. This dressing is the heart of the salad, so take your time to ensure it’s well mixed. Tip: Adjust the amount of chili flakes to suit your heat preference.

    Step 2: Combine the Greens and Herbs

    In a large mixing bowl, toss together the mixed greens, mint leaves, cilantro, and green onions. The freshness of these ingredients will add a crisp texture and vibrant color to your salad.

    Step 3: Add the Meat and Tomatoes

    Add the thinly sliced cooked meat and halved cherry tomatoes to the bowl. The meat adds a hearty element, while the tomatoes bring a juicy sweetness that balances the dressing’s tanginess.

    Step 4: Dress the Salad

    Pour the dressing over the salad and toss everything together until well coated. The key here is to ensure every bite is as flavorful as the last. Tip: Let the salad sit for a few minutes before serving to allow the flavors to meld.

    Step 5: Garnish and Serve

    Sprinkle the crushed roasted peanuts on top for an added crunch and nutty flavor. Serve immediately and enjoy the burst of flavors in every bite. Tip: For an extra layer of texture, consider adding crispy fried shallots on top.

    Tips and Tricks

    To elevate your Thai Meat Salad, consider marinating the meat in a bit of the dressing before adding it to the salad. This will infuse it with even more flavor. If you’re using raw meat, grill or pan-sear it to perfection before slicing. For a vegetarian version, tofu or tempeh makes a great substitute. Always taste the dressing before adding it to the salad and adjust the seasoning as needed. Remember, the salad is best served fresh, but you can prepare the components ahead of time and assemble just before serving.

    Recipe Variations

    • For a seafood twist, substitute the meat with grilled shrimp or squid.
    • Add sliced cucumbers or shredded carrots for extra crunch and color.
    • Use different herbs like Thai basil or lemongrass for a unique flavor profile.
    • For a sweeter version, add a bit of mango or pineapple to the salad.
    • Swap the peanuts for cashews or almonds for a different nutty flavor.

    Frequently Asked Questions

    Can I make this salad ahead of time?

    While you can prepare the ingredients ahead of time, it’s best to dress the salad just before serving to prevent the greens from wilting. The meat can be marinated in advance for extra flavor.

    Is there a substitute for fish sauce?

    Yes, if you’re vegetarian or allergic to fish, you can use soy sauce or tamari as a substitute. Keep in mind this will slightly alter the traditional flavor of the dish.

    How can I make this salad spicier?

    To increase the heat, add more chili flakes or include fresh sliced Thai chilies in the salad. Always adjust the spice level to your preference.

    Summary

    This Thai Meat Salad is a vibrant, flavorful dish that’s perfect for a quick and healthy meal. With its combination of fresh herbs, tangy dressing, and hearty meat, it’s sure to become a favorite. Customize it to your taste and enjoy a taste of Thailand at home.

  • Quinoa and Lentil Salad Recipe: A Protein-Packed Delight

    Quinoa and Lentil Salad Recipe: A Protein-Packed Delight

    Now, let’s dive into a dish that’s as nutritious as it is delicious. This quinoa and lentil salad is the perfect blend of textures and flavors, making it a hit for any meal of the day.

    Why This Recipe Works

    • It’s a complete protein source, combining quinoa and lentils for all essential amino acids.
    • The salad is packed with fiber, aiding digestion and keeping you full longer.
    • It’s versatile, allowing for endless variations based on your taste preferences.
    • Prep is a breeze, making it perfect for meal prep or a quick lunch.
    • The dressing adds a zesty kick, elevating the flavors of the salad.

    Ingredients

    • 1 cup quinoa, rinsed
    • 1 cup green lentils, rinsed
    • 2 cups water
    • 1 cucumber, diced
    • 1 red bell pepper, diced
    • 1/4 cup red onion, finely chopped
    • 1/4 cup olive oil
    • 2 tbsp lemon juice
    • 1 tsp salt
    • 1/2 tsp black pepper
    • 1/4 cup fresh parsley, chopped

    Equipment Needed

    • Medium saucepan
    • Mixing bowls
    • Whisk
    • Knife and cutting board
    • Measuring cups and spoons

    Instructions

    Quinoa And Lentil Salad Recipe

    Step 1: Cook the Quinoa and Lentils

    In a medium saucepan, bring 2 cups of water to a boil. Add the quinoa and lentils, reduce heat to low, cover, and simmer for 15 minutes, or until the water is absorbed and the quinoa is fluffy. Remove from heat and let it sit covered for 5 minutes. Tip: Fluff with a fork to prevent clumping.

    Step 2: Prepare the Vegetables

    While the quinoa and lentils are cooking, dice the cucumber and red bell pepper, and finely chop the red onion. Place them in a large mixing bowl. Tip: For a milder onion flavor, soak the chopped red onion in cold water for 10 minutes, then drain.

    Step 3: Make the Dressing

    In a small bowl, whisk together the olive oil, lemon juice, salt, and black pepper until well combined. Taste and adjust seasoning as needed.

    Step 4: Combine Everything

    Add the cooked quinoa and lentils to the bowl with the vegetables. Pour the dressing over the top and toss gently to combine. Stir in the chopped parsley last for a fresh burst of flavor. Tip: Let the salad sit for 10 minutes before serving to allow the flavors to meld.

    Step 5: Serve and Enjoy

    Serve the salad at room temperature or chilled. It’s perfect on its own or as a side dish with grilled chicken or fish.

    Tips and Tricks

    For an extra crunch, add some toasted almonds or walnuts. If you’re not a fan of parsley, cilantro or mint makes a great substitute. To make this salad ahead, keep the dressing separate and add it just before serving to keep the vegetables crisp. For a creamier texture, mash half an avocado and mix it into the salad. And remember, the longer the salad sits, the more the flavors develop, so it’s even better the next day!

    Recipe Variations

    • Add feta cheese or goat cheese for a creamy, tangy twist.
    • Swap the lemon juice for balsamic vinegar for a deeper flavor profile.
    • Include roasted sweet potatoes or butternut squash for a hearty, autumnal version.
    • For a Mediterranean flair, add kalamata olives and sun-dried tomatoes.
    • Spice it up with a pinch of cumin or smoked paprika in the dressing.

    Frequently Asked Questions

    Can I use red quinoa instead of white?

    Absolutely! Red quinoa has a slightly nuttier flavor and holds its shape a bit better, making it a great choice for salads. Just keep in mind that the cooking time might vary slightly, so check the package instructions.

    How long does this salad keep in the fridge?

    This salad will stay fresh in an airtight container in the fridge for up to 5 days. The flavors actually improve over time, making it a fantastic make-ahead meal.

    Can I freeze this salad?

    While you can freeze it, the texture of the vegetables and quinoa may change upon thawing, becoming a bit mushy. It’s best enjoyed fresh or stored in the fridge.

    Summary

    This quinoa and lentil salad is a nutritious, flavorful, and versatile dish that’s perfect for any occasion. With its high protein and fiber content, it’s as satisfying as it is delicious. Plus, it’s easy to customize based on your preferences or what you have on hand.

  • Beef Brisket Salad Recipe: A Hearty Twist on Greens

    Beef Brisket Salad Recipe: A Hearty Twist on Greens

    Craving something that’s both hearty and refreshing? This beef brisket salad combines the rich flavors of slow-cooked brisket with the crispness of fresh greens for a meal that’s sure to satisfy. Perfect for those who think salads can’t be filling!

    Why This Recipe Works

    • The slow-cooked beef brisket adds a depth of flavor that’s unmatched by quicker cooking methods.
    • Combining warm brisket with cool greens creates a delightful contrast in temperatures and textures.
    • The homemade dressing ties all the components together with a perfect balance of tangy and sweet.
    • It’s a versatile dish that can serve as a main course or a substantial side.
    • Leftovers? No problem. This salad is just as delicious the next day.

    Ingredients

    • 2 lbs beef brisket, trimmed
    • 1 tbsp olive oil
    • 1 tsp salt
    • 1 tsp black pepper
    • 2 cups mixed greens
    • 1/2 cup cherry tomatoes, halved
    • 1/4 cup red onion, thinly sliced
    • 1/4 cup blue cheese, crumbled
    • 1/4 cup balsamic vinaigrette

    Equipment Needed

    • Slow cooker
    • Chef’s knife
    • Cutting board
    • Mixing bowls
    • Salad spinner

    Instructions

    Beef Brisket Salad Recipe

    Step 1: Season and Sear the Brisket

    Start by seasoning your 2 lbs of beef brisket with 1 tsp each of salt and black pepper. Heat 1 tbsp of olive oil in a pan over medium-high heat. Sear the brisket on all sides until it’s beautifully browned, about 3-4 minutes per side. This step locks in the flavors and adds a delicious crust to the meat.

    Step 2: Slow Cook to Perfection

    Transfer the seared brisket to your slow cooker. Cover and cook on low for 8 hours, or until the meat is tender and falls apart easily. The low and slow method ensures the brisket is juicy and full of flavor.

    Step 3: Prepare the Salad Base

    While the brisket is cooking, wash and dry 2 cups of mixed greens using a salad spinner. This ensures your greens are crisp and free of excess water. Slice 1/2 cup of cherry tomatoes in half and thinly slice 1/4 cup of red onion for a sharp contrast to the sweet brisket.

    Step 4: Assemble Your Salad

    Once the brisket is done, let it rest for 10 minutes before slicing against the grain. Arrange the mixed greens on a plate, top with sliced brisket, cherry tomatoes, red onion, and 1/4 cup of crumbled blue cheese. Drizzle with 1/4 cup of balsamic vinaigrette to bring all the flavors together.

    Step 5: Serve and Enjoy

    Serve your beef brisket salad immediately while the brisket is still warm. The combination of warm meat and cool greens is a game-changer. Enjoy the burst of flavors and textures in every bite!

    Tips and Tricks

    For an even more flavorful brisket, consider marinating it overnight in your favorite spices and a bit of vinegar to tenderize the meat further. When searing, make sure your pan is hot enough to create a good crust without cooking the meat too much. For the salad, adding nuts like walnuts or pecans can introduce a nice crunch and extra protein. If you’re not a fan of blue cheese, feta or goat cheese makes a great substitute. Lastly, the dressing can be made ahead of time and stored in the fridge for up to a week.

    Recipe Variations

    • Swap the balsamic vinaigrette for a honey mustard dressing for a sweeter profile.
    • Add avocado slices for a creamy texture and healthy fats.
    • Use arugula instead of mixed greens for a peppery kick.
    • Incorporate grilled vegetables like zucchini or bell peppers for added smokiness.
    • For a low-carb version, skip the greens and serve the brisket over cauliflower rice.

    Frequently Asked Questions

    Can I cook the brisket in an oven instead of a slow cooker?

    Absolutely! Preheat your oven to 300°F and place the seared brisket in a roasting pan. Cover tightly with foil and cook for about 3-4 hours, or until tender. The key is low and slow, regardless of the cooking method.

    How can I make this salad ahead of time?

    You can prepare the brisket and dressing up to two days in advance. Store them separately in the fridge. Assemble the salad just before serving to keep the greens crisp and fresh.

    What’s the best way to slice brisket?

    Always slice brisket against the grain. This means cutting perpendicular to the muscle fibers, which makes the meat more tender and easier to chew. Look for the direction of the fibers and slice accordingly.

    Summary

    This beef brisket salad is a perfect blend of hearty and refreshing, making it ideal for any meal. With tender slow-cooked brisket, crisp greens, and a tangy dressing, it’s a dish that’s sure to impress.

  • Ham Salad Sandwich Spread Recipe: A Delightful Twist on a Classic

    Ham Salad Sandwich Spread Recipe: A Delightful Twist on a Classic

    Every now and then, we stumble upon a recipe that’s so simple yet so satisfying, it becomes a staple in our kitchen. This ham salad sandwich spread is one of those gems, offering a perfect blend of flavors and textures that’ll make your sandwiches anything but ordinary.

    Why This Recipe Works

    • The combination of finely chopped ham and creamy mayonnaise creates a rich and satisfying texture that’s hard to resist.
    • Adding a touch of mustard and sweet relish introduces a perfect balance of tangy and sweet flavors, elevating the overall taste.
    • It’s incredibly versatile, serving as a fantastic spread for sandwiches, a dip for crackers, or even a topping for salads.
    • This recipe is a great way to use up leftover ham, reducing waste and saving money.
    • With just a few simple ingredients and minimal prep time, it’s a quick and easy solution for busy days.

    Ingredients

    • 2 cups finely chopped cooked ham
    • 1/2 cup mayonnaise
    • 2 tablespoons sweet relish
    • 1 tablespoon yellow mustard
    • 1/4 teaspoon black pepper

    Equipment Needed

    • Mixing bowl
    • Wooden spoon or spatula
    • Measuring cups and spoons
    • Knife and cutting board (for chopping ham, if not pre-chopped)

    Instructions

    Ham Salad Sandwich Spread Recipe

    Step 1: Prepare Your Ingredients

    Start by ensuring your ham is finely chopped to achieve the perfect texture for your spread. If you’re using leftover ham from a previous meal, make sure to remove any excess fat or gristle. Measure out your mayonnaise, sweet relish, mustard, and black pepper so everything is ready to go.

    Step 2: Combine the Ingredients

    In a large mixing bowl, add the chopped ham, mayonnaise, sweet relish, mustard, and black pepper. Using a wooden spoon or spatula, gently mix all the ingredients together until well combined. The goal is to have a uniform mixture where the ham is evenly coated with the mayonnaise and other flavors.

    Step 3: Adjust the Consistency

    If your spread seems too thick, you can add a little more mayonnaise, one tablespoon at a time, until you reach your desired consistency. Conversely, if it’s too runny, you can add a bit more chopped ham to thicken it up. Taste the mixture and adjust the seasoning if necessary.

    Step 4: Chill Before Serving

    For the best flavor, cover the bowl with plastic wrap and refrigerate the ham salad for at least 30 minutes before serving. This allows the flavors to meld together beautifully. If you’re in a hurry, you can serve it immediately, but the taste will be even better after a short chill.

    Step 5: Serve and Enjoy

    Once chilled, your ham salad sandwich spread is ready to enjoy. Spread it generously on your favorite bread, add some lettuce and tomato for extra crunch and freshness, and dig in. It’s also great as a dip with crackers or as a topping for a green salad.

    Tips and Tricks

    For a smoother spread, you can pulse the ham in a food processor a few times before mixing it with the other ingredients. If you prefer a chunkier texture, hand-chopping is the way to go. Experiment with different types of mustard, such as Dijon or spicy brown, to vary the flavor profile. Adding a hard-boiled egg, finely chopped, can introduce a new dimension of taste and texture. For a healthier version, substitute Greek yogurt for half of the mayonnaise. Always taste and adjust the seasoning before serving, as the saltiness of the ham can vary.

    Recipe Variations

    • Spicy Kick: Add a dash of hot sauce or a pinch of cayenne pepper for those who like it hot.
    • Cheesy Delight: Mix in some shredded cheddar cheese for a creamy, cheesy version.
    • Vegetable Boost: Incorporate finely diced celery or onions for added crunch and flavor.
    • Sweet and Savory: A tablespoon of honey or maple syrup can add a unique sweet twist.
    • Herb Infusion: Fresh herbs like dill or parsley can brighten up the flavor profile.

    Frequently Asked Questions

    Can I make this recipe ahead of time? Absolutely! This ham salad spread can be made up to 3 days in advance and stored in an airtight container in the refrigerator. The flavors will continue to develop, making it even more delicious.

    What’s the best way to chop the ham? For a finer texture, a food processor works wonders. Just pulse a few times until the ham reaches your desired consistency. For a more rustic, chunky spread, hand-chopping with a sharp knife is ideal.

    Can I use low-fat mayonnaise? Yes, you can substitute low-fat or even fat-free mayonnaise if you’re watching your calorie intake. Keep in mind that this may slightly alter the taste and texture of the spread.

    Summary

    This ham salad sandwich spread is a versatile, flavorful, and easy-to-make recipe that’s perfect for sandwiches, dips, or salad toppings. With simple ingredients and minimal prep time, it’s a must-try for anyone looking to add a little excitement to their meals.

  • Taco Layer Salad Recipe: A Fiesta in Every Bite

    Taco Layer Salad Recipe: A Fiesta in Every Bite

    Just when you thought tacos couldn’t get any better, we’ve turned them into a salad that’s as fun to make as it is to eat. This taco layer salad is packed with all your favorite taco flavors, layered for maximum enjoyment, and perfect for any gathering or a hearty weeknight dinner.

    Why This Recipe Works

    • Layers of flavor ensure every bite is as delicious as the last.
    • Customizable to suit any dietary preference or taste.
    • Perfect for meal prep, as the flavors meld beautifully overnight.
    • A great way to incorporate more veggies into your diet without sacrificing taste.
    • The combination of textures from crunchy lettuce to creamy avocado is unbeatable.

    Ingredients

    • 1 lb ground beef (or turkey for a lighter option)
    • 1 packet taco seasoning
    • 1 head iceberg lettuce, chopped
    • 1 cup cherry tomatoes, halved
    • 1 avocado, diced
    • 1/2 cup shredded cheddar cheese
    • 1/2 cup sour cream
    • 1/4 cup sliced black olives
    • 1/4 cup chopped green onions
    • 1 cup crushed tortilla chips

    Equipment Needed

    • Large skillet
    • Mixing bowls
    • Chef’s knife
    • Cutting board
    • Measuring cups and spoons

    Instructions

    Taco Layer Salad Recipe

    Step 1: Brown the Meat

    Heat a large skillet over medium-high heat and add the ground beef. Cook until no pink remains, about 5-7 minutes, breaking it apart with a spoon as it cooks. Drain any excess fat, then stir in the taco seasoning and 1/4 cup water. Simmer for 5 minutes until the mixture thickens. Tip: For extra flavor, toast the taco seasoning in the skillet before adding the meat.

    Step 2: Prepare the Layers

    While the meat cooks, chop the lettuce, halve the cherry tomatoes, dice the avocado, and slice the green onions. Arrange these ingredients in separate bowls for easy assembly. Tip: To prevent the avocado from browning, toss it with a little lime juice.

    Step 3: Assemble the Salad

    In a large clear bowl, start with a layer of chopped lettuce. Top with the cooked taco meat, followed by cherry tomatoes, avocado, cheese, black olives, and green onions. Repeat the layers until all ingredients are used, ending with a layer of lettuce. Tip: For a stunning presentation, press the layers down slightly after each addition.

    Step 4: Add the Finishing Touches

    Dollop the sour cream over the top layer of lettuce, then sprinkle with crushed tortilla chips for crunch. Serve immediately, or cover and refrigerate until ready to serve.

    Step 5: Serve and Enjoy

    To serve, scoop down to the bottom of the bowl to get all the layers in each serving. Offer additional toppings like hot sauce or extra cheese on the side for those who want to customize their plate.

    Tips and Tricks

    For a lighter version, substitute Greek yogurt for the sour cream. If you’re making this salad ahead of time, keep the tortilla chips separate until just before serving to maintain their crunch. For a vegetarian version, replace the ground beef with a plant-based alternative or black beans. To add a smoky flavor, char the tomatoes under the broiler for a few minutes before adding them to the salad. Lastly, for a more colorful presentation, use a mix of red and green lettuce.

    Recipe Variations

    • Swap the ground beef for shredded chicken or pork for a different protein option.
    • Add a layer of cooked quinoa or rice for extra heartiness.
    • Include a layer of corn or black beans for additional texture and flavor.
    • Use a different type of cheese, such as pepper jack or cotija, for a twist on the classic.
    • For a low-carb version, omit the tortilla chips and add more avocado for creaminess.

    Frequently Asked Questions

    Q: Can I make this salad ahead of time?
    A: Absolutely! You can assemble the salad up to a day in advance, just wait to add the sour cream and tortilla chips until you’re ready to serve to keep everything fresh and crunchy.

    Q: How can I make this recipe vegetarian?
    A: Easily swap the ground beef for a plant-based meat alternative or use black beans for a protein-packed vegetarian option. Just be sure to season well to keep all the bold taco flavors.

    Q: What’s the best way to serve this salad?
    A: This salad is best served in a clear bowl to show off all the beautiful layers. Make sure to scoop all the way down to the bottom to get a bit of every layer in each serving.

    Summary

    This taco layer salad is a fun, flavorful twist on traditional tacos that’s perfect for any occasion. With layers of seasoned meat, fresh veggies, and creamy toppings, it’s a dish that’s as enjoyable to make as it is to eat. Customizable and great for ahead-of-time prep, it’s sure to be a hit at your next gathering.

  • Taco Salad Recipe: A Crunchy, Flavorful Fiesta in a Bowl

    Taco Salad Recipe: A Crunchy, Flavorful Fiesta in a Bowl

    Zesty, vibrant, and packed with textures, this taco salad is your ticket to a quick and satisfying meal. Perfect for busy weeknights or lazy weekends, it’s a crowd-pleaser that combines the best of tacos and salads in one delicious bowl.

    Why This Recipe Works

    • It’s a perfect balance of crunchy and creamy textures, thanks to the fresh veggies and smooth avocado.
    • The homemade taco seasoning adds a depth of flavor that store-bought versions can’t match.
    • It’s customizable, allowing everyone to tweak the ingredients to their liking.
    • Quick to prepare, making it ideal for last-minute dinners.
    • Packed with protein and fiber, it’s as nutritious as it is delicious.

    Ingredients

    • 1 lb ground beef (or turkey for a lighter option)
    • 1 tbsp homemade taco seasoning
    • 1 head romaine lettuce, chopped
    • 1 cup cherry tomatoes, halved
    • 1 avocado, diced
    • 1/2 cup shredded cheddar cheese
    • 1/2 cup sour cream
    • 1/2 cup salsa
    • 1 cup tortilla chips, crushed

    Equipment Needed

    • Large skillet
    • Mixing bowls
    • Chopping board and knife
    • Measuring cups and spoons

    Instructions

    Taco Salad Recipe

    Step 1: Brown the Meat

    Heat a large skillet over medium heat and add the ground beef. Cook until no pink remains, about 5-7 minutes. Drain excess fat, then stir in the taco seasoning and 1/4 cup water. Simmer for 2 minutes until the mixture thickens. Tip: For extra flavor, toast the taco seasoning in a dry pan before adding it to the meat.

    Step 2: Prep the Veggies

    While the meat cooks, chop the romaine lettuce, halve the cherry tomatoes, and dice the avocado. Place them in a large mixing bowl. Tip: For the crispiest salad, chill the chopped lettuce in ice water for 10 minutes, then pat dry.

    Step 3: Assemble the Salad

    Add the cooked meat to the bowl with the veggies. Top with shredded cheese, sour cream, salsa, and crushed tortilla chips. Toss gently to combine, or layer the ingredients for a prettier presentation. Tip: Add the tortilla chips last to keep them crunchy.

    Step 4: Serve Immediately

    Divide the salad among plates and serve right away. The warmth of the meat contrasts beautifully with the cool, crisp veggies, making every bite a delight.

    Tips and Tricks

    For a lighter version, substitute Greek yogurt for sour cream and use baked tortilla chips. If you’re meal prepping, keep the dressing and chips separate until serving to maintain texture. For an extra kick, add jalapeños or a dash of hot sauce. To make it vegetarian, swap the meat for black beans or quinoa. Always taste and adjust the seasoning before serving.

    Recipe Variations

    • Swap the ground beef for chicken or shrimp for a different protein option.
    • Use kale or spinach instead of romaine for a nutrient boost.
    • Add corn, black olives, or red onions for extra flavor and color.
    • Try a lime vinaigrette instead of salsa and sour cream for a tangier twist.
    • For a low-carb version, skip the tortilla chips and add more veggies.

    Frequently Asked Questions

    Can I make this salad ahead of time? Yes, but keep the wet ingredients separate until serving to prevent sogginess. The meat can be cooked and stored in the fridge for up to 3 days.

    What’s the best way to store leftovers? In an airtight container in the fridge for up to 2 days. Note that the chips will soften over time.

    Can I use store-bought taco seasoning? Absolutely, but homemade allows you to control the salt and spice levels. If using store-bought, opt for a low-sodium version.

    Summary

    This taco salad is a versatile, flavorful dish that’s easy to make and customizable to suit any taste. Perfect for a quick dinner or a fun meal with friends, it’s sure to become a staple in your recipe rotation.

  • Crunchy Fritos Taco Salad: A Tex-Mex Twist You’ll Love

    Crunchy Fritos Taco Salad: A Tex-Mex Twist You’ll Love

    Unleash your inner chef with this irresistibly crunchy taco salad that combines the bold flavors of Tex-Mex with the satisfying crunch of Fritos. Perfect for a quick dinner or a fun party dish, this recipe is sure to become a favorite.

    Why This Recipe Works

    • The combination of crispy Fritos and fresh salad ingredients creates a perfect texture contrast.
    • It’s incredibly versatile, allowing for endless customization based on your taste preferences.
    • Quick and easy to prepare, making it ideal for busy weeknights.
    • The dressing doubles as a marinade, infusing the meat with flavor before cooking.
    • It’s a crowd-pleaser, perfect for gatherings and potlucks.

    Ingredients

    • 1 lb ground beef
    • 1 packet taco seasoning
    • 1 head iceberg lettuce, chopped
    • 1 cup cherry tomatoes, halved
    • 1/2 cup red onion, diced
    • 1 cup cheddar cheese, shredded
    • 1 cup Fritos corn chips
    • 1/2 cup sour cream
    • 1/4 cup salsa
    • 1 avocado, diced

    Equipment Needed

    • Large skillet
    • Mixing bowls
    • Salad spinner
    • Chef’s knife
    • Cutting board

    Instructions

    Taco Salad Recipe With Fritos

    Brown the Ground Beef

    Heat a large skillet over medium-high heat. Add the ground beef, breaking it apart with a spoon, and cook until no longer pink, about 5-7 minutes. Drain any excess fat, then stir in the taco seasoning and 1/4 cup of water. Simmer for 5 minutes until the mixture thickens. Tip: For extra flavor, brown the beef with a diced onion before adding the seasoning.

    Prepare the Salad Base

    In a large mixing bowl, combine the chopped lettuce, cherry tomatoes, red onion, and avocado. Toss gently to mix. Tip: For a crisper salad, chill the lettuce in ice water for 10 minutes before chopping.

    Mix the Dressing

    In a small bowl, whisk together the sour cream and salsa until smooth. This will serve as both the salad dressing and a drizzle for the finished dish.

    Assemble the Salad

    Add the warm taco meat to the salad base, followed by the shredded cheese and Fritos. Drizzle with the dressing and toss lightly to combine. Tip: Add the Fritos just before serving to maintain their crunch.

    Serve Immediately

    Divide the salad among plates and serve immediately for the best texture and flavor. Enjoy the crunch and flavors of this delightful Tex-Mex inspired dish.

    Tips and Tricks

    For those looking to elevate their taco salad game, consider these advanced tips. First, try making your own taco seasoning from scratch for a fresher, more customizable flavor profile. Second, experiment with different types of lettuce, such as romaine or butter lettuce, for varied textures. Third, for a healthier version, substitute Greek yogurt for sour cream in the dressing. Lastly, consider adding a squeeze of lime juice over the assembled salad for a bright, acidic contrast to the rich flavors.

    Recipe Variations

    • Swap ground beef for ground turkey or chicken for a lighter version.
    • Use crushed tortilla chips instead of Fritos for a different crunch.
    • Add black beans or corn for extra fiber and sweetness.
    • Top with pickled jalapeños for a spicy kick.
    • For a vegetarian version, omit the meat and double up on beans and veggies.

    Frequently Asked Questions

    Can I make this salad ahead of time?

    Yes, you can prepare the components ahead of time, but assemble the salad just before serving to keep the Fritos crunchy. Store the dressing, meat, and salad base separately in the fridge.

    What can I use instead of Fritos?

    Any corn-based chip will work, such as tortilla chips or even Doritos for a different flavor profile. The key is to use something that will add a satisfying crunch.

    How can I make this recipe gluten-free?

    Ensure that your taco seasoning and chips are gluten-free. Most Fritos are gluten-free, but always check the packaging to be sure.

    Summary

    This Crunchy Fritos Taco Salad is a fun, flavorful twist on the classic taco salad, perfect for any occasion. With its easy preparation and customizable options, it’s sure to please everyone at the table.