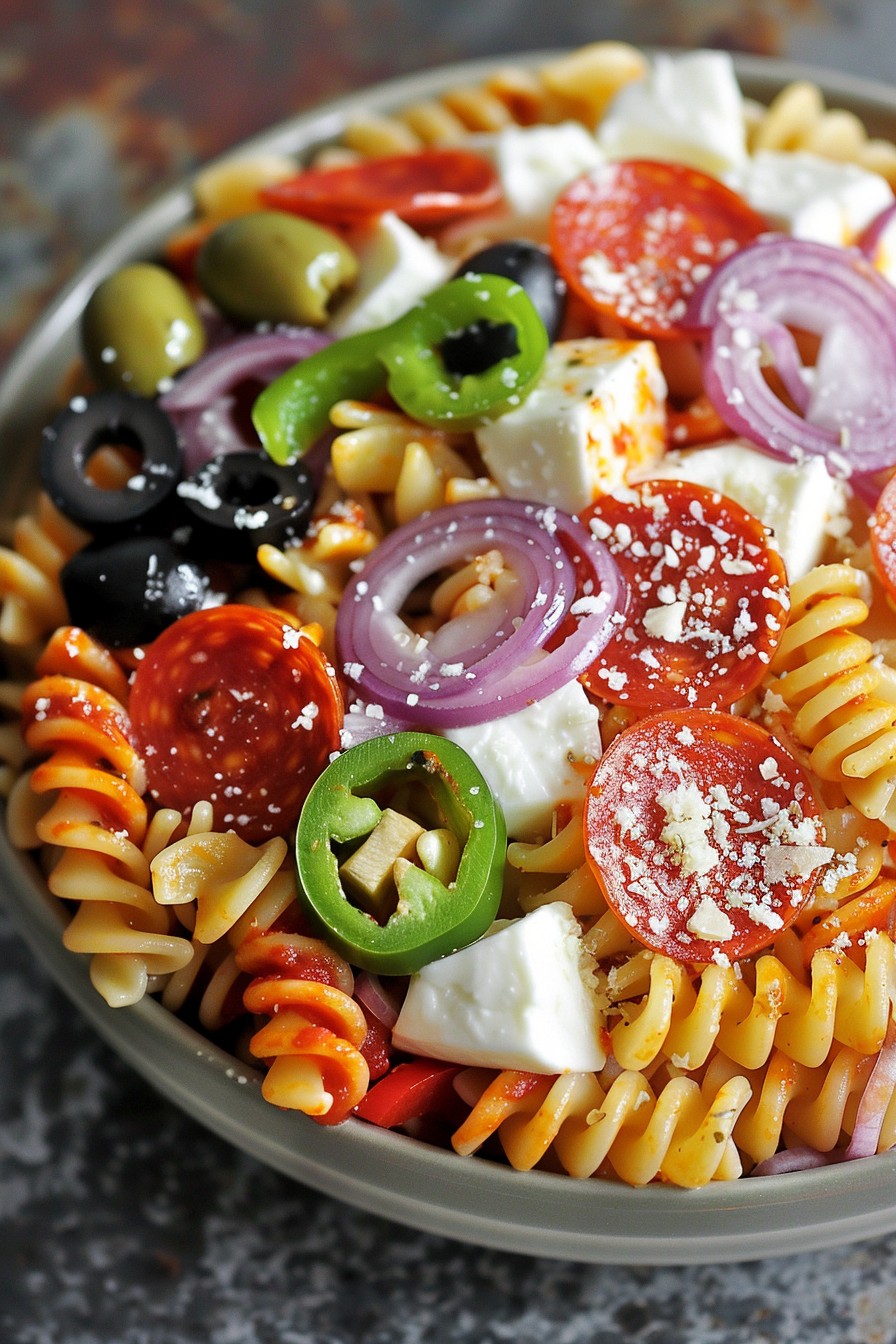
Category: Pasta Salad Recipes

  • Barilla Bowtie Pasta Salad Recipe: A Fun Twist on a Classic

    Barilla Bowtie Pasta Salad Recipe: A Fun Twist on a Classic

    Howdy, pasta lovers! Today, we’re diving into a dish that’s as fun to make as it is to eat. This Barilla Bowtie Pasta Salad is a vibrant, flavorful twist on the classic pasta salad, perfect for picnics, potlucks, or just because you deserve something delicious.

    Why This Recipe Works

    • The bowtie pasta holds onto the dressing and mix-ins beautifully, ensuring every bite is packed with flavor.
    • It’s incredibly versatile; swap out veggies or proteins based on what you have on hand.
    • The dressing is a simple yet irresistible combination of tangy and sweet, making the salad a crowd-pleaser.
    • Prep is a breeze, and the salad can be made ahead, freeing up your time for more important things, like deciding which bowl to serve it in.

    Ingredients

    • 1 box (16 oz) Barilla Bowtie Pasta
    • 1 cup cherry tomatoes, halved
    • 1 cucumber, diced
    • 1/2 red onion, thinly sliced
    • 1 cup feta cheese, crumbled
    • 1/4 cup olive oil
    • 2 tbsp red wine vinegar
    • 1 tbsp honey
    • 1 tsp dried oregano
    • Salt and pepper to taste

    Equipment Needed

    • Large pot
    • Colander
    • Large mixing bowl
    • Whisk
    • Measuring cups and spoons

    Instructions
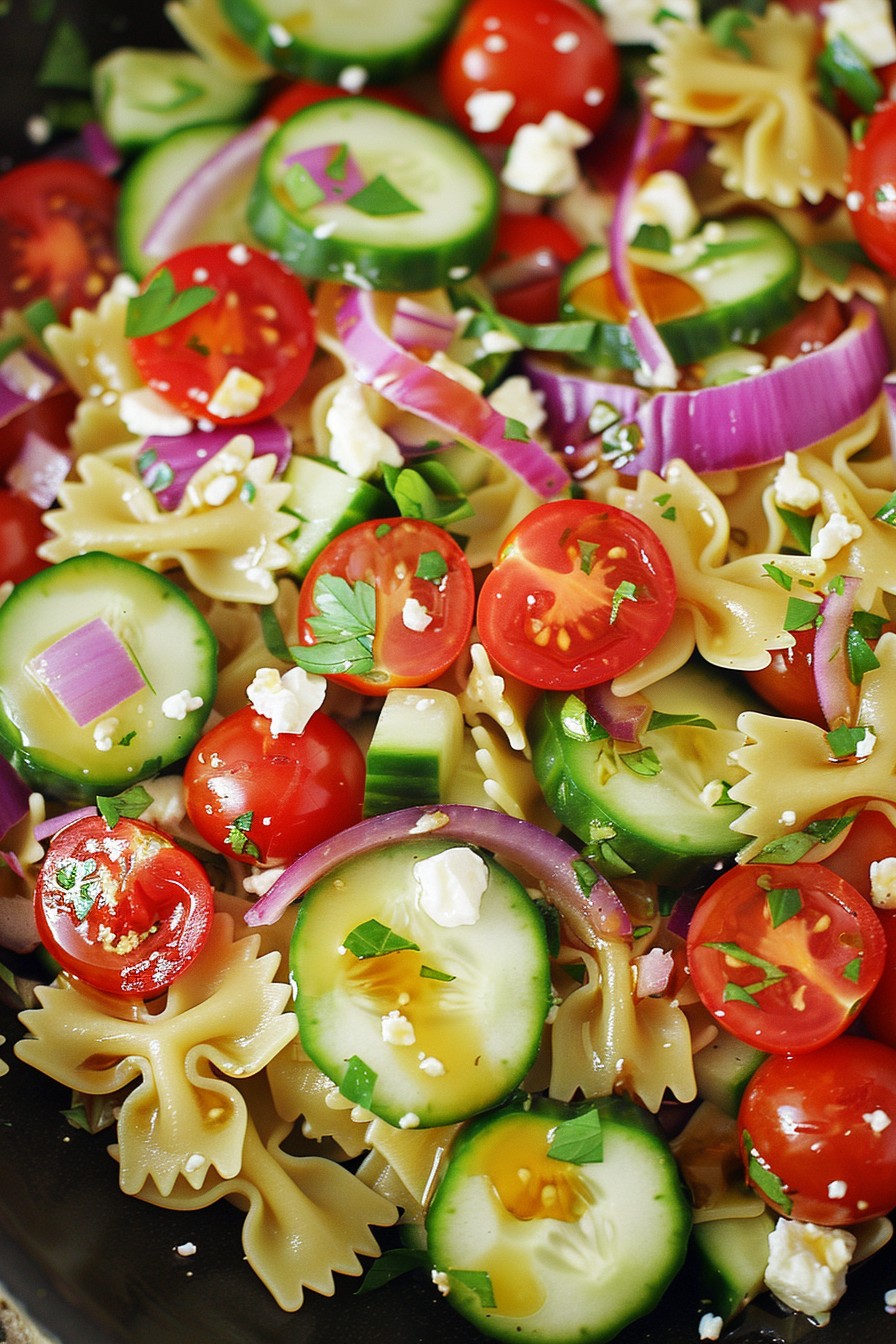
    Barilla Bowtie Pasta Salad Recipe

    Step 1: Cook the Pasta to Perfection

    Bring a large pot of salted water to a rolling boil. Add the Barilla Bowtie Pasta and cook according to the package instructions, usually about 11 minutes, until al dente. Drain in a colander and rinse under cold water to stop the cooking process. Tip: Salting the water well is the first step to flavorful pasta.

    Step 2: Whisk Together the Dressing

    In a large mixing bowl, whisk together the olive oil, red wine vinegar, honey, dried oregano, salt, and pepper until well combined. This dressing is the secret weapon of this salad, so take a moment to taste and adjust the seasoning as needed.

    Step 3: Combine the Ingredients

    Add the cooled pasta, cherry tomatoes, cucumber, red onion, and feta cheese to the bowl with the dressing. Gently toss everything together until well coated. Tip: Letting the salad sit for 10 minutes before serving allows the flavors to meld beautifully.

    Step 4: Serve and Enjoy

    Transfer the pasta salad to a serving dish or keep it in the bowl. Either way, it’s ready to be devoured. Serve chilled or at room temperature for the best experience.

    Tips and Tricks

    For an extra crunch, add some toasted pine nuts or walnuts. If you’re making this ahead, hold off on adding the feta until just before serving to keep it from getting too soft. For a creamier version, mix in a tablespoon of mayonnaise or Greek yogurt into the dressing. Always taste as you go; adjusting the seasoning can make a world of difference.

    Recipe Variations

    • Protein Power: Add grilled chicken, shrimp, or chickpeas for a protein boost.
    • Veggie Delight: Swap in or add bell peppers, olives, or artichoke hearts for more veggie variety.
    • Cheese Please: Try goat cheese or mozzarella pearls instead of feta for a different cheese experience.
    • Dressing Swap: Use balsamic vinegar or lemon juice in place of red wine vinegar for a different tang.

    Frequently Asked Questions

    Can I make this pasta salad ahead of time? Absolutely! This salad actually tastes better after the flavors have had time to meld. Just keep it refrigerated and add any delicate ingredients like fresh herbs or cheese right before serving.

    How long will this pasta salad last in the fridge? Stored in an airtight container, it should stay fresh for up to 3 days. Just give it a quick stir before serving again.

    Can I use a different type of pasta? Sure, but bowtie pasta is ideal for this recipe because its shape holds the dressing and ingredients well. If you substitute, choose a pasta with similar qualities.

    Summary

    This Barilla Bowtie Pasta Salad is a delightful mix of flavors and textures, perfect for any occasion. Easy to make and even easier to love, it’s sure to become a go-to recipe in your collection.
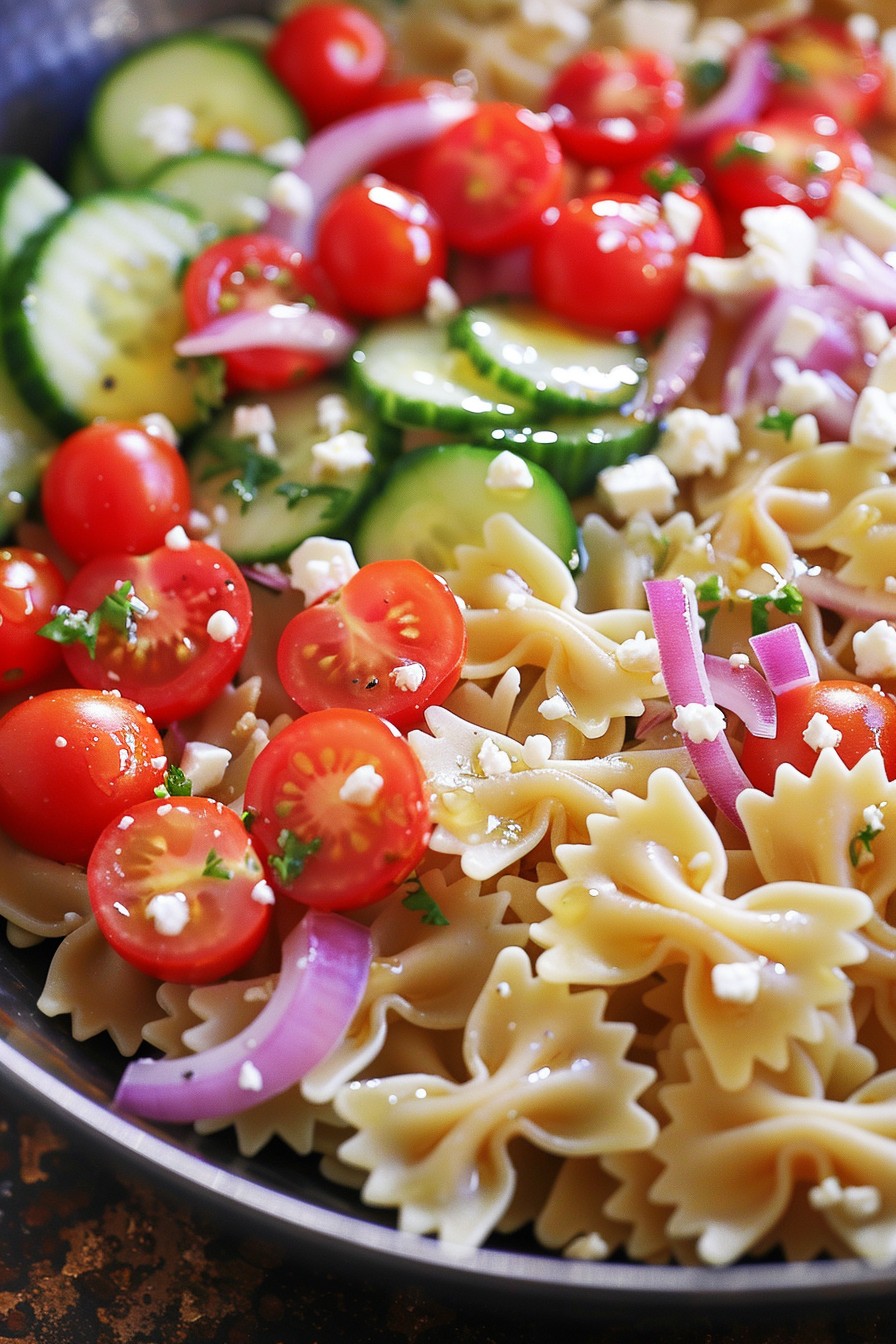
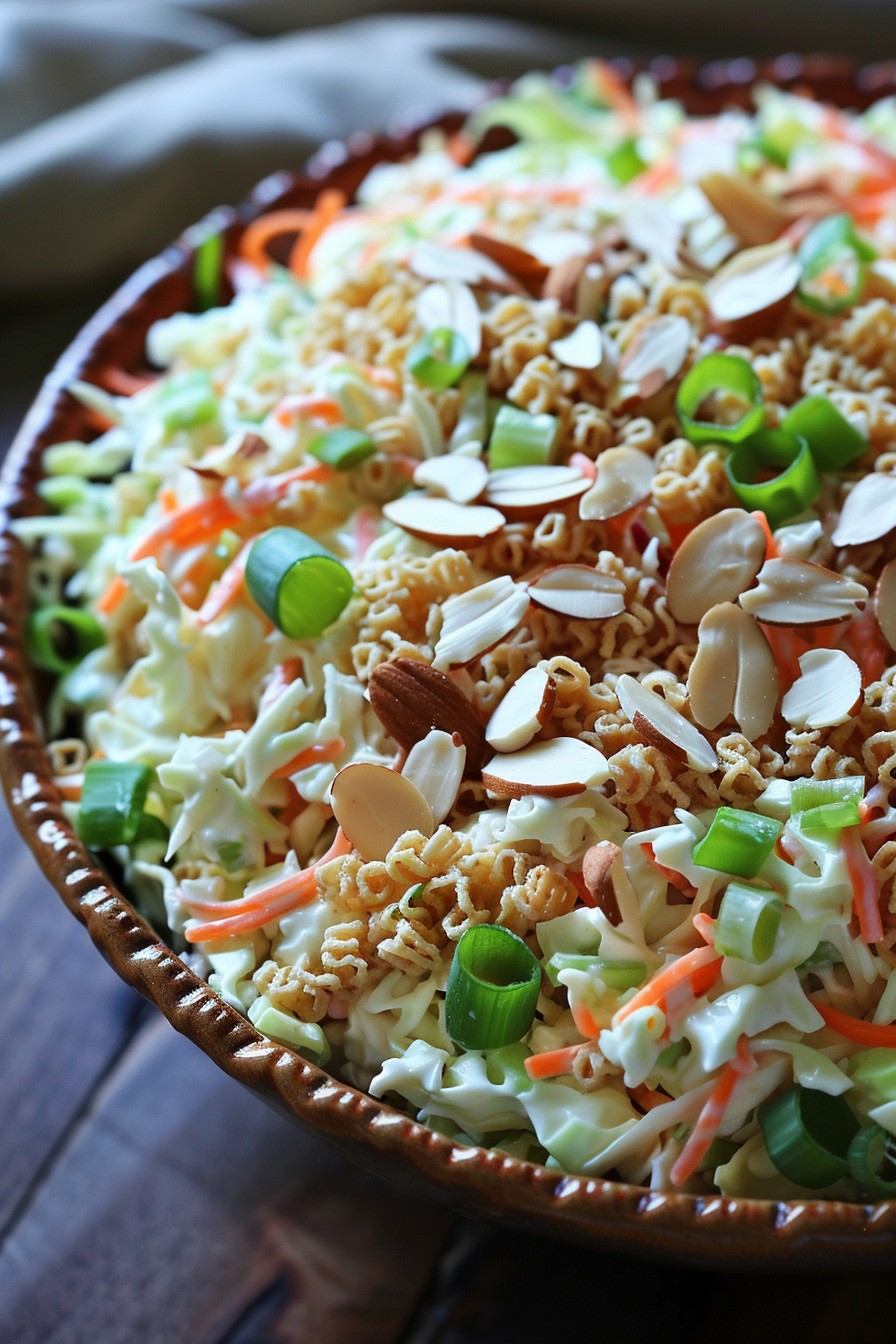
  • Crunchy & Creamy Coleslaw Ramen Noodle Salad Recipe – A Fusion Delight!

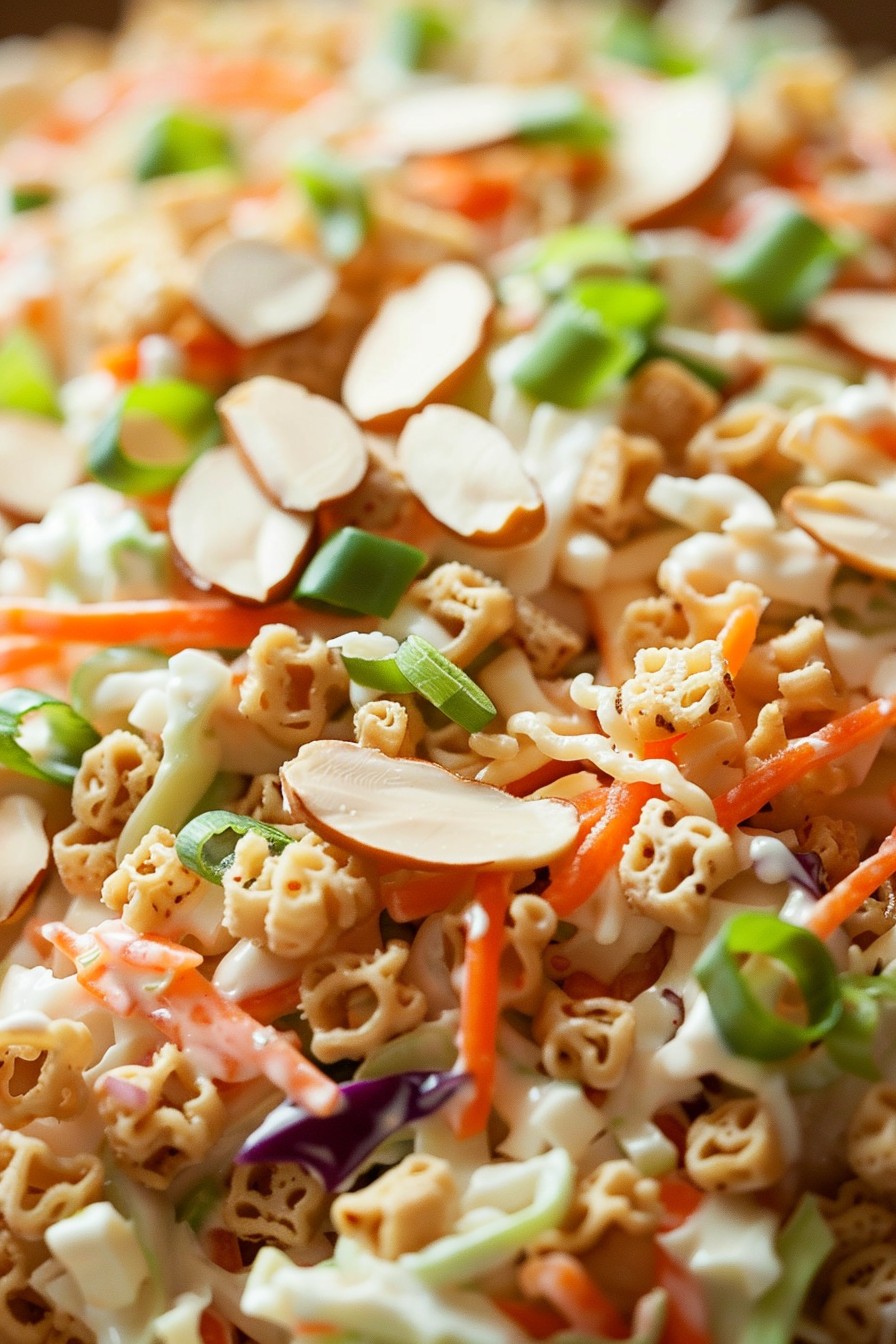
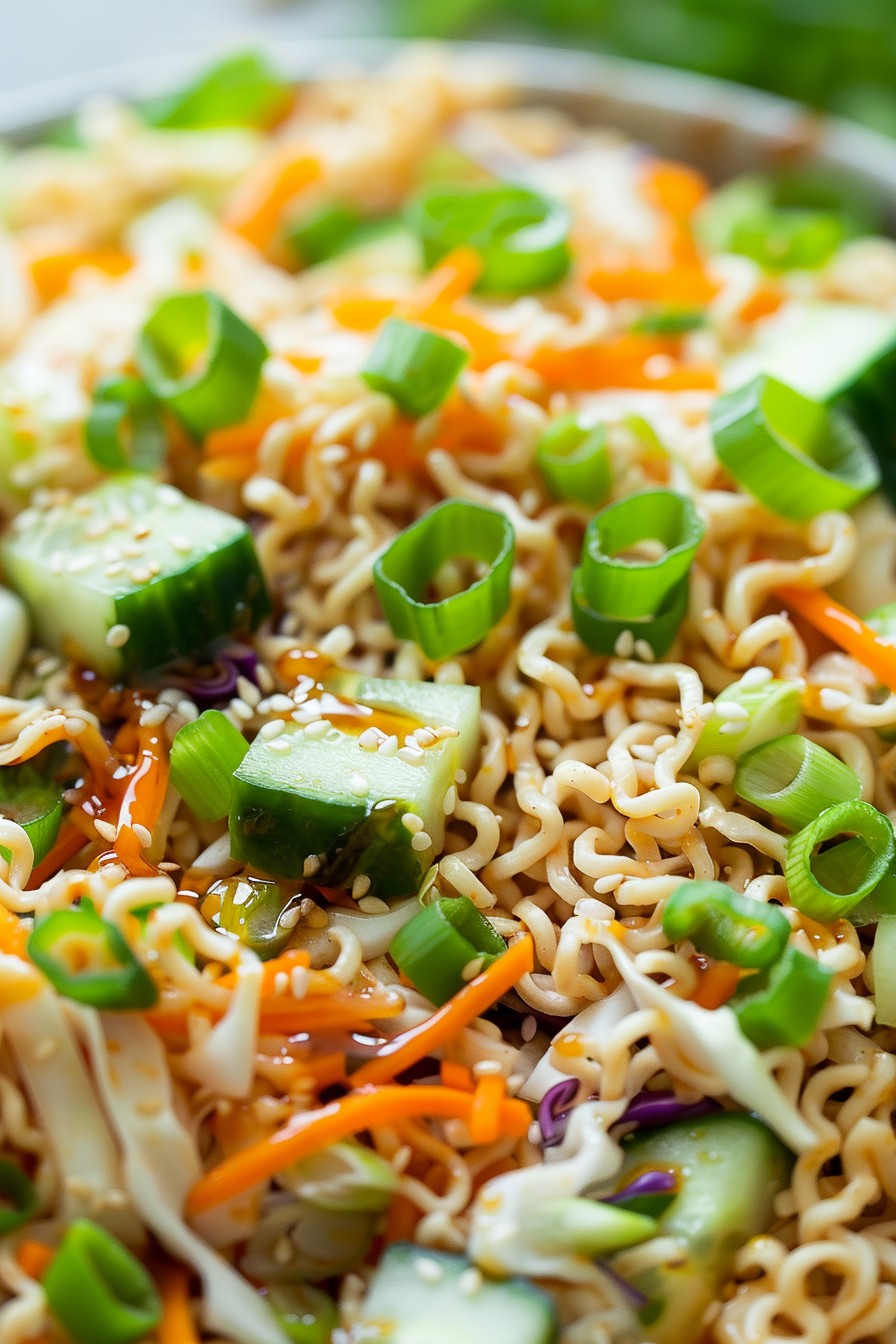
    Crunchy & Creamy Coleslaw Ramen Noodle Salad Recipe – A Fusion Delight!

    Unleash your taste buds with this unexpected yet utterly delicious fusion of coleslaw and ramen noodles. Perfect for picnics, potlucks, or a quick lunch, this recipe brings together the best of both worlds in a dish that’s as fun to make as it is to eat.

    Why This Recipe Works

    • The crunch of ramen noodles adds an unexpected texture to the creamy coleslaw, creating a perfect balance.
    • It’s incredibly versatile, allowing for endless variations to suit any taste or dietary preference.
    • Quick and easy to prepare, this dish is perfect for last-minute gatherings or a speedy lunch option.
    • The combination of flavors from the coleslaw dressing and the savory ramen seasoning packs a punch in every bite.

    Ingredients

    • 1 package (3 oz) ramen noodles, crushed (discard seasoning packet or save for another use)
    • 4 cups coleslaw mix
    • 1/2 cup mayonnaise
    • 2 tbsp apple cider vinegar
    • 1 tbsp sugar
    • 1/2 tsp salt
    • 1/4 tsp black pepper
    • 1/4 cup sliced almonds
    • 2 green onions, thinly sliced

    Equipment Needed

    • Large mixing bowl
    • Whisk
    • Measuring cups and spoons
    • Knife and cutting board

    Instructions

    Coleslaw Ramen Noodle Salad Recipe

    Step 1: Prepare the Dressing

    In a large mixing bowl, whisk together the mayonnaise, apple cider vinegar, sugar, salt, and black pepper until smooth. This creamy dressing is the secret to binding all the flavors together. Tip: For a lighter version, you can substitute half of the mayonnaise with Greek yogurt.

    Step 2: Combine the Coleslaw and Dressing

    Add the coleslaw mix to the bowl with the dressing. Use a spatula or your hands to toss until the coleslaw is evenly coated. This ensures every bite is flavorful. Tip: Letting the coleslaw sit for 5 minutes before adding the noodles allows the flavors to meld beautifully.

    Step 3: Add the Crunch

    Stir in the crushed ramen noodles and sliced almonds. The noodles will start to soften slightly but retain a delightful crunch. Tip: For extra crunch, toast the almonds in a dry skillet over medium heat for 2-3 minutes before adding them to the salad.

    Step 4: Garnish and Serve

    Sprinkle the sliced green onions over the top for a pop of color and freshness. Serve immediately for the best texture, or refrigerate for up to 2 hours if you prefer a softer noodle texture.

    Tips and Tricks

    For those looking to elevate this dish, consider adding a protein like grilled chicken or shrimp to make it a hearty meal. If you’re serving this at a gathering, keep the noodles separate and add them just before serving to maintain their crunch. Experiment with different types of nuts or seeds for varying textures and flavors. A dash of sesame oil can add an Asian twist to the dressing, complementing the ramen noodles perfectly.

    Recipe Variations

    • Spicy Version: Add a teaspoon of sriracha or a pinch of red pepper flakes to the dressing for a kick.
    • Vegetarian Delight: Mix in some edamame or chickpeas for extra protein.
    • Fruity Twist: Incorporate diced apples or raisins for a sweet contrast to the savory flavors.
    • Asian Fusion: Swap the mayonnaise with a mix of peanut butter and soy sauce for an Asian-inspired dressing.

    Frequently Asked Questions

    Can I make this salad ahead of time?

    Yes, you can prepare the coleslaw and dressing ahead of time, but add the ramen noodles and almonds just before serving to keep them crunchy. The salad is best enjoyed within a few hours of assembly.

    Can I use a different type of noodle?

    Absolutely! While ramen noodles provide a unique texture, you can experiment with soba noodles or even spaghetti broken into small pieces for a different twist.

    Is there a way to make this recipe healthier?

    For a healthier version, use whole wheat ramen noodles, reduce the mayonnaise by half and substitute with Greek yogurt, and add more vegetables like shredded carrots or bell peppers.

    Summary

    This Coleslaw Ramen Noodle Salad is a crunchy, creamy, and utterly delicious fusion dish that’s perfect for any occasion. Easy to make and highly customizable, it’s sure to become a favorite in your recipe collection.

  • Angel Pasta Salad Recipe: A Heavenly Dish for Any Occasion

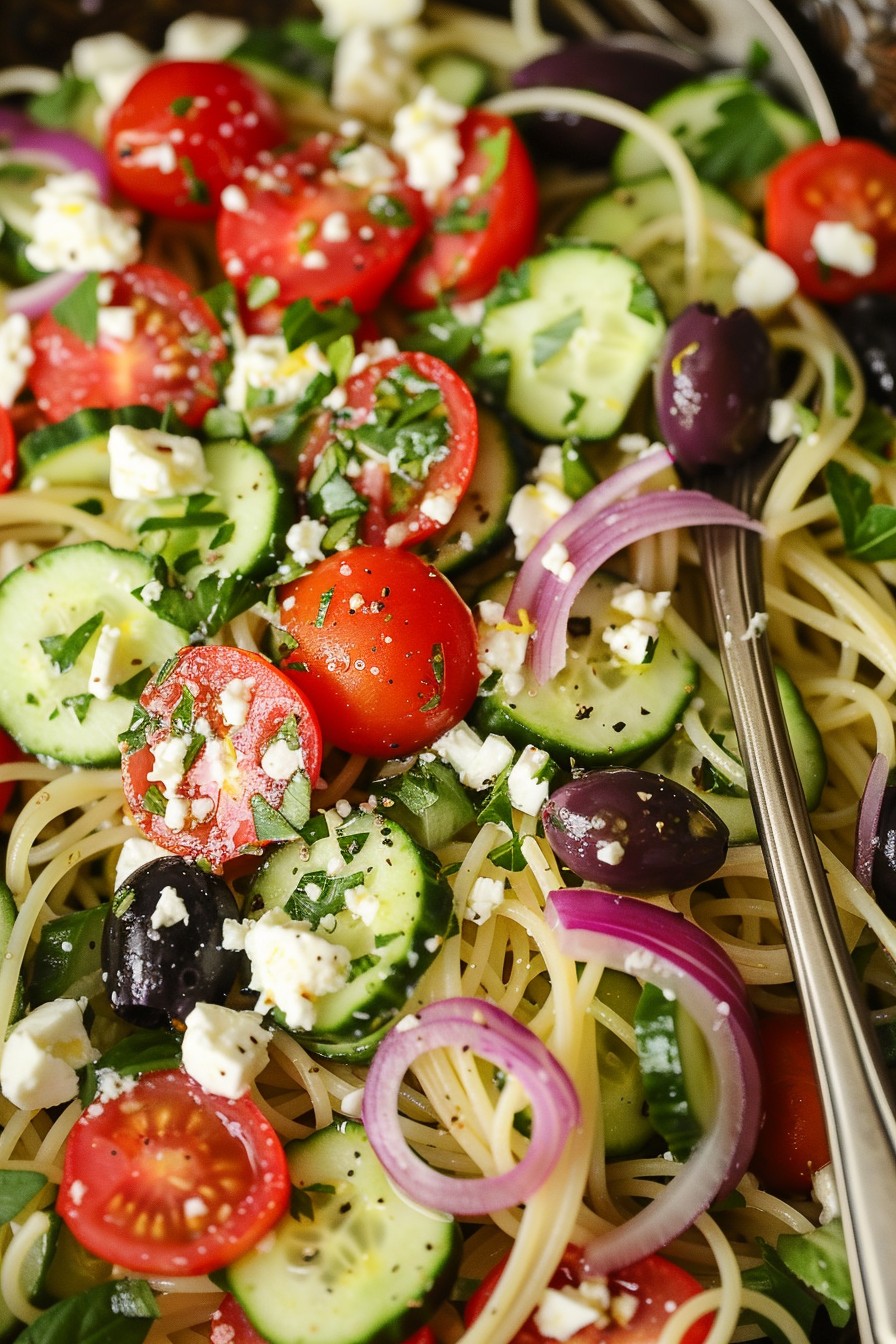
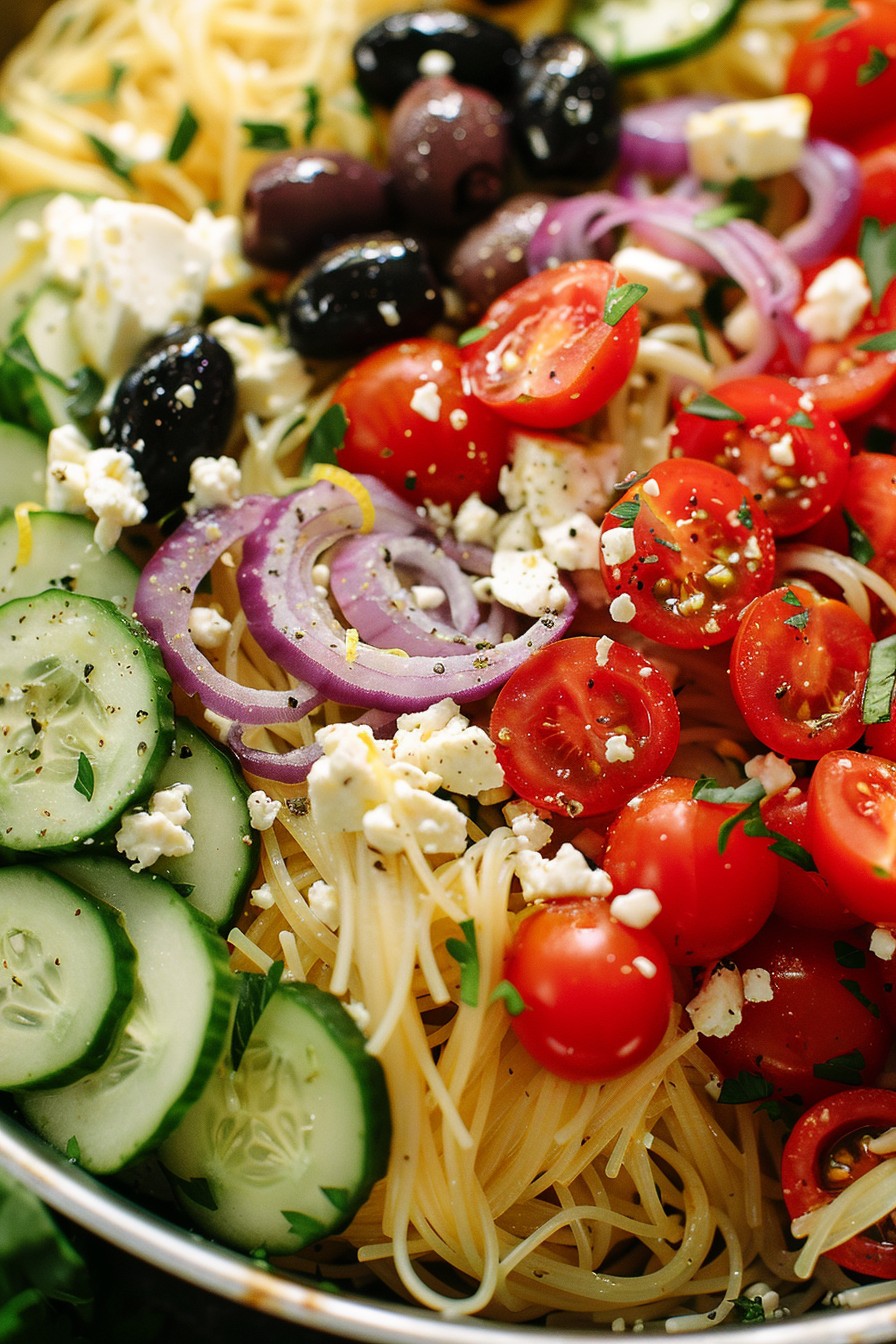
    Angel Pasta Salad Recipe: A Heavenly Dish for Any Occasion

    Howdy, food lovers! Today, we’re diving into a dish that’s as light and delightful as its name suggests. This angel pasta salad is the perfect blend of flavors and textures, making it a hit for picnics, potlucks, or just a refreshing meal at home. Let’s get started!

    Why This Recipe Works

    • The combination of tender angel hair pasta and crisp vegetables creates a satisfying contrast in every bite.
    • A homemade dressing brings all the ingredients together with a zesty, flavorful punch.
    • It’s incredibly versatile, allowing you to customize it with your favorite add-ins.
    • Perfect for making ahead, as the flavors meld beautifully overnight.
    • Light yet filling, it’s a crowd-pleaser that won’t weigh you down.

    Ingredients

    • 8 oz angel hair pasta, broken into 2-inch pieces
    • 1 cup cherry tomatoes, halved
    • 1/2 cup cucumber, diced
    • 1/4 cup red onion, thinly sliced
    • 1/4 cup black olives, sliced
    • 1/4 cup feta cheese, crumbled
    • 2 tbsp olive oil
    • 1 tbsp lemon juice
    • 1 tsp dried oregano
    • Salt and pepper to taste

    Equipment Needed

    • Large pot
    • Colander
    • Large mixing bowl
    • Whisk
    • Measuring cups and spoons

    Instructions

    Angel Pasta Salad Recipe

    Step 1: Cook the Pasta to Perfection

    Bring a large pot of salted water to a rolling boil. Add the angel hair pasta and cook for 4-5 minutes, or until al dente. Drain in a colander and rinse under cold water to stop the cooking process. Tip: Rinsing the pasta with cold water prevents it from sticking together.

    Step 2: Prepare the Vegetables

    While the pasta cooks, halve the cherry tomatoes, dice the cucumber, and thinly slice the red onion. Combine these in a large mixing bowl with the sliced black olives. Tip: For an extra crunch, you can add bell peppers or celery.

    Step 3: Whisk Together the Dressing

    In a small bowl, whisk together the olive oil, lemon juice, dried oregano, salt, and pepper until well combined. This simple dressing will add a bright and herby flavor to the salad.

    Step 4: Combine All Ingredients

    Add the cooled pasta to the bowl with the vegetables. Pour the dressing over the top and toss gently to coat everything evenly. Sprinkle the crumbled feta cheese over the salad for a creamy, tangy finish. Tip: Let the salad sit for 10 minutes before serving to allow the flavors to meld.

    Step 5: Serve and Enjoy

    Transfer the salad to a serving dish and enjoy immediately, or cover and refrigerate for up to 24 hours for even more flavorful results. This dish is perfect for any occasion, from casual lunches to elegant dinners.

    Tips and Tricks

    For those looking to elevate their angel pasta salad, consider these advanced tips. First, toasting the pasta before boiling can add a nutty depth of flavor. Second, marinating the vegetables in the dressing for an hour before combining with the pasta can intensify the flavors. Lastly, adding a pinch of sugar to the dressing can balance the acidity of the lemon juice. These small tweaks can make a big difference in the final dish.

    Recipe Variations

    • For a protein-packed version, add grilled chicken or shrimp.
    • Swap the feta cheese for goat cheese or mozzarella pearls for a different flavor profile.
    • Incorporate sun-dried tomatoes and artichoke hearts for a Mediterranean twist.
    • Use whole wheat or gluten-free pasta to cater to dietary needs.
    • Add a handful of fresh basil or parsley for a herby freshness.

    Frequently Asked Questions

    Can I make this salad ahead of time?

    Absolutely! This salad actually tastes better after sitting for a few hours or overnight, as the flavors have time to meld together. Just be sure to give it a good stir before serving to redistribute the dressing.

    What other dressings can I use?

    While the homemade dressing in this recipe is delicious, you can also use store-bought Italian or Greek dressing for convenience. Alternatively, a balsamic vinaigrette or a creamy Caesar dressing would also work well.

    Can I add meat to this salad?

    Yes, adding grilled chicken, shrimp, or even salami can turn this salad into a hearty main dish. Just be sure to cook any meat thoroughly and add it just before serving to maintain its texture.

    Summary

    This angel pasta salad is a light, flavorful, and versatile dish that’s perfect for any occasion. With its combination of tender pasta, crisp vegetables, and zesty dressing, it’s sure to be a hit with everyone. Plus, it’s easy to customize with your favorite ingredients!

  • Tortellini Cold Salad Recipe: A Refreshing Twist on Pasta Salad

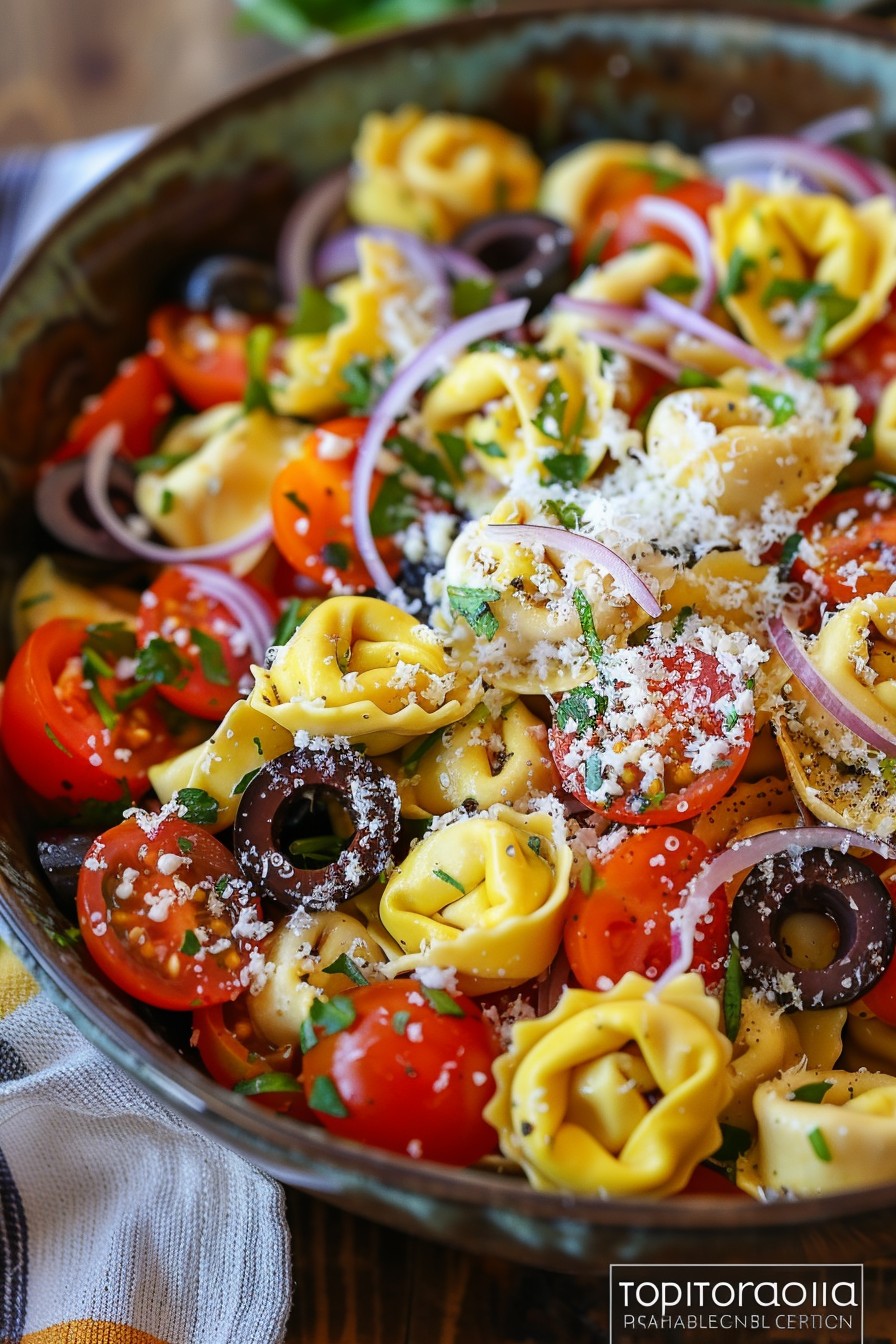
    Tortellini Cold Salad Recipe: A Refreshing Twist on Pasta Salad

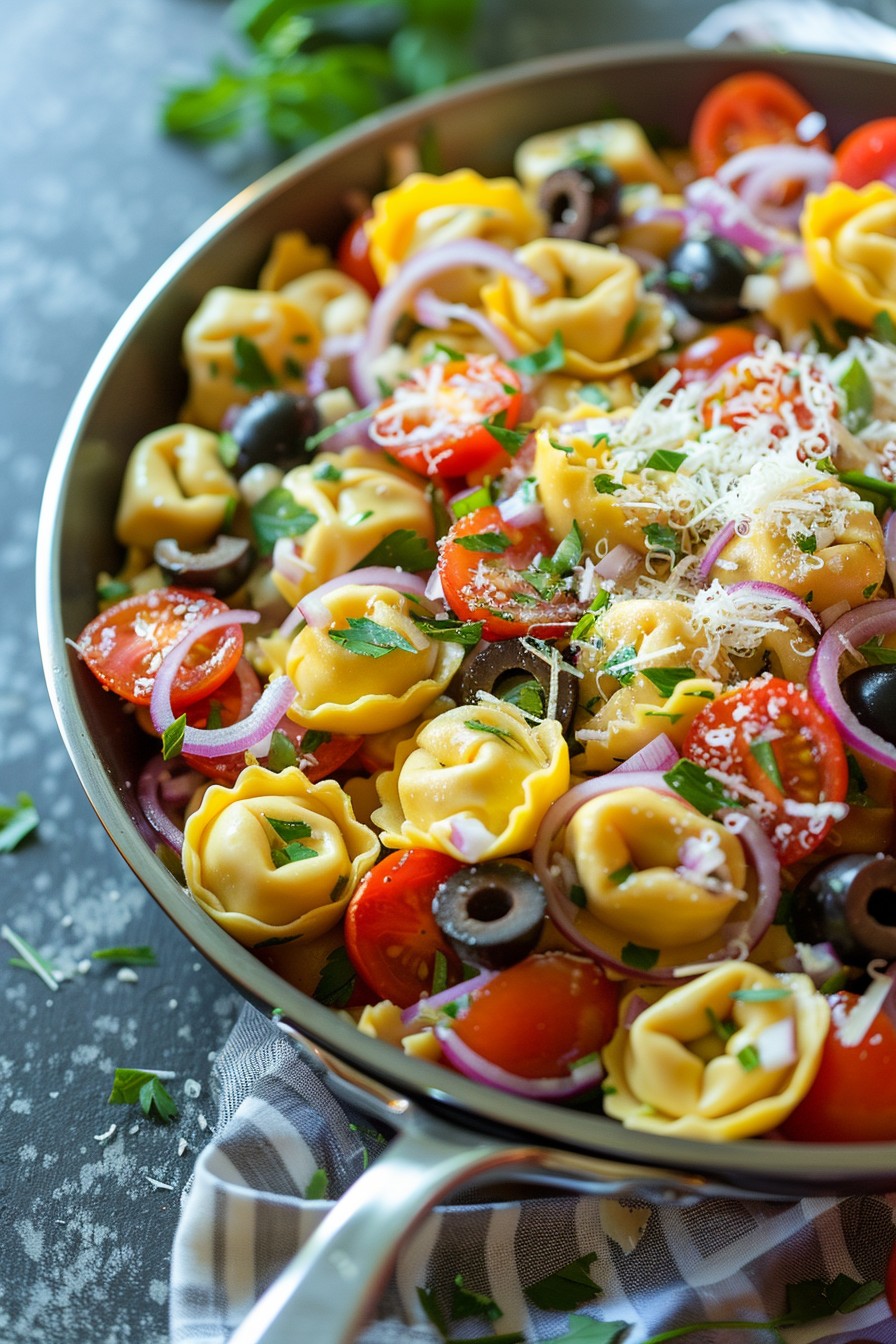
    Just when you thought pasta salad couldn’t get any better, here comes the tortellini cold salad to prove you wrong. Jam-packed with flavors, textures, and colors, this dish is your next go-to for picnics, potlucks, or a quick fridge raid. Let’s dive into making this crowd-pleaser that’s as easy to whip up as it is delicious.

    Why This Recipe Works

    • The cheese-filled tortellini adds a creamy, indulgent texture that’s unmatched by regular pasta.
    • Fresh veggies and a tangy dressing bring a refreshing contrast to the rich tortellini.
    • It’s versatile; swap ingredients based on what’s in your fridge or pantry.
    • Perfect for make-ahead meals, as the flavors meld and intensify overnight.
    • No cooking required for the dressing, making it a breeze to prepare.

    Ingredients

    • 1 lb cheese tortellini, cooked and cooled
    • 1 cup cherry tomatoes, halved
    • 1/2 cup black olives, sliced
    • 1/4 cup red onion, finely diced
    • 1/2 cup Italian dressing
    • 1/4 cup grated Parmesan cheese
    • Salt and pepper to taste

    Equipment Needed

    • Large mixing bowl
    • Colander
    • Measuring cups and spoons
    • Knife and cutting board

    Instructions

    Tortellini Cold Salad Recipe

    Step 1: Cook the Tortellini

    Bring a large pot of salted water to a boil. Add the tortellini and cook according to the package instructions, usually about 7-9 minutes, until al dente. Drain and rinse under cold water to stop the cooking process. Tip: Adding a splash of olive oil to the boiling water can prevent the tortellini from sticking together.

    Step 2: Prep the Veggies

    While the tortellini cooks, halve the cherry tomatoes, slice the black olives, and finely dice the red onion. Tip: Soaking the diced red onion in cold water for 10 minutes can mellow its sharpness.

    Step 3: Combine Ingredients

    In a large mixing bowl, combine the cooled tortellini, prepared veggies, and Italian dressing. Toss gently to ensure everything is evenly coated. Tip: For best results, let the salad chill in the fridge for at least an hour before serving to allow the flavors to meld.

    Step 4: Season and Serve

    Before serving, sprinkle with grated Parmesan cheese and season with salt and pepper to taste. Give it one final toss and serve chilled.

    Tips and Tricks

    For those looking to elevate their tortellini cold salad, consider these pro tips. First, toasting the tortellini in a dry pan after boiling can add a delightful crunch. Second, incorporating a mix of fresh herbs like basil or parsley can introduce a burst of freshness. Third, for a creamier version, mix in a tablespoon of mayonnaise or Greek yogurt into the dressing. Lastly, adding protein such as grilled chicken or shrimp can turn this side dish into a hearty main course.

    Recipe Variations

    • Swap the Italian dressing for a balsamic vinaigrette for a deeper flavor profile.
    • Add avocado chunks for a creamy texture and healthy fats.
    • Include sun-dried tomatoes and artichoke hearts for a Mediterranean twist.
    • Use spinach or arugula for a green boost.
    • For a spicy kick, add sliced jalapeños or a dash of red pepper flakes.

    Frequently Asked Questions

    Can I make this salad ahead of time?

    Absolutely! This salad actually tastes better the next day as the flavors have more time to meld. Just hold off on adding the Parmesan until right before serving to keep it from getting soggy.

    What’s the best way to store leftovers?

    Store in an airtight container in the refrigerator for up to 3 days. If the salad seems dry upon serving, a quick drizzle of additional dressing can revive it.

    Can I use frozen tortellini?

    Yes, frozen tortellini works just as well as fresh. Just be sure to cook it according to the package directions and cool it completely before mixing it with the other ingredients.

    Summary

    This tortellini cold salad is a refreshing, flavorful twist on traditional pasta salad, perfect for any occasion. With its simple preparation and versatile ingredients, it’s sure to become a staple in your recipe collection.

  • Pasta Salad Recipe for Kids: A Fun, Flavorful Adventure

    Pasta Salad Recipe for Kids: A Fun, Flavorful Adventure

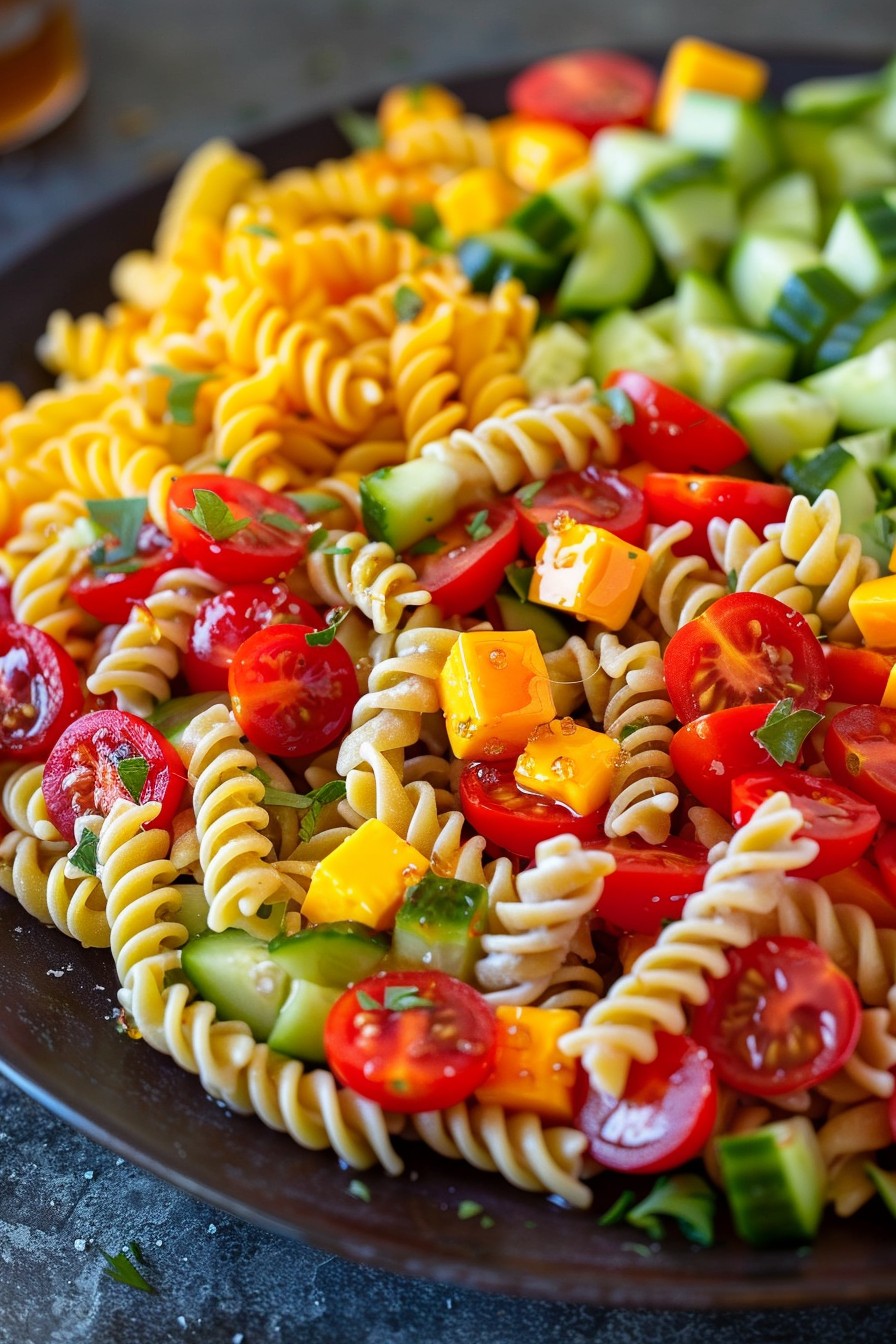
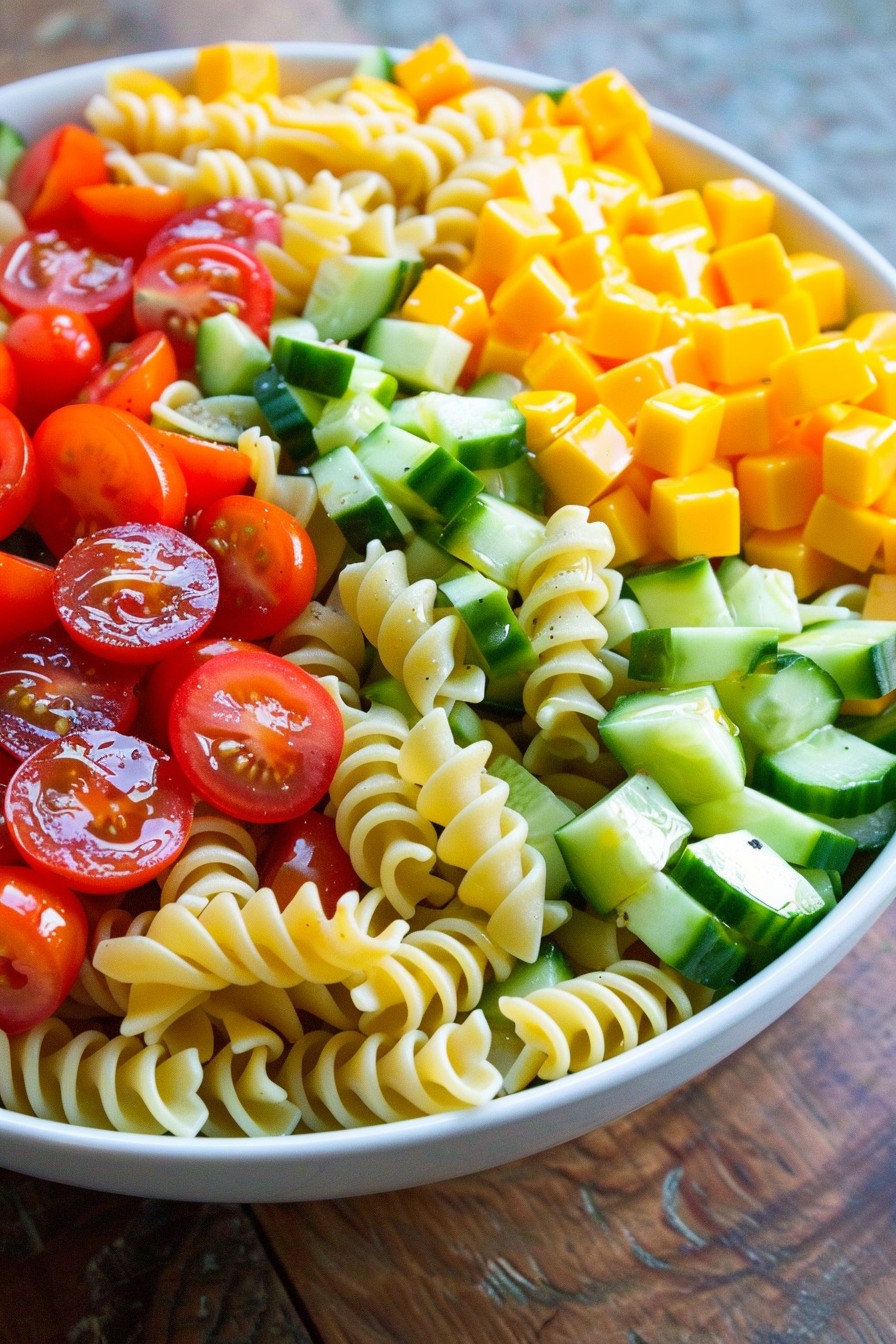
    Ready to whip up a dish that’ll have the kiddos begging for seconds? This pasta salad is not just a meal; it’s a colorful journey through flavors and textures that even the pickiest eaters can’t resist. Let’s dive into making this delightful dish that’s perfect for picnics, lunches, or just because.

    Why This Recipe Works

    • Kid-Friendly Ingredients: We’re using familiar favorites like pasta, cheese, and veggies, making it a hit with the little ones.
    • Customizable: Easily swap out or add ingredients based on your child’s preferences or dietary needs.
    • Perfect for Any Occasion: Whether it’s a school lunch or a family barbecue, this pasta salad fits right in.
    • Make-Ahead Magic: It tastes even better the next day, making meal prep a breeze.

    Ingredients

    • 2 cups of rotini pasta (colorful for extra fun)
    • 1 cup of cherry tomatoes, halved
    • 1/2 cup of cucumber, diced
    • 1/2 cup of cheddar cheese, cubed
    • 1/4 cup of olive oil
    • 2 tablespoons of vinegar
    • 1 teaspoon of honey
    • Salt and pepper to taste

    Equipment Needed

    • Large pot
    • Colander
    • Large mixing bowl
    • Whisk
    • Measuring cups and spoons

    Instructions

    Pasta Salad Recipe For Kids

    Step 1: Cook the Pasta

    Bring a large pot of salted water to a boil. Add the rotini pasta and cook according to the package instructions, usually about 8-10 minutes, until al dente. Drain the pasta in a colander and rinse under cold water to stop the cooking process. This ensures your pasta salad is perfectly tender, not mushy.

    Step 2: Prepare the Dressing

    In a large mixing bowl, whisk together the olive oil, vinegar, honey, salt, and pepper until well combined. This simple dressing brings a sweet and tangy flavor that kids love. Tip: Let the kids help with the whisking—it’s a great way to get them involved!

    Step 3: Combine the Ingredients

    Add the cooled pasta, cherry tomatoes, cucumber, and cheddar cheese to the bowl with the dressing. Gently toss everything together until well coated. The vibrant colors and shapes make this dish as fun to look at as it is to eat.

    Step 4: Chill and Serve

    Cover the bowl and refrigerate the pasta salad for at least 1 hour before serving. This allows the flavors to meld together beautifully. Serve chilled for a refreshing treat that’s perfect for warm days.

    Tips and Tricks

    For an extra protein boost, add some diced chicken or turkey. If you’re dealing with veggie skeptics, try grating the carrots or zucchini finely so they blend in seamlessly. Always taste and adjust the seasoning before serving—sometimes a little extra honey or salt can make all the difference. For a dairy-free version, skip the cheese or use a plant-based alternative. Remember, the key to a great pasta salad is balance, so feel free to play around with the ingredient ratios until you find your family’s perfect mix.

    Recipe Variations

    • Italian Twist: Swap the cheddar for mozzarella pearls and add some sliced olives and a sprinkle of Italian seasoning.
    • Greek Style: Add feta cheese, kalamata olives, and a squeeze of lemon juice for a Mediterranean flair.
    • Rainbow Salad: Use a variety of colorful veggies like bell peppers, purple cabbage, and yellow squash to make the dish as vibrant as possible.
    • Protein Packed: Mix in some chickpeas or black beans for an extra fiber and protein boost.

    Frequently Asked Questions

    Can I make this pasta salad ahead of time?

    Absolutely! In fact, making it a day ahead allows the flavors to develop more fully. Just keep it refrigerated and give it a good stir before serving.

    What if my child doesn’t like vinegar?

    You can easily substitute the vinegar with lemon juice for a different kind of tanginess that might be more to their liking.

    How long will this pasta salad keep in the fridge?

    Stored in an airtight container, it should stay fresh for up to 3 days. Just be sure to give it a quick toss before serving again.

    Summary

    This pasta salad is a surefire way to bring a smile to your child’s face. With its simple ingredients, customizable options, and make-ahead convenience, it’s a recipe that parents will love just as much as the kids. Give it a try and watch it become a new family favorite.

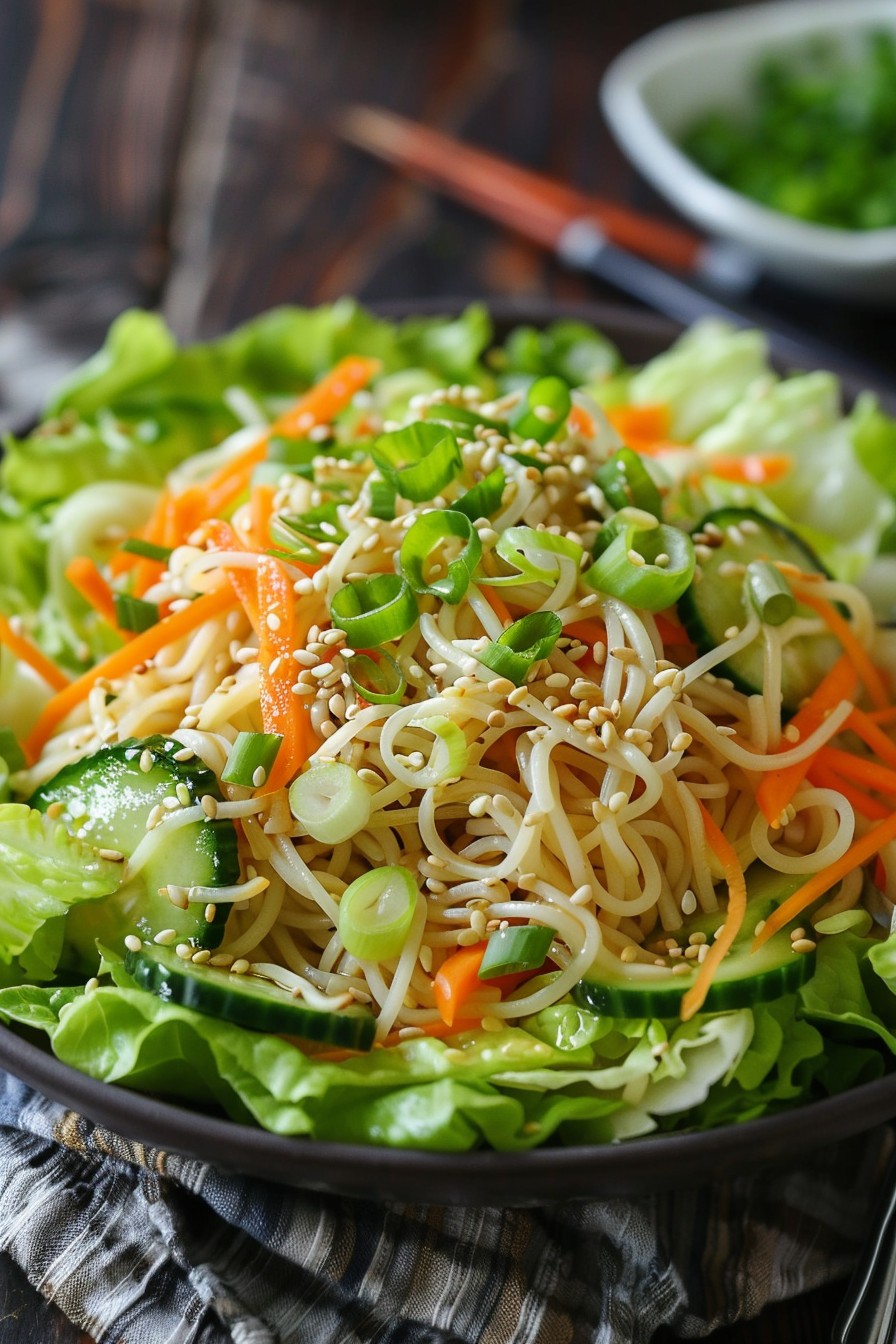
  • Somen Salad Recipe: A Refreshing Summer Delight

    Somen Salad Recipe: A Refreshing Summer Delight

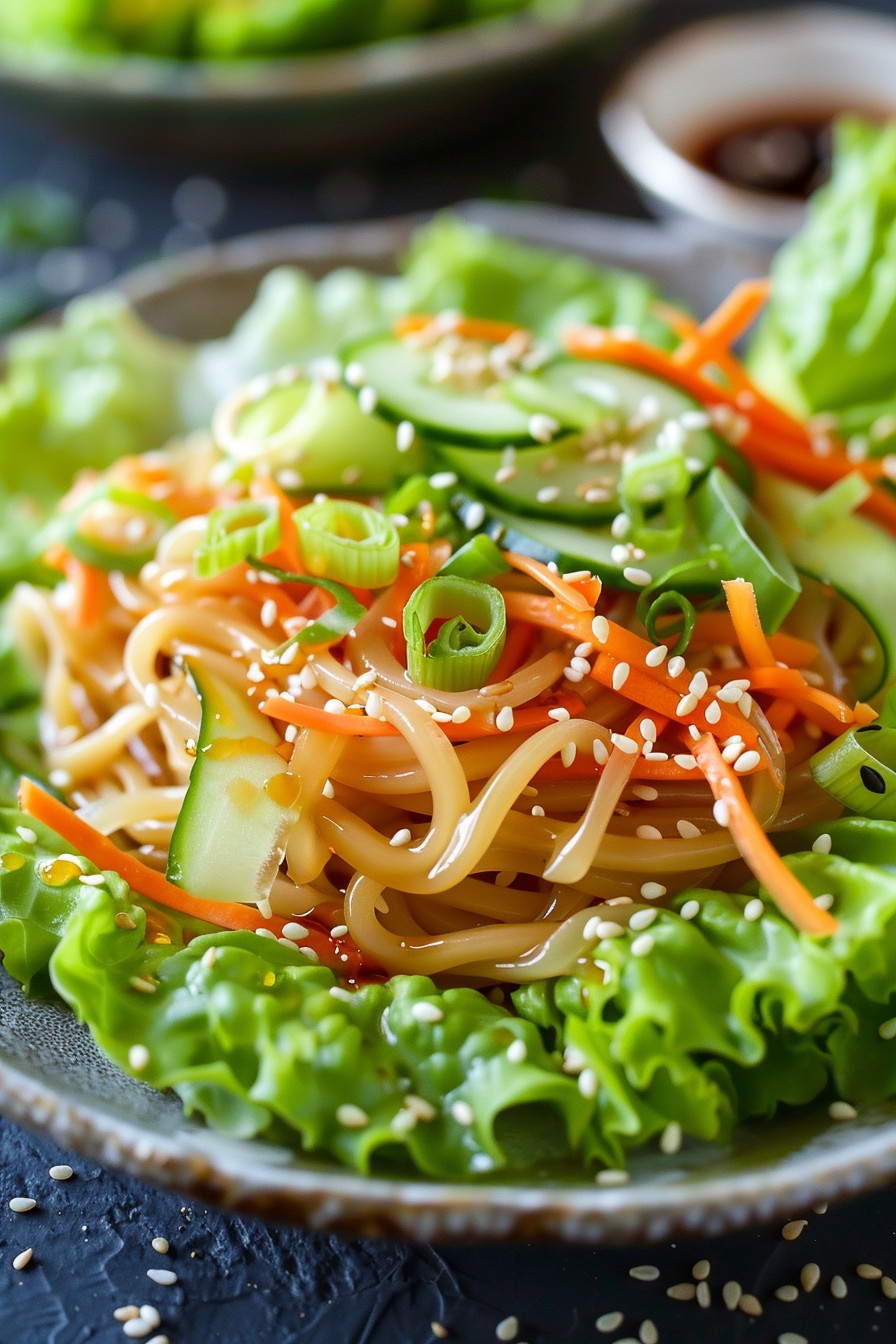
    Ready to dive into a dish that’s as fun to make as it is to eat? This somen salad recipe is your ticket to a refreshing, flavorful meal that’s perfect for those hot summer days. Let’s get started!

    Why This Recipe Works

    • It’s a perfect blend of cool, refreshing noodles and crisp, vibrant vegetables.
    • The dressing is a harmonious mix of savory, sweet, and tangy flavors that’ll have your taste buds dancing.
    • It’s incredibly versatile, allowing you to customize it with your favorite proteins or veggies.
    • Quick and easy to prepare, making it ideal for busy weeknights or last-minute gatherings.
    • The dish is as visually appealing as it is delicious, guaranteed to impress your guests.

    Ingredients

    • 8 oz somen noodles
    • 2 cups shredded lettuce
    • 1 cucumber, julienned
    • 1 carrot, julienned
    • 2 green onions, thinly sliced
    • 1/4 cup soy sauce
    • 2 tbsp rice vinegar
    • 1 tbsp sugar
    • 1 tsp sesame oil
    • 1 tbsp sesame seeds

    Equipment Needed

    • Large pot
    • Colander
    • Mixing bowls
    • Whisk
    • Measuring cups and spoons

    Instructions

    Somen Salad Recipe

    Step 1: Cook the Somen Noodles

    Bring a large pot of water to a rolling boil. Add the somen noodles and cook for about 3 minutes, or until they’re just tender. Drain them in a colander and rinse under cold water to stop the cooking process. Tip: Rinsing the noodles removes excess starch, preventing them from sticking together.

    Step 2: Prepare the Vegetables

    While the noodles are cooking, julienne the cucumber and carrot, and thinly slice the green onions. Shred the lettuce if you haven’t already. Having all your veggies prepped and ready to go makes assembling the salad a breeze.

    Step 3: Make the Dressing

    In a small mixing bowl, whisk together the soy sauce, rice vinegar, sugar, and sesame oil until the sugar is completely dissolved. This dressing is the secret to the salad’s irresistible flavor, so don’t skip this step!

    Step 4: Assemble the Salad

    In a large serving bowl, layer the shredded lettuce, followed by the somen noodles, and then the julienned vegetables. Drizzle the dressing over the top and sprinkle with sesame seeds. Tip: For the best flavor, let the salad sit for about 10 minutes before serving to allow the noodles to absorb the dressing.

    Step 5: Serve and Enjoy

    Give the salad a gentle toss right before serving to ensure every bite is perfectly dressed. Serve chilled for the most refreshing experience. Tip: For an extra crunch, add some toasted sesame seeds or crushed peanuts on top.

    Tips and Tricks

    To take your somen salad to the next level, consider these advanced tips. First, for a deeper flavor, let the dressing sit for an hour before using it. This allows the flavors to meld together beautifully. Second, if you’re adding protein like chicken or shrimp, marinate it in a bit of the dressing before cooking to infuse it with flavor. Lastly, for a more colorful presentation, use a mix of purple and green cabbage instead of lettuce. These small tweaks can make a big difference in the overall taste and appearance of your dish.

    Recipe Variations

    • Add grilled chicken or shrimp for a protein-packed version.
    • Swap the somen noodles for soba noodles for a heartier texture.
    • Include avocado slices for a creamy, rich addition.
    • Top with a soft-boiled egg for extra richness.
    • Use a spicy mayo drizzle for those who like a bit of heat.

    Frequently Asked Questions

    Can I make this salad ahead of time?

    Absolutely! You can prep all the components a day in advance and store them separately in the fridge. Just assemble and add the dressing right before serving to keep the noodles from getting soggy.

    Is there a gluten-free version of this recipe?

    Yes, you can use gluten-free soy sauce and rice noodles to make this dish gluten-free. Just be sure to check all your ingredients to ensure they meet your dietary needs.

    Can I add other vegetables to the salad?

    Definitely! Feel free to throw in any veggies you have on hand. Bell peppers, radishes, and snap peas would all be great additions. The more colorful, the better!

    Summary

    This somen salad is a light, refreshing dish that’s perfect for summer. With its crisp vegetables, tender noodles, and flavorful dressing, it’s sure to become a favorite. Plus, it’s highly customizable, so you can make it your own. Give it a try and enjoy a taste of summer in every bite!

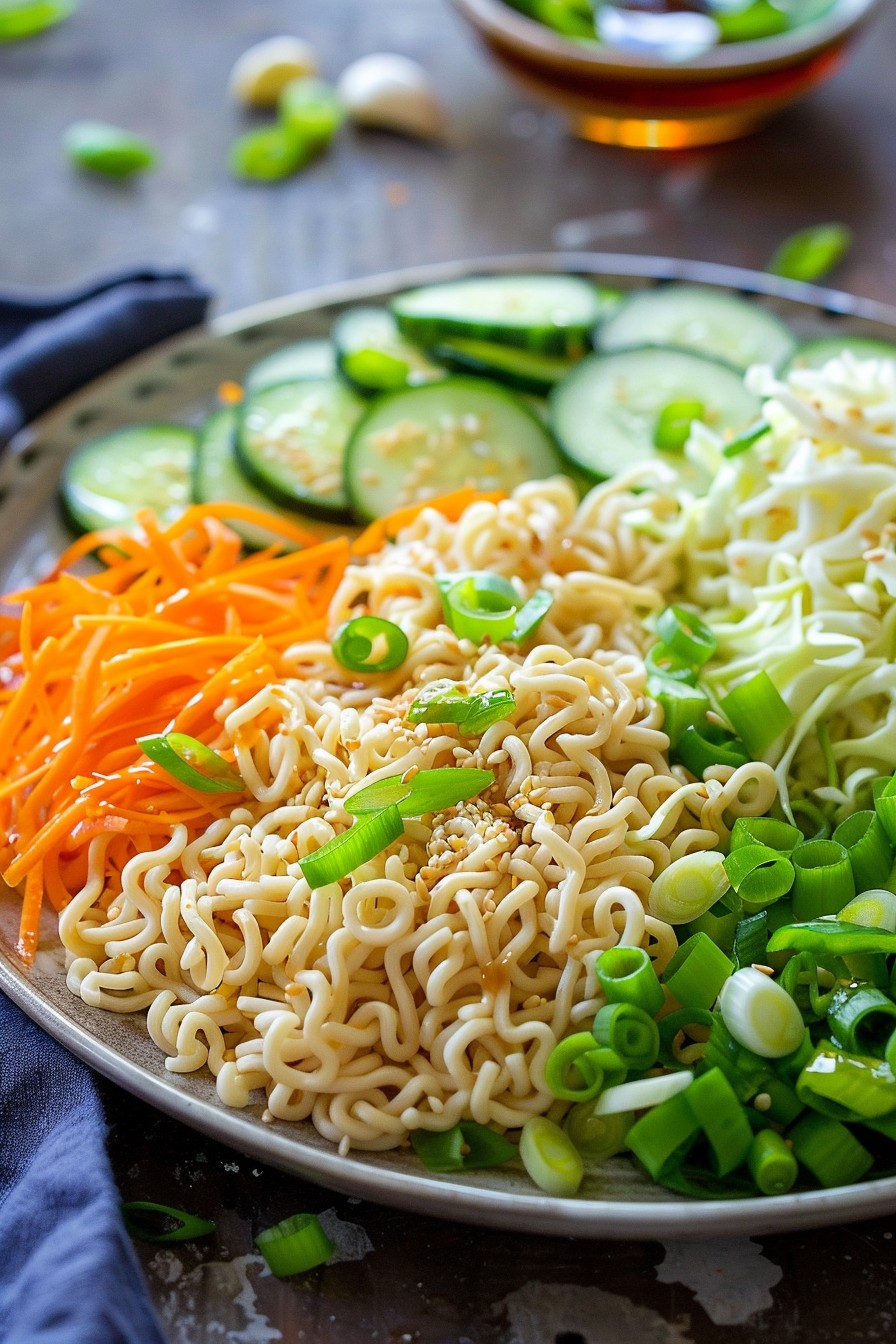
  • Oriental Salad Ramen Recipe: A Crunchy Twist on a Classic

    Oriental Salad Ramen Recipe: A Crunchy Twist on a Classic

    Venture into the world of flavors with this Oriental Salad Ramen recipe that combines the crunch of fresh vegetables with the savory depth of ramen. Perfect for a quick lunch or a light dinner, this dish is a delightful way to enjoy ramen beyond the broth.

    Why This Recipe Works

    • Combines the convenience of instant ramen with the freshness of a salad for a balanced meal.
    • The dressing adds a tangy and slightly sweet flavor that elevates the dish.
    • Customizable with your favorite vegetables and proteins for endless variations.

    Ingredients

    • 2 packs of instant ramen noodles (seasoning packets discarded)
    • 2 cups of shredded cabbage
    • 1 cup of shredded carrots
    • 1/2 cup of sliced cucumbers
    • 1/4 cup of chopped green onions
    • 2 tbsp of sesame oil
    • 2 tbsp of soy sauce
    • 1 tbsp of honey
    • 1 tsp of grated ginger
    • 1 clove of garlic, minced

    Equipment Needed

    • Large mixing bowl
    • Small whisk or fork
    • Pot for boiling water
    • Colander

    Instructions

    Oriental Salad Ramen Recipe

    Step 1: Prepare the Noodles

    Bring a pot of water to a boil and cook the ramen noodles according to the package instructions, omitting the seasoning packet. Drain the noodles in a colander and rinse under cold water to stop the cooking process. This ensures your noodles stay firm and don’t turn mushy in the salad.

    Step 2: Mix the Dressing

    In a small bowl, whisk together the sesame oil, soy sauce, honey, grated ginger, and minced garlic until well combined. This dressing is the secret to the salad’s addictive flavor, so make sure it’s thoroughly mixed.

    Step 3: Combine the Salad

    In a large mixing bowl, toss the cooled noodles with the shredded cabbage, carrots, cucumbers, and green onions. Pour the dressing over the salad and toss until everything is evenly coated. The vibrant colors of the vegetables make this dish as visually appealing as it is tasty.

    Step 4: Let It Marinate

    Allow the salad to sit for at least 10 minutes before serving. This brief marinating time lets the flavors meld together beautifully, enhancing the overall taste of the dish.

    Step 5: Serve and Enjoy

    Divide the salad into bowls and serve immediately. For an extra crunch, sprinkle some sesame seeds on top before serving. This dish is best enjoyed fresh but can be refrigerated for a short time if needed.

    Tips and Tricks

    For those looking to take this Oriental Salad Ramen to the next level, consider adding grilled chicken or shrimp for a protein boost. Toasting the sesame seeds before sprinkling them on top can also add a deeper flavor. If you prefer a spicier kick, a dash of chili oil or sriracha can be mixed into the dressing. Remember, the key to a great salad is in the freshness of the ingredients, so try to use the crispest vegetables you can find.

    Recipe Variations

    • Add sliced avocado for a creamy texture and healthy fats.
    • Swap the honey for maple syrup for a vegan-friendly version.
    • Include mandarin orange segments for a sweet and tangy twist.
    • Use rice noodles instead of ramen for a gluten-free option.
    • Top with a soft-boiled egg for added richness.

    Frequently Asked Questions

    Can I make this salad ahead of time?

    Yes, you can prepare the salad a few hours in advance, but it’s best to add the dressing just before serving to keep the vegetables crisp. If you do dress it ahead, the noodles may absorb the dressing and soften, which changes the texture but not necessarily the taste.

    Is there a substitute for sesame oil?

    While sesame oil adds a distinct flavor, you can use olive oil or avocado oil in a pinch. The taste will be different, but the salad will still be delicious. For a closer flavor profile, try adding a teaspoon of tahini to the dressing.

    How can I add more protein to this dish?

    Grilled chicken, shrimp, tofu, or even edamame are great protein additions. Just cook your protein of choice separately and toss it in with the salad for a more filling meal.

    Summary

    This Oriental Salad Ramen recipe is a quick, flavorful, and versatile dish that’s perfect for any occasion. With its combination of crunchy vegetables, savory dressing, and satisfying noodles, it’s a meal that’s sure to please.

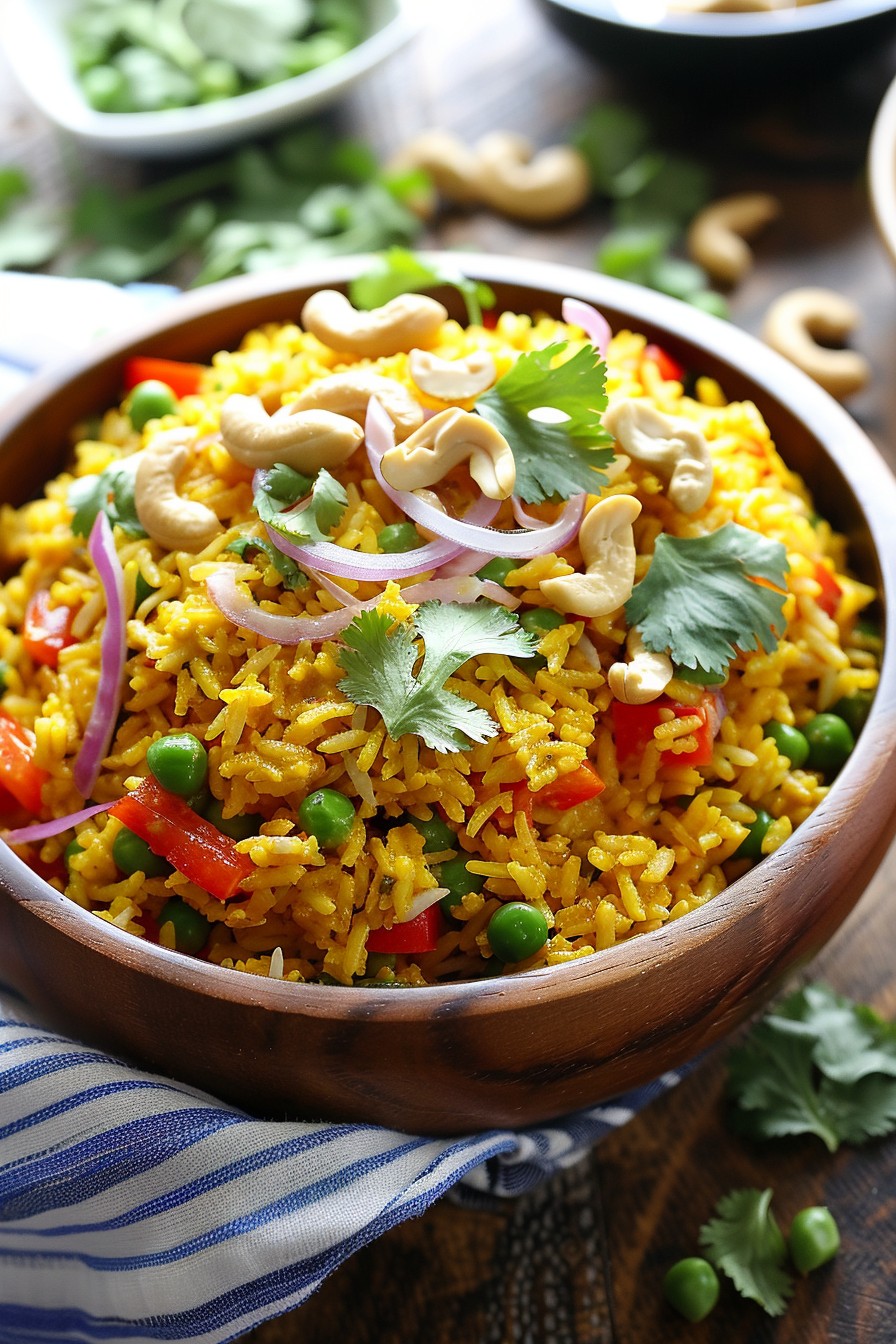
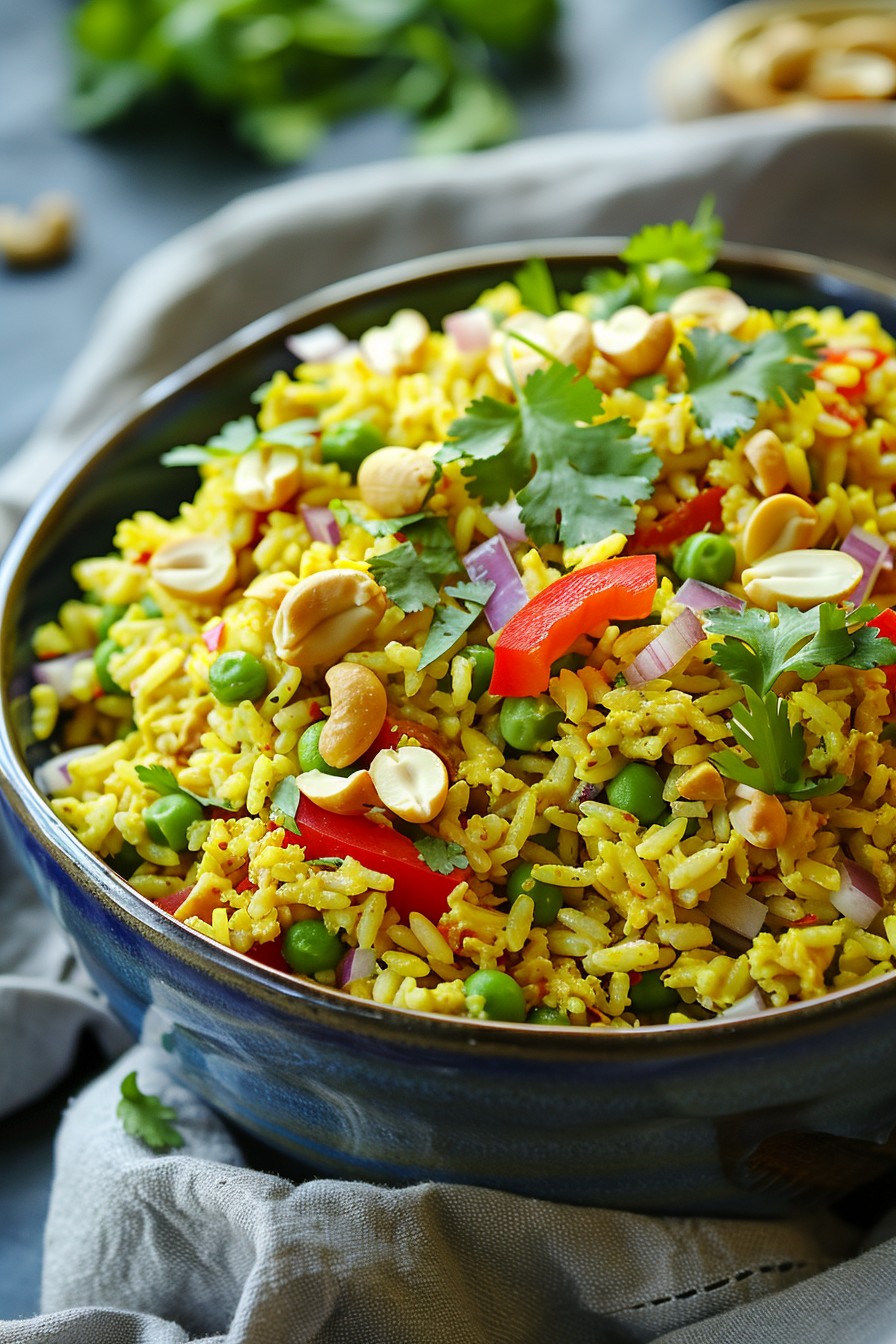
  • Curried Rice Salad: A Flavor Fiesta in Every Bite!

    Curried Rice Salad: A Flavor Fiesta in Every Bite!

    Every now and then, a recipe comes along that’s so vibrant and packed with flavor, it practically dances off the plate. This Curried Rice Salad is that dish—a delightful mix of textures and tastes that’ll make your taste buds sing. Perfect for picnics, potlucks, or just spicing up your lunch routine, this salad is a guaranteed crowd-pleaser.

    Why This Recipe Works

    • The combination of warm curry powder and cool, crisp vegetables creates a balance of flavors that’s utterly addictive.
    • It’s a fantastic make-ahead dish, as the flavors meld and deepen when left to sit, making it even more delicious the next day.
    • This salad is incredibly versatile, allowing for endless variations based on what you have in your pantry or fridge.
    • It’s a great way to use up leftover rice, transforming something plain into a dish that’s anything but.
    • The addition of nuts or seeds adds a satisfying crunch, elevating the texture to new heights.

    Ingredients

    • 2 cups cooked rice, cooled (preferably day-old for the best texture)
    • 1 tbsp curry powder (adjust to taste)
    • 1/2 cup mayonnaise (or Greek yogurt for a lighter version)
    • 1 tbsp lemon juice (freshly squeezed for the brightest flavor)
    • 1/2 cup diced red bell pepper (for a sweet crunch)
    • 1/4 cup finely chopped red onion (soaked in cold water for 10 minutes to mellow the bite)
    • 1/2 cup frozen peas, thawed (no need to cook, they’ll soften in the salad)
    • 1/4 cup chopped cilantro (for a fresh, herby note)
    • Salt and pepper to taste
    • 1/4 cup roasted cashews or almonds (for that essential crunch)

    Equipment Needed

    • Large mixing bowl
    • Small bowl for dressing
    • Measuring cups and spoons
    • Knife and cutting board
    • Spatula or large spoon for mixing

    Instructions

    Recipe Curried Rice Salad

    Step 1: Prep Your Ingredients

    Start by ensuring all your ingredients are prepped and ready to go. Dice the red bell pepper into small, bite-sized pieces, finely chop the red onion, and give the cilantro a rough chop. If you’re using nuts, give them a rough chop as well for even distribution throughout the salad. Having everything prepped makes the assembly process a breeze.

    Step 2: Make the Dressing

    In a small bowl, whisk together the mayonnaise (or Greek yogurt), curry powder, and lemon juice until smooth. The curry powder should be fully incorporated, with no lumps. Taste the dressing and adjust the seasoning with salt and pepper. Remember, the dressing will coat all the ingredients, so make sure it’s seasoned to your liking.

    Step 3: Combine the Salad

    In a large mixing bowl, combine the cooled rice, diced red bell pepper, chopped red onion, thawed peas, and cilantro. Pour the dressing over the top and gently mix everything together until well coated. Be careful not to overmix, as you don’t want the rice to become mushy. The goal is a uniform distribution of dressing without compromising the texture of the rice.

    Step 4: Add the Crunch

    Fold in the chopped nuts last to preserve their crunch. This step is crucial for adding texture to the salad, making each bite interesting. If you’re not serving the salad immediately, you might want to add the nuts right before serving to ensure they stay crisp.

    Step 5: Chill and Serve

    Cover the salad and let it chill in the refrigerator for at least 30 minutes before serving. This resting time allows the flavors to meld together beautifully. Serve the salad cold, garnished with a little extra cilantro or nuts on top for presentation.

    Tips and Tricks

    For an even more flavorful salad, consider toasting the curry powder in a dry skillet for a minute before adding it to the dressing. This step wakes up the spices, releasing their essential oils and deepening the flavor. If you’re looking for a lighter version, Greek yogurt is a fantastic substitute for mayonnaise, offering a tangy contrast to the warm spices. Don’t skip soaking the red onion; it really does take the edge off, making it more palatable for those who are sensitive to raw onion. Lastly, if you’re making this salad ahead of time, hold off on adding the nuts until just before serving to keep them crunchy.

    Recipe Variations

    • For a protein-packed version, add diced grilled chicken or chickpeas.
    • Swap the peas for diced cucumber or cherry tomatoes for a different texture and flavor profile.
    • Use quinoa or couscous instead of rice for a twist on the grain.
    • Add a handful of raisins or dried cranberries for a sweet contrast to the savory curry.
    • For a spicy kick, include a diced jalapeño or a dash of cayenne pepper in the dressing.

    Frequently Asked Questions

    Can I use brown rice instead of white rice? Absolutely! Brown rice adds a nutty flavor and extra fiber, making it a healthy alternative. Just keep in mind that it might make the salad a bit denser.

    How long does this salad keep in the fridge? Stored in an airtight container, this salad will keep for up to 3 days. The flavors continue to develop, making it even more delicious over time.

    Can I make this salad vegan? Yes, simply substitute the mayonnaise with a vegan mayo or additional Greek yogurt alternative. Ensure your curry powder is vegan-friendly, as some brands may contain trace animal products.

    Summary

    This Curried Rice Salad is a vibrant, flavorful dish that’s perfect for any occasion. With its easy preparation, versatility, and delicious taste, it’s sure to become a staple in your recipe repertoire. Whether you’re looking for a quick lunch or a standout side dish, this salad delivers on all fronts.

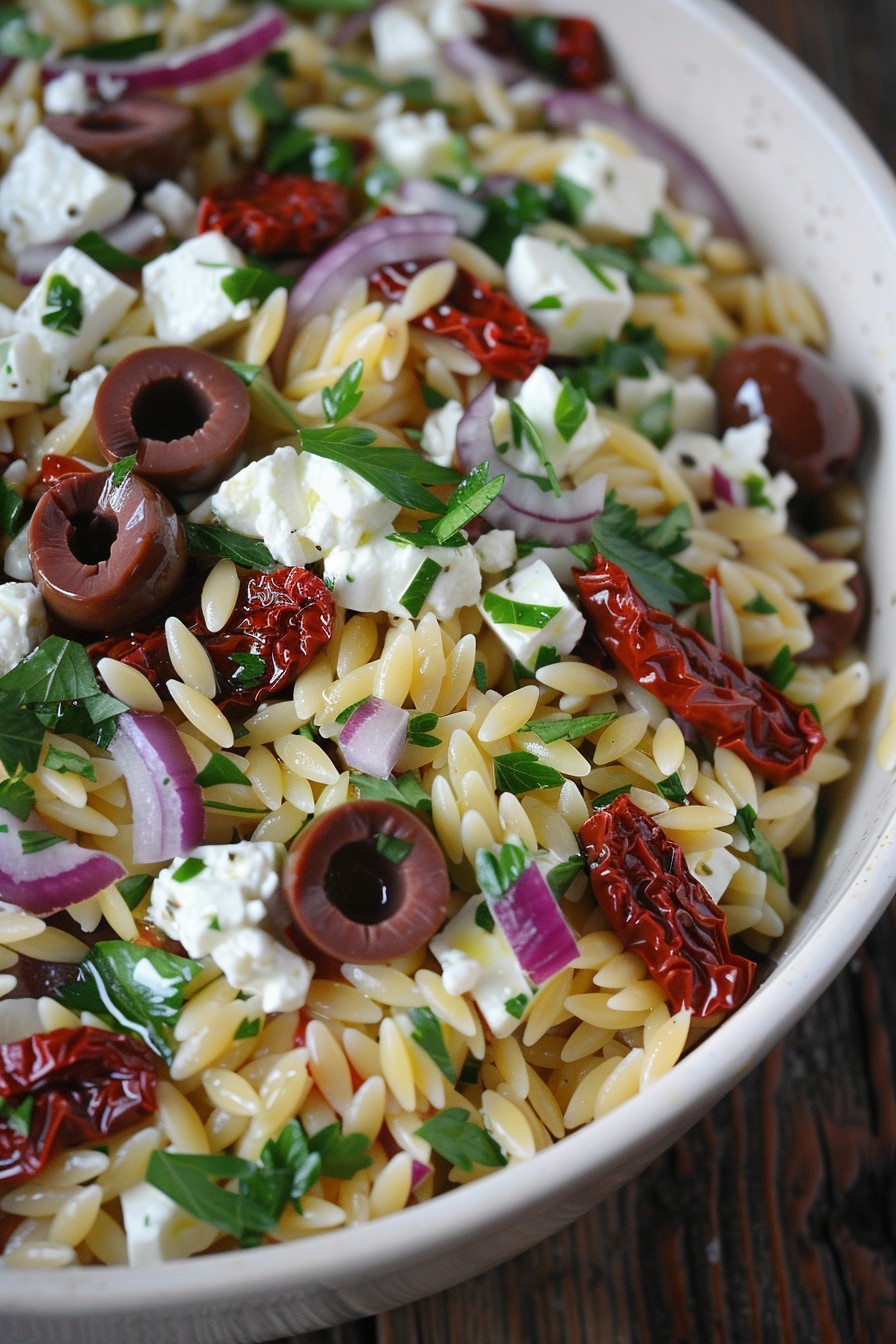
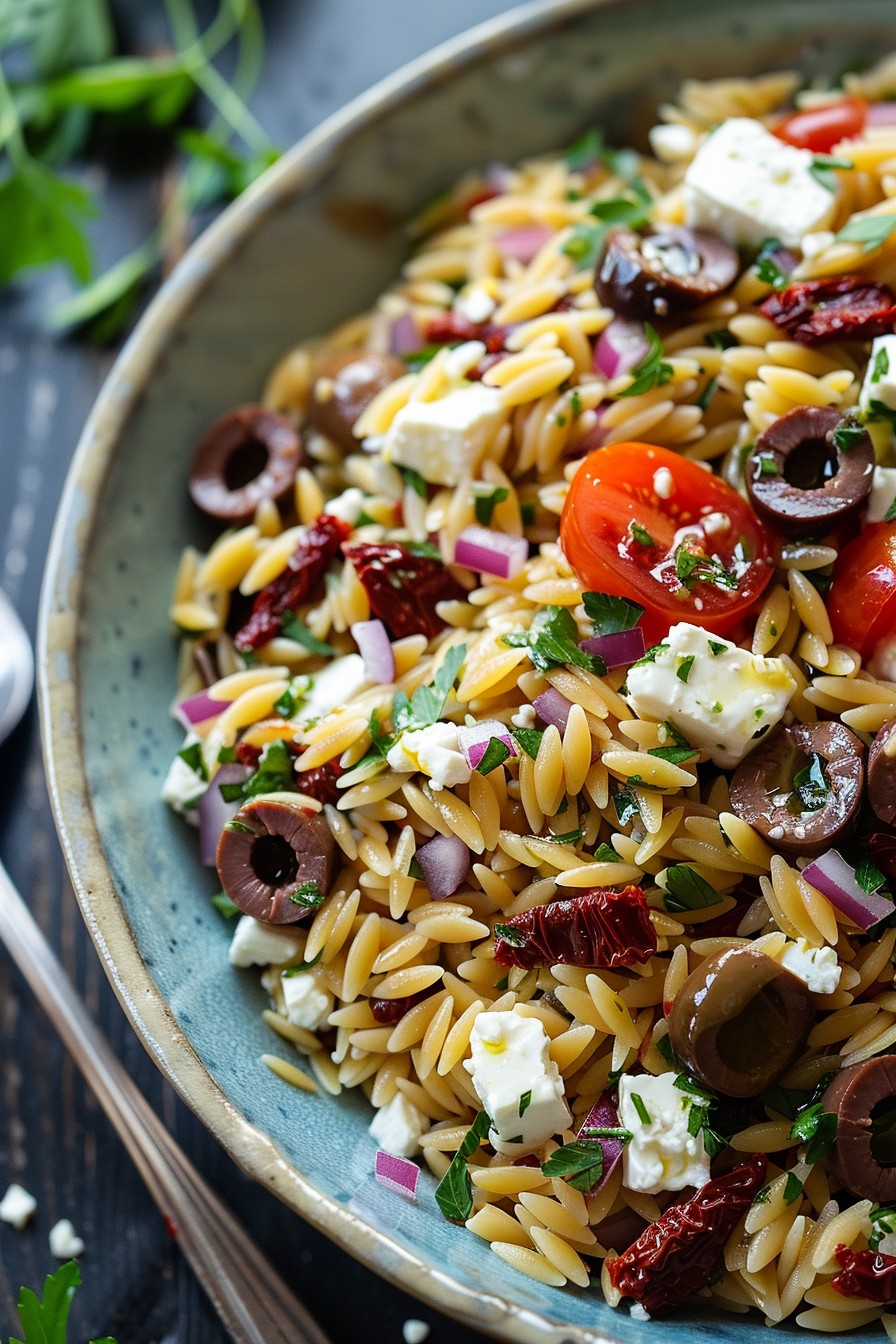
  • Mediterranean Orzo Pasta Salad Recipe: A Zesty Summer Delight

    Mediterranean Orzo Pasta Salad Recipe: A Zesty Summer Delight

    Greetings, food lovers! Get ready to dive into a bowl of sunshine with this Mediterranean Orzo Pasta Salad. It’s packed with vibrant flavors, fresh ingredients, and a zesty dressing that’ll transport you straight to the Mediterranean coast. Perfect for picnics, potlucks, or a refreshing weeknight dinner.

    Why This Recipe Works

    • Flavor Bomb: The combination of tangy feta, briny olives, and sweet sun-dried tomatoes creates a symphony of flavors in every bite.
    • Texture Heaven: Orzo’s unique shape and texture make it the perfect base for a salad, offering a delightful chewiness that pairs wonderfully with crisp veggies.
    • Quick & Easy: With minimal cooking and prep time, this recipe is a breeze to whip up, making it ideal for busy days.
    • Versatile: Serve it as a main, a side, or even a hearty snack. It’s delicious warm, cold, or at room temperature.

    Ingredients

    • 1 cup orzo pasta
    • 2 cups water
    • 1/2 cup crumbled feta cheese
    • 1/4 cup sliced Kalamata olives
    • 1/4 cup chopped sun-dried tomatoes
    • 1/4 cup chopped red onion
    • 1/4 cup chopped fresh parsley
    • 2 tbsp olive oil
    • 1 tbsp lemon juice
    • 1 tsp dried oregano
    • Salt and pepper to taste

    Equipment Needed

    • Medium saucepan
    • Colander
    • Large mixing bowl
    • Whisk
    • Measuring cups and spoons

    Instructions

    Mediterranean Orzo Pasta Salad Recipe

    Step 1: Cook the Orzo

    Bring 2 cups of water to a boil in a medium saucepan. Add the orzo pasta and a pinch of salt. Cook for 8-10 minutes, stirring occasionally, until the orzo is al dente. Drain the orzo in a colander and rinse under cold water to stop the cooking process. Tip: Rinsing the orzo prevents it from sticking together and cools it down quickly for the salad.

    Step 2: Prepare the Dressing

    In a large mixing bowl, whisk together the olive oil, lemon juice, dried oregano, salt, and pepper. This simple dressing will coat the orzo and veggies beautifully, adding a bright and herby flavor. Tip: Let the dressing sit for a few minutes to allow the flavors to meld together before adding the other ingredients.

    Step 3: Combine the Ingredients

    Add the cooled orzo to the bowl with the dressing. Toss to coat evenly. Then, gently fold in the feta cheese, Kalamata olives, sun-dried tomatoes, red onion, and fresh parsley. The key here is to mix gently to keep the ingredients intact and distribute them evenly throughout the salad.

    Step 4: Chill and Serve

    Cover the bowl with plastic wrap and refrigerate for at least 30 minutes to allow the flavors to develop. This step is crucial for achieving the best taste. Serve chilled or at room temperature, garnished with extra parsley if desired.

    Tips and Tricks

    For an extra flavor boost, consider toasting the orzo in a dry skillet before boiling it. This adds a nutty depth to the pasta. If you’re short on time, you can skip the chilling step, but the salad tastes best when the flavors have had time to marry. For a creamier texture, add a tablespoon of Greek yogurt to the dressing. Always taste and adjust the seasoning before serving, as the saltiness of the feta and olives can vary.

    Recipe Variations

    • Protein Power: Add grilled chicken, shrimp, or chickpeas for a protein-packed meal.
    • Veggie Delight: Toss in cucumbers, bell peppers, or artichoke hearts for extra crunch and color.
    • Cheese Swap: Try goat cheese or mozzarella pearls instead of feta for a different flavor profile.
    • Grain Alternative: Substitute orzo with quinoa or couscous for a gluten-free option.

    Frequently Asked Questions

    Can I make this salad ahead of time?

    Absolutely! This salad actually tastes better the next day as the flavors have more time to meld. Just store it in an airtight container in the fridge for up to 3 days. Give it a quick stir before serving to refresh the ingredients.

    Is there a substitute for orzo?

    Yes, if you can’t find orzo or prefer a different pasta, small shapes like ditalini or even rice can work well. Just adjust the cooking time according to the package instructions for the substitute you choose.

    Can I freeze this salad?

    Freezing is not recommended as the texture of the pasta and vegetables will change upon thawing, resulting in a mushy salad. It’s best enjoyed fresh or stored in the fridge for a few days.

    Summary

    This Mediterranean Orzo Pasta Salad is a vibrant, flavorful dish that’s perfect for any occasion. Easy to make and endlessly customizable, it’s sure to become a staple in your recipe collection. Enjoy the taste of the Mediterranean with every bite!

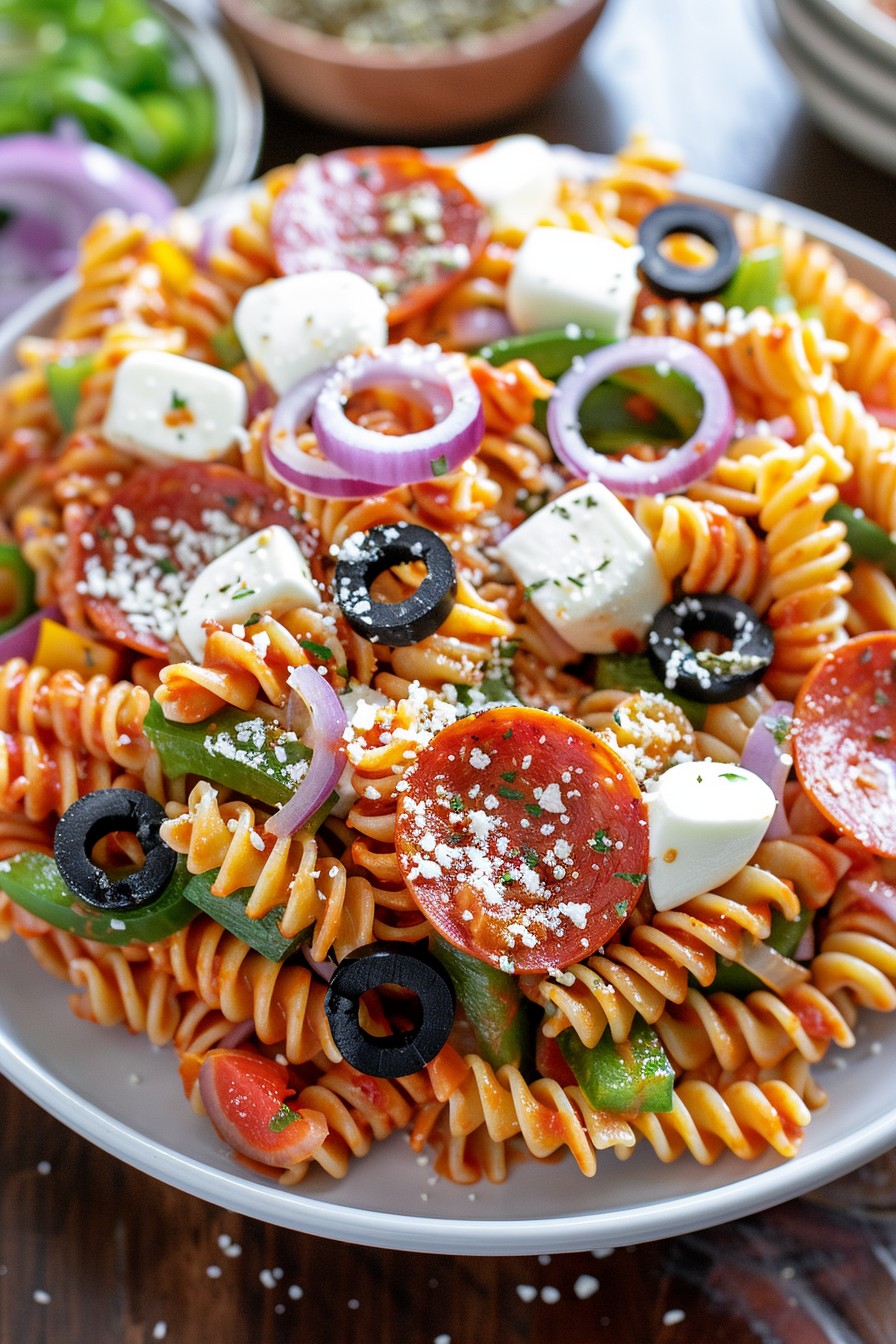
  • Pizza Pasta Salad Recipe: A Fun Twist on Two Classics

    Pizza Pasta Salad Recipe: A Fun Twist on Two Classics

    How about combining the best of both worlds into one delicious dish? This Pizza Pasta Salad is your answer to those days when you can’t decide between pizza and pasta. It’s a crowd-pleaser that’s perfect for picnics, potlucks, or just a fun family dinner.

    Why This Recipe Works

    • It’s a unique combination of two beloved dishes, offering the flavors of pizza in the form of a refreshing pasta salad.
    • The recipe is versatile, allowing for endless customization based on your favorite pizza toppings.
    • It’s easy to make and can be prepared ahead of time, making it perfect for busy schedules.
    • The dressing doubles as a marinade, infusing the pasta with rich, pizza-like flavors.
    • It’s a great way to sneak in some veggies for the picky eaters in your life.

    Ingredients

    • 1 lb rotini pasta
    • 1 cup pepperoni slices, quartered
    • 1 cup mozzarella cheese, cubed
    • 1/2 cup black olives, sliced
    • 1/2 cup green bell pepper, diced
    • 1/2 cup red onion, thinly sliced
    • 1/4 cup grated Parmesan cheese
    • 1/2 cup Italian dressing
    • 1/4 cup pizza sauce
    • 1 tsp dried oregano
    • 1/2 tsp garlic powder
    • Salt and pepper to taste

    Equipment Needed

    • Large pot
    • Colander
    • Large mixing bowl
    • Measuring cups and spoons
    • Knife and cutting board

    Instructions

    Pizza Pasta Salad Recipe

    Step 1: Cook the Pasta

    Bring a large pot of salted water to a boil. Add the rotini pasta and cook according to package instructions until al dente, usually about 8-10 minutes. Drain the pasta in a colander and rinse under cold water to stop the cooking process. This ensures your salad stays fresh and not mushy.

    Step 2: Prepare the Toppings

    While the pasta cooks, quarter the pepperoni slices, cube the mozzarella cheese, slice the black olives, dice the green bell pepper, and thinly slice the red onion. Having all your toppings prepped and ready makes assembling the salad a breeze.

    Step 3: Make the Dressing

    In a small bowl, whisk together the Italian dressing, pizza sauce, dried oregano, garlic powder, salt, and pepper. This dressing is the secret to giving your pasta salad that unmistakable pizza flavor.

    Step 4: Combine Everything

    In a large mixing bowl, combine the cooled pasta, prepared toppings, and dressing. Toss everything together until well coated. The key here is to ensure every bite is as flavorful as the last.

    Step 5: Chill and Serve

    Cover the bowl and refrigerate the salad for at least an hour before serving. This allows the flavors to meld together beautifully. Just before serving, give it a quick toss and sprinkle with grated Parmesan cheese for an extra flavor boost.

    Tips and Tricks

    For an even more authentic pizza taste, consider adding some sliced mushrooms or jalapeños if you like a bit of heat. If you’re short on time, you can use store-bought Italian dressing, but homemade will always taste better. To make this dish vegetarian, simply omit the pepperoni and add more veggies like cherry tomatoes or artichoke hearts. For a healthier version, use whole wheat pasta and low-fat cheese. Always taste and adjust the seasoning before serving, as pasta tends to absorb flavors.

    Recipe Variations

    • Meat Lover’s Version: Add cooked and crumbled Italian sausage or bacon bits along with the pepperoni.
    • Veggie Delight: Skip the meat and load up on your favorite vegetables like bell peppers, onions, olives, and mushrooms.
    • Cheese Galore: Mix in different types of cheese like cheddar, provolone, or feta for a richer taste.
    • Spicy Kick: Add some red pepper flakes or diced jalapeños to the dressing for a spicy version.
    • BBQ Chicken Pizza Pasta Salad: Use BBQ sauce instead of pizza sauce and add grilled chicken pieces.

    Frequently Asked Questions

    Can I make this salad ahead of time?

    Absolutely! This salad actually tastes better after it’s been chilled for a few hours as the flavors have more time to meld together. Just be sure to add the Parmesan cheese right before serving to keep it fresh.

    How long will this pasta salad last in the fridge?

    Stored in an airtight container, this pasta salad will last for up to 3 days in the refrigerator. After that, the pasta may start to get a bit soggy.

    Can I use a different type of pasta?

    Yes, you can use any short pasta like penne, farfalle, or shells. Just keep in mind that cooking times may vary depending on the pasta shape.

    Summary

    This Pizza Pasta Salad is a fun and delicious twist on two classic dishes. It’s easy to make, customizable, and perfect for any occasion. Whether you’re a meat lover or a veggie enthusiast, there’s a variation for everyone to enjoy.