Category: Seafood Salad Recipes

  • Japanese Tuna Salad Recipe: A Fresh Twist on a Classic

    Japanese Tuna Salad Recipe: A Fresh Twist on a Classic

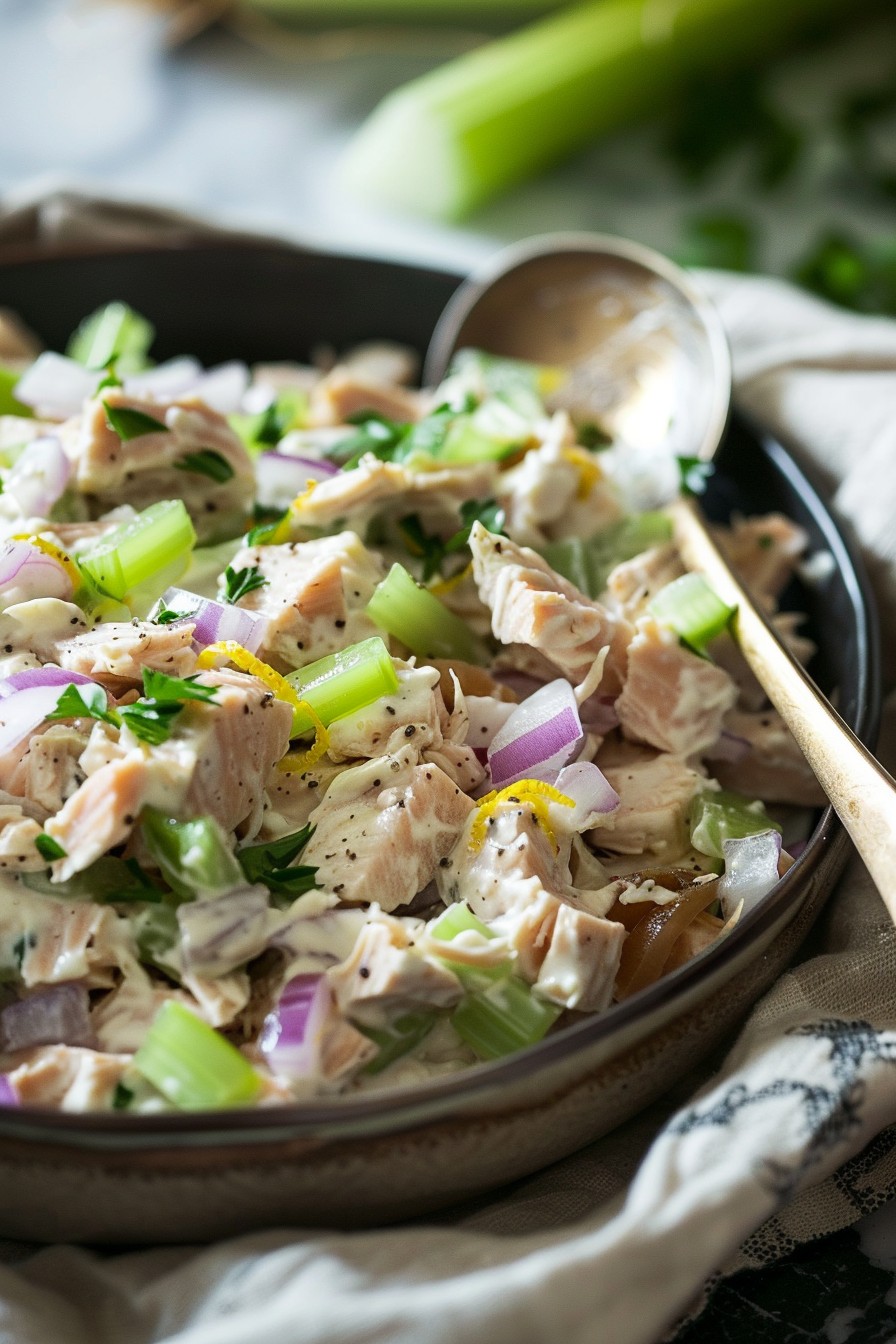
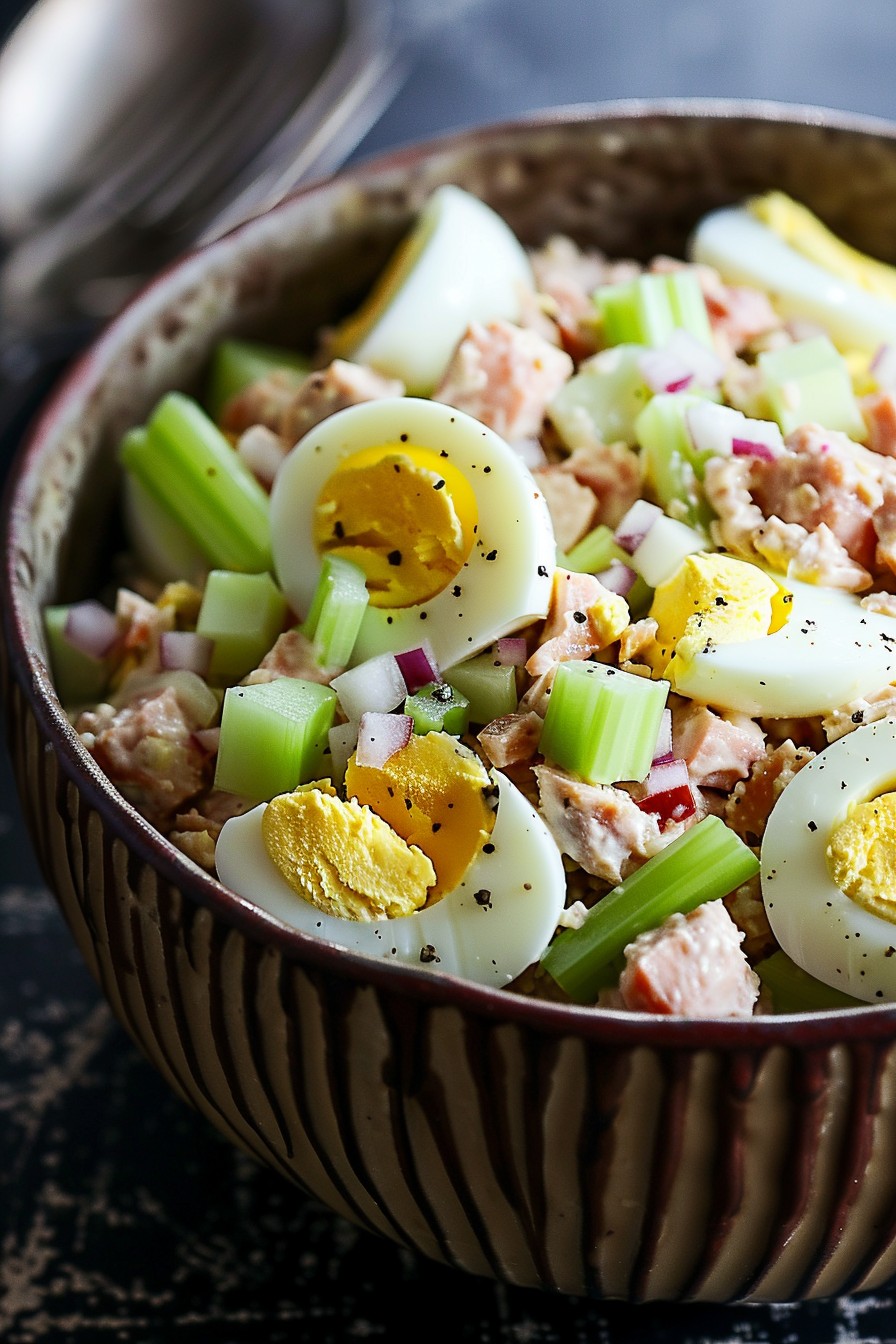
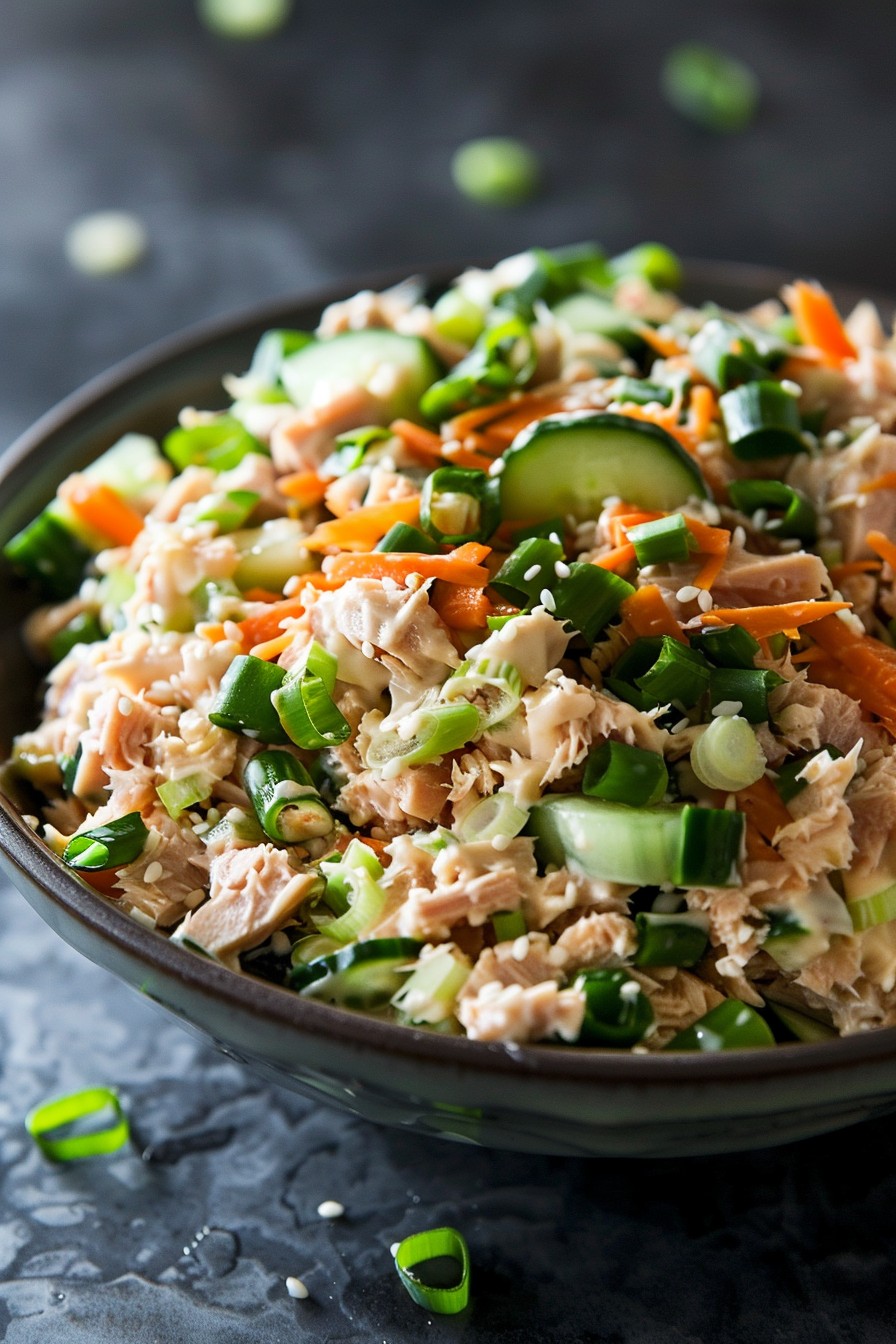
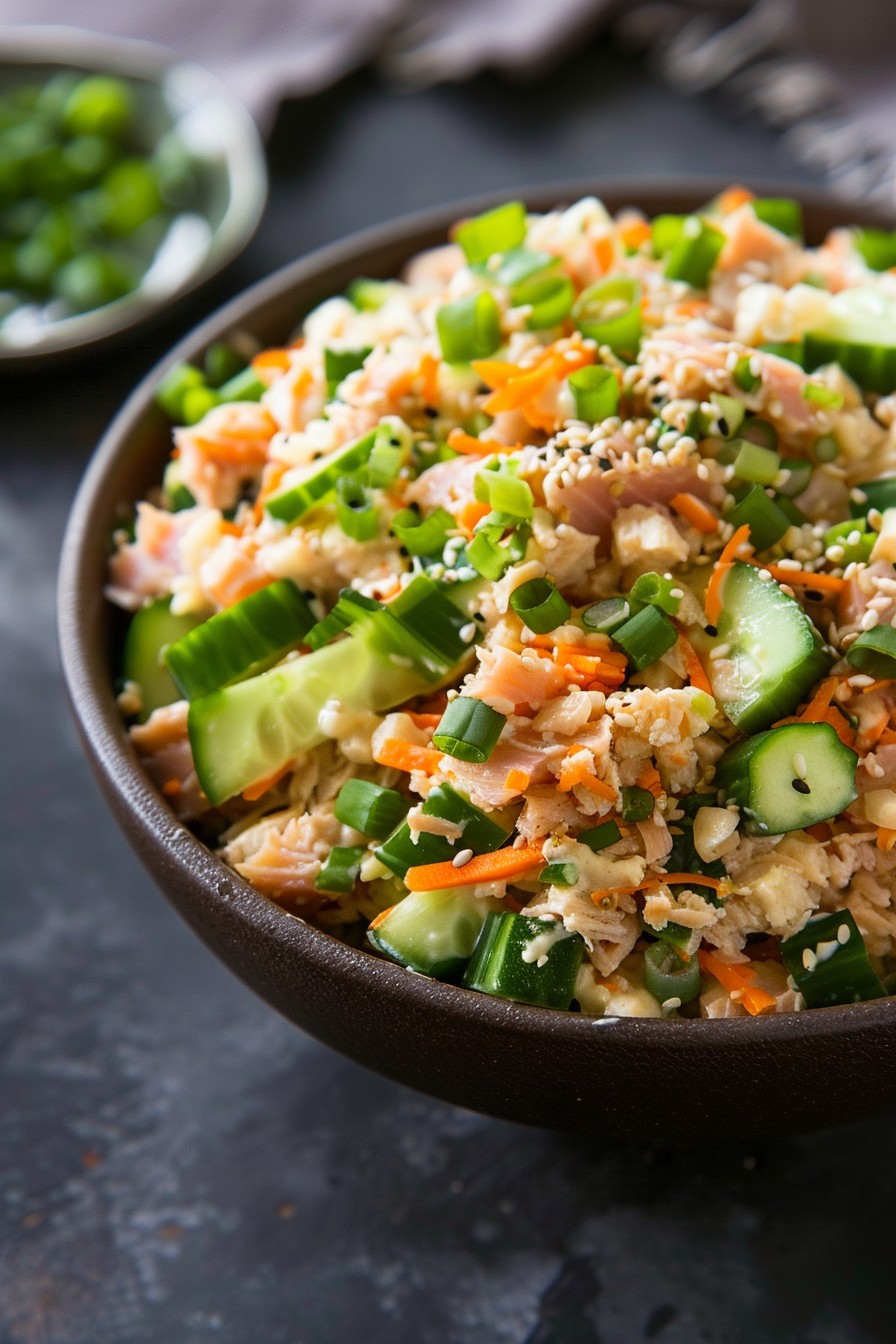
    How about we take your tuna salad game to the next level? This Japanese-inspired version is packed with umami, crunch, and a hint of sweetness, making it anything but ordinary. Perfect for sandwiches, sushi rolls, or just by itself, this recipe is a must-try for anyone looking to spice up their lunch routine.

    Why This Recipe Works

    • The combination of soy sauce and sesame oil adds a depth of flavor that’s hard to resist.
    • Crunchy cucumbers and carrots provide a refreshing contrast to the tender tuna.
    • It’s incredibly versatile—serve it as a salad, in a sandwich, or even as a sushi filling.
    • Quick and easy to make, perfect for meal prep or a last-minute lunch.
    • Healthy and packed with protein, making it a great option for fitness enthusiasts.

    Ingredients

    • 2 cans (5 oz each) tuna in water, drained
    • 1/4 cup mayonnaise
    • 1 tbsp soy sauce
    • 1 tsp sesame oil
    • 1/2 cup cucumber, finely diced
    • 1/2 cup carrot, finely grated
    • 2 green onions, thinly sliced
    • 1 tsp sugar
    • 1/2 tsp grated ginger

    Equipment Needed

    • Mixing bowl
    • Measuring cups and spoons
    • Grater
    • Knife and cutting board

    Instructions

    Japanese Tuna Salad Recipe

    Step 1: Prepare the Vegetables

    Start by finely dicing the cucumber and grating the carrot. Thinly slice the green onions. The key here is to get all your veggies prepped and ready to go, ensuring a smooth cooking process. Tip: For extra crunch, you can leave the cucumber seeds in, but removing them will prevent your salad from getting too watery.

    Step 2: Mix the Dressing

    In a small bowl, whisk together the mayonnaise, soy sauce, sesame oil, sugar, and grated ginger until smooth. This dressing is the heart of the recipe, so make sure it’s well combined. The sesame oil adds a nutty flavor that’s signature to Japanese cuisine, so don’t skip it!

    Step 3: Combine Tuna and Vegetables

    In a large mixing bowl, flake the drained tuna with a fork. Add the prepared cucumber, carrot, and green onions. Gently toss to combine. The goal is to keep the tuna in nice, bite-sized pieces, so avoid overmixing.

    Step 4: Add the Dressing

    Pour the dressing over the tuna and vegetable mixture. Fold everything together until evenly coated. The dressing should lightly coat every piece, but there shouldn’t be any pooling at the bottom of the bowl. Tip: If you prefer a creamier salad, you can add an extra tablespoon of mayonnaise.

    Step 5: Chill and Serve

    Cover the bowl and refrigerate the salad for at least 30 minutes before serving. This allows the flavors to meld together beautifully. Serve chilled as a salad, in a sandwich, or as a filling for sushi rolls. The salad will keep in the fridge for up to 2 days, making it a great make-ahead option.

    Tips and Tricks

    For those looking to elevate their Japanese tuna salad even further, consider these tips. First, toasting sesame seeds and sprinkling them on top before serving adds a lovely texture and nutty flavor. Second, if you’re using the salad as a sushi filling, mix in a bit of sushi vinegar to the dressing for an authentic taste. Lastly, for a spicier kick, a dash of sriracha or wasabi can be mixed into the dressing. These small tweaks can make a big difference in the overall flavor profile of your dish.

    Recipe Variations

    • For a low-carb version, serve the tuna salad in lettuce wraps instead of bread.
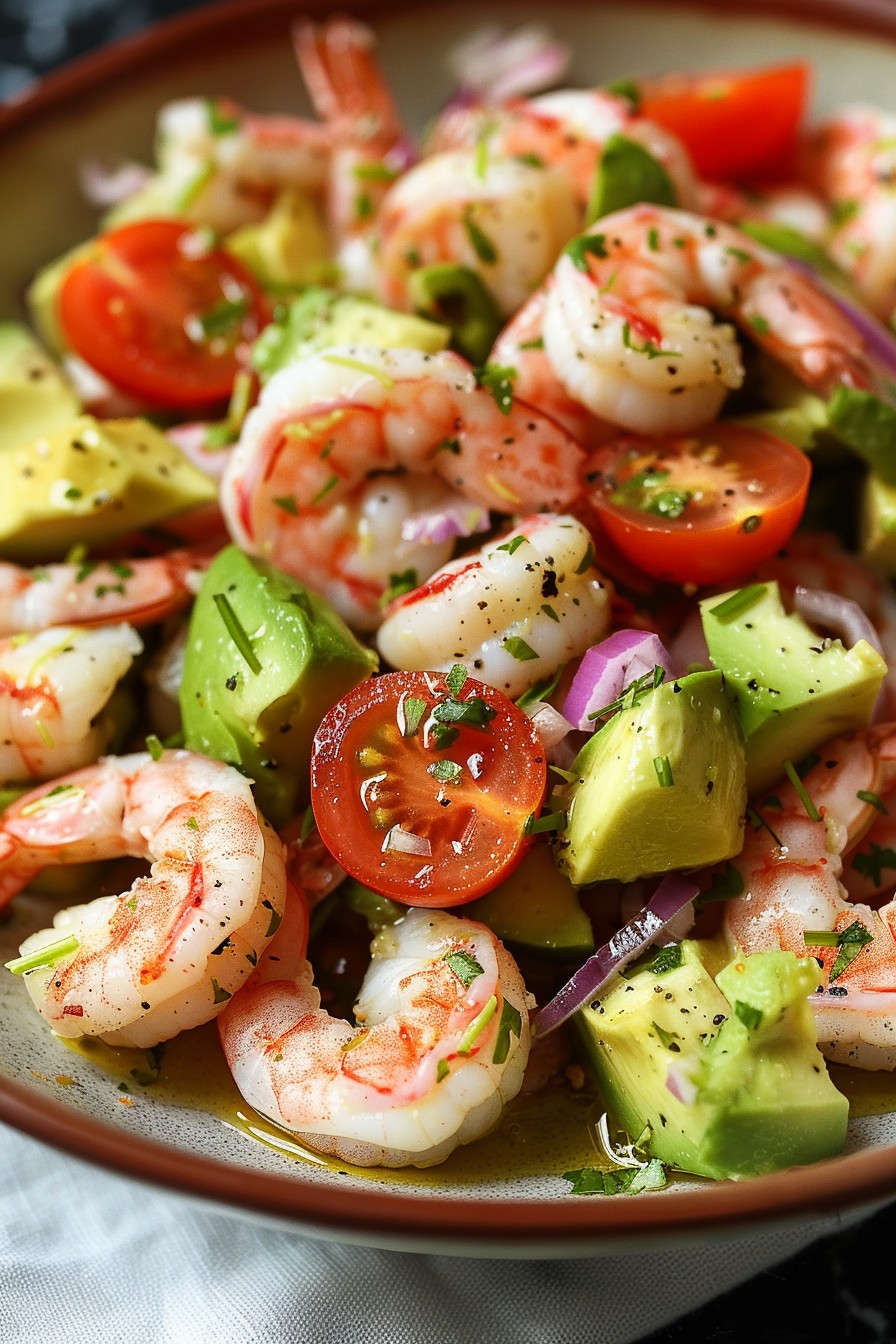
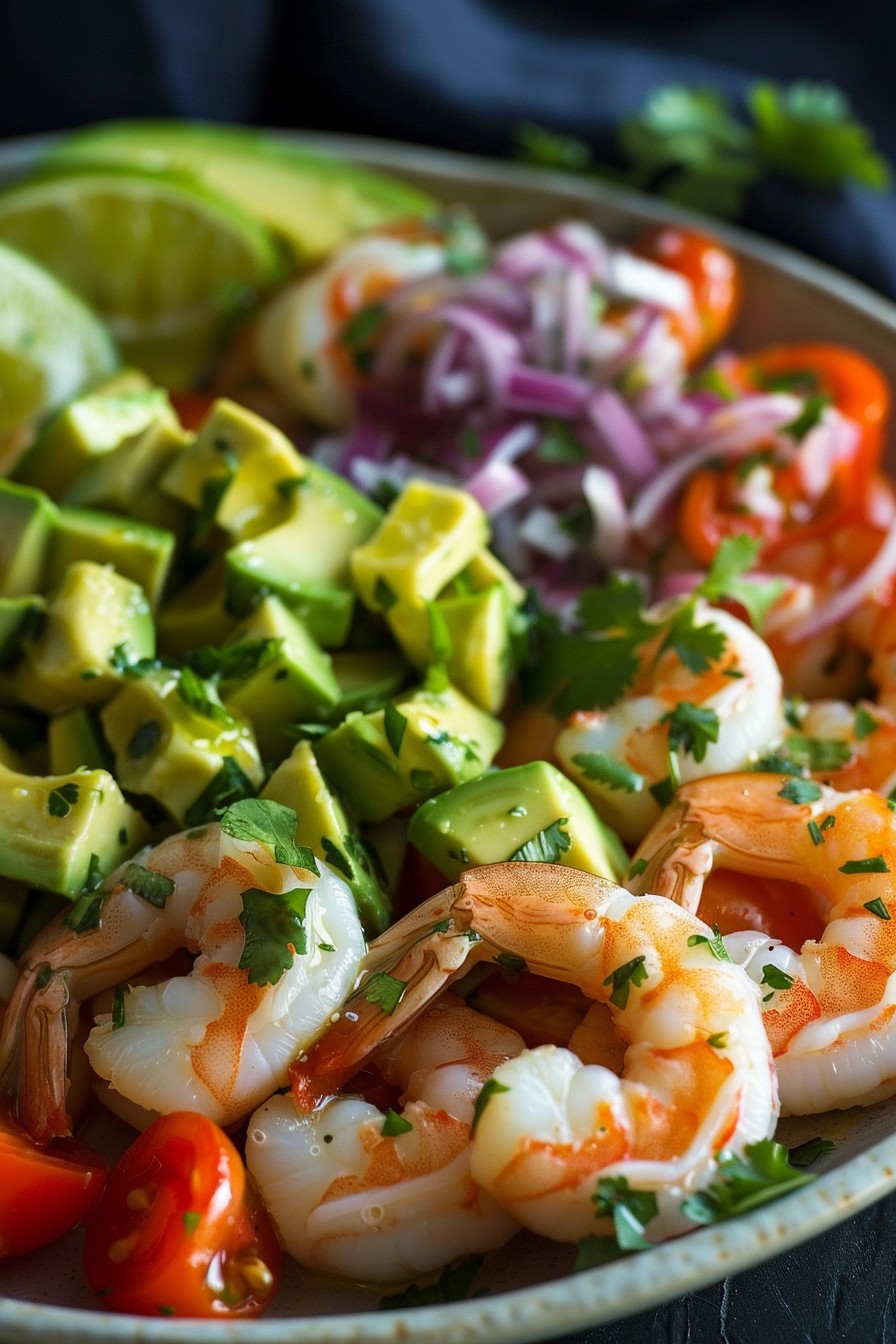
    • Add diced avocado for a creamy texture and healthy fats.
    • Swap the tuna for cooked salmon or chicken for a different protein option.
    • Incorporate seaweed salad or nori strips for an extra Japanese touch.
    • Use Greek yogurt instead of mayonnaise for a lighter dressing.

    Frequently Asked Questions

    Can I use fresh tuna instead of canned?

    Absolutely! If you have access to fresh tuna, you can cook it to your liking (medium-rare is recommended for the best texture), then flake it and use it in place of canned. Just make sure it’s cooled before mixing with the other ingredients.

    How long does this salad last in the fridge?

    This Japanese tuna salad will stay fresh in the refrigerator for up to 2 days when stored in an airtight container. After that, the vegetables may start to lose their crunch, and the flavors won’t be as vibrant.

    Can I make this recipe vegan?

    Yes, you can! Substitute the tuna with mashed chickpeas or jackfruit for a similar texture, and use vegan mayonnaise. The rest of the ingredients are already plant-based, so you’ll have a delicious vegan version of this salad.

    Summary

    This Japanese Tuna Salad is a flavorful, versatile dish that’s perfect for any occasion. With its unique blend of ingredients and easy preparation, it’s sure to become a staple in your recipe collection. Whether you’re looking for a quick lunch or a creative sushi filling, this recipe has you covered.

  • Bay Shrimp Salad Recipe: A Light and Flavorful Delight

    Bay Shrimp Salad Recipe: A Light and Flavorful Delight

    Let’s dive into a dish that’s as refreshing as a sea breeze on a hot summer day. This bay shrimp salad is not only packed with flavor but also comes together in no time, making it the perfect quick lunch or elegant appetizer.

    Why This Recipe Works

    • The combination of fresh bay shrimp and crisp vegetables offers a delightful contrast in textures.
    • A zesty lemon dressing brightens up the dish, enhancing the natural sweetness of the shrimp.
    • It’s incredibly versatile, allowing for numerous variations to suit any taste or dietary preference.
    • Quick and easy to prepare, this salad is perfect for busy weeknights or last-minute gatherings.
    • Light yet satisfying, it’s a great option for those looking for a healthy meal without sacrificing flavor.

    Ingredients

    • 1 pound bay shrimp, cooked and peeled
    • 2 cups mixed greens, washed and dried
    • 1 cucumber, diced
    • 1 avocado, sliced
    • 1/4 cup red onion, thinly sliced
    • 2 tablespoons olive oil
    • 1 tablespoon lemon juice
    • Salt and pepper to taste

    Equipment Needed

    • Large mixing bowl
    • Small whisk or fork
    • Measuring cups and spoons
    • Chef’s knife
    • Cutting board

    Instructions

    Bay Shrimp Salad Recipe

    Prepare the Dressing

    In a small bowl, whisk together the olive oil and lemon juice until well combined. Season with salt and pepper to taste. This simple dressing will bring all the flavors of the salad together beautifully.

    Combine the Salad Ingredients

    In a large mixing bowl, gently toss the mixed greens, cucumber, avocado, and red onion. The key here is to be gentle to avoid bruising the greens or mashing the avocado.

    Add the Shrimp

    Add the bay shrimp to the bowl with the salad ingredients. The shrimp should be evenly distributed throughout the salad for the perfect bite every time.

    Dress the Salad

    Drizzle the dressing over the salad and toss lightly to coat. Be sure not to overdress the salad; you want just enough to enhance the flavors without overwhelming them.

    Serve Immediately

    This salad is best enjoyed fresh, so serve it right away. If you need to prepare it in advance, keep the dressing separate until just before serving to maintain the crispness of the vegetables.

    Tips and Tricks

    For an extra burst of flavor, consider adding a pinch of garlic powder or a dash of hot sauce to the dressing. If you’re not a fan of red onion, green onions make a great substitute with a milder flavor. To make this salad more filling, add a handful of quinoa or chickpeas. Always use the freshest ingredients possible for the best taste and texture. Lastly, if you’re serving this salad at a gathering, consider presenting it in a large, clear bowl to showcase the vibrant colors.

    Recipe Variations

    • For a Mediterranean twist, add feta cheese, olives, and a sprinkle of oregano.
    • Turn it into a taco salad by serving it in a crispy tortilla bowl with a dollop of sour cream.
    • Make it a citrus delight by adding segments of orange or grapefruit for a sweet and tangy flavor.
    • For a low-carb option, replace the mixed greens with spiralized zucchini or cucumber noodles.
    • Add a crunchy element with toasted almonds or walnuts for extra texture and a nutty flavor.

    Frequently Asked Questions

    Can I use frozen shrimp for this recipe?

    Absolutely! Just make sure to thaw the shrimp completely and pat them dry before adding to the salad to prevent any excess moisture from diluting the dressing.

    How long can I store this salad in the fridge?

    This salad is best enjoyed the day it’s made, but you can store it in an airtight container in the fridge for up to one day. Keep the dressing separate if possible to maintain freshness.

    Can I make this salad vegan?

    Yes! Simply omit the shrimp and add more vegetables or a plant-based protein like tofu or tempeh. The dressing is already vegan-friendly.

    Summary

    This bay shrimp salad is a light, flavorful, and versatile dish that’s perfect for any occasion. With its simple ingredients and easy preparation, it’s sure to become a favorite in your recipe collection.

  • Tuna Salad Recipe with Cottage Cheese: A Creamy Twist on a Classic

    Tuna Salad Recipe with Cottage Cheese: A Creamy Twist on a Classic

    Today, we’re diving into a refreshing take on the traditional tuna salad by introducing cottage cheese into the mix. This recipe is not only easy to whip up but also packs a protein punch that’ll keep you satisfied for hours. Let’s get started!

    Why This Recipe Works

    • Cottage cheese adds a creamy texture and boosts the protein content, making this salad more filling.
    • The combination of crunchy vegetables and smooth cottage cheese creates a delightful contrast in every bite.
    • It’s versatile! Enjoy it as a sandwich filler, on crackers, or straight out of the bowl.
    • This recipe is quick to prepare, perfect for those busy days when you need a nutritious meal in a pinch.
    • It’s customizable with your favorite add-ins, making it a recipe you’ll come back to again and again.

    Ingredients

    • 2 cans (5 oz each) tuna in water, drained
    • 1 cup cottage cheese
    • 1/2 cup diced celery
    • 1/4 cup diced red onion
    • 1 tbsp lemon juice
    • 1/2 tsp salt
    • 1/4 tsp black pepper
    • 1/4 cup chopped fresh dill

    Equipment Needed

    • Mixing bowl
    • Measuring cups and spoons
    • Knife and cutting board
    • Can opener

    Instructions

    Tuna Salad Recipe With Cottage Cheese

    Step 1: Prepare Your Ingredients

    Start by draining the tuna well to remove any excess water. This ensures your salad isn’t watery. Dice the celery and red onion into small, uniform pieces for even distribution throughout the salad. If you’re not a fan of raw onion’s bite, you can soak the diced onion in cold water for 10 minutes to mellow the flavor.

    Step 2: Combine the Base Ingredients

    In a large mixing bowl, flake the drained tuna with a fork. Add the cottage cheese, diced celery, and red onion. The cottage cheese should be at room temperature to mix more easily. Stir gently to combine, ensuring you don’t mash the cottage cheese too much unless you prefer a smoother texture.

    Step 3: Season the Salad

    Add the lemon juice, salt, and black pepper to the bowl. The lemon juice not only adds a fresh zing but also helps to brighten the flavors of the other ingredients. Taste as you go and adjust the seasoning to your preference. Remember, you can always add more, but you can’t take it away!

    Step 4: Add the Fresh Herbs

    Fold in the chopped fresh dill. Dill pairs wonderfully with tuna and cottage cheese, offering a burst of freshness. If you’re not a dill fan, parsley or chives make great substitutes. This is also the time to add any other extras you like, such as capers or diced pickles, for an extra flavor dimension.

    Step 5: Chill and Serve

    For the best flavor, cover the bowl and refrigerate the salad for at least 30 minutes before serving. This allows the flavors to meld together beautifully. Serve chilled on your choice of bread, crackers, or over a bed of greens for a low-carb option.

    Tips and Tricks

    For a smoother texture, you can blend the cottage cheese before adding it to the salad. This is especially helpful if you’re serving it to kids or prefer a less chunky consistency. If you’re watching your sodium intake, opt for low-sodium tuna and cottage cheese. To add a bit of crunch, consider tossing in some sunflower seeds or chopped almonds. For a dairy-free version, substitute the cottage cheese with mashed avocado or a dairy-free yogurt alternative. Always taste and adjust the seasoning after chilling, as flavors can dull in the fridge.

    Recipe Variations

    • Spicy Tuna Salad: Add a diced jalapeño or a dash of hot sauce for some heat.
    • Mediterranean Twist: Incorporate chopped olives, sun-dried tomatoes, and a sprinkle of feta cheese.
    • Avocado Tuna Salad: Replace cottage cheese with mashed avocado for a creamy, healthy fat boost.
    • Egg and Tuna Salad: Hard-boiled eggs add extra protein and a different texture.
    • Curried Tuna Salad: A teaspoon of curry powder can transform the flavor profile entirely.

    Frequently Asked Questions

    Can I use Greek yogurt instead of cottage cheese?

    Absolutely! Greek yogurt is a great substitute for cottage cheese if you’re looking for a similar texture with a tangier flavor. Just be mindful of the consistency; you might need to adjust the amount to achieve the desired creaminess.

    How long can I store this tuna salad?

    This tuna salad can be stored in an airtight container in the refrigerator for up to 3 days. However, it’s best enjoyed within the first 24 hours when the textures are at their peak.

    Can I make this recipe ahead of time?

    Yes, this recipe is perfect for meal prep. Just hold off on adding the fresh herbs until you’re ready to serve to maintain their brightness and color.

    Summary

    This tuna salad with cottage cheese is a creamy, protein-packed twist on the classic. It’s easy to make, customizable, and perfect for a quick lunch or snack. Give it a try and see how it becomes a staple in your recipe rotation!

  • Tuna Salad Yogurt Recipe: A Creamy Twist on a Classic

    Tuna Salad Yogurt Recipe: A Creamy Twist on a Classic

    Kickstart your culinary adventure with this refreshing tuna salad yogurt recipe that swaps out mayo for Greek yogurt, offering a healthier, protein-packed alternative without sacrificing flavor. Perfect for sandwiches, wraps, or a standalone dish, this recipe is a game-changer for meal prep enthusiasts and health-conscious foodies alike.

    Why This Recipe Works

    • Healthier Alternative: Greek yogurt replaces mayonnaise, reducing calories and fat while boosting protein and probiotics.
    • Versatile: Enjoy it as a sandwich filler, atop greens, or with crackers for a quick snack.
    • Quick and Easy: Ready in under 10 minutes, it’s perfect for busy weekdays or last-minute lunches.
    • Customizable: Easily adapt the ingredients to suit your taste preferences or dietary needs.

    Ingredients

    • 2 cans (5 oz each) tuna in water, drained
    • 1/2 cup plain Greek yogurt
    • 1/4 cup diced celery
    • 1/4 cup diced red onion
    • 1 tbsp lemon juice
    • 1 tsp Dijon mustard
    • Salt and pepper to taste

    Equipment Needed

    • Mixing bowl
    • Measuring cups and spoons
    • Knife and cutting board
    • Can opener

    Instructions

    Tuna Salad Yogurt Recipe

    Step 1: Prepare Your Ingredients

    Start by draining the tuna thoroughly to avoid a watery salad. Dice the celery and red onion into small, uniform pieces to ensure every bite has a crunch. Measuring out your Greek yogurt, lemon juice, and Dijon mustard beforehand will streamline the mixing process.

    Step 2: Mix the Base

    In a large mixing bowl, combine the drained tuna, Greek yogurt, lemon juice, and Dijon mustard. Stir until the mixture is creamy and uniform. The acidity from the lemon juice will brighten the flavors, while the mustard adds a subtle depth.

    Step 3: Add the Veggies

    Fold in the diced celery and red onion, distributing them evenly throughout the mixture. These not only add texture but also a fresh, crisp contrast to the creamy base. Season with salt and pepper to taste, remembering you can always add more later.

    Step 4: Chill and Serve

    For the best flavor, cover the bowl and refrigerate the tuna salad for at least 30 minutes before serving. This resting period allows the flavors to meld together beautifully. Serve chilled on your choice of bread, greens, or crackers.

    Tips and Tricks

    For an even creamier texture, you can blend the Greek yogurt before adding it to the tuna. If you’re not a fan of raw onion, try soaking the diced pieces in cold water for 10 minutes to mellow their bite. Experiment with adding different herbs like dill or parsley for an extra flavor boost. Always taste and adjust the seasoning after chilling, as flavors can settle and change.

    Recipe Variations

    • Spicy Kick: Add a dash of cayenne pepper or diced jalapeños for heat.
    • Mediterranean Twist: Incorporate chopped olives, cucumber, and a sprinkle of feta cheese.
    • Avocado Creaminess: Mash in half an avocado for a richer texture and healthy fats.
    • Nutty Crunch: Stir in a handful of chopped almonds or walnuts for added crunch and nutrients.

    Frequently Asked Questions

    Can I use canned tuna in oil instead of water? Yes, but for a lighter salad, water-packed tuna is recommended. If using oil-packed, you may want to reduce the amount of Greek yogurt slightly to balance the richness.

    How long can I store this tuna salad? Properly stored in an airtight container, it will last in the refrigerator for up to 3 days. The flavors will continue to develop, making it even more delicious over time.

    Is there a dairy-free alternative to Greek yogurt? Absolutely! You can use dairy-free yogurt alternatives like coconut or almond milk yogurt. Just ensure they’re unsweetened and unflavored to maintain the savory profile of the salad.

    Summary

    This tuna salad yogurt recipe is a healthier, flavorful twist on the classic, ready in minutes and endlessly customizable. Perfect for any meal, it’s a testament to how simple swaps can elevate traditional dishes.

  • Caesar Salad with Shrimp Recipe: A Twist on the Classic

    Caesar Salad with Shrimp Recipe: A Twist on the Classic

    Unleash the flavor of the sea with this delectable Caesar salad topped with succulent shrimp. Perfect for those who love a classic with a twist, this recipe is sure to impress at any dinner table or summer BBQ.

    Why This Recipe Works

    • The combination of crispy romaine and juicy shrimp offers a perfect texture contrast.
    • Homemade Caesar dressing elevates the dish beyond store-bought versions.
    • Quick and easy to prepare, making it ideal for weeknight dinners or last-minute guests.
    • Customizable to suit dietary preferences, including gluten-free or dairy-free options.

    Ingredients

    • 1 lb large shrimp, peeled and deveined
    • 2 heads romaine lettuce, chopped
    • 1/2 cup grated Parmesan cheese
    • 1/2 cup Caesar dressing (homemade or store-bought)
    • 1 cup croutons
    • 2 tbsp olive oil
    • Salt and pepper to taste

    Equipment Needed

    • Large mixing bowl
    • Skillet
    • Salad spinner (optional)
    • Measuring cups and spoons

    Instructions

    Caesar Salad With Shrimp Recipe

    Prepare the Shrimp

    Heat olive oil in a skillet over medium-high heat. Season the shrimp with salt and pepper, then add to the skillet. Cook for 2-3 minutes per side until pink and opaque. Remove from heat and set aside.

    Chop the Lettuce

    Wash and dry the romaine lettuce thoroughly. Chop into bite-sized pieces and place in a large mixing bowl. Tip: Use a salad spinner to ensure the lettuce is dry for the best dressing adherence.

    Assemble the Salad

    Add the cooked shrimp, croutons, and half of the Parmesan cheese to the bowl with the lettuce. Drizzle with Caesar dressing and toss gently to combine.

    Serve and Enjoy

    Transfer the salad to serving plates and sprinkle with the remaining Parmesan cheese. Serve immediately for the best texture and flavor.

    Tips and Tricks

    For an extra flavor boost, try grilling the shrimp instead of sautéing. This adds a smoky depth that complements the creamy dressing beautifully. Always pat your shrimp dry before cooking to ensure a nice sear. If you’re making your own dressing, anchovy paste can be a great shortcut for traditional anchovies without the hassle of mincing.

    Recipe Variations

    • Swap shrimp for grilled chicken or salmon for a different protein option.
    • Add avocado slices or cherry tomatoes for extra freshness and color.
    • Use kale or spinach instead of romaine for a nutrient-packed version.
    • For a low-carb option, omit the croutons or use almond flour croutons.

    Frequently Asked Questions

    Can I make this salad ahead of time?

    Yes, but for the best results, keep the dressing and croutons separate until ready to serve to prevent sogginess. The shrimp can be cooked ahead and refrigerated, then added cold or quickly reheated before serving.

    What’s the best way to store leftovers?

    Store any leftovers in an airtight container in the refrigerator for up to 2 days. Note that the lettuce may wilt slightly, so it’s best enjoyed fresh.

    Can I use frozen shrimp?

    Absolutely! Just be sure to thaw them completely and pat dry before cooking to ensure they sear properly and don’t release too much water into the salad.

    Summary

    This Caesar salad with shrimp is a refreshing twist on the classic, combining crisp lettuce, creamy dressing, and succulent shrimp for a dish that’s both elegant and easy to make. Perfect for any occasion, it’s sure to become a new favorite.

  • Spicy Shrimp Salad Recipe: A Zesty Kick to Your Summer

    Spicy Shrimp Salad Recipe: A Zesty Kick to Your Summer

    Summer calls for dishes that are light, refreshing, and packed with flavor. This spicy shrimp salad is your go-to recipe for those hot days when you crave something zesty yet easy to whip up. Let’s dive into making this vibrant dish that’s sure to impress.

    Why This Recipe Works

    • The combination of succulent shrimp and crisp vegetables offers a perfect texture contrast.
    • A homemade spicy dressing elevates the dish with a customizable heat level.
    • Quick preparation means you can have this salad ready in under 30 minutes.
    • It’s versatile, serving as a main dish or a side, perfect for any occasion.
    • The recipe uses fresh, accessible ingredients for the best flavor and nutrition.

    Ingredients

    • 1 lb large shrimp, peeled and deveined
    • 2 cups mixed salad greens
    • 1 cup cherry tomatoes, halved
    • 1 avocado, sliced
    • 1/2 red onion, thinly sliced
    • 2 tbsp olive oil
    • 1 tbsp lime juice
    • 1 tsp chili powder
    • 1/2 tsp cayenne pepper
    • Salt and pepper to taste

    Equipment Needed

    • Large mixing bowl
    • Skillet
    • Measuring spoons and cups
    • Knife and cutting board

    Instructions

    Spicy Shrimp Salad Recipe

    Prepare the Shrimp

    Heat olive oil in a skillet over medium-high heat. Add the shrimp, seasoning them with chili powder, cayenne pepper, salt, and pepper. Cook for 2-3 minutes per side until they turn pink and opaque. Tip: Don’t overcrowd the skillet to ensure each shrimp gets perfectly seared.

    Mix the Salad Base

    In a large bowl, combine the mixed greens, cherry tomatoes, avocado, and red onion. Gently toss to mix the ingredients evenly. This colorful base is not only visually appealing but packed with nutrients.

    Make the Dressing

    Whisk together lime juice, a tablespoon of olive oil, a pinch of salt, and pepper in a small bowl. For an extra kick, add a dash more cayenne pepper. Tip: Adjust the lime juice to your taste for the perfect balance of tanginess.

    Combine and Serve

    Add the cooked shrimp to the salad base. Drizzle the dressing over the top and toss lightly to coat everything evenly. Serve immediately to enjoy the crispness of the vegetables and the warmth of the shrimp.

    Tips and Tricks

    For those who love a bit of crunch, consider adding toasted nuts or seeds like almonds or sunflower seeds. If you’re serving this salad at a gathering, keep the dressing and shrimp separate until ready to serve to maintain freshness. For a dairy-free version that’s still creamy, blend avocado into the dressing. Always taste your dressing before adding it to the salad to ensure the flavors are balanced. Lastly, if you’re not a fan of heat, reduce the cayenne pepper or omit it altogether.

    Recipe Variations

    • Swap shrimp for grilled chicken or tofu for a different protein option.
    • Add quinoa or brown rice to make the salad more filling.
    • Incorporate different vegetables like cucumbers or bell peppers for added crunch.
    • Use a different dressing, such as a creamy cilantro lime or a honey mustard, to change the flavor profile.
    • For a tropical twist, add mango or pineapple chunks to the salad.

    Frequently Asked Questions

    Can I make this salad ahead of time?

    Yes, you can prepare the components ahead of time, but it’s best to assemble the salad just before serving to prevent the greens from wilting and the shrimp from becoming rubbery. Store the dressing separately and add it when you’re ready to eat.

    How can I adjust the spiciness?

    The level of heat can easily be adjusted by increasing or decreasing the amount of cayenne pepper and chili powder. You can also remove the seeds from the chili peppers if you’re using fresh ones to reduce the heat.

    What’s the best way to cook the shrimp?

    For the best texture, cook the shrimp quickly over high heat until they’re just opaque. Overcooking can make them tough and rubbery. Grilling the shrimp is another great option that adds a smoky flavor.

    Summary

    This spicy shrimp salad is a quick, flavorful dish perfect for summer. With its combination of succulent shrimp, crisp vegetables, and a zesty dressing, it’s sure to become a favorite. Customize the heat level to your liking and enjoy a refreshing meal that’s as nutritious as it is delicious.

  • Smoked Whitefish Salad Recipe: A Smoky Delight

    Smoked Whitefish Salad Recipe: A Smoky Delight

    Forget the same old tuna salad; smoked whitefish salad is here to shake up your lunch routine with its rich, smoky flavors and creamy texture. Perfect for sandwiches, crackers, or straight out of the bowl, this recipe is a game-changer.

    Why This Recipe Works

    • The smoky flavor of the whitefish pairs perfectly with the creamy mayonnaise and tangy lemon juice, creating a balanced taste.
    • It’s incredibly versatile, serving as a great sandwich filler, cracker topping, or salad enhancer.
    • Quick and easy to prepare, this recipe is perfect for busy weekdays or last-minute gatherings.

    Ingredients

    • 1 lb smoked whitefish, skin and bones removed, flaked
    • 1/2 cup mayonnaise
    • 2 tbsp fresh lemon juice
    • 1/4 cup finely chopped red onion
    • 1/4 cup chopped fresh dill
    • Salt and pepper to taste

    Equipment Needed

    • Mixing bowl
    • Fork or spoon for mixing
    • Measuring cups and spoons

    Instructions

    Smoked Whitefish Salad Recipe

    Step 1: Prepare the Whitefish

    Start by carefully removing the skin and bones from the smoked whitefish. Use your fingers to flake the fish into small, bite-sized pieces. This ensures every bite of your salad is perfectly textured. Tip: If you’re short on time, some fishmongers will skin and bone the fish for you.

    Step 2: Mix the Dressing

    In a mixing bowl, combine the mayonnaise and fresh lemon juice. Whisk them together until smooth. This creamy and tangy dressing is the perfect base for your smoked whitefish salad. Tip: For a lighter version, you can substitute half of the mayonnaise with Greek yogurt.

    Step 3: Combine Ingredients

    Add the flaked whitefish, chopped red onion, and dill to the bowl with the dressing. Gently fold everything together until well combined. Be careful not to overmix, as you want to keep the fish flakes intact for texture. Season with salt and pepper to taste.

    Step 4: Chill Before Serving

    Cover the bowl with plastic wrap and refrigerate the salad for at least 30 minutes before serving. This chilling time allows the flavors to meld together beautifully. Tip: This salad tastes even better the next day, making it a great make-ahead option.

    Tips and Tricks

    For an extra smoky flavor, try adding a pinch of smoked paprika to the dressing. If you’re serving this salad at a party, consider presenting it in a hollowed-out bread bowl for a stunning visual effect. Always taste and adjust the seasoning after chilling, as cold temperatures can dull flavors. For a crunchier texture, add some finely chopped celery or cucumber. Remember, the quality of the smoked whitefish is key to this recipe, so don’t skimp on it.

    Recipe Variations

    • Add chopped hard-boiled eggs for a protein boost.
    • Mix in some capers or chopped pickles for a briny twist.
    • For a spicy kick, add a dash of hot sauce or some finely chopped jalapeños.
    • Swap the dill for other fresh herbs like parsley or chives for a different flavor profile.
    • Use smoked trout or salmon instead of whitefish for a variation on the theme.

    Frequently Asked Questions

    Can I make this recipe dairy-free? Absolutely! Just use a dairy-free mayonnaise alternative. There are many great options available that will work perfectly in this recipe.

    How long does smoked whitefish salad last in the fridge? Stored in an airtight container, it should keep for up to 3 days. Just give it a quick stir before serving again.

    Can I freeze smoked whitefish salad? It’s not recommended, as the mayonnaise can separate when thawed, affecting the texture and flavor.

    Summary

    This smoked whitefish salad recipe is a deliciously smoky, creamy, and versatile dish that’s perfect for any occasion. Easy to make and packed with flavor, it’s sure to become a new favorite.

  • Salmon Avocado Salad Recipe: A Fresh Twist on Summer Salads

    Salmon Avocado Salad Recipe: A Fresh Twist on Summer Salads

    Summer is the perfect time to lighten up your meals with fresh, flavorful ingredients. This salmon avocado salad combines the richness of salmon with the creamy texture of avocado for a dish that’s both satisfying and refreshing.

    Why This Recipe Works

    • The combination of omega-3 rich salmon and heart-healthy avocado makes this salad not only delicious but also packed with nutrients.
    • It’s incredibly versatile, serving as a perfect lunch, dinner, or even a fancy brunch option.
    • The recipe is quick and easy, requiring minimal cooking and preparation time.

    Ingredients

    • 1 lb fresh salmon fillet, skin removed
    • 2 ripe avocados, diced
    • 4 cups mixed greens
    • 1/2 cup cherry tomatoes, halved
    • 1/4 cup red onion, thinly sliced
    • 2 tbsp olive oil
    • 1 tbsp lemon juice
    • Salt and pepper to taste

    Equipment Needed

    • Mixing bowl
    • Salad spinner
    • Chef’s knife
    • Cutting board
    • Measuring spoons

    Instructions

    Salmon Avocado Salad Recipe

    Step 1: Prepare the Salmon

    Preheat your oven to 375°F. Season the salmon fillet with salt and pepper, then drizzle with 1 tbsp of olive oil. Bake for 12-15 minutes, or until the salmon flakes easily with a fork. Let it cool slightly before breaking it into chunks.

    Step 2: Assemble the Salad Base

    In a large mixing bowl, combine the mixed greens, cherry tomatoes, and red onion. Toss gently to mix. Tip: For extra crispness, spin your greens in a salad spinner before adding them to the bowl.

    Step 3: Add the Avocado and Salmon

    Gently fold in the diced avocado and salmon chunks into the salad base. Be careful not to mash the avocado too much to maintain its texture.

    Step 4: Dress the Salad

    In a small bowl, whisk together the remaining olive oil and lemon juice. Drizzle over the salad and toss lightly to coat. Tip: Add the dressing just before serving to keep the greens fresh.

    Step 5: Final Touches

    Season with additional salt and pepper if needed. Serve immediately for the best flavor and texture.

    Tips and Tricks

    For an extra flavor boost, consider adding a sprinkle of crushed red pepper flakes or a dash of your favorite hot sauce. If you’re meal prepping, keep the dressing separate until you’re ready to eat to prevent the salad from getting soggy. For a more substantial meal, add a handful of quinoa or farro to the salad.

    Recipe Variations

    • Swap the salmon for grilled chicken or shrimp for a different protein option.
    • Add crumbled feta or goat cheese for a creamy, tangy twist.
    • Incorporate different greens like arugula or spinach for varied flavors and textures.
    • For a nutty crunch, sprinkle toasted almonds or walnuts on top.

    Frequently Asked Questions

    Can I use canned salmon instead of fresh?

    Absolutely! Canned salmon is a great pantry staple that works well in this recipe. Just make sure to drain it well and remove any bones or skin before adding it to the salad.

    How long will this salad keep in the fridge?

    Without the dressing, the salad components can be stored separately in the fridge for up to 2 days. Once dressed, it’s best eaten immediately as the greens will start to wilt.

    Can I make this salad vegan?

    Yes! Simply omit the salmon and add more avocado or a plant-based protein like chickpeas or tofu to keep it hearty and satisfying.

    Summary

    This salmon avocado salad is a quick, nutritious, and delicious option for any meal. With its simple ingredients and easy preparation, it’s sure to become a staple in your summer recipe rotation.

  • Tuna Salad with Egg: A Classic Twist You’ll Love

    Tuna Salad with Egg: A Classic Twist You’ll Love

    Today, we’re diving into a timeless favorite with a protein-packed punch. This tuna salad recipe with egg is not just any ordinary dish; it’s a creamy, crunchy, and utterly satisfying meal that’s perfect for any day of the week.

    Why This Recipe Works

    • The combination of tuna and hard-boiled eggs provides a double dose of protein, making it a filling option for lunch or dinner.
    • Adding crisp celery and red onion introduces a refreshing crunch that contrasts beautifully with the creamy mayonnaise.
    • A squeeze of lemon juice brightens the entire dish, cutting through the richness for a balanced flavor profile.

    Ingredients

    • 2 cans (5 oz each) tuna in water, drained
    • 3 hard-boiled eggs, chopped
    • 1/2 cup mayonnaise
    • 1/4 cup celery, finely diced
    • 2 tbsp red onion, minced
    • 1 tbsp lemon juice
    • Salt and pepper to taste

    Equipment Needed

    • Mixing bowl
    • Knife
    • Cutting board
    • Measuring cups and spoons

    Instructions

    Tuna Salad Recipe Egg

    Step 1: Prepare Your Ingredients

    Start by draining the tuna thoroughly to avoid a watery salad. Chop the hard-boiled eggs into small, bite-sized pieces. Finely dice the celery and mince the red onion to ensure every bite has a bit of crunch and flavor. Tip: For an extra flavor boost, let the chopped red onion sit in lemon juice for a few minutes before adding it to the salad.

    Step 2: Combine the Tuna and Eggs

    In a large mixing bowl, flake the drained tuna with a fork. Add the chopped eggs to the bowl. Gently mix them together to start building the base of your salad. This is where the protein power of your meal comes together.

    Step 3: Add the Vegetables and Mayo

    Now, add the diced celery and the red onion (with lemon juice) to the bowl. Spoon in the mayonnaise, starting with 1/2 cup. Mix everything until well combined. If the salad seems too dry, add a little more mayonnaise to reach your desired consistency. Tip: For a healthier twist, you can substitute half of the mayonnaise with Greek yogurt.

    Step 4: Season to Perfection

    Season the salad with salt and pepper to taste. Remember, the tuna and mayonnaise already contain some salt, so start with a little and adjust as needed. A final squeeze of lemon juice can brighten the flavors even more.

    Step 5: Chill and Serve

    For the best flavor, cover the salad and refrigerate for at least 30 minutes before serving. This allows the flavors to meld together beautifully. Serve on a bed of greens, between slices of your favorite bread, or with crackers for a satisfying meal.

    Tips and Tricks

    For those looking to elevate their tuna salad game, consider these advanced tips. First, using high-quality tuna can make a significant difference in flavor. Look for tuna packed in olive oil for a richer taste. Second, adding a teaspoon of Dijon mustard can introduce a subtle tanginess that complements the mayonnaise. Lastly, for an extra crunch, throw in some chopped walnuts or almonds. These small tweaks can transform your tuna salad from good to gourmet.

    Recipe Variations

    • Avocado Tuna Salad: Replace half of the mayonnaise with mashed avocado for a creamy, healthy fat alternative.
    • Spicy Tuna Salad: Add a dash of hot sauce or some chopped jalapeños for a kick.
    • Mediterranean Tuna Salad: Mix in some chopped Kalamata olives and feta cheese for a Greek-inspired twist.
    • Apple and Walnut Tuna Salad: Incorporate diced apples and walnuts for a sweet and crunchy variation.

    Frequently Asked Questions

    Can I make this recipe ahead of time?

    Absolutely! This tuna salad with egg can be made up to two days in advance. Just be sure to store it in an airtight container in the refrigerator. The flavors will continue to develop, making it even more delicious the next day.

    Is there a substitute for mayonnaise?

    Yes, if you’re not a fan of mayonnaise, you can use Greek yogurt, avocado, or even hummus as a healthier alternative. Each option will give the salad a different texture and flavor profile, so choose based on your preference.

    How can I serve this tuna salad?

    This versatile salad can be served in so many ways! Enjoy it as a sandwich filling, atop a bed of greens for a low-carb option, or with crackers for a quick snack. It’s also great stuffed into tomatoes or avocado halves for a fancy presentation.

    Summary

    This tuna salad with egg is a classic dish that’s both nutritious and delicious. With its creamy texture, crunchy vegetables, and protein-packed ingredients, it’s a meal that’s sure to satisfy. Whether you’re looking for a quick lunch or a light dinner, this recipe is a winner.

  • Shrimp and Avocado Salad Recipe: A Refreshing Summer Delight

    Shrimp and Avocado Salad Recipe: A Refreshing Summer Delight

    A absolutely delightful dish that combines the creamy texture of avocado with the succulent taste of shrimp, perfect for those warm summer days. This recipe is not only easy to make but also packs a punch of flavors that will leave your taste buds dancing.

    Why This Recipe Works

    • The combination of shrimp and avocado offers a perfect balance of protein and healthy fats, making it a nutritious meal option.
    • With minimal cooking required, this recipe is quick to prepare, ideal for busy weeknights or last-minute gatherings.
    • The lime dressing adds a zesty kick, enhancing the natural flavors of the ingredients without overpowering them.

    Ingredients

    • 1 lb shrimp, peeled and deveined
    • 2 ripe avocados, diced
    • 1 cup cherry tomatoes, halved
    • 1/4 cup red onion, finely chopped
    • 2 tbsp olive oil
    • 1 lime, juiced
    • Salt and pepper to taste

    Equipment Needed

    • Mixing bowl
    • Skillet
    • Knife
    • Cutting board

    Instructions

    Shrimp And Avocado Salad Recipe

    Prepare the Shrimp

    Heat the olive oil in a skillet over medium-high heat. Add the shrimp, seasoning with salt and pepper, and cook for 2-3 minutes on each side until they turn pink and opaque. Remove from heat and let them cool slightly.

    Chop the Vegetables

    While the shrimp are cooling, dice the avocados, halve the cherry tomatoes, and finely chop the red onion. Combine these in a large mixing bowl.

    Make the Dressing

    In a small bowl, whisk together the lime juice, a tablespoon of olive oil, and a pinch of salt and pepper. Adjust the seasoning to your taste.

    Combine Everything

    Add the slightly cooled shrimp to the bowl with the vegetables. Drizzle the dressing over the top and gently toss to combine all the ingredients evenly.

    Serve Immediately

    This salad is best enjoyed fresh. Serve it on its own or with a side of crusty bread for a more filling meal.

    Tips and Tricks

    For the best flavor, use ripe but firm avocados. They should yield slightly to pressure but not be mushy. If you’re not serving the salad immediately, add the avocado last to prevent it from browning. You can also substitute the shrimp with grilled chicken for a different protein option. The dressing can be made ahead of time and stored in the fridge for up to a week.

    Recipe Variations

    • Add a handful of corn kernels for a sweet crunch.
    • Include some diced cucumber for extra freshness.
    • Swap the lime juice with lemon juice for a different citrus note.
    • Add a sprinkle of chili flakes for a spicy kick.
    • Use mango instead of tomatoes for a tropical twist.

    Frequently Asked Questions

    Can I make this salad ahead of time?

    Yes, but for the best texture and flavor, add the avocado and dressing just before serving. The other components can be prepared ahead and stored in the fridge.

    Can I use frozen shrimp?

    Absolutely! Just make sure to thaw them completely and pat them dry before cooking to ensure they sear properly.

    How can I tell if the shrimp are cooked?

    Shrimp are done when they turn pink and opaque. Overcooking can make them rubbery, so keep an eye on them during cooking.

    Summary

    This shrimp and avocado salad is a quick, nutritious, and flavorful dish perfect for any occasion. With simple ingredients and easy steps, it’s sure to become a favorite.