Category: Seafood Salad Recipes

  • Chill Out with This Cold Tuna Pasta Salad Recipe

    Chill Out with This Cold Tuna Pasta Salad Recipe

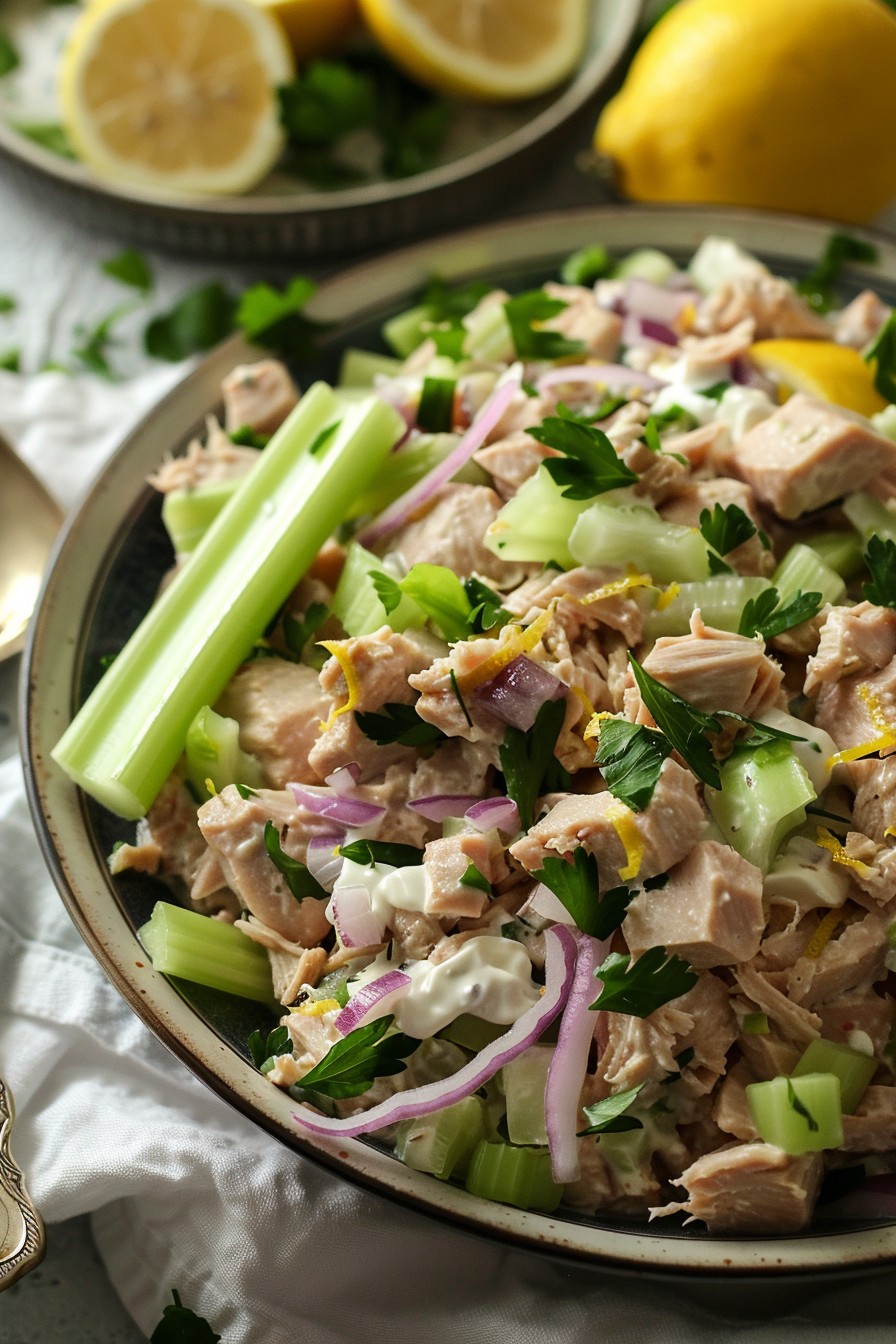
    Let’s face it, when the temperature rises, the last thing you want is to slave over a hot stove. That’s where this cold tuna pasta salad comes in—a refreshing, no-cook-required dish that’s perfect for picnics, potlucks, or just a lazy summer dinner.

    Why This Recipe Works

    • Quick and Easy: With minimal prep and no cooking required beyond boiling pasta, this recipe is a breeze to whip up.
    • Versatile: Easily customizable with whatever veggies or dressings you have on hand.
    • Perfect for Meal Prep: Stays fresh in the fridge for days, making it ideal for busy weeks.

    Ingredients

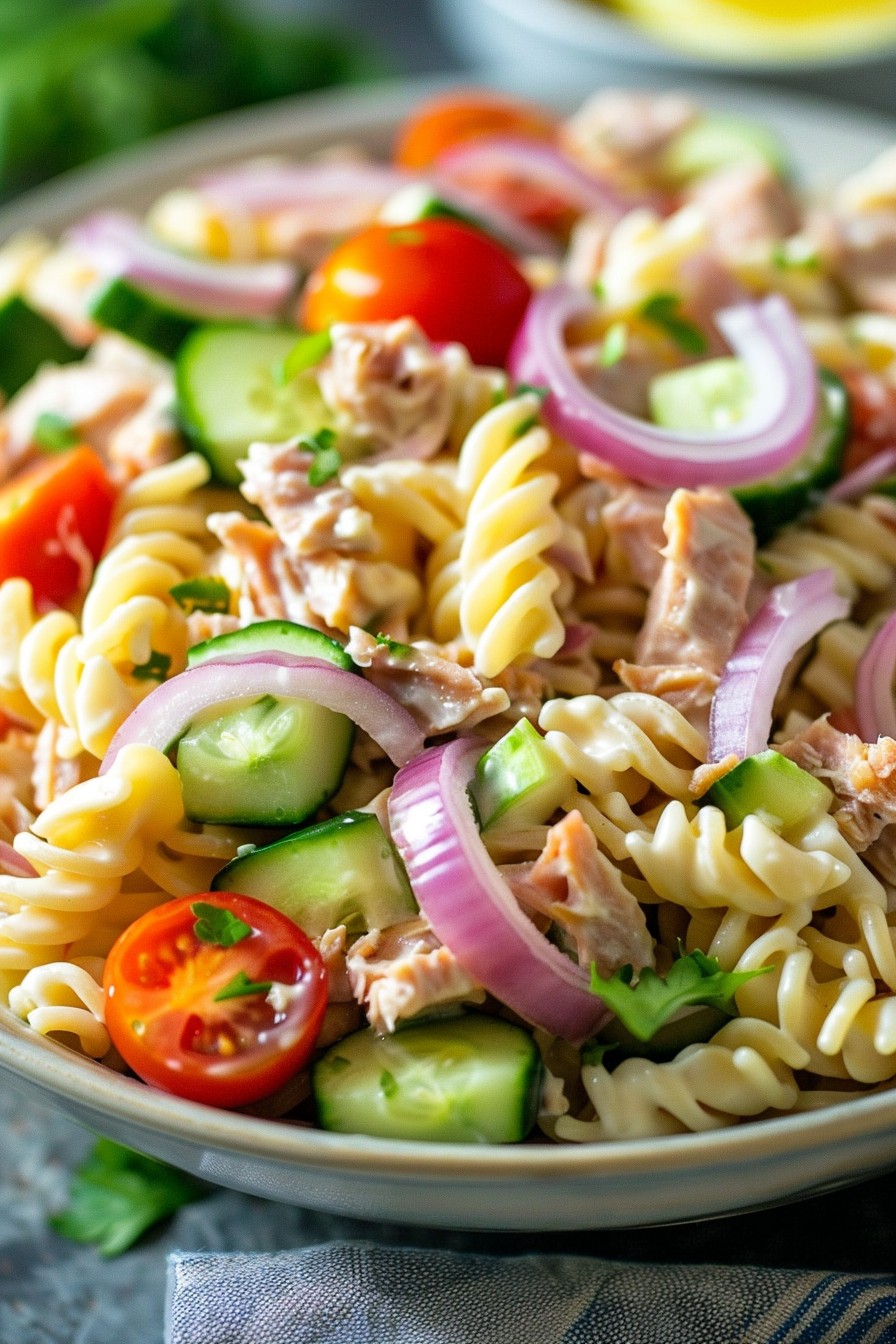
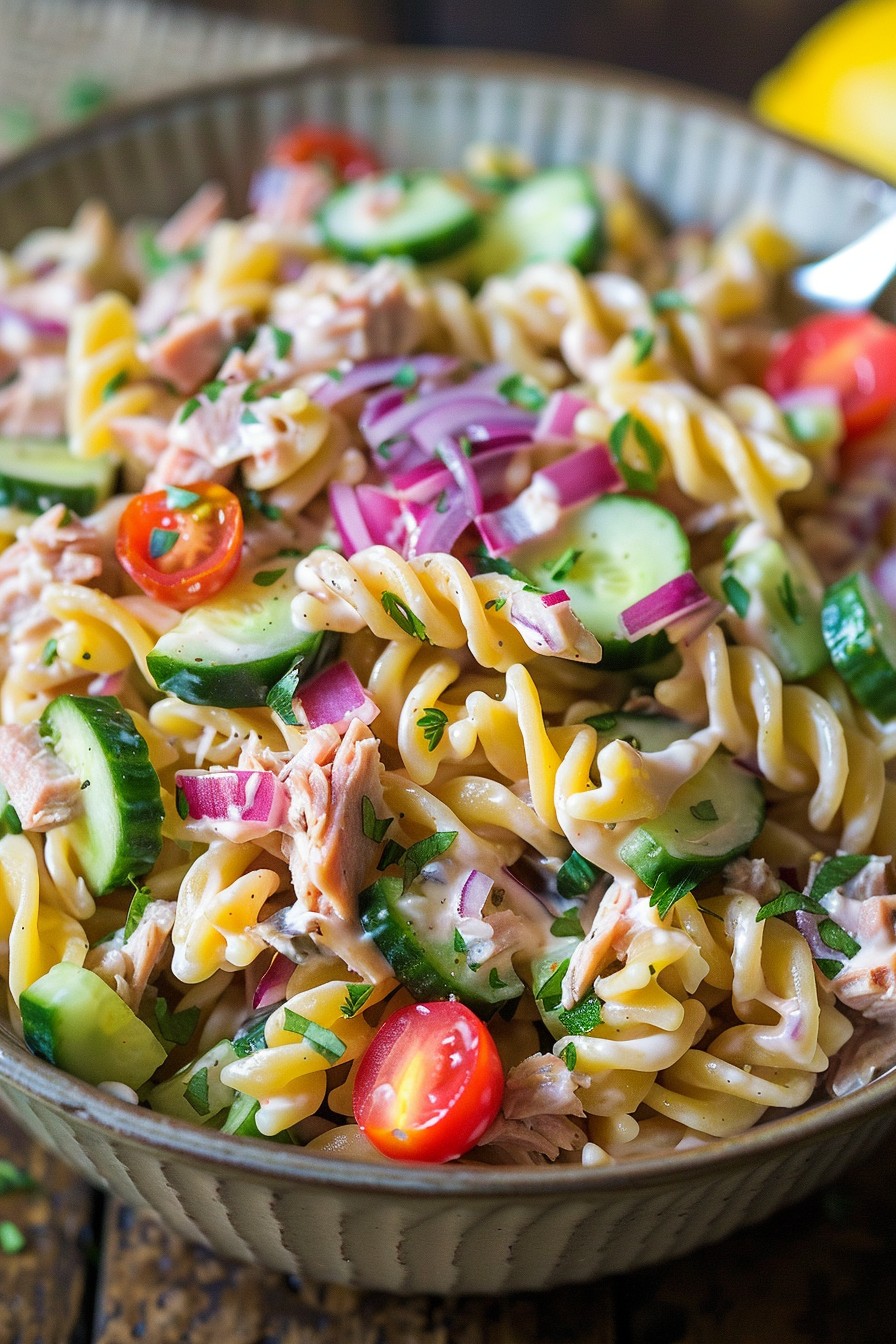
    • 8 oz pasta (like fusilli or penne)
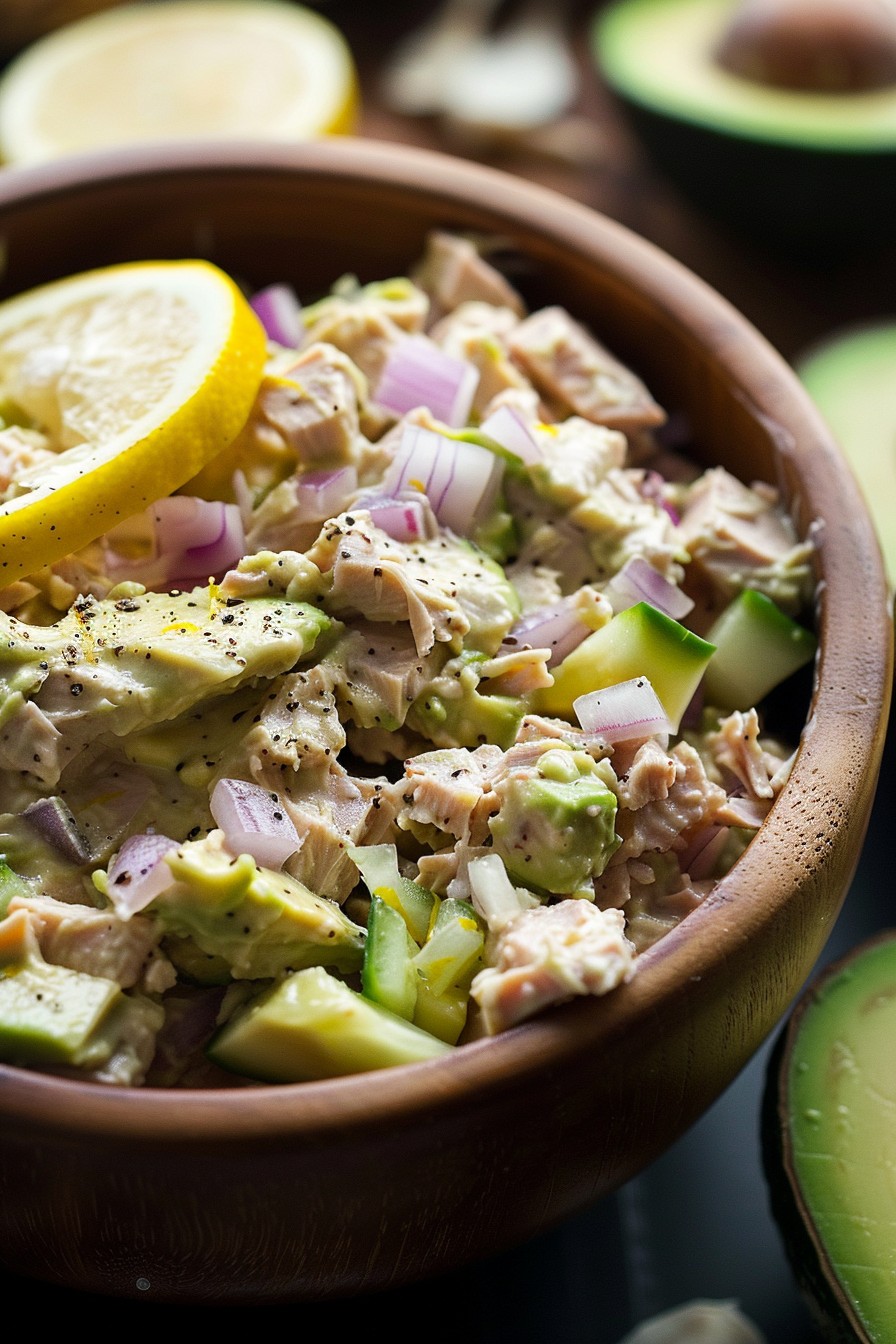
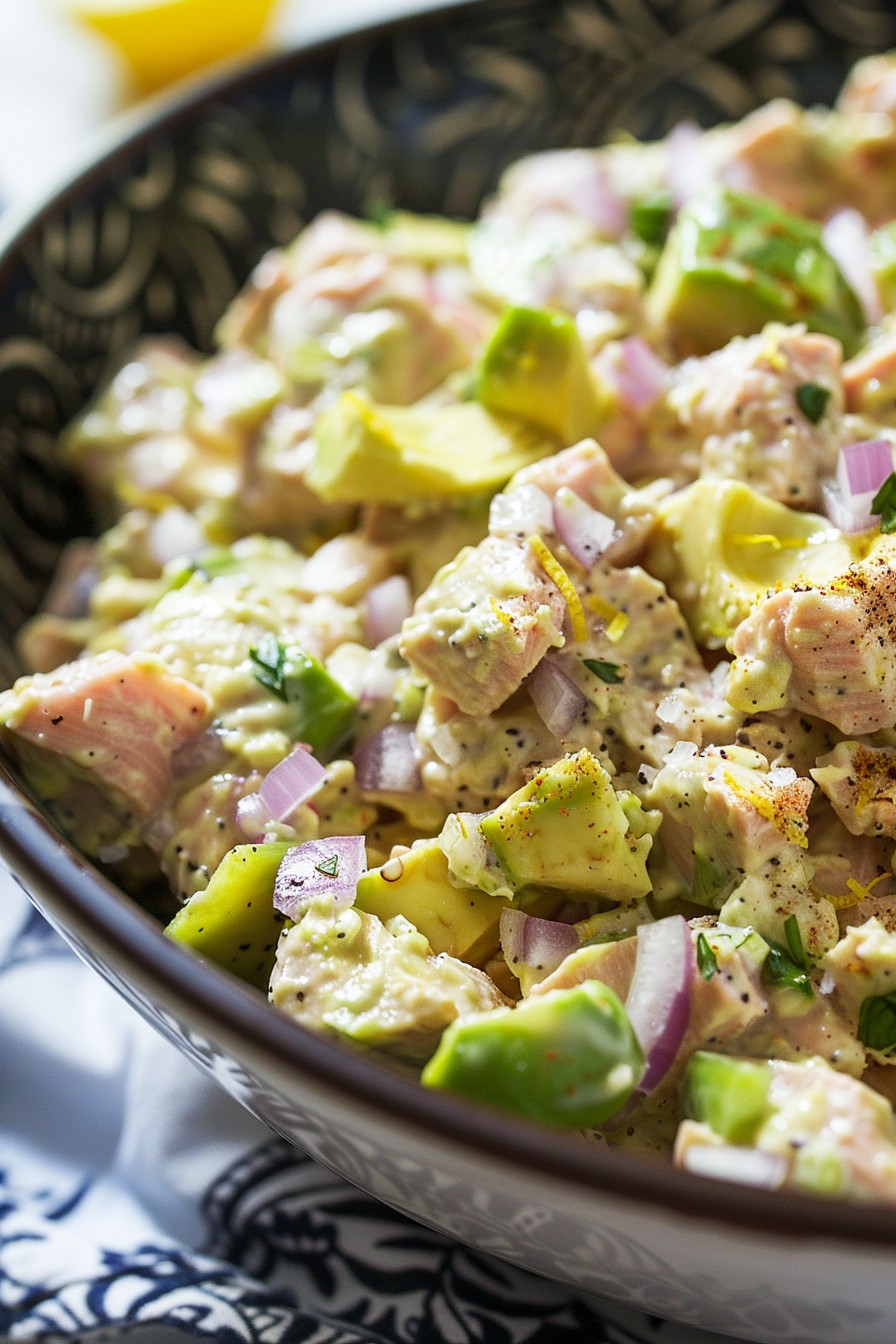
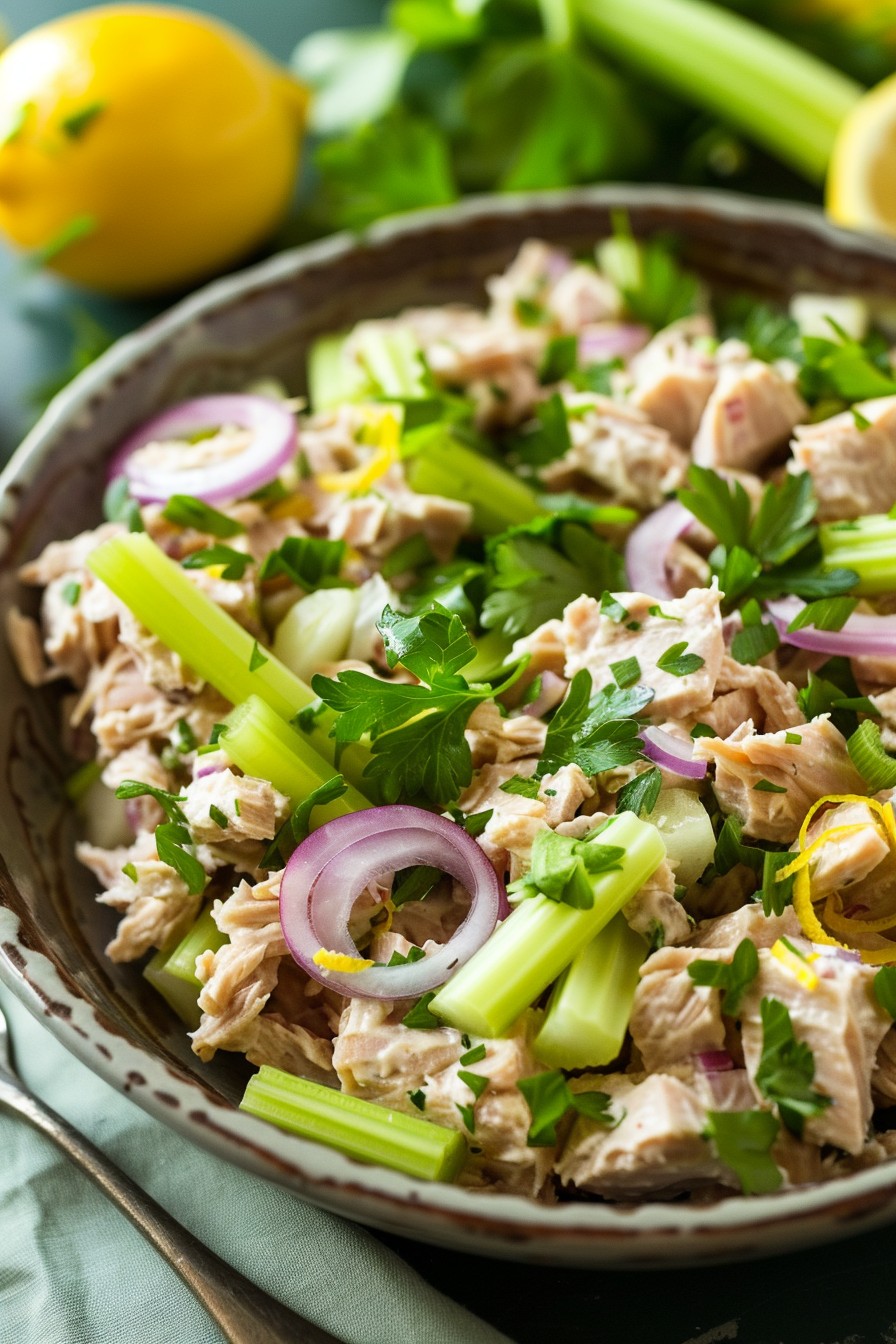
    • 1 can (5 oz) tuna in water, drained
    • 1/2 cup mayonnaise
    • 1/4 cup red onion, finely diced
    • 1/2 cup cucumber, diced
    • 1/2 cup cherry tomatoes, halved
    • 1 tbsp lemon juice
    • Salt and pepper to taste

    Equipment Needed

    • Large pot
    • Colander
    • Large mixing bowl
    • Measuring cups and spoons

    Instructions

    Cold Tuna Pasta Salad Recipe

    Boil the Pasta

    Fill a large pot with water and bring to a rolling boil. Add a generous pinch of salt, then stir in the pasta. Cook according to package instructions until al dente, usually about 8-10 minutes. Drain in a colander and rinse under cold water to cool quickly.

    Mix the Dressing

    In a large mixing bowl, combine the mayonnaise and lemon juice. Whisk until smooth. This creamy dressing will coat every noodle and veggie perfectly.

    Combine All Ingredients

    Add the cooled pasta, drained tuna, red onion, cucumber, and cherry tomatoes to the bowl with the dressing. Gently toss until everything is evenly coated. Season with salt and pepper to taste.

    Chill Before Serving

    Cover the bowl with plastic wrap and refrigerate for at least 1 hour before serving. This allows the flavors to meld together beautifully.

    Tips and Tricks

    For an extra crunch, add some diced celery or bell peppers. If you’re not a fan of mayonnaise, Greek yogurt makes a great substitute. To make this dish even more hearty, throw in some cooked chickpeas or kidney beans. Always taste and adjust the seasoning after chilling, as flavors can mellow out in the fridge.

    Recipe Variations

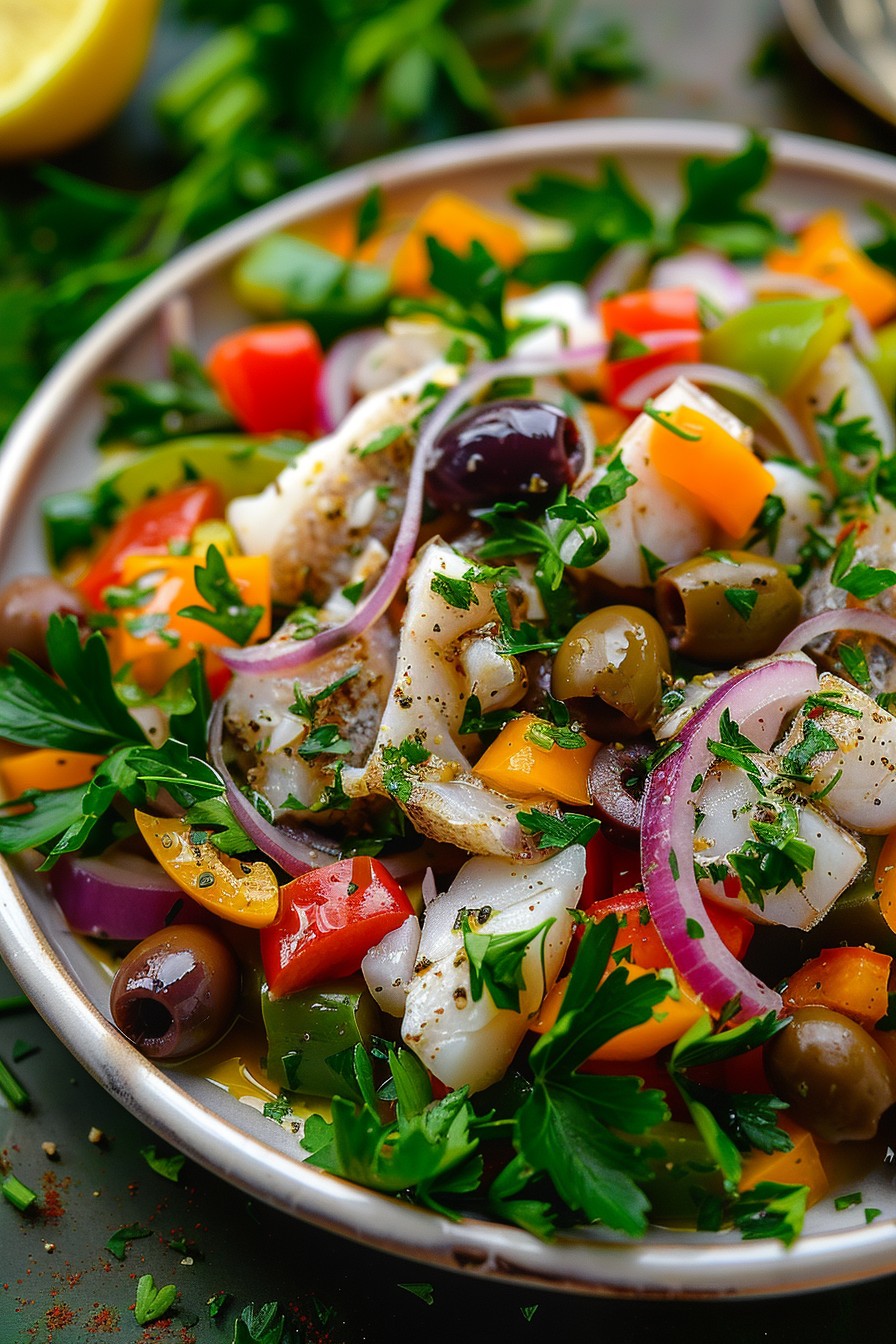
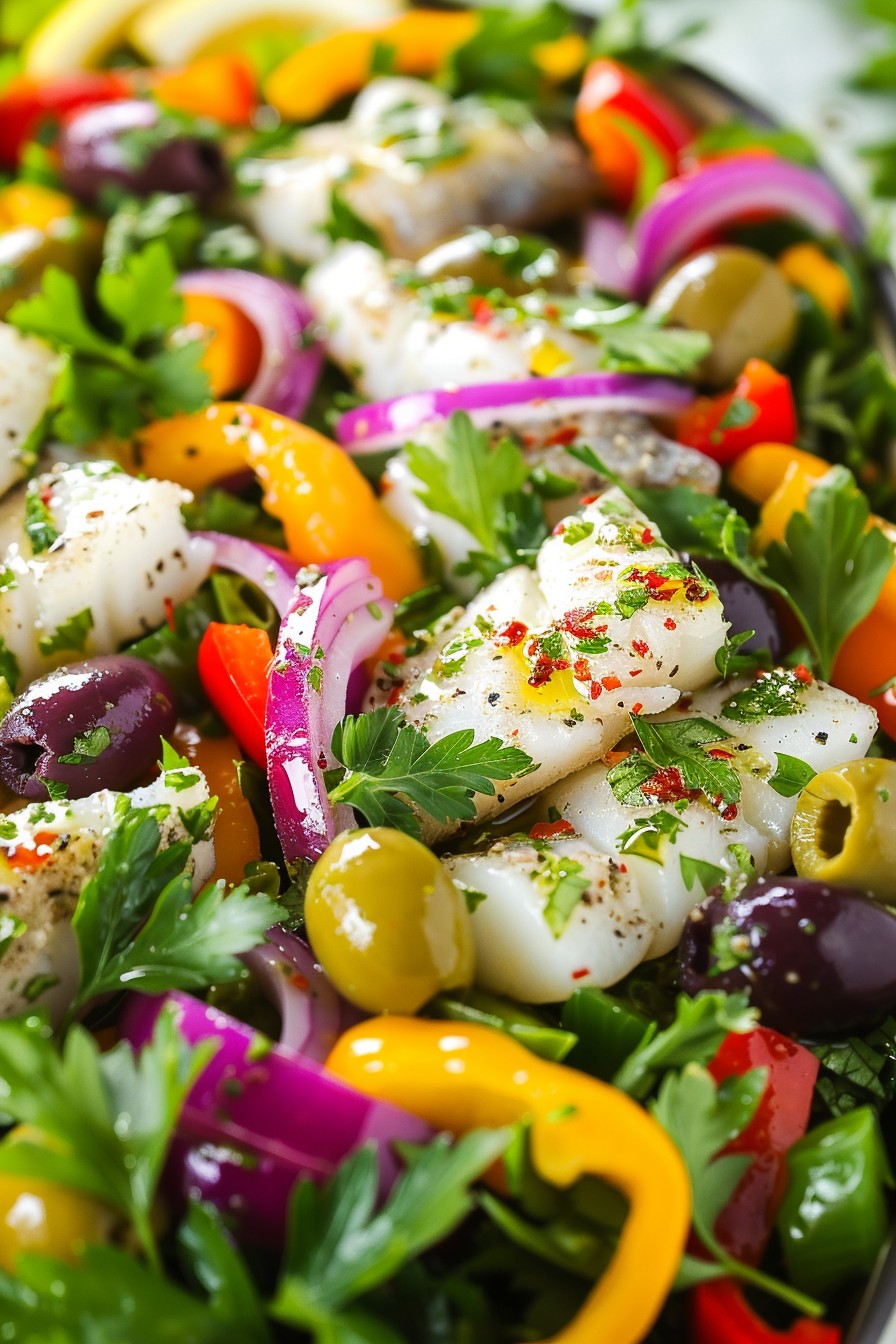
    • Mediterranean Twist: Swap the mayo for olive oil and add olives and feta cheese.
    • Spicy Kick: Mix in some diced jalapeños or a dash of hot sauce.
    • Herb Lover’s: Fresh dill, parsley, or basil can add a bright, herby flavor.

    Frequently Asked Questions

    Can I use a different type of pasta?

    Absolutely! While fusilli and penne are great for holding onto the dressing, any short pasta will work. Just avoid long noodles like spaghetti, as they’re harder to eat cold.

    How long does this salad last in the fridge?

    Stored in an airtight container, it’ll stay fresh for up to 3 days. The veggies might soften a bit, but the flavors will only get better.

    Can I make this recipe vegan?

    Yes! Substitute the tuna with chickpeas and use vegan mayo. You’ll still get that satisfying protein and creaminess.

    Summary

    This cold tuna pasta salad is the ultimate summer dish—easy, refreshing, and endlessly customizable. Perfect for those days when you want something delicious without the hassle.

  • Asian Salmon Salad Recipe: A Flavor Bomb in Every Bite

    Asian Salmon Salad Recipe: A Flavor Bomb in Every Bite

    Welcome to a culinary adventure that’s about to make your taste buds dance with joy. This Asian Salmon Salad is not just a meal; it’s a vibrant, flavorful journey that combines the richness of salmon with the freshness of greens, all tied together with an irresistible Asian-inspired dressing.

    Why This Recipe Works

    • The perfect balance of flavors: sweet, tangy, and umami all in one bite.
    • Quick and easy to prepare, making it ideal for weeknight dinners or fancy lunches.
    • Packed with nutrients, offering a healthy dose of omega-3s, vitamins, and minerals.
    • Versatile recipe that allows for numerous variations to suit any palate.
    • The salmon is cooked to perfection, ensuring a moist and flaky texture every time.

    Ingredients

    • 1 lb salmon fillet, skin-on
    • 2 tbsp soy sauce
    • 1 tbsp honey
    • 1 tbsp sesame oil
    • 1 tsp ginger, grated
    • 1 clove garlic, minced
    • 4 cups mixed greens
    • 1 avocado, sliced
    • 1/2 cup edamame, shelled
    • 1/4 cup cilantro, chopped
    • 2 tbsp sesame seeds

    Equipment Needed

    • Baking sheet
    • Mixing bowls
    • Whisk
    • Chef’s knife
    • Cutting board

    Instructions

    Asian Salmon Salad Recipe

    Preheat and Prep

    Start by preheating your oven to 375°F. While the oven heats up, mix the soy sauce, honey, sesame oil, ginger, and garlic in a small bowl to create the marinade. Place the salmon fillet on a baking sheet and brush half of the marinade over the salmon, ensuring it’s evenly coated.

    Bake the Salmon

    Bake the salmon in the preheated oven for about 12-15 minutes, or until the salmon flakes easily with a fork. The internal temperature should reach 145°F for perfect doneness. While the salmon bakes, toss the mixed greens, avocado, edamame, and cilantro in a large bowl.

    Assemble the Salad

    Once the salmon is done, let it rest for a couple of minutes before flaking it into large pieces. Add the salmon to the salad bowl, drizzle with the remaining marinade, and sprinkle sesame seeds on top for an extra crunch.

    Tips and Tricks

    For an even more flavorful salmon, marinate it for at least 30 minutes before baking. If you’re short on time, a quick 10-minute marinade will still impart plenty of flavor. Toasting the sesame seeds before sprinkling them on the salad enhances their nutty flavor. For a spicier kick, add a dash of sriracha to the marinade. Always let the salmon rest after baking to ensure it stays moist and tender.

    Recipe Variations

    • Swap the salmon for grilled chicken or tofu for a different protein option.
    • Add mango or pineapple for a sweet and tangy twist.
    • Include quinoa or brown rice to make the salad more filling.
    • Use a different dressing, like peanut or miso, for a new flavor profile.
    • Top with crispy wonton strips for added texture.

    Frequently Asked Questions

    Can I use frozen salmon?

    Absolutely! Just make sure to thaw it completely in the refrigerator before marinating and baking. This ensures even cooking and the best texture.

    How long can I store leftovers?

    Leftovers can be stored in an airtight container in the refrigerator for up to 2 days. However, the salad is best enjoyed fresh to maintain the crispness of the greens.

    Can I make this recipe gluten-free?

    Yes, simply use tamari or a gluten-free soy sauce alternative in place of regular soy sauce to make this dish gluten-free.

    Summary

    This Asian Salmon Salad is a delightful mix of flavors and textures, offering a healthy, delicious, and easy-to-make meal option. Perfect for any day of the week, it’s sure to become a favorite in your recipe collection.

  • Jewel Seafood Salad Recipe: A Dazzling Dish That’s Surprisingly Simple

    Jewel Seafood Salad Recipe: A Dazzling Dish That’s Surprisingly Simple

    Crafting a seafood salad that’s as visually stunning as it is delicious might seem like a task reserved for the pros, but guess what? You’re about to prove that theory wrong. This jewel seafood salad is a vibrant mix of flavors and textures that’ll have your guests thinking you’ve been hiding a chef’s hat all along.

    Why This Recipe Works

    • The combination of fresh seafood and crisp vegetables offers a perfect balance of textures.
    • A zesty homemade dressing elevates the natural flavors of the seafood without overpowering them.
    • It’s a versatile dish that can be served as an appetizer, main course, or even a fancy sandwich filling.
    • Prep time is minimal, making it ideal for last-minute gatherings.
    • The colorful presentation makes it a feast for the eyes as well as the palate.

    Ingredients

    • 1 lb mixed seafood (shrimp, scallops, and crab meat), cooked and chilled
    • 1 cup cherry tomatoes, halved
    • 1 avocado, diced
    • 1/2 red onion, thinly sliced
    • 1/4 cup fresh cilantro, chopped
    • 1/4 cup olive oil
    • 2 tbsp lime juice
    • 1 tsp honey
    • Salt and pepper to taste

    Equipment Needed

    • Large mixing bowl
    • Small whisk or fork
    • Measuring cups and spoons
    • Sharp knife
    • Cutting board

    Instructions

    Jewel Seafood Salad Recipe

    Step 1: Prepare the Seafood

    Start by ensuring your mixed seafood is fully cooked and chilled. If you’re using shrimp, make sure they’re peeled and deveined. For scallops, remove the side muscle if present. Crab meat should be picked over for shells. Combine all the seafood in a large mixing bowl.

    Step 2: Chop the Vegetables

    Halve the cherry tomatoes, dice the avocado, and thinly slice the red onion. Add these to the bowl with the seafood. The key here is uniformity in size for a harmonious bite every time.

    Step 3: Make the Dressing

    In a small bowl, whisk together the olive oil, lime juice, honey, salt, and pepper until well combined. This dressing is the secret weapon that ties all the flavors together.

    Step 4: Combine and Toss

    Pour the dressing over the seafood and vegetable mixture. Gently toss everything together to ensure each piece is lightly coated with the dressing. Be careful not to overmix, especially if you’re using delicate crab meat.

    Step 5: Garnish and Serve

    Sprinkle the chopped cilantro over the top for a fresh, herby finish. Serve the salad chilled, either on its own, over a bed of greens, or with some crusty bread on the side.

    Tips and Tricks

    For the best texture, make sure your seafood is patted dry before mixing. If you’re not a fan of cilantro, parsley or dill make great substitutes. To add a bit of crunch, toss in some toasted slivered almonds or pepitas. If you’re preparing this salad ahead of time, wait to add the avocado until just before serving to prevent browning. For a spicier kick, add a finely chopped jalapeño to the mix.

    Recipe Variations

    • Swap out the seafood for grilled chicken or tofu for a different protein option.
    • Add mango or pineapple for a sweet contrast to the savory elements.
    • Use a different dressing, such as a creamy avocado or spicy mayo, to change up the flavor profile.
    • Incorporate quinoa or couscous to turn this salad into a heartier meal.
    • For a Mediterranean twist, add olives and feta cheese.

    Frequently Asked Questions

    Can I use frozen seafood?

    Absolutely! Just make sure it’s fully thawed and patted dry before using. Frozen seafood can be a great time-saver and is often just as nutritious as fresh.

    How long does this salad keep?

    Stored in an airtight container in the refrigerator, it should last for up to two days. However, the fresher, the better, especially when it comes to the texture of the seafood and vegetables.

    Can I make this salad spicy?

    Yes, feel free to add some heat with a dash of cayenne pepper, a sprinkle of red pepper flakes, or that jalapeño we mentioned earlier. Adjust to your preferred level of spiciness.

    Summary

    This jewel seafood salad is a testament to the beauty of simple ingredients coming together to create something extraordinary. It’s quick, versatile, and guaranteed to impress.

  • Creamy Tuna Salad Without Celery: A Crunch-Free Delight

    Creamy Tuna Salad Without Celery: A Crunch-Free Delight

    Perfect for those who love their tuna salad smooth and creamy without the crunch of celery. This recipe is a game-changer for celery haters and lovers of rich, flavorful tuna salad alike. Packed with flavor and easy to make, it’s your new go-to lunch recipe.

    Why This Recipe Works

    • Uses creamy avocado for a healthy fat boost and smooth texture.
    • Dijon mustard adds a tangy depth that elevates the tuna.
    • Quick and easy to prepare, perfect for meal prep or a speedy lunch.
    • No celery means no unwanted crunch, just smooth, creamy goodness.

    Ingredients

    • 2 cans (5 oz each) tuna in water, drained
    • 1 ripe avocado, mashed
    • 2 tbsp mayonnaise
    • 1 tbsp Dijon mustard
    • 1/4 cup red onion, finely diced
    • 1 tbsp lemon juice
    • Salt and pepper to taste

    Equipment Needed

    • Mixing bowl
    • Fork or potato masher
    • Measuring spoons
    • Knife and cutting board

    Instructions

    Tuna Salad Recipe Without Celery

    Step 1: Prepare Your Ingredients

    Start by draining the tuna well to avoid a watery salad. Mash the avocado in a mixing bowl until smooth. Finely dice the red onion to ensure it distributes evenly throughout the salad without overpowering any bite.

    Step 2: Combine the Wet Ingredients

    Add the mayonnaise, Dijon mustard, and lemon juice to the mashed avocado. Mix until the ingredients are fully incorporated. This combination will give your tuna salad a creamy base with a tangy kick.

    Step 3: Add the Tuna and Onion

    Flake the drained tuna into the bowl with the avocado mixture. Add the diced red onion. Gently fold everything together to keep the tuna from becoming too mushy. Season with salt and pepper to taste.

    Step 4: Let It Chill

    For the best flavor, cover the bowl and refrigerate the tuna salad for at least 30 minutes. This allows the flavors to meld together beautifully.

    Step 5: Serve and Enjoy

    Once chilled, give the salad a quick stir and serve on your favorite bread, crackers, or over a bed of greens. Enjoy the creamy, crunchy-free delight!

    Tips and Tricks

    For an even creamier texture, you can add an extra tablespoon of mayonnaise. If you’re not a fan of red onion, try substituting with green onions for a milder flavor. To add a bit of texture without celery, consider tossing in some chopped pickles or capers. Always taste and adjust the seasoning after chilling, as flavors can mellow out in the fridge.

    Recipe Variations

    • Spicy Tuna Salad: Add a dash of hot sauce or some diced jalapeños for heat.
    • Herbed Tuna Salad: Mix in fresh dill, parsley, or chives for a herby twist.
    • Protein-Packed: Stir in some hard-boiled eggs for extra protein.
    • Avocado-Free: Substitute the avocado with Greek yogurt for a different kind of creaminess.

    Frequently Asked Questions

    Can I make this tuna salad ahead of time? Absolutely! This tuna salad can be made up to 2 days in advance. Just keep it covered in the refrigerator until you’re ready to serve.

    What can I use instead of avocado? If you’re not a fan of avocado, Greek yogurt or extra mayonnaise can be used as substitutes to achieve a creamy texture.

    How can I add crunch without celery? Try adding diced cucumbers, apples, or even nuts like almonds or walnuts for a crunchy texture without the celery.

    Summary

    This creamy tuna salad without celery is perfect for those who prefer their salads smooth and rich. Easy to make and versatile, it’s a delicious option for lunches or quick meals. With the option to customize, it’s sure to become a favorite.

  • Baccala Salad Recipe: A Delightful Dive into Mediterranean Flavors

    Baccala Salad Recipe: A Delightful Dive into Mediterranean Flavors

    Ready to whisk your taste buds away to the Mediterranean? This baccala salad recipe is your ticket to a flavorful journey, combining the rich taste of salted cod with fresh, vibrant ingredients.

    Why This Recipe Works

    • The salted cod (baccala) offers a unique, savory depth that’s perfectly balanced by the crispness of fresh vegetables.
    • Soaking the baccala properly removes excess salt, ensuring the fish is perfectly seasoned and tender.
    • The combination of olive oil, lemon juice, and herbs creates a dressing that’s both light and packed with flavor.
    • This salad is versatile, serving as a refreshing appetizer or a hearty main dish.
    • It’s a make-ahead wonder, with flavors that deepen and meld beautifully overnight.

    Ingredients

    • 1 lb baccala (salted cod), soaked for 48 hours, water changed every 12 hours
    • 2 cups mixed bell peppers, thinly sliced
    • 1 cup red onion, thinly sliced
    • 1/2 cup Kalamata olives, pitted and halved
    • 1/4 cup fresh parsley, chopped
    • 1/4 cup extra virgin olive oil
    • 2 tbsp lemon juice
    • 1 tsp dried oregano
    • Salt and pepper to taste

    Equipment Needed

    • Large bowl
    • Mixing spoon
    • Sharp knife
    • Cutting board

    Instructions

    Baccala Salad Recipe Food

    Step 1: Prepare the Baccala

    After soaking the baccala for 48 hours, drain and pat it dry. Cut into bite-sized pieces. This step ensures the fish is tender and not overly salty, making it the perfect base for our salad.

    Step 2: Combine the Vegetables

    In a large bowl, mix the sliced bell peppers, red onion, Kalamata olives, and chopped parsley. The vibrant colors and textures of these vegetables will add freshness and crunch to the salad.

    Step 3: Make the Dressing

    Whisk together the olive oil, lemon juice, dried oregano, and a pinch of salt and pepper in a small bowl. This simple dressing will bring all the flavors together with a bright, herby note.

    Step 4: Assemble the Salad

    Add the prepared baccala to the bowl of vegetables. Drizzle the dressing over the top and gently toss to combine. The key here is to mix gently to keep the baccala pieces intact.

    Step 5: Let It Marinate

    Cover the bowl and refrigerate for at least 2 hours before serving. This marinating time allows the flavors to meld together beautifully, enhancing the overall taste of the salad.

    Tips and Tricks

    For the best baccala salad, consider these pro tips: Always change the soaking water for the baccala every 12 hours to ensure it’s not too salty. If you’re short on time, you can reduce the soaking time to 24 hours, but be sure to taste the baccala for saltiness before using. For an extra flavor boost, add a clove of minced garlic to the dressing. If you prefer a bit of heat, a pinch of red pepper flakes will do the trick. Lastly, serving the salad at room temperature can enhance its flavors, so take it out of the fridge 30 minutes before serving.

    Recipe Variations

    • Add boiled potatoes for a heartier version, turning the salad into a full meal.
    • Incorporate capers for an extra tangy bite that complements the baccala beautifully.
    • Swap the bell peppers for cherry tomatoes for a sweeter, juicier texture.
    • Use fresh basil instead of parsley for a different herbal note.
    • For a creamier dressing, mix in a tablespoon of Greek yogurt.

    Frequently Asked Questions

    Can I use fresh cod instead of baccala?

    While fresh cod can be used, it won’t have the same depth of flavor as baccala. Baccala’s salted and dried nature gives the salad its distinctive taste. If using fresh cod, you might want to lightly salt it and let it sit for a few hours to mimic the flavor.

    How long can I store the baccala salad?

    The salad can be stored in an airtight container in the refrigerator for up to 3 days. The flavors will continue to develop, making it even more delicious over time.

    Is there a quicker way to desalt baccala?

    Soaking is the most effective method to desalt baccala, but if you’re in a hurry, you can soak it in warm water for 8 hours, changing the water every 2 hours. However, the traditional method yields the best texture and flavor.

    Summary

    This baccala salad is a Mediterranean masterpiece, offering a perfect balance of flavors and textures. It’s easy to make, versatile, and sure to impress. Whether as an appetizer or main dish, it’s a delightful way to enjoy the rich taste of salted cod.

  • Crab Salad Sushi Recipe: A Delightful Twist on Classic Sushi

    Crab Salad Sushi Recipe: A Delightful Twist on Classic Sushi

    Crab salad sushi combines the creamy, tangy flavors of crab salad with the delicate texture of sushi rice, all wrapped up in a nori sheet. It’s a fusion dish that’s surprisingly easy to make at home, offering a fresh take on traditional sushi that’s perfect for any occasion.

    Why This Recipe Works

    • The combination of creamy crab salad with sushi rice offers a perfect balance of textures and flavors.
    • Using imitation crab makes this recipe affordable and accessible without sacrificing taste.
    • It’s a versatile dish that can be customized with your favorite sushi ingredients.
    • Perfect for sushi beginners, as it doesn’t require raw fish.
    • Great for parties or as a unique lunch option.

    Ingredients

    • 2 cups sushi rice, cooked and seasoned
    • 1 lb imitation crab meat, shredded
    • 1/4 cup mayonnaise
    • 1 tbsp sriracha sauce
    • 1 tsp sesame oil
    • 1/2 cucumber, julienned
    • 4 nori sheets
    • 1 avocado, sliced
    • 1 tbsp sesame seeds

    Equipment Needed

    • Bamboo sushi mat
    • Sharp knife
    • Mixing bowls
    • Plastic wrap

    Instructions

    Crab Salad Recipe Sushi

    Prepare the Crab Salad

    In a mixing bowl, combine the shredded imitation crab meat with mayonnaise, sriracha sauce, and sesame oil. Mix until well combined. This creamy and slightly spicy crab salad will be the star of your sushi rolls.

    Assemble Your Sushi

    Lay a nori sheet on the bamboo mat covered with plastic wrap. Spread a thin layer of sushi rice over the nori, leaving a small margin at the top. Arrange the crab salad, cucumber, and avocado slices in a line along the bottom edge of the rice.

    Roll It Up

    Using the bamboo mat, tightly roll the sushi away from you, applying gentle pressure to ensure it holds its shape. The plastic wrap helps prevent sticking and makes rolling easier.

    Slice and Serve

    With a sharp knife, slice the roll into 6-8 pieces. Wipe the knife with a damp cloth between cuts for cleaner slices. Sprinkle with sesame seeds for an extra crunch and flavor.

    Enjoy Your Creation

    Serve your crab salad sushi with soy sauce, pickled ginger, and wasabi on the side. Enjoy the creamy, tangy, and slightly spicy flavors that make this dish a standout.

    Tips and Tricks

    • For a smoother rolling process, slightly wet your hands when handling the sushi rice to prevent sticking.
    • If you’re new to rolling sushi, practice with the bamboo mat to get the tightness just right. It’s all about the pressure.
    • Experiment with the amount of sriracha in the crab salad to adjust the heat level to your liking.
    • Letting the rolled sushi sit for a few minutes before slicing can help it hold its shape better.
    • For an extra flavor boost, lightly toast the sesame seeds before sprinkling them on the sushi.

    Recipe Variations

    • Spicy Mayo Drizzle: Add a drizzle of spicy mayo on top for an extra kick.
    • Vegetarian Version: Substitute the crab with mashed avocado or tofu for a vegetarian twist.
    • Extra Crunch: Include tempura flakes inside the roll for added texture.
    • Different Proteins: Try using real crab meat or shrimp instead of imitation crab.
    • Colorful Rolls: Add strips of bell pepper or carrot for a pop of color and crunch.

    Frequently Asked Questions

    Can I use real crab meat instead of imitation?

    Absolutely! Real crab meat will give your sushi a more authentic and luxurious flavor. Just ensure it’s fresh and properly cleaned before using.

    How do I store leftover sushi?

    Sushi is best enjoyed fresh, but if you must store it, wrap it tightly in plastic wrap and refrigerate for up to 24 hours. The rice may harden, so it’s not ideal, but it’s still edible.

    Can I make this recipe gluten-free?

    Yes, by using gluten-free soy sauce and ensuring all other ingredients, like the imitation crab, are gluten-free. Always check labels to be safe.

    What’s the best way to slice sushi rolls?

    Use a very sharp knife and wet it with water or vinegar between cuts. This prevents sticking and ensures clean, beautiful slices every time.

    Can I add other vegetables to the roll?

    Definitely! Feel free to add any vegetables you like, such as bell peppers, carrots, or asparagus. Just make sure they’re cut into thin strips for easy rolling.

    Summary

    This crab salad sushi recipe is a fun and easy way to enjoy sushi at home. With its creamy crab salad center and customizable fillings, it’s sure to be a hit. Perfect for beginners and sushi lovers alike.

  • King Crab Salad Recipe: A Luxurious Twist on a Classic

    King Crab Salad Recipe: A Luxurious Twist on a Classic

    Some say the king crab is the crown jewel of the sea, and this salad is here to prove it. Combining succulent crab meat with crisp vegetables and a zesty dressing, this dish is a showstopper that’s surprisingly simple to make.

    Why This Recipe Works

    • The sweetness of king crab meat pairs perfectly with the tangy dressing, creating a balance of flavors that’s hard to resist.
    • Using fresh, high-quality ingredients ensures every bite is packed with flavor and texture.
    • This recipe is versatile, allowing for various substitutions and additions to suit any palate.
    • It’s a quick and easy dish to prepare, making it perfect for last-minute gatherings or a fancy weeknight dinner.

    Ingredients

    • 1 pound king crab meat, cooked and shelled
    • 1/2 cup mayonnaise
    • 2 tablespoons lemon juice
    • 1 teaspoon Dijon mustard
    • 1/4 cup celery, finely diced
    • 1/4 cup red onion, finely diced
    • Salt and pepper to taste
    • 1 tablespoon fresh dill, chopped
    • Lettuce leaves for serving

    Equipment Needed

    • Mixing bowl
    • Whisk
    • Measuring cups and spoons
    • Knife and cutting board

    Instructions

    King Crab Salad Recipe

    Prepare the Dressing

    In a mixing bowl, whisk together the mayonnaise, lemon juice, and Dijon mustard until smooth. This creates a creamy base that will coat the crab meat beautifully. Tip: For an extra zing, add a pinch of cayenne pepper to the dressing.

    Combine the Ingredients

    Gently fold the king crab meat, celery, red onion, and fresh dill into the dressing. Be careful not to break up the crab meat too much. The goal is to keep those lovely chunks intact for texture. Season with salt and pepper to taste.

    Chill Before Serving

    Cover the bowl with plastic wrap and refrigerate the salad for at least 30 minutes. This allows the flavors to meld together beautifully. Tip: If you’re in a hurry, you can serve it immediately, but the flavors won’t be as developed.

    Serve and Enjoy

    Arrange lettuce leaves on a platter and spoon the crab salad on top. Garnish with additional dill if desired. This dish is best enjoyed cold, making it a perfect summer meal or appetizer.

    Tips and Tricks

    For the best results, use fresh king crab meat if possible. However, high-quality canned or frozen crab meat can also work in a pinch. Always check for any remaining shell fragments before mixing. To elevate the dish, consider adding avocado slices or a sprinkle of paprika for color and flavor. If you’re serving this at a party, consider presenting it in small lettuce cups for easy, elegant serving.

    Recipe Variations

    • Add diced avocado for a creamy texture and rich flavor.
    • Swap the mayonnaise for Greek yogurt for a lighter version.
    • Incorporate diced mango or pineapple for a sweet and savory twist.
    • Use lime juice instead of lemon for a different citrus note.
    • Add a dash of hot sauce or Sriracha for a spicy kick.

    Frequently Asked Questions

    Can I use imitation crab meat?

    While imitation crab meat is more affordable, it won’t provide the same luxurious taste and texture as real king crab meat. If you’re on a budget, consider using lump crab meat as a middle ground.

    How long can I store the salad?

    This salad is best enjoyed within 24 hours of preparation. Store it in an airtight container in the refrigerator to maintain freshness.

    Can I make this salad ahead of time?

    Yes, you can prepare the salad up to a day in advance. Just be sure to keep it refrigerated until you’re ready to serve.

    Summary

    This king crab salad is a delightful blend of sweet crab meat, crisp vegetables, and a tangy dressing. It’s easy to make, versatile, and perfect for any occasion. Whether you’re hosting a dinner party or looking for a quick and elegant meal, this recipe is sure to impress.

  • Lobster Salad Recipe Without Mayonnaise: A Light & Zesty Delight

    Lobster Salad Recipe Without Mayonnaise: A Light & Zesty Delight

    Today, we’re diving into a lobster salad that skips the mayo but keeps all the flavor. Trust me, your taste buds won’t miss it one bit. This recipe is all about letting the lobster shine, with a dressing that’s light, zesty, and utterly delicious.

    Why This Recipe Works

    • It’s a healthier alternative to traditional lobster salad, cutting out the mayo without sacrificing taste.
    • The dressing is a vibrant mix of citrus and herbs, perfectly complementing the sweet lobster meat.
    • It’s incredibly versatile, serving as a perfect sandwich filler, salad topper, or elegant appetizer.

    Ingredients

    • 1 lb cooked lobster meat, chopped
    • 1/4 cup extra virgin olive oil
    • 2 tbsp fresh lemon juice
    • 1 tsp lemon zest
    • 1/4 cup finely chopped celery
    • 2 tbsp chopped fresh dill
    • Salt and pepper to taste

    Equipment Needed

    • Mixing bowl
    • Whisk
    • Measuring cups and spoons
    • Knife and cutting board

    Instructions

    Lobster Salad Recipe Without Mayonnaise

    Step 1: Prepare the Dressing

    In a mixing bowl, whisk together the olive oil, lemon juice, and lemon zest until well combined. This creates a light and zesty base for your salad. Tip: For an extra flavor boost, let the dressing sit for 10 minutes before adding the lobster.

    Step 2: Combine the Ingredients

    Add the chopped lobster meat, celery, and dill to the bowl with the dressing. Gently toss to ensure everything is evenly coated. The key here is to be gentle to keep the lobster meat from breaking apart too much.

    Step 3: Season to Taste

    Season the salad with salt and pepper to your liking. Remember, the lobster is already flavorful, so you might not need much. Tip: Always taste before adding more seasoning.

    Step 4: Chill Before Serving

    Cover the bowl and refrigerate the salad for at least 30 minutes. This allows the flavors to meld together beautifully. Serving it chilled also enhances the refreshing quality of the dish.

    Tips and Tricks

    For the best lobster salad, start with the freshest lobster you can find. If you’re cooking the lobster yourself, be sure not to overcook it, as this can make the meat tough. Another tip is to experiment with the dressing by adding a pinch of cayenne pepper for a slight kick. Lastly, if you’re serving this as an appetizer, consider presenting it in small lettuce cups for an elegant touch.

    Recipe Variations

    • Add avocado for a creamy texture without the mayo.
    • Incorporate diced mango or peach for a sweet contrast to the savory lobster.
    • Swap the dill for tarragon or basil for a different herbal note.
    • Mix in some finely diced cucumber for extra crunch.
    • Use lime instead of lemon for a tropical twist.

    Frequently Asked Questions

    Can I use frozen lobster meat?

    Absolutely! Just make sure it’s thoroughly thawed and drained to avoid any excess water in your salad. Frozen lobster can be a great time-saver and is often more accessible than fresh.

    How long does this salad last in the fridge?

    Stored in an airtight container, it should keep for up to two days. However, it’s best enjoyed the day it’s made when the lobster is at its freshest.

    Can I make this salad ahead of time?

    Yes, preparing it a few hours in advance allows the flavors to develop even more. Just hold off on adding any avocado or fresh herbs until right before serving to maintain their texture and color.

    Summary

    This lobster salad without mayonnaise is a light, flavorful alternative that’s perfect for any occasion. With its zesty dressing and fresh ingredients, it’s sure to impress. Whether you’re looking for a healthy lunch option or an elegant appetizer, this recipe has you covered.

  • Salad Shrimp Recipe: A Quick & Flavorful Delight

    Salad Shrimp Recipe: A Quick & Flavorful Delight

    Kickstart your culinary adventure with this salad shrimp recipe that’s as easy to make as it is delicious. Perfect for a light lunch or a fancy dinner starter, this dish brings the ocean’s bounty right to your plate with minimal fuss and maximum flavor.

    Why This Recipe Works

    • Quick Prep: With pre-cooked shrimp, this recipe comes together in no time, making it perfect for busy weeknights.
    • Versatile: Easily adaptable to suit your taste preferences or whatever ingredients you have on hand.
    • Healthy: Packed with protein and veggies, it’s a nutritious option that doesn’t skimp on taste.

    Ingredients

    • 1 pound salad shrimp, pre-cooked and peeled
    • 2 cups mixed greens
    • 1 avocado, diced
    • 1/2 cup cherry tomatoes, halved
    • 1/4 cup red onion, thinly sliced
    • 2 tbsp olive oil
    • 1 tbsp lemon juice
    • Salt and pepper to taste

    Equipment Needed

    • Mixing bowl
    • Salad spinner
    • Chef’s knife
    • Cutting board

    Instructions

    Salad Shrimp Recipe

    Prepare Your Ingredients

    Start by ensuring your shrimp are thawed if frozen. Rinse them under cold water and pat dry with paper towels. This step is crucial for removing any excess moisture that could dilute your dressing. Meanwhile, wash your mixed greens and spin them dry to ensure your salad isn’t soggy. Dice the avocado, halve the cherry tomatoes, and thinly slice the red onion for a colorful and crunchy addition to your salad.

    Make the Dressing

    In a small bowl, whisk together the olive oil and lemon juice until well combined. Season with salt and pepper to taste. This simple dressing brings a bright and tangy flavor that complements the sweetness of the shrimp perfectly. For an extra kick, consider adding a pinch of garlic powder or a dash of hot sauce.

    Combine the Salad

    In a large mixing bowl, toss the mixed greens, avocado, cherry tomatoes, and red onion with half of the dressing. This ensures every bite is flavorful. Add the shrimp and gently toss again with the remaining dressing. Be careful not to overmix, as you want to keep the shrimp intact for a pleasing presentation.

    Serve Immediately

    This salad is best enjoyed fresh, so serve it right away. If you need to prepare it in advance, keep the dressing separate until just before serving to maintain the crispness of the greens and the texture of the shrimp.

    Tips and Tricks

    For the best texture, avoid overcooking the shrimp if you’re using raw shrimp instead of pre-cooked. They should be pink and opaque, which usually takes about 2-3 minutes per side over medium heat. To add more depth to your dressing, incorporate a teaspoon of Dijon mustard or honey for a sweet and tangy twist. Lastly, for a more substantial meal, consider adding quinoa or couscous to the salad for extra fiber and protein.

    Recipe Variations

    • Spicy Shrimp Salad: Add diced jalapeños or a sprinkle of chili flakes for a spicy kick.
    • Mediterranean Twist: Incorporate olives, feta cheese, and cucumber for a Mediterranean flair.
    • Asian-Inspired: Swap the olive oil and lemon juice for sesame oil and rice vinegar, and add some edamame and mandarin oranges.

    Frequently Asked Questions

    Can I use frozen shrimp for this recipe? Absolutely! Just make sure to thaw them completely and pat them dry before adding to the salad to prevent any wateriness.

    How long can I store this salad? It’s best enjoyed immediately, but you can store it in the refrigerator for up to a day. Keep the dressing separate until ready to serve.

    Can I add other proteins? Yes, this salad is versatile. Grilled chicken or tofu can be great alternatives or additions to the shrimp.

    Summary

    This salad shrimp recipe is a quick, healthy, and delicious option for any meal. With its simple preparation and versatile nature, it’s sure to become a go-to in your culinary repertoire.

  • Tuna Salad Recipe for Diabetics: A Deliciously Healthy Twist

    Tuna Salad Recipe for Diabetics: A Deliciously Healthy Twist

    Tantalizing your taste buds while keeping your blood sugar in check is no small feat, but this tuna salad recipe is up to the challenge. Packed with flavor and nutrients, it’s a game-changer for anyone looking to enjoy a hearty meal without the guilt.

    Why This Recipe Works

    • Low in carbs and sugars, making it perfect for diabetics.
    • Rich in omega-3 fatty acids from tuna, promoting heart health.
    • Uses Greek yogurt instead of mayo for a healthier, protein-packed dressing.
    • Includes crunchy veggies for texture and fiber, aiding in digestion.
    • Quick and easy to prepare, perfect for a healthy lunch or snack.

    Ingredients

    • 2 cans (5 oz each) of tuna in water, drained
    • 1/2 cup plain Greek yogurt
    • 1/4 cup diced celery
    • 1/4 cup diced red onion
    • 1 tbsp lemon juice
    • 1 tsp Dijon mustard
    • Salt and pepper to taste

    Equipment Needed

    • Mixing bowl
    • Measuring cups and spoons
    • Knife and cutting board
    • Can opener

    Instructions

    Tuna Salad Recipe For Diabetics

    Step 1: Prepare Your Ingredients

    Start by draining the tuna thoroughly to avoid a watery salad. Dice the celery and red onion into small, uniform pieces to ensure every bite has a perfect crunch. Measuring out your Greek yogurt, lemon juice, and Dijon mustard beforehand will streamline the mixing process.

    Step 2: Mix the Dressing

    In your mixing bowl, combine the Greek yogurt, lemon juice, and Dijon mustard. Whisk them together until the mixture is smooth and homogenous. This creates a tangy and creamy base for your salad, minus the excess fats found in traditional mayo.

    Step 3: Combine All Ingredients

    Add the drained tuna, diced celery, and red onion to the bowl with your dressing. Gently fold everything together to coat the tuna and veggies evenly without breaking the tuna down too much. Season with salt and pepper to taste.

    Step 4: Chill Before Serving

    For the best flavor, cover the bowl and refrigerate your tuna salad for at least 30 minutes. This allows the flavors to meld together beautifully. Serving it chilled also enhances the refreshing quality of the dish.

    Step 5: Serve and Enjoy

    Once chilled, give your tuna salad a quick stir and serve it on a bed of greens, in a whole wheat wrap, or with whole grain crackers for added fiber. It’s a versatile dish that’s as nutritious as it is delicious.

    Tips and Tricks

    For an extra crunch, consider adding diced cucumbers or bell peppers. If you’re watching your sodium intake, opt for low-sodium tuna and skip adding extra salt. To boost the protein content even further, a handful of chopped nuts or seeds can be a great addition. Always taste your salad before serving to adjust the seasoning as needed. Remember, the key to a great tuna salad is balancing the flavors to suit your palate.

    Recipe Variations

    • Swap Greek yogurt with avocado for a creamy, healthy fat alternative.
    • Add a dash of curry powder for a spicy twist.
    • Include chopped apples or grapes for a sweet and savory version.
    • Use chickpeas instead of tuna for a vegetarian option.
    • Mix in some capers or olives for a briny flavor boost.

    Frequently Asked Questions

    Can I use canned salmon instead of tuna?

    Absolutely! Canned salmon is a great alternative to tuna and offers a similar texture and nutritional profile. Just make sure to remove any bones and skin before mixing it into your salad.

    How long can I store this tuna salad?

    This tuna salad can be stored in an airtight container in the refrigerator for up to 3 days. Make sure to give it a good stir before serving again.

    Is this recipe keto-friendly?

    Yes, with its low carb content, this tuna salad fits well within a keto diet. Just be mindful of the serving accompaniments to keep your carb intake in check.

    Summary

    This tuna salad recipe is a diabetic-friendly delight that doesn’t skimp on flavor or nutrition. Easy to make and versatile, it’s a perfect addition to your healthy eating plan.