Category: Vegetable Salad Recipes

  • Crunchy Coleslaw Salad Recipe: The Ultimate Side Dish

    Crunchy Coleslaw Salad Recipe: The Ultimate Side Dish

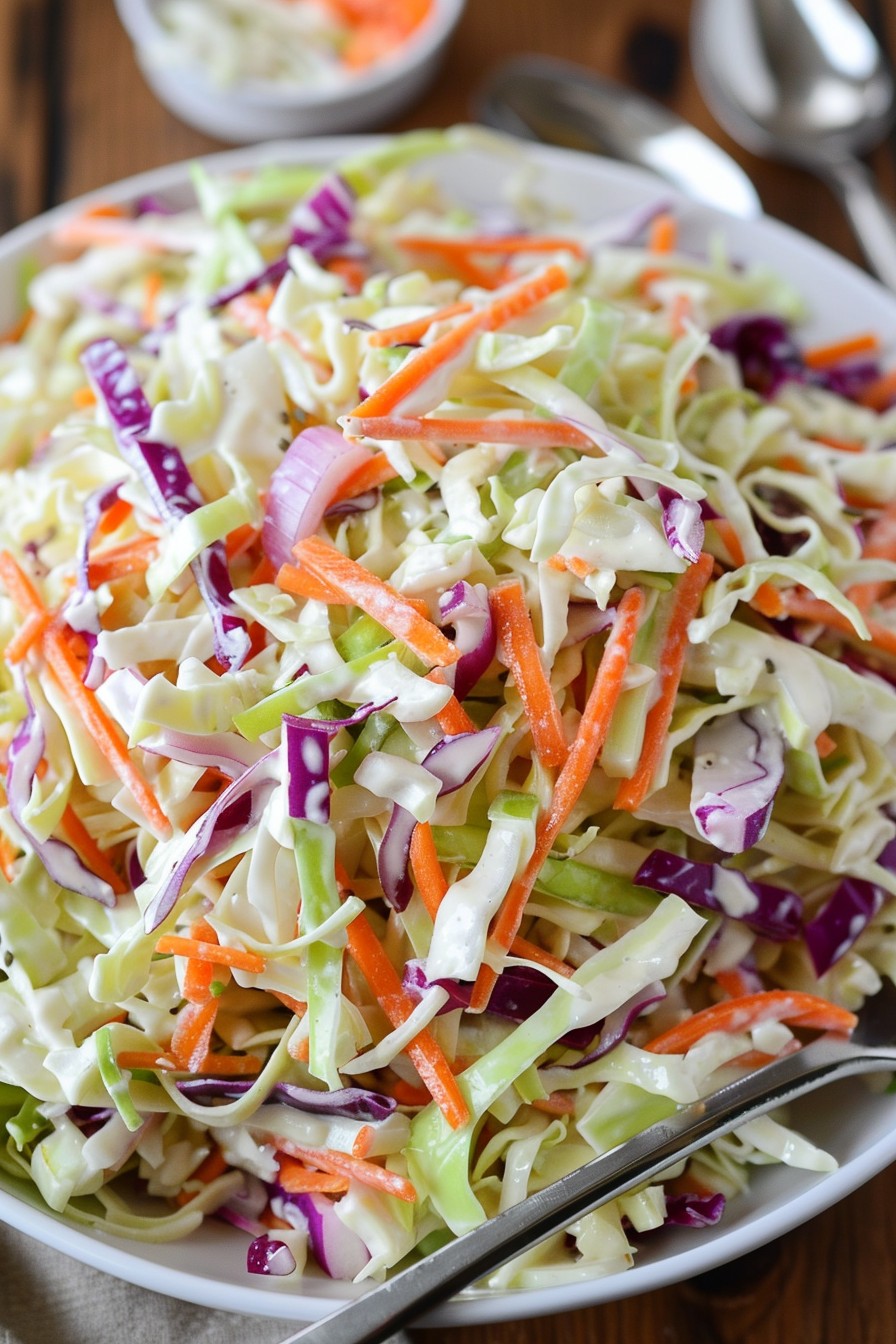
    Bold flavors and crisp textures make this coleslaw a must-try. Perfect for picnics, BBQs, or just because you deserve something crunchy and delicious today.

    Why This Recipe Works

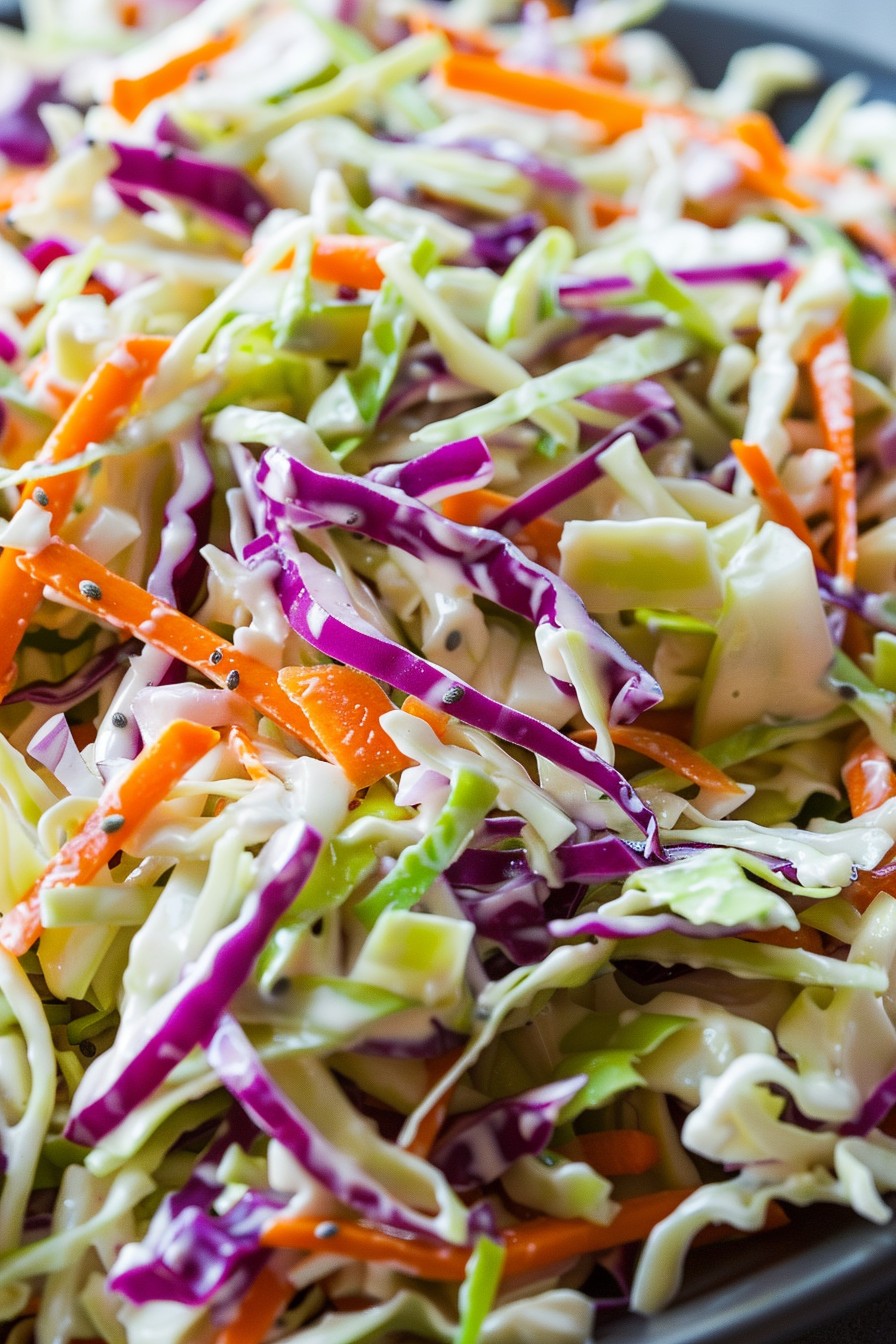
    • The combination of green and red cabbage adds not just color but a depth of flavor that’s unbeatable.
    • Our secret dressing recipe balances tangy, sweet, and creamy perfectly.
    • Adding carrots and a hint of onion brings a freshness that elevates the entire dish.
    • It’s incredibly versatile – serve it as a side, on sandwiches, or even as a taco topping.
    • Prep is a breeze, making it perfect for last-minute gatherings.

    Ingredients

    • 1/2 head green cabbage, thinly sliced
    • 1/2 head red cabbage, thinly sliced
    • 2 large carrots, grated
    • 1/4 cup red onion, finely diced
    • 1 cup mayonnaise
    • 2 tbsp apple cider vinegar
    • 1 tbsp sugar
    • 1 tsp celery seed
    • Salt and pepper to taste

    Equipment Needed

    • Large mixing bowl
    • Whisk
    • Chef’s knife
    • Grater
    • Measuring cups and spoons

    Instructions

    Crunchy Coleslaw Salad Recipe

    Step 1: Prep Your Veggies

    Start by thinly slicing both the green and red cabbage. You’re aiming for shreds that are about 1/8 inch thick for the perfect crunch. Grate the carrots on the large holes of your grater for nice, hearty pieces. Finely dice the red onion to ensure every bite has a hint of its sharp, sweet flavor. Combine all these in your large mixing bowl.

    Step 2: Whisk Together the Dressing

    In a smaller bowl, whisk together the mayonnaise, apple cider vinegar, sugar, and celery seed until smooth. The sugar should be completely dissolved, and the celery seed evenly distributed. This is your moment to adjust the seasoning with salt and pepper to your liking.

    Step 3: Combine and Toss

    Pour the dressing over the cabbage mixture. Using a large spoon or your hands (clean, of course), toss everything together until the veggies are evenly coated. Be gentle to keep the cabbage crisp but thorough to ensure every shred gets some love.

    Step 4: Let It Marinate

    Cover the bowl with plastic wrap and let it sit in the fridge for at least an hour. This waiting period allows the flavors to meld together beautifully and the cabbage to soften just enough while retaining its crunch.

    Step 5: Serve and Enjoy

    Give the coleslaw one final toss before serving to redistribute any dressing that may have settled. Serve it chilled for the best texture and flavor experience.

    Tips and Tricks

    For an extra crunch, consider adding a handful of sunflower seeds or chopped almonds. If you’re not a fan of mayonnaise, Greek yogurt makes a fantastic substitute that’s lighter but just as creamy. Always taste your dressing before adding it to the veggies; adjusting the sweetness or tanginess to your preference is key. For a brighter color, add a bit more red cabbage or even some shredded purple carrots. Lastly, if you’re making this ahead of time, hold off on adding the dressing until a few hours before serving to keep everything crisp.

    Recipe Variations

    • Spicy Coleslaw: Add a diced jalapeño or a teaspoon of cayenne pepper to the dressing for a kick.
    • Asian-Inspired Coleslaw: Swap the dressing for a mix of soy sauce, sesame oil, rice vinegar, and a touch of honey.
    • Fruity Coleslaw: Mix in some diced apples or raisins for a sweet twist.
    • Vegan Coleslaw: Use vegan mayonnaise and skip the sugar or use a vegan substitute.
    • Herbed Coleslaw: Add fresh dill, parsley, or cilantro for a herby freshness.

    Frequently Asked Questions

    Q: Can I make this coleslaw ahead of time?
    A: Absolutely! In fact, letting it sit for a few hours or overnight allows the flavors to meld together beautifully. Just keep it covered in the fridge until you’re ready to serve.

    Q: How long does homemade coleslaw last in the fridge?
    A: Stored properly in an airtight container, your coleslaw will stay fresh and crunchy for up to 3 days. After that, it might start to get a bit soggy.

    Q: Can I use bagged coleslaw mix instead of fresh cabbage?
    A: Sure, if you’re short on time, a bagged mix can be a great shortcut. Just be sure to check the freshness of the veggies, as they can sometimes be less crisp than freshly cut ones.

    Summary

    This crunchy coleslaw salad is the perfect blend of crisp veggies and creamy dressing, making it an ideal side for any meal. Easy to make and versatile, it’s sure to become a staple in your recipe collection.

  • Roasted Cauliflower Salad Recipe: A Crunchy, Flavorful Delight

    Roasted Cauliflower Salad Recipe: A Crunchy, Flavorful Delight

    Every now and then, a recipe comes along that changes the way you think about a vegetable. This roasted cauliflower salad is that recipe. It’s packed with flavors and textures that will make you forget you’re eating something so good for you.

    Why This Recipe Works

    • The roasting process caramelizes the cauliflower, bringing out its natural sweetness and adding a depth of flavor that boiling or steaming just can’t match.
    • Combining the roasted cauliflower with fresh greens, nuts, and a tangy dressing creates a perfect balance of textures and tastes.
    • It’s versatile! Serve it as a side dish or add some protein to make it a main course.
    • It’s a great way to get your veggies in without feeling like you’re sacrificing flavor for health.
    • Leftovers (if you have any) taste just as good the next day, making it a great option for meal prep.

    Ingredients

    • 1 large head of cauliflower, cut into florets
    • 2 tablespoons olive oil
    • 1 teaspoon salt
    • 1/2 teaspoon black pepper
    • 4 cups mixed greens
    • 1/2 cup chopped walnuts
    • 1/4 cup dried cranberries
    • 1/4 cup crumbled feta cheese
    • 2 tablespoons balsamic vinegar
    • 1 tablespoon honey
    • 1 teaspoon Dijon mustard

    Equipment Needed

    • Baking sheet
    • Mixing bowls
    • Whisk
    • Measuring cups and spoons

    Instructions

    Roasted Cauliflower Salad Recipe

    Preheat and Prepare

    Start by preheating your oven to 400°F. While the oven is heating up, toss the cauliflower florets with olive oil, salt, and pepper on a baking sheet until they’re evenly coated. This ensures every piece gets perfectly roasted.

    Roast to Perfection

    Spread the cauliflower out in a single layer on the baking sheet. Roast in the preheated oven for 25-30 minutes, or until the edges are golden brown and crispy. Stirring halfway through cooking helps achieve even browning.

    Whisk Together the Dressing

    While the cauliflower is roasting, whisk together the balsamic vinegar, honey, and Dijon mustard in a small bowl. This dressing adds a sweet and tangy flavor that complements the roasted cauliflower beautifully.

    Assemble the Salad

    In a large mixing bowl, combine the mixed greens, roasted cauliflower, chopped walnuts, dried cranberries, and crumbled feta cheese. Drizzle the dressing over the top and toss gently to combine all the ingredients.

    Serve and Enjoy

    Transfer the salad to a serving dish and enjoy immediately. The contrast between the warm roasted cauliflower and the cool, crisp greens is absolutely delightful.

    Tips and Tricks

    For an extra crunch, toast the walnuts in a dry skillet over medium heat for a few minutes before adding them to the salad. If you’re not a fan of feta, goat cheese or blue cheese would also be delicious in this salad. To make it a meal, add some grilled chicken or chickpeas for protein. The dressing can be made ahead of time and stored in the refrigerator for up to a week. Just give it a good shake or whisk before using.

    Recipe Variations

    • Swap out the walnuts for pecans or almonds for a different nutty flavor.
    • Use pomegranate seeds instead of dried cranberries for a pop of color and a tart contrast.
    • Add some sliced avocado for creaminess and healthy fats.
    • Try roasting the cauliflower with some curry powder or smoked paprika for a spice kick.
    • For a vegan version, omit the cheese or use a plant-based alternative.

    Frequently Asked Questions

    Can I use frozen cauliflower?

    While fresh cauliflower is preferred for this recipe, you can use frozen cauliflower in a pinch. Just be sure to thaw and pat it dry thoroughly before roasting to avoid steaming it in the oven.

    How long does this salad keep?

    This salad is best enjoyed fresh, but it will keep in the refrigerator for up to 2 days. The greens may wilt slightly, but the flavors will still be delicious.

    Can I make this salad ahead of time?

    You can roast the cauliflower and prepare the dressing ahead of time, but wait to assemble the salad until just before serving to keep the greens crisp.

    Summary

    This roasted cauliflower salad is a flavorful, nutritious dish that’s perfect for any occasion. With its combination of sweet, tangy, and crunchy elements, it’s sure to become a new favorite.

  • Gazpacho Salad Recipe: A Cool Twist on a Classic

    Gazpacho Salad Recipe: A Cool Twist on a Classic

    Kick off your summer with this refreshing gazpacho salad recipe that combines the best of both worlds: the cool, crisp flavors of gazpacho with the satisfying crunch of a fresh salad. Perfect for those hot days when you want something light yet flavorful.

    Why This Recipe Works

    • It’s a no-cook recipe, making it perfect for hot summer days.
    • The combination of fresh vegetables and a tangy dressing brings out the best in each ingredient.
    • It’s versatile; serve it as a side dish or add protein to make it a main course.
    • The recipe is quick to prepare, taking less than 30 minutes from start to finish.
    • It’s a great way to use up summer vegetables from your garden or farmers’ market.

    Ingredients

    • 2 cups diced cucumbers
    • 2 cups diced tomatoes
    • 1 cup diced red bell pepper
    • 1/2 cup diced red onion
    • 1/4 cup chopped fresh basil
    • 2 tbsp olive oil
    • 2 tbsp red wine vinegar
    • 1 tsp salt
    • 1/2 tsp black pepper

    Equipment Needed

    • Large mixing bowl
    • Cutting board
    • Chef’s knife
    • Measuring cups and spoons
    • Whisk

    Instructions

    Gazpacho Salad Recipe

    Step 1: Prepare the Vegetables

    Start by washing all your vegetables thoroughly. Dice the cucumbers, tomatoes, red bell pepper, and red onion into uniform pieces to ensure every bite is perfect. Chop the fresh basil finely. This uniformity not only makes the salad look more appealing but also ensures that the flavors meld together beautifully.

    Step 2: Make the Dressing

    In a small bowl, whisk together the olive oil, red wine vinegar, salt, and black pepper until well combined. This simple dressing will enhance the natural flavors of the vegetables without overpowering them.

    Step 3: Combine Ingredients

    In a large mixing bowl, combine the diced cucumbers, tomatoes, red bell pepper, red onion, and chopped basil. Pour the dressing over the vegetables and toss gently to coat everything evenly. Let the salad sit for about 10 minutes to allow the flavors to meld together.

    Step 4: Serve and Enjoy

    Serve the gazpacho salad chilled for the best flavor. It’s perfect on its own or as a side dish with grilled meats or seafood. Garnish with additional basil leaves if desired for an extra touch of freshness.

    Tips and Tricks

    For an even more flavorful salad, consider letting it marinate in the refrigerator for an hour before serving. This allows the vegetables to absorb the dressing more fully. If you’re not a fan of red wine vinegar, apple cider vinegar makes a great substitute. For a bit of crunch, add some diced avocado or croutons right before serving. Always taste and adjust the seasoning before serving, as the saltiness can vary depending on the vegetables.

    Recipe Variations

    • Add diced avocado for a creamy texture.
    • Include cooked shrimp or chicken for a protein boost.
    • Swap out the red wine vinegar for balsamic for a sweeter dressing.
    • Add a handful of croutons for extra crunch.
    • Mix in some cooked quinoa or farro for a heartier salad.

    Frequently Asked Questions

    Can I make this salad ahead of time?

    Yes, you can prepare the salad up to a day in advance. However, for the best texture, add any crunchy elements like croutons or avocado just before serving.

    Is there a substitute for red wine vinegar?

    Absolutely! Apple cider vinegar or balsamic vinegar can be used in place of red wine vinegar for a slightly different flavor profile.

    Can I add other vegetables?

    Definitely. Feel free to include any summer vegetables you have on hand. Zucchini, corn, or even green beans would make great additions.

    Summary

    This gazpacho salad is a refreshing, no-cook dish perfect for summer. With its vibrant colors and flavors, it’s sure to be a hit at any gathering. Quick to prepare and versatile, it’s a must-try recipe for the season.

  • Chill Out with This Cool Cold Beetroot Salad Recipe

    Chill Out with This Cool Cold Beetroot Salad Recipe

    Hey there, food lovers! Have you ever wanted to impress your friends with a salad that’s as vibrant in color as it is in flavor? Here’s your chance to shine with this cold beetroot salad that’s perfect for those hot summer days or whenever you need a refreshing side dish.

    Why This Recipe Works

    • The natural sweetness of beets pairs perfectly with the tanginess of the dressing, creating a balanced flavor profile.
    • It’s a no-cook recipe, making it ideal for hot days when you don’t want to turn on the stove.
    • The salad is packed with nutrients, offering a healthy option that doesn’t skimp on taste.
    • It’s versatile, allowing for various add-ins or substitutions based on what you have on hand.
    • The vibrant color makes it a showstopper at any meal, guaranteed to catch everyone’s eye.

    Ingredients

    • 3 medium beetroots, peeled and grated (about 2 cups)
    • 1/4 cup olive oil
    • 2 tablespoons apple cider vinegar
    • 1 tablespoon honey
    • 1/2 teaspoon salt
    • 1/4 teaspoon black pepper
    • 1/4 cup chopped walnuts
    • 2 tablespoons chopped fresh dill

    Equipment Needed

    • Grater
    • Mixing bowl
    • Whisk
    • Measuring cups and spoons

    Instructions

    Cold Beetroot Salad Recipe

    Prepare the Beetroots

    Start by peeling the beetroots. Then, using a grater, grate them into a mixing bowl. Be careful, as beetroots can stain your hands and clothes. Wearing gloves might be a good idea if you’re concerned about stains.

    Make the Dressing

    In a small bowl, whisk together the olive oil, apple cider vinegar, honey, salt, and black pepper until well combined. This dressing will bring a sweet and tangy flavor to the salad, enhancing the natural taste of the beetroots.

    Combine Ingredients

    Pour the dressing over the grated beetroots and toss well to ensure every strand is coated. Then, add the chopped walnuts and fresh dill, mixing gently to distribute them evenly throughout the salad.

    Chill the Salad

    Cover the bowl with plastic wrap and refrigerate for at least 1 hour before serving. This chilling time allows the flavors to meld together beautifully, making the salad even more delicious.

    Serve and Enjoy

    Once chilled, give the salad a quick stir and serve it cold. It’s perfect as a side dish or even as a light main course for those who love their veggies.

    Tips and Tricks

    For an extra crunch, toast the walnuts before adding them to the salad. This will enhance their flavor and add a delightful texture. If you’re not a fan of dill, parsley or cilantro can be great substitutes. To save time, you can use pre-cooked beetroots, but make sure they’re cooled before grating. For a creamier version, add a dollop of Greek yogurt to the dressing. Lastly, if you’re preparing this salad ahead of time, add the walnuts just before serving to keep them crunchy.

    Recipe Variations

    • Add crumbled feta or goat cheese for a creamy, tangy twist.
    • Include sliced apples or pears for a sweet and crunchy addition.
    • Swap walnuts for pecans or almonds for a different nutty flavor.
    • Mix in some arugula or spinach to turn it into a more substantial salad.
    • For a citrusy note, add orange segments or a bit of orange zest to the dressing.

    Frequently Asked Questions

    Can I use canned beetroots?

    Yes, you can use canned beetroots for convenience. Just make sure to drain and rinse them well before grating to remove any excess brine or preservatives that might alter the taste of your salad.

    How long can I store this salad?

    This salad can be stored in an airtight container in the refrigerator for up to 3 days. However, the walnuts may lose some of their crunch over time, so you might want to add them fresh when serving leftovers.

    Is there a way to make this salad vegan?

    Absolutely! Just substitute the honey with maple syrup or agave nectar to keep the sweetness without using any animal products. The rest of the ingredients are already vegan-friendly.

    Summary

    This cold beetroot salad is a refreshing, nutritious, and colorful dish that’s perfect for any occasion. Easy to make and customizable, it’s sure to become a favorite in your recipe collection.

  • Yellow Potato Salad Recipe: A Summer Picnic Must-Have

    Yellow Potato Salad Recipe: A Summer Picnic Must-Have

    Very few dishes scream summer like a hearty, creamy yellow potato salad. Perfect for picnics, potlucks, or just a cozy night in, this recipe is a crowd-pleaser that combines simplicity with deliciousness. Let’s dive into making this classic dish that’s bound to become a staple in your recipe collection.

    Why This Recipe Works

    • The use of yellow potatoes offers a buttery texture and rich flavor that stands up well to dressing.
    • A perfect balance of creamy and tangy dressing coats every bite without overwhelming the potatoes.
    • Simple ingredients come together to create a complex flavor profile that’s both comforting and refreshing.
    • It’s versatile enough to serve as a side or a main dish, depending on your mood.
    • The recipe is easy to customize with your favorite add-ins or spices.

    Ingredients

    • 2 pounds yellow potatoes, washed and cut into 1-inch cubes
    • 1 cup mayonnaise
    • 2 tablespoons Dijon mustard
    • 1 tablespoon apple cider vinegar
    • 1/2 cup finely chopped red onion
    • 2 stalks celery, finely chopped
    • 2 hard-boiled eggs, chopped
    • Salt and pepper to taste
    • 1/4 cup chopped fresh parsley

    Equipment Needed

    • Large pot
    • Mixing bowls
    • Knife and cutting board
    • Measuring cups and spoons
    • Potato masher (optional)

    Instructions

    Yellow Potato Salad Recipe

    Step 1: Cook the Potatoes

    Place the cubed potatoes in a large pot and cover with cold water by about an inch. Bring to a boil over high heat, then reduce to a simmer and cook until the potatoes are tender but still hold their shape, about 10-12 minutes. Tip: Start checking at 10 minutes to avoid overcooking. Drain well and let cool slightly.

    Step 2: Prepare the Dressing

    In a large mixing bowl, whisk together the mayonnaise, Dijon mustard, and apple cider vinegar until smooth. Season with salt and pepper to taste. This creamy, tangy dressing is the secret to the salad’s irresistible flavor.

    Step 3: Combine the Ingredients

    Add the slightly cooled potatoes to the dressing along with the red onion, celery, and hard-boiled eggs. Gently fold everything together until the potatoes are evenly coated. Tip: For a chunkier salad, leave some potato pieces larger; for a creamier texture, lightly mash a few pieces.

    Step 4: Chill and Serve

    Cover the salad and refrigerate for at least 1 hour to allow the flavors to meld. Before serving, sprinkle with chopped fresh parsley for a pop of color and freshness. Tip: The salad tastes even better the next day, making it a great make-ahead dish.

    Tips and Tricks

    For those looking to elevate their yellow potato salad, consider these advanced tips. First, roasting the potatoes instead of boiling can add a deeper flavor and firmer texture. Second, incorporating crispy bacon or smoked paprika can introduce a smoky dimension that’s utterly addictive. Lastly, for a lighter version, substitute half the mayonnaise with Greek yogurt. These tweaks can transform the dish while keeping its soul intact.

    Recipe Variations

    • Add diced pickles or capers for a briny twist.
    • Mix in some diced avocado for creaminess and healthy fats.
    • For a spicy kick, include a dash of hot sauce or diced jalapeños.
    • Swap the parsley for dill or chives for a different herbal note.
    • Include some crumbled feta or blue cheese for a tangy, salty punch.

    Frequently Asked Questions

    Can I use a different type of potato?

    Absolutely! While yellow potatoes are ideal for their texture and flavor, red or Yukon gold potatoes can also work well. Just avoid russet potatoes as they tend to fall apart more easily.

    How long can I store the potato salad?

    Stored in an airtight container in the refrigerator, the salad will keep for up to 3 days. Be sure to give it a good stir before serving again to redistribute the dressing.

    Can I make this recipe vegan?

    Yes, by substituting the mayonnaise with a vegan alternative and omitting the eggs. You might also add some diced tofu or chickpeas for extra protein.

    Summary

    This yellow potato salad recipe is a versatile, flavorful dish that’s perfect for any occasion. With its creamy dressing, tender potatoes, and customizable add-ins, it’s sure to be a hit. Whether you’re a novice or a seasoned cook, this recipe is straightforward and rewarding.

  • Amish Broccoli Cauliflower Salad Recipe: A Crunchy, Creamy Delight

    Amish Broccoli Cauliflower Salad Recipe: A Crunchy, Creamy Delight

    Delight your taste buds with this Amish-inspired broccoli cauliflower salad that’s bursting with flavors and textures. Perfect for picnics, potlucks, or a healthy side dish, this recipe is a crowd-pleaser.

    Why This Recipe Works

    • The combination of raw broccoli and cauliflower provides a satisfying crunch and is packed with nutrients.
    • A creamy, slightly sweet dressing balances the vegetables’ natural bitterness.
    • Adding bacon and cheese introduces a savory depth that makes this salad irresistible.
    • It’s a make-ahead dish, allowing flavors to meld beautifully in the fridge.
    • Versatile and easy to customize based on what you have in your pantry.

    Ingredients

    • 4 cups broccoli florets, chopped into bite-sized pieces
    • 4 cups cauliflower florets, chopped into bite-sized pieces
    • 1/2 cup red onion, finely diced
    • 1 cup cheddar cheese, shredded
    • 6 strips bacon, cooked and crumbled
    • 1/2 cup mayonnaise
    • 1/4 cup sour cream
    • 2 tablespoons apple cider vinegar
    • 2 tablespoons sugar
    • Salt and pepper to taste

    Equipment Needed

    • Large mixing bowl
    • Whisk
    • Measuring cups and spoons
    • Knife and cutting board

    Instructions

    Amish Broccoli Cauliflower Salad Recipe

    Step 1: Prepare the Vegetables

    Start by washing the broccoli and cauliflower under cold water. Dry them thoroughly to ensure the dressing sticks well. Chop into bite-sized pieces for easy eating. Finely dice the red onion to distribute its flavor evenly throughout the salad.

    Step 2: Make the Dressing

    In a small bowl, whisk together mayonnaise, sour cream, apple cider vinegar, and sugar until smooth. Season with salt and pepper to taste. This creamy dressing will coat the vegetables perfectly, offering a sweet and tangy flavor profile.

    Step 3: Combine Ingredients

    In a large mixing bowl, combine the chopped broccoli, cauliflower, red onion, shredded cheddar cheese, and crumbled bacon. Pour the dressing over the top and gently toss until everything is evenly coated. Tip: Letting the salad sit for an hour before serving enhances the flavors.

    Step 4: Chill Before Serving

    Cover the bowl with plastic wrap and refrigerate for at least 1 hour. This chilling time allows the flavors to meld together and the vegetables to slightly soften, making the salad even more delicious.

    Step 5: Final Touches

    Before serving, give the salad a quick stir to redistribute the dressing. Taste and adjust seasoning if necessary. For an extra crunch, sprinkle some additional bacon crumbles on top.

    Tips and Tricks

    For those looking to elevate this Amish broccoli cauliflower salad, consider roasting the broccoli and cauliflower for a deeper flavor. If you’re short on time, pre-chopped vegetables from the store can be a lifesaver. To make this salad healthier, substitute Greek yogurt for mayonnaise and sour cream. Always taste the dressing before adding it to the salad to ensure the balance of flavors is to your liking. Lastly, for a vegetarian version, simply omit the bacon or use a plant-based alternative.

    Recipe Variations

    • Add sunflower seeds or chopped nuts for an extra crunch.
    • Incorporate dried cranberries or raisins for a sweet contrast.
    • Use a mix of different cheeses like feta or blue cheese for a unique twist.
    • For a lighter version, replace half of the mayonnaise with Greek yogurt.
    • Add diced apples or grapes for a fruity flavor burst.

    Frequently Asked Questions

    Can I make this salad ahead of time?

    Absolutely! This salad actually tastes better after it’s had time to sit in the fridge, allowing the flavors to meld. Just be sure to add any crunchy toppings like nuts or additional bacon right before serving to maintain their texture.

    How long does this salad last in the fridge?

    Stored in an airtight container, this salad can last up to 3 days in the refrigerator. However, it’s best enjoyed within the first 48 hours for optimal freshness and texture.

    Can I freeze this salad?

    Freezing is not recommended as the vegetables will become mushy upon thawing, and the mayonnaise-based dressing may separate, affecting the salad’s texture and flavor.

    Summary

    This Amish broccoli cauliflower salad is a perfect blend of crunchy vegetables, creamy dressing, and savory toppings. It’s easy to make, customizable, and always a hit at gatherings. Give it a try for your next meal or event!

  • Spinach and Kale Salad Recipe: A Leafy Green Delight

    Spinach and Kale Salad Recipe: A Leafy Green Delight

    Ready to dive into a bowl of greens that’s anything but boring? This spinach and kale salad is packed with flavors and textures that will make you forget you’re eating something healthy. Let’s get started!

    Why This Recipe Works

    • The combination of spinach and kale offers a perfect balance of tender and hearty greens.
    • A homemade dressing brings everything together with a zesty kick.
    • Adding nuts and cheese introduces a delightful crunch and creaminess.
    • It’s versatile enough to serve as a side or bulk up for a main dish.
    • Prep is quick and easy, making it perfect for busy weeknights.

    Ingredients

    • 2 cups fresh spinach, washed and dried
    • 2 cups kale, stems removed and leaves torn into bite-sized pieces
    • 1/4 cup olive oil
    • 2 tbsp lemon juice
    • 1 tsp honey
    • 1/2 tsp salt
    • 1/4 tsp black pepper
    • 1/4 cup walnuts, toasted and chopped
    • 1/4 cup feta cheese, crumbled

    Equipment Needed

    • Large salad bowl
    • Small mixing bowl
    • Whisk
    • Measuring cups and spoons
    • Knife and cutting board

    Instructions

    Spinach And Kale Salad Recipe

    Step 1: Prepare the Greens

    Start by washing your spinach and kale under cold water. Dry them thoroughly using a salad spinner or patting them dry with a clean kitchen towel. Tear the kale into bite-sized pieces and place both greens in a large salad bowl. Tip: Massaging the kale with a bit of olive oil can help soften its texture.

    Step 2: Make the Dressing

    In a small mixing bowl, whisk together the olive oil, lemon juice, honey, salt, and black pepper until well combined. Taste and adjust the seasoning if necessary. This dressing is the secret to bringing all the flavors together, so don’t skip it!

    Step 3: Toast the Walnuts

    Heat a small skillet over medium heat. Add the walnuts and toast them for about 3-5 minutes, stirring occasionally, until they’re fragrant and slightly browned. Let them cool before chopping. Tip: Toasting nuts enhances their flavor and adds a nice crunch to the salad.

    Step 4: Assemble the Salad

    Add the toasted walnuts and crumbled feta cheese to the bowl with the greens. Drizzle the dressing over the top and toss everything together until well coated. Serve immediately for the best texture and flavor.

    Tips and Tricks

    For an extra flavor boost, try adding a pinch of garlic powder or a dash of Dijon mustard to the dressing. If you’re not a fan of walnuts, almonds or pecans make great substitutes. To make this salad a meal, add some grilled chicken or shrimp. Remember, the key to a great salad is in the dressing, so don’t be afraid to experiment with different vinegars or citrus juices to find your perfect match.

    Recipe Variations

    • Swap out the feta for goat cheese or blue cheese for a different creamy element.
    • Add some dried cranberries or sliced apples for a sweet contrast to the savory flavors.
    • Include avocado slices for extra creaminess and healthy fats.
    • Try using different nuts like almonds or pecans for a variation in texture and taste.
    • For a vegan version, omit the cheese or use a plant-based alternative.

    Frequently Asked Questions

    Can I make this salad ahead of time?

    Yes, you can prepare the greens and dressing separately up to a day in advance. However, wait to toss everything together until you’re ready to serve to prevent the greens from getting soggy.

    How can I store leftovers?

    Store any leftovers in an airtight container in the refrigerator for up to 2 days. The greens may wilt slightly, but it will still be tasty.

    Is there a substitute for honey in the dressing?

    Absolutely! Maple syrup or agave nectar are great vegan alternatives that will still give you that hint of sweetness.

    Summary

    This spinach and kale salad is a vibrant, flavorful dish that’s as nutritious as it is delicious. With its simple ingredients and easy preparation, it’s sure to become a staple in your recipe collection.

  • Fall Spinach Salad Recipe: A Crunchy, Nutty Delight

    Fall Spinach Salad Recipe: A Crunchy, Nutty Delight

    Unleash the flavors of fall with this vibrant spinach salad that’s packed with texture and taste. Perfect for those who love a hearty yet healthy dish that’s as nutritious as it is delicious.

    Why This Recipe Works

    • The combination of fresh spinach, crunchy nuts, and sweet dried cranberries offers a perfect balance of textures and flavors.
    • A homemade vinaigrette dressing elevates the salad with a tangy and sweet profile that complements the ingredients beautifully.
    • Quick and easy to prepare, this salad is ideal for busy weeknights or as a show-stopping side at your next gathering.

    Ingredients

    • 6 cups fresh spinach, washed and dried
    • 1/2 cup walnuts, toasted and chopped
    • 1/4 cup dried cranberries
    • 1/4 cup crumbled feta cheese
    • 2 tbsp olive oil
    • 1 tbsp balsamic vinegar
    • 1 tsp honey
    • Salt and pepper to taste

    Equipment Needed

    • Large salad bowl
    • Small mixing bowl
    • Whisk
    • Measuring cups and spoons

    Instructions

    Fall Spinach Salad Recipe

    Step 1: Prepare the Dressing

    In a small mixing bowl, whisk together the olive oil, balsamic vinegar, honey, and a pinch of salt and pepper until well combined. Taste and adjust the seasoning if necessary. This dressing is the secret to bringing all the salad components together with its perfect balance of tangy and sweet.

    Step 2: Toast the Walnuts

    Heat a dry skillet over medium heat and add the walnuts. Toast them for about 5 minutes, stirring frequently, until they’re fragrant and slightly golden. Be careful not to burn them, as this can introduce a bitter taste to your salad.

    Step 3: Assemble the Salad

    In a large salad bowl, combine the fresh spinach, toasted walnuts, dried cranberries, and crumbled feta cheese. The key here is to distribute the ingredients evenly so every bite is packed with flavor and texture.

    Step 4: Dress the Salad

    Drizzle the dressing over the salad just before serving. Toss gently to ensure all the ingredients are lightly coated with the dressing. This step is crucial for achieving the perfect flavor balance without making the salad soggy.

    Step 5: Serve Immediately

    Enjoy your fall spinach salad right away to appreciate the crispness of the spinach and the crunch of the walnuts. This salad doesn’t keep well once dressed, so it’s best served fresh.

    Tips and Tricks

    For an extra layer of flavor, consider adding a sprinkle of cinnamon or nutmeg to the dressing. These spices complement the fall theme beautifully. If you’re not a fan of walnuts, pecans or almonds make excellent substitutes. To save time, you can toast the nuts in advance and store them in an airtight container. Always wash and dry the spinach thoroughly to prevent the dressing from diluting. For a vegan version, omit the feta cheese or use a plant-based alternative.

    Recipe Variations

    • Add sliced apples or pears for a fresh, fruity twist.
    • Incorporate quinoa or chickpeas for added protein and heartiness.
    • Swap the balsamic vinegar for apple cider vinegar in the dressing for a different flavor profile.
    • Use goat cheese instead of feta for a creamier texture.
    • Add avocado slices for a boost of healthy fats and creaminess.

    Frequently Asked Questions

    Can I make this salad ahead of time? Yes, you can prepare the ingredients and dressing separately in advance. However, combine them only just before serving to maintain the best texture and freshness.

    What can I use instead of spinach? Kale or mixed greens are great alternatives. Just ensure they’re fresh and properly prepared for the best results.

    How can I make this salad more filling? Adding grilled chicken, salmon, or tofu can turn this salad into a satisfying main course with added protein.

    Summary

    This fall spinach salad is a delightful mix of textures and flavors, featuring fresh spinach, crunchy walnuts, sweet cranberries, and a tangy homemade dressing. It’s quick to prepare, making it perfect for any occasion.

  • Sun-Dried Tomato Dense Bean Salad Recipe: A Flavor Bomb in Every Bite

    Sun-Dried Tomato Dense Bean Salad Recipe: A Flavor Bomb in Every Bite

    Now, let’s dive into a recipe that’s as nutritious as it is delicious. This sun-dried tomato dense bean salad is packed with flavors and textures that will make your taste buds dance. Perfect for picnics, potlucks, or a healthy lunch option, this salad is a crowd-pleaser.

    Why This Recipe Works

    • The combination of creamy beans and tangy sun-dried tomatoes creates a perfect balance of flavors.
    • It’s loaded with protein and fiber, making it a filling meal that’s also good for you.
    • The salad gets better as it sits, making it a great make-ahead dish.
    • It’s versatile and can be customized with whatever ingredients you have on hand.
    • The dressing is simple yet packs a punch, tying all the ingredients together beautifully.

    Ingredients

    • 2 cups cooked dense beans (like cannellini or garbanzo), drained and rinsed
    • 1/2 cup sun-dried tomatoes in oil, drained and chopped
    • 1/4 cup red onion, finely diced
    • 1/4 cup fresh parsley, chopped
    • 2 tbsp olive oil
    • 1 tbsp balsamic vinegar
    • Salt and pepper to taste

    Equipment Needed

    • Mixing bowl
    • Measuring cups and spoons
    • Knife and cutting board
    • Salad spoon

    Instructions

    Sun Dried Tomato Dense Bean Salad Recipe

    Step 1: Prep Your Ingredients

    Start by draining and rinsing your beans to remove any excess sodium or canning liquid. Chop the sun-dried tomatoes into bite-sized pieces if they’re not already pre-chopped. Finely dice the red onion to ensure it distributes evenly throughout the salad. Chop the fresh parsley for a burst of color and freshness. Tip: Soaking the red onion in cold water for 10 minutes can mellow its sharpness.

    Step 2: Make the Dressing

    In a small bowl, whisk together the olive oil and balsamic vinegar until well combined. Season with salt and pepper to taste. This simple dressing will enhance the natural flavors of the salad ingredients without overpowering them. Tip: For an extra flavor boost, add a minced garlic clove to the dressing.

    Step 3: Combine the Salad

    In a large mixing bowl, combine the beans, sun-dried tomatoes, red onion, and parsley. Pour the dressing over the top and gently toss until everything is evenly coated. The salad should be colorful and well-mixed, with each ingredient shining through. Tip: Let the salad sit for at least 30 minutes before serving to allow the flavors to meld.

    Tips and Tricks

    For those looking to elevate their sun-dried tomato dense bean salad, consider roasting your own beans instead of using canned for a deeper flavor. Adding a sprinkle of feta cheese or toasted nuts can introduce a new texture and taste dimension. If you’re meal prepping, this salad keeps well in the fridge for up to 3 days, making it a convenient option for busy weeks. Experiment with different herbs like basil or cilantro for a fresh twist. Lastly, for a creamier texture, mash a small portion of the beans before mixing them in.

    Recipe Variations

    • Add grilled chicken or shrimp for a protein-packed meal.
    • Swap out the dense beans for lentils or chickpeas for a different texture.
    • Incorporate quinoa or farro to make it more filling.
    • Use different types of sun-dried tomatoes, such as those packed with herbs, for added flavor.
    • Add avocado slices for creaminess and healthy fats.

    Frequently Asked Questions

    Can I use dried beans instead of canned? Absolutely! Just be sure to soak and cook them according to package instructions before using in the salad. This might add some prep time but can enhance the salad’s texture and flavor.

    How long does this salad last in the fridge? Stored in an airtight container, the salad will stay fresh for up to 3 days. The flavors will continue to develop, making it even more delicious over time.

    Can I make this salad vegan? Yes, this recipe is naturally vegan as long as you ensure your sun-dried tomatoes and other ingredients don’t contain any animal products.

    Summary

    This sun-dried tomato dense bean salad is a vibrant, flavorful dish that’s as easy to make as it is delicious. Perfect for any occasion, it’s a healthy, protein-packed option that doesn’t skimp on taste.

  • Greek Salad Recipe with Cucumber: A Crispy, Refreshing Delight

    Greek Salad Recipe with Cucumber: A Crispy, Refreshing Delight

    Perfect for those hot summer days or when you’re craving something light yet satisfying, this Greek salad recipe with cucumber is a game-changer. Packed with fresh veggies and a tangy dressing, it’s a dish that promises to refresh your palate and brighten your day.

    Why This Recipe Works

    • The combination of crisp cucumbers and juicy tomatoes offers a refreshing crunch that’s hard to resist.
    • Feta cheese adds a creamy texture and salty tang, balancing the freshness of the vegetables.
    • Olive oil and lemon juice dressing brings all the flavors together with a simple yet vibrant taste.
    • It’s incredibly versatile, allowing for numerous variations to suit any taste or dietary preference.
    • Quick and easy to prepare, making it perfect for last-minute gatherings or a healthy weeknight dinner.

    Ingredients

    • 2 large cucumbers, diced
    • 4 medium tomatoes, chopped
    • 1 red onion, thinly sliced
    • 1 cup Kalamata olives, pitted
    • 1/2 cup feta cheese, crumbled
    • 1/4 cup extra virgin olive oil
    • 2 tbsp lemon juice
    • 1 tsp dried oregano
    • Salt and pepper to taste

    Equipment Needed

    • Large mixing bowl
    • Salad tongs or large spoon
    • Measuring cups and spoons
    • Knife and cutting board

    Instructions

    Greek Salad Recipe Cucumber

    Step 1: Prepare Your Vegetables

    Start by washing all your vegetables thoroughly. Dice the cucumbers into bite-sized pieces, ensuring they’re uniform for even eating. Chop the tomatoes similarly, and thinly slice the red onion to avoid overpowering the salad. Tip: For a milder onion flavor, soak the sliced onions in cold water for 10 minutes before adding them to the salad.

    Step 2: Combine the Base Ingredients

    In your large mixing bowl, combine the diced cucumbers, chopped tomatoes, and sliced red onion. Add the Kalamata olives for that authentic Greek flavor. Gently toss these ingredients together to start building your salad’s foundation. Tip: If you’re not a fan of olives, you can reduce the quantity or substitute them with capers for a different but equally tasty twist.

    Step 3: Make the Dressing

    In a small bowl, whisk together the extra virgin olive oil and lemon juice until well combined. Add the dried oregano, and season with salt and pepper to taste. This simple dressing is key to bringing all the flavors together, so don’t skip it! Tip: For an extra flavor boost, let the dressing sit for a few minutes before adding it to the salad to allow the oregano to infuse.

    Step 4: Dress the Salad

    Pour the dressing over the salad and toss gently to ensure all the vegetables are evenly coated. Be careful not to overmix, as you want to keep the vegetables crisp and intact. This is the moment when your salad starts to come alive with flavor.

    Step 5: Add the Feta Cheese

    Sprinkle the crumbled feta cheese over the top of the salad just before serving. This not only adds a creamy texture but also makes the salad visually appealing. Tip: For a dairy-free version, you can omit the feta or use a vegan cheese alternative.

    Tips and Tricks

    To elevate your Greek salad, consider these advanced tips: Always use the freshest vegetables you can find for the best taste and texture. If you have time, let the salad sit for about 10 minutes after dressing to allow the flavors to meld together. For added protein, toss in some grilled chicken or chickpeas. And remember, the quality of your olive oil can make or break the dressing, so opt for a good extra virgin variety.

    Recipe Variations

    • Add avocado for a creamy texture and healthy fats.
    • Include bell peppers for extra crunch and color.
    • Swap the feta for goat cheese for a different tangy flavor.
    • Add quinoa or farro to make it a more substantial meal.
    • For a spicy kick, include some sliced jalapeños or a dash of red pepper flakes.

    Frequently Asked Questions

    Can I make this salad ahead of time?

    Yes, you can prepare the ingredients ahead of time, but it’s best to dress the salad just before serving to keep the vegetables crisp. If you need to make it ahead, store the dressing separately and combine when ready to eat.

    How long does this salad last in the fridge?

    Properly stored in an airtight container, the salad can last for up to 2 days. However, the vegetables may start to lose their crispness after the first day.

    Can I use a different type of cheese?

    Absolutely! While feta is traditional, you can experiment with other cheeses like mozzarella, halloumi, or even blue cheese for a different flavor profile.

    Summary

    This Greek salad recipe with cucumber is a refreshing, easy-to-make dish that’s perfect for any occasion. With its crisp vegetables, tangy dressing, and creamy feta, it’s a crowd-pleaser that’s as nutritious as it is delicious.