Category: Vegetable Salad Recipes

  • Southern 7 Layer Salad Recipe: A Classic Crowd-Pleaser

    Southern 7 Layer Salad Recipe: A Classic Crowd-Pleaser

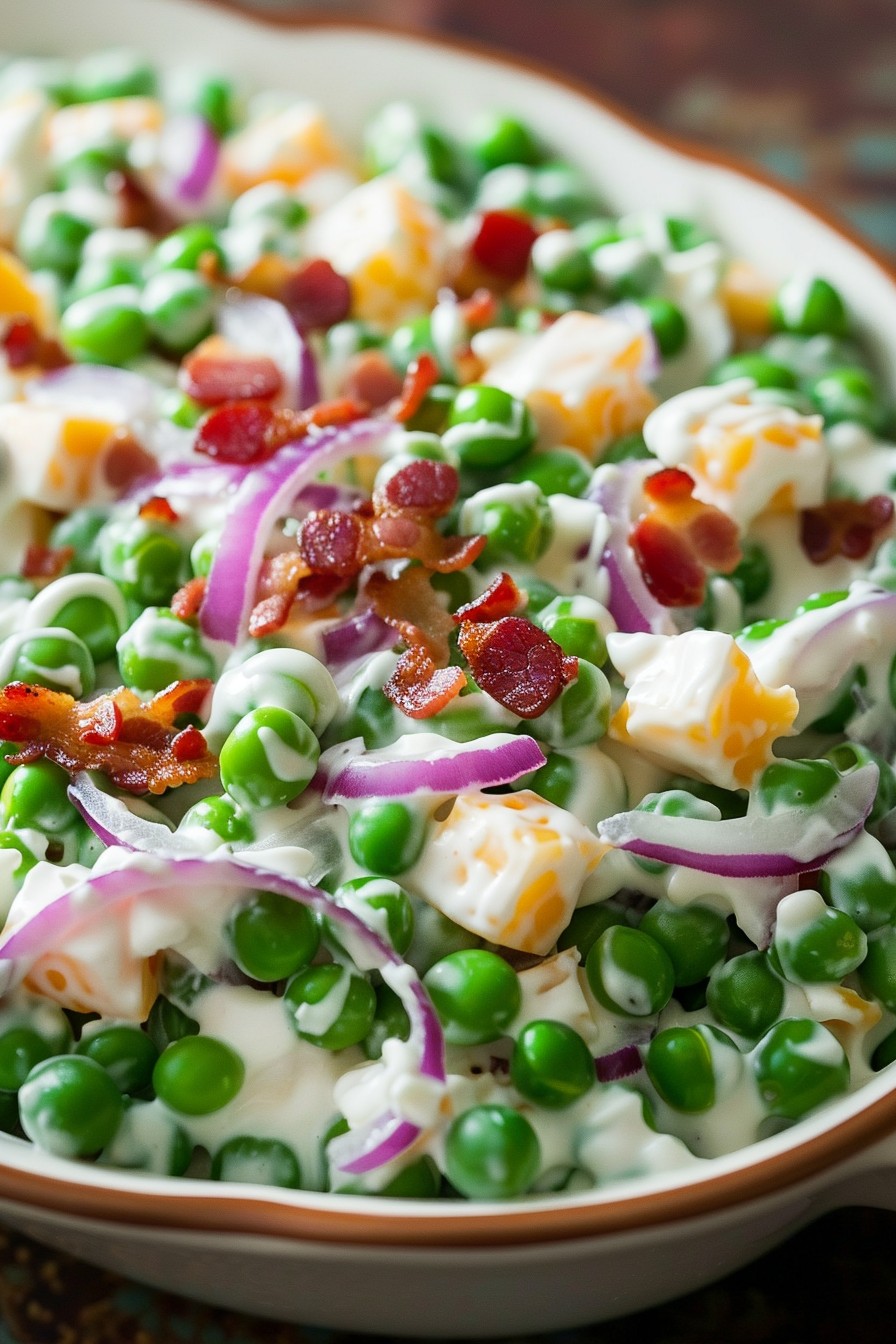
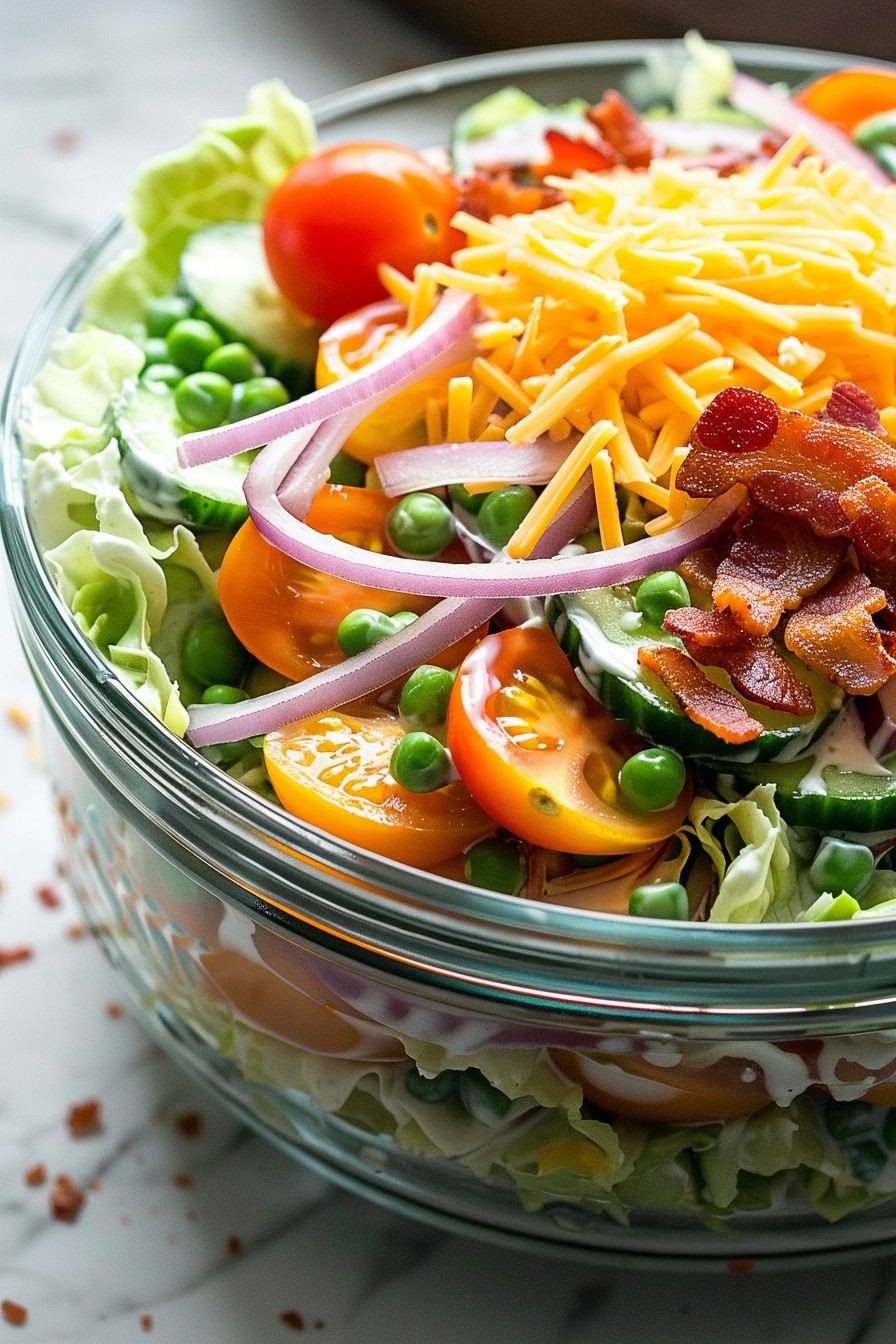
    Every bite of this Southern 7 Layer Salad is a trip down memory lane, packed with crisp veggies, creamy dressing, and a sprinkle of bacon for good measure. It’s the perfect dish for potlucks, picnics, or any gathering where you want to impress without the stress.

    Why This Recipe Works

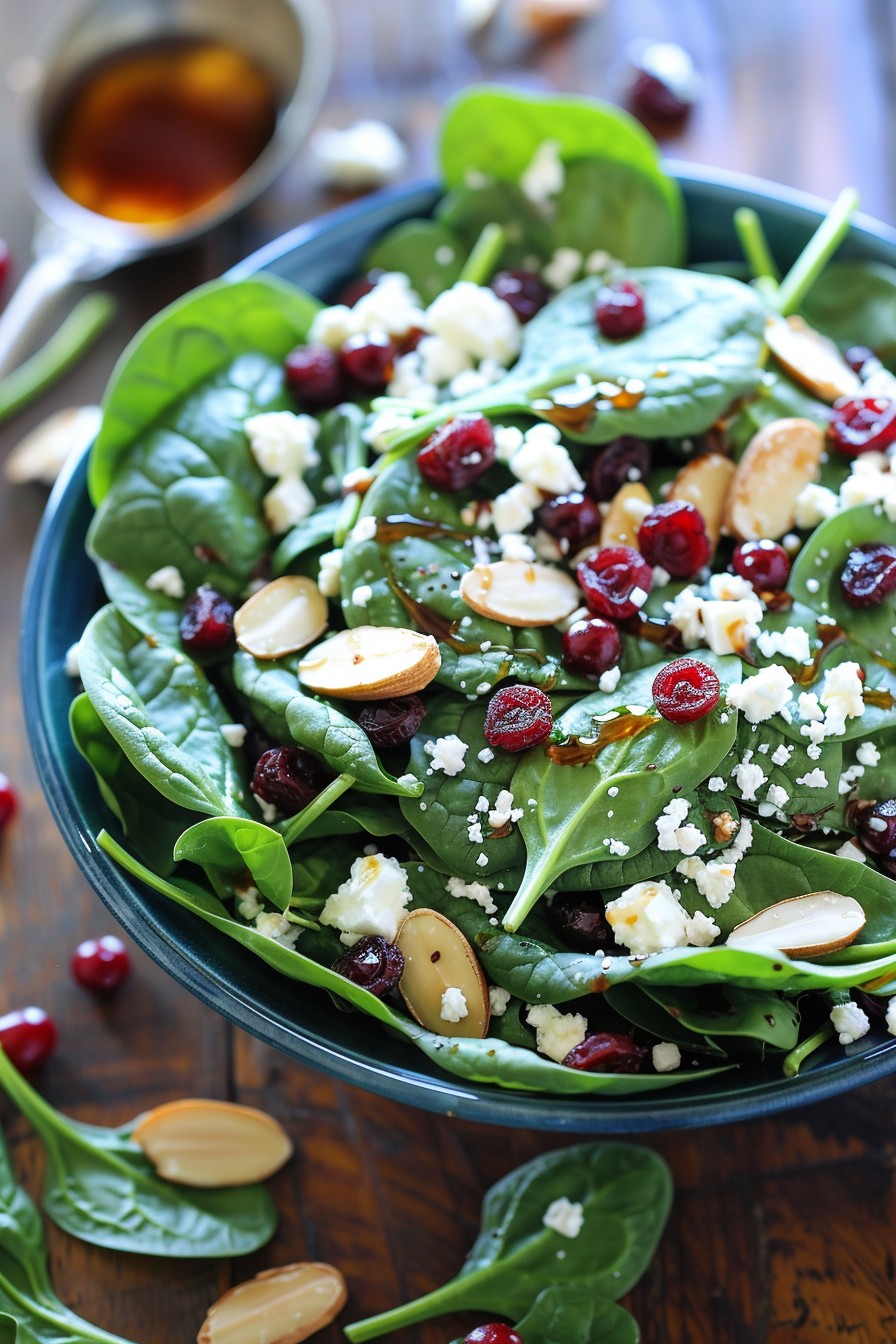
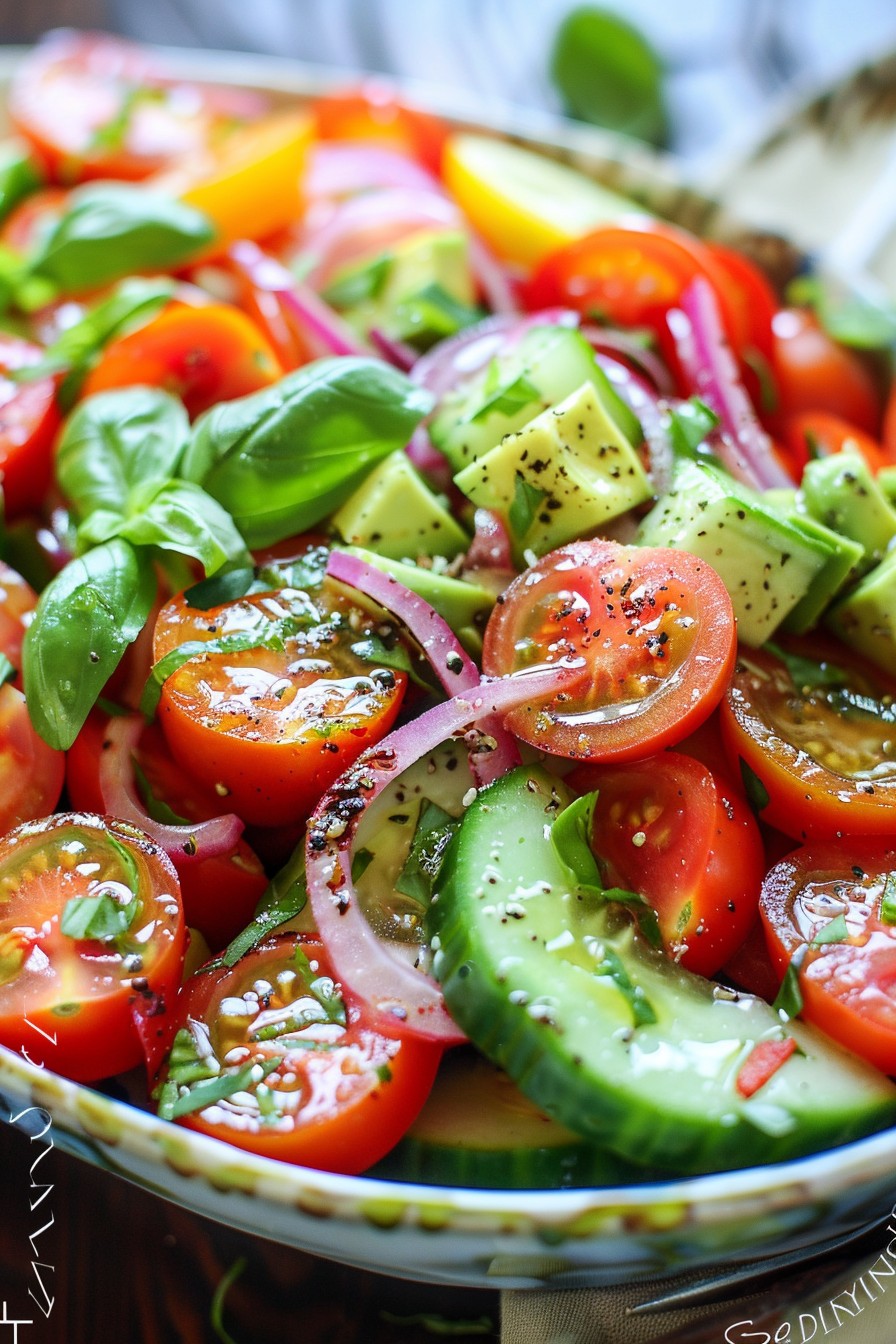
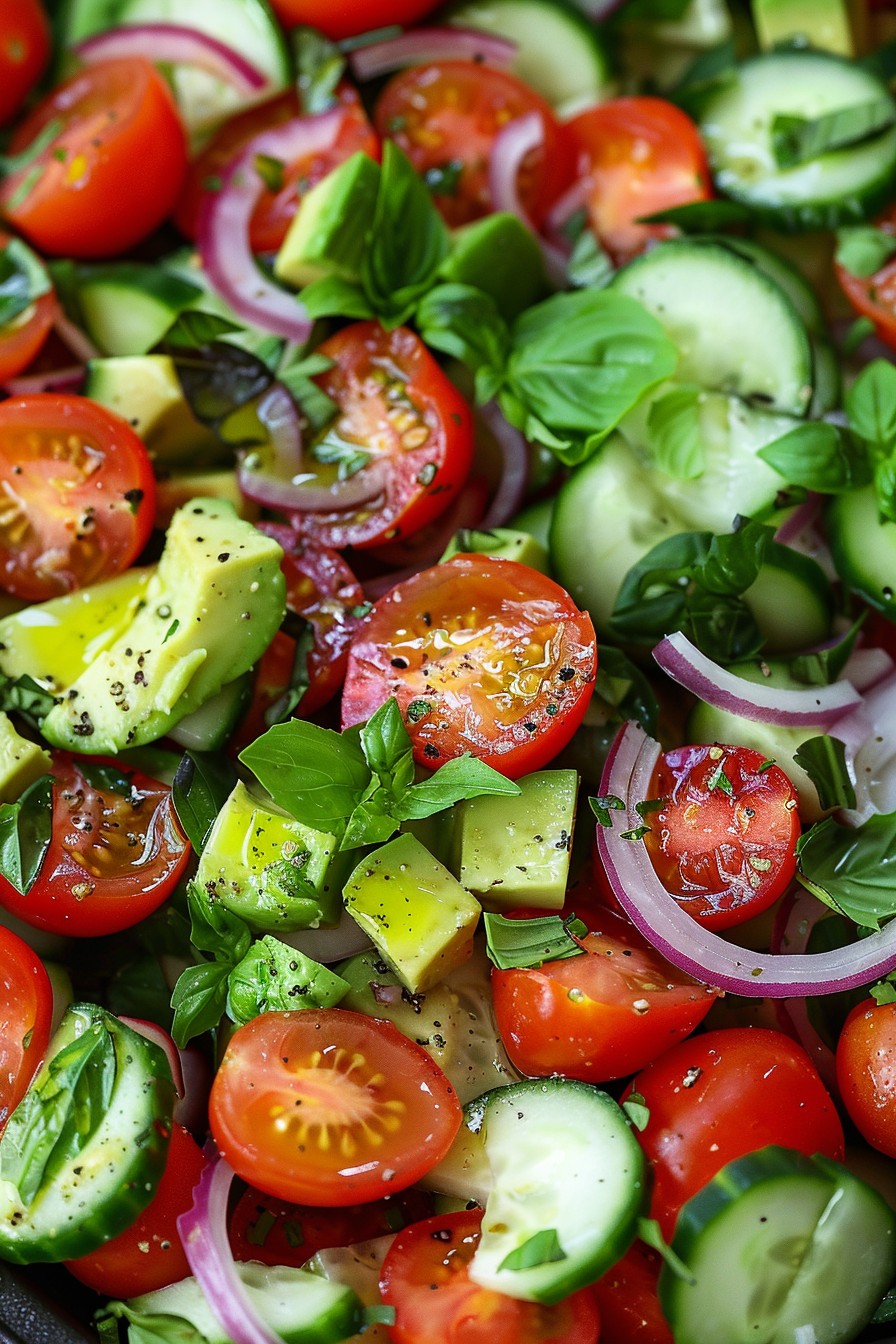
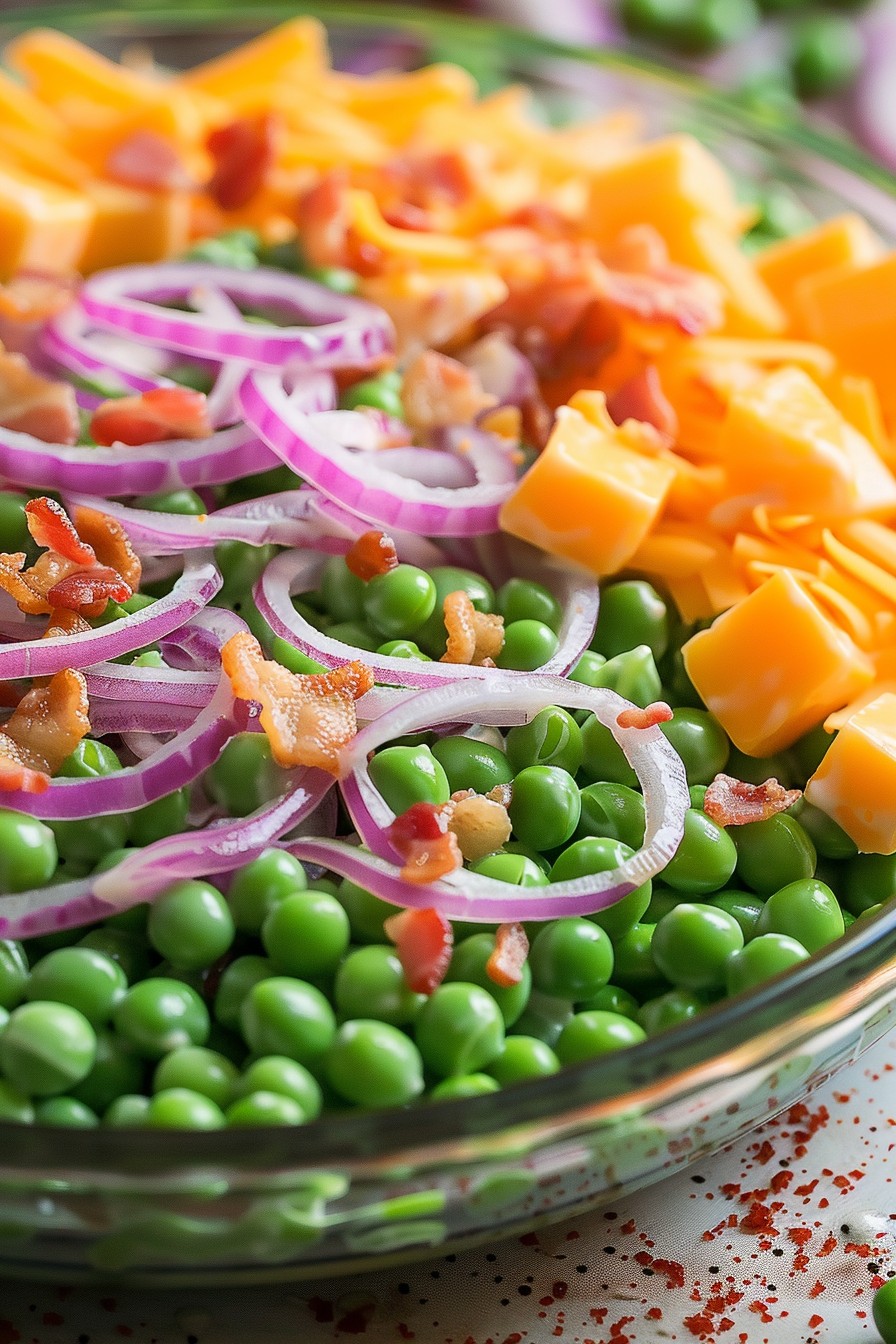
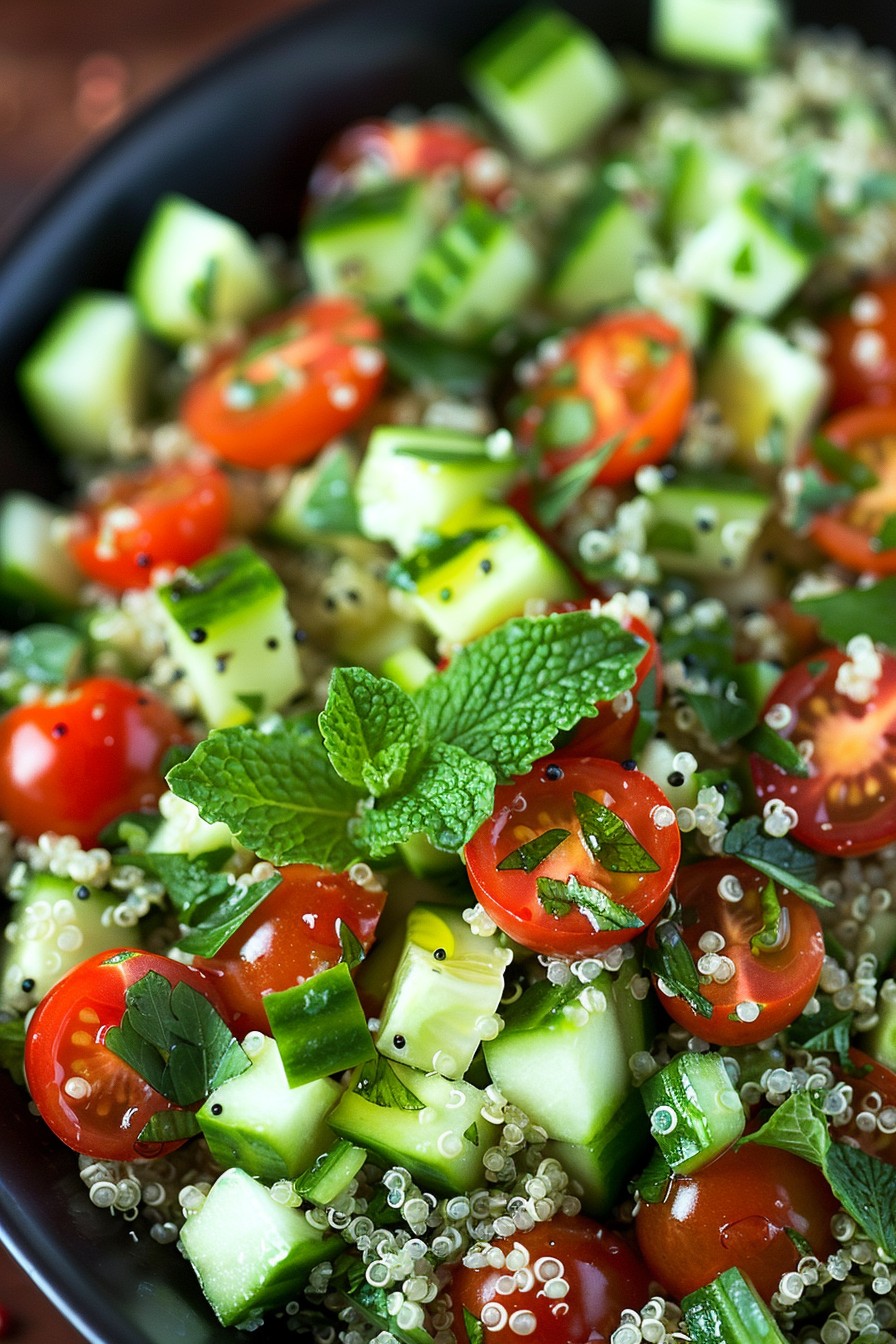
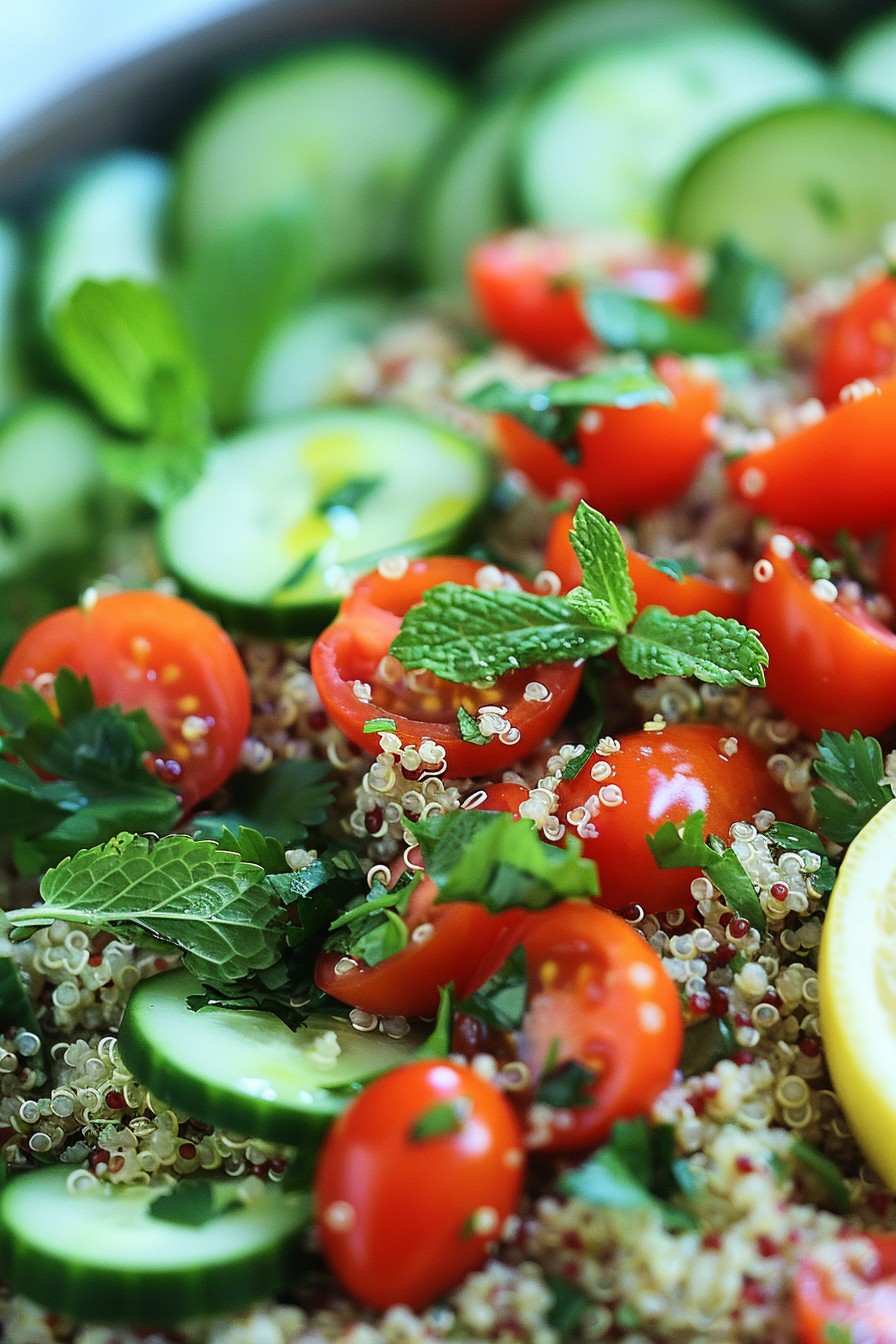
    • Layers of fresh vegetables provide a crunchy texture and vibrant colors that make the salad as beautiful as it is delicious.
    • The creamy dressing ties all the layers together with a tangy sweetness that’s irresistible.
    • Adding bacon and cheese on top gives a savory depth that elevates the salad from side dish to star of the show.
    • It’s make-ahead friendly, allowing the flavors to meld together beautifully overnight.
    • Customizable layers mean you can tweak it to suit your taste or what you have on hand.

    Ingredients

    • 1 head iceberg lettuce, chopped
    • 1 cup cherry tomatoes, halved
    • 1 cucumber, sliced
    • 1 red onion, thinly sliced
    • 1 cup frozen peas, thawed
    • 1 1/2 cups mayonnaise
    • 2 tablespoons sugar
    • 1 cup shredded cheddar cheese
    • 8 slices bacon, cooked and crumbled

    Equipment Needed

    • Large clear bowl (to show off those layers!)
    • Mixing bowl
    • Whisk
    • Knife and cutting board

    Instructions

    Southern 7 Layer Salad Recipe

    Step 1: Prepare the Vegetables

    Start by washing and chopping all your vegetables. The iceberg lettuce should be chopped into bite-sized pieces, the cherry tomatoes halved, the cucumber sliced, and the red onion thinly sliced. This ensures every layer is easy to eat and visually appealing. Tip: For an extra crunch, you can chill the vegetables in the fridge before assembling the salad.

    Step 2: Layer the Lettuce

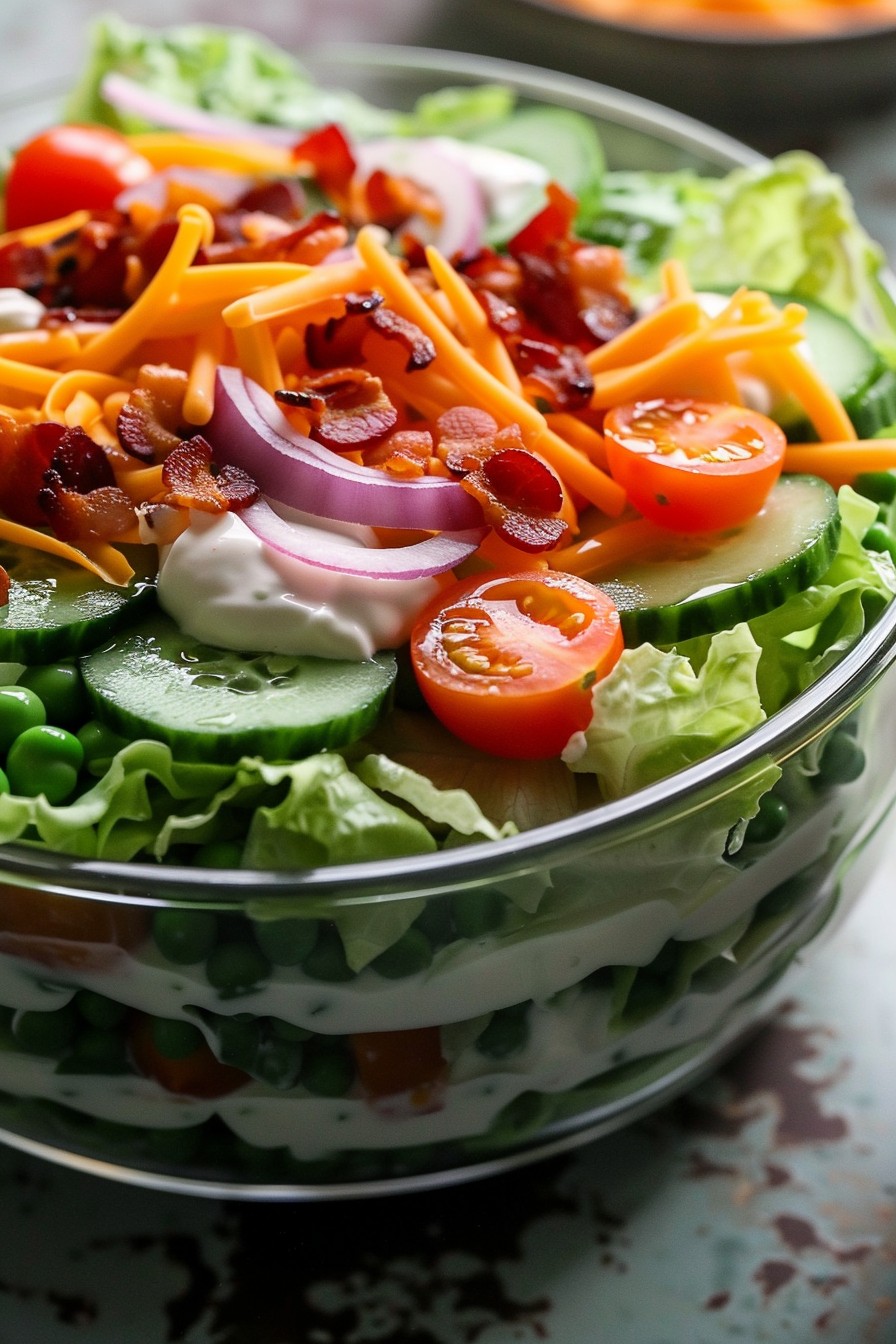
    Place the chopped iceberg lettuce at the bottom of your clear bowl. This forms the base of your salad and supports all the other layers. Press down gently to compact the lettuce slightly, which helps keep the layers distinct. Tip: Using a clear bowl not only showcases the beautiful layers but also makes serving a breeze.

    Step 3: Add the Vegetables

    Layer the cherry tomatoes, cucumber slices, red onion, and thawed peas on top of the lettuce. Each vegetable should form its own distinct layer for maximum visual impact. The peas add a sweet pop of flavor and color that contrasts beautifully with the other vegetables.

    Step 4: Prepare the Dressing

    In a mixing bowl, whisk together the mayonnaise and sugar until smooth. This creamy, slightly sweet dressing is what binds the salad together. Spread it evenly over the top of the vegetable layers, making sure to cover them completely to seal in the freshness.

    Step 5: Top with Cheese and Bacon

    Sprinkle the shredded cheddar cheese and crumbled bacon over the top of the dressing. These toppings add a rich, savory element that makes the salad irresistible. For the best flavor and texture, add the bacon just before serving to keep it crispy.

    Tips and Tricks

    For a lighter version of the dressing, you can substitute half of the mayonnaise with Greek yogurt. This adds a tangy flavor and reduces the calorie count without sacrificing creaminess. If you’re preparing the salad ahead of time, wait to add the bacon until just before serving to maintain its crispiness. For a vegetarian version, omit the bacon and consider adding toasted nuts for crunch. To ensure each layer is distinct, press down gently after adding each vegetable. This also helps the salad hold together better when serving.

    Recipe Variations

    • Swap out the iceberg lettuce for romaine or spinach for a different texture and nutritional profile.
    • Add hard-boiled eggs between the vegetable layers for extra protein.
    • Use a mix of cheeses, such as Monterey Jack or pepper Jack, for a spicier kick.
    • Incorporate avocado slices for a creamy, healthy fat addition.
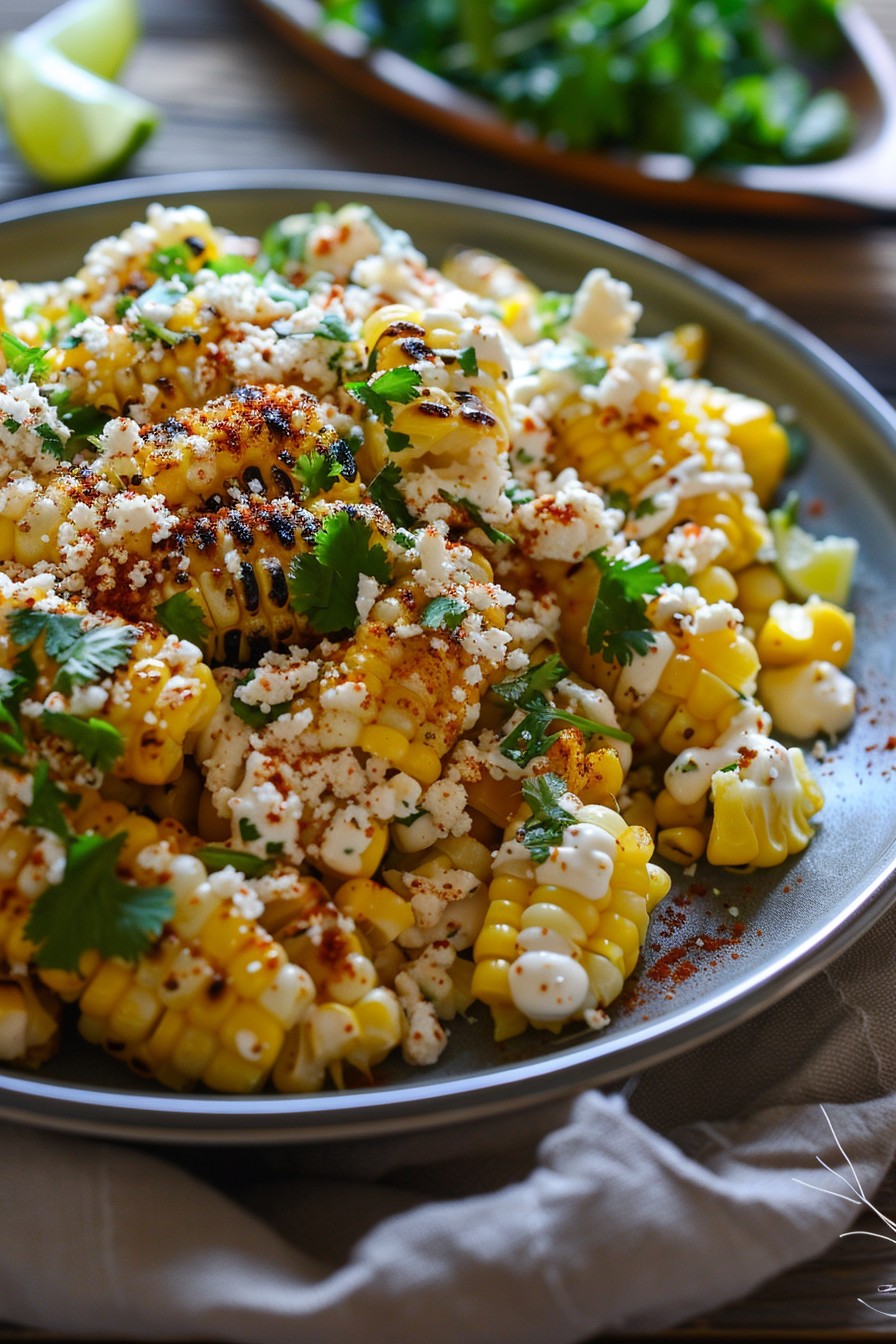
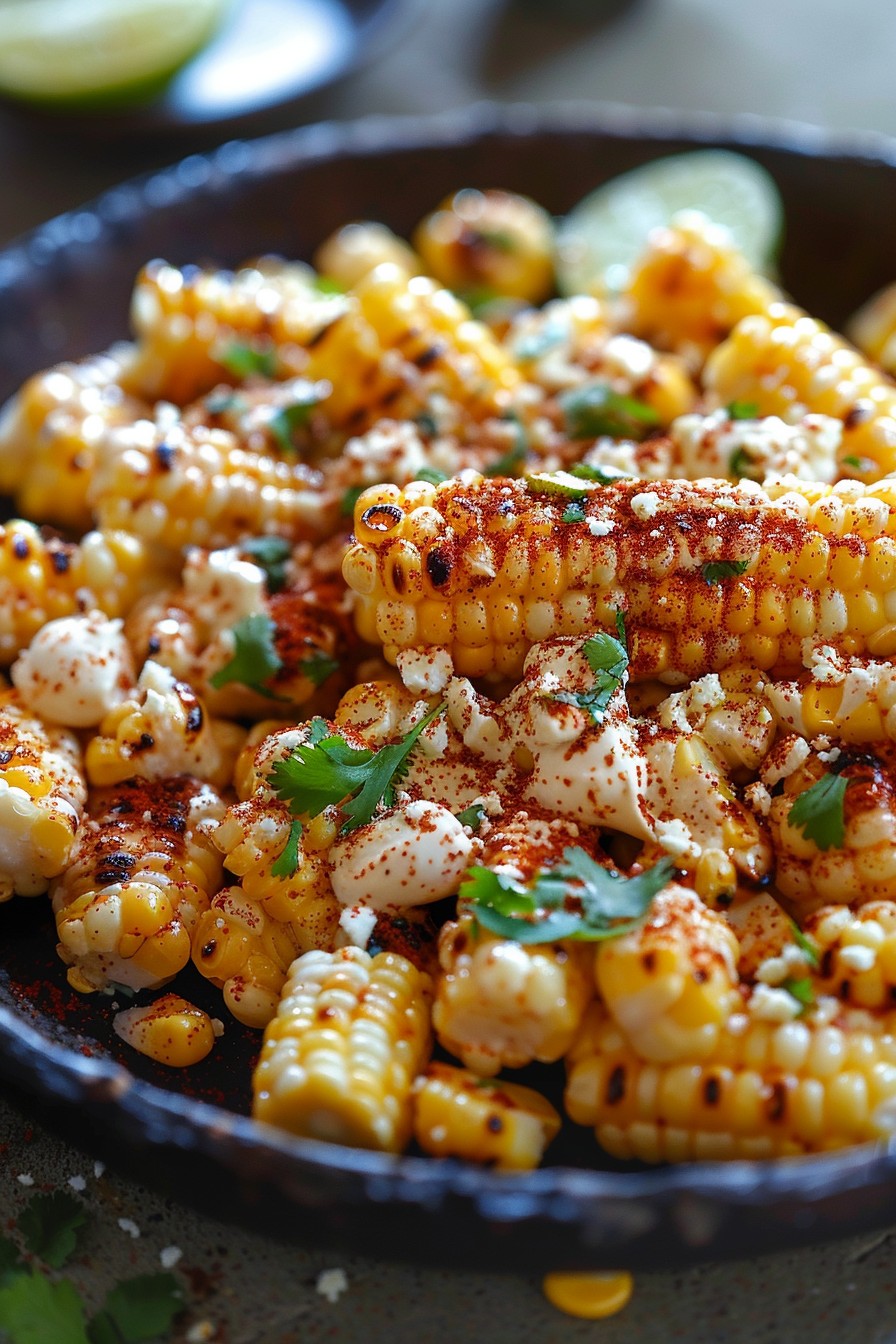
    • Replace the peas with corn for a sweeter, summery twist.

    Frequently Asked Questions

    Can I make this salad ahead of time? Absolutely! In fact, making it a day ahead allows the flavors to meld together beautifully. Just add the bacon and any other crispy toppings right before serving to keep them from getting soggy.

    How long does the salad last in the fridge? Stored properly in an airtight container, the salad will last for up to 3 days. However, it’s best enjoyed within the first 24 hours for optimal texture and freshness.

    Can I use a different type of dressing? While the mayonnaise-based dressing is traditional, you can experiment with ranch or a vinaigrette for a different flavor profile. Just keep in mind that the salad’s texture and layering might be affected.

    Summary

    This Southern 7 Layer Salad is a timeless classic that’s as easy to make as it is delicious. With its layers of fresh vegetables, creamy dressing, and savory toppings, it’s sure to be a hit at any gathering. Plus, it’s customizable to suit your tastes and dietary needs.

  • Spinach Craisin Salad Recipe: A Sweet and Savory Delight

    Spinach Craisin Salad Recipe: A Sweet and Savory Delight

    Zesty, fresh, and bursting with flavors, this Spinach Craisin Salad is your go-to dish for any occasion. Whether you’re looking for a light lunch or a vibrant side, this recipe promises a delightful mix of textures and tastes that will leave everyone asking for seconds.

    Why This Recipe Works

    • The combination of sweet craisins and savory spinach creates a perfect balance of flavors.
    • Adding nuts introduces a satisfying crunch that elevates the salad’s texture.
    • A homemade dressing ties all the ingredients together for a cohesive and delicious dish.

    Ingredients

    • 6 cups fresh spinach, washed and dried
    • 1/2 cup craisins
    • 1/4 cup sliced almonds, toasted
    • 1/4 cup feta cheese, crumbled
    • 2 tbsp olive oil
    • 1 tbsp balsamic vinegar
    • 1 tsp honey
    • Salt and pepper to taste

    Equipment Needed

    • Large salad bowl
    • Small mixing bowl
    • Whisk
    • Measuring cups and spoons

    Instructions

    Spinach Craisin Salad Recipe

    Step 1: Prepare the Spinach

    Start by ensuring your spinach is thoroughly washed and dried to prevent any sogginess in your salad. Tear the leaves into bite-sized pieces if they’re too large, and place them in your large salad bowl. This step is crucial for achieving the perfect salad base.

    Step 2: Add the Toppings

    Sprinkle the craisins, toasted almonds, and crumbled feta cheese over the spinach. The craisins add a sweet pop, while the almonds bring a nutty crunch, and the feta offers a creamy tang. This trio of toppings is what makes the salad stand out.

    Step 3: Whisk Together the Dressing

    In a small bowl, combine the olive oil, balsamic vinegar, honey, and a pinch of salt and pepper. Whisk vigorously until the mixture is emulsified and slightly thickened. This homemade dressing is simple yet elevates the salad with its sweet and tangy profile.

    Step 4: Dress the Salad

    Drizzle the dressing over the salad just before serving. Toss gently to ensure every leaf is lightly coated without overwhelming the ingredients. The key is to dress the salad sparingly to maintain the freshness and crispness of the spinach.

    Step 5: Serve Immediately

    For the best experience, serve the salad right after dressing it. This ensures the spinach stays crisp and the toppings retain their texture. Enjoy the vibrant colors and flavors that make this salad a feast for the senses.

    Tips and Tricks

    Toasting the almonds brings out their nutty flavor, adding depth to the salad. If you’re preparing the salad ahead of time, keep the dressing separate and add it just before serving to prevent the spinach from wilting. For an extra layer of flavor, consider adding a pinch of cinnamon or nutmeg to the dressing. These small touches can make a big difference in the overall taste of your salad.

    Recipe Variations

    • Swap craisins for dried cherries or apricots for a different sweet twist.
    • Use walnuts or pecans instead of almonds for a variation in crunch.
    • Add grilled chicken or shrimp to turn the salad into a hearty main dish.
    • Incorporate avocado slices for a creamy texture and healthy fats.
    • Try goat cheese instead of feta for a tangier flavor profile.

    Frequently Asked Questions

    Can I use baby spinach instead of regular spinach?

    Absolutely! Baby spinach is tender and sweet, making it a great alternative. Just ensure it’s washed and dried properly to maintain the salad’s freshness.

    How long can I store the dressed salad?

    It’s best enjoyed immediately, but if you must store it, keep it in the fridge for no more than a few hours. The spinach will start to wilt, and the nuts may lose their crunch.

    Can I make the dressing ahead of time?

    Yes, the dressing can be prepared up to 3 days in advance. Store it in an airtight container in the refrigerator and give it a good shake or whisk before using.

    Summary

    This Spinach Craisin Salad is a delightful mix of sweet and savory, perfect for any meal. With simple ingredients and easy steps, it’s a foolproof recipe that’s sure to impress.

  • Korean Salad Recipe: A Crunchy, Tangy Delight

    Korean Salad Recipe: A Crunchy, Tangy Delight

    How about adding a zesty twist to your salad game? This Korean salad recipe is not just a bowl of greens; it’s a vibrant mix of textures and flavors that will make your taste buds dance. Perfect for a quick lunch or a side dish that steals the show.

    Why This Recipe Works

    • The combination of crisp vegetables and a tangy, slightly sweet dressing creates a perfect balance of flavors.
    • It’s incredibly versatile, allowing you to mix and match ingredients based on what’s in your fridge.
    • Quick and easy to prepare, making it ideal for busy weeknights or last-minute gatherings.
    • The salad dressing can be made ahead of time, saving you precious minutes when you’re in a rush.
    • It’s a great way to incorporate more vegetables into your diet in a delicious way.

    Ingredients

    • 4 cups mixed greens (spinach, lettuce, and arugula)
    • 1 cup thinly sliced cucumber
    • 1 cup shredded carrots
    • 1/2 cup thinly sliced red bell pepper
    • 1/4 cup chopped green onions
    • 1 tbsp sesame seeds
    • For the dressing: 2 tbsp soy sauce, 1 tbsp sesame oil, 1 tbsp honey, 1 tbsp rice vinegar, 1 tsp minced garlic, 1 tsp grated ginger

    Equipment Needed

    • Large mixing bowl
    • Whisk
    • Measuring cups and spoons
    • Knife and cutting board

    Instructions

    Korean Salad Recipe

    Prepare the Vegetables

    Start by washing all your vegetables thoroughly under cold water. Pat them dry with a clean towel to ensure the dressing sticks well. Slice the cucumber and red bell pepper into thin strips for that perfect crunch. Shred the carrots using a grater or a knife, and chop the green onions finely. Toss all the vegetables into a large mixing bowl.

    Make the Dressing

    In a small bowl, whisk together the soy sauce, sesame oil, honey, rice vinegar, minced garlic, and grated ginger until well combined. Taste and adjust the seasoning if necessary. This dressing is the heart of the salad, so take your time to get the balance right.

    Combine and Toss

    Pour the dressing over the prepared vegetables in the mixing bowl. Using clean hands or salad tongs, gently toss the salad to ensure every piece is coated with the dressing. Be careful not to overmix, as this can make the greens wilt.

    Garnish and Serve

    Sprinkle the sesame seeds over the top of the salad for an added nutty flavor and a bit of crunch. Serve immediately to enjoy the salad at its freshest. If you’re not serving right away, keep the dressing separate and add it just before serving.

    Tips and Tricks

    For an extra crunch, add some toasted nuts or seeds like almonds or sunflower seeds. If you prefer a spicier kick, a dash of chili flakes or a spoonful of gochujang (Korean chili paste) can be mixed into the dressing. To make this salad more filling, add some grilled chicken or tofu. Always taste your dressing before adding it to the salad; you might want to adjust the sweetness or tanginess to your preference. Lastly, for the best texture, chop all your vegetables uniformly.

    Recipe Variations

    • Add some sliced avocado for a creamy texture and healthy fats.
    • Include some cooked soba noodles or quinoa to turn this salad into a hearty meal.
    • Swap the honey in the dressing for maple syrup to make it vegan.
    • Add some kimchi for an authentic Korean flavor and probiotic benefits.
    • Use different vegetables like radishes or snap peas for variety.

    Frequently Asked Questions

    Can I make this salad ahead of time?

    Yes, you can prepare the vegetables and the dressing separately a day in advance. However, it’s best to combine them just before serving to prevent the greens from getting soggy. Store the dressing in an airtight container in the fridge and the prepared vegetables in a separate container with a paper towel to absorb excess moisture.

    Is there a substitute for sesame oil?

    While sesame oil adds a unique flavor to the dressing, you can use olive oil as a substitute if you’re in a pinch. Keep in mind that the taste will be slightly different, so you might want to add a bit more garlic or ginger to compensate for the lack of sesame flavor.

    How can I make this salad more protein-rich?

    Adding grilled chicken, tofu, or even some hard-boiled eggs can boost the protein content of this salad. For a seafood twist, some cooked shrimp or thinly sliced beef would also work wonderfully with the flavors of the dressing.

    Summary

    This Korean salad is a refreshing, flavorful dish that’s easy to make and customizable to your taste. With its crunchy vegetables and tangy dressing, it’s sure to become a favorite in your recipe collection.

  • Costco Kale Salad Recipe: A Copycat That’s Actually Easy

    Costco Kale Salad Recipe: A Copycat That’s Actually Easy

    Unlock the secret to making Costco’s famous kale salad at home with this foolproof recipe. Perfect for meal prep, potlucks, or when you’re just craving that signature crunch and tang.

    Why This Recipe Works

    • Uses massaged kale for a tender, not tough, base.
    • Combines sweet and savory flavors for a balanced bite.
    • Includes a homemade dressing that’s better than store-bought.
    • Packs well for lunches, staying crisp for days.
    • Customizable with your favorite add-ins for endless variety.

    Ingredients

    • 1 bunch kale, stems removed and leaves chopped (about 6 cups)
    • 1/2 cup dried cranberries
    • 1/2 cup pepitas (pumpkin seeds)
    • 1/4 cup grated Parmesan cheese
    • 1/4 cup olive oil
    • 2 tbsp apple cider vinegar
    • 1 tbsp honey
    • 1/2 tsp salt
    • 1/4 tsp black pepper

    Equipment Needed

    • Large mixing bowl
    • Salad spinner (optional)
    • Measuring cups and spoons
    • Whisk
    • Knife and cutting board

    Instructions

    Costco Kale Salad Recipe

    Step 1: Prep the Kale

    Start by removing the stems from the kale leaves, then chop the leaves into bite-sized pieces. If you have a salad spinner, give the kale a good rinse and spin it dry. No spinner? No problem. Just pat the leaves dry with a clean towel. Tip: Massaging the kale with a bit of olive oil and salt before adding other ingredients helps soften it.

    Step 2: Make the Dressing

    In a small bowl, whisk together the olive oil, apple cider vinegar, honey, salt, and pepper until well combined. Taste and adjust the seasoning if needed. This dressing is the secret weapon of the salad, so don’t skip it!

    Step 3: Combine the Salad

    In your large mixing bowl, toss the prepared kale with the dressing until every leaf is lightly coated. Add the dried cranberries, pepitas, and Parmesan cheese, then give everything another good toss to combine. Tip: Letting the salad sit for 10 minutes before serving allows the flavors to meld beautifully.

    Step 4: Serve and Enjoy

    Transfer the salad to a serving dish or divide it into meal prep containers. This salad keeps well in the fridge for up to 3 days, making it a great make-ahead option for busy weeks.

    Tips and Tricks

    For those looking to elevate their Costco kale salad game, consider toasting the pepitas in a dry skillet over medium heat for a few minutes until they’re golden and fragrant. This adds an extra layer of flavor and crunch. Another pro tip is to use a microplane to grate the Parmesan cheese finely, ensuring it distributes evenly throughout the salad. If you’re not a fan of cranberries, try substituting with chopped dried apricots or cherries for a different sweet note. Lastly, for a nut-free version, sunflower seeds make a great alternative to pepitas.

    Recipe Variations

    • Add grilled chicken or shrimp for a protein-packed meal.
    • Swap out the Parmesan for feta or goat cheese for a different flavor profile.
    • Include sliced avocado or cucumber for extra freshness and crunch.
    • Use maple syrup instead of honey for a vegan dressing option.
    • Mix in quinoa or farro for a hearty grain salad variation.

    Frequently Asked Questions

    Can I use bagged kale instead of fresh?

    Absolutely! Bagged kale is a convenient option, just make sure to give it a good rinse and dry before using. The key is to massage it well to ensure it’s tender and not too tough.

    How long does this salad last in the fridge?

    This salad stays fresh for up to 3 days when stored in an airtight container in the refrigerator. The kale holds up much better than other greens, making it perfect for meal prep.

    Can I make this salad vegan?

    Yes! Simply omit the Parmesan cheese or use a vegan cheese alternative, and swap the honey for maple syrup in the dressing. It’s just as delicious and completely plant-based.

    Summary

    This Costco kale salad recipe brings the beloved store-bought favorite into your kitchen with minimal effort and maximum flavor. Perfect for any occasion, it’s a versatile, make-ahead dish that’s sure to impress.

  • Tomato Cucumber Avocado Salad: A Refreshing Summer Delight

    Tomato Cucumber Avocado Salad: A Refreshing Summer Delight

    Brighten up your summer meals with this vibrant and healthy tomato cucumber avocado salad. It’s the perfect blend of freshness and flavor that will leave you craving more.

    Why This Recipe Works

    • The combination of juicy tomatoes, crisp cucumbers, and creamy avocados creates a delightful texture contrast.
    • A simple dressing of olive oil and lemon juice enhances the natural flavors without overpowering them.
    • This salad is incredibly versatile, serving as a perfect side dish or a light main course.
    • It’s packed with nutrients, making it as healthy as it is delicious.
    • Quick and easy to prepare, it’s ideal for busy weeknights or last-minute gatherings.

    Ingredients

    • 2 cups cherry tomatoes, halved
    • 1 large cucumber, diced
    • 2 ripe avocados, cubed
    • 1/4 cup red onion, thinly sliced
    • 2 tbsp olive oil
    • 1 tbsp lemon juice
    • Salt and pepper to taste
    • 1/4 cup fresh basil, chopped

    Equipment Needed

    • Large mixing bowl
    • Sharp knife
    • Cutting board
    • Measuring cups and spoons

    Instructions

    Recipe Tomato Cucumber Avocado Salad

    Prepare the Vegetables

    Start by washing the cherry tomatoes and cucumber under cold water. Halve the cherry tomatoes and dice the cucumber into bite-sized pieces. Thinly slice the red onion to add a bit of sharpness to the salad. Tip: For a milder onion flavor, soak the sliced onion in cold water for 10 minutes before adding it to the salad.

    Cube the Avocados

    Cut the avocados in half, remove the pit, and carefully cube the flesh. To prevent browning, drizzle a little lemon juice over the avocado cubes immediately after cutting. This not only adds flavor but also keeps the avocados looking fresh.

    Make the Dressing

    In a small bowl, whisk together the olive oil and lemon juice. Season with salt and pepper to taste. This simple dressing brings all the ingredients together without masking their natural flavors.

    Combine All Ingredients

    In a large mixing bowl, gently toss the tomatoes, cucumber, avocado, and red onion with the dressing. Be careful not to mash the avocados. Add the chopped basil last for a fresh, aromatic finish. Tip: For the best flavor, let the salad sit for 5 minutes before serving to allow the flavors to meld.

    Serve and Enjoy

    Transfer the salad to a serving dish and enjoy immediately. This salad is best served fresh but can be stored in the refrigerator for up to 2 hours. Tip: If you need to prepare it in advance, add the avocados just before serving to maintain their texture.

    Tips and Tricks

    For an extra burst of flavor, consider adding a handful of crumbled feta cheese or a sprinkle of toasted nuts for crunch. If you’re not a fan of basil, cilantro or parsley make great substitutes. To make this salad more filling, add a protein like grilled chicken or chickpeas. Always use ripe but firm avocados to ensure they hold their shape in the salad. For a spicier kick, add a pinch of red pepper flakes or a dash of hot sauce to the dressing.

    Recipe Variations

    • Add quinoa or farro for a heartier salad.
    • Swap the lemon juice for lime juice and add cilantro for a Mexican twist.
    • Include diced mango or strawberries for a sweet and savory version.
    • Use balsamic vinegar instead of lemon juice for a richer dressing.
    • Add olives and feta cheese for a Mediterranean flair.

    Frequently Asked Questions

    Can I make this salad ahead of time?

    While you can prepare the vegetables and dressing ahead, it’s best to add the avocados and basil just before serving to prevent browning and maintain freshness. The salad is best enjoyed within a few hours of preparation.

    How do I choose ripe avocados?

    Look for avocados that are slightly soft to the touch but not mushy. The skin should be dark and free of large blemishes. If the avocado is too firm, let it ripen at room temperature for a day or two.

    Can I substitute another oil for olive oil?

    Yes, avocado oil or grapeseed oil are great alternatives. However, olive oil adds a distinct flavor that complements the salad ingredients well.

    Summary

    This tomato cucumber avocado salad is a refreshing, nutritious, and easy-to-make dish that’s perfect for any occasion. With its vibrant colors and flavors, it’s sure to be a hit at your next meal or gathering.

  • Frozen Pea Salad Recipe: A Cool Twist on a Classic

    Frozen Pea Salad Recipe: A Cool Twist on a Classic

    Every now and then, a recipe comes along that’s so simple yet so satisfying, it earns a permanent spot in your culinary repertoire. This frozen pea salad is one of those recipes. It’s crisp, refreshing, and packed with flavors that meld together beautifully after a quick chill in the fridge.

    Why This Recipe Works

    • Quick and Easy: With minimal prep time and no cooking required, this salad is a breeze to put together.
    • Refreshing: The frozen peas thaw just enough to be tender yet still retain a delightful crunch.
    • Versatile: Perfect as a side dish or a light main, it’s adaptable to whatever you’re serving.
    • Flavorful: A tangy dressing and mix-ins like cheese and bacon elevate the humble pea to new heights.

    Ingredients

    • 4 cups frozen peas, thawed
    • 1/2 cup mayonnaise
    • 2 tablespoons apple cider vinegar
    • 1 teaspoon sugar
    • 1/2 teaspoon salt
    • 1/4 teaspoon black pepper
    • 1/2 cup diced cheddar cheese
    • 1/4 cup diced red onion
    • 4 slices bacon, cooked and crumbled

    Equipment Needed

    • Large mixing bowl
    • Whisk
    • Measuring cups and spoons
    • Serving bowl

    Instructions

    Frozen Pea Salad Recipe

    Step 1: Prepare the Dressing

    In a large mixing bowl, whisk together the mayonnaise, apple cider vinegar, sugar, salt, and black pepper until smooth. This creamy, tangy dressing is the secret to the salad’s addictive flavor. Tip: For a lighter version, you can substitute half of the mayonnaise with Greek yogurt.

    Step 2: Combine the Ingredients

    Add the thawed peas, diced cheddar cheese, and diced red onion to the bowl with the dressing. Gently stir until all the ingredients are evenly coated. The combination of sweet peas, sharp cheese, and pungent onion creates a perfect balance of flavors.

    Step 3: Add the Bacon

    Fold in the crumbled bacon, reserving a little for garnish if desired. The bacon adds a smoky crunch that contrasts beautifully with the creamy peas. Tip: For a vegetarian version, omit the bacon or substitute with smoked almonds for a similar crunch and flavor.

    Step 4: Chill the Salad

    Cover the bowl with plastic wrap and refrigerate for at least 1 hour before serving. This chilling time allows the flavors to meld together and the peas to soften slightly. Tip: If you’re in a hurry, you can serve the salad immediately, but the flavors won’t be as developed.

    Step 5: Serve and Enjoy

    Transfer the salad to a serving bowl, garnish with the reserved bacon if using, and serve chilled. This salad is best enjoyed the day it’s made but can be stored in the refrigerator for up to 2 days.

    Tips and Tricks

    For the best texture, make sure your peas are fully thawed but still cold when you mix them with the dressing. If you’re using fresh peas, blanch them quickly in boiling water, then shock them in ice water to preserve their bright green color and crisp texture. To make this salad ahead of time, prepare all the components but wait to add the bacon until just before serving to keep it crispy. For a more colorful presentation, add some diced red bell pepper or shredded carrots. And remember, the salad’s flavor improves as it sits, so don’t skip the chilling step if you can help it.

    Recipe Variations

    • Mediterranean Twist: Swap the cheddar for feta cheese and add some chopped Kalamata olives and a sprinkle of oregano.
    • Southwestern Style: Add some corn, black beans, diced avocado, and a squeeze of lime juice for a Tex-Mex flair.
    • Asian Inspired: Use a dressing of sesame oil, rice vinegar, and a touch of soy sauce, and top with toasted sesame seeds.
    • Protein-Packed: Stir in some diced ham or turkey to turn this side into a hearty main dish.

    Frequently Asked Questions

    Can I use fresh peas instead of frozen? Absolutely! Fresh peas will give you a slightly sweeter and more vibrant salad. Just blanch them for a minute or two in boiling water, then cool them down in ice water before using.

    How long can I store the salad? This salad is best enjoyed within 1-2 days of making it. After that, the peas can start to lose their texture and the dressing may separate a bit.

    Can I make this salad vegan? Yes! Simply use vegan mayonnaise and skip the bacon or use a plant-based alternative. You can also add some smoked paprika to mimic the smoky flavor of bacon.

    Summary

    This frozen pea salad is a refreshing, easy-to-make dish that’s perfect for picnics, potlucks, or a quick weeknight side. With its creamy dressing, crisp peas, and smoky bacon, it’s a crowd-pleaser that’s sure to become a favorite.

  • Caesar Kale Salad Recipe: A Crunchy Twist on a Classic

    Caesar Kale Salad Recipe: A Crunchy Twist on a Classic

    Alright, let’s dive into making a Caesar salad that even Julius himself would envy. This version swaps out the traditional romaine for kale, adding a nutritious punch and a satisfying crunch that’ll have you coming back for seconds.

    Why This Recipe Works

    • Kale’s sturdy leaves hold up beautifully against the creamy Caesar dressing, ensuring every bite is as crisp as the last.
    • Homemade croutons add a golden, buttery crunch that store-bought versions just can’t match.
    • The addition of Parmesan cheese brings a salty, umami depth that complements the kale’s earthiness.
    • This salad is a meal in itself but can easily be paired with your favorite protein for an extra hearty dish.
    • It’s a fantastic way to sneak some greens into your diet without sacrificing flavor.

    Ingredients

    • 1 bunch kale, stems removed and leaves torn into bite-sized pieces
    • 1/2 cup grated Parmesan cheese
    • 1 cup homemade croutons
    • 1/2 cup Caesar dressing
    • 1 tbsp lemon juice
    • Salt and pepper to taste

    Equipment Needed

    • Large mixing bowl
    • Salad spinner
    • Baking sheet
    • Chef’s knife

    Instructions

    Caesar Kale Salad Recipe

    Prepare the Kale

    Start by washing your kale thoroughly under cold water. Use a salad spinner to dry the leaves completely—this ensures the dressing sticks properly. Remove the stems and tear the leaves into bite-sized pieces. Place the kale in a large mixing bowl.

    Make the Croutons

    Preheat your oven to 375°F. Cut day-old bread into 1-inch cubes, toss with olive oil, salt, and your favorite herbs, then spread on a baking sheet. Bake for 10-15 minutes until golden and crispy. Let cool before adding to the salad.

    Dress the Salad

    Add the Caesar dressing and lemon juice to the kale. Use your hands to massage the dressing into the leaves—this helps soften the kale and ensures every leaf is coated. Season with salt and pepper to taste.

    Add the Toppings

    Sprinkle the grated Parmesan cheese and homemade croutons over the dressed kale. Toss gently to combine, ensuring the toppings are evenly distributed throughout the salad.

    Serve Immediately

    This salad is best enjoyed right after preparation to maintain the crunch of the croutons and the freshness of the kale. Serve as a standalone meal or as a side to your favorite dish.

    Tips and Tricks

    For an even more flavorful salad, try roasting the kale leaves lightly before adding the dressing. This brings out a slightly sweeter flavor and adds another layer of texture. If you’re short on time, a store-bought Caesar dressing can work in a pinch, but homemade will always taste better. Don’t skip massaging the kale—it’s the secret to removing any bitterness and making the leaves tender. For a nuttier flavor, swap half the Parmesan with pecorino Romano. And remember, the quality of your ingredients will make or break this salad, so opt for the best you can find.

    Recipe Variations

    • Add grilled chicken or shrimp for a protein-packed meal.
    • Swap the kale for Brussels sprouts leaves for a different kind of crunch.
    • Include anchovies in the dressing for a traditional Caesar flavor.
    • Top with avocado slices for a creamy contrast.
    • Use gluten-free bread for the croutons to make this salad celiac-friendly.

    Frequently Asked Questions

    Can I make this salad ahead of time?

    Yes, but keep the dressing and croutons separate until just before serving to prevent the kale from wilting and the croutons from getting soggy. The kale can be prepped and stored in the fridge, and the croutons can be kept in an airtight container at room temperature.

    How do I store leftovers?

    Leftovers can be stored in an airtight container in the refrigerator for up to 2 days. Note that the croutons will lose their crunch over time, so you might want to make a fresh batch if you plan on having leftovers.

    Can I use bottled lemon juice?

    While fresh lemon juice is preferred for its bright flavor, bottled lemon juice can be used in a pinch. Just be aware that it might have a slightly different taste and could contain preservatives.

    Summary

    This Caesar Kale Salad is a delightful twist on the classic, offering a nutritious and flavorful option that’s perfect for any occasion. With its crunchy homemade croutons, creamy dressing, and hearty kale, it’s a salad that stands tall on its own or as part of a larger meal.

  • Tabbouleh Quinoa Salad Recipe: A Fresh Twist on a Classic

    Tabbouleh Quinoa Salad Recipe: A Fresh Twist on a Classic

    Fabulous flavors and fresh ingredients come together in this Tabbouleh Quinoa Salad recipe. Perfect for those who love a healthy, yet delicious meal that’s easy to make and packed with nutrients. Let’s dive into how you can bring this Mediterranean-inspired dish to your table today.

    Why This Recipe Works

    • Quinoa adds a protein-packed punch, making this salad more filling than traditional tabbouleh.
    • The combination of fresh herbs and vegetables offers a burst of flavor in every bite.
    • It’s versatile! Serve as a side, main, or even a wrap filling.
    • Prep-friendly: This salad tastes even better the next day, making it perfect for meal prep.
    • Gluten-free and vegan-friendly, catering to a wide range of dietary needs.

    Ingredients

    • 1 cup quinoa, rinsed
    • 2 cups water
    • 1 large cucumber, diced
    • 2 cups cherry tomatoes, halved
    • 1/2 cup fresh parsley, finely chopped
    • 1/4 cup fresh mint, finely chopped
    • 1/4 cup olive oil
    • 2 tbsp lemon juice
    • 1 tsp salt
    • 1/2 tsp black pepper

    Equipment Needed

    • Medium saucepan
    • Mixing bowls
    • Knife and cutting board
    • Measuring cups and spoons

    Instructions

    Tabbouleh Quinoa Salad Recipe

    Step 1: Cook the Quinoa

    Start by rinsing your quinoa under cold water to remove any bitterness. In a medium saucepan, bring 2 cups of water to a boil. Add the quinoa, reduce the heat to low, cover, and let it simmer for about 15 minutes, or until all the water is absorbed. Once done, fluff with a fork and let it cool to room temperature. Tip: For extra flavor, cook the quinoa in vegetable broth instead of water.

    Step 2: Prepare the Vegetables

    While the quinoa is cooling, dice the cucumber and halve the cherry tomatoes. Try to keep the pieces uniform in size for a consistent texture in every bite. Finely chop the parsley and mint, ensuring you have about 1/2 cup of parsley and 1/4 cup of mint once chopped. Tip: For a quicker prep, use a food processor to chop the herbs.

    Step 3: Mix the Dressing

    In a small bowl, whisk together the olive oil, lemon juice, salt, and black pepper. This simple dressing will bring all the flavors together beautifully. Adjust the seasoning to your taste, perhaps adding a bit more lemon juice for extra zing.

    Step 4: Combine All Ingredients

    In a large mixing bowl, combine the cooled quinoa, prepared vegetables, and herbs. Pour the dressing over the top and gently toss everything together until well combined. Make sure every grain of quinoa and every piece of vegetable is coated with the dressing for maximum flavor.

    Step 5: Chill and Serve

    For the best flavor, cover the salad and let it chill in the refrigerator for at least 30 minutes before serving. This allows the flavors to meld together beautifully. Serve chilled as a refreshing side or a light main dish. Tip: Garnish with additional fresh herbs or lemon wedges for a beautiful presentation.

    Tips and Tricks

    For those looking to elevate their Tabbouleh Quinoa Salad, consider these advanced tips. First, toasting the quinoa before cooking can add a nutty flavor that complements the fresh herbs beautifully. Second, if you’re serving this salad at a party, consider adding pomegranate seeds for a pop of color and a burst of sweetness. Lastly, for a creamier texture, a dollop of Greek yogurt can be mixed into the dressing, adding a tangy twist to the classic flavors.

    Recipe Variations

    • Add feta cheese for a creamy, salty contrast to the fresh vegetables.
    • Incorporate grilled chicken or shrimp to turn this side into a hearty main dish.
    • Swap quinoa for bulgur wheat to stick closer to the traditional tabbouleh recipe.
    • For a sweeter version, add diced mango or peaches for a summer twist.
    • Use lime juice instead of lemon for a different citrus note.

    Frequently Asked Questions

    Can I make this salad ahead of time?

    Absolutely! This salad actually tastes better after sitting for a few hours or overnight, as the flavors have time to meld together. Just be sure to give it a good stir before serving to redistribute the dressing.

    Is quinoa gluten-free?

    Yes, quinoa is naturally gluten-free, making this salad a great option for those with gluten sensitivities or celiac disease. Just ensure all other ingredients used are also gluten-free.

    How long will this salad last in the fridge?

    Stored in an airtight container, this salad will keep well in the refrigerator for up to 3 days. The vegetables may soften slightly over time, but the flavors will continue to develop.

    Summary

    This Tabbouleh Quinoa Salad is a refreshing, nutritious twist on the classic, perfect for any occasion. With its simple ingredients and easy preparation, it’s sure to become a staple in your recipe collection.

  • Smoked Potato Salad Recipe: A Smoky Twist on a Classic

    Smoked Potato Salad Recipe: A Smoky Twist on a Classic

    Howdy, food lovers! Today, we’re diving into a dish that’s sure to be the star of your next barbecue or potluck. This smoked potato salad combines the creamy, comforting flavors of traditional potato salad with a deep, smoky twist that’ll have everyone asking for seconds.

    Why This Recipe Works

    • The smoking process infuses the potatoes with a rich, smoky flavor that’s unmatched by any liquid smoke or seasoning.
    • Using a mix of mayonnaise and sour cream creates a creamy, tangy dressing that perfectly complements the smokiness.
    • Adding crisp celery and red onion provides a refreshing crunch and a burst of flavor in every bite.
    • This recipe is versatile and can be customized with your favorite herbs and spices.
    • It’s a make-ahead dish, allowing the flavors to meld together beautifully in the fridge.

    Ingredients

    • 2 pounds of red potatoes, quartered
    • 1 cup mayonnaise
    • 1/2 cup sour cream
    • 1/2 cup celery, finely chopped
    • 1/4 cup red onion, finely chopped
    • 2 tablespoons fresh dill, chopped
    • 1 tablespoon Dijon mustard
    • Salt and pepper to taste

    Equipment Needed

    • Smoker
    • Large mixing bowl
    • Wooden spoon
    • Knife and cutting board

    Instructions

    Smoked Potato Salad Recipe

    Step 1: Smoke the Potatoes

    Heat your smoker to 225°F. Place the quartered potatoes on the smoker rack and smoke for about 2 hours, or until they’re tender but still hold their shape. The low and slow cooking method ensures they absorb maximum smoky flavor.

    Step 2: Prepare the Dressing

    While the potatoes are smoking, whisk together the mayonnaise, sour cream, Dijon mustard, salt, and pepper in a large mixing bowl. This creamy base will coat the potatoes and other ingredients perfectly.

    Step 3: Combine Ingredients

    Once the potatoes are done, let them cool slightly before adding them to the dressing. Gently fold in the celery, red onion, and fresh dill until everything is evenly coated. Be careful not to overmix to keep the potatoes from breaking apart.

    Step 4: Chill and Serve

    Cover the bowl and refrigerate the salad for at least an hour before serving. This resting time allows the flavors to meld together and the salad to cool to the perfect temperature.

    Tips and Tricks

    For an even smokier flavor, consider using hickory or mesquite wood chips in your smoker. If you’re short on time, you can smoke the potatoes at a higher temperature, but keep an eye on them to prevent overcooking. For a lighter version, substitute Greek yogurt for half of the mayonnaise. Always taste and adjust the seasoning before serving, as the flavors can change after chilling.

    Recipe Variations

    • Add crispy bacon bits for a salty, crunchy contrast.
    • Mix in some hard-boiled eggs for extra protein and texture.
    • Try using sweet potatoes instead of red potatoes for a sweeter twist.
    • Incorporate some pickles or capers for a tangy kick.
    • For a spicy version, add a dash of hot sauce or some chopped jalapeños.

    Frequently Asked Questions

    Can I make this recipe without a smoker?

    Absolutely! While the smoker gives the potatoes an incredible depth of flavor, you can achieve a similar effect by roasting the potatoes in the oven with a bit of liquid smoke added to the dressing. Just roast at 400°F until tender.

    How long can I store the smoked potato salad?

    This salad keeps well in the refrigerator for up to 3 days. Just give it a good stir before serving to redistribute the dressing.

    Can I use a different type of potato?

    Yes, you can use Yukon gold or even russet potatoes, but keep in mind that the texture and cooking time may vary slightly. Red potatoes are recommended for their waxy texture that holds up well to smoking and mixing.

    Summary

    This smoked potato salad is a flavorful twist on the classic, perfect for any gathering. With its smoky depth, creamy dressing, and crunchy veggies, it’s sure to be a hit. Plus, it’s easy to customize to your taste preferences.

  • Elote Salad Recipe: A Zesty Twist on a Street Food Classic

    Elote Salad Recipe: A Zesty Twist on a Street Food Classic

    Summer’s here, and what better way to celebrate than with a dish that screams sunshine, laughter, and a little bit of mess? This elote salad recipe takes all the beloved flavors of Mexican street corn and turns it into a fork-friendly salad that’s perfect for picnics, potlucks, or just because.

    Why This Recipe Works

    • It combines the smoky, tangy, and creamy flavors of traditional elote in a salad form that’s easier to eat and share.
    • The use of both fresh and charred corn adds depth and texture to the dish.
    • A homemade creamy lime dressing ties all the ingredients together with a bright, zesty finish.
    • It’s customizable with various toppings to suit any taste preference.
    • Perfect for making ahead, allowing the flavors to meld together beautifully.

    Ingredients

    • 4 cups fresh corn kernels (about 4 ears)
    • 1/2 cup mayonnaise
    • 1/4 cup sour cream
    • 1 tbsp lime juice
    • 1 tsp chili powder
    • 1/2 tsp smoked paprika
    • 1/4 cup chopped cilantro
    • 1/4 cup crumbled cotija cheese
    • Salt to taste

    Equipment Needed

    • Large mixing bowl
    • Whisk
    • Grill or grill pan
    • Knife
    • Cutting board

    Instructions

    Elote Salad Recipe

    Step 1: Char the Corn

    Heat your grill or grill pan over medium-high heat. Spread the corn kernels in a single layer and cook, stirring occasionally, until they start to char, about 5-7 minutes. This adds a smoky flavor that’s quintessential to elote.

    Step 2: Make the Dressing

    In a large bowl, whisk together the mayonnaise, sour cream, lime juice, chili powder, and smoked paprika until smooth. This creamy, tangy dressing is what gives the salad its signature elote taste.

    Step 3: Combine Ingredients

    Add the charred corn, fresh corn, and chopped cilantro to the bowl with the dressing. Gently toss until everything is evenly coated. The combination of textures and flavors here is what makes the salad so irresistible.

    Step 4: Add the Cheese

    Sprinkle the crumbled cotija cheese over the salad and give it one final gentle toss. The cheese adds a salty, creamy element that balances the tanginess of the dressing.

    Step 5: Serve and Enjoy

    Transfer the salad to a serving dish and sprinkle with a little extra chili powder and cilantro for garnish. Serve immediately or chill for an hour to let the flavors meld together even more.

    Tips and Tricks

    For an even smokier flavor, try grilling the whole ears of corn before cutting off the kernels. If you’re short on time, frozen corn can be used in place of fresh—just be sure to thaw and drain it well. For a lighter version, Greek yogurt can substitute for the sour cream. And if cotija cheese is hard to find, feta makes a great stand-in. Finally, don’t skip the resting time if possible; it really does make a difference in how the flavors come together.

    Recipe Variations

    • Add diced avocado for extra creaminess and a boost of healthy fats.
    • Mix in black beans and diced tomatoes for a heartier salad that can serve as a main dish.
    • For a spicy kick, add diced jalapeños or a dash of hot sauce to the dressing.
    • Swap the corn for roasted sweet potatoes in the fall for a seasonal twist.
    • Use grilled zucchini or eggplant in place of corn for a low-carb version.

    Frequently Asked Questions

    Can I make this salad ahead of time?

    Absolutely! In fact, making it a few hours ahead allows the flavors to meld together beautifully. Just hold off on adding the cheese until you’re ready to serve to keep it from getting too soft.

    Is there a substitute for cotija cheese?

    Yes, feta cheese is a great alternative. It has a similar salty and tangy profile that works well in this dish. Just be mindful that feta is a bit softer, so it might blend into the salad more than cotija would.

    Can I use frozen corn?

    Definitely. Thaw the corn completely and pat it dry to remove excess moisture before using. For the best flavor, try to char it as you would fresh corn to bring out its sweetness and add a smoky depth.

    Summary

    This elote salad is a vibrant, flavorful twist on the classic Mexican street food. It’s easy to make, customizable, and perfect for any summer gathering. With its combination of smoky, tangy, and creamy elements, it’s sure to be a hit.