Blog

  • Spinach and Bacon Salad Dressing Recipe: A Flavor Bomb for Your Greens

    Spinach and Bacon Salad Dressing Recipe: A Flavor Bomb for Your Greens

    Welcome to a game-changing recipe that will make your salads the talk of the town. Who knew that combining spinach and bacon could create such a magical dressing? Let’s dive into the delicious details.

    Why This Recipe Works

    • The smoky flavor of bacon perfectly complements the earthy tones of spinach, creating a balanced and irresistible dressing.
    • Using fresh spinach ensures a vibrant color and a nutrient-packed punch.
    • The addition of a touch of honey balances the acidity and smokiness, rounding out the flavors beautifully.
    • It’s versatile enough to dress up any salad, from a simple green salad to a more elaborate dinner salad.
    • Prep time is minimal, making it a quick fix for busy weeknights or last-minute gatherings.

    Ingredients

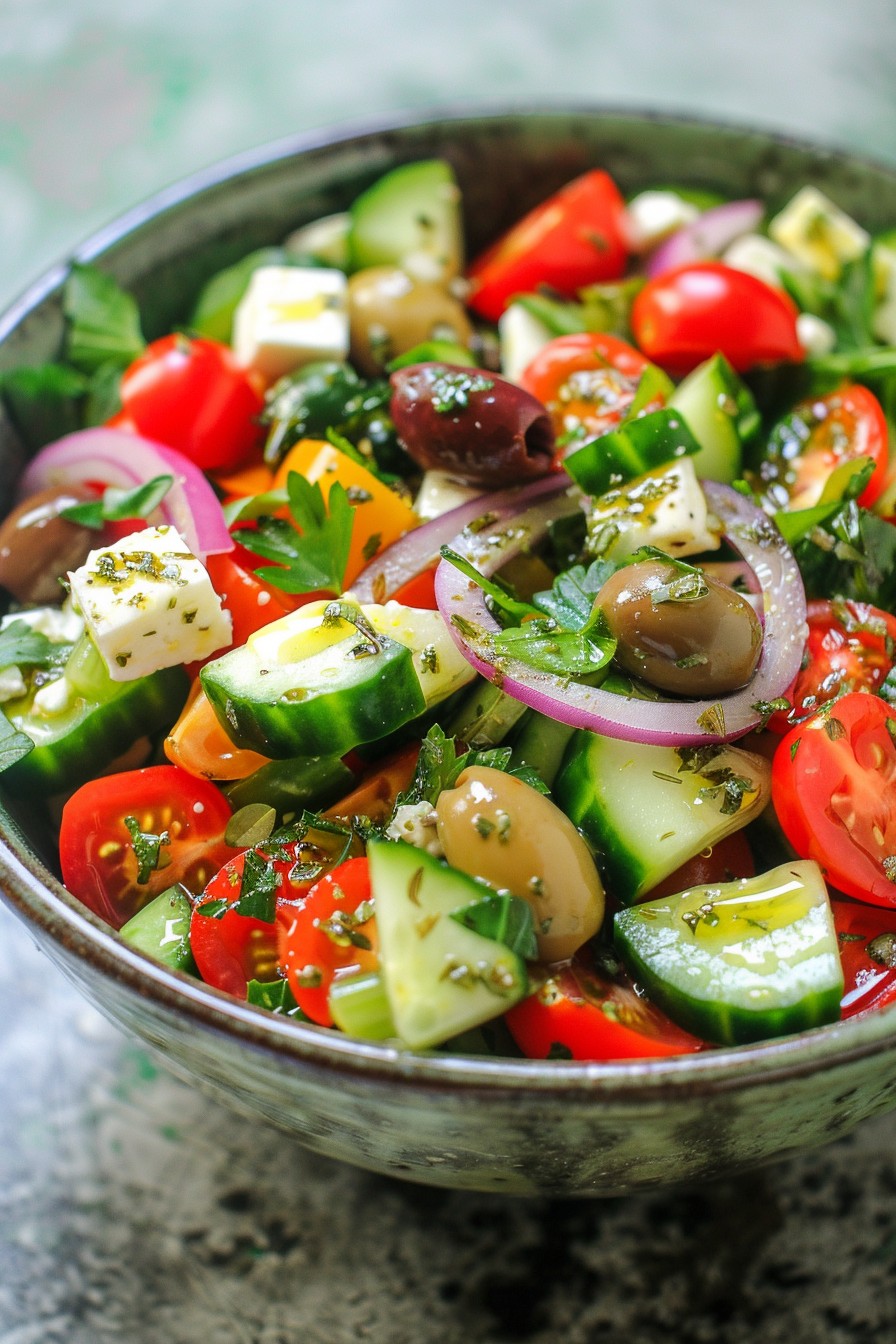
    • 4 cups fresh spinach leaves, tightly packed
    • 6 slices bacon, cooked until crispy and crumbled
    • 1/2 cup mayonnaise
    • 1/4 cup sour cream
    • 2 tablespoons apple cider vinegar
    • 1 tablespoon honey
    • 1 teaspoon Dijon mustard
    • Salt and pepper to taste

    Equipment Needed

    • Blender or food processor
    • Measuring cups and spoons
    • Mixing bowl
    • Whisk

    Instructions

    Spinach And Bacon Salad Dressing Recipe

    Step 1: Prepare Your Ingredients

    Start by washing your spinach leaves thoroughly under cold water to remove any dirt or grit. Pat them dry with a clean kitchen towel or use a salad spinner. Cook your bacon until it’s crispy, then let it cool before crumbling it into small pieces. This ensures your dressing has the perfect texture and flavor.

    Step 2: Blend the Spinach and Bacon

    In your blender or food processor, combine the spinach and half of the crumbled bacon. Pulse until the spinach is finely chopped and the bacon is well incorporated. This step is crucial for achieving that signature smoky flavor throughout the dressing.

    Step 3: Mix the Wet Ingredients

    In a separate mixing bowl, whisk together the mayonnaise, sour cream, apple cider vinegar, honey, and Dijon mustard until smooth. This mixture will serve as the creamy base of your dressing, so make sure there are no lumps.

    Step 4: Combine Everything

    Add the spinach and bacon mixture to the wet ingredients. Stir until everything is well combined. Taste and adjust the seasoning with salt and pepper as needed. Remember, the bacon adds saltiness, so you might not need much extra salt.

    Step 5: Final Touches

    Transfer your dressing to a serving bowl or jar and sprinkle the remaining crumbled bacon on top for garnish. Chill in the refrigerator for at least 30 minutes before serving to allow the flavors to meld together beautifully.

    Tips and Tricks

    For a smoother dressing, you can blend all the ingredients together in the blender or food processor. If you prefer a chunkier texture, hand-chopping the spinach and bacon is the way to go. To make this dressing ahead of time, prepare it up to two days in advance and store it in the refrigerator. The flavors will continue to develop over time. For a lighter version, substitute Greek yogurt for the mayonnaise and sour cream. This will give you a tangier, but equally delicious, dressing.

    Recipe Variations

    • Add a clove of garlic for a spicy kick.
    • Substitute maple syrup for honey for a deeper sweetness.
    • Include a handful of fresh herbs like parsley or chives for an herby twist.
    • For a vegetarian version, omit the bacon and add smoked paprika for that smoky flavor.
    • Use kale instead of spinach for a different nutrient profile and texture.

    Frequently Asked Questions

    Can I use frozen spinach? Yes, but make sure to thaw and squeeze out all the excess water first. Frozen spinach can make the dressing too watery if not properly prepared.

    How long does this dressing last in the fridge? Stored in an airtight container, it should keep for up to 5 days. Just give it a good stir before serving.

    Can I make this dressing vegan? Absolutely! Use vegan mayonnaise and sour cream substitutes, and skip the bacon or use a vegan bacon alternative.

    Summary

    This spinach and bacon salad dressing is a flavorful, easy-to-make addition to any salad. With its perfect balance of smoky, sweet, and tangy, it’s sure to become a staple in your recipe collection.

  • Cottage Cheese Salad Dressing Recipe: Creamy, Dreamy & Delicious

    Cottage Cheese Salad Dressing Recipe: Creamy, Dreamy & Delicious

    Mmm, get ready to dive into the creamiest, dreamiest cottage cheese salad dressing you’ve ever tasted. Perfect for those who love a healthy twist without sacrificing flavor. This recipe is a game-changer for your salads, offering a protein-packed punch that’ll keep you coming back for more.

    Why This Recipe Works

    • It’s a protein powerhouse, thanks to the cottage cheese, making your salad more satisfying.
    • The blend of herbs and spices adds a burst of flavor that elevates any salad from good to great.
    • It’s incredibly versatile, working well with a variety of salad ingredients from greens to grains.
    • Prep is a breeze, requiring just a few minutes and minimal equipment.
    • It’s a healthier alternative to store-bought dressings, free from preservatives and unnecessary additives.

    Ingredients

    • 1 cup cottage cheese (low-fat or full-fat, your choice)
    • 2 tbsp olive oil
    • 1 tbsp lemon juice (freshly squeezed for the best flavor)
    • 1 garlic clove, minced
    • 1/2 tsp dried dill
    • 1/4 tsp salt
    • 1/4 tsp black pepper
    • 2 tbsp water (to adjust consistency)

    Equipment Needed

    • Blender or food processor
    • Measuring cups and spoons
    • Small bowl for mixing
    • Spoon or spatula

    Instructions

    Cottage Cheese Salad Dressing Recipe

    Step 1: Blend the Base

    Start by adding the cottage cheese, olive oil, and lemon juice to your blender or food processor. Blend on medium speed for about 30 seconds, or until the mixture is smooth. If you prefer a chunkier texture, blend for less time. Tip: For an extra smooth dressing, strain the cottage cheese before blending to remove any excess liquid.

    Step 2: Add the Flavor

    Once your base is smooth, add the minced garlic, dried dill, salt, and black pepper. Blend again for another 20 seconds to ensure all the flavors are well incorporated. Taste and adjust the seasoning if necessary. Tip: Fresh herbs can be used in place of dried for a brighter flavor profile.

    Step 3: Adjust the Consistency

    If your dressing is too thick, gradually add water, one tablespoon at a time, blending after each addition until you reach your desired consistency. Remember, the dressing will thicken slightly once chilled. Tip: For a tangier dressing, add a little more lemon juice to taste.

    Step 4: Chill and Serve

    Transfer the dressing to a small bowl or jar and refrigerate for at least 30 minutes before serving. This allows the flavors to meld together beautifully. Serve over your favorite salad and enjoy!

    Tips and Tricks

    For those looking to take their cottage cheese salad dressing to the next level, consider these advanced tips. First, experimenting with different herbs can completely transform the flavor. Try basil for an Italian twist or cilantro for a Mexican flair. Second, incorporating a teaspoon of honey or maple syrup can add a subtle sweetness that balances the tanginess beautifully. Lastly, for a creamier texture, blend in a quarter of an avocado. Not only does it enhance the texture, but it also adds healthy fats and a vibrant green color.

    Recipe Variations

    • Spicy Kick: Add a pinch of cayenne pepper or a few dashes of hot sauce for those who like it hot.
    • Herb Garden: Mix in fresh parsley, chives, and tarragon for a fresh, herby dressing.
    • Cheesy Delight: Stir in a tablespoon of grated Parmesan or feta cheese for an extra cheesy flavor.
    • Sweet and Tangy: A dash of apple cider vinegar and a teaspoon of honey can sweeten the deal.
    • Creamy Avocado: Blend in half an avocado for a richer, creamier texture and a boost of healthy fats.

    Frequently Asked Questions

    Can I make this dressing ahead of time?

    Absolutely! This dressing can be made up to 3 days in advance and stored in an airtight container in the refrigerator. Just give it a good stir or shake before serving to recombine any separated ingredients.

    Is there a dairy-free alternative to cottage cheese?

    Yes, for a dairy-free version, you can substitute the cottage cheese with silken tofu or a dairy-free yogurt. Keep in mind that the flavor and texture will vary slightly, so you may need to adjust the seasonings to taste.

    How can I thin the dressing without adding water?

    If you prefer not to use water, you can thin the dressing with a little more olive oil, lemon juice, or even a splash of milk or a milk alternative. Each option will slightly alter the flavor, so choose based on your preference.

    Summary

    This cottage cheese salad dressing is a creamy, flavorful, and healthy addition to any salad. With simple ingredients and easy steps, it’s a must-try for anyone looking to elevate their salad game. Plus, with endless variations, you can customize it to suit any taste or dietary need.

  • Smoked Potato Salad Recipe: A Smoky Twist on a Classic

    Smoked Potato Salad Recipe: A Smoky Twist on a Classic

    Howdy, food lovers! Today, we’re diving into a dish that’s sure to be the star of your next barbecue or potluck. This smoked potato salad combines the creamy, comforting flavors of traditional potato salad with a deep, smoky twist that’ll have everyone asking for seconds.

    Why This Recipe Works

    • The smoking process infuses the potatoes with a rich, smoky flavor that’s unmatched by any liquid smoke or seasoning.
    • Using a mix of mayonnaise and sour cream creates a creamy, tangy dressing that perfectly complements the smokiness.
    • Adding crisp celery and red onion provides a refreshing crunch and a burst of flavor in every bite.
    • This recipe is versatile and can be customized with your favorite herbs and spices.
    • It’s a make-ahead dish, allowing the flavors to meld together beautifully in the fridge.

    Ingredients

    • 2 pounds of red potatoes, quartered
    • 1 cup mayonnaise
    • 1/2 cup sour cream
    • 1/2 cup celery, finely chopped
    • 1/4 cup red onion, finely chopped
    • 2 tablespoons fresh dill, chopped
    • 1 tablespoon Dijon mustard
    • Salt and pepper to taste

    Equipment Needed

    • Smoker
    • Large mixing bowl
    • Wooden spoon
    • Knife and cutting board

    Instructions

    Smoked Potato Salad Recipe

    Step 1: Smoke the Potatoes

    Heat your smoker to 225°F. Place the quartered potatoes on the smoker rack and smoke for about 2 hours, or until they’re tender but still hold their shape. The low and slow cooking method ensures they absorb maximum smoky flavor.

    Step 2: Prepare the Dressing

    While the potatoes are smoking, whisk together the mayonnaise, sour cream, Dijon mustard, salt, and pepper in a large mixing bowl. This creamy base will coat the potatoes and other ingredients perfectly.

    Step 3: Combine Ingredients

    Once the potatoes are done, let them cool slightly before adding them to the dressing. Gently fold in the celery, red onion, and fresh dill until everything is evenly coated. Be careful not to overmix to keep the potatoes from breaking apart.

    Step 4: Chill and Serve

    Cover the bowl and refrigerate the salad for at least an hour before serving. This resting time allows the flavors to meld together and the salad to cool to the perfect temperature.

    Tips and Tricks

    For an even smokier flavor, consider using hickory or mesquite wood chips in your smoker. If you’re short on time, you can smoke the potatoes at a higher temperature, but keep an eye on them to prevent overcooking. For a lighter version, substitute Greek yogurt for half of the mayonnaise. Always taste and adjust the seasoning before serving, as the flavors can change after chilling.

    Recipe Variations

    • Add crispy bacon bits for a salty, crunchy contrast.
    • Mix in some hard-boiled eggs for extra protein and texture.
    • Try using sweet potatoes instead of red potatoes for a sweeter twist.
    • Incorporate some pickles or capers for a tangy kick.
    • For a spicy version, add a dash of hot sauce or some chopped jalapeños.

    Frequently Asked Questions

    Can I make this recipe without a smoker?

    Absolutely! While the smoker gives the potatoes an incredible depth of flavor, you can achieve a similar effect by roasting the potatoes in the oven with a bit of liquid smoke added to the dressing. Just roast at 400°F until tender.

    How long can I store the smoked potato salad?

    This salad keeps well in the refrigerator for up to 3 days. Just give it a good stir before serving to redistribute the dressing.

    Can I use a different type of potato?

    Yes, you can use Yukon gold or even russet potatoes, but keep in mind that the texture and cooking time may vary slightly. Red potatoes are recommended for their waxy texture that holds up well to smoking and mixing.

    Summary

    This smoked potato salad is a flavorful twist on the classic, perfect for any gathering. With its smoky depth, creamy dressing, and crunchy veggies, it’s sure to be a hit. Plus, it’s easy to customize to your taste preferences.

  • Ranch Dressing Potato Salad Recipe: A Creamy Dream Come True

    Ranch Dressing Potato Salad Recipe: A Creamy Dream Come True

    Perfect for picnics, potlucks, or just because, this Ranch Dressing Potato Salad is the creamy, herby side dish you didn’t know you needed. Packed with flavor and easy to make, it’s sure to be a hit.

    Why This Recipe Works

    • The combination of creamy ranch dressing and tender potatoes creates a perfect texture balance.
    • Fresh herbs add a burst of flavor that elevates the dish beyond your average potato salad.
    • It’s versatile enough to serve as a side or a main dish for vegetarians.
    • The recipe is straightforward, with no complicated steps or hard-to-find ingredients.
    • It can be made ahead of time, making it perfect for meal prep or entertaining.

    Ingredients

    • 2 pounds of red potatoes, washed and cubed
    • 1 cup of ranch dressing
    • 1/2 cup of sour cream
    • 1/4 cup of chopped fresh dill
    • 1/4 cup of chopped fresh chives
    • Salt and pepper to taste

    Equipment Needed

    • Large pot
    • Mixing bowl
    • Knife and cutting board
    • Measuring cups and spoons

    Instructions

    Ranch Dressing Potato Salad Recipe

    Step 1: Cook the Potatoes

    Fill a large pot with water and bring it to a boil. Add the cubed potatoes and cook for about 10-12 minutes, or until they are fork-tender. Drain the potatoes and let them cool slightly. Tip: Don’t overcook the potatoes, or they’ll become mushy in the salad.

    Step 2: Prepare the Dressing

    In a mixing bowl, combine the ranch dressing and sour cream. Stir until smooth. Add the chopped dill and chives, then season with salt and pepper to taste. Tip: For a lighter version, you can use Greek yogurt instead of sour cream.

    Step 3: Combine Everything

    Add the slightly cooled potatoes to the dressing mixture. Gently fold the potatoes into the dressing until they are evenly coated. Be careful not to mash the potatoes. Tip: Letting the salad chill in the fridge for an hour before serving allows the flavors to meld together beautifully.

    Tips and Tricks

    For an extra crunch, add some diced celery or red onion to the salad. If you’re short on time, you can use store-bought ranch dressing, but homemade will always taste better. To make the salad more filling, consider adding hard-boiled eggs or bacon bits. Always taste and adjust the seasoning before serving, as potatoes can absorb a lot of salt.

    Recipe Variations

    • Add crispy bacon bits for a smoky flavor.
    • Mix in some hard-boiled eggs for extra protein.
    • Use Greek yogurt instead of sour cream for a healthier version.
    • Add diced avocado for a creamy texture and healthy fats.
    • Swap the red potatoes for sweet potatoes for a different flavor profile.

    Frequently Asked Questions

    Can I make this salad ahead of time?

    Absolutely! This salad actually tastes better after it’s had some time to chill in the fridge, allowing the flavors to meld together. Just give it a good stir before serving.

    How long will this potato salad last in the fridge?

    Stored in an airtight container, this potato salad will last for up to 3 days in the refrigerator. After that, the potatoes may start to get a bit mushy.

    Can I use dried herbs instead of fresh?

    While fresh herbs provide the best flavor, you can use dried herbs in a pinch. Just remember that dried herbs are more potent, so you’ll need to use about one-third the amount of fresh.

    Summary

    This Ranch Dressing Potato Salad is a creamy, flavorful twist on the classic dish. Easy to make and versatile, it’s perfect for any occasion. With fresh herbs and a tangy dressing, it’s sure to be a crowd-pleaser.

  • Cowboy Salad Recipe: A Hearty, Flavor-Packed Dish for Any Occasion

    Cowboy Salad Recipe: A Hearty, Flavor-Packed Dish for Any Occasion

    Ready to rustle up something delicious? This Cowboy Salad is a riot of flavors and textures that’ll make your taste buds dance. Perfect for picnics, potlucks, or just a hearty meal at home, it’s as fun to make as it is to eat.

    Why This Recipe Works

    • It’s a perfect balance of protein, veggies, and grains, making it a nutritious one-bowl meal.
    • The dressing is a tangy, sweet, and spicy concoction that brings all the ingredients together beautifully.
    • It’s incredibly versatile; you can easily swap out ingredients based on what you have on hand.
    • Prep is a breeze, and it gets better as it sits, making it ideal for meal prep.
    • It’s a crowd-pleaser that appeals to both kids and adults alike.

    Ingredients

    • 2 cups cooked quinoa, cooled
    • 1 can (15 oz) black beans, rinsed and drained
    • 1 cup corn kernels (fresh, frozen, or canned)
    • 1 red bell pepper, diced
    • 1 avocado, diced
    • 1/4 cup cilantro, chopped
    • 1/4 cup lime juice
    • 2 tbsp olive oil
    • 1 tsp cumin
    • Salt and pepper to taste

    Equipment Needed

    • Large mixing bowl
    • Measuring cups and spoons
    • Knife and cutting board
    • Whisk

    Instructions

    Cowboy Salad Recipe

    Step 1: Prepare the Base

    In a large mixing bowl, combine the cooled quinoa, black beans, corn, and diced red bell pepper. Toss gently to mix. Tip: For extra flavor, you can toast the quinoa before cooking it.

    Step 2: Make the Dressing

    In a small bowl, whisk together lime juice, olive oil, cumin, salt, and pepper until well combined. Tip: Adjust the lime juice and salt to taste; the dressing should be bright and flavorful.

    Step 3: Combine and Toss

    Pour the dressing over the quinoa mixture and toss until everything is evenly coated. Tip: Let the salad sit for 10 minutes before serving to allow the flavors to meld.

    Step 4: Add the Avocado and Cilantro

    Gently fold in the diced avocado and chopped cilantro. Be careful not to mash the avocado.

    Step 5: Serve and Enjoy

    Serve the salad immediately, or refrigerate for up to 2 days. The flavors will continue to develop over time.

    Tips and Tricks

    For the best texture, make sure the quinoa is completely cooled before adding the other ingredients. If you’re in a hurry, spread it on a baking sheet to cool faster. You can also add a pinch of sugar to the dressing to balance the acidity. For a creamier texture, mash half of the avocado before adding it to the salad. If you’re not a fan of cilantro, parsley makes a great substitute.

    Recipe Variations

    • Swap quinoa for brown rice or farro for a different grain base.
    • Add diced chicken or shrimp for extra protein.
    • Include diced mango or pineapple for a sweet twist.
    • Use black-eyed peas instead of black beans for a Southern flair.
    • Add a diced jalapeño for an extra kick.

    Frequently Asked Questions

    Can I make this salad ahead of time?

    Absolutely! This salad actually tastes better after it’s had time to sit. Just hold off on adding the avocado until you’re ready to serve to prevent it from browning.

    Is this salad gluten-free?

    Yes, as long as you ensure that all your ingredients, especially the quinoa and any added sauces, are certified gluten-free.

    How long does this salad keep?

    Stored in an airtight container in the refrigerator, it’ll last for up to 3 days. The avocado may brown slightly, but it’ll still taste great.

    Summary

    This Cowboy Salad is a vibrant, nutritious dish that’s as versatile as it is delicious. Perfect for any occasion, it’s sure to become a staple in your recipe repertoire.

  • Elote Salad Recipe: A Zesty Twist on a Street Food Classic

    Elote Salad Recipe: A Zesty Twist on a Street Food Classic

    Summer’s here, and what better way to celebrate than with a dish that screams sunshine, laughter, and a little bit of mess? This elote salad recipe takes all the beloved flavors of Mexican street corn and turns it into a fork-friendly salad that’s perfect for picnics, potlucks, or just because.

    Why This Recipe Works

    • It combines the smoky, tangy, and creamy flavors of traditional elote in a salad form that’s easier to eat and share.
    • The use of both fresh and charred corn adds depth and texture to the dish.
    • A homemade creamy lime dressing ties all the ingredients together with a bright, zesty finish.
    • It’s customizable with various toppings to suit any taste preference.
    • Perfect for making ahead, allowing the flavors to meld together beautifully.

    Ingredients

    • 4 cups fresh corn kernels (about 4 ears)
    • 1/2 cup mayonnaise
    • 1/4 cup sour cream
    • 1 tbsp lime juice
    • 1 tsp chili powder
    • 1/2 tsp smoked paprika
    • 1/4 cup chopped cilantro
    • 1/4 cup crumbled cotija cheese
    • Salt to taste

    Equipment Needed

    • Large mixing bowl
    • Whisk
    • Grill or grill pan
    • Knife
    • Cutting board

    Instructions

    Elote Salad Recipe

    Step 1: Char the Corn

    Heat your grill or grill pan over medium-high heat. Spread the corn kernels in a single layer and cook, stirring occasionally, until they start to char, about 5-7 minutes. This adds a smoky flavor that’s quintessential to elote.

    Step 2: Make the Dressing

    In a large bowl, whisk together the mayonnaise, sour cream, lime juice, chili powder, and smoked paprika until smooth. This creamy, tangy dressing is what gives the salad its signature elote taste.

    Step 3: Combine Ingredients

    Add the charred corn, fresh corn, and chopped cilantro to the bowl with the dressing. Gently toss until everything is evenly coated. The combination of textures and flavors here is what makes the salad so irresistible.

    Step 4: Add the Cheese

    Sprinkle the crumbled cotija cheese over the salad and give it one final gentle toss. The cheese adds a salty, creamy element that balances the tanginess of the dressing.

    Step 5: Serve and Enjoy

    Transfer the salad to a serving dish and sprinkle with a little extra chili powder and cilantro for garnish. Serve immediately or chill for an hour to let the flavors meld together even more.

    Tips and Tricks

    For an even smokier flavor, try grilling the whole ears of corn before cutting off the kernels. If you’re short on time, frozen corn can be used in place of fresh—just be sure to thaw and drain it well. For a lighter version, Greek yogurt can substitute for the sour cream. And if cotija cheese is hard to find, feta makes a great stand-in. Finally, don’t skip the resting time if possible; it really does make a difference in how the flavors come together.

    Recipe Variations

    • Add diced avocado for extra creaminess and a boost of healthy fats.
    • Mix in black beans and diced tomatoes for a heartier salad that can serve as a main dish.
    • For a spicy kick, add diced jalapeños or a dash of hot sauce to the dressing.
    • Swap the corn for roasted sweet potatoes in the fall for a seasonal twist.
    • Use grilled zucchini or eggplant in place of corn for a low-carb version.

    Frequently Asked Questions

    Can I make this salad ahead of time?

    Absolutely! In fact, making it a few hours ahead allows the flavors to meld together beautifully. Just hold off on adding the cheese until you’re ready to serve to keep it from getting too soft.

    Is there a substitute for cotija cheese?

    Yes, feta cheese is a great alternative. It has a similar salty and tangy profile that works well in this dish. Just be mindful that feta is a bit softer, so it might blend into the salad more than cotija would.

    Can I use frozen corn?

    Definitely. Thaw the corn completely and pat it dry to remove excess moisture before using. For the best flavor, try to char it as you would fresh corn to bring out its sweetness and add a smoky depth.

    Summary

    This elote salad is a vibrant, flavorful twist on the classic Mexican street food. It’s easy to make, customizable, and perfect for any summer gathering. With its combination of smoky, tangy, and creamy elements, it’s sure to be a hit.

  • Greek Salad and Dressing: A Crispy, Crunchy Summer Delight

    Greek Salad and Dressing: A Crispy, Crunchy Summer Delight

    Kickstart your summer with this refreshing Greek salad and dressing recipe that’s bursting with flavors and textures. Perfect for picnics, potlucks, or a light dinner, this dish is a crowd-pleaser that combines crisp vegetables, creamy feta, and a tangy homemade dressing.

    Why This Recipe Works

    • The combination of crisp cucumbers, juicy tomatoes, and crunchy bell peppers offers a satisfying texture contrast.
    • Homemade dressing with olive oil, lemon juice, and oregano elevates the salad with fresh, vibrant flavors.
    • Adding Kalamata olives and feta cheese introduces a salty, briny depth that’s unmistakably Greek.
    • This salad is incredibly versatile, easily adaptable to include your favorite veggies or proteins.
    • It’s a quick, no-cook recipe that’s perfect for hot summer days when you want to avoid the stove.

    Ingredients

    • 1 large cucumber, diced
    • 2 cups cherry tomatoes, halved
    • 1 green bell pepper, diced
    • 1/2 red onion, thinly sliced
    • 1 cup Kalamata olives, pitted
    • 1 cup feta cheese, cubed
    • 1/4 cup extra virgin olive oil
    • 2 tbsp lemon juice
    • 1 tsp dried oregano
    • Salt and pepper to taste

    Equipment Needed

    • Large mixing bowl
    • Small whisk or fork
    • Measuring cups and spoons
    • Knife and cutting board

    Instructions

    Recipe For Greek Salad And Dressing

    Step 1: Prep Your Vegetables

    Start by washing all your vegetables thoroughly. Dice the cucumber into bite-sized pieces, ensuring each piece is roughly the same size for uniform eating. Halve the cherry tomatoes, and dice the green bell pepper into similar-sized pieces. Thinly slice the red onion to avoid overpowering bites. Tip: For a less pungent onion flavor, soak the sliced onions in cold water for 10 minutes before adding them to the salad.

    Step 2: Combine the Salad Ingredients

    In your large mixing bowl, combine the diced cucumber, halved cherry tomatoes, diced green bell pepper, and sliced red onion. Add the pitted Kalamata olives and cubed feta cheese. Gently toss the ingredients to distribute them evenly. Tip: For the best flavor, let the salad sit for a few minutes after tossing to allow the flavors to meld slightly.

    Step 3: Whisk Together the Dressing

    In a small bowl, whisk together the extra virgin olive oil and lemon juice until well combined. Add the dried oregano, and season with salt and pepper to taste. Whisk again to ensure all the ingredients are fully incorporated. Tip: For a creamier dressing, you can add a teaspoon of Dijon mustard to the mix.

    Step 4: Dress the Salad

    Drizzle the dressing over the salad, starting with half the amount. Gently toss the salad to coat the ingredients evenly. Taste and add more dressing as needed, depending on your preference for moisture and flavor intensity.

    Step 5: Serve and Enjoy

    Transfer the salad to a serving dish or individual plates. For an extra touch of freshness, garnish with a sprinkle of additional dried oregano or some fresh herbs like parsley or dill. Serve immediately to enjoy the crisp textures at their best.

    Tips and Tricks

    For those looking to take their Greek salad to the next level, consider these advanced tips. First, try roasting your vegetables lightly before adding them to the salad for a deeper flavor profile. Second, experiment with different types of olives or cheeses to find your perfect combination. Third, make the dressing ahead of time and let it sit to allow the flavors to develop more fully. Lastly, for a protein-packed version, add grilled chicken or shrimp to make it a hearty main dish.

    Recipe Variations

    • Add avocado for a creamy texture and healthy fats.
    • Incorporate quinoa or chickpeas for a protein boost.
    • Swap the feta for goat cheese for a tangier taste.
    • Use a mix of different colored bell peppers for a more visually appealing dish.
    • Add a handful of fresh mint or basil for an herby freshness.

    Frequently Asked Questions

    Can I make this salad ahead of time?

    Yes, you can prepare the salad ingredients and dressing separately a day in advance. However, for the best texture, combine them just before serving to prevent the vegetables from becoming soggy.

    How long does the salad last in the fridge?

    Once dressed, the salad is best eaten within a day. Undressed, the vegetables can last up to 3 days when stored properly in an airtight container.

    Can I use bottled lemon juice instead of fresh?

    While fresh lemon juice is preferred for its bright flavor, bottled lemon juice can be used in a pinch. Just be aware that the flavor may not be as vibrant.

    Summary

    This Greek salad and dressing recipe is a refreshing, flavorful dish perfect for any occasion. With crisp vegetables, tangy feta, and a homemade dressing, it’s a healthy, delicious option that’s easy to customize to your taste.

  • Som Tum Salad Dressing Recipe: A Zesty Twist on a Classic

    Som Tum Salad Dressing Recipe: A Zesty Twist on a Classic

    Make your salads sing with this vibrant Som Tum dressing! Perfect for those who love a balance of sweet, sour, and spicy, this dressing will transform your greens into a Thai-inspired masterpiece.

    Why This Recipe Works

    • The combination of lime juice and fish sauce creates a perfect harmony of sour and umami flavors.
    • Palm sugar adds a subtle sweetness that balances the heat from the chilies.
    • Fresh garlic and chilies provide a punch of flavor that’s unmistakably authentic.
    • It’s versatile enough to dress any salad, not just Som Tum.
    • Quick to make, with no cooking required, it’s a hassle-free way to elevate your meals.

    Ingredients

    • 1/4 cup lime juice (freshly squeezed)
    • 3 tbsp fish sauce
    • 2 tbsp palm sugar (grated)
    • 2 cloves garlic (minced)
    • 1-2 Thai chilies (finely chopped, adjust to taste)
    • 1 tbsp roasted peanuts (crushed, for garnish)

    Equipment Needed

    • Mortar and pestle (or a small bowl and fork)
    • Measuring spoons and cups
    • Small mixing bowl
    • Whisk

    Instructions

    Som Tum Salad Dressing Recipe

    Step 1: Combine the Base Ingredients

    In your mortar and pestle or small bowl, combine the minced garlic and chopped chilies. Gently pound or press them together to release their flavors. This step is crucial for infusing the dressing with a deep, aromatic taste. Tip: Wear gloves when handling chilies to avoid skin irritation.

    Step 2: Add the Liquid Components

    Pour in the lime juice and fish sauce, then whisk together until the palm sugar is completely dissolved. The mixture should start to smell incredibly fragrant. Tip: If palm sugar is hard to find, brown sugar makes a good substitute.

    Step 3: Adjust to Taste

    Taste your dressing and adjust the flavors as needed. More lime juice for acidity, fish sauce for saltiness, or sugar for sweetness. Remember, the dressing should be a balance of all three flavors. Tip: Let the dressing sit for 10 minutes before serving to allow the flavors to meld.

    Step 4: Serve and Enjoy

    Drizzle over your favorite salad, toss to coat evenly, and garnish with crushed peanuts for an extra crunch. This dressing is best used fresh but can be stored in the fridge for up to a week.

    Tips and Tricks

    For those looking to take their Som Tum dressing to the next level, consider these advanced tips. First, toasting the peanuts before crushing them adds a deeper nutty flavor. Second, using a microplane to grate the garlic will give you a finer paste, distributing the flavor more evenly. Lastly, if you’re not a fan of too much heat, remove the seeds from the chilies before chopping. These small adjustments can make a big difference in the final taste of your dressing.

    Recipe Variations

    • For a vegetarian version, substitute the fish sauce with soy sauce or a vegan fish sauce alternative.
    • Add a tablespoon of tamarind paste for an extra layer of sourness and complexity.
    • Include a teaspoon of shrimp paste for an authentic Thai flavor boost.
    • For a smoother dressing, blend all the ingredients in a food processor until smooth.
    • Add a splash of coconut milk for a creamier, milder version of the dressing.

    Frequently Asked Questions

    Can I make this dressing ahead of time?

    Absolutely! This dressing can be made up to a week in advance and stored in an airtight container in the refrigerator. Just give it a good stir or shake before using, as the ingredients may separate over time.

    Is there a substitute for palm sugar?

    Yes, brown sugar is the closest substitute for palm sugar in terms of flavor and texture. You can also use granulated sugar, but you might need to adjust the quantity as it’s sweeter than palm sugar.

    How spicy is this dressing?

    The spiciness can be easily adjusted by the number of chilies you use. Start with one chili and add more according to your preference. Remember, it’s easier to add heat than to take it away!

    Summary

    This Som Tum salad dressing is a vibrant, flavorful addition to any salad, offering a perfect balance of sweet, sour, and spicy. Easy to make and customizable, it’s sure to become a staple in your kitchen.

  • Crunchy & Satisfying Roasted Chickpea Salad Recipe

    Crunchy & Satisfying Roasted Chickpea Salad Recipe

    A delightful twist on your everyday salad, this roasted chickpea salad is not only packed with flavors but also offers a satisfying crunch that will make you forget you’re eating healthy. Perfect for lunch, dinner, or even as a hearty side, this recipe is a game-changer for salad lovers.

    Why This Recipe Works

    • The roasted chickpeas add a crunchy texture and protein boost, making the salad more filling.
    • A mix of fresh vegetables ensures a colorful, nutrient-rich meal that’s as good for your body as it is for your taste buds.
    • The homemade dressing ties all the flavors together with a perfect balance of tanginess and sweetness.
    • It’s versatile; easily customizable based on what you have in your fridge or pantry.
    • Quick and easy to prepare, this salad is perfect for busy weeknights or meal prep.

    Ingredients

    • 2 cups chickpeas, drained and rinsed
    • 1 tbsp olive oil
    • 1/2 tsp salt
    • 1/2 tsp paprika
    • 4 cups mixed greens (spinach, arugula, or your choice)
    • 1 cup cherry tomatoes, halved
    • 1/2 cucumber, diced
    • 1/4 red onion, thinly sliced
    • 1 avocado, diced
    • For the dressing: 3 tbsp olive oil, 1 tbsp lemon juice, 1 tsp honey, 1/2 tsp Dijon mustard, salt and pepper to taste

    Equipment Needed

    • Baking sheet
    • Mixing bowls
    • Whisk
    • Measuring cups and spoons

    Instructions

    Roasted Chickpea Salad Recipe

    Preheat and Prep Your Chickpeas

    Preheat your oven to 400°F. While the oven is heating, pat the chickpeas dry with a paper towel to remove any excess moisture. This step is crucial for achieving that perfect crunch. Toss the chickpeas with olive oil, salt, and paprika until evenly coated. Spread them out on a baking sheet in a single layer to ensure even roasting.

    Roast to Perfection

    Place the baking sheet in the preheated oven and roast the chickpeas for 20-25 minutes, shaking the pan halfway through. You’ll know they’re done when they’re golden brown and crispy. Let them cool slightly before adding to the salad to maintain their crunch.

    Assemble Your Salad Base

    In a large bowl, combine the mixed greens, cherry tomatoes, cucumber, red onion, and avocado. The variety of colors not only makes the salad visually appealing but also ensures a range of nutrients and flavors.

    Whisk Up the Dressing

    In a small bowl, whisk together the olive oil, lemon juice, honey, Dijon mustard, salt, and pepper until well combined. The honey adds a touch of sweetness that balances the tanginess of the lemon juice perfectly.

    Bring It All Together

    Add the roasted chickpeas to the salad bowl, drizzle with the dressing, and toss gently to combine. Serve immediately to enjoy the contrast of the warm chickpeas with the cool, crisp vegetables.

    Tips and Tricks

    For an extra flavor boost, try adding different spices to your chickpeas before roasting, such as cumin or garlic powder. If you’re meal prepping, keep the dressing separate until you’re ready to eat to prevent the greens from getting soggy. For a nuttier flavor, toast the chickpeas a few minutes longer, but keep an eye on them to avoid burning. Adding a handful of nuts or seeds can introduce another layer of texture and nutrition. Lastly, if you’re not a fan of honey, maple syrup makes a great substitute in the dressing.

    Recipe Variations

    • Mediterranean Twist: Add feta cheese, olives, and a sprinkle of oregano to the salad for a Mediterranean flair.
    • Spicy Kick: Toss the chickpeas with chili powder or cayenne pepper before roasting for those who like it hot.
    • Asian Inspired: Substitute the dressing with a mix of sesame oil, soy sauce, and a dash of rice vinegar for an Asian twist.
    • Summer Fresh: Add fresh corn, peaches, and a basil vinaigrette for a summery version.
    • Protein Packed: Top with grilled chicken or shrimp for an extra protein boost.

    Frequently Asked Questions

    Can I use canned chickpeas?

    Absolutely! Canned chickpeas are a convenient option. Just make sure to drain and rinse them well before roasting to remove any excess sodium and to help them crisp up better in the oven.

    How do I store leftovers?

    Store the salad and dressing separately in airtight containers in the fridge. The salad will keep for up to 2 days, but it’s best enjoyed fresh. The chickpeas may lose some of their crunch over time.

    Can I make this recipe vegan?

    Yes, this recipe is naturally vegan as long as you ensure your dressing ingredients are vegan-friendly. Substitute honey with maple syrup or agave nectar if needed.

    Summary

    This roasted chickpea salad is a crunchy, flavorful, and nutritious meal that’s easy to make and customizable to your taste. Perfect for any occasion, it’s a healthy option that doesn’t skimp on satisfaction.

  • Fresh & Zesty Basil Salad Recipe: A Summer Delight

    Fresh & Zesty Basil Salad Recipe: A Summer Delight

    Get ready to elevate your salad game with this vibrant basil salad recipe. Great for those who love a burst of freshness in every bite, this dish combines the aromatic flavors of basil with a mix of crisp vegetables and a tangy dressing. Perfect for summer picnics or as a refreshing side dish, it’s sure to impress.

    Why This Recipe Works

    • The combination of fresh basil leaves with crisp cucumbers and juicy tomatoes creates a refreshing texture contrast.
    • A simple yet flavorful dressing made with olive oil, lemon juice, and a hint of garlic enhances the natural flavors of the vegetables.
    • This salad is incredibly versatile, allowing for numerous variations to suit any taste preference.
    • It’s quick and easy to prepare, making it perfect for last-minute gatherings or a healthy weekday meal.
    • The bright colors and fresh ingredients make this salad as visually appealing as it is delicious.

    Ingredients

    • 2 cups fresh basil leaves, washed and dried
    • 1 large cucumber, thinly sliced
    • 1 cup cherry tomatoes, halved
    • 1/4 cup red onion, thinly sliced
    • 1/4 cup extra virgin olive oil
    • 2 tbsp lemon juice
    • 1 clove garlic, minced
    • Salt and pepper to taste

    Equipment Needed

    • Large mixing bowl
    • Whisk
    • Measuring cups and spoons
    • Knife and cutting board

    Instructions

    Basil Salad Recipe

    Step 1: Prepare the Vegetables

    Start by washing all your vegetables thoroughly. Slice the cucumber into thin rounds, halve the cherry tomatoes, and thinly slice the red onion. For a milder onion flavor, you can soak the sliced onions in cold water for about 10 minutes before draining and adding them to the salad.

    Step 2: Make the Dressing

    In a small bowl, whisk together the olive oil, lemon juice, minced garlic, salt, and pepper until well combined. Taste and adjust the seasoning as needed. This dressing is key to bringing all the flavors together, so don’t skimp on the taste test!

    Step 3: Combine the Salad

    In a large mixing bowl, gently toss the basil leaves, cucumber slices, cherry tomatoes, and red onion. Be careful not to bruise the basil leaves as you mix. The goal is to keep everything fresh and crisp.

    Step 4: Dress the Salad

    Drizzle the dressing over the salad and toss lightly to ensure everything is evenly coated. It’s best to add the dressing just before serving to keep the vegetables from becoming soggy.

    Step 5: Serve and Enjoy

    Transfer the salad to a serving dish and enjoy immediately. This salad pairs wonderfully with grilled meats or can stand alone as a light and refreshing meal.

    Tips and Tricks

    For an extra burst of flavor, consider adding a handful of toasted pine nuts or shaved Parmesan cheese to the salad. If you’re preparing this salad ahead of time, keep the dressing separate and add it just before serving to maintain the crispness of the vegetables. For those who enjoy a bit of heat, a pinch of red pepper flakes can add a nice kick to the dressing.

    Recipe Variations

    • Add sliced strawberries or peaches for a sweet and savory twist.
    • Incorporate quinoa or chickpeas to make the salad more filling.
    • Swap the lemon juice in the dressing for balsamic vinegar for a deeper flavor profile.
    • Use a mix of different basil varieties, such as Thai or lemon basil, for unique flavor notes.
    • Add avocado slices for creaminess and healthy fats.

    Frequently Asked Questions

    Can I make this salad ahead of time?

    Yes, you can prepare the vegetables and dressing separately a few hours in advance. However, it’s best to combine them just before serving to ensure the salad remains crisp and fresh.

    What can I substitute for basil if I don’t have any?

    While basil is the star of this recipe, you can substitute it with other leafy greens like arugula or spinach for a different flavor profile. Keep in mind that the unique taste of basil is what makes this salad special.

    Is this salad vegan?

    Yes, this basil salad recipe is vegan as it contains no animal products. Just ensure that any additions or substitutions you make align with vegan dietary preferences.

    Summary

    This basil salad is a refreshing, flavorful dish that’s perfect for summer. With its simple ingredients and easy preparation, it’s a great way to enjoy the season’s bounty. Whether you stick to the classic recipe or experiment with variations, it’s sure to be a hit.