Blog

  • Deviled Egg Salad Sandwich Recipe: A Twist on a Classic

    Deviled Egg Salad Sandwich Recipe: A Twist on a Classic

    How about we take the classic deviled eggs and turn them into a sandwich? That’s right, this deviled egg salad sandwich is the perfect blend of creamy, tangy, and crunchy, all between two slices of your favorite bread. It’s a lunchtime game-changer that’s as easy to make as it is delicious.

    Why This Recipe Works

    • The combination of creamy egg yolks and tangy mustard creates a flavor profile that’s hard to resist.
    • Adding crunchy celery and onions gives the sandwich a satisfying texture contrast.
    • It’s a versatile recipe that can be customized with various add-ins to suit your taste.
    • Perfect for using up leftover hard-boiled eggs, making it both economical and delicious.
    • Quick and easy to prepare, ideal for a no-fuss lunch or snack.

    Ingredients

    • 6 large eggs, hard-boiled and peeled
    • 1/4 cup mayonnaise
    • 1 tablespoon yellow mustard
    • 1/2 teaspoon paprika
    • 1/4 cup finely chopped celery
    • 2 tablespoons finely chopped onion
    • Salt and pepper to taste
    • 4 slices of bread, toasted
    • Lettuce leaves (optional)

    Equipment Needed

    • Mixing bowl
    • Fork or potato masher
    • Measuring spoons and cups
    • Knife and cutting board
    • Toaster

    Instructions

    Deviled Egg Salad Sandwich Recipe

    Step 1: Prepare the Eggs

    Start by peeling your hard-boiled eggs. Once peeled, cut them in half and remove the yolks, placing them in a mixing bowl. Chop the egg whites into small pieces and set them aside. This step ensures your egg salad has the perfect texture.

    Step 2: Make the Deviled Mixture

    Using a fork or potato masher, mash the egg yolks until they’re fine. Add the mayonnaise, mustard, and paprika, mixing until smooth. This creamy mixture is the heart of your deviled egg salad, giving it that signature flavor.

    Step 3: Combine Ingredients

    Fold the chopped egg whites, celery, and onion into the yolk mixture. Season with salt and pepper to taste. The celery and onion add a nice crunch and freshness to the salad, balancing the creaminess of the yolks.

    Step 4: Toast the Bread

    While you’re combining the salad ingredients, toast your bread until it’s golden brown. Toasting the bread adds texture and prevents it from getting soggy when you add the egg salad.

    Step 5: Assemble the Sandwich

    Spread the deviled egg salad on one slice of toasted bread. Add lettuce leaves if desired, then top with another slice of bread. Cut in half and serve immediately for the best taste and texture.

    Tips and Tricks

    For an extra kick, add a dash of hot sauce or a sprinkle of cayenne pepper to the yolk mixture. If you’re making this ahead of time, store the egg salad and bread separately to keep the bread from getting soggy. For a healthier version, substitute Greek yogurt for half of the mayonnaise. Always taste and adjust the seasoning before assembling the sandwich to ensure it’s just right.

    Recipe Variations

    • Add crispy bacon bits for a smoky flavor.
    • Mix in diced pickles or relish for a tangy twist.
    • Use avocado instead of mayonnaise for a healthier, creamy texture.
    • Try different types of mustard, like Dijon or whole grain, for varied flavors.
    • Serve the egg salad on a croissant or in a wrap for a different presentation.

    Frequently Asked Questions

    Can I make the egg salad ahead of time?

    Absolutely! The egg salad can be stored in an airtight container in the refrigerator for up to 2 days. Just give it a good stir before using to bring back the creamy consistency.

    What’s the best way to hard-boil eggs for this recipe?

    Place eggs in a saucepan and cover with water. Bring to a boil, then cover and remove from heat. Let sit for 12 minutes, then transfer to ice water to cool. This method ensures perfectly cooked yolks without the green ring.

    Can I use something other than bread?

    Definitely! This egg salad is versatile. Try it on crackers, in lettuce wraps, or even as a topping for a green salad for a low-carb option.

    Summary

    This deviled egg salad sandwich is a delightful twist on two classics. It’s creamy, crunchy, and full of flavor, making it a perfect lunch option. Easy to make and customizable, it’s sure to become a favorite.

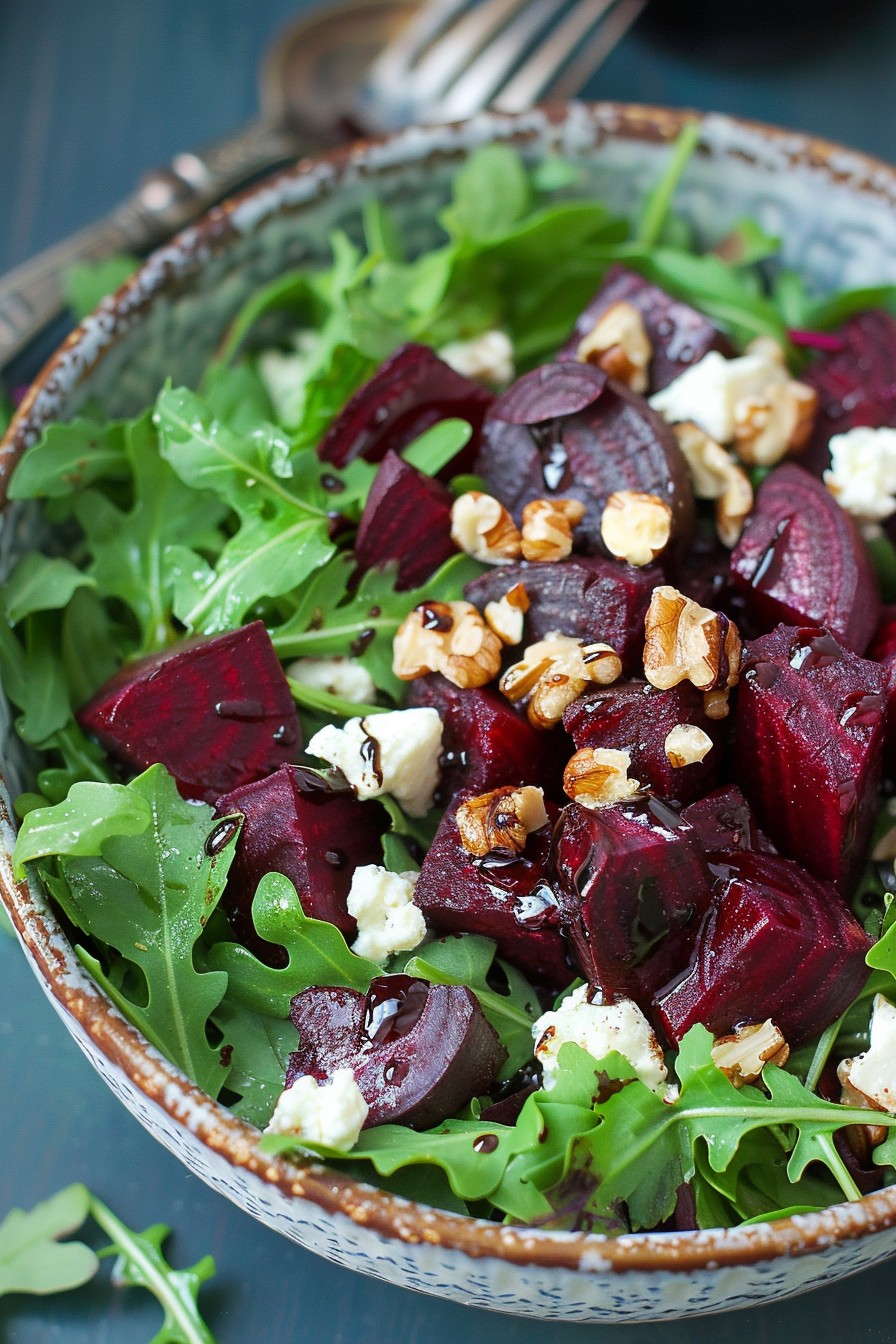
  • Beet Arugula Salad Recipe: A Vibrant Veggie Delight

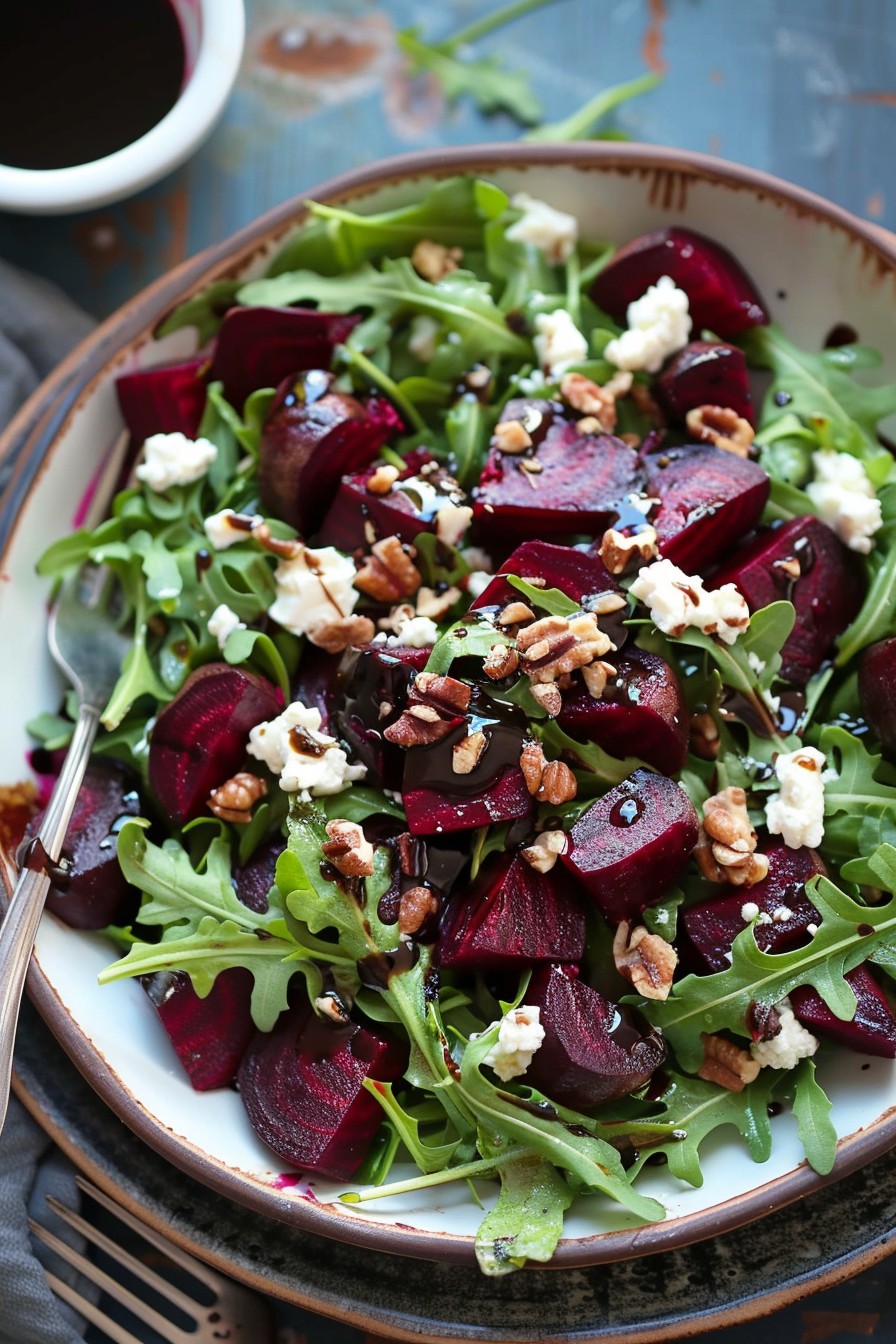
    Beet Arugula Salad Recipe: A Vibrant Veggie Delight

    Perfect for those who love a salad that’s as nutritious as it is colorful, this beet arugula salad is a feast for the eyes and the palate. Packed with earthy beets, peppery arugula, and a tangy dressing, it’s a dish that promises to brighten any meal.

    Why This Recipe Works

    • The combination of sweet roasted beets and spicy arugula creates a perfect balance of flavors.
    • Adding goat cheese and walnuts introduces a creamy texture and a crunchy contrast, making every bite interesting.
    • The homemade balsamic vinaigrette ties all the components together with its acidity and sweetness.
    • This salad is not only delicious but also packed with nutrients, offering a healthy dose of fiber, vitamins, and antioxidants.
    • It’s versatile enough to serve as a side dish or a main course, making it a great option for any occasion.

    Ingredients

    • 3 medium beets, peeled and diced into 1-inch cubes
    • 5 cups arugula, washed and dried
    • 1/2 cup goat cheese, crumbled
    • 1/4 cup walnuts, roughly chopped
    • 2 tbsp olive oil
    • 1 tbsp balsamic vinegar
    • 1 tsp honey
    • Salt and pepper to taste

    Equipment Needed

    • Baking sheet
    • Parchment paper
    • Mixing bowls
    • Whisk
    • Salad spinner

    Instructions

    Beet Arugula Salad Recipe

    Preheat and Prepare the Beets

    Preheat your oven to 400°F. Toss the diced beets with 1 tablespoon of olive oil, salt, and pepper on a parchment-lined baking sheet. Roast for 25-30 minutes, or until the beets are tender and slightly caramelized. Let them cool slightly before adding to the salad.

    Make the Dressing

    In a small bowl, whisk together the remaining olive oil, balsamic vinegar, honey, and a pinch of salt and pepper. Taste and adjust the seasoning as needed. This dressing should be tangy with a hint of sweetness to complement the beets and arugula.

    Assemble the Salad

    In a large mixing bowl, combine the arugula, roasted beets, crumbled goat cheese, and chopped walnuts. Drizzle the dressing over the salad and toss gently to coat all the ingredients evenly. Be careful not to overdress the salad; you want each component to shine.

    Serve Immediately

    This salad is best served fresh, so plate it right after tossing with the dressing. The warmth of the beets will slightly wilt the arugula, creating a delightful texture contrast with the crunchy walnuts and creamy goat cheese.

    Tips and Tricks

    For an extra flavor boost, try toasting the walnuts in a dry skillet over medium heat for a few minutes until fragrant. This enhances their nuttiness and adds another layer of texture to the salad. If you’re not a fan of goat cheese, feta or blue cheese make excellent substitutes. To save time, you can roast the beets ahead of time and store them in the fridge until you’re ready to assemble the salad. Just bring them to room temperature or give them a quick warm-up in the microwave before adding to the arugula.

    Recipe Variations

    • Add sliced avocado for extra creaminess and healthy fats.
    • Swap out the walnuts for pecans or almonds for a different crunch.
    • Include some orange segments or dried cranberries for a sweet and tangy twist.
    • For a protein-packed version, add grilled chicken or chickpeas.
    • Use spinach or mixed greens instead of arugula if you prefer a milder green.

    Frequently Asked Questions

    Can I use canned beets instead of fresh?

    While fresh roasted beets offer the best flavor and texture, canned beets can be a time-saving alternative. Just be sure to drain and rinse them well to remove any excess liquid or tinny taste. Keep in mind that canned beets are usually softer, so they won’t have the same bite as roasted fresh beets.

    How can I make this salad vegan?

    To make this salad vegan, simply omit the goat cheese or substitute it with a vegan cheese alternative. You can also add more nuts or avocado to compensate for the creaminess that the goat cheese provides. Ensure the honey in the dressing is replaced with maple syrup or agave nectar to keep it plant-based.

    How long does this salad keep?

    This salad is best enjoyed immediately after assembly, as the arugula can wilt and the beets may bleed their color into the dressing over time. If you need to store leftovers, keep the dressing separate and add it just before serving. The components can be stored in the fridge for up to 2 days.

    Summary

    This beet arugula salad is a colorful, nutritious, and flavorful dish that’s perfect for any occasion. With its balance of sweet, spicy, creamy, and crunchy elements, it’s sure to be a hit. Plus, it’s easy to customize based on your preferences or what you have on hand.

  • Pretzel Jello Salad Recipe: A Sweet and Salty Delight

    Pretzel Jello Salad Recipe: A Sweet and Salty Delight

    Crafting the perfect dessert that balances sweet and salty flavors can be a challenge, but this Pretzel Jello Salad recipe hits all the right notes. Combining the crunch of pretzels with the smoothness of cream cheese and the freshness of jello, it’s a dish that promises to be a hit at any gathering.

    Why This Recipe Works

    • The contrast between the salty pretzel crust and the sweet jello topping creates a delightful flavor explosion.
    • Using cream cheese as a middle layer adds a rich and creamy texture that ties the dish together.
    • It’s incredibly versatile, allowing for various jello flavors to match any occasion or preference.
    • The recipe is straightforward, requiring no advanced cooking skills, making it accessible to everyone.
    • It’s a make-ahead dish, perfect for reducing last-minute party prep stress.

    Ingredients

    • 2 cups crushed pretzels
    • 3/4 cup melted butter
    • 3 tablespoons sugar
    • 8 ounces cream cheese, softened
    • 1 cup whipped topping
    • 1/2 cup sugar
    • 1 package (6 ounces) strawberry jello
    • 2 cups boiling water
    • 2 cups cold water

    Equipment Needed

    • 9×13 inch baking dish
    • Mixing bowls
    • Electric mixer
    • Measuring cups and spoons

    Instructions

    Pretzel Jello Salad Recipe

    Step 1: Prepare the Pretzel Crust

    Start by preheating your oven to 350°F. In a mixing bowl, combine the crushed pretzels, melted butter, and 3 tablespoons of sugar. Press this mixture firmly into the bottom of your 9×13 inch baking dish. Bake for 10 minutes, then remove from the oven and let it cool completely. This crust is the salty foundation of your salad, so ensure it’s evenly pressed for the perfect bite every time.

    Step 2: Create the Cream Cheese Layer

    While the crust cools, beat the softened cream cheese and 1/2 cup sugar together until smooth. Gently fold in the whipped topping until well combined. Spread this mixture over the cooled pretzel crust, ensuring an even layer. This creamy middle layer is what makes the salad so decadent, so take your time to spread it smoothly.

    Step 3: Prepare the Jello Topping

    Dissolve the strawberry jello in 2 cups of boiling water, stirring until completely dissolved. Add 2 cups of cold water to the mixture and stir well. Carefully pour the jello over the cream cheese layer. Chill the salad in the refrigerator for at least 4 hours, or until the jello is fully set. The key here is patience; rushing the chilling process can lead to a runny topping.

    Step 4: Serve and Enjoy

    Once the jello is set, your Pretzel Jello Salad is ready to serve. Cut into squares and serve chilled. The combination of textures and flavors is best enjoyed cold, making it a refreshing dessert option.

    Tips and Tricks

    For an extra crunch, consider toasting the pretzels before crushing them for the crust. If you’re short on time, you can use pre-crushed pretzels, but freshly crushed ones offer a better texture. When spreading the cream cheese layer, a spatula dipped in warm water can help achieve a smoother surface. For a more decadent version, mix in some mini marshmallows with the cream cheese layer. Always ensure the jello is completely dissolved before adding the cold water to avoid graininess.

    Recipe Variations

    • Try using different jello flavors like lime or blueberry for a colorful twist.
    • Add a layer of fresh fruit, such as strawberries or peaches, between the cream cheese and jello layers for added freshness.
    • For a nuttier flavor, mix chopped pecans or walnuts into the pretzel crust.
    • Use chocolate jello and add a layer of chocolate chips for a chocolate lover’s version.
    • For a lighter version, substitute the whipped topping with Greek yogurt.

    Frequently Asked Questions

    Can I make this recipe ahead of time?

    Absolutely! This dish is perfect for making ahead. Just prepare as directed and keep it refrigerated until you’re ready to serve. It can be made up to 24 hours in advance, making it a stress-free option for parties.

    Can I use a different type of crust?

    While pretzels provide the signature salty crunch, you can experiment with graham crackers or crushed cookies for a different flavor profile. Just keep in mind that the unique taste of this salad comes from the pretzel crust.

    How do I prevent the jello from seeping into the cream cheese layer?

    Ensure the cream cheese layer is fully set and smooth before adding the jello. Pouring the jello gently over the back of a spoon can also help distribute it evenly without disturbing the layers beneath.

    Summary

    This Pretzel Jello Salad recipe is a delightful mix of sweet and salty, with layers of crunchy pretzel crust, creamy cheese, and refreshing jello. It’s easy to make, versatile, and always a crowd-pleaser.

  • Egg Salad Recipe with Bacon: A Creamy, Crunchy Delight

    Egg Salad Recipe with Bacon: A Creamy, Crunchy Delight

    Unleash the ultimate comfort food with this egg salad recipe that’s taken to the next level with crispy bacon. Perfect for sandwiches, wraps, or a standalone dish, this recipe promises a delightful mix of textures and flavors that’ll have you coming back for more.

    Why This Recipe Works

    • The combination of creamy eggs and crispy bacon creates a perfect texture contrast.
    • Simple ingredients come together for a flavor-packed dish that’s both satisfying and easy to make.
    • Versatile enough to serve as a sandwich, wrap, or salad, making it a great option for any meal.

    Ingredients

    • 6 large eggs
    • 4 strips of bacon, cooked and crumbled
    • 1/4 cup mayonnaise
    • 1 tbsp mustard
    • 1/4 cup finely chopped celery
    • 2 tbsp finely chopped red onion
    • Salt and pepper to taste

    Equipment Needed

    • Medium saucepan
    • Mixing bowl
    • Knife and cutting board
    • Measuring cups and spoons

    Instructions

    Egg Salad Recipe With Bacon

    Step 1: Boil the Eggs

    Place the eggs in a medium saucepan and cover with water by about an inch. Bring to a boil over high heat, then cover and remove from heat. Let sit for 12 minutes for perfectly hard-boiled eggs. Tip: Adding a pinch of salt to the water can make peeling easier.

    Step 2: Prepare the Bacon

    While the eggs are cooking, fry the bacon in a skillet over medium heat until crispy, about 5-7 minutes. Drain on paper towels, then crumble into small pieces. Tip: Baking bacon on a rack in the oven at 400°F for 15-20 minutes is a less messy alternative.

    Step 3: Chop the Vegetables

    Finely chop the celery and red onion. The smaller the pieces, the better they’ll distribute throughout the salad, ensuring every bite is flavorful.

    Step 4: Mix the Salad

    In a large mixing bowl, combine the peeled and chopped eggs, crumbled bacon, mayonnaise, mustard, celery, and red onion. Gently stir until everything is well coated. Season with salt and pepper to taste. Tip: For extra creaminess, add an additional tablespoon of mayonnaise.

    Step 5: Serve and Enjoy

    Serve the egg salad on toasted bread, over a bed of greens, or with crackers for a quick snack. It’s best enjoyed fresh but can be stored in the refrigerator for up to two days.

    Tips and Tricks

    For those looking to elevate their egg salad, consider these advanced tips. First, using a mix of mayonnaise and Greek yogurt can add a tangy twist while reducing calories. Second, incorporating fresh herbs like dill or chives can introduce a fresh flavor dimension. Lastly, for a smoother texture, mash the eggs with a fork instead of chopping them. These small adjustments can make a big difference in the final dish.

    Recipe Variations

    • Add avocado for a creamy texture and healthy fats.
    • Swap bacon for smoked salmon for a luxurious twist.
    • Include a teaspoon of curry powder for a spicy kick.
    • Use Greek yogurt instead of mayonnaise for a lighter version.
    • Add diced pickles or relish for a tangy crunch.

    Frequently Asked Questions

    Can I make this recipe ahead of time?

    Yes, you can prepare the egg salad up to two days in advance. Store it in an airtight container in the refrigerator. However, for the best texture, add the bacon just before serving to keep it crispy.

    How can I make this recipe healthier?

    To make a healthier version, consider using turkey bacon, reducing the amount of mayonnaise, or substituting it with Greek yogurt. Adding more vegetables like spinach or avocado can also increase the nutritional value.

    What’s the best way to serve egg salad?

    Egg salad is incredibly versatile. It can be served as a sandwich filling, on top of a green salad, or even as a dip with crackers or vegetables. The choice depends on your personal preference and the occasion.

    Summary

    This egg salad recipe with bacon is a delightful mix of creamy and crunchy textures, perfect for any meal. With simple ingredients and easy steps, it’s a must-try for anyone looking for a comforting and flavorful dish.

  • Smashed Potato Salad Recipe: A Smashing Twist on a Classic

    Smashed Potato Salad Recipe: A Smashing Twist on a Classic

    Very few dishes can claim the universal love that potato salad enjoys, but our smashed potato salad is here to shake things up. With its rustic charm and unbeatable texture, this recipe is a game-changer for picnics and potlucks alike.

    Why This Recipe Works

    • The smashing technique creates more surface area for the dressing to cling to, ensuring every bite is packed with flavor.
    • Using a mix of Yukon Gold and red potatoes offers the perfect balance of creaminess and firmness.
    • A bold, tangy dressing cuts through the richness of the potatoes, making the salad irresistibly refreshing.
    • Adding crispy bacon and fresh herbs introduces layers of texture and freshness that elevate the dish.
    • This recipe is customizable, allowing you to tweak it to your taste preferences or dietary needs.

    Ingredients

    • 2 pounds mixed Yukon Gold and red potatoes, scrubbed
    • 1/2 cup mayonnaise
    • 2 tablespoons Dijon mustard
    • 1 tablespoon apple cider vinegar
    • 1/2 teaspoon salt
    • 1/4 teaspoon black pepper
    • 4 slices bacon, cooked and crumbled
    • 2 tablespoons chopped fresh chives
    • 2 tablespoons chopped fresh dill

    Equipment Needed

    • Large pot
    • Colander
    • Mixing bowls
    • Potato masher or fork
    • Measuring cups and spoons

    Instructions

    Smashed Potato Salad Recipe

    Step 1: Boil the Potatoes

    Place the scrubbed potatoes in a large pot and cover with cold water by about an inch. Bring to a boil over high heat, then reduce to a simmer and cook until the potatoes are tender when pierced with a fork, about 15-20 minutes. Tip: Start checking at 15 minutes to avoid overcooking.

    Step 2: Prepare the Dressing

    While the potatoes cook, whisk together the mayonnaise, Dijon mustard, apple cider vinegar, salt, and pepper in a small bowl until smooth. Set aside. This is also a good time to cook your bacon if you haven’t already.

    Step 3: Smash the Potatoes

    Drain the potatoes and let them cool just enough to handle. Using a potato masher or fork, gently smash each potato to about 1/2-inch thickness. They should hold together but be craggy enough to soak up the dressing. Tip: Don’t over-smash; you want texture, not mush.

    Step 4: Combine Everything

    Transfer the smashed potatoes to a large mixing bowl. Pour the dressing over the potatoes and gently toss to coat. Add the crumbled bacon, chives, and dill, and give everything one final gentle mix to distribute the ingredients evenly.

    Step 5: Chill and Serve

    Cover the bowl and refrigerate the potato salad for at least 1 hour before serving to allow the flavors to meld. Tip: For best results, let it chill for up to 4 hours.

    Tips and Tricks

    For those looking to take their smashed potato salad to the next level, consider roasting the potatoes instead of boiling them for a deeper flavor. Another pro tip is to mix in some sour cream or Greek yogurt with the mayonnaise for a tangier, creamier dressing. If you’re serving this at a party, garnish with extra herbs and bacon on top for a beautiful presentation. For a lighter version, you can reduce the mayonnaise and add more vinegar or a splash of olive oil. Remember, the key to a great potato salad is balancing the flavors and textures to your liking.

    Recipe Variations

    • For a vegetarian version, omit the bacon and add smoked paprika for a similar depth of flavor.
    • Swap out the dill and chives for parsley and tarragon for a different herbal note.
    • Add chopped pickles or capers for a briny twist.
    • For a heartier salad, mix in some hard-boiled eggs or diced celery for crunch.
    • Try using sweet potatoes instead of regular potatoes for a sweeter, nutrient-packed alternative.

    Frequently Asked Questions

    Can I make this potato salad ahead of time?

    Absolutely! In fact, making it a day ahead allows the flavors to develop even more. Just keep it refrigerated and give it a quick stir before serving. If the salad seems a bit dry after chilling, you can freshen it up with a little extra mayonnaise or vinegar.

    What’s the best way to store leftovers?

    Store any leftovers in an airtight container in the refrigerator for up to 3 days. The potatoes may absorb more of the dressing over time, so you might want to add a little extra dressing when serving leftovers to bring it back to life.

    Can I use other types of potatoes?

    Yes, you can use any waxy or all-purpose potatoes you like. Just keep in mind that starchy potatoes like Russets might fall apart more when smashed, so they’re not ideal for this recipe. Yukon Gold and red potatoes are recommended for their texture and flavor.

    Summary

    This smashed potato salad is a delightful twist on the classic, offering a perfect blend of textures and flavors. It’s easy to make, customizable, and sure to be a hit at any gathering. Give it a try and see why it’s smashing its way into everyone’s hearts!

  • Zesty Lime Jello Congealed Salad: A Retro Delight

    Zesty Lime Jello Congealed Salad: A Retro Delight

    Every now and then, a recipe comes along that’s so delightfully retro, it’s impossible not to love. This lime jello congealed salad is a throwback to the 1950s, offering a perfect blend of sweet, tangy, and creamy that’s sure to be a hit at your next gathering.

    Why This Recipe Works

    • The combination of lime jello and pineapple offers a refreshing tanginess that’s balanced by the creaminess of the cottage cheese and whipped topping.
    • It’s incredibly easy to make, requiring no cooking skills beyond boiling water and mixing ingredients.
    • This salad is versatile, serving as a side dish or dessert, making it perfect for potlucks and family dinners alike.
    • The vibrant green color makes it a visually appealing addition to any table.
    • It can be made ahead of time, freeing you up to focus on other dishes or guests.

    Ingredients

    • 1 package (3 oz) lime gelatin
    • 1 cup boiling water
    • 1 cup cold water
    • 1 can (8 oz) crushed pineapple, drained
    • 1 cup small curd cottage cheese
    • 1 cup whipped topping, thawed

    Equipment Needed

    • Mixing bowl
    • Whisk
    • Measuring cups
    • Spatula
    • Refrigerator

    Instructions

    Recipe For Lime Jello Congealed Salad

    Step 1: Dissolve the Gelatin

    Start by dissolving the lime gelatin in boiling water. Stir continuously for about 2 minutes until the gelatin is completely dissolved. This ensures a smooth texture in your final product. Tip: For an extra zesty flavor, add a teaspoon of lime zest to the mixture.

    Step 2: Add Cold Water

    After the gelatin is fully dissolved, stir in the cold water. This step cools the mixture down, preparing it for the addition of other ingredients without cooking them. Make sure the water is cold to speed up the cooling process.

    Step 3: Incorporate Pineapple and Cottage Cheese

    Gently fold in the drained crushed pineapple and cottage cheese. The pineapple adds a tropical sweetness, while the cottage cheese introduces a creamy texture. Tip: For a smoother texture, blend the cottage cheese before adding it to the mixture.

    Step 4: Fold in Whipped Topping

    Once the pineapple and cottage cheese are well incorporated, fold in the whipped topping. This adds lightness and a fluffy texture to the salad. Be gentle to maintain the airiness of the whipped topping.

    Step 5: Chill Until Set

    Pour the mixture into a serving dish and refrigerate for at least 4 hours, or until fully set. The salad should be firm to the touch but still jiggle slightly. Tip: For a quicker set, place the salad in the freezer for the first hour before transferring to the refrigerator.

    Tips and Tricks

    For those looking to elevate their lime jello congealed salad, consider these advanced tips. First, using freshly squeezed lime juice in place of some of the cold water can intensify the lime flavor. Second, layering the salad with a clear gelatin layer can add visual appeal. Third, incorporating mini marshmallows or nuts can add texture and flavor contrasts. Remember, the key to a perfect congealed salad is balancing the flavors and textures to suit your taste.

    Recipe Variations

    • For a tropical twist, replace the pineapple with mango or papaya.
    • Add a layer of cream cheese mixed with powdered sugar for a richer dessert version.
    • Incorporate shredded coconut for added texture and a hint of sweetness.
    • Use sugar-free gelatin and whipped topping for a lighter version.
    • Add a handful of chopped pecans or walnuts for a crunchy contrast.

    Frequently Asked Questions

    Can I use fresh pineapple instead of canned?

    Fresh pineapple contains enzymes that can prevent the gelatin from setting properly. If you prefer fresh pineapple, it’s best to use it as a garnish after the salad has set.

    How long can I store the salad in the refrigerator?

    The salad can be stored in the refrigerator for up to 3 days. Make sure it’s covered to prevent it from absorbing other flavors.

    Can I make this recipe vegan?

    Yes, by using agar-agar instead of gelatin and opting for vegan whipped topping and cottage cheese alternatives. The texture and taste will be slightly different but still delicious.

    Summary

    This lime jello congealed salad is a fun, easy-to-make dish that’s perfect for any occasion. With its vibrant color and delightful mix of flavors and textures, it’s sure to be a crowd-pleaser.

  • Gluten-Free Chicken Salad Recipe: A Crunchy, Creamy Delight

    Gluten-Free Chicken Salad Recipe: A Crunchy, Creamy Delight

    Deliciously satisfying and packed with flavor, this gluten-free chicken salad is your go-to for a quick lunch or a light dinner. It’s easy to make, full of texture, and absolutely delicious.

    Why This Recipe Works

    • It’s gluten-free, making it a great option for those with dietary restrictions.
    • The combination of crunchy vegetables and creamy dressing creates a perfect texture balance.
    • Using rotisserie chicken saves time without sacrificing flavor.
    • It’s versatile; serve it on a bed of greens, in a gluten-free wrap, or enjoy it as is.
    • The recipe is easily customizable to suit your taste preferences.

    Ingredients

    • 2 cups cooked chicken, shredded (rotisserie chicken works great)
    • 1/2 cup mayonnaise (ensure it’s gluten-free)
    • 1 tbsp Dijon mustard
    • 1 celery stalk, finely diced
    • 1/4 cup red onion, finely diced
    • 1/2 cup grapes, halved
    • Salt and pepper to taste

    Equipment Needed

    • Mixing bowl
    • Measuring cups and spoons
    • Knife and cutting board

    Instructions

    Gluten Free Chicken Salad Recipe

    Step 1: Prepare Your Ingredients

    Start by shredding your cooked chicken into bite-sized pieces. Finely dice the celery and red onion, and halve the grapes. Having all your ingredients prepped and ready to go makes the assembly process a breeze.

    Step 2: Mix the Dressing

    In a large mixing bowl, combine the mayonnaise and Dijon mustard. Whisk them together until smooth. This creamy base will coat all your ingredients beautifully, adding a tangy flavor that complements the chicken perfectly.

    Step 3: Combine Ingredients

    Add the shredded chicken, diced celery, red onion, and halved grapes to the bowl with the dressing. Gently toss everything together until all the ingredients are evenly coated with the dressing. Season with salt and pepper to taste.

    Step 4: Chill Before Serving

    For the best flavor, cover the bowl with plastic wrap and refrigerate the chicken salad for at least 30 minutes before serving. This allows the flavors to meld together beautifully.

    Step 5: Serve and Enjoy

    Once chilled, give the salad a quick stir and serve it on a bed of greens, in a gluten-free wrap, or enjoy it straight from the bowl. It’s delicious any way you choose!

    Tips and Tricks

    For an extra crunch, consider adding a handful of chopped almonds or walnuts. If you’re not a fan of mayonnaise, Greek yogurt makes a great substitute for a lighter version. To make this salad ahead of time, prepare it up to two days in advance and store it in the refrigerator. The flavors will continue to develop, making it even more delicious.

    Recipe Variations

    • Add diced apples for a sweet crunch.
    • Swap the grapes for dried cranberries for a different kind of sweetness.
    • Include avocado for extra creaminess and healthy fats.
    • Use turkey instead of chicken for a different protein option.
    • Add curry powder to the dressing for a spicy twist.

    Frequently Asked Questions

    Can I make this recipe dairy-free?

    Absolutely! Simply substitute the mayonnaise with a dairy-free alternative. There are many options available that will give you the same creamy texture without the dairy.

    How long can I store this chicken salad?

    This chicken salad can be stored in an airtight container in the refrigerator for up to 3 days. Just give it a good stir before serving to redistribute the dressing.

    Can I freeze this chicken salad?

    Freezing is not recommended as the mayonnaise-based dressing and the vegetables may not hold up well, resulting in a less desirable texture upon thawing.

    Summary

    This gluten-free chicken salad is a versatile, delicious, and easy-to-make dish that’s perfect for any occasion. With its creamy dressing and crunchy vegetables, it’s sure to be a hit.

  • Chicken Salad with Apple Recipe: A Crunchy, Juicy Delight

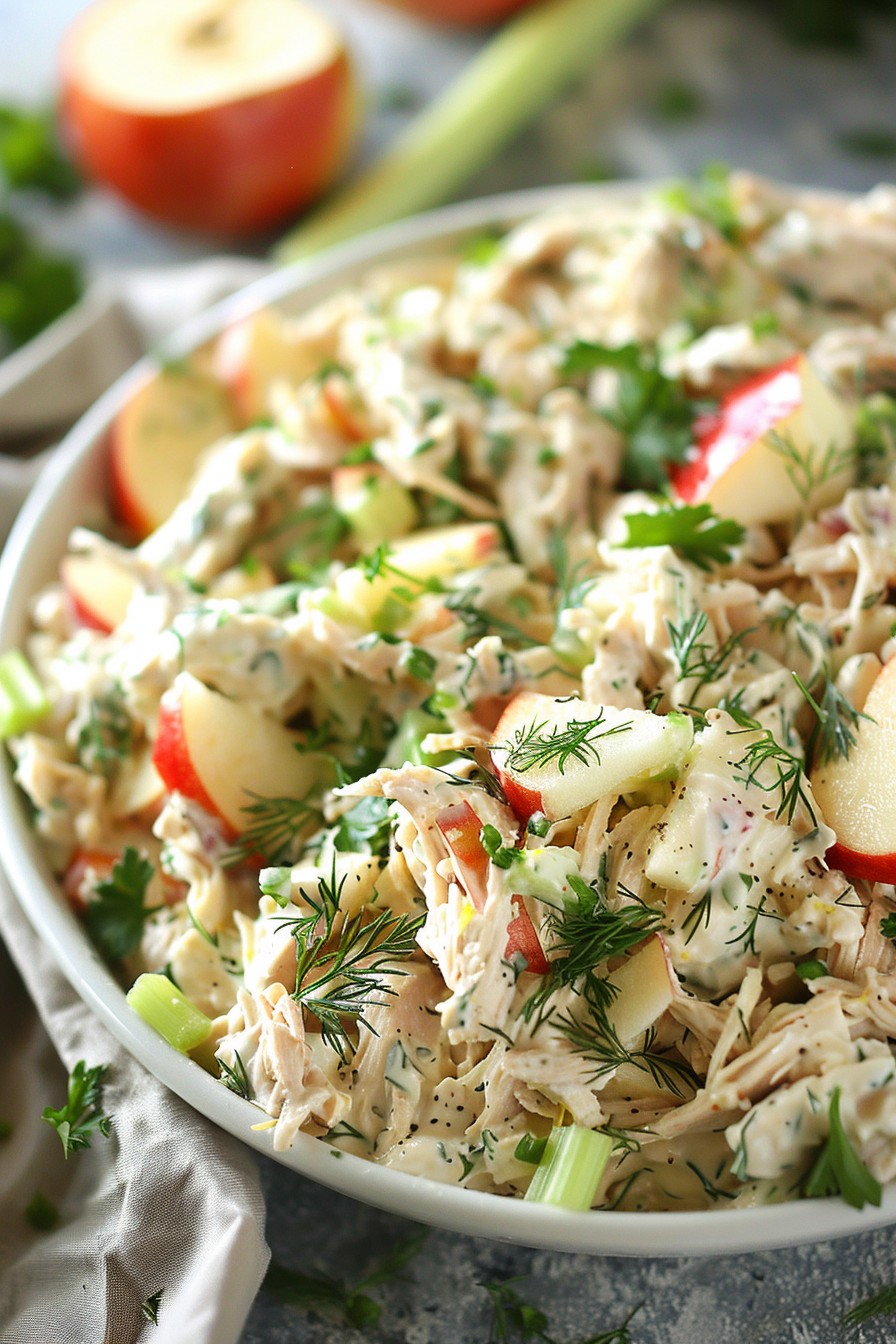
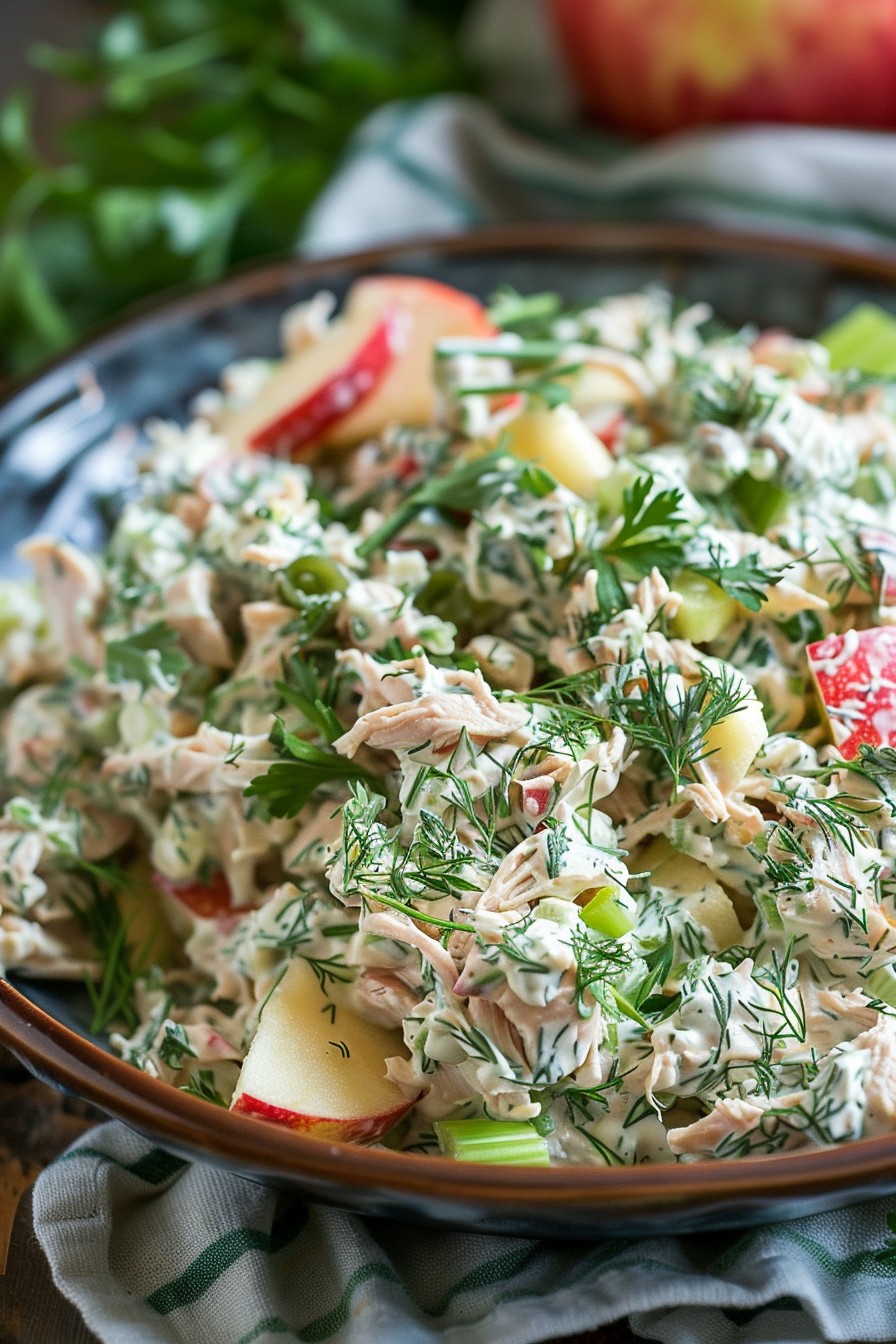
    Chicken Salad with Apple Recipe: A Crunchy, Juicy Delight

    How about adding a twist to your regular chicken salad? This chicken salad with apple recipe brings together the savory taste of chicken with the sweet and crunchy texture of apples, creating a perfect balance of flavors that will tantalize your taste buds.

    Why This Recipe Works

    • The combination of tender chicken and crisp apples provides a delightful contrast in textures.
    • Greek yogurt adds a creamy texture without the heaviness of mayonnaise.
    • Fresh herbs like dill and parsley bring a burst of freshness to the dish.
    • It’s versatile and can be served as a sandwich filler, on a bed of greens, or as a standalone dish.
    • This recipe is quick to prepare, making it perfect for busy weekdays or last-minute gatherings.

    Ingredients

    • 2 cups cooked chicken, shredded
    • 1 large apple, diced
    • 1/2 cup Greek yogurt
    • 1/4 cup mayonnaise
    • 1 tablespoon lemon juice
    • 1/4 cup chopped celery
    • 2 tablespoons chopped fresh dill
    • 2 tablespoons chopped fresh parsley
    • Salt and pepper to taste

    Equipment Needed

    • Mixing bowl
    • Measuring cups and spoons
    • Knife and cutting board
    • Spatula

    Instructions

    Chicken Salad With Apple Recipe

    Prepare Your Ingredients

    Start by ensuring your chicken is cooked and shredded into bite-sized pieces. Dice the apple into small cubes, roughly the same size as the chicken pieces for uniform texture. Chop the celery, dill, and parsley finely to distribute their flavors evenly throughout the salad.

    Mix the Dressing

    In a mixing bowl, combine the Greek yogurt, mayonnaise, and lemon juice. Whisk them together until smooth. This mixture will serve as the creamy base of your salad, offering a tangy flavor that complements the sweetness of the apples.

    Combine All Ingredients

    Add the shredded chicken, diced apple, chopped celery, dill, and parsley to the bowl with the dressing. Gently fold the ingredients together until everything is evenly coated with the dressing. Be careful not to overmix to maintain the texture of the apples and chicken.

    Season to Taste

    Once all ingredients are combined, taste the salad and adjust the seasoning with salt and pepper as needed. Remember, the flavors will meld and intensify as the salad chills, so it’s okay if it tastes a bit mild at this stage.

    Chill Before Serving

    Cover the bowl with plastic wrap and refrigerate the salad for at least 30 minutes before serving. This chilling time allows the flavors to blend together beautifully. Serve the salad cold, either on its own, over greens, or as a sandwich filling.

    Tips and Tricks

    For an extra crunch, consider adding a handful of chopped walnuts or almonds to the salad. If you’re preparing this salad ahead of time, you can mix all the ingredients except the apples and add them just before serving to prevent browning. For a lighter version, you can substitute all the mayonnaise with Greek yogurt. Always taste and adjust the seasoning after chilling, as cold temperatures can dull flavors.

    Recipe Variations

    • Swap the apple for grapes or dried cranberries for a different sweet element.
    • Add curry powder to the dressing for a spicy twist.
    • Include avocado for extra creaminess and healthy fats.
    • Use turkey instead of chicken for a different protein option.
    • Mix in some blue cheese or feta for a tangy flavor boost.

    Frequently Asked Questions

    Can I make this salad ahead of time?

    Absolutely! This salad can be made up to a day in advance. Just keep it refrigerated and add any crunchy elements like nuts or additional apples right before serving to maintain their texture.

    What type of apple works best in this recipe?

    Crisp and slightly sweet apples like Honeycrisp or Fuji are ideal for this recipe as they hold their shape well and provide a nice contrast to the creamy dressing. Avoid overly soft apples that might turn mushy.

    Is there a dairy-free alternative to Greek yogurt?

    Yes, you can use coconut yogurt or any plant-based yogurt alternative to keep the recipe dairy-free. The flavor will vary slightly, so choose one that you enjoy.

    Summary

    This chicken salad with apple recipe is a refreshing twist on the classic, combining juicy apples with tender chicken in a creamy, herbed dressing. It’s quick to prepare, versatile, and sure to be a hit at any meal.

  • Bavarian Potato Salad Recipe: A Tangy Twist on a Classic

    Bavarian Potato Salad Recipe: A Tangy Twist on a Classic

    Bavarian potato salad brings a delightful tanginess to your table, perfect for those who love a bit of zest in their dishes. Unlike its mayo-laden cousins, this version is dressed in a warm vinegar and bacon dressing that’s irresistibly good.

    Why This Recipe Works

    • The warm vinegar dressing soaks into the potatoes, creating a flavor-packed bite every time.
    • Bacon adds a smoky depth that balances the tanginess of the vinegar.
    • Using waxy potatoes ensures the salad holds its shape, offering the perfect texture.
    • Fresh herbs brighten the dish, adding a layer of freshness.
    • It’s served warm, making it a comforting side dish for any meal.

    Ingredients

    • 2 pounds waxy potatoes, peeled and sliced into 1/4-inch rounds
    • 6 slices bacon, chopped
    • 1 small onion, finely diced
    • 1/2 cup apple cider vinegar
    • 1/2 cup water
    • 2 tablespoons sugar
    • 1 teaspoon salt
    • 1/2 teaspoon black pepper
    • 2 tablespoons fresh chives, chopped

    Equipment Needed

    • Large pot
    • Skillet
    • Mixing bowl
    • Whisk

    Instructions

    Bavarian Potato Salad Recipe

    Step 1: Cook the Potatoes

    Place the peeled and sliced potatoes in a large pot and cover with cold water. Bring to a boil over high heat, then reduce to a simmer and cook until the potatoes are just tender, about 10 minutes. Drain and set aside.

    Step 2: Fry the Bacon

    In a skillet over medium heat, cook the chopped bacon until crispy, about 5 minutes. Remove the bacon with a slotted spoon and set aside, leaving the drippings in the skillet.

    Step 3: Sauté the Onion

    Add the finely diced onion to the bacon drippings in the skillet. Cook over medium heat until the onion is translucent, about 3 minutes.

    Step 4: Prepare the Dressing

    Whisk together the apple cider vinegar, water, sugar, salt, and black pepper in a small bowl. Pour this mixture into the skillet with the onions and bring to a simmer. Cook for 2 minutes to slightly reduce the dressing.

    Step 5: Combine Everything

    Add the cooked potatoes and crispy bacon to the skillet with the dressing. Gently toss to coat the potatoes evenly. Sprinkle with fresh chives before serving warm.

    Tips and Tricks

    For an extra layer of flavor, consider adding a teaspoon of mustard to the dressing. It complements the vinegar beautifully. If you’re not a fan of bacon, smoked turkey is a great substitute. Always taste the dressing before adding it to the potatoes; you might want to adjust the sweetness or tanginess to your liking. Letting the salad sit for 10 minutes before serving allows the flavors to meld together even more.

    Recipe Variations

    • Add diced pickles for an extra tangy crunch.
    • Substitute half the vinegar with beef broth for a richer flavor.
    • Include hard-boiled eggs for a protein boost.
    • Use sweet potatoes instead of waxy potatoes for a sweeter version.
    • Add a dash of hot sauce to the dressing for a spicy kick.

    Frequently Asked Questions

    Can I make this salad ahead of time?

    Yes, you can prepare the components ahead, but it’s best combined and served warm. If you must, gently reheat the salad before serving to revive the flavors.

    What type of potatoes are best for this recipe?

    Waxy potatoes like Yukon Gold or red potatoes are ideal because they hold their shape well after cooking.

    Can I use a different type of vinegar?

    Absolutely! White wine vinegar or even a mild rice vinegar can work, but apple cider vinegar is traditional and offers the best flavor balance.

    Summary

    This Bavarian Potato Salad is a tangy, smoky, and utterly delicious twist on the classic. Perfect for picnics, potlucks, or a cozy family dinner, it’s sure to become a favorite.

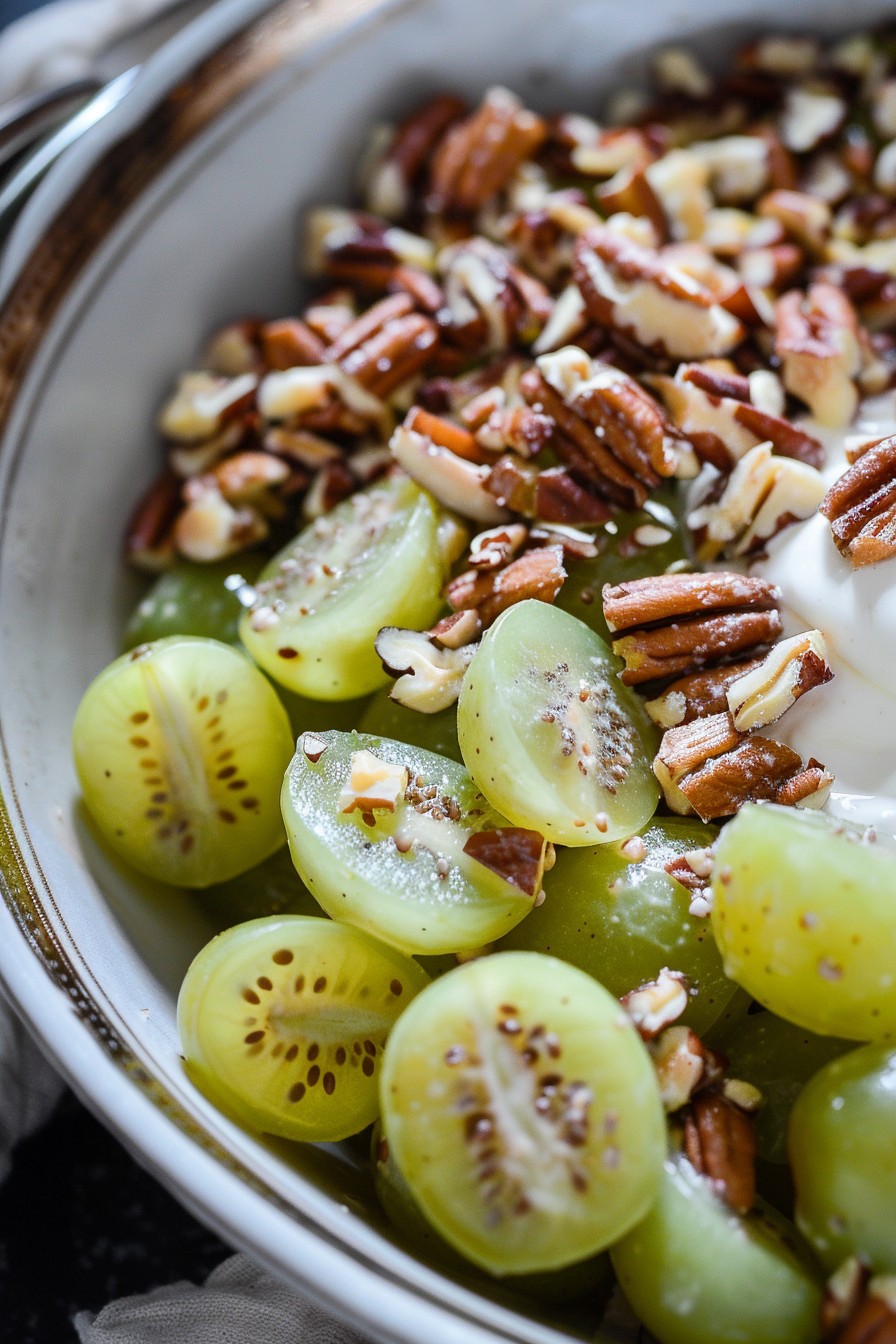
  • Green Grape Salad Recipe: A Refreshing Summer Delight

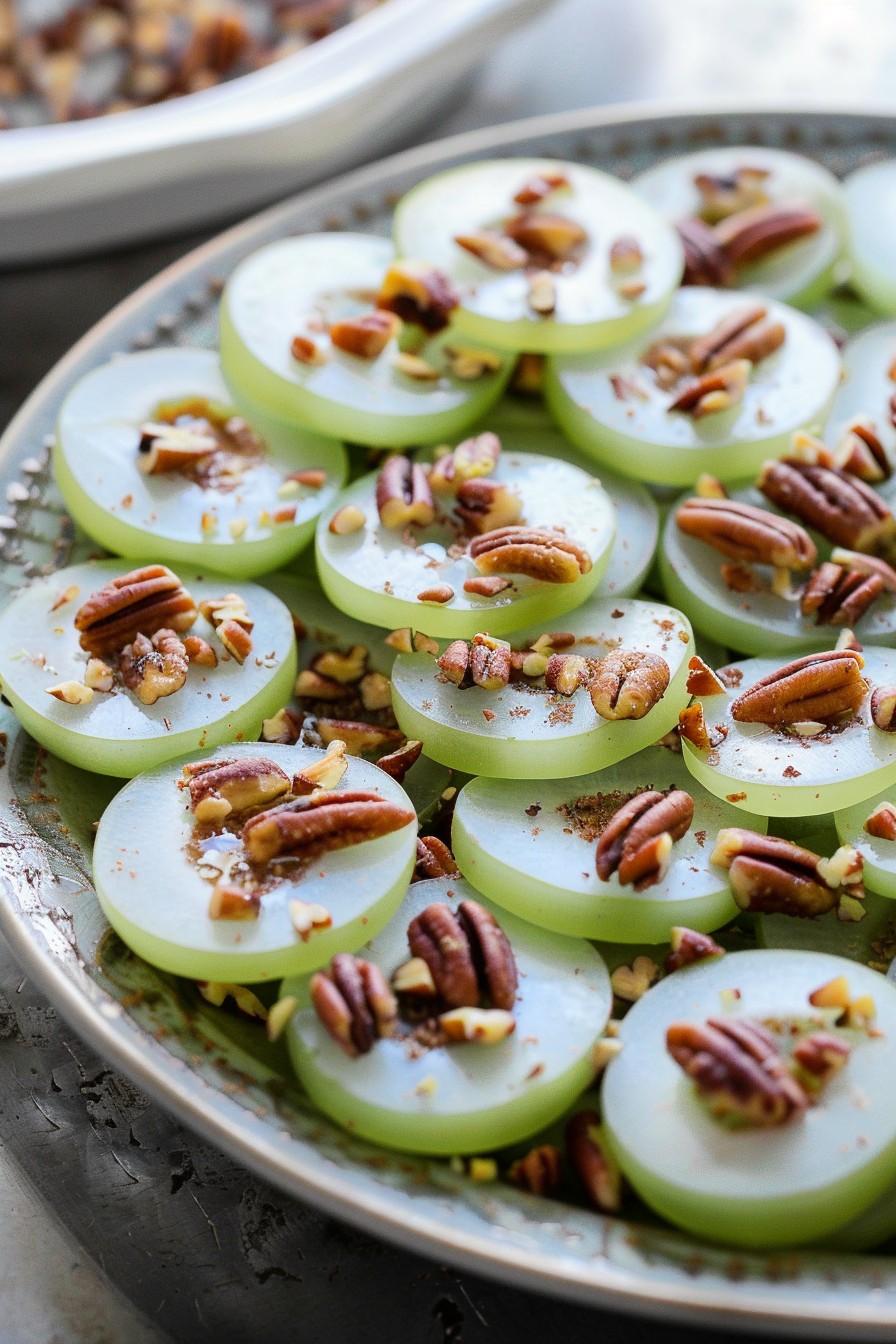
    Green Grape Salad Recipe: A Refreshing Summer Delight

    Out of all the summer salads, this green grape salad stands out for its simplicity and burst of flavors. Perfect for picnics, potlucks, or just a lazy afternoon snack, this recipe is a game-changer. Let’s dive into why this salad is a must-try and how you can whip it up in no time.

    Why This Recipe Works

    • The combination of sweet green grapes and tangy dressing creates a perfect balance of flavors.
    • It’s incredibly easy to make, requiring no cooking and just a few minutes of prep time.
    • The salad is versatile, allowing for numerous variations to suit your taste.
    • It’s a crowd-pleaser, appealing to both kids and adults alike.
    • The freshness of the ingredients makes it a healthy choice for any occasion.

    Ingredients

    • 2 cups of green grapes, halved
    • 1/2 cup of sour cream
    • 1/4 cup of brown sugar
    • 1/2 cup of chopped pecans
    • 1/2 teaspoon of vanilla extract

    Equipment Needed

    • Mixing bowl
    • Measuring cups and spoons
    • Knife and cutting board
    • Spatula

    Instructions

    Green Grape Salad Recipe

    Step 1: Prepare the Grapes

    Start by washing the green grapes thoroughly under cold water. Pat them dry with a clean towel. Using a sharp knife, carefully halve each grape. This step ensures that every bite of your salad is bursting with flavor. Tip: For an extra crunch, you can leave a few grapes whole.

    Step 2: Mix the Dressing

    In a mixing bowl, combine the sour cream, brown sugar, and vanilla extract. Whisk them together until the mixture is smooth and the sugar is fully dissolved. This creamy dressing will coat the grapes beautifully, adding a rich flavor to the salad.

    Step 3: Combine Ingredients

    Add the halved grapes to the bowl with the dressing. Gently fold them in until all the grapes are evenly coated. Be careful not to crush the grapes while mixing. Tip: For best results, let the salad chill in the refrigerator for at least an hour before serving to enhance the flavors.

    Step 4: Add the Final Touch

    Sprinkle the chopped pecans over the top of the salad just before serving. This adds a delightful crunch and nutty flavor that complements the sweetness of the grapes and the creaminess of the dressing.

    Tips and Tricks

    For an extra layer of flavor, consider toasting the pecans before adding them to the salad. This will bring out their natural oils and enhance their nutty taste. If you’re not a fan of pecans, walnuts or almonds make great substitutes. To make the salad ahead of time, prepare the grapes and dressing separately and combine them just before serving to maintain the grapes’ freshness and crunch. For a lighter version, you can substitute Greek yogurt for the sour cream.

    Recipe Variations

    • Add diced apples or pears for an extra fruity twist.
    • Incorporate a handful of mini marshmallows for a sweeter, more dessert-like salad.
    • Mix in some crumbled bacon for a savory contrast to the sweet grapes.
    • Use honey instead of brown sugar for a different kind of sweetness.
    • Experiment with different nuts like walnuts or almonds for varied textures and flavors.

    Frequently Asked Questions

    Can I use red grapes instead of green?

    Absolutely! Red grapes will work just as well in this recipe. They might add a slightly different flavor profile due to their natural sweetness, but the salad will still be delicious. Feel free to mix both red and green grapes for a colorful presentation.

    How long can I store this salad?

    This salad is best enjoyed fresh but can be stored in the refrigerator for up to 2 days. Keep in mind that the grapes may release some juice over time, which can make the dressing a bit runny. If you’re planning to make it ahead, consider adding the dressing just before serving.

    Can I make this salad vegan?

    Yes, you can easily make this salad vegan by substituting the sour cream with a plant-based alternative like coconut yogurt. Just ensure that the substitute you choose has a similar consistency and tanginess to sour cream to maintain the salad’s intended flavor profile.

    Summary

    This green grape salad is a refreshing, easy-to-make dish that’s perfect for any summer gathering. With its sweet and tangy flavors, it’s sure to be a hit among guests of all ages. Plus, its versatility allows for endless variations to suit any taste preference.