Blog

  • Creamy Pasta Chicken Salad with Mayonnaise: A Summer Delight

    Creamy Pasta Chicken Salad with Mayonnaise: A Summer Delight

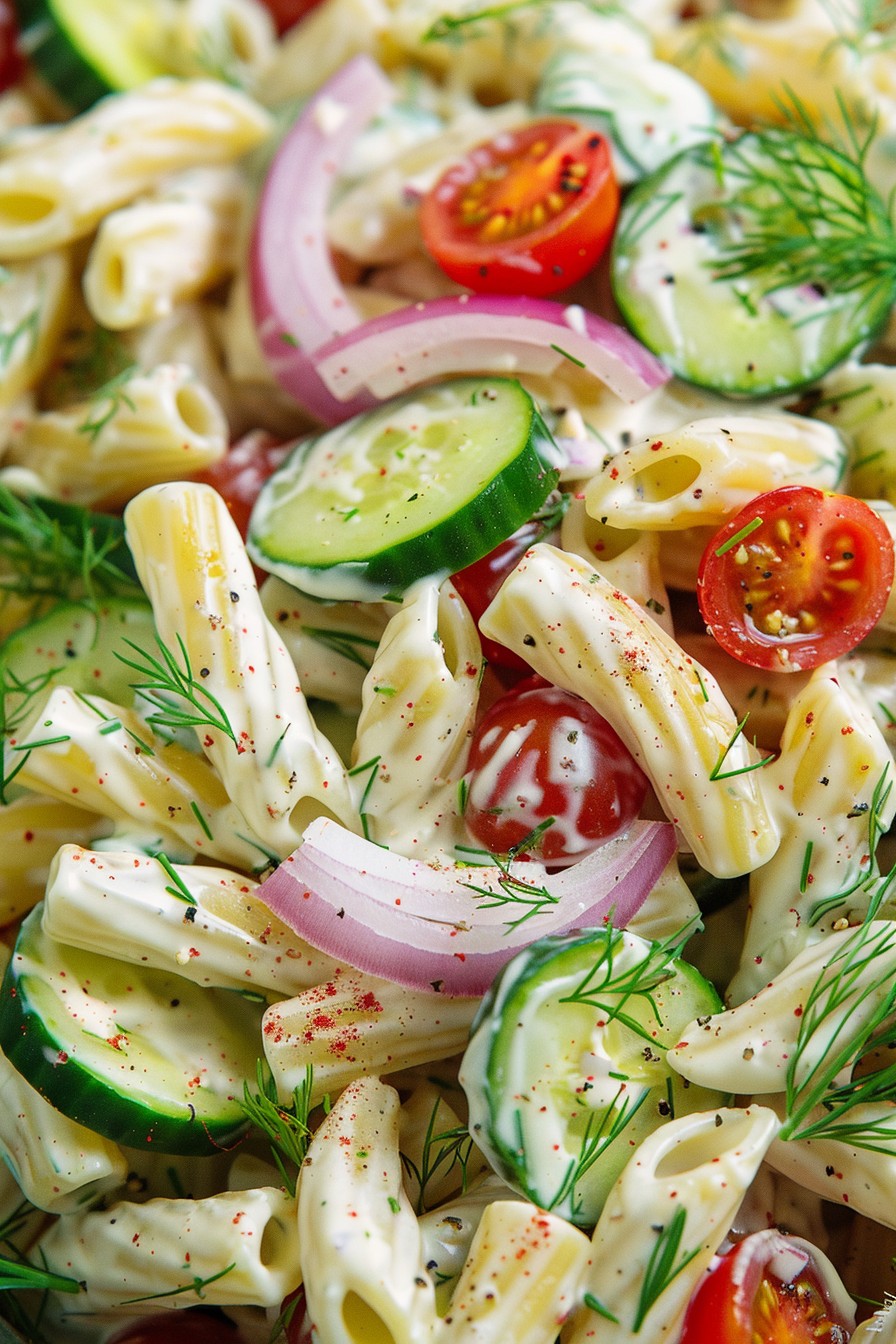
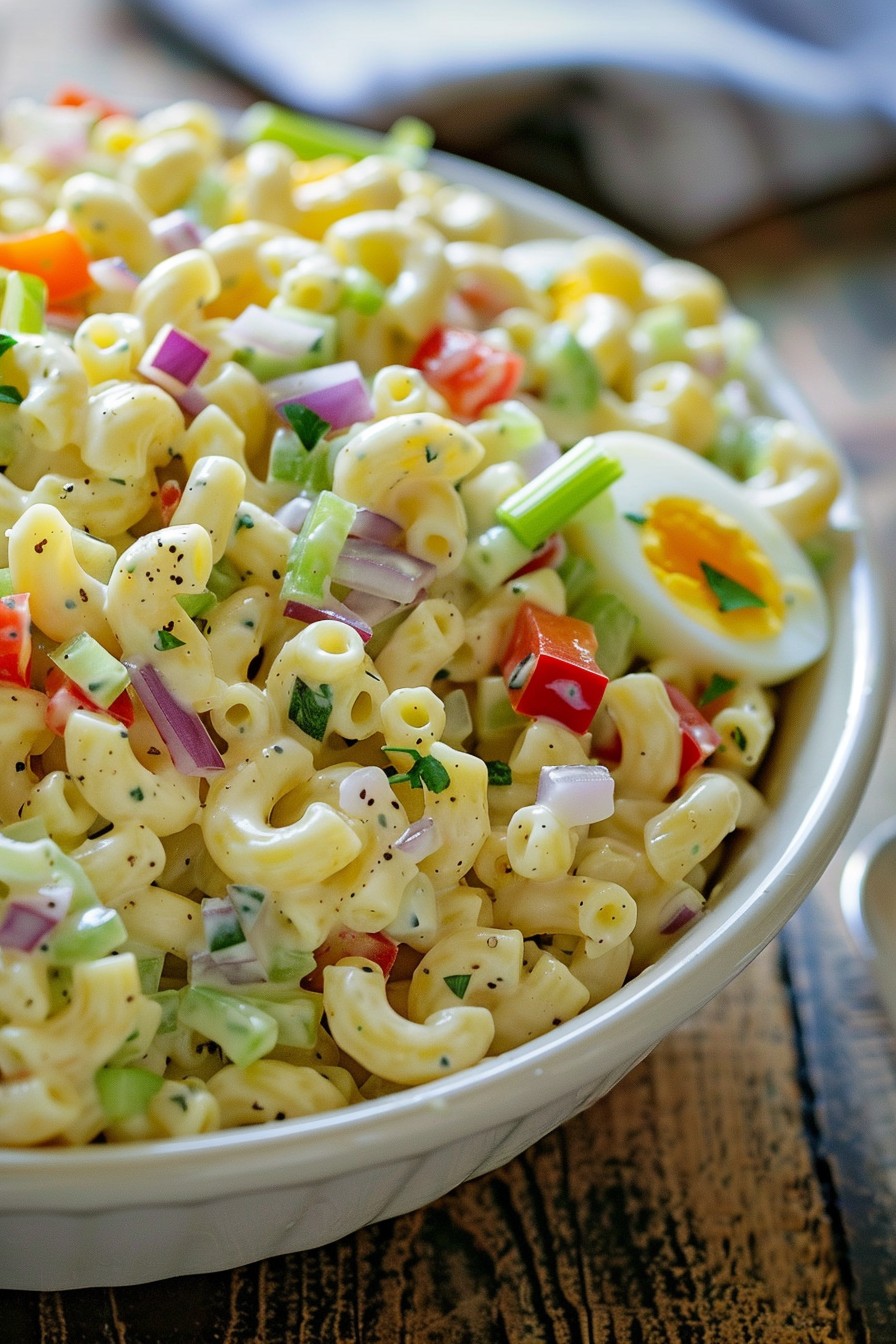
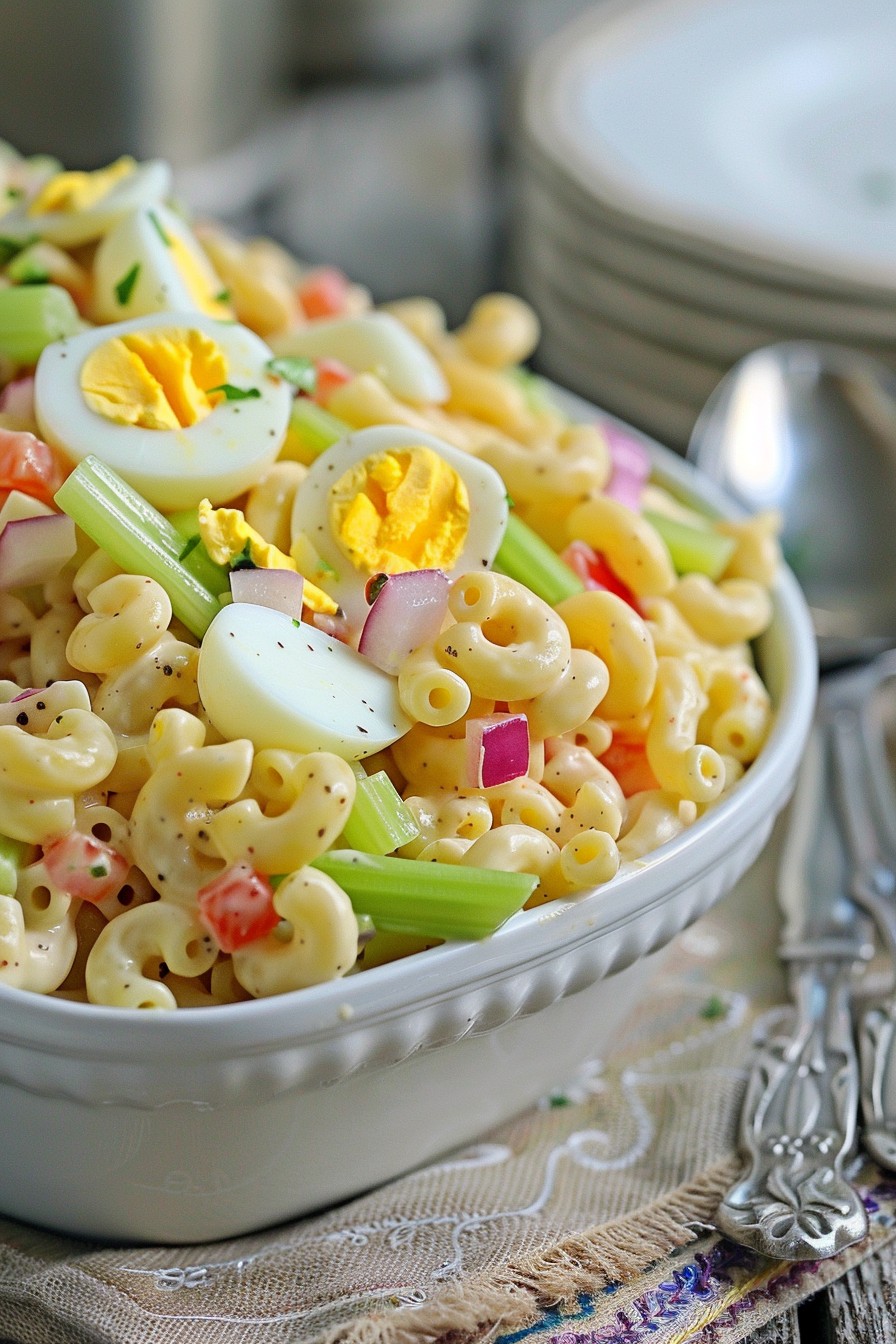
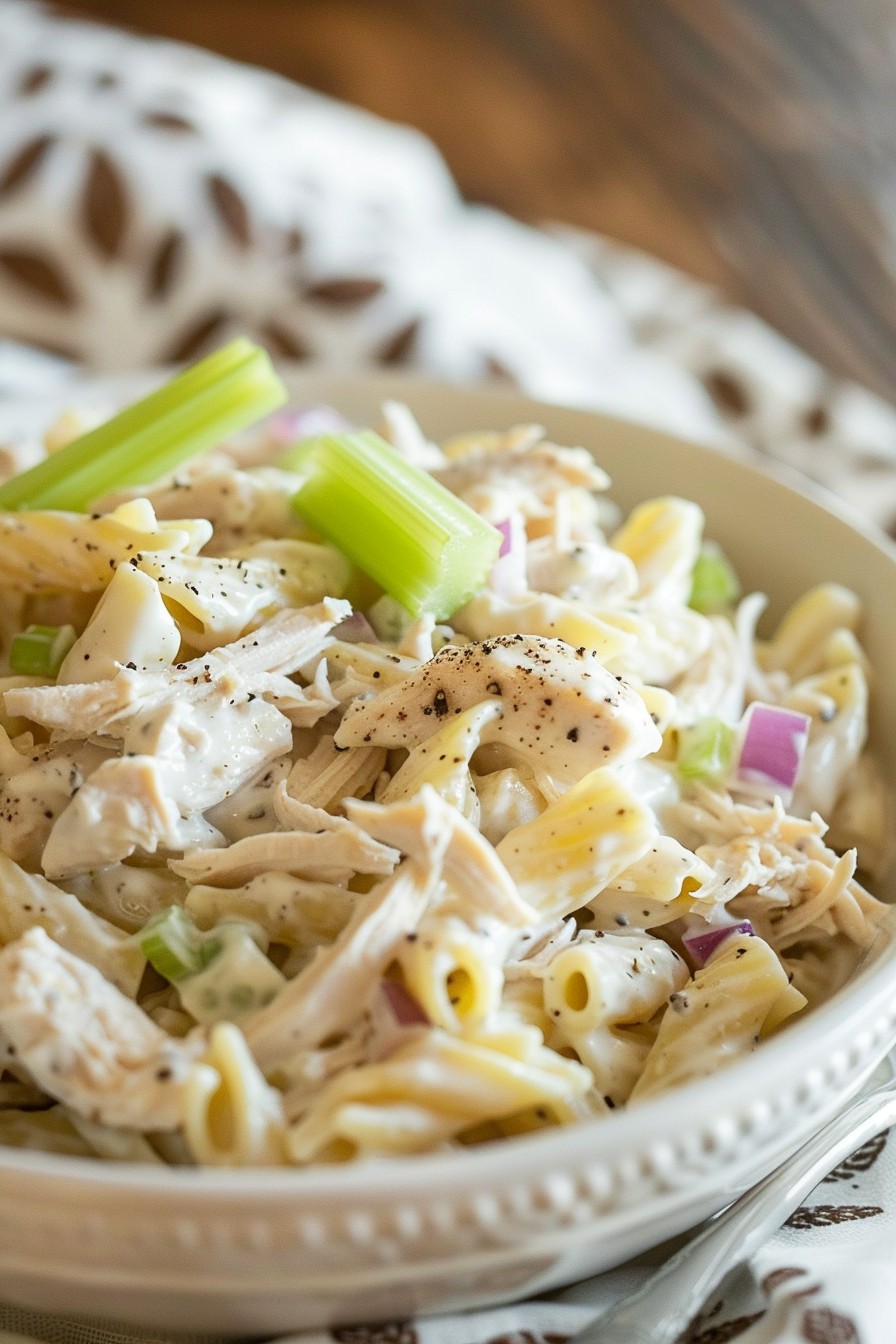
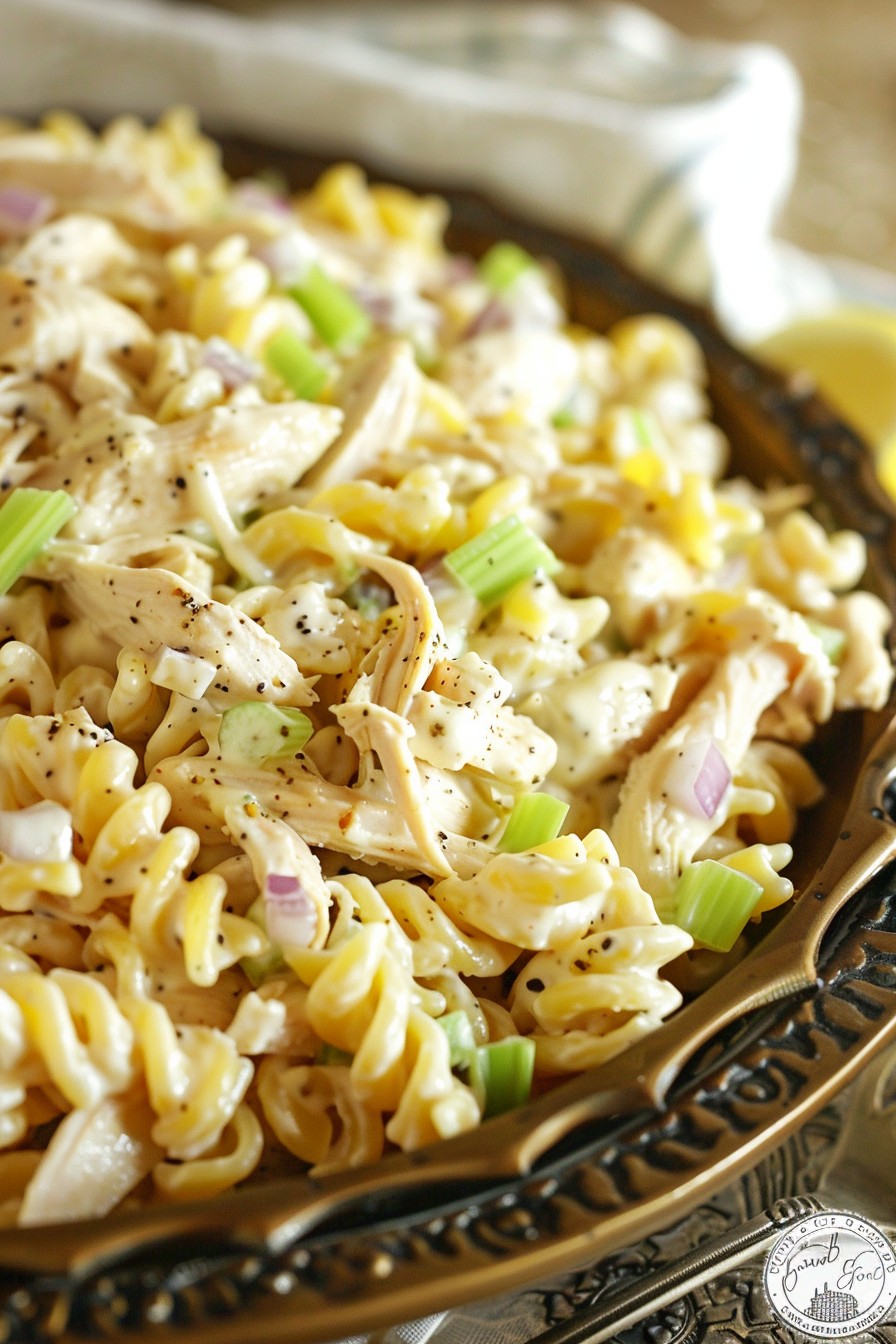
    A absolutely delightful dish that combines the heartiness of pasta with the lean protein of chicken, all tossed in a creamy mayonnaise dressing. Perfect for picnics, potlucks, or a quick lunch, this recipe is sure to become a favorite.

    Why This Recipe Works

    • The combination of tender chicken and al dente pasta provides a satisfying texture contrast.
    • Mayonnaise-based dressing ensures a creamy, rich flavor that coats every ingredient perfectly.
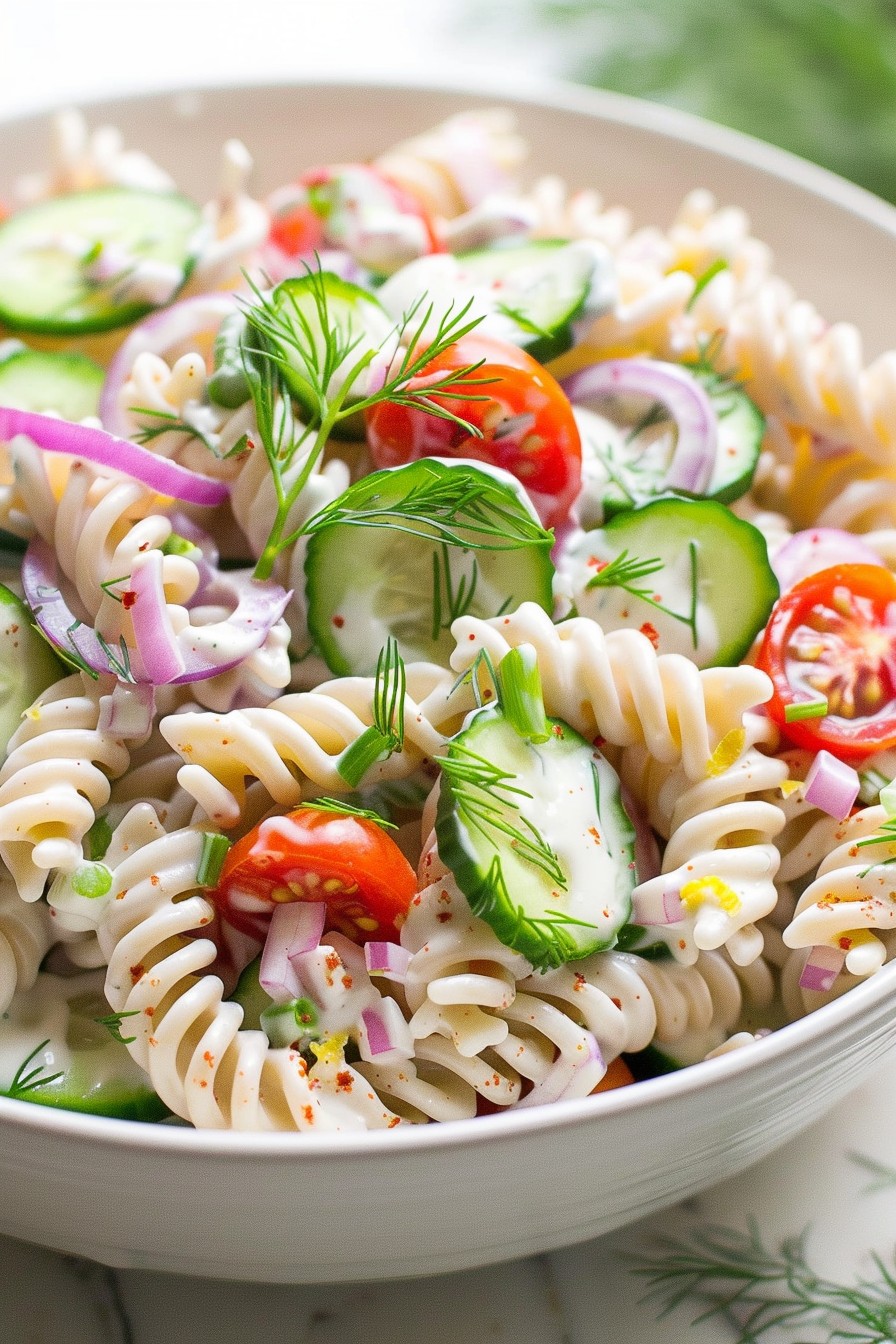
    • It’s versatile; easily customizable with your favorite veggies or herbs.
    • Quick to prepare, making it ideal for busy weeknights or last-minute gatherings.
    • Leftovers taste even better the next day, as flavors meld together beautifully.

    Ingredients

    • 2 cups cooked chicken, shredded
    • 3 cups pasta, cooked and cooled
    • 1 cup mayonnaise
    • 1/2 cup celery, finely chopped
    • 1/4 cup red onion, finely diced
    • 1 tbsp lemon juice
    • 1 tsp salt
    • 1/2 tsp black pepper
    • 1/2 tsp garlic powder

    Equipment Needed

    • Large mixing bowl
    • Measuring cups and spoons
    • Pot for boiling pasta
    • Knife and cutting board

    Instructions

    Pasta Chicken Salad Recipe Mayonnaise

    Step 1: Prepare Your Ingredients

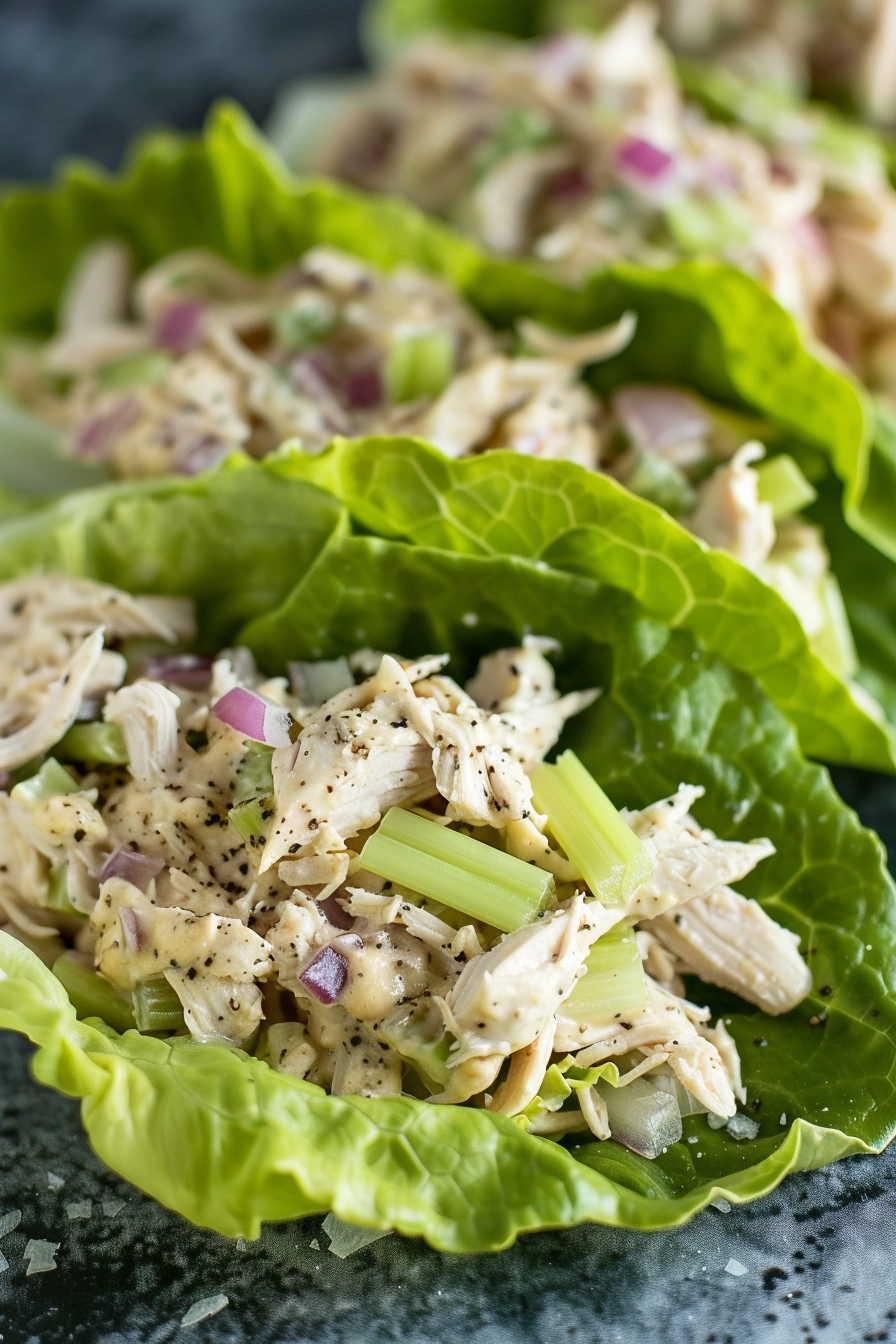
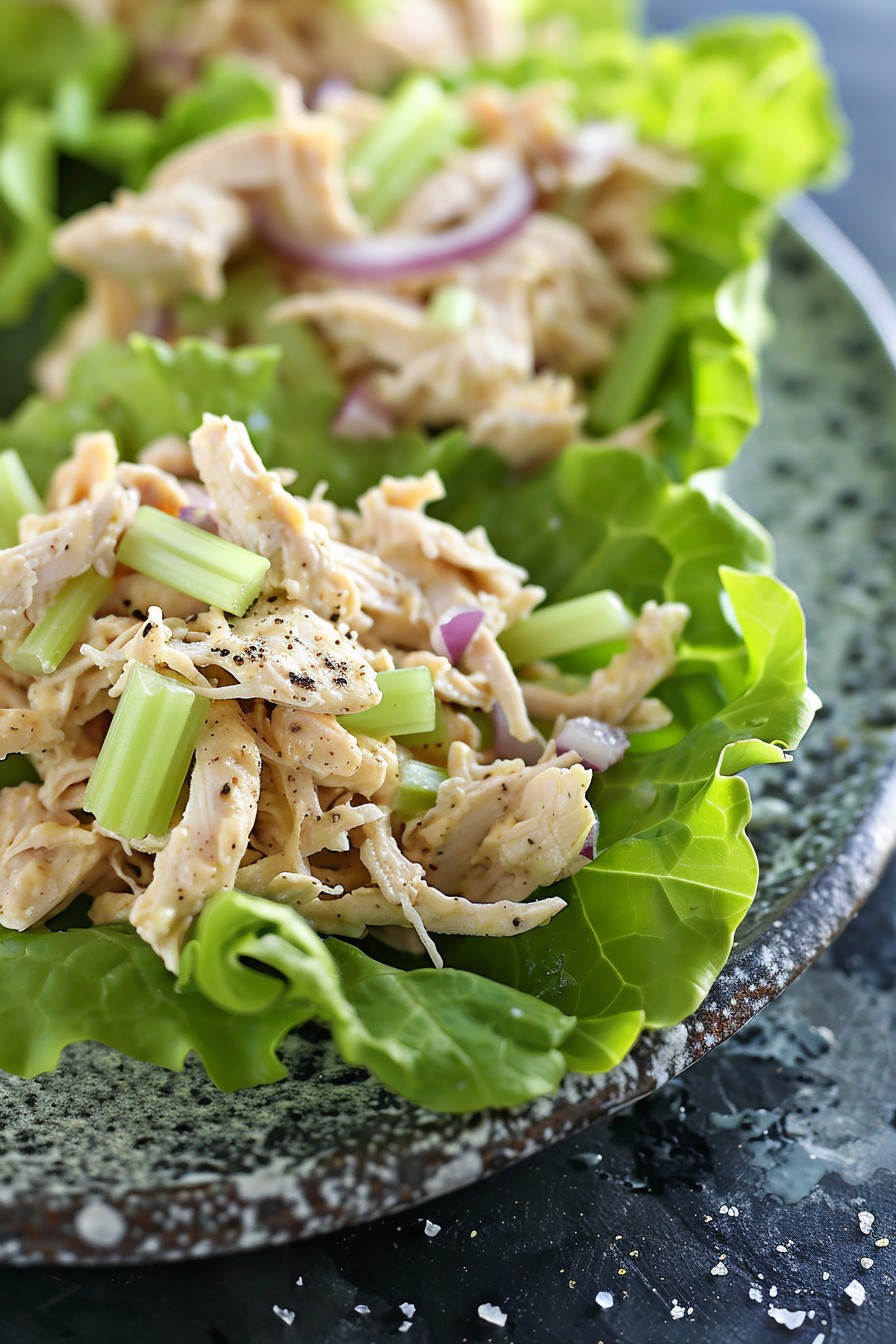
    Start by ensuring your chicken is cooked and shredded into bite-sized pieces. Cook your pasta according to the package instructions until al dente, then rinse under cold water to stop the cooking process. Chop your celery and red onion finely to ensure they distribute evenly throughout the salad.

    Step 2: Mix the Dressing

    In a large mixing bowl, combine the mayonnaise, lemon juice, salt, black pepper, and garlic powder. Whisk these ingredients together until smooth. This creamy dressing will coat your pasta and chicken beautifully, so make sure it’s well mixed.

    Step 3: Combine All Ingredients

    Add the cooled pasta, shredded chicken, chopped celery, and diced red onion to the bowl with the dressing. Gently toss everything together until all the ingredients are evenly coated with the mayonnaise mixture. Be careful not to overmix, as this can break the pasta.

    Step 4: Chill Before Serving

    For the best flavor, cover the salad and refrigerate it for at least an hour before serving. This allows the flavors to meld together and the salad to cool to the perfect temperature for enjoying.

    Step 5: Serve and Enjoy

    Once chilled, give the salad a quick stir to redistribute the dressing. Serve it cold, garnished with a sprinkle of fresh herbs if desired. This dish is perfect on its own or as a side at your next barbecue.

    Tips and Tricks

    For an extra crunch, consider adding some chopped nuts or seeds to the salad. If you’re looking for a lighter version, you can substitute half of the mayonnaise with Greek yogurt. Always taste and adjust the seasoning before serving, as chilling can mute flavors slightly. For a more vibrant salad, add some diced bell peppers or cherry tomatoes. Lastly, if you’re making this salad ahead of time, hold off on adding the onions until just before serving to keep their crunch.

    Recipe Variations

    • Swap the chicken for turkey or ham for a different protein twist.
    • Add some curry powder to the dressing for a warm, spicy flavor.
    • Include some grapes or apples for a sweet contrast to the creamy dressing.
    • Use whole wheat or gluten-free pasta to cater to dietary needs.
    • Mix in some avocado for extra creaminess and healthy fats.

    Frequently Asked Questions

    Can I make this salad ahead of time?

    Absolutely! This salad actually tastes better after it’s had time to chill in the fridge, making it a great make-ahead dish. Just be sure to store it in an airtight container to keep it fresh.

    How long will this salad keep in the fridge?

    Stored properly, this pasta chicken salad will stay fresh for up to 3 days in the refrigerator. After that, the pasta may start to soften too much, and the flavors won’t be as vibrant.

    Can I freeze this salad?

    Freezing is not recommended, as the mayonnaise-based dressing and pasta texture will not hold up well after thawing. It’s best enjoyed fresh or refrigerated for a few days.

    Summary

    This creamy pasta chicken salad with mayonnaise is a versatile, delicious dish perfect for any occasion. Easy to make and customizable, it’s sure to be a hit with everyone who tries it.

  • Refreshing Cucumber Pasta Salad Recipe: A Summer Delight

    Refreshing Cucumber Pasta Salad Recipe: A Summer Delight

    Forget the oven, this cucumber pasta salad is your ticket to a cool, crunchy, and creamy side dish that screams summer. Perfect for picnics, potlucks, or just because you deserve something delicious without breaking a sweat.

    Why This Recipe Works

    • It’s a no-cook recipe, saving you from the summer heat.
    • The combination of crunchy cucumbers and creamy dressing hits all the right textures.
    • It’s versatile; add your favorite veggies or proteins to make it your own.
    • Prep ahead and it gets better as it chills, making it perfect for meal prep.
    • Light yet satisfying, it’s a crowd-pleaser that won’t weigh you down.

    Ingredients

    • 8 oz pasta (rotini or penne works great)
    • 2 large cucumbers, diced
    • 1/2 cup red onion, finely chopped
    • 1 cup cherry tomatoes, halved
    • 1/4 cup fresh dill, chopped
    • 1/2 cup mayonnaise
    • 1/4 cup sour cream
    • 2 tbsp lemon juice
    • 1 tsp garlic powder
    • Salt and pepper to taste

    Equipment Needed

    • Large mixing bowl
    • Colander
    • Measuring cups and spoons
    • Knife and cutting board

    Instructions

    Cucumber Pasta Salad Recipe

    Step 1: Cook the Pasta

    Bring a large pot of salted water to a boil. Add the pasta and cook according to package instructions until al dente, about 8-10 minutes. Drain and rinse under cold water to stop the cooking process. Tip: Adding a splash of olive oil to the water can prevent the pasta from sticking together.

    Step 2: Prepare the Vegetables

    While the pasta cooks, dice the cucumbers, chop the red onion, halve the cherry tomatoes, and chop the fresh dill. Combine these in a large mixing bowl. Tip: For less bite, soak the chopped red onion in cold water for 10 minutes before adding it to the salad.

    Step 3: Make the Dressing

    In a small bowl, whisk together the mayonnaise, sour cream, lemon juice, garlic powder, salt, and pepper until smooth. Taste and adjust seasoning as needed. Tip: For a lighter version, you can substitute Greek yogurt for the mayonnaise and sour cream.

    Step 4: Combine Everything

    Add the cooled pasta to the bowl with the vegetables. Pour the dressing over the top and gently toss until everything is evenly coated. Be careful not to overmix to keep the vegetables crisp.

    Step 5: Chill and Serve

    Cover the salad and refrigerate for at least 1 hour before serving to allow the flavors to meld. Serve chilled for the best taste and texture.

    Tips and Tricks

    For an extra crunch, add some diced bell peppers or celery. If you’re making this salad ahead of time, hold off on adding the dressing until just before serving to keep the vegetables crisp. For a protein boost, toss in some grilled chicken or chickpeas. Always taste and adjust the seasoning after chilling, as flavors can mellow out in the fridge.

    Recipe Variations

    • Add avocado for a creamy twist and healthy fats.
    • Swap the dill for basil or parsley for a different herby flavor.
    • Include some crumbled feta or grated Parmesan for a cheesy element.
    • For a spicy kick, add some diced jalapeños or a dash of hot sauce to the dressing.
    • Use whole wheat or gluten-free pasta to suit dietary needs.

    Frequently Asked Questions

    Can I make this salad ahead of time?

    Absolutely! This salad actually tastes better after it’s had time to chill and the flavors have melded together. Just keep it covered in the refrigerator for up to 3 days.

    What’s the best way to store leftovers?

    Store any leftovers in an airtight container in the refrigerator. It’s best enjoyed within 3 days, as the vegetables may start to lose their crunch over time.

    Can I use a different type of pasta?

    Yes, feel free to use your favorite pasta shape. Just keep in mind that smaller shapes like rotini or penne work best for holding onto the dressing and vegetables.

    Summary

    This cucumber pasta salad is a refreshing, no-cook dish perfect for summer gatherings. With its creamy dressing and crunchy vegetables, it’s a versatile recipe that can be customized to your liking. Easy to make and even easier to enjoy!

  • Grilled Salad Recipe: A Sizzling Twist on Fresh Greens

    Grilled Salad Recipe: A Sizzling Twist on Fresh Greens

    Never thought you’d grill a salad, did you? This recipe turns the concept of salad on its head by introducing a smoky, charred flavor to your favorite greens. Perfect for summer BBQs or when you’re craving something light yet unexpectedly hearty.

    Why This Recipe Works

    • Grilling adds a smoky depth to vegetables, transforming them from ordinary to extraordinary.
    • The combination of warm grilled veggies with cool, crisp greens offers a delightful contrast in temperatures and textures.
    • It’s a versatile recipe that allows for endless customization based on what’s in season or your personal preferences.

    Ingredients

    • 2 cups mixed greens (washed and dried)
    • 1 large bell pepper (sliced into strips)
    • 1 zucchini (sliced lengthwise)
    • 1 tbsp olive oil
    • Salt and pepper to taste
    • 1/4 cup feta cheese (crumbled)
    • 2 tbsp balsamic glaze

    Equipment Needed

    • Grill
    • Grill brush
    • Tongs
    • Mixing bowl

    Instructions

    Grilled Salad Recipe

    Preheat Your Grill

    Heat your grill to medium-high heat, about 375°F. This ensures your veggies get those perfect grill marks without burning.

    Prepare the Vegetables

    Toss the bell pepper and zucchini slices with olive oil, salt, and pepper. This not only adds flavor but also helps prevent sticking.

    Grill to Perfection

    Place the vegetables on the grill. Cook for 3-4 minutes per side, until you see char marks and they’re tender but still crisp.

    Assemble Your Salad

    Layer the mixed greens on a plate, top with the grilled vegetables, sprinkle with feta cheese, and drizzle with balsamic glaze.

    Serve Immediately

    This salad is best enjoyed right away while the veggies are still warm and the greens are crisp.

    Tips and Tricks

    Grilling vegetables can be a game-changer for your salads. Here are some advanced tips to elevate your grilled salad game: Always preheat your grill to avoid sticking and ensure even cooking. Don’t overcrowd the grill; give each piece of vegetable its own space to cook properly. Experiment with different types of vinegar or citrus juices in place of balsamic glaze for a new flavor profile. Remember, the key to a great grilled salad is balancing the smoky flavors with fresh, crisp elements.

    Recipe Variations

    • Swap out the bell pepper and zucchini for eggplant or asparagus depending on the season.
    • Add grilled chicken or shrimp for a protein-packed version.
    • Try different cheeses like goat cheese or blue cheese for a twist on the flavor.
    • Incorporate nuts or seeds for added crunch and nutrition.
    • Use a variety of dressings, from creamy ranch to a light vinaigrette, to keep the recipe fresh and exciting.

    Frequently Asked Questions

    Can I make this salad ahead of time? While you can prep the vegetables ahead, it’s best to grill and assemble the salad just before serving to maintain the best texture and flavor.

    What other vegetables can I grill for this salad? Almost any vegetable can be grilled for this salad. Think outside the box with carrots, corn, or even romaine lettuce hearts.

    How do I prevent the vegetables from sticking to the grill? Ensure your grill is properly preheated and your vegetables are lightly coated in oil. Also, avoid moving them too soon; let them develop a sear first.

    Summary

    This grilled salad recipe is a fun and flavorful way to enjoy your greens with a smoky twist. Perfect for any occasion, it’s sure to impress with its simplicity and depth of flavor.

  • Old Fashioned Orange Fluff Salad Recipe: A Nostalgic Delight

    Old Fashioned Orange Fluff Salad Recipe: A Nostalgic Delight

    Craving a blast from the past? This old fashioned orange fluff salad recipe is your ticket to a creamy, dreamy side dish that’s as fun to make as it is to eat. Perfect for potlucks, picnics, or just because!

    Why This Recipe Works

    • Easy to Make: With just a few simple ingredients and no baking required, this recipe is a breeze to whip up.
    • Versatile: Serve it as a side dish, dessert, or even a sweet snack. It’s delicious any time of day.
    • Crowd-Pleaser: Its creamy texture and sweet, citrusy flavor make it a hit with both kids and adults alike.

    Ingredients

    • 1 package (3.4 oz) instant vanilla pudding mix
    • 1 can (11 oz) mandarin oranges, drained
    • 1 can (8 oz) crushed pineapple, drained
    • 1 cup mini marshmallows
    • 1/2 cup sour cream
    • 1 cup whipped topping, thawed

    Equipment Needed

    • Large mixing bowl
    • Rubber spatula
    • Measuring cups and spoons

    Instructions

    Old Fashioned Orange Fluff Salad Recipe

    Step 1: Prepare the Pudding Mix

    In a large mixing bowl, combine the instant vanilla pudding mix with the sour cream. Stir until the mixture is smooth and no lumps remain. This step is crucial for achieving that creamy texture we all love in a fluff salad.

    Step 2: Fold in the Fruits

    Gently fold in the drained mandarin oranges and crushed pineapple into the pudding mixture. Be careful not to overmix to keep the fruits intact for that perfect bite every time.

    Step 3: Add the Marshmallows

    Stir in the mini marshmallows until they’re evenly distributed throughout the mixture. The marshmallows add a delightful sweetness and texture contrast to the salad.

    Step 4: Incorporate the Whipped Topping

    Fold in the whipped topping until the mixture is light and fluffy. This step transforms the salad into its signature airy consistency.

    Step 5: Chill and Serve

    Cover the bowl with plastic wrap and refrigerate for at least 2 hours before serving. This chilling time allows the flavors to meld together beautifully.

    Tips and Tricks

    For an extra burst of citrus flavor, consider adding a teaspoon of orange zest to the pudding mixture. If you’re serving this salad at a summer picnic, keep it chilled in a cooler until it’s time to eat to maintain its texture. For a lighter version, substitute the sour cream with Greek yogurt and use a sugar-free pudding mix.

    Recipe Variations

    • Tropical Twist: Swap the mandarin oranges for diced mango and add shredded coconut for a tropical flair.
    • Berry Delight: Replace the oranges and pineapple with mixed berries for a refreshing summer version.
    • Nutty Crunch: Add chopped pecans or walnuts for a crunchy texture contrast.

    Frequently Asked Questions

    Can I make this recipe ahead of time?

    Absolutely! This salad actually tastes better after it’s had time to chill in the refrigerator, making it a perfect make-ahead dish for busy days or gatherings.

    How long does the salad last in the fridge?

    Stored in an airtight container, the salad will keep for up to 3 days in the refrigerator. Just give it a quick stir before serving if any separation occurs.

    Can I use fresh fruit instead of canned?

    Yes, you can use fresh mandarin oranges and pineapple. Just make sure to drain any excess juice to prevent the salad from becoming too watery.

    Summary

    This old fashioned orange fluff salad is a creamy, dreamy side dish that’s as easy to make as it is delicious. With its sweet citrus flavor and fluffy texture, it’s sure to be a hit at any gathering.

  • Tomato Feta Cucumber Salad Recipe: A Refreshing Summer Delight

    Tomato Feta Cucumber Salad Recipe: A Refreshing Summer Delight

    Here’s a salad that’s as easy to make as it is delicious. Perfect for those hot summer days when you want something light, refreshing, and packed with flavor. This tomato feta cucumber salad is a crowd-pleaser that comes together in minutes.

    Why This Recipe Works

    • The combination of juicy tomatoes, crisp cucumbers, and creamy feta creates a perfect balance of textures.
    • A simple dressing of olive oil and lemon juice enhances the natural flavors without overpowering them.
    • It’s incredibly versatile, serving as a side dish, a light lunch, or even a topping for grilled meats.
    • This salad is a great way to use up summer’s bounty of tomatoes and cucumbers.
    • It’s healthy, refreshing, and requires no cooking, making it perfect for hot days.

    Ingredients

    • 2 cups cherry tomatoes, halved
    • 1 large cucumber, diced
    • 1/2 cup feta cheese, crumbled
    • 1/4 cup red onion, thinly sliced
    • 2 tbsp olive oil
    • 1 tbsp lemon juice
    • Salt and pepper to taste
    • Fresh basil leaves, chopped (optional)

    Equipment Needed

    • Large mixing bowl
    • Measuring cups and spoons
    • Knife and cutting board
    • Whisk or fork for dressing

    Instructions

    Tomato Feta Cucumber Salad Recipe

    Prepare Your Vegetables

    Start by washing your cherry tomatoes and cucumber under cold water. Halve the cherry tomatoes and dice the cucumber into bite-sized pieces. Thinly slice the red onion. The key here is to ensure all pieces are roughly the same size for a uniform bite every time. Tip: If you’re not a fan of raw onion’s sharpness, soak the slices in cold water for 10 minutes to mellow them out.

    Combine the Salad Ingredients

    In a large mixing bowl, combine the halved cherry tomatoes, diced cucumber, and sliced red onion. Gently toss these ingredients together to mix them evenly. Then, sprinkle the crumbled feta cheese over the top. The feta adds a creamy texture and salty flavor that contrasts beautifully with the fresh vegetables.

    Whisk Together the Dressing

    In a small bowl, whisk together the olive oil and lemon juice until well combined. Season with salt and pepper to taste. This simple dressing brings all the flavors together without overshadowing the natural taste of the vegetables. Tip: For an extra flavor boost, add a pinch of dried oregano or some chopped fresh basil to the dressing.

    Dress the Salad

    Drizzle the dressing over the salad ingredients in the large mixing bowl. Gently toss everything together to ensure the dressing coats all the vegetables and feta evenly. Be careful not to overmix, as you don’t want to crush the tomatoes or cucumbers.

    Serve and Enjoy

    Transfer the salad to a serving dish and garnish with additional chopped basil if desired. This salad is best served immediately but can be refrigerated for up to an hour before serving if needed. Tip: For added crunch, sprinkle some toasted pine nuts or croutons on top before serving.

    Tips and Tricks

    This tomato feta cucumber salad is wonderfully adaptable. Here are some advanced tips to elevate your salad game. First, consider the quality of your ingredients. Since this salad is so simple, using the freshest vegetables and highest quality feta will make a noticeable difference. Second, experiment with the dressing. A balsamic glaze can add a sweet and tangy twist, or a splash of red wine vinegar can deepen the flavors. Third, if you’re making this salad ahead of time, add the feta and dressing just before serving to keep the vegetables crisp and the feta from becoming too soft. Lastly, don’t be afraid to add other ingredients like olives, avocado, or even some grilled chicken to turn this side dish into a main course.

    Recipe Variations

    • Add some protein: Toss in some grilled chicken, shrimp, or chickpeas to make this salad a hearty main dish.
    • Switch up the cheese: Try using goat cheese or mozzarella pearls instead of feta for a different flavor profile.
    • Add some grains: Mix in some cooked quinoa or farro to add texture and make the salad more filling.
    • Spice it up: Add some diced jalapeños or a sprinkle of red pepper flakes for a bit of heat.
    • Change the dressing: Use a balsamic vinaigrette or a honey mustard dressing for a different taste.

    Frequently Asked Questions

    Can I make this salad ahead of time?

    Yes, you can prepare the vegetables and store them in the refrigerator separately from the dressing and feta. Combine everything just before serving to maintain the best texture and flavor. The salad is best enjoyed fresh but can be stored in the fridge for up to a day if necessary.

    What can I use instead of feta cheese?

    If you’re not a fan of feta, goat cheese or mozzarella are great alternatives. Both offer a creamy texture but with a milder flavor. For a vegan version, try using a dairy-free cheese alternative or simply omit the cheese altogether.

    How can I make this salad more filling?

    Adding a protein like grilled chicken, shrimp, or chickpeas can turn this side dish into a satisfying main course. You can also add some cooked grains like quinoa or farro for extra substance.

    Summary

    This tomato feta cucumber salad is a simple, refreshing dish perfect for summer. With its combination of fresh vegetables, creamy feta, and a light dressing, it’s a versatile recipe that can be adapted to suit any taste. Whether served as a side or a main, it’s sure to be a hit.

  • Chicken Salad Lettuce Wraps: A Crunchy, Healthy Delight

    Chicken Salad Lettuce Wraps: A Crunchy, Healthy Delight

    Very few dishes offer the perfect blend of health and taste like these chicken salad lettuce wraps. Packed with protein and wrapped in crisp lettuce, they’re a guilt-free pleasure that doesn’t skimp on flavor. Ideal for a quick lunch or a light dinner, these wraps are about to become your new favorite.

    Why This Recipe Works

    • The combination of tender chicken and crunchy vegetables offers a satisfying texture contrast.
    • Using lettuce instead of bread lowers the carb content, making it a healthier option.
    • The homemade dressing adds a fresh, zesty flavor that store-bought versions can’t match.
    • It’s versatile; easily customizable to suit your taste preferences or dietary needs.
    • Quick and easy to prepare, perfect for busy weekdays.

    Ingredients

    • 2 cups cooked chicken, shredded
    • 1/2 cup mayonnaise
    • 1 tbsp Dijon mustard
    • 1/2 cup celery, finely chopped
    • 1/4 cup red onion, finely diced
    • 1/2 tsp salt
    • 1/4 tsp black pepper
    • 8 large lettuce leaves (Romaine or Butter lettuce works best)

    Equipment Needed

    • Mixing bowl
    • Measuring cups and spoons
    • Knife and cutting board

    Instructions

    Chicken Salad Lettuce Recipe

    Step 1: Prepare the Chicken Salad

    In a large mixing bowl, combine the shredded chicken, mayonnaise, Dijon mustard, celery, red onion, salt, and black pepper. Mix until all ingredients are well incorporated. Tip: For an extra crunch, add some chopped walnuts or almonds.

    Step 2: Select Your Lettuce Leaves

    Choose large, sturdy lettuce leaves that can hold the chicken salad without tearing. Rinse them under cold water and pat dry with a paper towel. Tip: Romaine lettuce is great for its crunch, but Butter lettuce offers a softer, more buttery texture.

    Step 3: Assemble the Wraps

    Lay out the lettuce leaves on a clean surface. Spoon the chicken salad onto the center of each leaf, dividing it evenly among them. Fold the sides of the lettuce over the filling, then roll from the bottom up to enclose the salad. Tip: Don’t overfill the leaves to prevent tearing.

    Tips and Tricks

    For the best flavor, let the chicken salad sit in the refrigerator for at least an hour before assembling the wraps. This allows the flavors to meld together beautifully. If you’re meal prepping, store the salad and lettuce leaves separately and assemble just before eating to keep the lettuce crisp. For a lighter version, substitute Greek yogurt for half of the mayonnaise. Adding fresh herbs like dill or parsley can elevate the flavor profile significantly.

    Recipe Variations

    • Swap the chicken for turkey or tuna for a different protein option.
    • Add grapes or apples for a sweet twist.
    • Include avocado slices for extra creaminess and healthy fats.
    • Use a spicy mayo or sriracha to add heat.
    • For a dairy-free version, use vegan mayonnaise.

    Frequently Asked Questions

    Can I make the chicken salad ahead of time?

    Absolutely! The chicken salad can be made up to 3 days in advance and stored in the refrigerator. Just give it a good stir before using, as the mayonnaise may settle.

    What’s the best way to shred chicken?

    You can shred cooked chicken using two forks, pulling the meat apart in opposite directions. For larger quantities, a stand mixer with the paddle attachment can make quick work of shredding chicken.

    Can I use iceberg lettuce instead?

    Yes, iceberg lettuce can be used, but it’s more prone to tearing due to its crispness. If you prefer iceberg, look for the most flexible leaves and handle them gently when wrapping.

    Summary

    These chicken salad lettuce wraps are a delicious, healthy option that’s easy to make and customizable to your taste. Perfect for a light meal or snack, they’re sure to satisfy without the guilt.

  • Cucumber Salad with Mayo Recipe: A Creamy, Crunchy Delight

    Cucumber Salad with Mayo Recipe: A Creamy, Crunchy Delight

    Just when you thought cucumber salads couldn’t get any better, here comes this creamy, dreamy version with mayo to prove you wrong. Perfect for picnics, potlucks, or just because you deserve something delicious today.

    Why This Recipe Works

    • The combination of crisp cucumbers and creamy mayo creates a texture that’s irresistibly satisfying.
    • It’s incredibly easy to make, requiring no cooking and just a few minutes of prep time.
    • The recipe is versatile, allowing for numerous variations to suit any taste or dietary preference.
    • It’s a great way to use up those garden-fresh cucumbers that seem to multiply overnight.
    • This salad gets better as it sits, making it a perfect make-ahead dish for busy days.

    Ingredients

    • 2 large cucumbers, thinly sliced
    • 1/2 cup mayonnaise
    • 1 tablespoon apple cider vinegar
    • 1 teaspoon sugar
    • 1/2 teaspoon salt
    • 1/4 teaspoon black pepper
    • 1/4 cup red onion, thinly sliced (optional)

    Equipment Needed

    • Mixing bowl
    • Whisk
    • Measuring cups and spoons
    • Knife and cutting board

    Instructions

    Cucumber Salad With Mayo Recipe

    Prepare the Cucumbers

    Start by washing your cucumbers thoroughly under cold water. Slice them as thinly as possible for the best texture. If you’re not a fan of cucumber skins, feel free to peel them first. Tip: For an extra crisp salad, sprinkle the sliced cucumbers with a little salt and let them sit for 10 minutes before rinsing and patting dry.

    Mix the Dressing

    In a large mixing bowl, whisk together the mayonnaise, apple cider vinegar, sugar, salt, and black pepper until smooth. This creamy dressing is the heart of the salad, so make sure it’s well combined. Tip: If you prefer a tangier salad, you can adjust the amount of vinegar to taste.

    Combine Ingredients

    Add the sliced cucumbers (and red onion, if using) to the bowl with the dressing. Gently toss everything together until the cucumbers are evenly coated. Be careful not to overmix, as you want to keep those cucumber slices intact.

    Chill Before Serving

    Cover the bowl with plastic wrap and refrigerate the salad for at least 30 minutes before serving. This chilling time allows the flavors to meld together beautifully. Tip: For the best flavor, let the salad chill for up to 2 hours.

    Serve and Enjoy

    Give the salad a quick stir before serving to redistribute the dressing. Serve it cold as a refreshing side dish to your favorite meals. It’s especially good alongside grilled meats or as part of a summer BBQ spread.

    Tips and Tricks

    For those looking to elevate their cucumber salad game, here are some pro tips. First, consider using a mandoline for uniformly thin cucumber slices, which not only looks professional but ensures every bite is perfect. Second, if you’re watching your calories, you can substitute Greek yogurt for half of the mayo for a lighter version that’s still creamy. Third, adding fresh dill or parsley can introduce a new layer of flavor that complements the creamy dressing wonderfully. Lastly, for a bit of crunch, sprinkle some toasted sunflower seeds or crumbled bacon on top before serving.

    Recipe Variations

    • Spicy Kick: Add a diced jalapeño or a sprinkle of red pepper flakes for some heat.
    • Herb Garden: Mix in fresh herbs like dill, parsley, or chives for a burst of freshness.
    • Protein Power: Turn it into a main dish by adding grilled chicken or shrimp.
    • Dairy-Free Delight: Use vegan mayo to make this salad dairy-free without sacrificing creaminess.
    • Sweet and Tangy: Swap the sugar for honey and add a bit more vinegar for a sweeter, tangier version.

    Frequently Asked Questions

    Can I make this salad ahead of time?

    Absolutely! This salad actually tastes better after it’s had some time to chill in the fridge, making it a perfect make-ahead dish. Just be sure to give it a good stir before serving to redistribute the dressing.

    How long will this salad keep in the fridge?

    Stored in an airtight container, this cucumber salad will stay fresh in the refrigerator for up to 3 days. However, it’s best enjoyed within the first 24 hours for optimal texture.

    Can I use low-fat mayo?

    Yes, you can use low-fat or even fat-free mayo if you’re looking to cut calories. Just keep in mind that the texture and flavor might be slightly different than with full-fat mayo.

    Summary

    This cucumber salad with mayo is a creamy, crunchy delight that’s easy to make and versatile enough to suit any taste. Perfect for any occasion, it’s a refreshing side dish that’s sure to please.

  • Beet Salad with Orange: A Vibrant Twist on a Classic

    Beet Salad with Orange: A Vibrant Twist on a Classic

    Mixing the earthy sweetness of beets with the citrusy zing of oranges creates a salad that’s as delightful to the palate as it is to the eye. This recipe is a testament to how simple ingredients can come together to form something extraordinary.

    Why This Recipe Works

    • The combination of beets and oranges offers a perfect balance of earthy and citrusy flavors.
    • Roasting the beets enhances their natural sweetness, adding depth to the salad.
    • The addition of nuts introduces a satisfying crunch, contrasting beautifully with the soft textures of the beets and oranges.
    • A simple vinaigrette ties all the components together without overpowering the natural flavors.
    • This salad is not only delicious but also packed with nutrients, making it a healthy choice for any meal.

    Ingredients

    • 3 medium beets, peeled and diced
    • 2 large oranges, peeled and segmented
    • 1/4 cup walnuts, roughly chopped
    • 2 tbsp olive oil
    • 1 tbsp balsamic vinegar
    • Salt and pepper to taste
    • 1/4 cup feta cheese, crumbled (optional)

    Equipment Needed

    • Baking sheet
    • Parchment paper
    • Mixing bowls
    • Whisk
    • Knife and cutting board

    Instructions

    Beet Salad Recipe Orange

    Preheat and Prepare

    Preheat your oven to 400°F (200°C). Line a baking sheet with parchment paper for easy cleanup. Toss the diced beets with 1 tablespoon of olive oil, salt, and pepper. Spread them out on the prepared baking sheet in a single layer to ensure even roasting.

    Roast the Beets

    Roast the beets in the preheated oven for about 25-30 minutes, or until they are tender and slightly caramelized around the edges. Stir them halfway through cooking to promote even roasting. Let them cool slightly before adding to the salad.

    Prepare the Dressing

    In a small bowl, whisk together the remaining olive oil, balsamic vinegar, a pinch of salt, and pepper. Adjust the seasoning to taste. This simple dressing will enhance the natural flavors of the beets and oranges without overwhelming them.

    Assemble the Salad

    In a large mixing bowl, combine the roasted beets, orange segments, and chopped walnuts. Drizzle the dressing over the salad and toss gently to coat all the ingredients evenly. If using, sprinkle the crumbled feta cheese on top for an extra layer of flavor.

    Serve and Enjoy

    Transfer the salad to a serving dish and serve immediately. The contrast of warm beets with cool oranges and the crunch of walnuts makes every bite a delightful experience.

    Tips and Tricks

    For an extra burst of flavor, toast the walnuts in a dry skillet over medium heat for a few minutes until fragrant. This enhances their nuttiness and adds another layer of texture to the salad. If you’re short on time, you can use pre-cooked beets, though roasting them fresh will give you the best flavor. To make the salad ahead of time, prepare the components separately and combine them just before serving to maintain the best texture and freshness.

    Recipe Variations

    • Swap the oranges for grapefruit for a more tart flavor profile.
    • Add avocado slices for creaminess and healthy fats.
    • Use goat cheese instead of feta for a tangier taste.
    • Incorporate a handful of arugula for a peppery bite and extra greens.
    • For a sweeter version, drizzle with a bit of honey before serving.

    Frequently Asked Questions

    Can I make this salad ahead of time?

    Yes, you can prepare the components of the salad ahead of time, but it’s best to assemble it just before serving to prevent the ingredients from becoming soggy. Store the roasted beets, orange segments, and dressing separately in the refrigerator, and combine them when you’re ready to eat.

    What other nuts can I use instead of walnuts?

    Pecans or almonds would be great substitutes for walnuts in this recipe. Both offer a similar crunch and pair well with the flavors of beets and oranges. Just make sure to toast them lightly to bring out their best qualities.

    Is there a vegan alternative to feta cheese?

    For a vegan version of this salad, you can omit the feta cheese or use a plant-based cheese alternative. Nutritional yeast can also be sprinkled on top for a cheesy flavor without the dairy.

    Summary

    This beet salad with orange is a colorful, nutritious, and flavorful dish that’s perfect for any occasion. With its combination of sweet, earthy, and citrusy flavors, it’s sure to be a hit. Plus, it’s easy to customize based on your preferences or what you have on hand.

  • Mueller’s Macaroni Salad Recipe: A Creamy Dream Come True

    Mueller’s Macaroni Salad Recipe: A Creamy Dream Come True

    Howdy, pasta lovers! Today, we’re diving fork-first into the creamy, dreamy world of Mueller’s Macaroni Salad. This isn’t just any pasta salad; it’s a bowl of happiness that brings picnics and potlucks to life. Let’s get cooking!

    Why This Recipe Works

    • The perfect blend of creamy and tangy flavors makes every bite irresistible.
    • Crunchy veggies add a fresh contrast to the tender macaroni.
    • It’s a make-ahead marvel, tasting even better the next day.
    • Simple ingredients come together for a dish that’s both comforting and exciting.
    • Versatile enough to pair with any main, from grilled meats to veggie burgers.

    Ingredients

    • 1 lb Mueller’s elbow macaroni
    • 1 cup mayonnaise
    • 2 tbsp apple cider vinegar
    • 1 tbsp sugar
    • 1 tsp salt
    • 1/2 tsp black pepper
    • 1 cup diced celery
    • 1/2 cup diced red onion
    • 1/2 cup diced red bell pepper
    • 2 hard-boiled eggs, chopped

    Equipment Needed

    • Large pot
    • Colander
    • Large mixing bowl
    • Whisk
    • Measuring cups and spoons
    • Knife and cutting board

    Instructions

    Muellers Macaroni Salad Recipe

    Boil the Macaroni to Perfection

    Fill your large pot with water and bring it to a rolling boil. Add the macaroni and cook according to the package instructions, usually about 8 minutes, until al dente. Drain in a colander and rinse under cold water to stop the cooking process. Tip: Adding a splash of olive oil to the boiling water can prevent sticking.

    Whisk Together the Dressing

    In your large mixing bowl, whisk together the mayonnaise, apple cider vinegar, sugar, salt, and black pepper until smooth. This creamy, tangy dressing is the heart of the salad, so make sure it’s well blended. Tip: For an extra tangy kick, add a teaspoon of mustard to the mix.

    Combine Macaroni and Veggies

    Add the cooled macaroni to the bowl with the dressing. Toss to coat evenly. Then, gently fold in the diced celery, red onion, red bell pepper, and chopped hard-boiled eggs. The colors and textures here are what make this salad a feast for the eyes as well as the palate.

    Chill to Let Flavors Marry

    Cover the bowl with plastic wrap and refrigerate for at least 2 hours, though overnight is better. This waiting period allows the flavors to meld together beautifully. Tip: Give the salad a good stir before serving to redistribute the dressing.

    Serve and Enjoy

    Once chilled, give your macaroni salad a final toss and serve it up. Whether it’s the star of your picnic or a side at your BBQ, it’s sure to be a hit. Remember, the best dishes are those made with love and shared with friends.

    Tips and Tricks

    For those looking to elevate their macaroni salad game, consider these pro tips. First, toasting your macaroni lightly before boiling can add a nutty depth to the dish. Second, incorporating a mix of fresh herbs like dill or parsley can introduce a bright, fresh flavor. Lastly, for a smoother dressing, blend the mayonnaise and vinegar before adding the other ingredients. These small tweaks can make a big difference in the final product.

    Recipe Variations

    • Add cooked, chopped bacon for a smoky twist.
    • Mix in some shredded cheddar cheese for extra creaminess.
    • Swap the red bell pepper for pickled jalapenos for a spicy kick.
    • Use Greek yogurt in place of half the mayonnaise for a lighter version.
    • Include some peas or diced carrots for added color and nutrition.

    Frequently Asked Questions

    Can I use a different type of pasta? Absolutely! While elbow macaroni is traditional, feel free to experiment with shells, rotini, or any small pasta shape. Just keep in mind that cooking times may vary.

    How long does the salad last in the fridge? Stored properly in an airtight container, your macaroni salad will stay fresh for up to 3 days. After that, the texture may start to change.

    Can I make this recipe vegan? Yes, you can! Substitute the mayonnaise with a vegan alternative and omit the eggs. Consider adding some diced avocado for creaminess.

    Summary

    Mueller’s Macaroni Salad is a creamy, tangy, and crunchy delight that’s perfect for any occasion. With simple ingredients and easy steps, it’s a recipe that promises to bring joy to your table. Don’t forget to experiment with variations to make it your own!

  • Peach and Tomato Salad Recipe: A Summer Delight

    Peach and Tomato Salad Recipe: A Summer Delight

    Delight your taste buds with this refreshing peach and tomato salad, a perfect blend of sweet and savory flavors that scream summer. This dish is not only a feast for the eyes but also a breeze to make, ensuring you spend less time in the kitchen and more time enjoying the sunny days.

    Why This Recipe Works

    • The combination of ripe peaches and juicy tomatoes creates a perfect balance of sweetness and acidity.
    • Fresh basil adds a fragrant aroma that elevates the dish to a whole new level.
    • A simple dressing of olive oil and balsamic vinegar enhances the natural flavors without overpowering them.
    • This salad is incredibly versatile, serving as a great side dish or a light main course.
    • It’s a quick and easy recipe that requires no cooking, making it perfect for hot summer days.

    Ingredients

    • 2 large peaches, sliced
    • 2 cups cherry tomatoes, halved
    • 1/4 cup fresh basil leaves, torn
    • 2 tbsp extra virgin olive oil
    • 1 tbsp balsamic vinegar
    • Salt and pepper to taste

    Equipment Needed

    • Large mixing bowl
    • Sharp knife
    • Cutting board
    • Measuring spoons

    Instructions

    Peach And Tomato Salad Recipe

    Prepare the Fruits and Herbs

    Start by washing the peaches and cherry tomatoes under cold running water. Slice the peaches into thin wedges and halve the cherry tomatoes. Tear the fresh basil leaves into small pieces to release their aromatic oils. Combine all these in a large mixing bowl.

    Make the Dressing

    In a small bowl, whisk together the extra virgin olive oil and balsamic vinegar until well combined. Season with salt and pepper to taste. This simple dressing will bring out the natural flavors of the peaches and tomatoes.

    Combine and Toss

    Pour the dressing over the peach and tomato mixture. Gently toss everything together to ensure all the pieces are evenly coated with the dressing. Be careful not to mash the peaches and tomatoes while mixing.

    Let It Marinate

    Allow the salad to sit at room temperature for about 10 minutes before serving. This short marination time lets the flavors meld together beautifully, enhancing the overall taste of the salad.

    Serve and Enjoy

    Transfer the salad to a serving dish and garnish with a few extra basil leaves for a pop of color. Serve immediately and enjoy the burst of summer flavors in every bite.

    Tips and Tricks

    For the best flavor, use peaches and tomatoes that are ripe but still firm. Overripe fruits can make the salad too mushy. If you’re not a fan of balsamic vinegar, you can substitute it with apple cider vinegar for a slightly different taste. Adding a handful of arugula can introduce a peppery note to the salad, making it even more interesting. For a creamier texture, sprinkle some crumbled feta cheese on top before serving. Lastly, if you’re preparing this salad ahead of time, add the dressing just before serving to keep the ingredients fresh and crisp.

    Recipe Variations

    • Add some sliced cucumbers for an extra crunch.
    • Include some red onion slices for a bit of sharpness.
    • Swap peaches with nectarines for a slightly different flavor profile.
    • Add some grilled chicken or shrimp to turn this salad into a hearty meal.
    • Use mint instead of basil for a refreshing twist.

    Frequently Asked Questions

    Can I make this salad ahead of time?

    Yes, you can prepare the ingredients ahead of time, but it’s best to add the dressing just before serving to prevent the salad from becoming soggy. The peaches and tomatoes can be sliced and stored in the refrigerator, and the dressing can be made separately and stored at room temperature.

    What can I substitute for balsamic vinegar?

    If you don’t have balsamic vinegar, you can use apple cider vinegar or red wine vinegar as a substitute. Each will give the salad a slightly different flavor, so choose based on your personal preference.

    How can I tell if the peaches are ripe?

    Ripe peaches should yield slightly to gentle pressure and have a sweet aroma at the stem end. Avoid peaches that are too hard or have green spots, as they are not fully ripe.

    Summary

    This peach and tomato salad is a celebration of summer flavors, combining the sweetness of peaches with the juiciness of tomatoes and the freshness of basil. It’s easy to make, versatile, and sure to be a hit at any gathering. Enjoy this delightful dish as a side or a light meal on a warm day.