Blog

  • Spicy Asian Cucumber Salad Recipe: A Crunchy, Tangy Delight

    Spicy Asian Cucumber Salad Recipe: A Crunchy, Tangy Delight

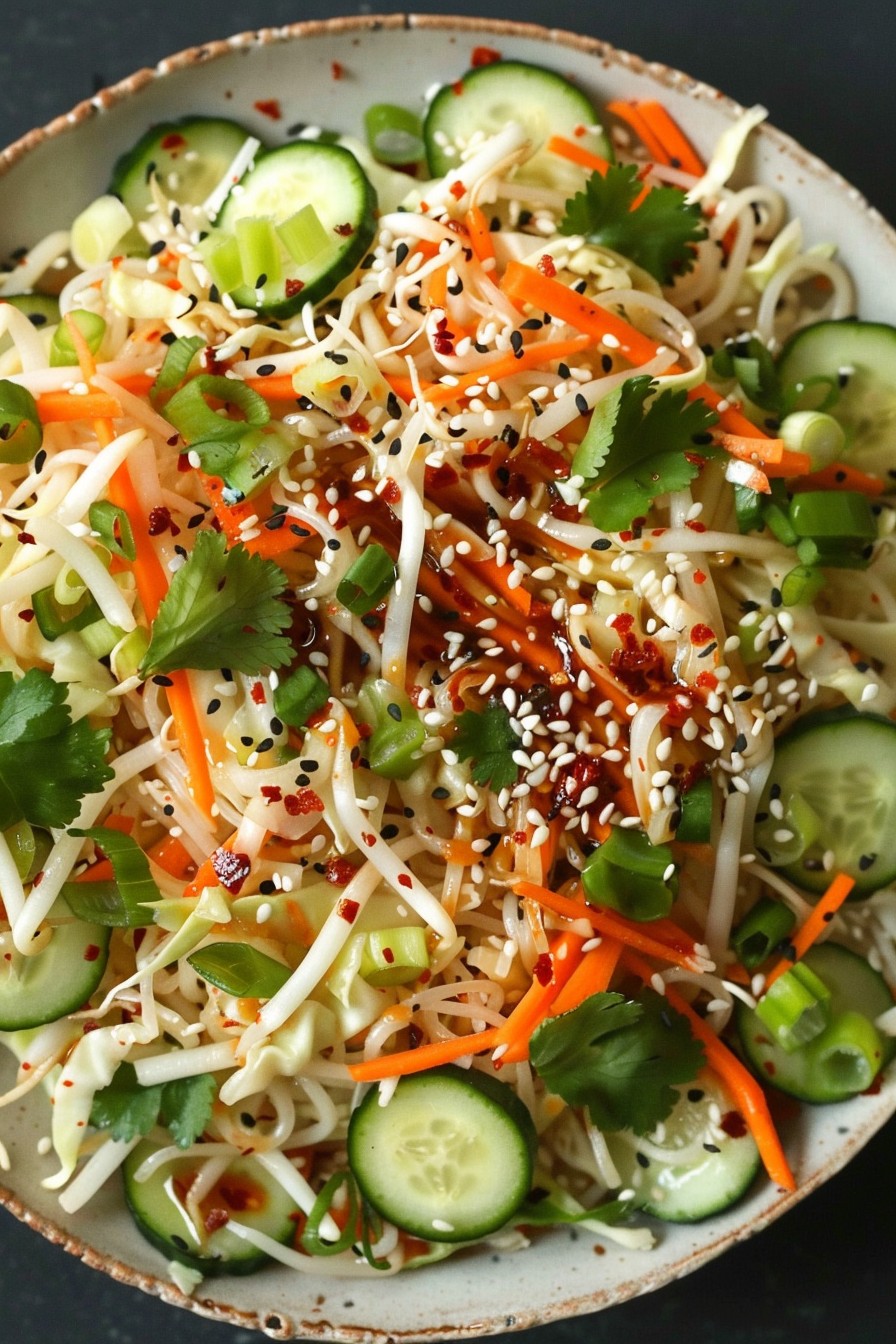
    Get ready to spice up your salad game with this irresistibly crunchy and tangy Spicy Asian Cucumber Salad. Perfect for those who love a little heat with their eat, this recipe is a breeze to whip up and packs a punch of flavor that’ll have you coming back for seconds.

    Why This Recipe Works

    • The combination of crisp cucumbers and a spicy, tangy dressing creates a perfect balance of flavors and textures.
    • It’s incredibly versatile, serving as a great side dish, appetizer, or even a light main course.
    • Quick and easy to prepare, it’s ideal for last-minute gatherings or when you’re craving something fresh and flavorful.
    • The salad gets better as it marinates, making it a great make-ahead option.
    • It’s a healthy, low-calorie dish that doesn’t skimp on taste.

    Ingredients

    • 2 large cucumbers, thinly sliced
    • 1/4 cup rice vinegar
    • 2 tbsp soy sauce
    • 1 tbsp sesame oil
    • 1 tbsp honey
    • 2 cloves garlic, minced
    • 1 tsp red pepper flakes
    • 1/2 tsp salt
    • 1/4 cup chopped cilantro
    • 1 tbsp toasted sesame seeds

    Equipment Needed

    • Large mixing bowl
    • Whisk
    • Measuring cups and spoons
    • Knife and cutting board

    Instructions

    Spicy Asian Cucumber Salad Recipe

    Step 1: Prepare the Cucumbers

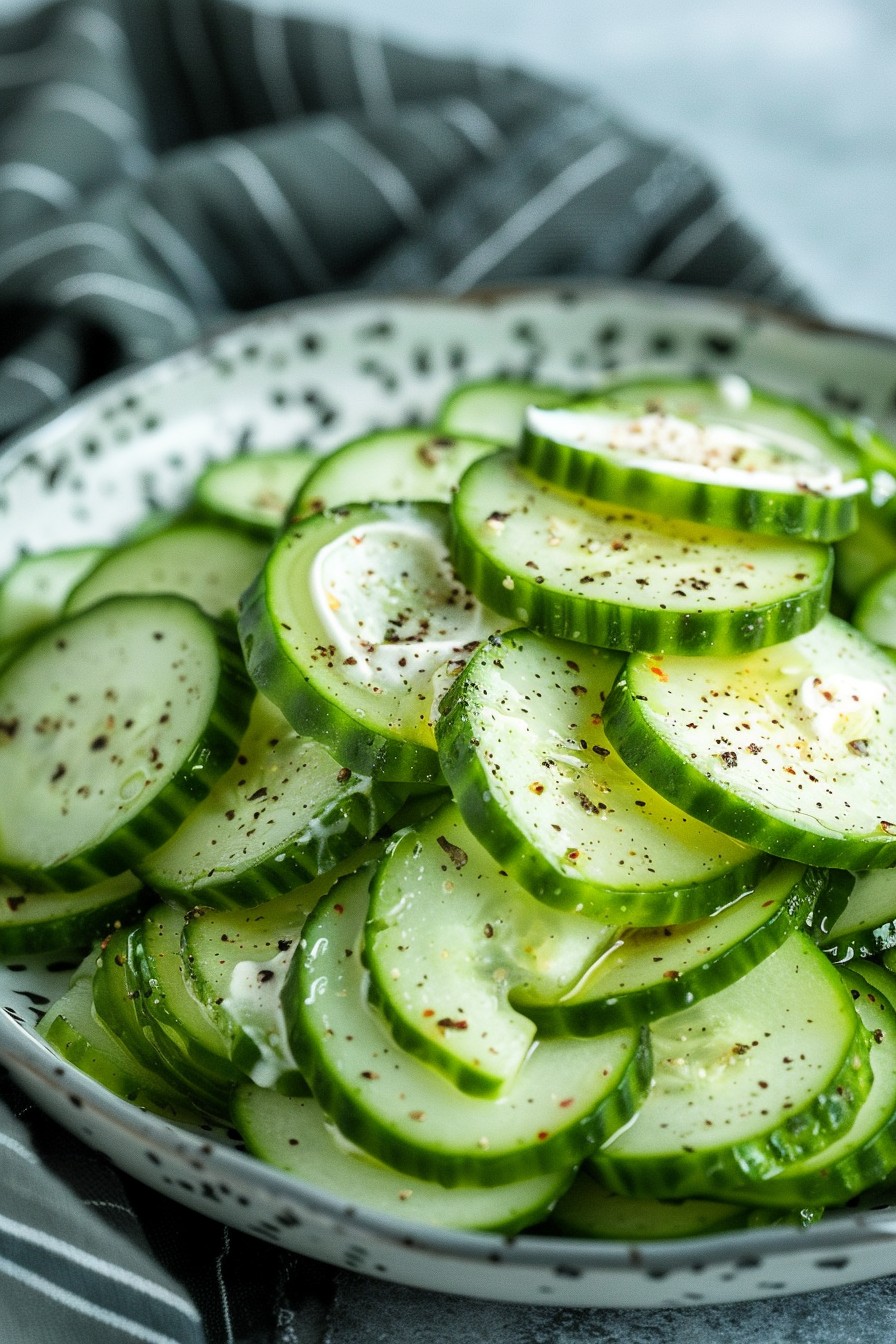
    Start by washing the cucumbers thoroughly under cold water. Thinly slice them into rounds, about 1/8 inch thick, for the perfect crunch. If you prefer, you can also half the slices for easier eating. Place the sliced cucumbers in a large mixing bowl and sprinkle with salt. Let them sit for about 10 minutes to draw out excess moisture, then drain and pat dry.

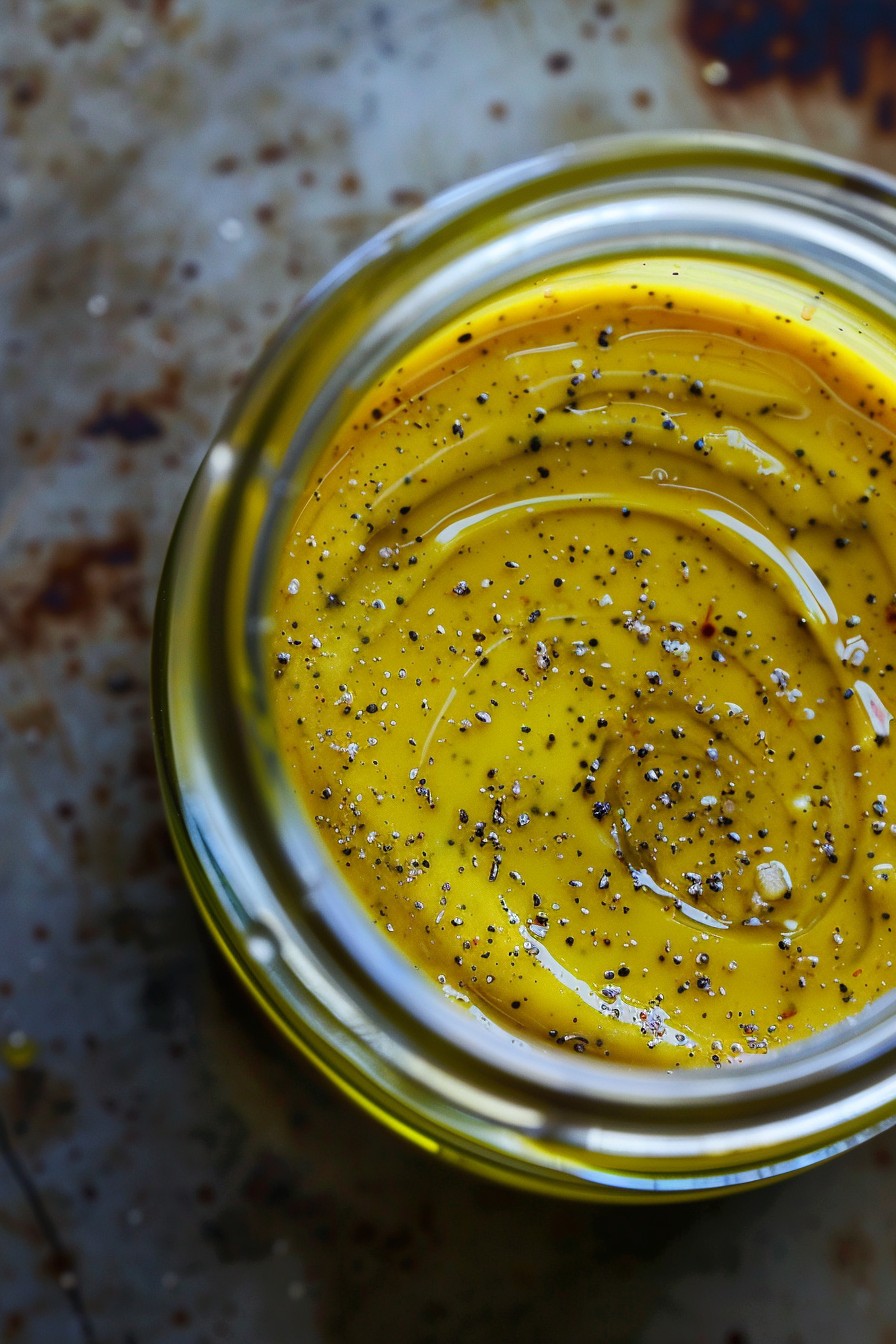
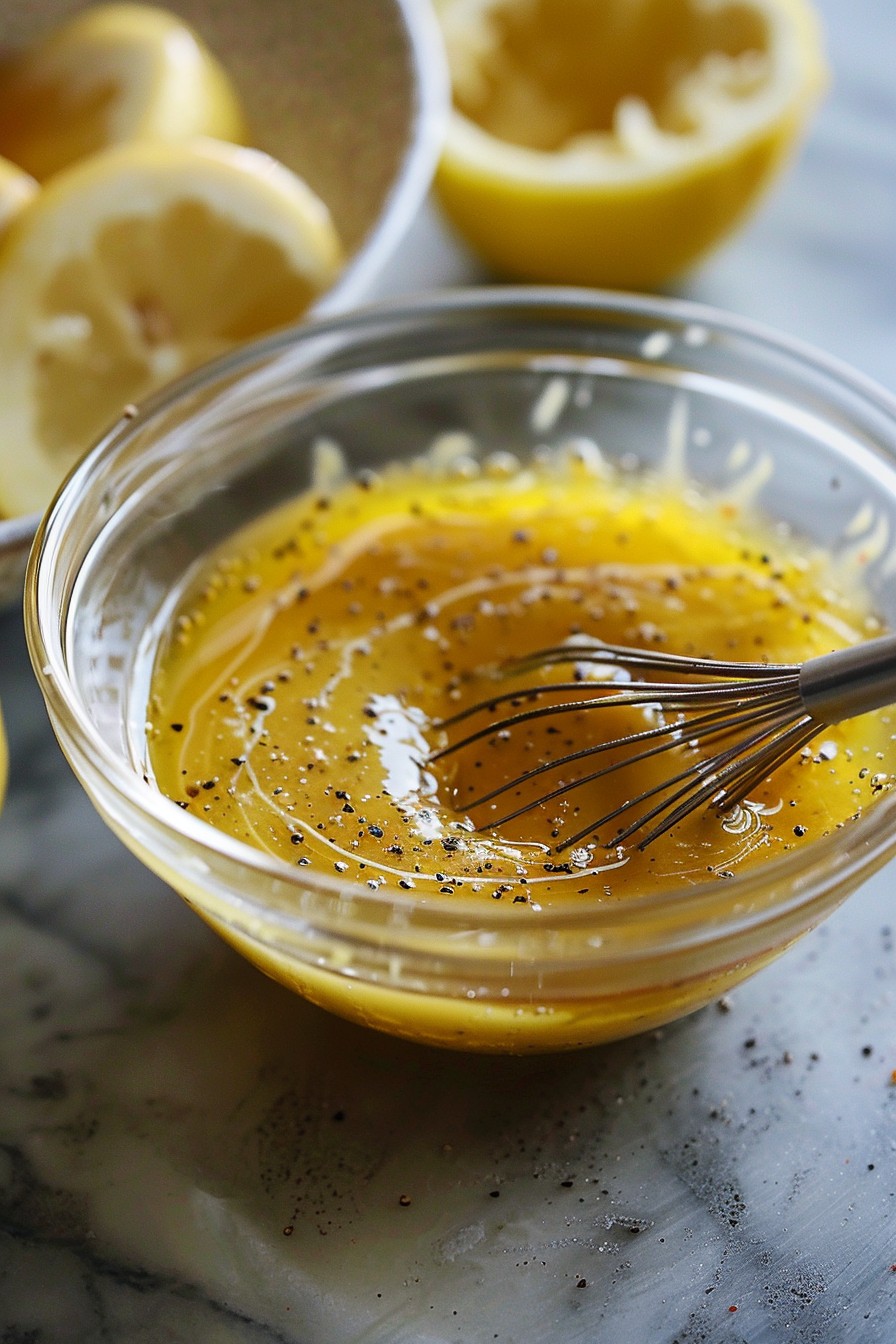
    Step 2: Make the Dressing

    In a small bowl, whisk together the rice vinegar, soy sauce, sesame oil, honey, minced garlic, and red pepper flakes until well combined. The honey should be fully dissolved into the mixture, creating a smooth, tangy, and slightly sweet dressing with a kick of heat.

    Step 3: Combine and Marinate

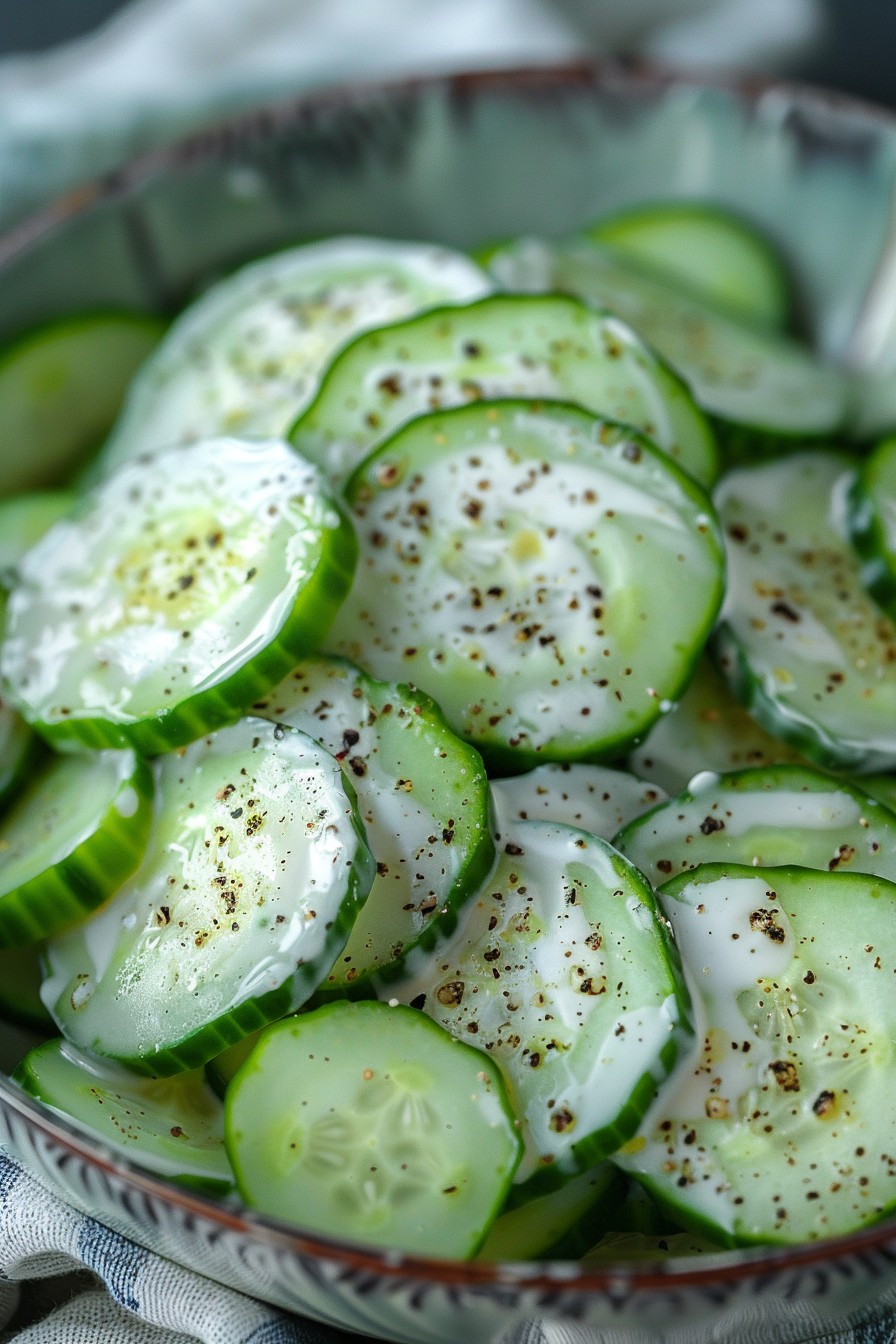
    Pour the dressing over the prepared cucumbers in the mixing bowl. Gently toss to ensure every slice is evenly coated with the dressing. Cover the bowl with plastic wrap and let it marinate in the refrigerator for at least 30 minutes. This allows the flavors to meld together and the cucumbers to soak up the delicious dressing.

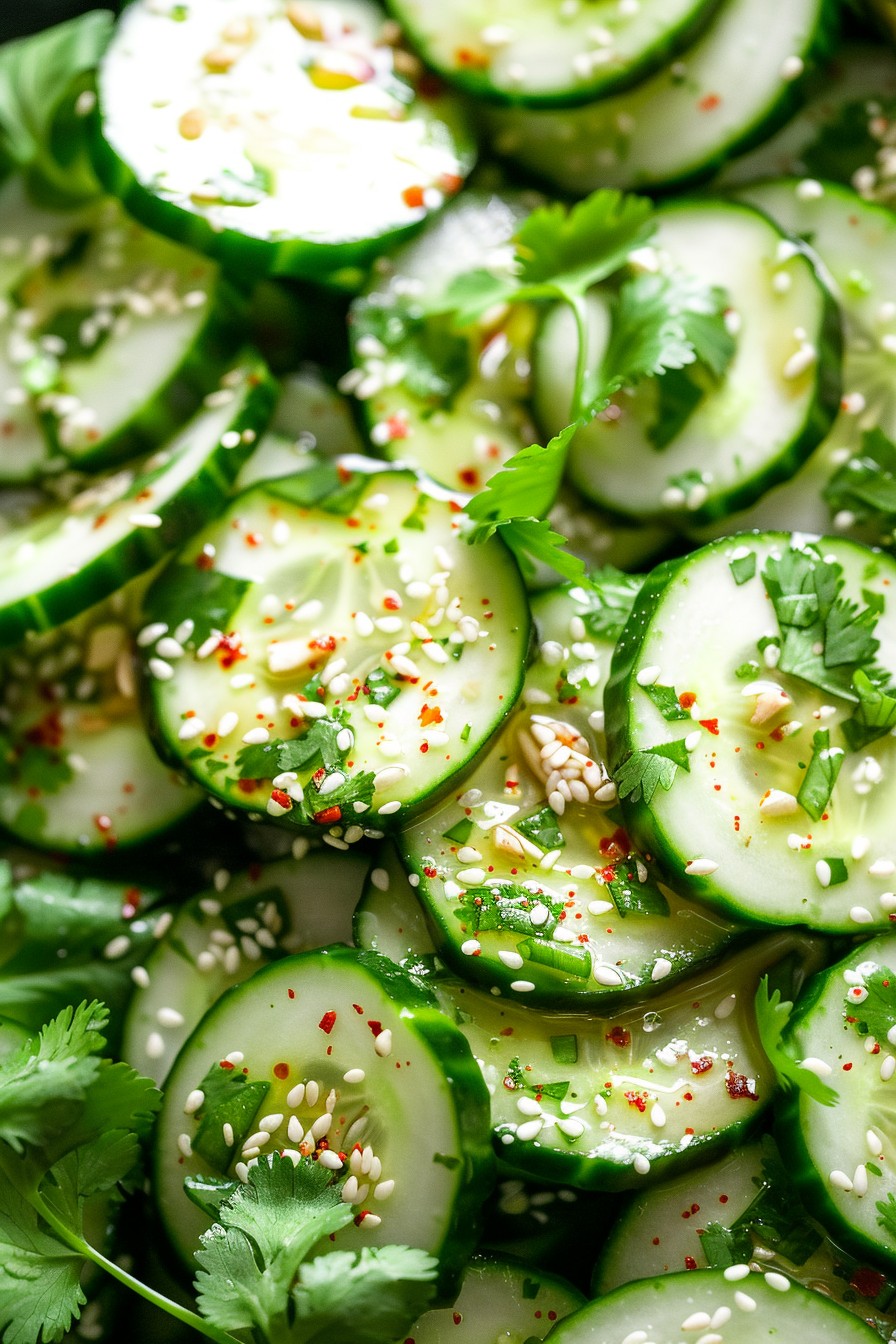
    Step 4: Garnish and Serve

    Before serving, give the salad a quick toss to redistribute the dressing. Sprinkle with chopped cilantro and toasted sesame seeds for an extra layer of flavor and a beautiful presentation. Serve chilled for the best taste experience.

    Tips and Tricks

    For an extra crunch, try using English cucumbers which have thinner skins and fewer seeds. If you’re sensitive to spice, adjust the amount of red pepper flakes to suit your taste. To make this salad ahead of time, prepare the cucumbers and dressing separately and combine them a few hours before serving to maintain the cucumbers’ crispness. For a more substantial meal, add some grilled chicken or shrimp on top. Lastly, always taste and adjust the seasoning before serving, as the flavors can vary based on the cucumbers’ sweetness and your personal preference.

    Recipe Variations

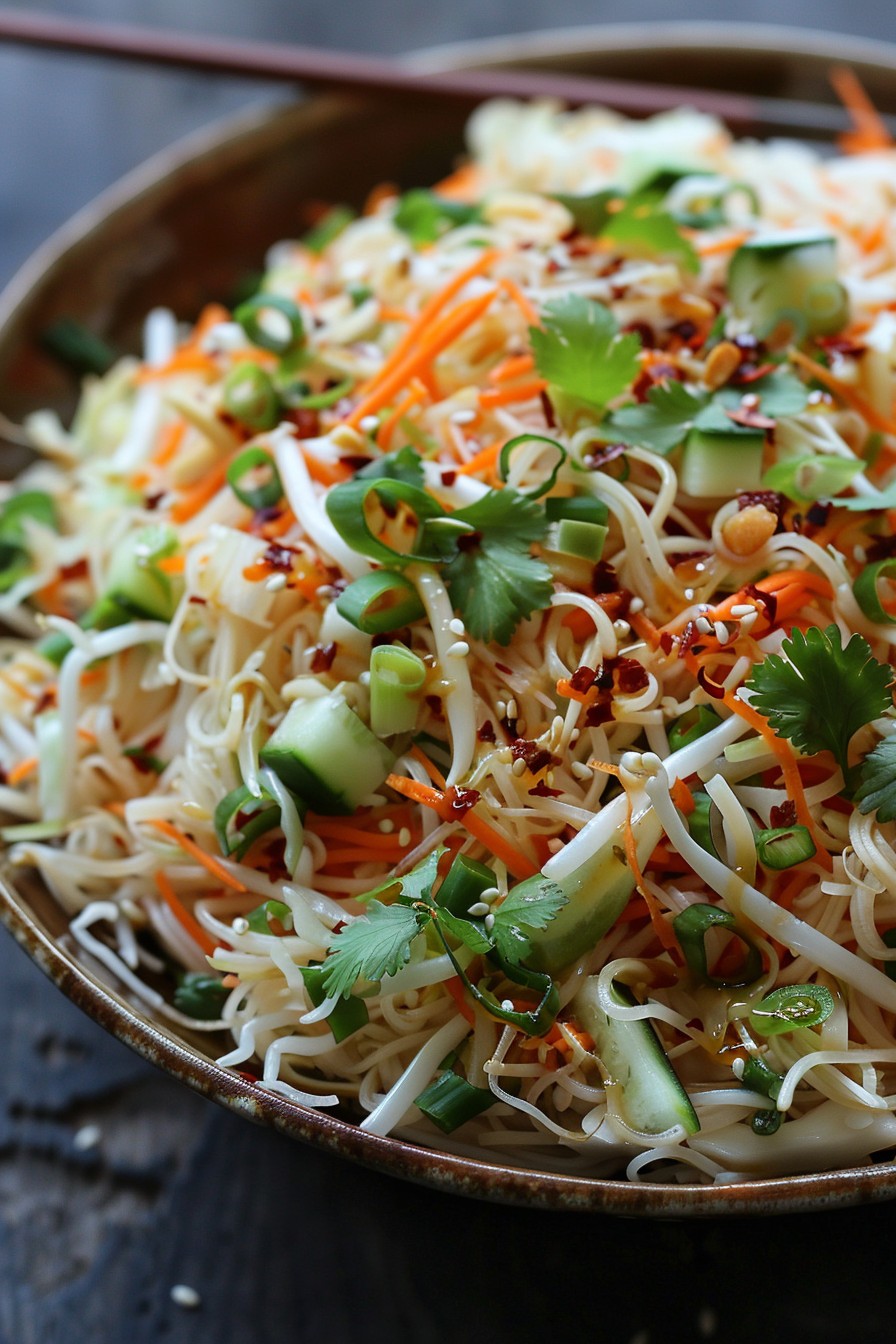
    • Add sliced radishes or carrots for additional crunch and color.
    • Swap the honey for maple syrup or agave for a vegan version.
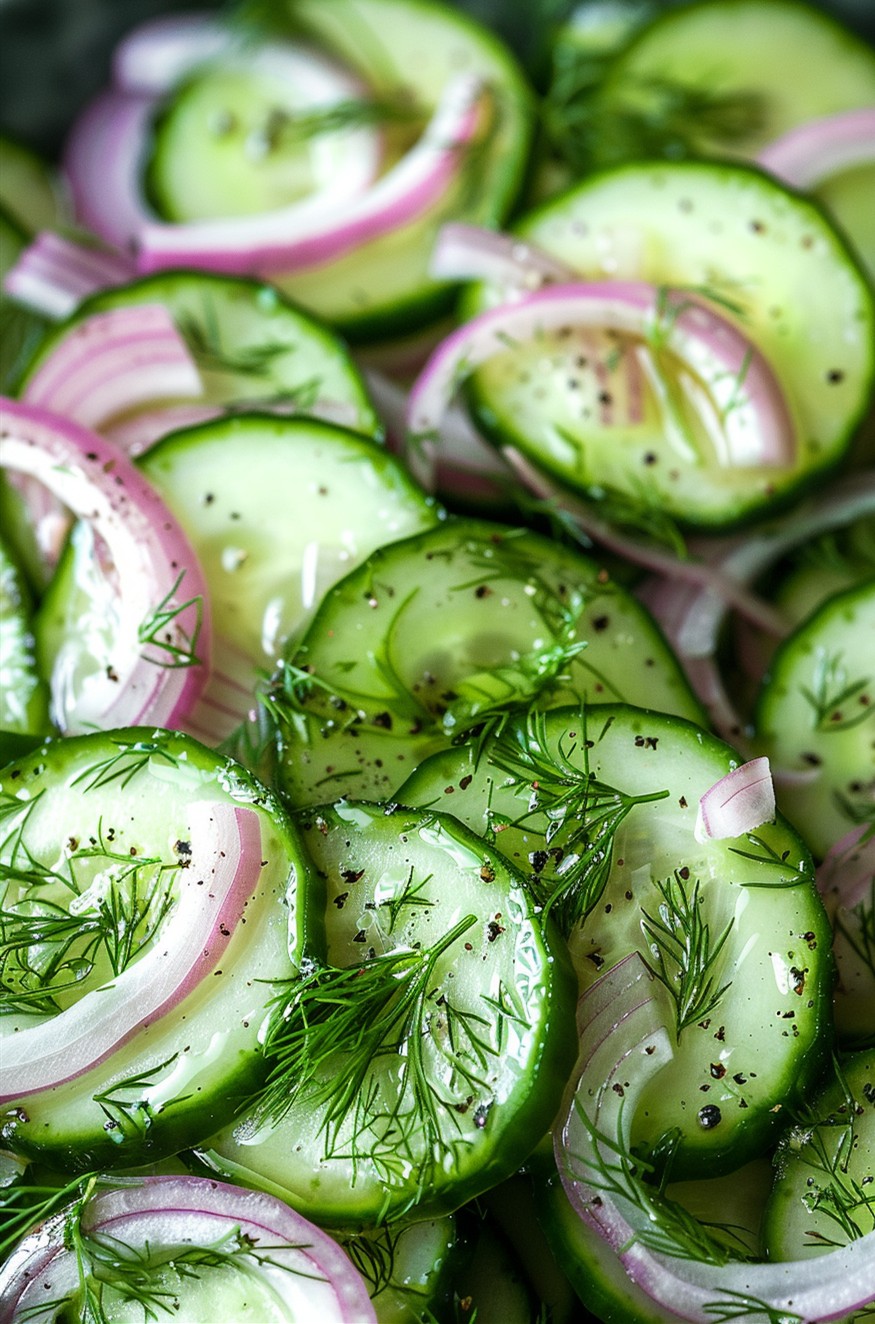
    • Include some thinly sliced red onion for a sharp contrast to the sweet and spicy flavors.
    • Top with crushed peanuts or cashews for extra texture and nuttiness.
    • Use lime juice instead of rice vinegar for a different tangy twist.

    Frequently Asked Questions

    Can I make this salad less spicy?

    Absolutely! The heat in this salad comes from the red pepper flakes, so simply reduce the amount or omit them entirely if you prefer a milder flavor. You can also add a bit more honey to balance out the spiciness.

    How long does this salad keep in the fridge?

    This salad is best enjoyed within 24 hours of making it, as the cucumbers will start to lose their crunch over time. However, it will still be tasty for up to 2 days if stored in an airtight container in the refrigerator.

    Can I use a different type of vinegar?

    Yes, while rice vinegar is recommended for its mild and slightly sweet flavor, you can substitute it with apple cider vinegar or white wine vinegar. Just keep in mind that the taste will be slightly different.

    Summary

    This Spicy Asian Cucumber Salad is a refreshing, flavorful dish that’s perfect for any occasion. With its perfect balance of crunch, tang, and heat, it’s sure to become a favorite. Plus, it’s easy to customize based on your preferences, making it a versatile recipe to have in your arsenal.

  • Tropical Fruit Salad Recipe: A Burst of Sunshine in Every Bite

    Tropical Fruit Salad Recipe: A Burst of Sunshine in Every Bite

    Summer’s here, and what better way to celebrate than with a bowl full of tropical goodness? This tropical fruit salad is not just a treat for your taste buds but also a feast for your eyes with its vibrant colors. Let’s dive into making this refreshing dish that’s perfect for any summer gathering.

    Why This Recipe Works

    • It’s a perfect blend of sweet and tangy flavors that dance on your palate.
    • The variety of textures from the different fruits makes every bite interesting.
    • It’s incredibly easy to make, requiring no cooking, just chopping and mixing.
    • This salad is not only delicious but also packed with vitamins and antioxidants.
    • It’s versatile and can be customized based on what fruits you have on hand.

    Ingredients

    • 2 cups diced pineapple
    • 2 cups diced mango
    • 1 cup sliced kiwi
    • 1 cup diced papaya
    • 1/2 cup pomegranate seeds
    • 2 tbsp honey
    • 1 tbsp lime juice
    • 1/4 cup chopped mint leaves

    Equipment Needed

    • Large mixing bowl
    • Sharp knife
    • Cutting board
    • Measuring cups and spoons

    Instructions

    Tropical Fruit Salad Recipe

    Step 1: Prepare the Fruits

    Start by washing all your fruits under cold running water. Peel and dice the pineapple, mango, and papaya into bite-sized pieces. Slice the kiwi into thin rounds. Gently remove the seeds from the pomegranate. Tip: Use a sharp knife for clean cuts and to preserve the fruit’s texture.

    Step 2: Mix the Dressing

    In a small bowl, whisk together the honey and lime juice until well combined. This simple dressing will enhance the natural sweetness of the fruits. Tip: Adjust the amount of honey based on the sweetness of your fruits.

    Step 3: Combine Fruits and Dressing

    Place all the prepared fruits in a large mixing bowl. Drizzle the honey-lime dressing over the fruits. Gently toss the salad to ensure all the fruits are evenly coated with the dressing. Tip: Be gentle to avoid bruising the softer fruits.

    Step 4: Add the Final Touches

    Sprinkle the chopped mint leaves over the salad for a fresh aroma and a pop of color. Let the salad sit for about 10 minutes before serving to allow the flavors to meld together.

    Step 5: Serve and Enjoy

    Transfer the tropical fruit salad to a serving dish or individual bowls. Serve immediately for the best taste and texture. This salad is perfect on its own or as a side dish with grilled meats.

    Tips and Tricks

    For an extra layer of flavor, consider adding a pinch of chili powder or Tajin seasoning to the dressing for a spicy kick. If you’re preparing the salad ahead of time, add the mint leaves just before serving to keep them fresh and vibrant. To make the salad more filling, you can add a scoop of vanilla yogurt or cottage cheese. Always choose ripe but firm fruits for the best texture in your salad. Lastly, if you’re not a fan of honey, agave syrup makes a great vegan alternative.

    Recipe Variations

    • Add some crunch with toasted coconut flakes or chopped nuts like almonds or cashews.
    • Incorporate other tropical fruits such as star fruit, dragon fruit, or lychee for an exotic twist.
    • For a creamy version, mix in some coconut milk or whipped cream.
    • Turn it into a dessert by serving the salad over a scoop of vanilla ice cream or sorbet.
    • Make it a savory salad by adding diced avocado and a sprinkle of sea salt.

    Frequently Asked Questions

    Can I make this salad ahead of time?

    Yes, you can prepare the salad a few hours in advance. However, it’s best to add the mint leaves and dressing just before serving to maintain the freshness and texture of the fruits.

    How long does the tropical fruit salad last in the fridge?

    Stored in an airtight container, the salad can last for up to 2 days in the refrigerator. Keep in mind that the fruits may release some juices over time, making the salad a bit soggy.

    Can I use frozen fruits instead of fresh?

    While fresh fruits are recommended for the best texture and flavor, you can use thawed frozen fruits in a pinch. Just make sure to drain any excess liquid to prevent the salad from becoming watery.

    Summary

    This tropical fruit salad is a vibrant, refreshing, and healthy dish that’s perfect for summer. With its mix of sweet and tangy flavors, it’s sure to be a hit at any gathering. Plus, it’s incredibly easy to customize based on your preferences or what fruits you have available.

  • Refreshing Fruit Salad with Mint: A Summer Delight

    Refreshing Fruit Salad with Mint: A Summer Delight

    Welcome to a burst of freshness that will make your taste buds dance! This fruit salad with mint is not just a dish; it’s a vibrant celebration of flavors that’s perfect for any summer gathering or a cozy night in.

    Why This Recipe Works

    • The combination of fresh fruits and mint creates a refreshing and light dessert or side dish that’s bursting with flavors.
    • It’s incredibly easy to make, requiring no cooking, just some chopping and mixing.
    • The mint adds a surprising twist that elevates the fruit salad from ordinary to extraordinary.
    • This recipe is versatile, allowing for substitutions based on seasonal availability or personal preference.
    • It’s a healthy option that doesn’t skimp on taste, making it perfect for those looking for a nutritious yet delicious treat.

    Ingredients

    • 2 cups of strawberries, hulled and quartered
    • 1 cup of blueberries
    • 1 cup of grapes, halved
    • 1 mango, peeled and diced
    • 1/4 cup of fresh mint leaves, finely chopped
    • 2 tablespoons of honey
    • 1 tablespoon of lime juice

    Equipment Needed

    • Large mixing bowl
    • Sharp knife
    • Cutting board
    • Measuring cups and spoons

    Instructions

    Fruit Salad Recipe Mint

    Prepare Your Fruits

    Start by washing all your fruits under cold running water. Pat them dry with a clean towel. Hull the strawberries and cut them into quarters. Halve the grapes, and dice the mango into bite-sized pieces. Place all the prepared fruits into a large mixing bowl.

    Chop the Mint

    Take the fresh mint leaves and finely chop them until you have about 1/4 cup. The finer the chop, the more evenly the mint flavor will distribute throughout the salad.

    Mix the Dressing

    In a small bowl, whisk together the honey and lime juice until well combined. This will be the dressing that brings all the flavors together, adding a sweet and tangy dimension to the salad.

    Combine Everything

    Add the chopped mint to the bowl of fruits. Drizzle the honey-lime dressing over the top. Gently toss the salad until all the fruits are evenly coated with the dressing and the mint is well distributed.

    Chill Before Serving

    Cover the bowl with plastic wrap and refrigerate for at least 30 minutes before serving. This chilling time allows the flavors to meld together beautifully.

    Tips and Tricks

    For the best flavor, use ripe, in-season fruits. The natural sweetness of the fruits will enhance the overall taste of the salad. If you’re not a fan of honey, you can substitute it with agave syrup or maple syrup for a different flavor profile. To make the salad ahead of time, prepare all the ingredients and store them separately in the fridge. Combine them with the dressing just before serving to keep the fruits fresh and crisp. For an extra refreshing twist, add a splash of orange juice to the dressing. Lastly, if you’re serving this salad at a party, consider serving it in individual cups for a cute and convenient presentation.

    Recipe Variations

    • Add a tropical twist by including pineapple chunks and coconut flakes.
    • For a citrusy version, add segments of oranges or grapefruits.
    • Include some crunch by adding chopped nuts like almonds or walnuts.
    • Make it a dessert by serving the salad with a scoop of vanilla ice cream or a dollop of whipped cream.
    • For a more savory version, add a pinch of salt and some diced cucumber.

    Frequently Asked Questions

    Can I make this fruit salad ahead of time?

    Yes, you can prepare the fruits and chop the mint ahead of time, but it’s best to add the dressing and combine everything just before serving to prevent the fruits from becoming too soggy. If you must prepare it ahead, keep the dressing separate and add it at the last minute.

    How long will the fruit salad last in the fridge?

    The fruit salad is best enjoyed the day it’s made, but it can last in the fridge for up to 2 days. Keep in mind that the fruits may release more juice over time, which can make the salad a bit watery.

    Can I use frozen fruits instead of fresh?

    While fresh fruits are recommended for the best texture and flavor, you can use frozen fruits in a pinch. Just make sure to thaw them completely and drain any excess liquid before adding them to the salad to avoid watering it down.

    Summary

    This refreshing fruit salad with mint is a simple, healthy, and delicious dish that’s perfect for summer. With its vibrant colors and fresh flavors, it’s sure to be a hit at any gathering or as a sweet treat at home.

  • Chilled Asian Salad Recipe: A Refreshing Twist on Classic Flavors

    Chilled Asian Salad Recipe: A Refreshing Twist on Classic Flavors

    Now, let’s dive into a dish that’s as refreshing as a cool breeze on a hot summer day. This Chilled Asian Salad is your go-to recipe for a light, flavorful, and utterly satisfying meal that packs a punch of flavors and textures. Perfect for those days when you crave something delicious without the heaviness.

    Why This Recipe Works

    • The combination of crisp vegetables and tender noodles offers a delightful contrast in textures.
    • A tangy, slightly sweet dressing brings all the components together harmoniously.
    • It’s incredibly versatile, allowing for endless variations based on what you have on hand.
    • Prep ahead friendly, making it perfect for meal prep or last-minute gatherings.
    • Light yet satisfying, it’s a guilt-free option that doesn’t skimp on flavor.

    Ingredients

    • 8 oz rice noodles, cooked and chilled
    • 2 cups shredded cabbage
    • 1 cup shredded carrots
    • 1/2 cup thinly sliced cucumber
    • 1/4 cup chopped green onions
    • 1/4 cup chopped cilantro
    • 1/4 cup soy sauce
    • 2 tbsp rice vinegar
    • 1 tbsp sesame oil
    • 1 tbsp honey
    • 1 tsp grated ginger
    • 1 clove garlic, minced
    • 1/2 tsp red pepper flakes

    Equipment Needed

    • Large mixing bowl
    • Whisk
    • Measuring cups and spoons
    • Chef’s knife
    • Cutting board

    Instructions

    Cold Asian Salad Recipe

    Step 1: Prepare the Noodles

    Start by cooking the rice noodles according to the package instructions. Once cooked, rinse them under cold water to stop the cooking process and chill them in the refrigerator for about 15 minutes. This step ensures your noodles are perfectly tender yet firm to the bite, providing the ideal base for your salad.

    Step 2: Chop the Vegetables

    While the noodles are chilling, take the time to shred the cabbage and carrots, and slice the cucumber thinly. Chopping the green onions and cilantro now will save you time later. Uniform cuts not only make the salad more visually appealing but also ensure every bite is balanced.

    Step 3: Make the Dressing

    In a small bowl, whisk together the soy sauce, rice vinegar, sesame oil, honey, grated ginger, minced garlic, and red pepper flakes. The key to a great dressing is balance, so taste as you go and adjust the ingredients to suit your preference. A little more honey for sweetness or vinegar for tanginess can make all the difference.

    Step 4: Combine Everything

    In a large mixing bowl, combine the chilled noodles, shredded cabbage, carrots, sliced cucumber, green onions, and cilantro. Pour the dressing over the salad and toss gently to ensure everything is evenly coated. The salad is best served immediately, but letting it sit for a few minutes allows the flavors to meld beautifully.

    Step 5: Serve and Enjoy

    Divide the salad among serving bowls and garnish with additional cilantro or green onions if desired. This salad is a complete meal on its own but pairs wonderfully with grilled chicken or shrimp for added protein. Enjoy the burst of flavors and textures in every bite!

    Tips and Tricks

    For an extra crunch, consider adding some toasted sesame seeds or crushed peanuts on top. If you’re not a fan of spicy food, you can omit the red pepper flakes or adjust the amount to suit your taste. To make this salad ahead of time, prepare the components separately and combine them just before serving to maintain the best texture. Experiment with different vegetables like bell peppers or snap peas for added color and crunch. Lastly, if you find the dressing too thick, a splash of water can thin it out to your desired consistency.

    Recipe Variations

    • Protein Power: Add grilled chicken, shrimp, or tofu to turn this salad into a hearty main dish.
    • Veggie Delight: Incorporate additional vegetables like bell peppers, snap peas, or avocado for extra nutrients and flavors.
    • Noodle Swap: Substitute rice noodles with soba noodles or even spaghetti for a different texture.
    • Dressing Twist: Experiment with adding peanut butter or hoisin sauce to the dressing for a richer flavor profile.
    • Herb Heaven: Mix in fresh mint or basil for an aromatic twist that elevates the salad.

    Frequently Asked Questions

    Can I make this salad ahead of time?

    Absolutely! You can prepare the noodles, chop the vegetables, and make the dressing a day in advance. Just keep them separate and combine everything when you’re ready to serve to ensure the salad stays fresh and crisp.

    Is there a gluten-free option for this recipe?

    Yes, simply use gluten-free soy sauce or tamari in place of regular soy sauce to make this dish gluten-free. Also, ensure that your rice noodles are certified gluten-free if you’re sensitive to gluten.

    How can I add more protein to this salad?

    Grilled chicken, shrimp, tofu, or even edamame are great protein additions that complement the flavors of this salad beautifully. Just cook your protein of choice separately and add it to the salad when serving.

    Summary

    This Chilled Asian Salad is a vibrant, flavorful dish that’s perfect for any occasion. With its crisp vegetables, tender noodles, and tangy dressing, it’s a refreshing meal that’s both satisfying and light. Plus, it’s incredibly versatile, allowing you to customize it to your liking. Give it a try and enjoy a burst of Asian flavors in every bite!

  • Cucumber Salad Recipe with Mayo, Vinegar, and Sugar: A Crunchy Delight

    Cucumber Salad Recipe with Mayo, Vinegar, and Sugar: A Crunchy Delight

    Just when you thought cucumber salad couldn’t get any better, this recipe comes along to prove you wrong. Combining the crispness of cucumbers with the creamy tang of mayo and the sweet sharpness of vinegar and sugar, this dish is a summer picnic staple that’s sure to impress.

    Why This Recipe Works

    • The combination of mayo, vinegar, and sugar creates a perfectly balanced dressing that’s both creamy and tangy.
    • Using fresh cucumbers ensures a crisp texture that’s refreshing in every bite.
    • This recipe is incredibly versatile, allowing for numerous variations to suit any taste.
    • It’s quick and easy to prepare, making it perfect for last-minute gatherings.
    • The salad gets better as it marinates, making it a great make-ahead dish.

    Ingredients

    • 2 large cucumbers, thinly sliced
    • 1/2 cup mayonnaise
    • 2 tablespoons white vinegar
    • 1 tablespoon sugar
    • 1/4 teaspoon salt
    • 1/4 teaspoon black pepper

    Equipment Needed

    • Mixing bowl
    • Whisk
    • Measuring cups and spoons
    • Knife and cutting board

    Instructions

    Cucumber Salad Recipe Mayo Vinegar Sugar

    Prepare the Cucumbers

    Start by washing the cucumbers thoroughly under cold water. Slice them thinly using a sharp knife or a mandoline for uniform thickness. This ensures every bite is as crisp and refreshing as the last. Tip: For an extra crunch, leave the skins on.

    Make the Dressing

    In a mixing bowl, whisk together the mayonnaise, white vinegar, and sugar until the sugar is completely dissolved. The dressing should be smooth and slightly thick. Taste and adjust the sweetness or tanginess by adding more sugar or vinegar if needed.

    Combine and Marinate

    Add the sliced cucumbers to the bowl with the dressing. Gently toss to ensure each slice is evenly coated. Cover the bowl and refrigerate for at least 30 minutes to allow the flavors to meld. Tip: The longer it marinates, the more flavorful it becomes.

    Season to Taste

    Before serving, give the salad a quick stir and season with salt and black pepper to taste. The salt will enhance the flavors, while the pepper adds a subtle heat.

    Serve and Enjoy

    Transfer the salad to a serving dish and enjoy immediately. This dish pairs wonderfully with grilled meats or can stand alone as a light, refreshing side. Tip: Garnish with fresh dill or parsley for an extra pop of color and flavor.

    Tips and Tricks

    For those looking to elevate their cucumber salad, consider these advanced tips. First, using a mix of different vinegars, such as apple cider or rice vinegar, can add depth to the dressing. Second, adding thinly sliced onions or radishes can introduce new textures and flavors. Third, for a healthier version, substitute Greek yogurt for half of the mayonnaise. Lastly, letting the salad sit overnight in the fridge intensifies the flavors, making it even more delicious the next day.

    Recipe Variations

    • Add diced avocados for a creamy texture and rich flavor.
    • Incorporate chopped fresh herbs like dill, parsley, or cilantro for a herby twist.
    • Mix in some crumbled feta or blue cheese for a tangy, salty kick.
    • For a spicy version, add a pinch of red pepper flakes or diced jalapeños.
    • Swap the mayo for sour cream or Greek yogurt for a lighter dressing.

    Frequently Asked Questions

    Can I make this salad ahead of time? Absolutely! This salad actually tastes better after it’s had time to marinate in the fridge. Just give it a good stir before serving to redistribute the dressing.

    How long will this salad keep in the refrigerator? Stored in an airtight container, this cucumber salad will stay fresh for up to 3 days. However, it’s best enjoyed within the first 24 hours for optimal texture.

    Can I use English cucumbers instead of regular cucumbers? Yes, English cucumbers are a great choice for this recipe. They have thinner skins and fewer seeds, making them extra crisp and refreshing.

    Summary

    This cucumber salad with mayo, vinegar, and sugar is a simple yet delicious dish that’s perfect for any occasion. With its crisp texture and balanced flavors, it’s sure to be a hit. Plus, it’s easy to customize with your favorite add-ins.

  • Creamy Tuna Salad Without Celery: A Crunch-Free Delight

    Creamy Tuna Salad Without Celery: A Crunch-Free Delight

    Perfect for those who love their tuna salad smooth and creamy without the crunch of celery. This recipe is a game-changer for celery haters and lovers of rich, flavorful tuna salad alike. Packed with flavor and easy to make, it’s your new go-to lunch recipe.

    Why This Recipe Works

    • Uses creamy avocado for a healthy fat boost and smooth texture.
    • Dijon mustard adds a tangy depth that elevates the tuna.
    • Quick and easy to prepare, perfect for meal prep or a speedy lunch.
    • No celery means no unwanted crunch, just smooth, creamy goodness.

    Ingredients

    • 2 cans (5 oz each) tuna in water, drained
    • 1 ripe avocado, mashed
    • 2 tbsp mayonnaise
    • 1 tbsp Dijon mustard
    • 1/4 cup red onion, finely diced
    • 1 tbsp lemon juice
    • Salt and pepper to taste

    Equipment Needed

    • Mixing bowl
    • Fork or potato masher
    • Measuring spoons
    • Knife and cutting board

    Instructions

    Tuna Salad Recipe Without Celery

    Step 1: Prepare Your Ingredients

    Start by draining the tuna well to avoid a watery salad. Mash the avocado in a mixing bowl until smooth. Finely dice the red onion to ensure it distributes evenly throughout the salad without overpowering any bite.

    Step 2: Combine the Wet Ingredients

    Add the mayonnaise, Dijon mustard, and lemon juice to the mashed avocado. Mix until the ingredients are fully incorporated. This combination will give your tuna salad a creamy base with a tangy kick.

    Step 3: Add the Tuna and Onion

    Flake the drained tuna into the bowl with the avocado mixture. Add the diced red onion. Gently fold everything together to keep the tuna from becoming too mushy. Season with salt and pepper to taste.

    Step 4: Let It Chill

    For the best flavor, cover the bowl and refrigerate the tuna salad for at least 30 minutes. This allows the flavors to meld together beautifully.

    Step 5: Serve and Enjoy

    Once chilled, give the salad a quick stir and serve on your favorite bread, crackers, or over a bed of greens. Enjoy the creamy, crunchy-free delight!

    Tips and Tricks

    For an even creamier texture, you can add an extra tablespoon of mayonnaise. If you’re not a fan of red onion, try substituting with green onions for a milder flavor. To add a bit of texture without celery, consider tossing in some chopped pickles or capers. Always taste and adjust the seasoning after chilling, as flavors can mellow out in the fridge.

    Recipe Variations

    • Spicy Tuna Salad: Add a dash of hot sauce or some diced jalapeños for heat.
    • Herbed Tuna Salad: Mix in fresh dill, parsley, or chives for a herby twist.
    • Protein-Packed: Stir in some hard-boiled eggs for extra protein.
    • Avocado-Free: Substitute the avocado with Greek yogurt for a different kind of creaminess.

    Frequently Asked Questions

    Can I make this tuna salad ahead of time? Absolutely! This tuna salad can be made up to 2 days in advance. Just keep it covered in the refrigerator until you’re ready to serve.

    What can I use instead of avocado? If you’re not a fan of avocado, Greek yogurt or extra mayonnaise can be used as substitutes to achieve a creamy texture.

    How can I add crunch without celery? Try adding diced cucumbers, apples, or even nuts like almonds or walnuts for a crunchy texture without the celery.

    Summary

    This creamy tuna salad without celery is perfect for those who prefer their salads smooth and rich. Easy to make and versatile, it’s a delicious option for lunches or quick meals. With the option to customize, it’s sure to become a favorite.

  • Mozzarella Magic: The Ultimate Pasta Salad Recipe

    Mozzarella Magic: The Ultimate Pasta Salad Recipe

    Delight your taste buds with this refreshing pasta salad that’s perfect for any occasion. Packed with juicy mozzarella balls and a medley of fresh ingredients, it’s a crowd-pleaser that’s as easy to make as it is delicious.

    Why This Recipe Works

    • The combination of al dente pasta and creamy mozzarella balls creates a perfect texture contrast.
    • A homemade dressing brings all the flavors together without overpowering the fresh ingredients.
    • It’s versatile enough to serve as a main dish or a side, making it a great addition to any meal plan.

    Ingredients

    • 1 lb pasta (your choice, but fusilli works great)
    • 1 cup mozzarella balls, drained
    • 1 cup cherry tomatoes, halved
    • 1/2 cup black olives, sliced
    • 1/4 cup red onion, finely diced
    • 1/4 cup fresh basil, chopped
    • 1/4 cup olive oil
    • 2 tbsp balsamic vinegar
    • 1 tsp salt
    • 1/2 tsp black pepper

    Equipment Needed

    • Large pot
    • Colander
    • Large mixing bowl
    • Whisk
    • Measuring cups and spoons

    Instructions

    Pasta Salad Recipe With Mozzarella Balls

    Step 1: Cook the Pasta

    Bring a large pot of salted water to a rolling boil. Add the pasta and cook according to the package instructions until al dente, usually about 8-10 minutes. Drain the pasta in a colander and rinse under cold water to stop the cooking process. Tip: Adding a splash of olive oil to the boiling water can prevent the pasta from sticking together.

    Step 2: Prepare the Dressing

    In a large mixing bowl, whisk together the olive oil, balsamic vinegar, salt, and pepper until well combined. This simple dressing will coat the pasta and ingredients evenly, ensuring every bite is flavorful.

    Step 3: Combine the Ingredients

    Add the cooled pasta, mozzarella balls, cherry tomatoes, black olives, red onion, and fresh basil to the bowl with the dressing. Gently toss everything together until all the ingredients are evenly coated with the dressing. Tip: For the best flavor, let the salad chill in the refrigerator for at least an hour before serving.

    Step 4: Serve and Enjoy

    Once chilled, give the pasta salad a quick stir and adjust the seasoning if necessary. Serve cold and enjoy the burst of flavors and textures in every bite.

    Tips and Tricks

    For an extra layer of flavor, consider roasting the cherry tomatoes before adding them to the salad. This concentrates their sweetness and adds a slight smokiness. If you’re short on time, store-bought balsamic vinaigrette can be a quick substitute for the homemade dressing. Always taste and adjust the seasoning after the salad has chilled, as flavors can mellow out in the fridge.

    Recipe Variations

    • Add grilled chicken or shrimp for a protein-packed main dish.
    • Swap out the mozzarella balls for feta cheese for a tangier flavor profile.
    • Incorporate different vegetables like cucumbers or bell peppers for added crunch.
    • Use whole wheat or gluten-free pasta to cater to dietary needs.
    • Experiment with different herbs like parsley or oregano for a new twist.

    Frequently Asked Questions

    Can I make this pasta salad ahead of time?

    Absolutely! This pasta salad actually tastes better after it’s had time to chill and the flavors have melded together. Just be sure to give it a good stir before serving to redistribute the dressing.

    How long will the pasta salad last in the fridge?

    Stored in an airtight container, the pasta salad will keep for up to 3 days in the refrigerator. The mozzarella balls may start to lose their texture after that, so it’s best enjoyed within the first couple of days.

    Can I use a different type of cheese?

    Yes, you can substitute the mozzarella balls with any cheese you prefer. Just keep in mind that softer cheeses may not hold up as well in the salad, especially if you’re making it ahead of time.

    Summary

    This mozzarella pasta salad is a versatile, flavorful dish that’s perfect for picnics, potlucks, or a quick weeknight dinner. With its simple ingredients and easy preparation, it’s sure to become a staple in your recipe collection.

  • Beet Salad Recipe Vegan: A Colorful Feast for Your Senses

    Beet Salad Recipe Vegan: A Colorful Feast for Your Senses

    Spring into the vibrant world of vegan cooking with this beet salad that’s as nutritious as it is colorful. Simple ingredients come together to create a dish that’s bursting with flavor, texture, and visual appeal. Perfect for any season, this salad will make your taste buds dance with joy.

    Why This Recipe Works

    • Nutrient-packed: Beets are loaded with vitamins, minerals, and antioxidants, making this salad a health powerhouse.
    • Easy to make: With minimal prep and cook time, this recipe is perfect for busy weeknights or last-minute gatherings.
    • Versatile: Easily customizable with your favorite add-ins or dressings to suit any palate.
    • Beautiful presentation: The deep reds and purples of the beets make this dish a feast for the eyes as well as the stomach.

    Ingredients

    • 3 medium beets, peeled and diced into 1/2-inch cubes
    • 2 tbsp olive oil
    • 1 tbsp balsamic vinegar
    • 1/2 tsp salt
    • 1/4 tsp black pepper
    • 1/4 cup chopped walnuts
    • 2 cups mixed greens
    • 1/4 cup vegan feta cheese, crumbled

    Equipment Needed

    • Baking sheet
    • Mixing bowl
    • Chef’s knife
    • Cutting board

    Instructions

    Beet Salad Recipe Vegan

    Preheat and Prep

    Start by preheating your oven to 400°F. While the oven heats, peel and dice your beets into uniform 1/2-inch cubes to ensure even cooking. Toss the beets with olive oil, balsamic vinegar, salt, and pepper in a mixing bowl until evenly coated.

    Roast to Perfection

    Spread the beet cubes in a single layer on a baking sheet. Roast in the preheated oven for 25-30 minutes, stirring halfway through, until the beets are tender and slightly caramelized. This roasting process enhances their natural sweetness.

    Toast the Walnuts

    While the beets roast, toast the chopped walnuts in a dry skillet over medium heat for 3-5 minutes, stirring frequently, until they’re fragrant and lightly browned. This adds a delightful crunch and nutty flavor to the salad.

    Assemble the Salad

    Once the beets are roasted and slightly cooled, arrange the mixed greens on a serving platter. Top with the roasted beets, toasted walnuts, and crumbled vegan feta cheese. The combination of textures and flavors here is unbeatable.

    Serve and Enjoy

    Drizzle with a little more olive oil and balsamic vinegar if desired, and serve immediately. This salad is best enjoyed fresh, but leftovers can be stored in the fridge for up to two days.

    Tips and Tricks

    For an extra flavor boost, consider adding a sprinkle of fresh herbs like dill or parsley before serving. If you’re short on time, you can use pre-cooked beets, though roasting fresh beets will give you the best flavor. To make this salad even more filling, add a scoop of quinoa or chickpeas. Remember, the key to a great salad is balancing flavors and textures, so don’t be afraid to experiment with different ingredients.

    Recipe Variations

    • Add some fruit: Sliced oranges or apples can add a sweet contrast to the earthy beets.
    • Switch up the nuts: Try using pecans or almonds instead of walnuts for a different crunch.
    • Go creamy: A dollop of vegan yogurt or avocado can add a creamy texture to the salad.
    • Spice it up: A pinch of chili flakes or cumin can add a warm, spicy note to the dish.

    Frequently Asked Questions

    Can I make this salad ahead of time?

    Yes, you can roast the beets and toast the walnuts ahead of time, but for the best texture, assemble the salad just before serving. The greens can wilt if dressed too early, and the nuts can lose their crunch if stored with moisture.

    What can I use instead of vegan feta?

    If you’re not a fan of vegan feta, you can omit it or substitute with another vegan cheese like mozzarella or even a sprinkle of nutritional yeast for a cheesy flavor without the cheese.

    How do I store leftovers?

    Store any leftovers in an airtight container in the refrigerator for up to two days. Keep in mind that the greens may wilt, so it’s best to enjoy the salad fresh.

    Summary

    This vegan beet salad is a simple, nutritious, and delicious dish that’s perfect for any occasion. With its vibrant colors and rich flavors, it’s sure to impress. Whether you’re a seasoned vegan or just looking to incorporate more plant-based meals into your diet, this salad is a must-try.

  • Green Lentil Salad Recipe: A Fresh Twist on a Classic

    Green Lentil Salad Recipe: A Fresh Twist on a Classic

    How about we shake up your salad game with this vibrant green lentil salad? Packed with nutrients and bursting with flavors, it’s the perfect dish to brighten up your meal prep. Let’s dive into making this easy, wholesome, and downright delicious salad.

    Why This Recipe Works

    • Green lentils are a fantastic source of protein and fiber, making this salad both filling and nutritious.
    • The combination of fresh herbs and a zesty lemon dressing brings a refreshing taste that’s hard to resist.
    • It’s incredibly versatile; serve it as a main, a side, or even as a topping for toast.
    • Prep is a breeze, and the salad keeps well, making it perfect for meal prep.
    • Every bite offers a delightful mix of textures, from the tender lentils to the crisp vegetables.

    Ingredients

    • 1 cup green lentils, rinsed and drained
    • 2 cups water
    • 1/2 cup diced cucumber
    • 1/2 cup cherry tomatoes, halved
    • 1/4 cup red onion, finely diced
    • 1/4 cup fresh parsley, chopped
    • 2 tbsp olive oil
    • 1 tbsp lemon juice
    • 1 tsp salt
    • 1/2 tsp black pepper

    Equipment Needed

    • Medium saucepan
    • Mixing bowl
    • Knife and cutting board
    • Measuring cups and spoons

    Instructions

    Green Lentil Salad Recipe

    Step 1: Cook the Lentils

    In a medium saucepan, combine the green lentils and water. Bring to a boil over high heat, then reduce the heat to low and simmer for about 20 minutes, or until the lentils are tender but still hold their shape. Drain any excess water and let them cool slightly.

    Step 2: Prepare the Vegetables

    While the lentils are cooking, dice the cucumber, halve the cherry tomatoes, finely dice the red onion, and chop the fresh parsley. This is your chance to get all your veggies ready for the big mix.

    Step 3: Make the Dressing

    In a small bowl, whisk together the olive oil, lemon juice, salt, and black pepper. This simple dressing will bring all the flavors of your salad together beautifully.

    Step 4: Combine Everything

    In a large mixing bowl, combine the cooked lentils, prepared vegetables, and dressing. Gently toss everything together until well mixed. Taste and adjust the seasoning if necessary.

    Step 5: Serve or Store

    You can serve the salad immediately for a warm dish, or refrigerate it for an hour to let the flavors meld together for a cooler option. Either way, it’s delicious.

    Tips and Tricks

    For an extra flavor boost, consider adding a pinch of cumin or smoked paprika to the dressing. If you’re not a fan of raw onion, you can soak the diced onion in cold water for 10 minutes to mellow its bite. Lastly, for added texture, sprinkle some toasted nuts or seeds on top before serving.

    Recipe Variations

    • Add feta cheese or goat cheese for a creamy twist.
    • Include avocado slices for extra richness and healthy fats.
    • Swap the lemon juice for balsamic vinegar for a different flavor profile.
    • Mix in some quinoa or bulgur for an even heartier salad.
    • For a spicy kick, add diced jalapeños or a dash of chili flakes.

    Frequently Asked Questions

    Can I use canned lentils instead of dried?

    Absolutely! If you’re short on time, canned lentils are a great shortcut. Just be sure to rinse them well under cold water to remove any excess sodium or canning liquid before using them in the salad.

    How long does this salad keep in the fridge?

    This green lentil salad will stay fresh in the refrigerator for up to 3 days when stored in an airtight container. The flavors actually improve over time, making it a great make-ahead option.

    Can I make this salad vegan?

    This recipe is naturally vegan as written, making it a great option for those following a plant-based diet. Just be sure to check all your ingredients to ensure they meet your dietary needs.

    Summary

    This green lentil salad is a nutritious, flavorful, and versatile dish that’s perfect for any occasion. Easy to make and packed with wholesome ingredients, it’s sure to become a staple in your recipe collection.

  • Zesty Low Salt Salad Dressing Recipe: A Flavorful Twist Without the Sodium Overload

    Zesty Low Salt Salad Dressing Recipe: A Flavorful Twist Without the Sodium Overload

    Back in the kitchen with a game-changer for your salads! This low salt dressing packs all the flavor without the guilt, perfect for those watching their sodium intake but refusing to compromise on taste.

    Why This Recipe Works

    • Uses fresh citrus juice and zest for a natural flavor boost, reducing the need for salt.
    • Incorporates heart-healthy olive oil as the base, offering a smooth texture and rich taste.
    • Balances acidity and sweetness perfectly, making every bite of your salad a delight.

    Ingredients

    • 1/2 cup extra virgin olive oil
    • 1/4 cup fresh lemon juice
    • 1 tablespoon honey
    • 1 teaspoon Dijon mustard
    • 1 garlic clove, minced
    • 1/2 teaspoon black pepper

    Equipment Needed

    • Medium mixing bowl
    • Whisk
    • Measuring cups and spoons
    • Garlic press (optional)

    Instructions

    Low Salt Salad Dressing Recipe

    Step 1: Combine the Wet Ingredients

    In your medium mixing bowl, whisk together the fresh lemon juice and honey until the honey is fully dissolved. This creates a sweet and tangy base for your dressing. Tip: For an extra zing, add a teaspoon of lemon zest.

    Step 2: Add the Olive Oil

    Slowly drizzle in the olive oil while continuously whisking to emulsify the dressing. This ensures a smooth, cohesive texture. The goal is a slightly thickened mixture that coats the back of a spoon.

    Step 3: Incorporate the Flavor Boosters

    Add the Dijon mustard, minced garlic, and black pepper to the bowl. Whisk vigorously to distribute the flavors evenly throughout the dressing. Tip: Let the dressing sit for 10 minutes before serving to allow the flavors to meld.

    Step 4: Taste and Adjust

    Give your dressing a quick taste. If it’s too tangy, a bit more honey can balance it out. If it’s too thick, a splash of water can lighten it up. Remember, the flavors will continue to develop as it sits.

    Step 5: Serve or Store

    Use immediately over your favorite salad, or store in an airtight container in the refrigerator for up to a week. Shake well before each use as separation is natural.

    Tips and Tricks

    For those looking to elevate their dressing game, consider these advanced tips. First, experiment with different types of honey, such as wildflower or manuka, for unique flavor profiles. Second, toasting the black pepper before adding it can unlock deeper, more complex flavors. Lastly, incorporating fresh herbs like basil or thyme can add a refreshing twist to the dressing, perfect for summer salads.

    Recipe Variations

    • For a creamier version, blend in 1/4 cup of Greek yogurt or avocado.
    • Swap lemon juice for lime or orange juice for a different citrus note.
    • Add a pinch of cayenne pepper or red pepper flakes for a spicy kick.
    • Incorporate fresh herbs like dill or parsley for an herby flavor.
    • Use maple syrup instead of honey for a vegan option.

    Frequently Asked Questions

    Can I use bottled lemon juice instead of fresh?

    While bottled lemon juice is convenient, fresh lemon juice provides a brighter, more vibrant flavor that’s unmatched in this dressing. If you must use bottled, opt for one without added preservatives or salt.

    How long can I store this dressing?

    Stored properly in an airtight container in the refrigerator, this dressing can last up to a week. The olive oil may solidify when cold, so let it sit at room temperature for a few minutes before using.

    Is there a substitute for Dijon mustard?

    Yes, you can use whole grain mustard for a different texture or a teaspoon of mustard powder in a pinch. However, Dijon’s smoothness and slight tang are ideal for this recipe.

    Summary

    This low salt salad dressing is a testament to the fact that you don’t need excessive sodium to enjoy a flavorful salad. With simple ingredients and easy steps, it’s a must-try for health-conscious foodies.