Blog

  • Noodle Chicken Salad Recipe: A Crunchy, Flavorful Delight

    Noodle Chicken Salad Recipe: A Crunchy, Flavorful Delight

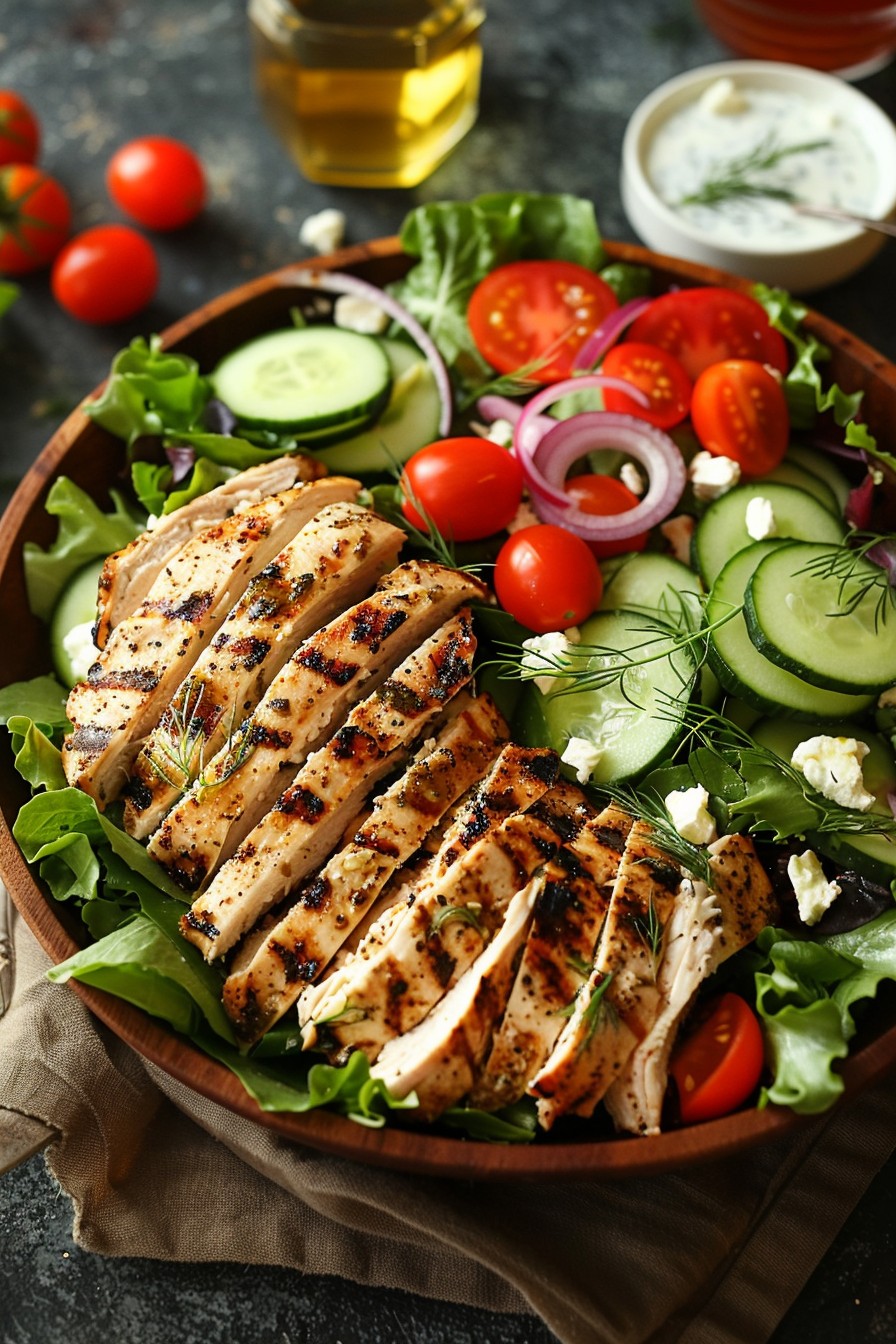
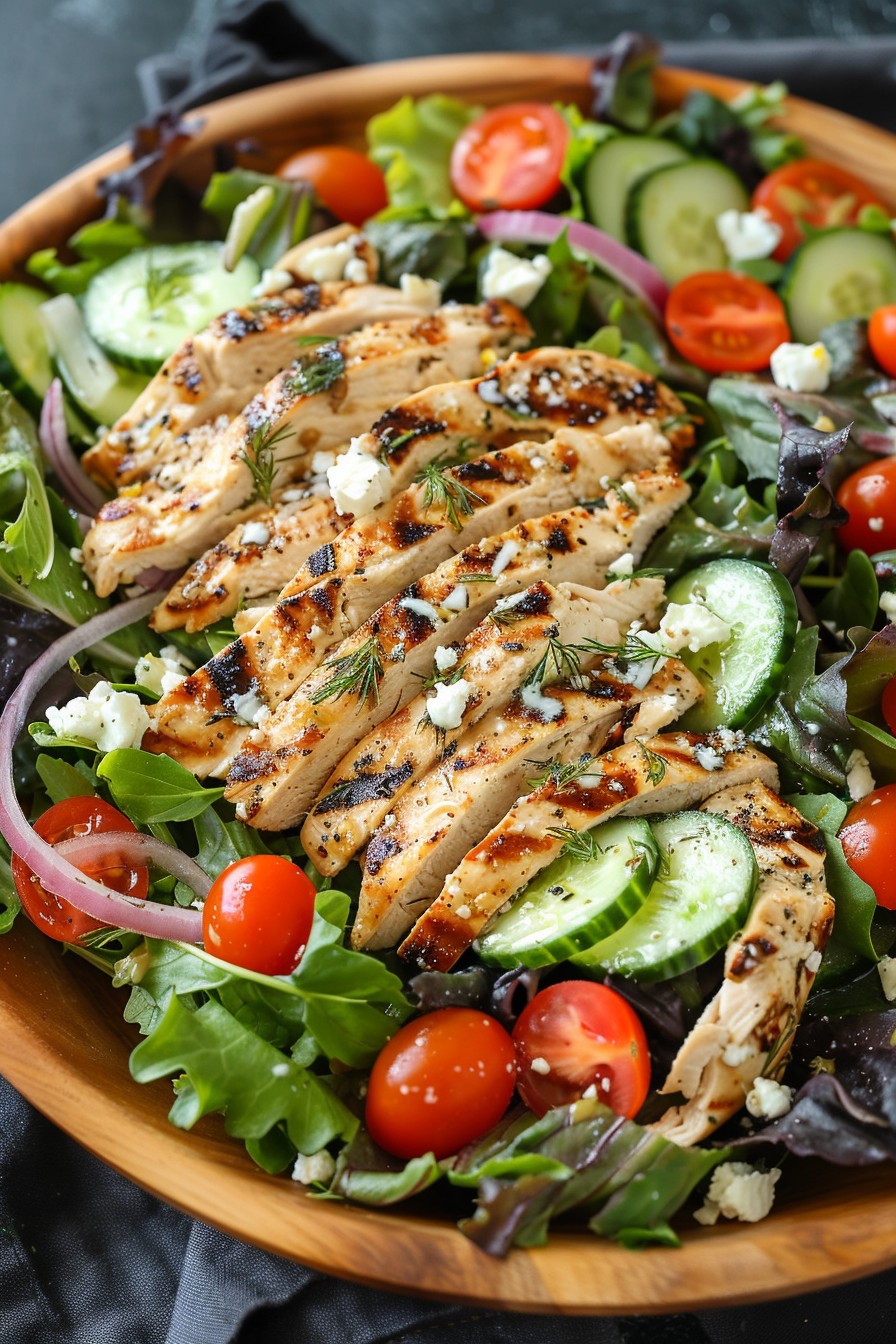
    Kickstart your culinary adventure with this noodle chicken salad recipe that’s bursting with textures and flavors. Perfect for picnics, potlucks, or a quick dinner, this dish is a crowd-pleaser that combines the heartiness of chicken with the crunch of fresh veggies and noodles.

    Why This Recipe Works

    • The combination of tender chicken and crunchy vegetables offers a satisfying texture contrast.
    • A homemade dressing elevates the dish with a perfect balance of sweet, tangy, and savory flavors.
    • It’s versatile, allowing for numerous substitutions based on dietary preferences or what’s in your pantry.
    • Quick to prepare, making it ideal for busy weeknights or last-minute gatherings.
    • Leftovers taste even better the next day, as the flavors meld together beautifully.

    Ingredients

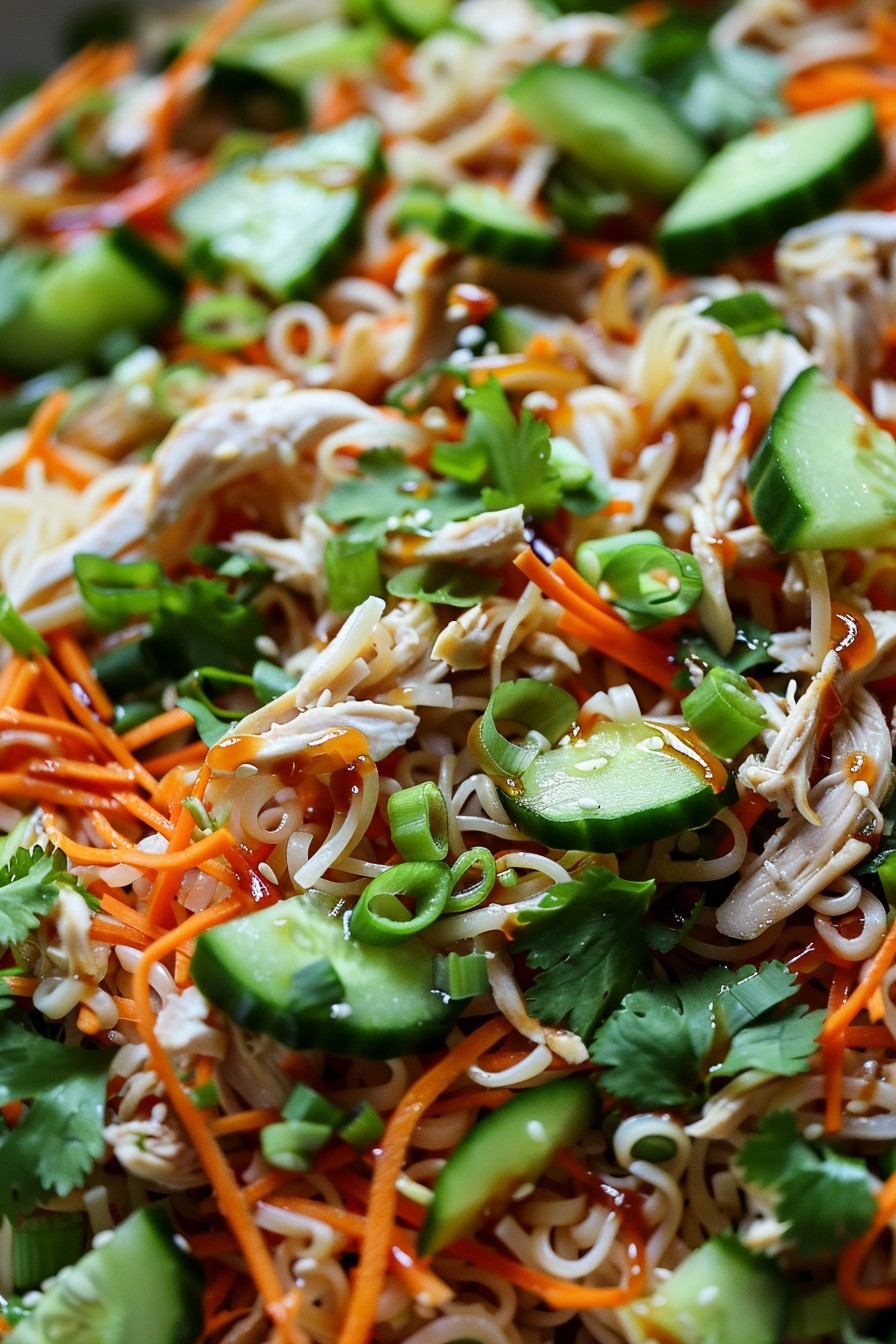
    • 2 cups cooked chicken, shredded
    • 8 oz rice noodles, cooked according to package instructions
    • 1 cup shredded carrots
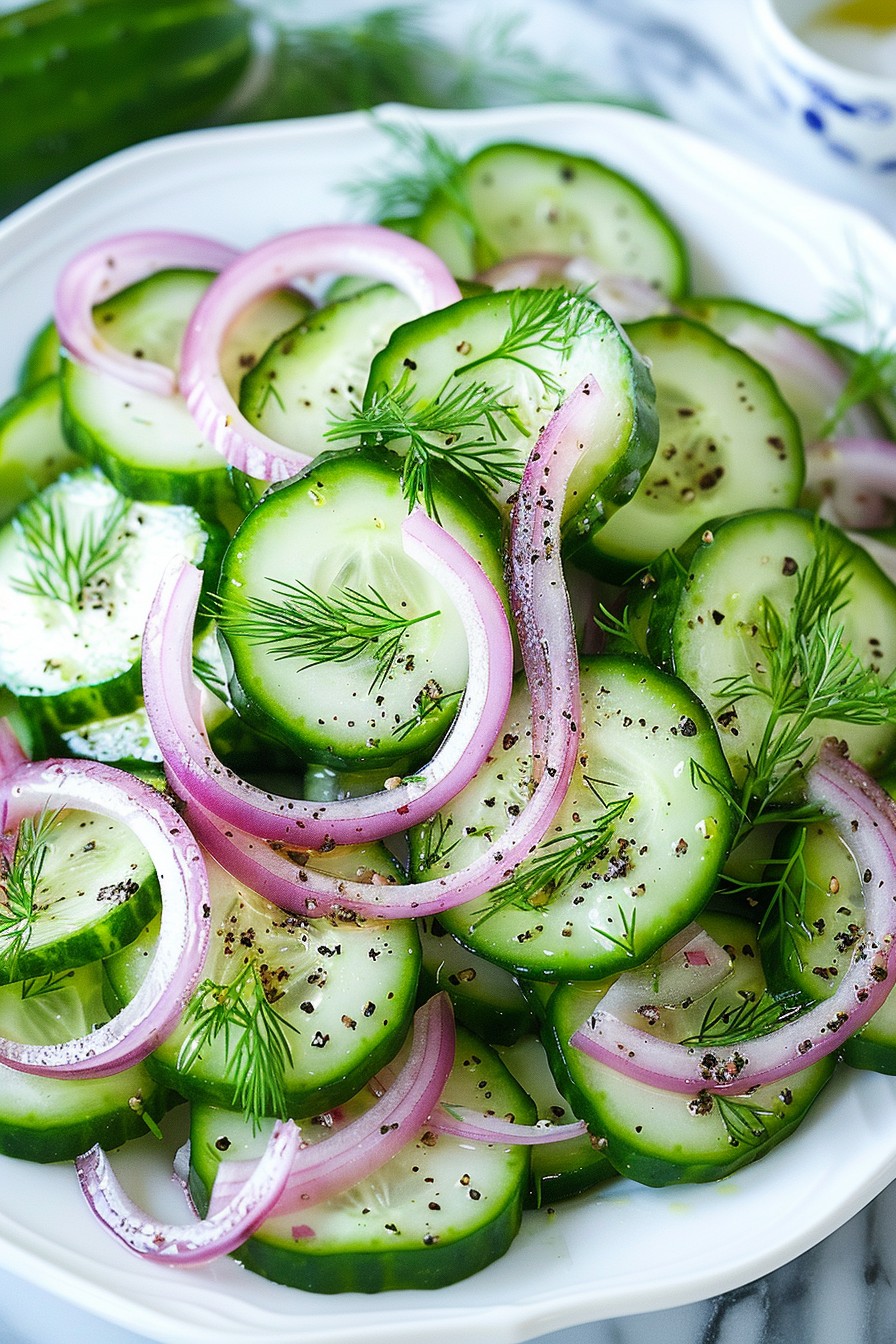
    • 1 cup thinly sliced cucumbers
    • 1/2 cup chopped green onions
    • 1/4 cup chopped cilantro
    • 1/4 cup soy sauce
    • 2 tbsp sesame oil
    • 2 tbsp honey
    • 1 tbsp rice vinegar
    • 1 tsp grated ginger
    • 1 clove garlic, minced

    Equipment Needed

    • Large mixing bowl
    • Whisk
    • Measuring cups and spoons
    • Pot for boiling noodles
    • Knife and cutting board

    Instructions

    Noodle Chicken Salad Recipe

    Step 1: Prepare the Dressing

    In a small bowl, whisk together the soy sauce, sesame oil, honey, rice vinegar, grated ginger, and minced garlic until well combined. This dressing is the secret to the salad’s addictive flavor, so take your time to ensure it’s perfectly blended.

    Step 2: Combine the Salad Ingredients

    In a large mixing bowl, toss the shredded chicken, cooked rice noodles, shredded carrots, sliced cucumbers, chopped green onions, and cilantro. The key here is to mix gently to keep the noodles from breaking and to distribute the ingredients evenly.

    Step 3: Dress the Salad

    Pour the dressing over the salad ingredients and toss to coat everything evenly. For the best flavor, let the salad sit for at least 10 minutes before serving to allow the noodles and chicken to absorb the dressing.

    Step 4: Serve and Enjoy

    Transfer the salad to a serving dish and garnish with additional cilantro or green onions if desired. This dish is best enjoyed fresh but can be refrigerated for up to two days.

    Tips and Tricks

    For an extra crunch, add some toasted sesame seeds or crushed peanuts right before serving. If you’re meal prepping, keep the dressing separate until you’re ready to eat to prevent the noodles from getting soggy. For a spicier kick, add a dash of sriracha or red pepper flakes to the dressing. Always taste and adjust the seasoning before serving, as the sweetness or saltiness can vary based on the ingredients used.

    Recipe Variations

    • Swap the chicken for shrimp or tofu for a different protein option.
    • Use zucchini noodles or spaghetti squash for a low-carb version.
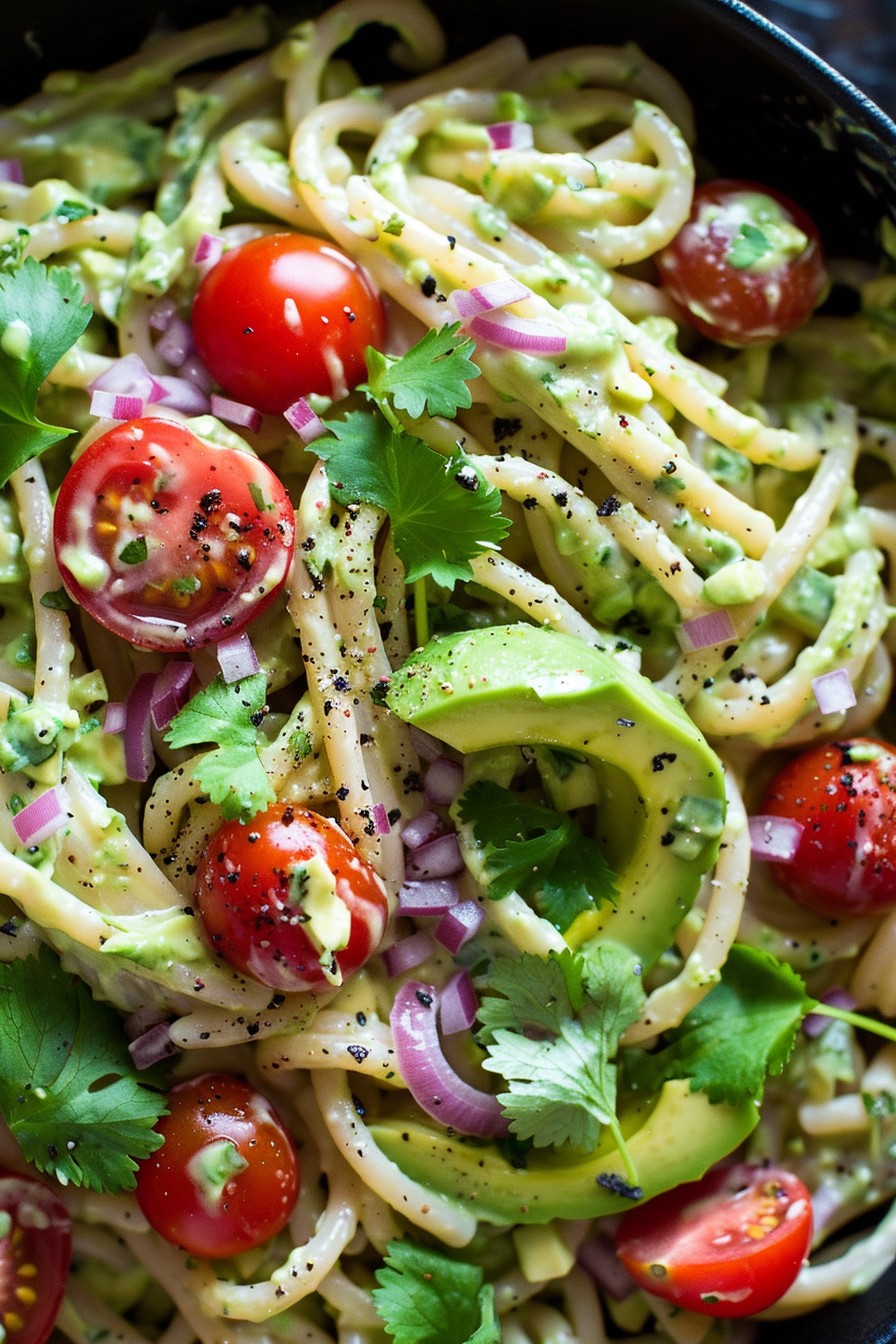
    • Add mango or pineapple for a sweet and tangy twist.
    • Incorporate avocado for creaminess and healthy fats.
    • Try different dressings, like peanut or hoisin sauce, for a new flavor profile.

    Frequently Asked Questions

    Can I make this salad ahead of time? Yes, you can prepare the salad up to a day in advance, but keep the dressing separate until you’re ready to serve to maintain the best texture.

    What can I use instead of rice noodles? Any thin pasta or even soba noodles would work well as a substitute for rice noodles in this recipe.

    Is there a way to make this recipe gluten-free? Absolutely! Just ensure you use gluten-free soy sauce and noodles to make this dish gluten-free.

    Summary

    This noodle chicken salad is a versatile, flavorful dish that’s perfect for any occasion. With its combination of crunchy vegetables, tender chicken, and a homemade dressing, it’s sure to become a favorite in your recipe collection.

  • Hot Cabbage Salad Recipe: A Sizzling Twist on a Classic

    Hot Cabbage Salad Recipe: A Sizzling Twist on a Classic

    Many think salads are just cold dishes, but this hot cabbage salad will change your mind. It’s a vibrant, flavorful dish that brings warmth and comfort to any table, perfect for those who love a little heat in their meals.

    Why This Recipe Works

    • The combination of crispy cabbage and a warm dressing creates a delightful contrast in textures.
    • It’s incredibly versatile, allowing for various additions like bacon or nuts for extra crunch.
    • This recipe is a quick fix for a nutritious side dish, ready in under 30 minutes.

    Ingredients

    • 1 medium head of cabbage, thinly sliced
    • 2 tbsp olive oil
    • 1 tbsp apple cider vinegar
    • 1 tsp honey
    • 1/2 tsp red pepper flakes
    • Salt and pepper to taste

    Equipment Needed

    • Large skillet
    • Mixing bowl
    • Whisk

    Instructions

    Hot Cabbage Salad Recipe

    Step 1: Prepare the Cabbage

    Start by thinly slicing the cabbage to ensure it cooks evenly. The thinner the slices, the better the texture will be in the final dish. Tip: Use a mandoline for uniform slices if you have one.

    Step 2: Heat the Skillet

    Heat the olive oil in a large skillet over medium heat. You’ll know it’s ready when the oil shimmers slightly. This is crucial for getting that perfect sauté on the cabbage.

    Step 3: Sauté the Cabbage

    Add the cabbage to the skillet, stirring occasionally. Cook for about 5-7 minutes until it starts to soften but still retains some crunch. Tip: Don’t overcrowd the skillet to ensure even cooking.

    Step 4: Prepare the Dressing

    In a mixing bowl, whisk together the apple cider vinegar, honey, red pepper flakes, salt, and pepper. This combination will give the salad a sweet and spicy kick.

    Step 5: Combine and Serve

    Pour the dressing over the warm cabbage and toss to coat evenly. Serve immediately to enjoy the contrast of temperatures and flavors. Tip: Garnish with sesame seeds for an extra layer of texture.

    Tips and Tricks

    For those looking to elevate this dish, consider roasting the cabbage instead of sautéing for a deeper flavor. Adding a splash of soy sauce to the dressing can introduce a umami element. If you’re serving this to guests, a sprinkle of fresh herbs like cilantro or parsley can add a pop of color and freshness. Remember, the key to this recipe is balancing the heat from the pepper flakes with the sweetness of the honey, so adjust according to your taste.

    Recipe Variations

    • Add crispy bacon bits for a smoky flavor.
    • Incorporate sliced almonds or walnuts for added crunch.
    • Swap the apple cider vinegar for balsamic for a sweeter dressing.
    • Include other vegetables like bell peppers or carrots for more color and nutrition.
    • For a vegan version, ensure the honey is substituted with maple syrup.

    Frequently Asked Questions

    Can I make this salad ahead of time?

    While it’s best served fresh, you can prepare the components ahead and combine them just before serving to maintain the texture and temperature contrast.

    Is there a substitute for apple cider vinegar?

    Yes, white wine vinegar or lemon juice can be used as alternatives, though they will slightly alter the flavor profile of the dish.

    How can I make this dish spicier?

    Increase the amount of red pepper flakes or add a dash of hot sauce to the dressing for an extra kick.

    Summary

    This hot cabbage salad is a game-changer for salad lovers, offering a warm, spicy, and sweet experience that’s both nutritious and easy to make. Perfect for any season, it’s a versatile dish that can be customized to suit any taste.

  • Filipino Fruit Salad: A Tropical Delight That’s Easy to Make

    Filipino Fruit Salad: A Tropical Delight That’s Easy to Make

    A absolutely delightful treat that brings a taste of the tropics to your table, this Filipino Fruit Salad is a must-try for anyone looking for a refreshing and easy dessert. Packed with a variety of fruits and creamy goodness, it’s perfect for any occasion.

    Why This Recipe Works

    • The combination of tropical fruits offers a refreshing and vibrant flavor profile that’s hard to resist.
    • Using canned fruits makes this recipe accessible year-round, no matter where you are.
    • The creamy dressing ties all the flavors together, creating a harmonious blend that’s both rich and light.
    • It’s incredibly versatile, allowing for numerous variations to suit any taste or dietary preference.
    • This salad is a crowd-pleaser, perfect for potlucks, parties, or as a sweet treat at home.

    Ingredients

    • 2 cups canned fruit cocktail, drained
    • 1 cup canned pineapple chunks, drained
    • 1 cup canned mandarin oranges, drained
    • 1 cup heavy cream
    • 1/2 cup condensed milk
    • 1/2 cup shredded coconut
    • 1/2 cup mini marshmallows

    Equipment Needed

    • Large mixing bowl
    • Whisk
    • Measuring cups and spoons
    • Serving dish

    Instructions

    Filipino Recipe Fruit Salad

    Step 1: Prepare the Fruits

    Start by draining all the canned fruits thoroughly to prevent the salad from becoming too watery. Combine the fruit cocktail, pineapple chunks, and mandarin oranges in a large mixing bowl. Gently toss them together to ensure an even distribution of flavors. Tip: For an extra touch of freshness, you can add a tablespoon of lemon juice to the fruits to enhance their natural flavors.

    Step 2: Whip the Cream

    In a separate bowl, pour the heavy cream and use a whisk to whip it until it forms soft peaks. This should take about 3-4 minutes. Be careful not to over-whip, as the cream can become too stiff. The goal is to achieve a light and fluffy texture that will blend beautifully with the other ingredients.

    Step 3: Combine Cream and Condensed Milk

    Once the cream is whipped, gently fold in the condensed milk. This combination will serve as the creamy dressing for your fruit salad. The condensed milk adds sweetness and richness, balancing the tartness of the fruits. Mix until just combined to maintain the lightness of the whipped cream.

    Step 4: Add the Final Touches

    Pour the creamy dressing over the prepared fruits and gently fold everything together until the fruits are evenly coated. Then, sprinkle in the shredded coconut and mini marshmallows, folding them in carefully to distribute throughout the salad. Tip: For a nutty crunch, consider adding a handful of chopped nuts like cashews or almonds.

    Step 5: Chill and Serve

    Transfer the salad to a serving dish and refrigerate for at least 2 hours before serving. This chilling time allows the flavors to meld together and the salad to set. Serve chilled for the best taste and texture. Tip: Garnish with a sprinkle of coconut or a few extra marshmallows on top for a decorative finish.

    Tips and Tricks

    For those looking to elevate their Filipino Fruit Salad, here are some advanced tips. First, consider using fresh fruits when in season for an even fresher taste. Just ensure they’re cut into bite-sized pieces. Second, experiment with the ratio of cream to condensed milk to suit your sweetness preference. Third, adding a dash of vanilla extract to the cream can introduce a subtle depth of flavor. Lastly, for a lighter version, you can substitute the heavy cream with Greek yogurt, though the texture will be less creamy.

    Recipe Variations

    • For a tropical twist, add chunks of fresh mango or papaya.
    • Incorporate a cup of cooked sago or tapioca pearls for a chewy texture.
    • Swap the condensed milk with coconut milk for a dairy-free version.
    • Add a layer of graham crackers at the bottom for a crunchy base.
    • Include a splash of rum or coconut liqueur for an adult version of this dessert.

    Frequently Asked Questions

    Can I make this salad ahead of time?

    Absolutely! This salad actually tastes better after chilling for a few hours as it allows the flavors to meld together. You can prepare it up to a day in advance, just keep it covered in the refrigerator until ready to serve.

    Can I use fresh fruits instead of canned?

    Yes, fresh fruits can be used for a fresher taste. Just make sure to adjust the sweetness accordingly since canned fruits are usually packed in syrup. You might need to add a bit more condensed milk or a sweetener of your choice.

    How long does this salad last in the fridge?

    Stored properly in an airtight container, the salad can last for up to 3 days in the refrigerator. However, it’s best enjoyed within the first 24-48 hours as the fruits may start to release more liquid over time.

    Summary

    This Filipino Fruit Salad is a delightful, easy-to-make dessert that’s perfect for any occasion. With its creamy dressing and tropical fruits, it’s sure to be a hit. Plus, it’s versatile enough to customize to your liking. Give it a try and bring a taste of the tropics to your table!

  • Crunchy Cucumber Salad with Vinegar: A Refreshing Summer Delight

    Crunchy Cucumber Salad with Vinegar: A Refreshing Summer Delight

    Perfect for those sweltering summer days, this cucumber salad recipe with vinegar is your go-to for a quick, refreshing side dish. Packed with crisp cucumbers and a tangy vinegar dressing, it’s a foolproof way to beat the heat.

    Why This Recipe Works

    • The combination of crisp cucumbers and tangy vinegar creates a refreshing flavor profile that’s hard to resist.
    • It’s incredibly easy to make, requiring just a few simple ingredients and minimal prep time.
    • This salad is versatile, serving as a perfect side dish for barbecues, picnics, or any summer meal.
    • The vinegar not only adds flavor but also helps to preserve the cucumbers, making the salad last longer in the fridge.
    • It’s a healthy, low-calorie option that doesn’t skimp on taste.

    Ingredients

    • 2 large cucumbers, thinly sliced
    • 1/2 cup white vinegar
    • 1/4 cup water
    • 2 tbsp sugar
    • 1 tsp salt
    • 1/2 tsp black pepper
    • 1/4 red onion, thinly sliced
    • 2 tbsp fresh dill, chopped

    Equipment Needed

    • Large mixing bowl
    • Whisk
    • Measuring cups and spoons
    • Sharp knife
    • Cutting board

    Instructions

    Cucumber Salad Recipe Vinegar

    Step 1: Prepare the Cucumbers

    Start by washing the cucumbers thoroughly under cold water. Using a sharp knife, slice them as thinly as possible for the best texture. If you prefer, you can peel the cucumbers, but leaving the skin on adds a nice color and extra nutrients.

    Step 2: Make the Vinegar Dressing

    In a large mixing bowl, whisk together the white vinegar, water, sugar, salt, and black pepper until the sugar and salt are completely dissolved. This creates a perfectly balanced dressing that’s tangy, sweet, and savory all at once.

    Step 3: Combine the Ingredients

    Add the sliced cucumbers and red onion to the bowl with the vinegar dressing. Gently toss to ensure every slice is coated. This is where the magic happens, as the cucumbers start to absorb the flavors of the dressing.

    Step 4: Add the Final Touches

    Sprinkle the chopped fresh dill over the salad and give it one final gentle toss. The dill adds a burst of freshness that complements the tangy vinegar perfectly.

    Step 5: Chill Before Serving

    For the best flavor, cover the bowl and refrigerate the salad for at least 30 minutes before serving. This allows the flavors to meld together beautifully.

    Tips and Tricks

    For an extra crunch, consider adding some thinly sliced radishes or bell peppers to the salad. If you’re not a fan of dill, parsley or cilantro can be great substitutes. To make the salad ahead of time, prepare the dressing and slice the cucumbers, but wait to combine them until just before serving to maintain the cucumbers’ crispness. For a sweeter version, increase the sugar to 3 tbsp. If you’re watching your sodium intake, you can reduce the salt to 1/2 tsp without sacrificing flavor.

    Recipe Variations

    • Asian-Inspired: Add a tablespoon of soy sauce and a teaspoon of sesame oil to the dressing, and garnish with sesame seeds.
    • Spicy Kick: Include a thinly sliced jalapeño or a dash of red pepper flakes for some heat.
    • Creamy Version: Stir in a couple of tablespoons of Greek yogurt or sour cream for a richer texture.
    • Herb Garden: Mix in other fresh herbs like mint or basil for a different flavor profile.
    • Fruit Twist: Add some thinly sliced apples or pears for a sweet and tangy contrast.

    Frequently Asked Questions

    Can I use apple cider vinegar instead of white vinegar?

    Absolutely! Apple cider vinegar will give the salad a slightly sweeter, fruitier flavor. It’s a great substitute if that’s what you have on hand or prefer.

    How long can I store this salad in the fridge?

    This cucumber salad will keep well in the refrigerator for up to 3 days. Just make sure it’s covered tightly to maintain freshness.

    Can I make this salad without sugar?

    Yes, you can omit the sugar or substitute it with a sugar alternative like honey or agave syrup for a different taste profile.

    Summary

    This cucumber salad with vinegar is a simple, refreshing dish that’s perfect for summer. With its crisp texture and tangy flavor, it’s sure to be a hit at any gathering.

  • Chicken Gyro Salad Recipe: A Flavorful Twist on a Classic

    Chicken Gyro Salad Recipe: A Flavorful Twist on a Classic

    Crafting the perfect chicken gyro salad is easier than you think, and it’s packed with flavors that will transport you straight to the streets of Athens. Combine juicy chicken, crisp veggies, and a tangy yogurt dressing for a meal that’s both refreshing and satisfying.

    Why This Recipe Works

    • The marinade infuses the chicken with authentic Greek flavors, ensuring every bite is packed with taste.
    • Using a mix of fresh vegetables adds crunch and color, making the salad as appealing to the eye as it is to the palate.
    • The homemade yogurt dressing is creamy and tangy, perfectly complementing the spiced chicken.
    • This recipe is versatile, allowing for easy substitutions to cater to dietary preferences or pantry availability.
    • It’s a balanced meal that combines protein, veggies, and healthy fats, making it nutritious and delicious.

    Ingredients

    • 1 lb chicken breast, thinly sliced
    • 2 tbsp olive oil
    • 1 tbsp lemon juice
    • 2 cloves garlic, minced
    • 1 tsp dried oregano
    • 1/2 tsp ground cumin
    • Salt and pepper to taste
    • 4 cups mixed greens
    • 1 cucumber, sliced
    • 1 cup cherry tomatoes, halved
    • 1/2 red onion, thinly sliced
    • 1/2 cup feta cheese, crumbled
    • 1/4 cup Greek yogurt
    • 1 tbsp dill, chopped
    • 1 tbsp olive oil
    • 1 tbsp lemon juice

    Equipment Needed

    • Mixing bowls
    • Whisk
    • Grill or skillet
    • Knife and cutting board
    • Measuring cups and spoons

    Instructions

    Chicken Gyro Salad Recipe

    Marinate the Chicken

    In a large bowl, whisk together olive oil, lemon juice, garlic, oregano, cumin, salt, and pepper. Add the chicken slices, ensuring they’re fully coated. Cover and refrigerate for at least 1 hour, or overnight for deeper flavor. Tip: For even more flavor, let the chicken marinate overnight.

    Cook the Chicken

    Heat a grill or skillet over medium-high heat. Cook the chicken for 5-7 minutes on each side, or until fully cooked and slightly charred. Let it rest for a few minutes before slicing. Tip: Don’t overcrowd the pan to ensure each piece gets a nice sear.

    Prepare the Dressing

    In a small bowl, mix Greek yogurt, dill, olive oil, lemon juice, salt, and pepper until smooth. Adjust the seasoning to taste. Tip: If the dressing is too thick, add a little water to thin it out.

    Assemble the Salad

    In a large bowl, combine mixed greens, cucumber, cherry tomatoes, and red onion. Add the sliced chicken and drizzle with the yogurt dressing. Toss gently to combine.

    Serve and Enjoy

    Divide the salad among plates and sprinkle with crumbled feta cheese. Serve immediately for the best texture and flavor.

    Tips and Tricks

    For an extra crunch, add some toasted pita chips on top of the salad. If you’re short on time, use store-bought rotisserie chicken instead of marinating and cooking your own. To make the salad more filling, add a scoop of quinoa or brown rice. For a dairy-free version, omit the feta cheese and use a dairy-free yogurt in the dressing. Always taste and adjust the seasoning of your dressing before adding it to the salad.

    Recipe Variations

    • Swap the chicken for lamb or beef for a more traditional gyro flavor.
    • Add olives and artichoke hearts for a Mediterranean twist.
    • Use tzatziki sauce instead of the yogurt dressing for a different flavor profile.
    • Incorporate avocado for added creaminess and healthy fats.
    • For a low-carb option, serve the salad over a bed of cauliflower rice.

    Frequently Asked Questions

    Can I make this salad ahead of time?

    Yes, you can prepare the components ahead of time, but it’s best to assemble the salad just before serving to keep the greens crisp. Store the dressing separately and add it when you’re ready to eat.

    How long does the chicken need to marinate?

    For optimal flavor, marinate the chicken for at least 1 hour. However, if you’re in a hurry, even 30 minutes will impart some flavor. Overnight marination is ideal for the most flavorful chicken.

    Can I use a different type of meat?

    Absolutely! This recipe is versatile. Lamb or beef would be great substitutes for chicken, offering a more traditional gyro taste. Just adjust the cooking time based on the meat you choose.

    Summary

    This Chicken Gyro Salad is a delightful mix of flavors and textures, combining spiced chicken, fresh veggies, and a creamy yogurt dressing. It’s a perfect meal for any day of the week, offering a healthy and delicious option that’s easy to customize.

  • Creamy Avocado Pasta Salad Recipe: A Summer Delight

    Creamy Avocado Pasta Salad Recipe: A Summer Delight

    Very few dishes scream summer quite like a creamy avocado pasta salad. It’s fresh, it’s vibrant, and it’s packed with flavors that will make your taste buds dance. Perfect for picnics, potlucks, or just a lazy Sunday afternoon, this recipe is about to become your new favorite.

    Why This Recipe Works

    • The creamy avocado dressing is a healthier alternative to mayonnaise-based dressings, offering a rich texture without the guilt.
    • It’s incredibly versatile; you can add any veggies or proteins you have on hand to make it your own.
    • The lemon juice not only adds a zesty kick but also keeps the avocado from browning, ensuring your salad looks as good as it tastes.
    • It’s quick and easy to prepare, making it perfect for last-minute gatherings.
    • The combination of fresh herbs and garlic elevates the dish, giving it a gourmet touch.

    Ingredients

    • 8 oz pasta of your choice (cooked according to package instructions)
    • 2 ripe avocados, peeled and pitted
    • 1/4 cup fresh lemon juice
    • 2 cloves garlic, minced
    • 1/4 cup olive oil
    • 1/2 cup cherry tomatoes, halved
    • 1/4 cup red onion, finely diced
    • 1/4 cup fresh cilantro, chopped
    • Salt and pepper to taste

    Equipment Needed

    • Large pot for boiling pasta
    • Colander
    • Food processor or blender
    • Large mixing bowl
    • Measuring cups and spoons

    Instructions

    Avocado Pasta Salad Recipe

    Step 1: Cook the Pasta

    Bring a large pot of salted water to a boil. Add the pasta and cook according to the package instructions until al dente, usually about 8-10 minutes. Drain the pasta in a colander and rinse under cold water to stop the cooking process. Let it cool completely.

    Step 2: Prepare the Avocado Dressing

    In a food processor or blender, combine the avocados, lemon juice, garlic, and olive oil. Blend until smooth and creamy. Season with salt and pepper to taste. If the dressing is too thick, you can thin it out with a little water or more lemon juice.

    Step 3: Combine the Ingredients

    In a large mixing bowl, combine the cooled pasta, avocado dressing, cherry tomatoes, red onion, and cilantro. Gently toss until everything is evenly coated with the dressing. Taste and adjust the seasoning if necessary.

    Step 4: Chill the Salad

    Cover the bowl with plastic wrap and refrigerate for at least 30 minutes to allow the flavors to meld together. This step is crucial for achieving the best taste.

    Step 5: Serve and Enjoy

    Give the salad a good stir before serving. You can garnish with additional cilantro or cherry tomatoes if desired. Serve chilled and enjoy the creamy, tangy, and fresh flavors of your avocado pasta salad.

    Tips and Tricks

    For an extra creamy texture, you can add a tablespoon of Greek yogurt to the avocado dressing. If you’re not a fan of cilantro, parsley or basil makes a great substitute. To add a protein boost, consider tossing in some grilled chicken or shrimp. For a spicy kick, a dash of cayenne pepper or chopped jalapeños will do the trick. Always use ripe avocados for the creamiest dressing; they should yield slightly to gentle pressure.

    Recipe Variations

    • Add grilled corn and black beans for a Mexican-inspired twist.
    • Swap the cherry tomatoes for sun-dried tomatoes for a more intense flavor.
    • Incorporate cooked bacon or pancetta for a smoky, savory note.
    • Use quinoa instead of pasta for a gluten-free version.
    • Add some crumbled feta or goat cheese for a tangy, creamy element.

    Frequently Asked Questions

    Can I make this salad ahead of time?

    Yes, you can prepare the salad up to a day in advance. Just keep in mind that the avocado may start to brown slightly, so it’s best to add a little extra lemon juice and store it in an airtight container in the fridge.

    How long will the salad last in the fridge?

    The salad is best enjoyed within 24 hours due to the avocado. After that, the texture and color may start to change, though it will still be safe to eat.

    Can I freeze the avocado pasta salad?

    Freezing is not recommended as the avocado and pasta will change texture significantly upon thawing, resulting in a mushy salad.

    Summary

    This creamy avocado pasta salad is a refreshing, healthy, and delicious dish perfect for any summer occasion. With its simple ingredients and easy preparation, it’s sure to be a hit at your next gathering.

  • Baccala Salad Recipe: A Delightful Dive into Mediterranean Flavors

    Baccala Salad Recipe: A Delightful Dive into Mediterranean Flavors

    Ready to whisk your taste buds away to the Mediterranean? This baccala salad recipe is your ticket to a flavorful journey, combining the rich taste of salted cod with fresh, vibrant ingredients.

    Why This Recipe Works

    • The salted cod (baccala) offers a unique, savory depth that’s perfectly balanced by the crispness of fresh vegetables.
    • Soaking the baccala properly removes excess salt, ensuring the fish is perfectly seasoned and tender.
    • The combination of olive oil, lemon juice, and herbs creates a dressing that’s both light and packed with flavor.
    • This salad is versatile, serving as a refreshing appetizer or a hearty main dish.
    • It’s a make-ahead wonder, with flavors that deepen and meld beautifully overnight.

    Ingredients

    • 1 lb baccala (salted cod), soaked for 48 hours, water changed every 12 hours
    • 2 cups mixed bell peppers, thinly sliced
    • 1 cup red onion, thinly sliced
    • 1/2 cup Kalamata olives, pitted and halved
    • 1/4 cup fresh parsley, chopped
    • 1/4 cup extra virgin olive oil
    • 2 tbsp lemon juice
    • 1 tsp dried oregano
    • Salt and pepper to taste

    Equipment Needed

    • Large bowl
    • Mixing spoon
    • Sharp knife
    • Cutting board

    Instructions

    Baccala Salad Recipe Food

    Step 1: Prepare the Baccala

    After soaking the baccala for 48 hours, drain and pat it dry. Cut into bite-sized pieces. This step ensures the fish is tender and not overly salty, making it the perfect base for our salad.

    Step 2: Combine the Vegetables

    In a large bowl, mix the sliced bell peppers, red onion, Kalamata olives, and chopped parsley. The vibrant colors and textures of these vegetables will add freshness and crunch to the salad.

    Step 3: Make the Dressing

    Whisk together the olive oil, lemon juice, dried oregano, and a pinch of salt and pepper in a small bowl. This simple dressing will bring all the flavors together with a bright, herby note.

    Step 4: Assemble the Salad

    Add the prepared baccala to the bowl of vegetables. Drizzle the dressing over the top and gently toss to combine. The key here is to mix gently to keep the baccala pieces intact.

    Step 5: Let It Marinate

    Cover the bowl and refrigerate for at least 2 hours before serving. This marinating time allows the flavors to meld together beautifully, enhancing the overall taste of the salad.

    Tips and Tricks

    For the best baccala salad, consider these pro tips: Always change the soaking water for the baccala every 12 hours to ensure it’s not too salty. If you’re short on time, you can reduce the soaking time to 24 hours, but be sure to taste the baccala for saltiness before using. For an extra flavor boost, add a clove of minced garlic to the dressing. If you prefer a bit of heat, a pinch of red pepper flakes will do the trick. Lastly, serving the salad at room temperature can enhance its flavors, so take it out of the fridge 30 minutes before serving.

    Recipe Variations

    • Add boiled potatoes for a heartier version, turning the salad into a full meal.
    • Incorporate capers for an extra tangy bite that complements the baccala beautifully.
    • Swap the bell peppers for cherry tomatoes for a sweeter, juicier texture.
    • Use fresh basil instead of parsley for a different herbal note.
    • For a creamier dressing, mix in a tablespoon of Greek yogurt.

    Frequently Asked Questions

    Can I use fresh cod instead of baccala?

    While fresh cod can be used, it won’t have the same depth of flavor as baccala. Baccala’s salted and dried nature gives the salad its distinctive taste. If using fresh cod, you might want to lightly salt it and let it sit for a few hours to mimic the flavor.

    How long can I store the baccala salad?

    The salad can be stored in an airtight container in the refrigerator for up to 3 days. The flavors will continue to develop, making it even more delicious over time.

    Is there a quicker way to desalt baccala?

    Soaking is the most effective method to desalt baccala, but if you’re in a hurry, you can soak it in warm water for 8 hours, changing the water every 2 hours. However, the traditional method yields the best texture and flavor.

    Summary

    This baccala salad is a Mediterranean masterpiece, offering a perfect balance of flavors and textures. It’s easy to make, versatile, and sure to impress. Whether as an appetizer or main dish, it’s a delightful way to enjoy the rich taste of salted cod.

  • Crispy Green Apple Salad Recipe: A Refreshing Twist on Classic Greens

    Crispy Green Apple Salad Recipe: A Refreshing Twist on Classic Greens

    Fresh, crunchy, and bursting with flavor, this green apple salad is the perfect way to brighten up your meal. Whether you’re looking for a light lunch or a vibrant side dish, this recipe promises to deliver a delightful crunch with every bite.

    Why This Recipe Works

    • The combination of crisp green apples and mixed greens offers a perfect balance of sweetness and earthiness.
    • A homemade honey mustard dressing adds a tangy kick that complements the apples beautifully.
    • Adding toasted walnuts introduces a nutty depth, making the salad more satisfying.
    • It’s incredibly versatile, allowing for numerous variations to suit any taste.
    • Quick and easy to prepare, it’s perfect for busy weeknights or last-minute gatherings.

    Ingredients

    • 2 large green apples, thinly sliced
    • 4 cups mixed salad greens
    • 1/2 cup walnuts, toasted and roughly chopped
    • 1/4 cup dried cranberries
    • 1/4 cup crumbled feta cheese
    • 2 tbsp olive oil
    • 1 tbsp honey
    • 1 tbsp Dijon mustard
    • 1 tbsp apple cider vinegar
    • Salt and pepper to taste

    Equipment Needed

    • Large salad bowl
    • Small mixing bowl
    • Whisk
    • Knife and cutting board
    • Measuring cups and spoons

    Instructions

    Green Apple Salad Recipe

    Prepare the Dressing

    In a small mixing bowl, whisk together the olive oil, honey, Dijon mustard, and apple cider vinegar until well combined. Season with salt and pepper to taste. This dressing strikes the perfect balance between sweet and tangy, elevating the flavors of the salad.

    Toast the Walnuts

    Place the walnuts in a dry skillet over medium heat. Toast them for about 5 minutes, stirring occasionally, until they’re fragrant and lightly browned. Toasting the walnuts enhances their nutty flavor, adding a wonderful crunch to the salad.

    Assemble the Salad

    In a large salad bowl, combine the mixed greens, sliced green apples, toasted walnuts, dried cranberries, and crumbled feta cheese. Toss gently to mix. The variety of textures and colors makes this salad as visually appealing as it is delicious.

    Dress the Salad

    Drizzle the prepared dressing over the salad and toss to coat evenly. Be sure to add the dressing just before serving to keep the greens crisp and fresh.

    Serve Immediately

    Divide the salad among plates and serve right away. This salad is best enjoyed fresh, with the apples retaining their crispness and the greens staying vibrant.

    Tips and Tricks

    For an extra burst of flavor, consider adding a sprinkle of cinnamon to the dressing. If you’re preparing the salad ahead of time, keep the dressing separate and add it just before serving to prevent the greens from wilting. For a more substantial meal, top the salad with grilled chicken or shrimp. Always use fresh, crisp apples for the best texture and flavor. Toasting the walnuts is a step you shouldn’t skip, as it significantly enhances their taste.

    Recipe Variations

    • Swap the green apples for pears or strawberries for a different fruit profile.
    • Use goat cheese instead of feta for a creamier texture.
    • Add avocado slices for extra creaminess and healthy fats.
    • Incorporate quinoa or chickpeas to make the salad more filling.
    • Try a balsamic vinaigrette instead of honey mustard for a deeper flavor.

    Frequently Asked Questions

    Can I make this salad ahead of time?

    Yes, you can prepare the components ahead of time, but it’s best to assemble and dress the salad just before serving to maintain the freshness and crispness of the ingredients. Store the dressing separately and toss everything together when you’re ready to eat.

    What type of apples works best in this salad?

    Green apples, such as Granny Smith, are ideal for this salad because of their crisp texture and tart flavor, which contrasts beautifully with the sweet dressing and other ingredients. However, you can use any apple variety you prefer.

    Can I substitute the walnuts?

    Absolutely! If you’re not a fan of walnuts or have a nut allergy, you can substitute them with pecans, almonds, or sunflower seeds for a similar crunch without the nuts.

    Summary

    This green apple salad is a refreshing and versatile dish that combines crisp apples, mixed greens, toasted walnuts, and a tangy honey mustard dressing. It’s quick to prepare, packed with flavors and textures, and can be easily customized to suit your preferences. Perfect for any occasion, this salad is sure to impress.

  • Chiparelli Salad Recipe: A Crunchy, Zesty Delight

    Chiparelli Salad Recipe: A Crunchy, Zesty Delight

    Every now and then, a salad comes along that shakes up your taste buds and leaves you craving more. This Chiparelli Salad is that dish—packed with crisp vegetables, a tangy dressing, and a sprinkle of magic that makes it unforgettable.

    Why This Recipe Works

    • The combination of crunchy vegetables and a zesty dressing creates a perfect balance of textures and flavors.
    • It’s incredibly versatile, allowing you to tweak ingredients based on what’s in your fridge.
    • Prep time is minimal, making it an ideal choice for busy weeknights or last-minute gatherings.

    Ingredients

    • 2 cups chopped romaine lettuce
    • 1 cup sliced cucumber
    • 1/2 cup sliced red onion
    • 1/2 cup chopped chiparelli peppers
    • 1/4 cup olive oil
    • 2 tbsp red wine vinegar
    • 1 tsp honey
    • Salt and pepper to taste

    Equipment Needed

    • Large mixing bowl
    • Whisk
    • Measuring cups and spoons
    • Knife and cutting board

    Instructions

    Chiparelli Salad Recipe

    Step 1: Prep Your Vegetables

    Start by washing all your vegetables under cold water. Chop the romaine lettuce into bite-sized pieces, slice the cucumber and red onion thinly, and chop the chiparelli peppers. Ensuring your vegetables are uniformly cut not only makes the salad look better but also ensures every bite is perfect.

    Step 2: Make the Dressing

    In a small bowl, whisk together the olive oil, red wine vinegar, honey, and a pinch of salt and pepper. The key here is to whisk until the mixture is emulsified—meaning the oil and vinegar have come together into a smooth dressing. This usually takes about a minute of vigorous whisking.

    Step 3: Combine and Toss

    Add all your prepped vegetables to the large mixing bowl. Drizzle the dressing over the top. Using salad tongs or two large spoons, gently toss the salad until all the vegetables are evenly coated with the dressing. Be careful not to overmix, as this can make the greens wilt.

    Step 4: Season to Taste

    Give your salad a quick taste test. Depending on your preference, you might want to add a bit more salt, pepper, or even a splash more vinegar for extra tang. Remember, seasoning is key to bringing out the flavors of your ingredients.

    Step 5: Serve Immediately

    This salad is best enjoyed right after it’s made, while the vegetables are still crisp and the flavors are fresh. Serve it in a large salad bowl or divide it among individual plates for a beautiful presentation.

    Tips and Tricks

    For an extra crunch, consider adding some toasted nuts or seeds to your salad. Walnuts or sunflower seeds work particularly well. If you’re preparing the salad ahead of time, keep the dressing separate and only toss it in right before serving to prevent the vegetables from getting soggy. Lastly, for a creamier dressing, you can add a tablespoon of Greek yogurt to the mix.

    Recipe Variations

    • Add some protein: Grilled chicken, shrimp, or tofu can turn this salad into a hearty main dish.
    • Switch up the greens: Try using kale or spinach instead of romaine for a different nutrient profile.
    • Fruit it up: Adding diced apples or pears can introduce a sweet contrast to the tangy dressing.

    Frequently Asked Questions

    Can I make this salad ahead of time? Yes, but keep the dressing separate until you’re ready to serve to maintain the crispness of the vegetables.

    What can I use instead of chiparelli peppers? Banana peppers or jalapeños can be a good substitute, depending on your heat preference.

    Is there a way to make this salad vegan? Absolutely! Just ensure the honey is replaced with maple syrup or agave nectar to keep it vegan-friendly.

    Summary

    This Chiparelli Salad is a vibrant, flavorful dish that’s as easy to make as it is delicious. With its crisp vegetables and zesty dressing, it’s sure to become a go-to recipe for any occasion.

  • Pickled Beet Salad Recipe: A Vibrant Veggie Delight

    Pickled Beet Salad Recipe: A Vibrant Veggie Delight

    Tantalizingly tangy and bursting with color, this pickled beet salad is a feast for the senses. Transform humble beets into a dazzling dish that’s as nutritious as it is delicious. Perfect for picnics, potlucks, or a fancy weeknight dinner, this recipe is sure to impress.

    Why This Recipe Works

    • The natural sweetness of beets is perfectly balanced by the tangy pickling liquid, creating a flavor profile that’s complex and satisfying.
    • Pickling the beets not only enhances their taste but also preserves their vibrant color, making this salad a visual standout.
    • This recipe is incredibly versatile, allowing for numerous variations to suit any taste or occasion.
    • It’s a make-ahead dream, as the flavors only get better with time, making it perfect for meal prep or entertaining.
    • With simple ingredients and straightforward steps, this recipe is accessible to cooks of all skill levels.

    Ingredients

    • 4 medium beets, peeled and thinly sliced
    • 1 cup apple cider vinegar
    • 1/2 cup water
    • 1/4 cup sugar
    • 1 teaspoon salt
    • 1/2 teaspoon black peppercorns
    • 2 cloves garlic, thinly sliced
    • 1/2 red onion, thinly sliced
    • 2 tablespoons olive oil
    • 1/4 cup chopped walnuts, toasted
    • 2 ounces goat cheese, crumbled
    • Fresh parsley, for garnish

    Equipment Needed

    • Medium saucepan
    • Mixing bowls
    • Whisk
    • Sharp knife
    • Cutting board
    • Measuring cups and spoons

    Instructions

    Pickled Beet Salad Recipe

    Step 1: Prepare the Pickling Liquid

    In a medium saucepan, combine the apple cider vinegar, water, sugar, salt, and black peppercorns. Bring the mixture to a boil over medium-high heat, stirring occasionally to ensure the sugar dissolves completely. Once boiling, remove the saucepan from the heat and let the pickling liquid cool slightly. This liquid is the secret to transforming your beets into something extraordinary.

    Step 2: Pickle the Beets

    Place the thinly sliced beets and garlic in a large mixing bowl. Pour the warm pickling liquid over the beets, ensuring they are fully submerged. Let the beets marinate at room temperature for at least 1 hour, or for deeper flavor, cover and refrigerate overnight. The longer they pickle, the more vibrant and flavorful they’ll become.

    Step 3: Assemble the Salad

    Once the beets have pickled to your liking, drain them, reserving a tablespoon of the pickling liquid. In a large serving bowl, combine the pickled beets, sliced red onion, and olive oil. Toss gently to combine. Drizzle with the reserved pickling liquid for an extra tangy kick.

    Step 4: Add the Finishing Touches

    Sprinkle the toasted walnuts and crumbled goat cheese over the salad. Garnish with fresh parsley for a pop of color and freshness. The combination of textures and flavors here is nothing short of magical.

    Step 5: Serve and Enjoy

    This salad is best served at room temperature, allowing all the flavors to shine. It pairs beautifully with grilled meats or can stand alone as a light, refreshing meal. Either way, it’s sure to be a hit.

    Tips and Tricks

    For those looking to elevate their pickled beet salad even further, consider these advanced tips. First, experiment with different types of vinegar for the pickling liquid; balsamic or red wine vinegar can add depth and complexity. Second, toasting the walnuts brings out their nutty flavor, adding another layer of taste to the salad. Lastly, if you’re short on time, store-bought pickled beets can be a quick substitute, though homemade will always have that special touch.

    Recipe Variations

    • For a sweeter twist, add orange segments or a drizzle of honey to the salad.
    • Incorporate different nuts like pecans or almonds for varied texture and flavor.
    • Add arugula or spinach to turn this side dish into a hearty main course salad.
    • For a dairy-free version, omit the goat cheese or substitute with avocado for creaminess.
    • Spice it up by adding thinly sliced jalapeños to the pickling liquid for a kick.

    Frequently Asked Questions

    Can I use canned beets instead of fresh?

    While canned beets are convenient, they lack the firm texture and fresh flavor of raw beets. If you’re in a pinch, they can be used, but for the best results, fresh beets are recommended.

    How long will the pickled beets last in the fridge?

    Properly stored in an airtight container, pickled beets can last up to 2 weeks in the refrigerator. The flavors will continue to develop over time, making them even more delicious.

    Can I make this salad vegan?

    Absolutely! Simply omit the goat cheese or use a vegan cheese alternative. The salad is still packed with flavor and texture without the dairy.

    Summary

    This pickled beet salad is a vibrant, flavorful dish that’s as easy to make as it is impressive. With its perfect balance of sweet and tangy, and endless possibilities for customization, it’s sure to become a staple in your recipe repertoire.