Blog

  • Tuna Salad Yogurt Recipe: A Creamy Twist on a Classic

    Tuna Salad Yogurt Recipe: A Creamy Twist on a Classic

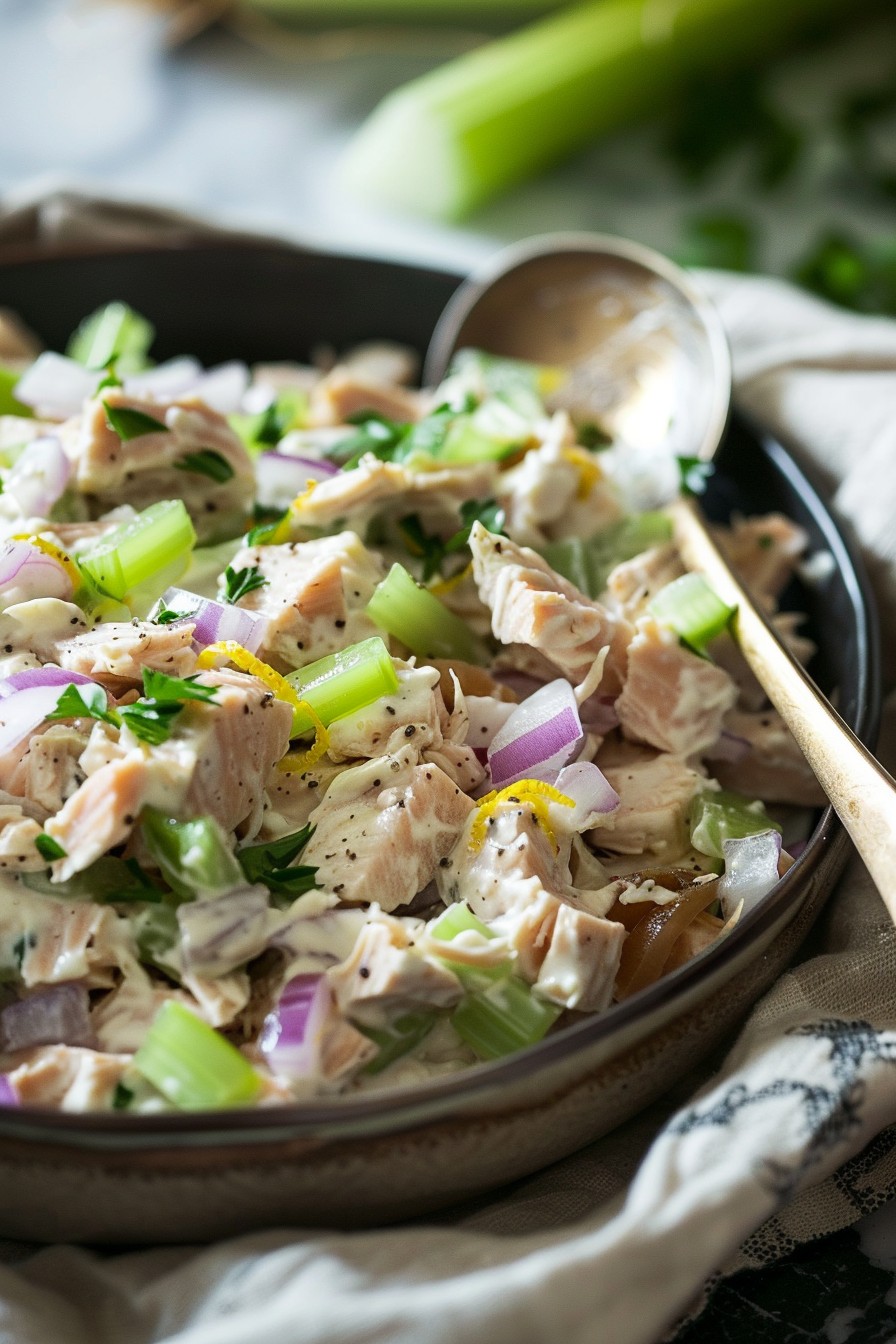
    Kickstart your culinary adventure with this refreshing tuna salad yogurt recipe that swaps out mayo for Greek yogurt, offering a healthier, protein-packed alternative without sacrificing flavor. Perfect for sandwiches, wraps, or a standalone dish, this recipe is a game-changer for meal prep enthusiasts and health-conscious foodies alike.

    Why This Recipe Works

    • Healthier Alternative: Greek yogurt replaces mayonnaise, reducing calories and fat while boosting protein and probiotics.
    • Versatile: Enjoy it as a sandwich filler, atop greens, or with crackers for a quick snack.
    • Quick and Easy: Ready in under 10 minutes, it’s perfect for busy weekdays or last-minute lunches.
    • Customizable: Easily adapt the ingredients to suit your taste preferences or dietary needs.

    Ingredients

    • 2 cans (5 oz each) tuna in water, drained
    • 1/2 cup plain Greek yogurt
    • 1/4 cup diced celery
    • 1/4 cup diced red onion
    • 1 tbsp lemon juice
    • 1 tsp Dijon mustard
    • Salt and pepper to taste

    Equipment Needed

    • Mixing bowl
    • Measuring cups and spoons
    • Knife and cutting board
    • Can opener

    Instructions

    Tuna Salad Yogurt Recipe

    Step 1: Prepare Your Ingredients

    Start by draining the tuna thoroughly to avoid a watery salad. Dice the celery and red onion into small, uniform pieces to ensure every bite has a crunch. Measuring out your Greek yogurt, lemon juice, and Dijon mustard beforehand will streamline the mixing process.

    Step 2: Mix the Base

    In a large mixing bowl, combine the drained tuna, Greek yogurt, lemon juice, and Dijon mustard. Stir until the mixture is creamy and uniform. The acidity from the lemon juice will brighten the flavors, while the mustard adds a subtle depth.

    Step 3: Add the Veggies

    Fold in the diced celery and red onion, distributing them evenly throughout the mixture. These not only add texture but also a fresh, crisp contrast to the creamy base. Season with salt and pepper to taste, remembering you can always add more later.

    Step 4: Chill and Serve

    For the best flavor, cover the bowl and refrigerate the tuna salad for at least 30 minutes before serving. This resting period allows the flavors to meld together beautifully. Serve chilled on your choice of bread, greens, or crackers.

    Tips and Tricks

    For an even creamier texture, you can blend the Greek yogurt before adding it to the tuna. If you’re not a fan of raw onion, try soaking the diced pieces in cold water for 10 minutes to mellow their bite. Experiment with adding different herbs like dill or parsley for an extra flavor boost. Always taste and adjust the seasoning after chilling, as flavors can settle and change.

    Recipe Variations

    • Spicy Kick: Add a dash of cayenne pepper or diced jalapeños for heat.
    • Mediterranean Twist: Incorporate chopped olives, cucumber, and a sprinkle of feta cheese.
    • Avocado Creaminess: Mash in half an avocado for a richer texture and healthy fats.
    • Nutty Crunch: Stir in a handful of chopped almonds or walnuts for added crunch and nutrients.

    Frequently Asked Questions

    Can I use canned tuna in oil instead of water? Yes, but for a lighter salad, water-packed tuna is recommended. If using oil-packed, you may want to reduce the amount of Greek yogurt slightly to balance the richness.

    How long can I store this tuna salad? Properly stored in an airtight container, it will last in the refrigerator for up to 3 days. The flavors will continue to develop, making it even more delicious over time.

    Is there a dairy-free alternative to Greek yogurt? Absolutely! You can use dairy-free yogurt alternatives like coconut or almond milk yogurt. Just ensure they’re unsweetened and unflavored to maintain the savory profile of the salad.

    Summary

    This tuna salad yogurt recipe is a healthier, flavorful twist on the classic, ready in minutes and endlessly customizable. Perfect for any meal, it’s a testament to how simple swaps can elevate traditional dishes.

  • Cucumber Salad Recipe with Ranch Dressing: A Crunchy, Creamy Delight

    Cucumber Salad Recipe with Ranch Dressing: A Crunchy, Creamy Delight

    Nothing beats the simplicity and refreshing taste of a cucumber salad, especially when it’s dressed in creamy ranch. Perfect for those hot summer days or as a light side dish, this recipe is a crowd-pleaser that’s both easy to make and delicious.

    Why This Recipe Works

    • The crispness of fresh cucumbers pairs perfectly with the creamy, tangy ranch dressing, creating a balance of textures and flavors.
    • It’s incredibly versatile, allowing for various add-ins like tomatoes, onions, or even avocado to suit your taste.
    • This salad is a breeze to prepare, requiring no cooking and just a few minutes of your time.
    • It’s a healthy option, low in calories but high in flavor, making it a great addition to any meal.
    • The ranch dressing can be homemade or store-bought, offering flexibility based on your time and preference.

    Ingredients

    • 2 large cucumbers, thinly sliced
    • 1/2 cup ranch dressing (homemade or store-bought)
    • 1/4 cup red onion, thinly sliced
    • 1 tbsp fresh dill, chopped
    • Salt and pepper to taste

    Equipment Needed

    • Mixing bowl
    • Sharp knife
    • Cutting board
    • Measuring cups and spoons

    Instructions

    Cucumber Salad Recipe With Ranch Dressing

    Prepare the Cucumbers

    Start by washing the cucumbers thoroughly under cold water. Using a sharp knife and cutting board, slice the cucumbers into thin rounds, about 1/8 inch thick. For an extra crisp texture, you can leave the skin on or peel it off based on your preference.

    Slice the Red Onion

    Take the red onion and slice it into thin strips. If you’re sensitive to the sharpness of raw onion, soak the slices in cold water for about 10 minutes to mellow the flavor before adding them to the salad.

    Mix the Ingredients

    In a large mixing bowl, combine the sliced cucumbers, red onion, and chopped dill. Gently toss the ingredients to ensure they’re evenly distributed. This is where the magic starts to happen, as the colors and textures begin to blend beautifully.

    Add the Ranch Dressing

    Pour the ranch dressing over the cucumber mixture. Use a spoon or spatula to fold the dressing into the salad, making sure every slice is lightly coated. Be gentle to keep the cucumbers crisp and not mushy.

    Season to Taste

    Finally, season the salad with salt and pepper to your liking. Give it one last gentle toss to incorporate the seasoning. For the best flavor, let the salad chill in the refrigerator for at least 30 minutes before serving, allowing the flavors to meld together.

    Tips and Tricks

    For an even more flavorful salad, consider making your own ranch dressing from scratch. It’s simpler than you might think and allows you to control the ingredients and adjust the flavors to your preference. Another tip is to use English cucumbers if available, as they have fewer seeds and a thinner skin, making them ideal for salads. Lastly, if you’re preparing this salad ahead of time, hold off on adding the dressing until just before serving to maintain the cucumbers’ crispness.

    Recipe Variations

    • Add cherry tomatoes or avocado slices for extra color and nutrients.
    • Swap the ranch dressing for a Greek yogurt-based dressing for a healthier twist.
    • Include crumbled feta or blue cheese for a tangy, creamy addition.
    • For a bit of crunch, toss in some sunflower seeds or chopped walnuts.
    • Spice it up with a dash of cayenne pepper or some sliced jalapeños.

    Frequently Asked Questions

    Can I make this salad ahead of time?

    Yes, you can prepare the components of the salad ahead of time, but it’s best to add the dressing just before serving to keep the cucumbers crisp. If you do dress the salad in advance, expect the cucumbers to soften slightly as they sit in the dressing.

    How long will this salad last in the fridge?

    Properly stored in an airtight container, this cucumber salad will last for up to 2 days in the refrigerator. However, it’s best enjoyed fresh, as the cucumbers will continue to release water and may become less crisp over time.

    Can I use a different type of dressing?

    Absolutely! While ranch dressing is a classic choice for this salad, feel free to experiment with other dressings like Italian, balsamic vinaigrette, or even a simple olive oil and lemon juice mixture for a lighter option.

    Summary

    This cucumber salad with ranch dressing is a refreshing, easy-to-make dish that’s perfect for any occasion. With its crisp cucumbers, creamy dressing, and customizable add-ins, it’s sure to be a hit. Whether you’re looking for a light side dish or a healthy snack, this recipe delivers on flavor and simplicity.

  • 7 Up Salad Recipe with Marshmallows: A Fluffy, Fizzy Delight

    7 Up Salad Recipe with Marshmallows: A Fluffy, Fizzy Delight

    Unbelievable as it may sound, this 7 Up salad combines the fizzy fun of soda with the sweet, pillowy goodness of marshmallows for a dessert that’s as easy to make as it is delicious. Perfect for potlucks, picnics, or just because, this recipe is sure to be a hit with kids and adults alike.

    Why This Recipe Works

    • The carbonation from the 7 Up adds a unique lightness to the salad, making it fluffy and airy.
    • Marshmallows absorb the soda’s flavor, creating a sweet, fizzy taste sensation.
    • It’s incredibly versatile; you can add fruits, nuts, or even chocolate to customize it to your liking.
    • Requires no baking, making it a perfect last-minute dessert option.
    • The combination of textures and flavors is unexpectedly delightful, proving that sometimes the weirdest combinations are the best.

    Ingredients

    • 4 cups mini marshmallows
    • 2 cups 7 Up soda, chilled
    • 1 cup heavy whipping cream
    • 1/4 cup powdered sugar
    • 1 tsp vanilla extract

    Equipment Needed

    • Large mixing bowl
    • Electric mixer
    • Rubber spatula
    • Serving dish

    Instructions

    7 Up Salad Recipe Marshmallows

    Step 1: Prepare Your Ingredients

    Before you begin, ensure all your ingredients are ready to go. Chill the 7 Up in the refrigerator for at least an hour before starting. This helps maintain the fizziness when mixed with other ingredients. Measure out the marshmallows, heavy whipping cream, powdered sugar, and vanilla extract so everything is at hand.

    Step 2: Whip the Cream

    In your large mixing bowl, pour the heavy whipping cream. Using an electric mixer on medium speed, whip the cream until it begins to thicken. Gradually add the powdered sugar and vanilla extract, continuing to whip until stiff peaks form. This should take about 3-4 minutes. The stiffer the peaks, the better the salad will hold its shape.

    Step 3: Fold in the Marshmallows

    Gently fold the mini marshmallows into the whipped cream mixture using a rubber spatula. Be careful not to deflate the whipped cream too much; the goal is to keep the mixture light and airy. This step is where the salad starts to come together, so take your time to ensure everything is evenly incorporated.

    Step 4: Add the 7 Up

    Slowly pour the chilled 7 Up into the bowl, folding gently as you go. The soda will start to react with the whipped cream, creating a fizzy, fluffy texture. Work quickly but carefully to maintain as much carbonation as possible. The mixture should be light and bubbly, with the marshmallows evenly distributed throughout.

    Step 5: Chill and Serve

    Transfer the salad to your serving dish and refrigerate for at least 30 minutes before serving. This allows the flavors to meld and the salad to set slightly. When ready, serve chilled for the best taste and texture experience.

    Tips and Tricks

    For an extra flavor boost, consider adding a splash of lemon or lime juice to the whipped cream before folding in the other ingredients. This adds a nice tang that balances the sweetness of the marshmallows and soda. If you’re serving this salad at a party, consider garnishing with fresh mint leaves or a sprinkle of citrus zest for a pop of color and flavor. And for those who love a bit of crunch, tossing in some chopped nuts or granola right before serving adds a delightful texture contrast.

    Recipe Variations

    • Fruity Twist: Add 1 cup of diced strawberries or pineapple chunks for a fresh, fruity version.
    • Chocolate Lover’s Dream: Mix in 1/2 cup of mini chocolate chips or cocoa powder for a chocolatey treat.
    • Nutty Delight: Stir in 1/2 cup of chopped pecans or almonds for added crunch and flavor.
    • Tropical Escape: Use coconut milk instead of heavy whipping cream and add shredded coconut for a tropical twist.
    • Berry Blast: Fold in a mix of raspberries, blueberries, and blackberries for a berry-packed salad.

    Frequently Asked Questions

    Can I use a different soda?

    Absolutely! While 7 Up gives a light, lemony flavor, you can experiment with other clear sodas like Sprite or even ginger ale for a different taste profile. Just keep in mind that the flavor of the soda will significantly influence the overall taste of the salad.

    How long does this salad last?

    This salad is best enjoyed the day it’s made, as the carbonation will start to dissipate over time. However, you can store it covered in the refrigerator for up to 24 hours. Just note that it may lose some of its fluffiness.

    Can I make this dairy-free?

    Yes, you can substitute the heavy whipping cream with a dairy-free alternative like coconut cream. Just ensure it’s chilled thoroughly before whipping to achieve the right consistency.

    Summary

    This 7 Up salad with marshmallows is a fun, fizzy, and fluffy dessert that’s perfect for any occasion. Easy to make and highly customizable, it’s sure to delight anyone who tries it. Whether you stick to the classic recipe or experiment with variations, this dish is a guaranteed crowd-pleaser.

  • Italian Salad Dressing Chicken Recipe: A Zesty Twist on Dinner

    Italian Salad Dressing Chicken Recipe: A Zesty Twist on Dinner

    Every now and then, a recipe comes along that’s so simple yet so flavorful, it feels like cheating. This Italian Salad Dressing Chicken is one of those magical dishes that packs a punch with minimal effort, thanks to the marinade doing all the heavy lifting.

    Why This Recipe Works

    • The Italian dressing acts as a perfect marinade, infusing the chicken with herbs and acidity that tenderize and flavor the meat deeply.
    • It’s incredibly versatile; serve it hot off the grill for dinner or slice it cold over a salad for lunch the next day.
    • This recipe is a crowd-pleaser, offering a delicious option that’s both gluten-free and low-carb, catering to various dietary preferences.
    • With only a handful of ingredients, it’s budget-friendly and doesn’t require any fancy kitchen gadgets.
    • The cooking method ensures juicy, flavorful chicken every time, with a beautiful char or sear that adds texture.

    Ingredients

    • 4 boneless, skinless chicken breasts (about 1.5 lbs)
    • 1 cup Italian salad dressing (store-bought or homemade)
    • 1 tbsp olive oil
    • 1 tsp garlic powder
    • 1 tsp onion powder
    • Salt and pepper to taste

    Equipment Needed

    • Grill or large skillet
    • Measuring cups and spoons
    • Mixing bowl
    • Tongs
    • Meat thermometer

    Instructions

    Italian Salad Dressing Chicken Recipe

    Step 1: Marinate the Chicken

    Begin by placing your chicken breasts in a large mixing bowl. Pour the Italian salad dressing over the chicken, ensuring each piece is well coated. For maximum flavor, let the chicken marinate in the refrigerator for at least 2 hours, though overnight is ideal. This step is crucial as the acidity in the dressing tenderizes the chicken, while the herbs and spices infuse it with flavor.

    Step 2: Preheat Your Cooking Surface

    Whether you’re grilling outdoors or using a skillet on the stove, preheating is key to getting that perfect sear. Heat your grill or skillet over medium-high heat (about 375°F to 400°F) and lightly oil the surface to prevent sticking. This ensures your chicken cooks evenly and develops a delicious crust.

    Step 3: Cook the Chicken

    Remove the chicken from the marinade, letting any excess drip off. Season both sides with garlic powder, onion powder, salt, and pepper. Place the chicken on the preheated grill or skillet. Cook for about 6-7 minutes per side, or until the internal temperature reaches 165°F. Avoid moving the chicken too much to allow a nice crust to form.

    Step 4: Let It Rest

    Once cooked, transfer the chicken to a plate and let it rest for at least 5 minutes before slicing. This allows the juices to redistribute, ensuring your chicken is moist and flavorful.

    Step 5: Serve and Enjoy

    Slice the chicken against the grain for tender bites and serve with your favorite sides. Whether it’s a fresh salad, roasted vegetables, or pasta, this chicken is sure to be the star of the meal.

    Tips and Tricks

    For those looking to elevate this dish further, consider these advanced tips. First, if using a skillet, deglaze the pan with a little chicken broth or white wine after cooking the chicken to create a quick sauce. Second, adding a splash of balsamic vinegar to the marinade can deepen the flavors. Lastly, for a smokier taste, try using a charcoal grill or adding a smoker box to your gas grill. These small tweaks can transform your dish from great to unforgettable.

    Recipe Variations

    • For a creamier version, mix in some mayonnaise or Greek yogurt into the marinade to create a richer texture.
    • Add some heat by incorporating red pepper flakes or a dash of hot sauce into the dressing.
    • Swap the chicken breasts for thighs or drumsticks for a more budget-friendly option with deeper flavor.
    • Vegetarian? Try this marinade on thick slices of cauliflower or portobello mushrooms for a hearty plant-based alternative.
    • For a sweeter twist, add a tablespoon of honey or maple syrup to the marinade to balance the acidity.

    Frequently Asked Questions

    Can I use bottled Italian dressing?

    Absolutely! Bottled Italian dressing works perfectly fine for this recipe and saves time. However, if you’re feeling adventurous, making your own dressing allows you to adjust the flavors to your liking, such as adding more garlic or herbs.

    How long can I marinate the chicken?

    While 2 hours is sufficient, marinating the chicken overnight will yield the most flavorful results. Just be cautious not to marinate for more than 24 hours, as the acidity can start to break down the proteins too much, resulting in a mushy texture.

    Can I bake this chicken instead of grilling or pan-searing?

    Yes, you can bake the chicken at 375°F for about 25-30 minutes, or until it reaches an internal temperature of 165°F. Baking is a great hands-off method, though you might miss out on the charred flavors from grilling or searing.

    Summary

    This Italian Salad Dressing Chicken is a testament to the power of simple ingredients coming together to create something extraordinary. With minimal prep and cooking time, it’s a weeknight savior that doesn’t skimp on flavor. Whether you’re grilling, pan-searing, or baking, this recipe promises juicy, flavorful chicken every time.

  • Beet Salad Recipe with Canned Beets: A Quick & Vibrant Side Dish

    Beet Salad Recipe with Canned Beets: A Quick & Vibrant Side Dish

    Now, let’s dive into a recipe that’s as easy as it is colorful. Using canned beets not only saves time but also ensures you have a delicious salad ready in minutes. Perfect for those busy days when you still want to eat something healthy and tasty.

    Why This Recipe Works

    • Using canned beets cuts down prep time significantly, making this salad a quick fix for any meal.
    • The combination of sweet beets, tangy dressing, and crunchy walnuts creates a perfect balance of flavors and textures.
    • It’s a versatile dish that can be served as a side or turned into a main with the addition of protein like grilled chicken or tofu.

    Ingredients

    • 1 can (15 oz) sliced beets, drained and quartered
    • 2 tbsp olive oil
    • 1 tbsp balsamic vinegar
    • 1/2 cup walnuts, roughly chopped
    • 1/4 cup crumbled feta cheese
    • Salt and pepper to taste

    Equipment Needed

    • Mixing bowl
    • Whisk
    • Measuring cups and spoons
    • Serving bowl

    Instructions

    Beet Salad Recipe With Canned Beets

    Step 1: Prepare the Dressing

    In a mixing bowl, whisk together the olive oil and balsamic vinegar until well combined. Season with salt and pepper to taste. This simple dressing brings out the natural sweetness of the beets.

    Step 2: Combine the Ingredients

    Add the quartered beets and chopped walnuts to the bowl with the dressing. Gently toss to ensure everything is evenly coated. The walnuts add a nice crunch and nutty flavor that complements the beets beautifully.

    Step 3: Add the Finishing Touches

    Sprinkle the crumbled feta cheese over the top of the salad. The saltiness of the feta balances the sweetness of the beets and the tanginess of the dressing.

    Step 4: Serve and Enjoy

    Transfer the salad to a serving bowl and enjoy immediately. This salad is best served fresh but can be refrigerated for up to two days.

    Tips and Tricks

    For an extra burst of flavor, toast the walnuts before adding them to the salad. This enhances their nuttiness and adds a deeper flavor profile to the dish. If you’re not a fan of feta, goat cheese is a great alternative that offers a similar tangy taste. Lastly, for a bit of freshness, consider adding some arugula or spinach to the salad. The greens will add a peppery note and make the salad even more nutritious.

    Recipe Variations

    • For a sweeter version, add some orange segments or a drizzle of honey to the dressing.
    • To make it more substantial, add grilled chicken, tofu, or chickpeas for protein.
    • For a different texture, substitute walnuts with pecans or almonds.
    • Add some diced avocado for creaminess and healthy fats.
    • Incorporate some grains like quinoa or farro to turn it into a hearty grain salad.

    Frequently Asked Questions

    Can I use fresh beets instead of canned? Absolutely! Just roast or boil them until tender before using. It will add a bit more time to the prep but the flavor is worth it.

    How long can I store this salad? It’s best enjoyed fresh but can be stored in the refrigerator for up to two days. The walnuts may lose some of their crunch over time.

    Is there a substitute for balsamic vinegar? Yes, red wine vinegar or apple cider vinegar can be used for a slightly different flavor profile.

    Summary

    This beet salad with canned beets is a quick, easy, and delicious side dish that’s perfect for any occasion. With its vibrant colors and balanced flavors, it’s sure to be a hit.

  • Dill-icious Potato Salad Recipe: A Summer Must-Have

    Dill-icious Potato Salad Recipe: A Summer Must-Have

    Mmm, nothing says summer like a creamy, dill-packed potato salad. This recipe is your go-to for picnics, BBQs, or just because. It’s easy, flavorful, and sure to be a hit.

    Why This Recipe Works

    • The combination of fresh dill and creamy dressing creates a refreshing flavor that’s perfect for hot days.
    • Using Yukon Gold potatoes ensures a buttery texture that holds up well in salad.
    • A splash of apple cider vinegar adds just the right amount of tang to balance the creaminess.

    Ingredients

    • 2 lbs Yukon Gold potatoes, cubed
    • 1/2 cup mayonnaise
    • 1/4 cup sour cream
    • 2 tbsp apple cider vinegar
    • 1/4 cup fresh dill, chopped
    • 1/2 cup red onion, finely diced
    • Salt and pepper to taste

    Equipment Needed

    • Large pot
    • Mixing bowl
    • Knife and cutting board
    • Measuring cups and spoons

    Instructions

    Potato Salad Recipe Dill

    Step 1: Cook the Potatoes

    Fill a large pot with water and bring to a boil. Add the cubed potatoes and cook for 10-12 minutes, or until they’re just tender. You want them to hold their shape for the salad. Drain and let them cool slightly.

    Step 2: Mix the Dressing

    In a mixing bowl, whisk together the mayonnaise, sour cream, and apple cider vinegar until smooth. Stir in the fresh dill and red onion. Season with salt and pepper to taste.

    Step 3: Combine and Chill

    Gently fold the slightly cooled potatoes into the dressing until well coated. Cover and refrigerate for at least 1 hour to let the flavors meld together. Serve chilled.

    Tips and Tricks

    For an extra flavor boost, try adding a teaspoon of Dijon mustard to the dressing. If you’re short on time, you can serve the salad immediately, but chilling it really enhances the flavors. For a lighter version, substitute Greek yogurt for the sour cream.

    Recipe Variations

    • Add crispy bacon bits for a smoky twist.
    • Mix in some hard-boiled eggs for extra protein.
    • Swap the dill for parsley or cilantro for a different herb flavor.
    • Include some diced celery or cucumber for added crunch.

    Frequently Asked Questions

    Can I use another type of potato?

    Yes, but Yukon Golds are recommended for their texture and flavor. Russets can be too starchy, and red potatoes might not hold up as well.

    How long can I store the potato salad?

    It will keep in the refrigerator for up to 3 days. Just give it a good stir before serving again.

    Can I make this recipe vegan?

    Absolutely! Just use vegan mayonnaise and sour cream substitutes. The flavor will still be fantastic.

    Summary

    This dill potato salad is creamy, tangy, and packed with fresh flavors. It’s the perfect side dish for any summer gathering.

  • Balsamic Salad Recipe: A Tangy Twist on Greens

    Balsamic Salad Recipe: A Tangy Twist on Greens

    Ready to elevate your salad game? This balsamic salad recipe is a perfect blend of sweet and tangy flavors that will make your taste buds dance. It’s simple, refreshing, and packed with nutrients, making it an ideal choice for any meal.

    Why This Recipe Works

    • The combination of balsamic vinegar and olive oil creates a dressing that’s both flavorful and heart-healthy.
    • Fresh greens and vegetables provide a crunchy texture and a boost of vitamins.
    • Adding nuts or cheese introduces a layer of richness and protein, making the salad more satisfying.

    Ingredients

    • 6 cups mixed greens (washed and dried)
    • 1/2 cup cherry tomatoes (halved)
    • 1/4 cup red onion (thinly sliced)
    • 1/4 cup balsamic vinegar
    • 1/2 cup extra virgin olive oil
    • 1/2 tsp salt
    • 1/4 tsp black pepper
    • 1/4 cup crumbled feta cheese (optional)
    • 1/4 cup walnuts (chopped, optional)

    Equipment Needed

    • Large salad bowl
    • Small mixing bowl
    • Whisk
    • Measuring cups and spoons

    Instructions

    Balsamic Salad Recipe

    Step 1: Prepare the Dressing

    In a small mixing bowl, whisk together the balsamic vinegar, olive oil, salt, and black pepper until well combined. Taste and adjust the seasoning if necessary. Tip: For a smoother dressing, you can blend the ingredients in a blender for 30 seconds.

    Step 2: Assemble the Salad

    In a large salad bowl, combine the mixed greens, cherry tomatoes, and red onion. Toss gently to mix the ingredients evenly. Tip: For added flavor, let the salad sit for 5 minutes after adding the dressing to allow the greens to slightly wilt and absorb the flavors.

    Step 3: Add the Final Touches

    Sprinkle the crumbled feta cheese and chopped walnuts over the salad if using. Toss lightly to distribute these ingredients throughout the salad. Tip: Toasting the walnuts beforehand will enhance their flavor and add a nice crunch.

    Tips and Tricks

    For those looking to take their balsamic salad to the next level, consider marinating the onions in the balsamic dressing for an hour before assembling the salad. This will soften their sharpness and infuse them with flavor. Additionally, experimenting with different types of greens, such as arugula or spinach, can add a new dimension to the dish. Lastly, for a sweeter dressing, a teaspoon of honey or maple syrup can be whisked into the balsamic mixture.

    Recipe Variations

    • Swap the feta cheese for goat cheese or blue cheese for a different flavor profile.
    • Add sliced strawberries or peaches for a sweet and tangy twist.
    • Include grilled chicken or shrimp to turn the salad into a hearty main dish.
    • Use avocado instead of nuts for a creamy texture and healthy fats.
    • Try different vinegars, such as apple cider or raspberry, for a unique dressing.

    Frequently Asked Questions

    Can I make the dressing ahead of time?

    Absolutely! The dressing can be prepared up to a week in advance and stored in an airtight container in the refrigerator. Just give it a good shake or whisk before using to recombine the ingredients.

    What’s the best way to store leftover salad?

    If you’ve already dressed the salad, it’s best enjoyed the same day as the greens will wilt. However, you can store undressed salad in an airtight container in the fridge for up to 2 days. Keep the dressing separate and add it just before serving.

    Can I use bottled balsamic vinaigrette instead of making my own?

    While homemade dressing is recommended for the freshest flavor, a high-quality bottled balsamic vinaigrette can be a convenient substitute. Look for one with minimal additives and a good balance of oil and vinegar.

    Summary

    This balsamic salad recipe is a delightful mix of flavors and textures, perfect for any occasion. With its simple ingredients and easy preparation, it’s a go-to dish for a healthy and delicious meal.

  • Garlic Expressions Salad Dressing Recipe: A Flavor Bomb for Your Greens

    Garlic Expressions Salad Dressing Recipe: A Flavor Bomb for Your Greens

    Forget the store-bought dressings that are loaded with preservatives and lackluster flavors. This homemade Garlic Expressions Salad Dressing is a game-changer for your salads, offering a perfect blend of tangy, sweet, and garlicky goodness that will make your taste buds dance.

    Why This Recipe Works

    • The combination of fresh garlic and high-quality olive oil creates a robust base that’s both flavorful and heart-healthy.
    • Apple cider vinegar adds a tangy kick that balances the sweetness of the honey, making every bite perfectly balanced.
    • This dressing is incredibly versatile, doubling as a marinade for meats or a drizzle for roasted vegetables.
    • It’s quick and easy to make, requiring just a few minutes and simple ingredients you likely already have in your pantry.
    • Customizable to your taste, you can adjust the garlic, sweetness, or acidity to suit your preferences.

    Ingredients

    • 1/2 cup extra virgin olive oil
    • 1/4 cup apple cider vinegar
    • 3 tablespoons honey
    • 4 cloves garlic, minced
    • 1 teaspoon salt
    • 1/2 teaspoon black pepper

    Equipment Needed

    • Measuring cups and spoons
    • Small mixing bowl
    • Whisk
    • Airtight container for storage

    Instructions

    Garlic Expressions Salad Dressing Recipe

    Step 1: Combine the Wet Ingredients

    In a small mixing bowl, whisk together the olive oil and apple cider vinegar until well combined. This creates the base of your dressing, ensuring the oil and vinegar emulsify for a smooth texture. Tip: For an extra smooth dressing, you can use a blender instead of whisking by hand.

    Step 2: Add the Sweetness

    Stir in the honey until it’s fully dissolved into the mixture. The honey not only adds sweetness but also helps to balance the acidity of the vinegar. Make sure to mix thoroughly to avoid any clumps of honey settling at the bottom.

    Step 3: Incorporate the Garlic and Seasonings

    Add the minced garlic, salt, and black pepper to the bowl. Whisk everything together until the garlic is evenly distributed throughout the dressing. The fresh garlic will infuse the dressing with its pungent flavor, so adjust the amount based on how garlicky you like your dressing.

    Step 4: Let It Marinate

    Transfer the dressing to an airtight container and let it sit in the refrigerator for at least 30 minutes before using. This resting period allows the flavors to meld together beautifully. Tip: The longer it sits, the more pronounced the garlic flavor becomes.

    Step 5: Serve and Enjoy

    Give the dressing a good shake or stir before drizzling it over your favorite salad. It’s also fantastic as a marinade for chicken or a dip for crusty bread. Store any leftovers in the refrigerator for up to a week.

    Tips and Tricks

    For those who love a creamier dressing, try adding a tablespoon of mayonnaise or Greek yogurt to the mix. It will give the dressing a richer texture and a slight tang. If you’re out of apple cider vinegar, white wine vinegar or lemon juice can be great substitutes, offering a different but equally delicious acidity. To make this dressing vegan, simply replace the honey with maple syrup or agave nectar. And for a smoother consistency, blending all the ingredients together can help emulsify the dressing more thoroughly than whisking by hand.

    Recipe Variations

    • Spicy Version: Add a pinch of red pepper flakes or a dash of hot sauce for a spicy kick.
    • Herb-Infused: Mix in fresh herbs like basil, parsley, or dill for an herby twist.
    • Citrusy Twist: Replace half of the vinegar with fresh lemon or lime juice for a citrusy flavor.
    • Creamy Garlic: Blend in a quarter cup of Greek yogurt or mayonnaise for a creamier texture.
    • Mustard Garlic: Add a tablespoon of Dijon mustard for an extra layer of flavor.

    Frequently Asked Questions

    Q: Can I use bottled minced garlic instead of fresh?
    A: While fresh garlic offers the best flavor, bottled minced garlic can be a convenient substitute. Just keep in mind that the flavor might be slightly less potent, so you might want to adjust the quantity to taste.

    Q: How long does this dressing last in the fridge?
    A: Stored in an airtight container, this dressing can last up to a week in the refrigerator. The flavors will continue to develop over time, making it even more delicious after a day or two.

    Q: Can I make this dressing without honey?
    A: Absolutely! If you’re looking for a sugar-free option, you can omit the honey or substitute it with a sugar alternative like stevia. The dressing will be more tart, but still delicious.

    Summary

    This Garlic Expressions Salad Dressing is a simple, flavorful, and versatile addition to any meal. With just a few ingredients and minutes of prep time, you can elevate your salads, marinades, and more. Customizable to suit any taste, it’s a must-try for anyone looking to add a burst of flavor to their dishes.

  • Caesar Salad with Shrimp Recipe: A Twist on the Classic

    Caesar Salad with Shrimp Recipe: A Twist on the Classic

    Unleash the flavor of the sea with this delectable Caesar salad topped with succulent shrimp. Perfect for those who love a classic with a twist, this recipe is sure to impress at any dinner table or summer BBQ.

    Why This Recipe Works

    • The combination of crispy romaine and juicy shrimp offers a perfect texture contrast.
    • Homemade Caesar dressing elevates the dish beyond store-bought versions.
    • Quick and easy to prepare, making it ideal for weeknight dinners or last-minute guests.
    • Customizable to suit dietary preferences, including gluten-free or dairy-free options.

    Ingredients

    • 1 lb large shrimp, peeled and deveined
    • 2 heads romaine lettuce, chopped
    • 1/2 cup grated Parmesan cheese
    • 1/2 cup Caesar dressing (homemade or store-bought)
    • 1 cup croutons
    • 2 tbsp olive oil
    • Salt and pepper to taste

    Equipment Needed

    • Large mixing bowl
    • Skillet
    • Salad spinner (optional)
    • Measuring cups and spoons

    Instructions

    Caesar Salad With Shrimp Recipe

    Prepare the Shrimp

    Heat olive oil in a skillet over medium-high heat. Season the shrimp with salt and pepper, then add to the skillet. Cook for 2-3 minutes per side until pink and opaque. Remove from heat and set aside.

    Chop the Lettuce

    Wash and dry the romaine lettuce thoroughly. Chop into bite-sized pieces and place in a large mixing bowl. Tip: Use a salad spinner to ensure the lettuce is dry for the best dressing adherence.

    Assemble the Salad

    Add the cooked shrimp, croutons, and half of the Parmesan cheese to the bowl with the lettuce. Drizzle with Caesar dressing and toss gently to combine.

    Serve and Enjoy

    Transfer the salad to serving plates and sprinkle with the remaining Parmesan cheese. Serve immediately for the best texture and flavor.

    Tips and Tricks

    For an extra flavor boost, try grilling the shrimp instead of sautéing. This adds a smoky depth that complements the creamy dressing beautifully. Always pat your shrimp dry before cooking to ensure a nice sear. If you’re making your own dressing, anchovy paste can be a great shortcut for traditional anchovies without the hassle of mincing.

    Recipe Variations

    • Swap shrimp for grilled chicken or salmon for a different protein option.
    • Add avocado slices or cherry tomatoes for extra freshness and color.
    • Use kale or spinach instead of romaine for a nutrient-packed version.
    • For a low-carb option, omit the croutons or use almond flour croutons.

    Frequently Asked Questions

    Can I make this salad ahead of time?

    Yes, but for the best results, keep the dressing and croutons separate until ready to serve to prevent sogginess. The shrimp can be cooked ahead and refrigerated, then added cold or quickly reheated before serving.

    What’s the best way to store leftovers?

    Store any leftovers in an airtight container in the refrigerator for up to 2 days. Note that the lettuce may wilt slightly, so it’s best enjoyed fresh.

    Can I use frozen shrimp?

    Absolutely! Just be sure to thaw them completely and pat dry before cooking to ensure they sear properly and don’t release too much water into the salad.

    Summary

    This Caesar salad with shrimp is a refreshing twist on the classic, combining crisp lettuce, creamy dressing, and succulent shrimp for a dish that’s both elegant and easy to make. Perfect for any occasion, it’s sure to become a new favorite.

  • Jello Fruit Salad Recipe: A Wobbly Delight

    Jello Fruit Salad Recipe: A Wobbly Delight

    Zesty and refreshing, this Jello Fruit Salad is the perfect blend of sweet, tangy, and wobbly goodness. Ideal for picnics, potlucks, or just because you deserve a treat that jiggles!

    Why This Recipe Works

    • The combination of fresh fruits and jello creates a refreshing and light dessert that’s perfect for any season.
    • It’s incredibly versatile; you can use any fruit you have on hand or prefer.
    • The recipe is foolproof, requiring no baking and minimal prep time.
    • It’s a hit with both kids and adults, making it a great option for family gatherings.
    • The colorful layers make it as visually appealing as it is delicious.

    Ingredients

    • 2 cups of mixed fresh fruits (strawberries, blueberries, kiwi, etc.), diced
    • 2 packages (3 oz each) of your favorite flavored gelatin
    • 2 cups boiling water
    • 1 cup cold water
    • 1/2 cup whipped cream (optional)

    Equipment Needed

    • Large mixing bowl
    • Whisk
    • Measuring cups
    • Knife and cutting board
    • Refrigerator

    Instructions

    Jello Fruit Salad Recipe

    Step 1: Prepare the Fruits

    Start by washing and dicing your chosen fruits into bite-sized pieces. This ensures every spoonful of your Jello Fruit Salad has a perfect mix of flavors and textures. Tip: For a more vibrant salad, use a variety of colorful fruits.

    Step 2: Dissolve the Gelatin

    In a large mixing bowl, combine the gelatin packages with 2 cups of boiling water. Whisk vigorously for about 2 minutes until the gelatin is completely dissolved. This step is crucial for a smooth, lump-free jello.

    Step 3: Add Cold Water

    Stir in 1 cup of cold water to the dissolved gelatin mixture. This helps to cool the mixture down before adding the fruits, ensuring they don’t get mushy.

    Step 4: Incorporate the Fruits

    Gently fold the diced fruits into the gelatin mixture until evenly distributed. Be careful not to overmix to keep the fruits intact. Tip: For an extra creamy texture, fold in 1/2 cup of whipped cream at this stage.

    Step 5: Chill to Set

    Pour the mixture into a serving dish or individual cups and refrigerate for at least 4 hours, or until fully set. The wait is worth it for that perfect jiggle!

    Tips and Tricks

    For a clearer jello, strain the dissolved gelatin mixture before adding fruits to remove any undissolved particles. To speed up the setting process, place the salad in the freezer for the first 30 minutes before transferring to the fridge. If you’re using canned fruits, drain them well to prevent excess liquid from diluting the gelatin. For a more adult version, a splash of citrus vodka can add a fun twist. Always use fresh fruits for the best texture and flavor.

    Recipe Variations

    • Try using coconut milk instead of cold water for a tropical twist.
    • Layer different flavors of gelatin and fruits for a rainbow effect.
    • Add mini marshmallows or nuts for extra texture.
    • Use sugar-free gelatin for a lighter version.
    • Incorporate yogurt for a creamy, tangy flavor.

    Frequently Asked Questions

    Can I use frozen fruits?

    Yes, but make sure to thaw and drain them thoroughly to avoid extra moisture that can prevent the gelatin from setting properly.

    How long does the salad last in the fridge?

    It’s best enjoyed within 3 days, as the fruits may start to release water and soften the jello over time.

    Can I make this recipe vegan?

    Absolutely! Use agar-agar instead of gelatin, which is a plant-based alternative, and ensure all other ingredients are vegan-friendly.

    Summary

    This Jello Fruit Salad is a delightful, easy-to-make dessert that’s perfect for any occasion. With its vibrant colors and refreshing taste, it’s sure to be a crowd-pleaser.