Blog

  • Tabouli Salad Recipe Couscous: A Fresh Twist on a Classic

    Tabouli Salad Recipe Couscous: A Fresh Twist on a Classic

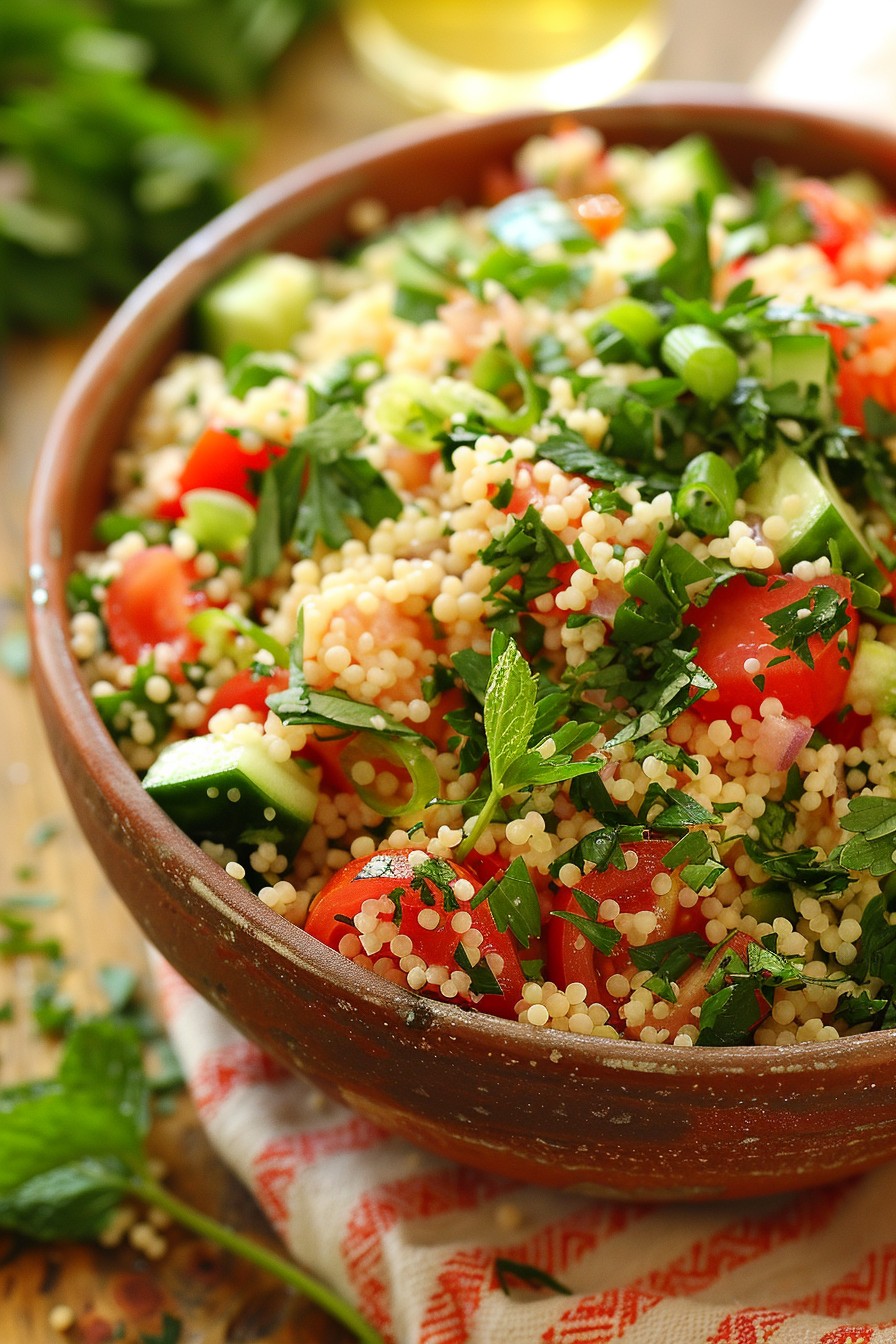
    Unleash the flavors of the Mediterranean with this easy-to-make tabouli salad that swaps traditional bulgur for fluffy couscous. Perfect for picnics, potlucks, or a light lunch, this dish is as nutritious as it is delicious.

    Why This Recipe Works

    • Couscous cooks faster than bulgur, making this recipe a time-saver without sacrificing texture or taste.
    • The combination of fresh herbs and vegetables offers a refreshing crunch and a burst of flavor in every bite.
    • Lemon juice and olive oil dressing keeps it light and tangy, perfectly complementing the earthy tones of the couscous.

    Ingredients

    • 1 cup couscous
    • 1 1/4 cups boiling water
    • 1/2 cup finely chopped parsley
    • 1/4 cup finely chopped mint
    • 2 medium tomatoes, diced
    • 1 cucumber, diced
    • 3 green onions, thinly sliced
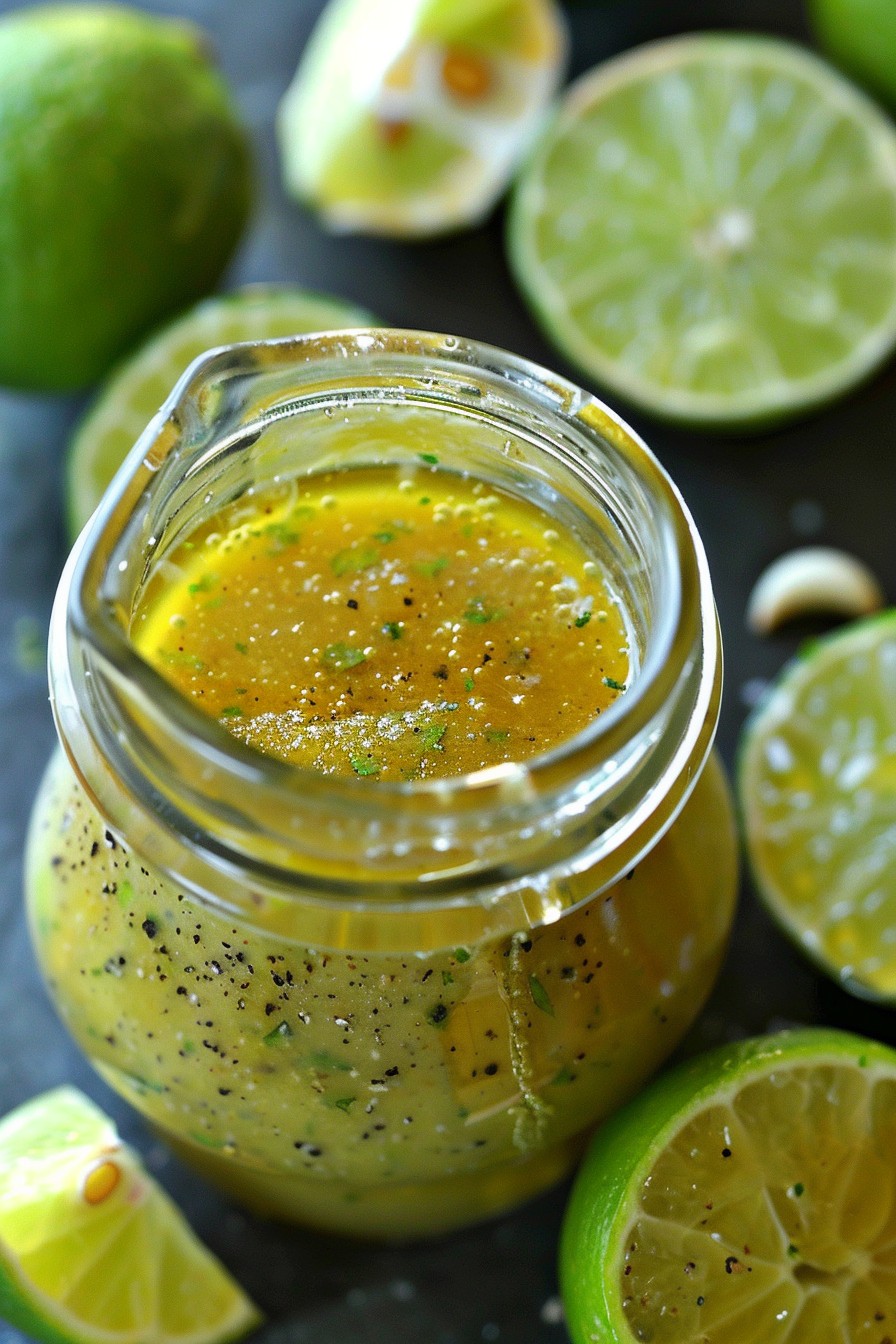
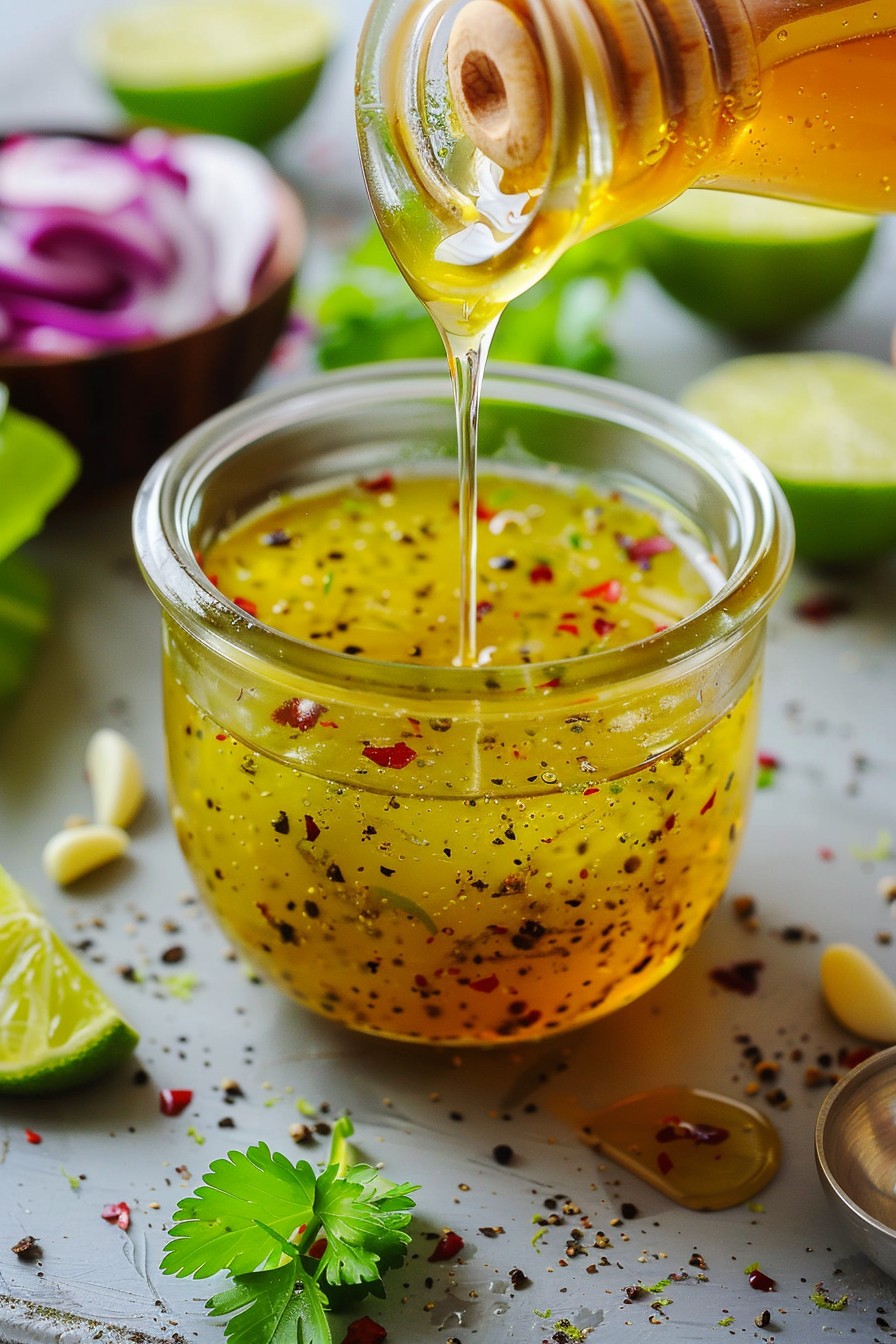
    • 1/4 cup olive oil
    • 3 tablespoons lemon juice
    • 1 teaspoon salt
    • 1/2 teaspoon black pepper

    Equipment Needed

    • Medium bowl
    • Fine mesh strainer
    • Knife
    • Cutting board
    • Measuring cups and spoons

    Instructions

    Tabouli Salad Recipe Couscous

    Step 1: Prepare the Couscous

    Place the couscous in a medium bowl and pour the boiling water over it. Cover the bowl with a lid or plate and let it sit for about 5 minutes, until the couscous has absorbed all the water. Fluff it with a fork to separate the grains. Tip: For extra flavor, you can cook the couscous in vegetable broth instead of water.

    Step 2: Chop the Vegetables and Herbs

    While the couscous is resting, finely chop the parsley, mint, tomatoes, cucumber, and green onions. The key to a great tabouli is finely chopped ingredients, so take your time with this step. Tip: Using a sharp knife will make this process easier and quicker.

    Step 3: Mix the Salad

    In a large bowl, combine the fluffed couscous with the chopped vegetables and herbs. Drizzle with olive oil and lemon juice, then sprinkle with salt and black pepper. Toss everything together until well combined. Tip: Let the salad sit for about 10 minutes before serving to allow the flavors to meld together.

    Step 4: Serve and Enjoy

    Transfer the tabouli salad to a serving dish and enjoy immediately, or refrigerate it for up to 2 days. The flavors will continue to develop over time, making it even more delicious the next day.

    Tips and Tricks

    For an even more vibrant tabouli salad, consider adding diced bell peppers or radishes for extra color and crunch. If you’re not a fan of mint, you can substitute it with more parsley or even cilantro for a different flavor profile. To make this dish ahead of time, prepare all the ingredients but wait to add the dressing until just before serving to keep the salad fresh and crisp.

    Recipe Variations

    • Add feta cheese or chickpeas for a protein boost.
    • Swap the couscous for quinoa or bulgur wheat for a different texture.
    • Include avocado for a creamy twist.
    • Use lime juice instead of lemon juice for a slightly different tang.
    • Add a pinch of cumin or coriander for an extra layer of flavor.

    Frequently Asked Questions

    Q: Can I make this recipe gluten-free?
    A: Absolutely! Just substitute the couscous with a gluten-free grain like quinoa or rice. The rest of the ingredients are naturally gluten-free, so you won’t need to make any other changes.

    Q: How long does tabouli salad last in the fridge?
    A: Stored in an airtight container, tabouli salad can last up to 2 days in the refrigerator. However, the longer it sits, the more the herbs will wilt, so it’s best enjoyed fresh.

    Q: Can I freeze tabouli salad?
    A: Freezing is not recommended as the fresh vegetables and herbs will lose their texture and flavor when thawed.

    Summary

    This couscous tabouli salad is a quick, flavorful, and versatile dish that’s perfect for any occasion. With its fresh ingredients and simple preparation, it’s sure to become a favorite in your recipe collection.

  • Lobster Salad Recipe Without Mayonnaise: A Light & Zesty Delight

    Lobster Salad Recipe Without Mayonnaise: A Light & Zesty Delight

    Today, we’re diving into a lobster salad that skips the mayo but keeps all the flavor. Trust me, your taste buds won’t miss it one bit. This recipe is all about letting the lobster shine, with a dressing that’s light, zesty, and utterly delicious.

    Why This Recipe Works

    • It’s a healthier alternative to traditional lobster salad, cutting out the mayo without sacrificing taste.
    • The dressing is a vibrant mix of citrus and herbs, perfectly complementing the sweet lobster meat.
    • It’s incredibly versatile, serving as a perfect sandwich filler, salad topper, or elegant appetizer.

    Ingredients

    • 1 lb cooked lobster meat, chopped
    • 1/4 cup extra virgin olive oil
    • 2 tbsp fresh lemon juice
    • 1 tsp lemon zest
    • 1/4 cup finely chopped celery
    • 2 tbsp chopped fresh dill
    • Salt and pepper to taste

    Equipment Needed

    • Mixing bowl
    • Whisk
    • Measuring cups and spoons
    • Knife and cutting board

    Instructions

    Lobster Salad Recipe Without Mayonnaise

    Step 1: Prepare the Dressing

    In a mixing bowl, whisk together the olive oil, lemon juice, and lemon zest until well combined. This creates a light and zesty base for your salad. Tip: For an extra flavor boost, let the dressing sit for 10 minutes before adding the lobster.

    Step 2: Combine the Ingredients

    Add the chopped lobster meat, celery, and dill to the bowl with the dressing. Gently toss to ensure everything is evenly coated. The key here is to be gentle to keep the lobster meat from breaking apart too much.

    Step 3: Season to Taste

    Season the salad with salt and pepper to your liking. Remember, the lobster is already flavorful, so you might not need much. Tip: Always taste before adding more seasoning.

    Step 4: Chill Before Serving

    Cover the bowl and refrigerate the salad for at least 30 minutes. This allows the flavors to meld together beautifully. Serving it chilled also enhances the refreshing quality of the dish.

    Tips and Tricks

    For the best lobster salad, start with the freshest lobster you can find. If you’re cooking the lobster yourself, be sure not to overcook it, as this can make the meat tough. Another tip is to experiment with the dressing by adding a pinch of cayenne pepper for a slight kick. Lastly, if you’re serving this as an appetizer, consider presenting it in small lettuce cups for an elegant touch.

    Recipe Variations

    • Add avocado for a creamy texture without the mayo.
    • Incorporate diced mango or peach for a sweet contrast to the savory lobster.
    • Swap the dill for tarragon or basil for a different herbal note.
    • Mix in some finely diced cucumber for extra crunch.
    • Use lime instead of lemon for a tropical twist.

    Frequently Asked Questions

    Can I use frozen lobster meat?

    Absolutely! Just make sure it’s thoroughly thawed and drained to avoid any excess water in your salad. Frozen lobster can be a great time-saver and is often more accessible than fresh.

    How long does this salad last in the fridge?

    Stored in an airtight container, it should keep for up to two days. However, it’s best enjoyed the day it’s made when the lobster is at its freshest.

    Can I make this salad ahead of time?

    Yes, preparing it a few hours in advance allows the flavors to develop even more. Just hold off on adding any avocado or fresh herbs until right before serving to maintain their texture and color.

    Summary

    This lobster salad without mayonnaise is a light, flavorful alternative that’s perfect for any occasion. With its zesty dressing and fresh ingredients, it’s sure to impress. Whether you’re looking for a healthy lunch option or an elegant appetizer, this recipe has you covered.

  • Champagne Vinaigrette Salad Dressing Recipe: Elevate Your Greens with a Sparkle

    Champagne Vinaigrette Salad Dressing Recipe: Elevate Your Greens with a Sparkle

    So, you’re looking to add a little pizzazz to your salad game? Look no further! This champagne vinaigrette is like the little black dress of salad dressings—elegant, versatile, and always in style. Let’s dive into making this bubbly concoction that’ll have your taste buds dancing.

    Why This Recipe Works

    • The combination of champagne vinegar and Dijon mustard creates a perfect balance of tangy and sweet.
    • Using high-quality olive oil ensures a smooth, rich texture that coats every leaf beautifully.
    • It’s incredibly versatile, pairing well with everything from a simple green salad to more elaborate dishes.
    • The recipe is quick and easy, requiring just a few minutes and minimal equipment.
    • It’s a great way to impress guests with your culinary skills without breaking a sweat.

    Ingredients

    • 1/2 cup champagne vinegar
    • 1 tablespoon Dijon mustard
    • 1 teaspoon honey
    • 1/2 teaspoon salt
    • 1/4 teaspoon freshly ground black pepper
    • 3/4 cup extra-virgin olive oil

    Equipment Needed

    • Measuring cups and spoons
    • A small whisk or fork
    • A jar with a tight-fitting lid for shaking

    Instructions

    Champagne Vinaigrette Salad Dressing Recipe

    Step 1: Combine the Base Ingredients

    In a small bowl, whisk together the champagne vinegar, Dijon mustard, honey, salt, and pepper until the honey is fully dissolved and the mixture is smooth. This is the foundation of your dressing, so take your time to ensure everything is well incorporated.

    Step 2: Slowly Add the Olive Oil

    Gradually drizzle in the olive oil while continuously whisking. This slow addition helps emulsify the dressing, creating a cohesive and creamy texture. If you rush this step, the dressing may separate.

    Step 3: Taste and Adjust

    Give your dressing a taste and adjust the seasoning if necessary. Maybe it needs a pinch more salt or a dash more honey? Trust your palate—it’s your best tool in the kitchen.

    Step 4: Shake It Up

    Transfer the dressing to a jar with a tight-fitting lid and give it a good shake. This not only mixes the dressing thoroughly but also helps to emulsify it further. Plus, it’s kinda fun.

    Step 5: Serve or Store

    Your champagne vinaigrette is ready to dress your favorite salad. If you’re not using it right away, store it in the refrigerator. Just remember to give it a good shake before serving to recombine any separated ingredients.

    Tips and Tricks

    For an even smoother dressing, consider using a blender or food processor to emulsify the ingredients. If you’re out of champagne vinegar, white wine vinegar makes a decent substitute, though the flavor profile will be slightly different. To add a bit of freshness, whisk in some finely chopped herbs like tarragon or chives. Always use the best quality olive oil you can afford—it makes a difference. And remember, dressing can be made ahead of time and stored in the fridge for up to a week.

    Recipe Variations

    • Add a minced shallot for a bit of sharpness and texture.
    • Swap out the honey for maple syrup for a different kind of sweetness.
    • Incorporate a teaspoon of lemon zest for a citrusy kick.
    • For a creamier version, blend in a tablespoon of Greek yogurt.
    • Throw in some crushed garlic if you’re a fan of bold flavors.

    Frequently Asked Questions

    Can I use regular vinegar instead of champagne vinegar?

    While you can substitute white wine vinegar or even apple cider vinegar in a pinch, champagne vinegar has a unique, delicate flavor that’s hard to replicate. The substitution will work, but the dressing won’t have quite the same sparkle.

    How long does this dressing last in the fridge?

    Stored properly in an airtight container, your champagne vinaigrette will stay fresh for up to a week. Just give it a good shake before using to recombine the ingredients.

    Can I make this dressing without honey?

    Absolutely! If you’re avoiding honey, you can use another sweetener like agave syrup or even skip the sweetener altogether. The dressing will be more tart, but still delicious.

    Summary

    This champagne vinaigrette is a simple yet sophisticated dressing that can elevate any salad. With its perfect balance of tangy and sweet, it’s sure to become a staple in your kitchen. Plus, it’s easy to customize to your taste preferences.

  • Creamy Chicken Salad Recipe with Mayo: A No-Fuss Lunch Favorite

    Creamy Chicken Salad Recipe with Mayo: A No-Fuss Lunch Favorite

    Some days call for a lunch that’s both effortless and satisfying. This creamy chicken salad recipe with mayo is your go-to solution, blending simplicity with flavors that dance on your palate.

    Why This Recipe Works

    • The combination of tender chicken and creamy mayo creates a texture that’s irresistibly smooth.
    • A hint of mustard and a squeeze of lemon juice add a tangy twist that elevates the dish.
    • It’s versatile enough to serve on bread, greens, or straight from the bowl.
    • Prep time is minimal, making it perfect for busy weekdays.
    • Customizable with your favorite add-ins for a personal touch.

    Ingredients

    • 2 cups cooked chicken, shredded
    • 1/2 cup mayonnaise
    • 1 tbsp mustard
    • 1 tbsp lemon juice
    • 1/4 cup celery, finely chopped
    • Salt and pepper to taste

    Equipment Needed

    • Mixing bowl
    • Whisk
    • Measuring cups and spoons
    • Knife and cutting board

    Instructions

    Chicken Salad Recipe With Mayo

    Step 1: Prepare Your Ingredients

    Start by ensuring your cooked chicken is shredded into bite-sized pieces. Finely chop the celery to add a crunchy texture to your salad. Measuring out your mayo, mustard, and lemon juice beforehand will streamline the mixing process.

    Step 2: Mix the Wet Ingredients

    In a large mixing bowl, whisk together the mayonnaise, mustard, and lemon juice until smooth. This combination will serve as the creamy base of your chicken salad, so make sure it’s well blended.

    Step 3: Combine with Chicken

    Add the shredded chicken and chopped celery to the bowl with your wet ingredients. Gently fold everything together until the chicken is evenly coated with the mayo mixture. Season with salt and pepper to taste.

    Step 4: Chill Before Serving

    For the best flavor, cover your chicken salad and refrigerate it for at least 30 minutes before serving. This allows the ingredients to meld together beautifully.

    Step 5: Serve and Enjoy

    Once chilled, your chicken salad is ready to be enjoyed. Serve it on a bed of greens, between slices of your favorite bread, or as is for a delicious and satisfying meal.

    Tips and Tricks

    For an even creamier texture, consider using Greek yogurt in place of half the mayo. If you’re a fan of crunch, adding chopped nuts or apples can introduce a delightful texture contrast. For those who enjoy a bit of heat, a dash of cayenne pepper or some diced jalapeños can spice things up. Remember, the key to a great chicken salad is balancing the creamy with the crunchy and the savory with the sweet or spicy, so don’t be afraid to experiment with flavors.

    Recipe Variations

    • Add grapes and walnuts for a sweet and nutty twist.
    • Incorporate curry powder and raisins for an exotic flavor profile.
    • Use avocado mayo for a healthier, dairy-free version.
    • Mix in diced pickles or relish for a tangy crunch.
    • Swap chicken for turkey or tuna for a different protein option.

    Frequently Asked Questions

    Can I make this chicken salad ahead of time? Absolutely! This chicken salad can be made up to 3 days in advance, making it a perfect meal prep option. Just store it in an airtight container in the fridge.

    What’s the best way to cook chicken for this salad? You can boil, bake, or even use a rotisserie chicken for convenience. The key is to ensure it’s cooked through and tender enough to shred easily.

    Can I freeze chicken salad? It’s not recommended to freeze chicken salad as the mayo can separate and the texture of the vegetables may become watery upon thawing.

    Summary

    This creamy chicken salad recipe with mayo is a versatile, easy-to-make dish that’s perfect for lunches, picnics, or a quick dinner. With simple ingredients and endless customization options, it’s sure to become a staple in your recipe collection.

  • Banana Fluff Salad Recipe: A Cloud of Delight

    Banana Fluff Salad Recipe: A Cloud of Delight

    Just when you thought bananas couldn’t get any better, along comes this banana fluff salad recipe to prove you wrong. It’s the perfect blend of creamy, fluffy, and fruity that’ll have you floating on cloud nine with every bite.

    Why This Recipe Works

    • It’s incredibly easy to make, requiring no baking or complicated steps.
    • The combination of bananas and whipped cream creates a texture that’s both light and satisfying.
    • It’s versatile, allowing for numerous variations to suit any taste.
    • Perfect for any occasion, from family dinners to potlucks.
    • It’s a great way to use up ripe bananas, reducing food waste.

    Ingredients

    • 4 ripe bananas, sliced
    • 2 cups heavy whipping cream
    • 1/4 cup powdered sugar
    • 1 tsp vanilla extract
    • 1/2 cup mini marshmallows
    • 1/4 cup chopped walnuts (optional)

    Equipment Needed

    • Electric mixer
    • Large mixing bowl
    • Spatula
    • Measuring cups and spoons

    Instructions

    Banana Fluff Salad Recipe

    Step 1: Whip the Cream

    In a large mixing bowl, pour the heavy whipping cream. Using an electric mixer on high speed, whip the cream until it starts to thicken. This should take about 2 minutes. Then, add the powdered sugar and vanilla extract, continuing to whip until stiff peaks form. Tip: Make sure your bowl and mixer attachments are cold for the best results.

    Step 2: Fold in the Bananas

    Gently fold the sliced bananas into the whipped cream mixture using a spatula. Be careful not to overmix, as you want to keep the mixture light and fluffy. Tip: For an extra touch of flavor, sprinkle a little lemon juice over the bananas before adding them to prevent browning.

    Step 3: Add the Extras

    Fold in the mini marshmallows and chopped walnuts (if using) until just combined. This adds a delightful texture and sweetness to the salad.

    Step 4: Chill Before Serving

    Cover the bowl with plastic wrap and refrigerate for at least 1 hour before serving. This allows the flavors to meld together beautifully. Tip: For an even fluffier texture, you can chill the bowl and beaters before whipping the cream.

    Tips and Tricks

    For those looking to elevate their banana fluff salad, consider these advanced tips. First, toasting the walnuts before adding them can bring out a deeper flavor. Second, incorporating a layer of crushed pineapple (well-drained) can add a tropical twist. Lastly, for a more decadent version, drizzle with caramel sauce before serving. Remember, the key to a perfect fluff salad is keeping it light, so avoid overmixing the ingredients.

    Recipe Variations

    • Chocolate Lover’s Dream: Add cocoa powder to the whipped cream and top with chocolate chips.
    • Tropical Twist: Mix in coconut flakes and diced mango for a sunny variation.
    • Berry Blast: Layer fresh strawberries or blueberries for a fruity contrast.
    • Nutty Delight: Swap walnuts for pecans or almonds for a different crunch.
    • Spiced Version: A dash of cinnamon or nutmeg can add warmth to the dish.

    Frequently Asked Questions

    Can I make this recipe ahead of time? Absolutely! This salad actually benefits from being made a few hours in advance, as it allows the flavors to meld. Just keep it refrigerated until you’re ready to serve.

    Can I use frozen bananas? While you can use frozen bananas, it’s best to thaw and drain them first to avoid adding extra moisture to the salad.

    Is there a dairy-free version? Yes, you can substitute the heavy whipping cream with coconut cream for a dairy-free alternative. Just make sure to chill the coconut cream can overnight before whipping.

    Summary

    This banana fluff salad is a delightful, easy-to-make dessert that’s perfect for any occasion. With its creamy texture and customizable variations, it’s sure to be a hit with everyone. Give it a try and watch it disappear!

  • Seafood Salad Dressing Recipe: A Zesty Twist to Your Greens

    Seafood Salad Dressing Recipe: A Zesty Twist to Your Greens

    Unleash the flavor of the ocean with this seafood salad dressing that’s bound to make your salads the talk of the town. Perfect for those who love a little zest and a lot of flavor, this dressing is your ticket to a refreshing and delicious meal.

    Why This Recipe Works

    • It combines the freshness of seafood with the tanginess of lemon and the creaminess of mayonnaise for a balanced flavor.
    • The addition of herbs and spices elevates the dressing, making it anything but ordinary.
    • It’s versatile enough to pair with any salad, from a simple green salad to a more elaborate seafood salad.

    Ingredients

    • 1 cup mayonnaise
    • 1/2 cup sour cream
    • 2 tbsp lemon juice
    • 1 tsp lemon zest
    • 1/2 tsp garlic powder
    • 1/2 tsp onion powder
    • 1/4 tsp paprika
    • 1/4 tsp salt
    • 1/4 tsp black pepper
    • 1/4 cup finely chopped parsley
    • 1/4 cup finely chopped dill
    • 1/2 cup finely chopped cooked shrimp
    • 1/2 cup finely chopped cooked crab meat

    Equipment Needed

    • Mixing bowl
    • Whisk
    • Measuring cups and spoons
    • Zester
    • Knife and cutting board

    Instructions

    Seafood Salad Dressing Recipe

    Step 1: Combine the Base Ingredients

    In a large mixing bowl, whisk together the mayonnaise and sour cream until smooth. This creates the creamy base of your dressing. For an extra smooth texture, you can use an electric mixer on low speed for about 30 seconds.

    Step 2: Add the Flavors

    Stir in the lemon juice, lemon zest, garlic powder, onion powder, paprika, salt, and black pepper. Mix well to ensure all the flavors are evenly distributed throughout the dressing. Taste and adjust the seasoning if necessary.

    Step 3: Incorporate the Herbs and Seafood

    Fold in the chopped parsley, dill, shrimp, and crab meat gently to avoid breaking the seafood pieces too much. This step adds texture and the signature seafood flavor to your dressing.

    Step 4: Chill Before Serving

    Cover the bowl with plastic wrap and refrigerate for at least 1 hour before serving. This allows the flavors to meld together beautifully. The dressing can be stored in the refrigerator for up to 3 days.

    Tips and Tricks

    For the best flavor, use fresh lemon juice and zest instead of bottled lemon juice. Fresh herbs also make a significant difference in the taste. If you’re using frozen seafood, make sure it’s thoroughly thawed and drained to prevent the dressing from becoming watery. For a smoother dressing, you can blend all the ingredients except the seafood in a food processor, then fold in the seafood by hand.

    Recipe Variations

    • For a lighter version, substitute Greek yogurt for half of the mayonnaise.
    • Add a teaspoon of horseradish for a spicy kick.
    • Include chopped capers or olives for a briny flavor.
    • Use smoked salmon instead of shrimp and crab for a different seafood twist.
    • For a dairy-free version, use avocado instead of sour cream.

    Frequently Asked Questions

    Can I make this dressing ahead of time?

    Absolutely! This dressing actually tastes better after it’s had time to chill and the flavors have melded together. Just be sure to store it in an airtight container in the refrigerator.

    What salads pair well with this dressing?

    This dressing is versatile and pairs well with a variety of salads, from simple mixed greens to more elaborate seafood or pasta salads. It’s also great as a dip for vegetables or crackers.

    Can I use canned seafood?

    Yes, you can use canned shrimp or crab meat in a pinch. Just be sure to drain it well and give it a quick rinse to remove any excess salt or preservatives.

    Summary

    This seafood salad dressing is a creamy, zesty, and flavorful addition to any salad. With its combination of fresh herbs, spices, and seafood, it’s sure to elevate your meal to the next level. Easy to make and versatile, it’s a must-try for seafood lovers.

  • Honey Lime Salad Dressing: A Zesty Twist to Elevate Your Greens

    Honey Lime Salad Dressing: A Zesty Twist to Elevate Your Greens

    Very few dressings can claim the perfect balance of sweet and tangy like our Honey Lime Salad Dressing. This recipe is a game-changer for your salad game, offering a refreshing burst of flavor that complements everything from leafy greens to fruit salads. Let’s dive into making this vibrant dressing that’s sure to become a staple in your kitchen.

    Why This Recipe Works

    • The combination of honey and lime creates a perfect harmony of sweetness and acidity, elevating any salad.
    • Using fresh lime juice instead of bottled ensures a brighter, more authentic flavor.
    • Extra virgin olive oil adds a smooth, rich base that carries the flavors beautifully.
    • This dressing is incredibly versatile, doubling as a marinade for chicken or shrimp.
    • It’s quick to make, requiring just a few minutes and no cooking.

    Ingredients

    • 1/4 cup fresh lime juice (about 2 limes)
    • 2 tablespoons honey
    • 1/2 cup extra virgin olive oil
    • 1 teaspoon Dijon mustard
    • 1/2 teaspoon salt
    • 1/4 teaspoon black pepper
    • 1 garlic clove, minced

    Equipment Needed

    • Measuring cups and spoons
    • Juicer or reamer
    • Whisk or blender
    • Small bowl or jar with lid

    Instructions

    Recipe For Honey Lime Salad Dressing

    Step 1: Juice the Limes

    Start by juicing your limes until you have 1/4 cup of fresh lime juice. This ensures your dressing has that vibrant, tangy flavor that bottled juice just can’t match. Tip: Roll the limes on the counter before cutting to maximize juice extraction.

    Step 2: Combine Wet Ingredients

    In a small bowl or jar, whisk together the lime juice, honey, and Dijon mustard until the honey is fully dissolved. This creates a smooth base for your dressing. Tip: If the honey is too thick, warm it slightly for easier mixing.

    Step 3: Slowly Add Olive Oil

    Gradually whisk in the olive oil to emulsify the dressing, ensuring it doesn’t separate. This step is crucial for achieving that perfect, creamy consistency. Tip: For an even smoother dressing, use a blender instead of a whisk.

    Step 4: Season to Taste

    Add the minced garlic, salt, and pepper, then whisk again to combine. Taste and adjust the seasoning as needed. Remember, the flavors will meld and intensify as the dressing sits.

    Step 5: Serve or Store

    Use immediately or store in an airtight container in the refrigerator for up to a week. Shake or whisk before serving to recombine the ingredients.

    Tips and Tricks

    For those looking to take their Honey Lime Salad Dressing to the next level, consider these advanced tips. First, infuse your olive oil with herbs like thyme or rosemary for an added layer of flavor. Second, if you prefer a creamier dressing, blend in a quarter of an avocado. Lastly, for a spicier kick, add a pinch of cayenne pepper or a few drops of hot sauce. These small tweaks can transform your dressing into something truly special.

    Recipe Variations

    • For a vegan version, substitute the honey with maple syrup or agave nectar.
    • Add a tablespoon of orange juice for a citrusy twist that brightens the flavor profile.
    • Incorporate fresh herbs like cilantro or mint for a refreshing herbal note.
    • For a creamier texture, mix in a tablespoon of Greek yogurt or mayonnaise.
    • Swap the Dijon mustard for whole grain mustard for a different texture and flavor.

    Frequently Asked Questions

    Can I make this dressing ahead of time? Absolutely! This dressing can be made up to a week in advance and stored in the refrigerator. Just give it a good shake or whisk before serving to recombine the ingredients.

    What can I use if I don’t have fresh limes? While fresh lime juice is recommended for the best flavor, you can use bottled lime juice in a pinch. Just be aware that the flavor might not be as vibrant.

    Is there a substitute for olive oil? Yes, you can use avocado oil or grapeseed oil as a substitute for olive oil. Both have neutral flavors that won’t overpower the dressing.

    Summary

    This Honey Lime Salad Dressing is a delightful blend of sweet and tangy flavors, perfect for elevating any salad. With just a few simple ingredients and steps, you can create a dressing that’s both versatile and delicious. Whether you’re dressing a simple green salad or using it as a marinade, this recipe is sure to impress.

  • Red Fruit Salad Recipe: A Vibrant Bowl of Joy

    Red Fruit Salad Recipe: A Vibrant Bowl of Joy

    Howdy, fruit lovers! Today, we’re diving into a bowl of pure happiness with our Red Fruit Salad. This recipe is not just a treat for your taste buds but also a feast for your eyes. Perfect for any season, this salad brings together the juiciest red fruits for a refreshing, healthy, and downright delicious experience.

    Why This Recipe Works

    • Colorful and Nutritious: Packed with antioxidants and vitamins, this salad is as healthy as it is beautiful.
    • Quick and Easy: With minimal prep time, you can whip up this salad in no time, making it perfect for busy days.
    • Versatile: Enjoy it as a standalone snack, a side dish, or even as a topping for your favorite desserts.

    Ingredients

    • 2 cups strawberries, hulled and sliced
    • 1 cup raspberries
    • 1 cup cherries, pitted and halved
    • 1 cup watermelon, cubed
    • 1 tbsp honey
    • 1 tbsp fresh mint leaves, chopped

    Equipment Needed

    • Large mixing bowl
    • Sharp knife
    • Cutting board
    • Measuring cups and spoons

    Instructions

    Red Fruit Salad Recipe

    Prepare Your Fruits

    Start by washing all your fruits under cold water. Pat them dry gently. Hull and slice the strawberries, pit and halve the cherries, and cube the watermelon. The raspberries can go in whole, but feel free to halve them if you prefer smaller pieces.

    Combine the Fruits

    In a large mixing bowl, gently toss together the strawberries, raspberries, cherries, and watermelon. The key here is to be gentle to keep the fruits intact and beautiful.

    Add the Sweet Touch

    Drizzle the honey over the fruit mixture. This not only adds a touch of sweetness but also brings all the flavors together beautifully.

    Garnish and Serve

    Sprinkle the chopped mint leaves over the top for a fresh, aromatic finish. Serve immediately or chill in the refrigerator for an hour to let the flavors meld together even more.

    Tips and Tricks

    For an extra zing, add a squeeze of lime juice to the salad. It brightens up the flavors and adds a lovely tang. If you’re serving this salad at a party, consider adding a splash of orange liqueur for an adult version. Always use the freshest fruits you can find for the best taste and texture. And remember, the salad tastes best when served fresh, but it can be stored in the fridge for up to two days.

    Recipe Variations

    • Add Some Crunch: Toss in some chopped nuts like almonds or walnuts for a delightful crunch.
    • Creamy Version: Mix in a dollop of Greek yogurt or whipped cream for a creamy twist.
    • Spicy Kick: A pinch of chili powder can add an unexpected but delicious spicy note.

    Frequently Asked Questions

    Can I use frozen fruits instead of fresh? While fresh fruits are recommended for the best texture and flavor, you can use frozen fruits in a pinch. Just make sure to thaw and drain them well before using.

    How can I make this salad ahead of time? You can prepare the fruits and keep them refrigerated separately. Combine them with the honey and mint just before serving to prevent the fruits from becoming soggy.

    Is there a substitute for honey? Absolutely! Maple syrup or agave nectar are great vegan alternatives that work just as well.

    Summary

    This Red Fruit Salad is a simple, nutritious, and versatile dish that’s perfect for any occasion. With its vibrant colors and fresh flavors, it’s sure to be a hit among kids and adults alike.

  • Apricot Salad Recipe: A Sweet and Tangy Delight

    Apricot Salad Recipe: A Sweet and Tangy Delight

    How about we dive into a recipe that’s as vibrant as a summer sunset? This apricot salad is the perfect blend of sweet, tangy, and crunchy, making it a hit at any gathering or a refreshing treat for yourself. Let’s get started!

    Why This Recipe Works

    • The combination of fresh apricots and mixed greens offers a delightful contrast in textures and flavors.
    • A homemade honey-lime dressing adds a zesty kick that complements the sweetness of the apricots.
    • Adding nuts introduces a satisfying crunch, making every bite interesting.
    • It’s incredibly versatile; you can easily swap ingredients based on what’s in season or your personal preferences.
    • This salad is not only delicious but also packed with nutrients, making it a healthy choice for any meal.

    Ingredients

    • 4 cups mixed greens (washed and dried)
    • 6 fresh apricots (pitted and sliced)
    • 1/2 cup walnuts (toasted and roughly chopped)
    • 1/4 cup feta cheese (crumbled)
    • 2 tbsp honey
    • 1 lime (juiced)
    • 2 tbsp olive oil
    • Salt and pepper to taste

    Equipment Needed

    • Large salad bowl
    • Small mixing bowl
    • Whisk
    • Knife and cutting board
    • Measuring cups and spoons

    Instructions

    Apricot Salad Recipe

    Prepare the Dressing

    In a small mixing bowl, whisk together the honey, lime juice, and olive oil until well combined. Season with salt and pepper to taste. This dressing is the secret to the salad’s vibrant flavor, so don’t skip it! Tip: For a smoother dressing, you can blend the ingredients instead of whisking.

    Toast the Walnuts

    Heat a dry skillet over medium heat and add the walnuts. Toast them for about 5 minutes, stirring occasionally, until they’re fragrant and slightly browned. Let them cool before adding to the salad. This step enhances the nuts’ flavor and adds a nice crunch.

    Assemble the Salad

    In a large salad bowl, combine the mixed greens, sliced apricots, toasted walnuts, and crumbled feta cheese. Drizzle the dressing over the salad and toss gently to coat all the ingredients evenly. Tip: Add the dressing just before serving to keep the greens crisp.

    Serve Immediately

    This salad is best enjoyed fresh, so serve it right after assembling. The contrast of the sweet apricots, tangy dressing, and crunchy walnuts is simply irresistible.

    Tips and Tricks

    To make this apricot salad even more special, consider these tips. First, if apricots aren’t in season, peaches or nectarines make great substitutes. Second, for an extra protein boost, add grilled chicken or shrimp. Third, toasting the nuts is a game-changer; it brings out their natural oils and flavors. Lastly, if you’re preparing the salad ahead of time, keep the dressing separate and add it just before serving to prevent the greens from wilting.

    Recipe Variations

    • Swap apricots for peaches or nectarines for a different sweet twist.
    • Use goat cheese instead of feta for a creamier texture.
    • Add avocado slices for extra creaminess and healthy fats.
    • Include a handful of arugula for a peppery kick.
    • For a vegan version, omit the cheese or use a plant-based alternative.

    Frequently Asked Questions

    Can I use dried apricots instead of fresh?

    While fresh apricots are recommended for their juiciness and texture, dried apricots can be used in a pinch. Just remember to soak them in warm water for about 10 minutes to soften before adding to the salad.

    How long can I store the leftover salad?

    This salad is best enjoyed fresh, but if you have leftovers, store them in an airtight container in the refrigerator for up to one day. Keep in mind that the greens may wilt slightly.

    Can I make the dressing ahead of time?

    Absolutely! The dressing can be prepared up to 3 days in advance and stored in the refrigerator. Just give it a good shake or whisk before using.

    Summary

    This apricot salad is a refreshing, nutritious, and versatile dish that’s perfect for any occasion. With its sweet and tangy flavors, it’s sure to be a crowd-pleaser. Give it a try and enjoy the taste of summer in every bite!

  • Crunchy & Creamy Coleslaw Ramen Noodle Salad Recipe – A Fusion Delight!

    Crunchy & Creamy Coleslaw Ramen Noodle Salad Recipe – A Fusion Delight!

    Unleash your taste buds with this unexpected yet utterly delicious fusion of coleslaw and ramen noodles. Perfect for picnics, potlucks, or a quick lunch, this recipe brings together the best of both worlds in a dish that’s as fun to make as it is to eat.

    Why This Recipe Works

    • The crunch of ramen noodles adds an unexpected texture to the creamy coleslaw, creating a perfect balance.
    • It’s incredibly versatile, allowing for endless variations to suit any taste or dietary preference.
    • Quick and easy to prepare, this dish is perfect for last-minute gatherings or a speedy lunch option.
    • The combination of flavors from the coleslaw dressing and the savory ramen seasoning packs a punch in every bite.

    Ingredients

    • 1 package (3 oz) ramen noodles, crushed (discard seasoning packet or save for another use)
    • 4 cups coleslaw mix
    • 1/2 cup mayonnaise
    • 2 tbsp apple cider vinegar
    • 1 tbsp sugar
    • 1/2 tsp salt
    • 1/4 tsp black pepper
    • 1/4 cup sliced almonds
    • 2 green onions, thinly sliced

    Equipment Needed

    • Large mixing bowl
    • Whisk
    • Measuring cups and spoons
    • Knife and cutting board

    Instructions

    Coleslaw Ramen Noodle Salad Recipe

    Step 1: Prepare the Dressing

    In a large mixing bowl, whisk together the mayonnaise, apple cider vinegar, sugar, salt, and black pepper until smooth. This creamy dressing is the secret to binding all the flavors together. Tip: For a lighter version, you can substitute half of the mayonnaise with Greek yogurt.

    Step 2: Combine the Coleslaw and Dressing

    Add the coleslaw mix to the bowl with the dressing. Use a spatula or your hands to toss until the coleslaw is evenly coated. This ensures every bite is flavorful. Tip: Letting the coleslaw sit for 5 minutes before adding the noodles allows the flavors to meld beautifully.

    Step 3: Add the Crunch

    Stir in the crushed ramen noodles and sliced almonds. The noodles will start to soften slightly but retain a delightful crunch. Tip: For extra crunch, toast the almonds in a dry skillet over medium heat for 2-3 minutes before adding them to the salad.

    Step 4: Garnish and Serve

    Sprinkle the sliced green onions over the top for a pop of color and freshness. Serve immediately for the best texture, or refrigerate for up to 2 hours if you prefer a softer noodle texture.

    Tips and Tricks

    For those looking to elevate this dish, consider adding a protein like grilled chicken or shrimp to make it a hearty meal. If you’re serving this at a gathering, keep the noodles separate and add them just before serving to maintain their crunch. Experiment with different types of nuts or seeds for varying textures and flavors. A dash of sesame oil can add an Asian twist to the dressing, complementing the ramen noodles perfectly.

    Recipe Variations

    • Spicy Version: Add a teaspoon of sriracha or a pinch of red pepper flakes to the dressing for a kick.
    • Vegetarian Delight: Mix in some edamame or chickpeas for extra protein.
    • Fruity Twist: Incorporate diced apples or raisins for a sweet contrast to the savory flavors.
    • Asian Fusion: Swap the mayonnaise with a mix of peanut butter and soy sauce for an Asian-inspired dressing.

    Frequently Asked Questions

    Can I make this salad ahead of time?

    Yes, you can prepare the coleslaw and dressing ahead of time, but add the ramen noodles and almonds just before serving to keep them crunchy. The salad is best enjoyed within a few hours of assembly.

    Can I use a different type of noodle?

    Absolutely! While ramen noodles provide a unique texture, you can experiment with soba noodles or even spaghetti broken into small pieces for a different twist.

    Is there a way to make this recipe healthier?

    For a healthier version, use whole wheat ramen noodles, reduce the mayonnaise by half and substitute with Greek yogurt, and add more vegetables like shredded carrots or bell peppers.

    Summary

    This Coleslaw Ramen Noodle Salad is a crunchy, creamy, and utterly delicious fusion dish that’s perfect for any occasion. Easy to make and highly customizable, it’s sure to become a favorite in your recipe collection.