Blog

  • Creamy Dreamy Chicken Salad Dressing: The Secret to Elevating Your Salad Game

    Creamy Dreamy Chicken Salad Dressing: The Secret to Elevating Your Salad Game

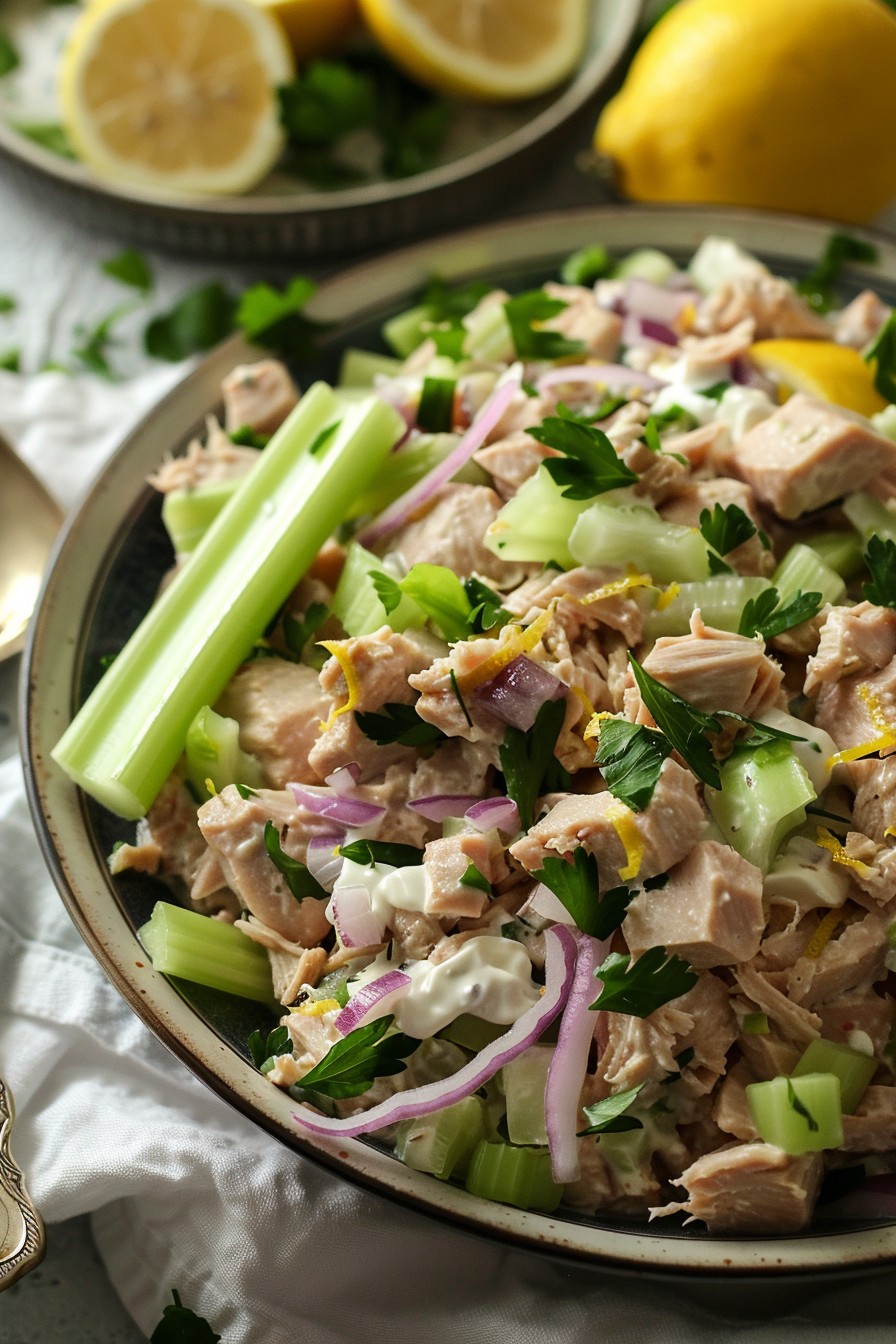
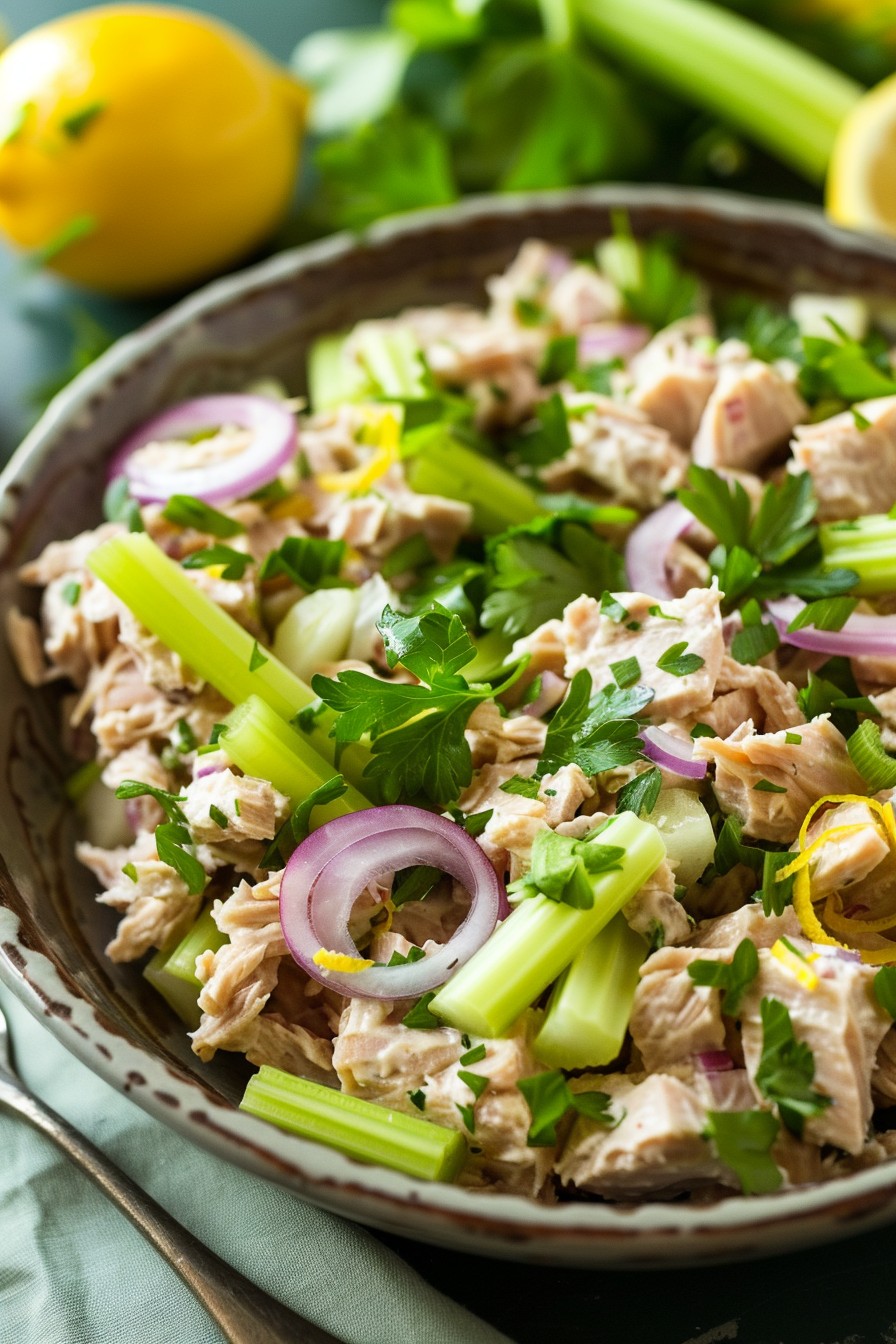
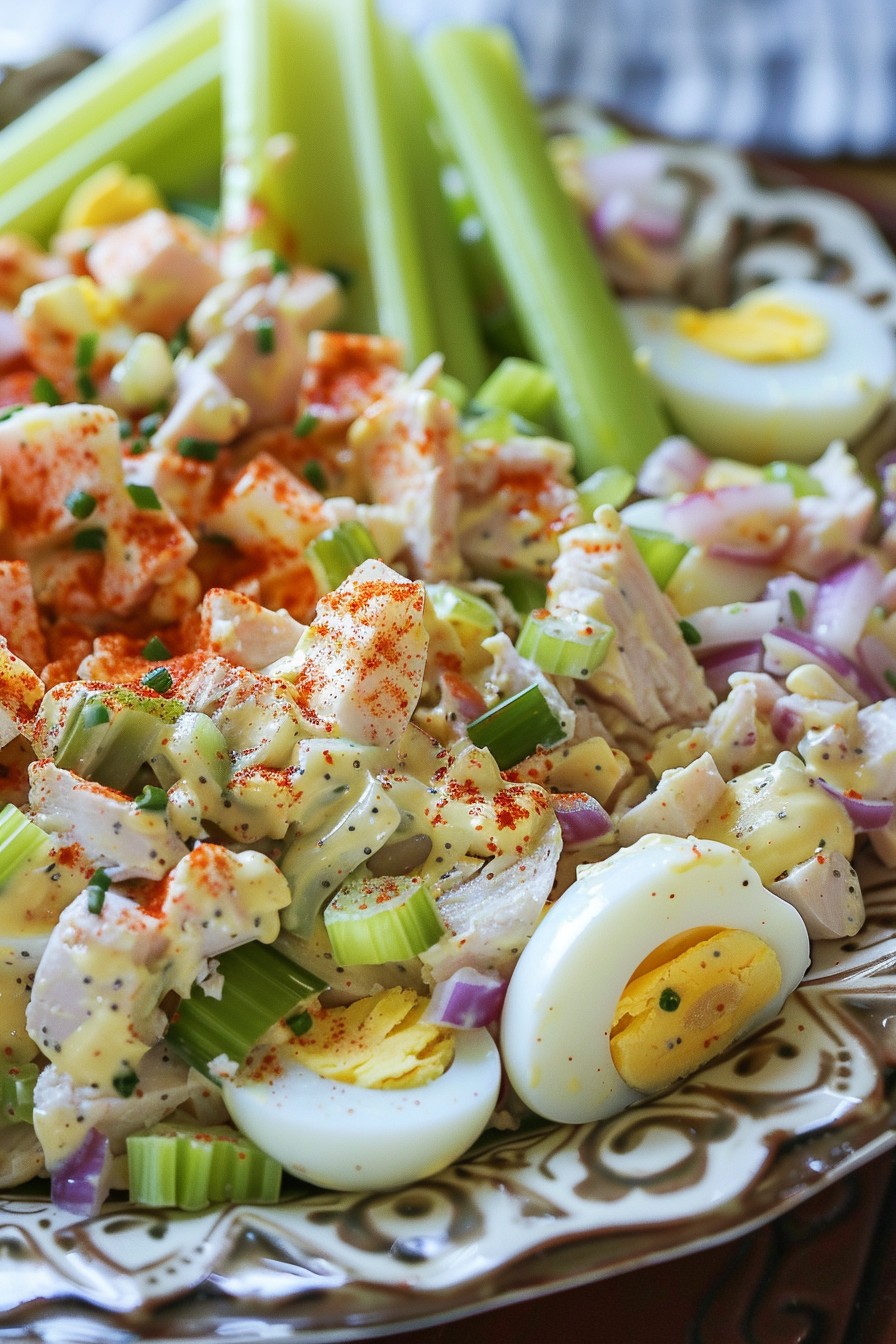
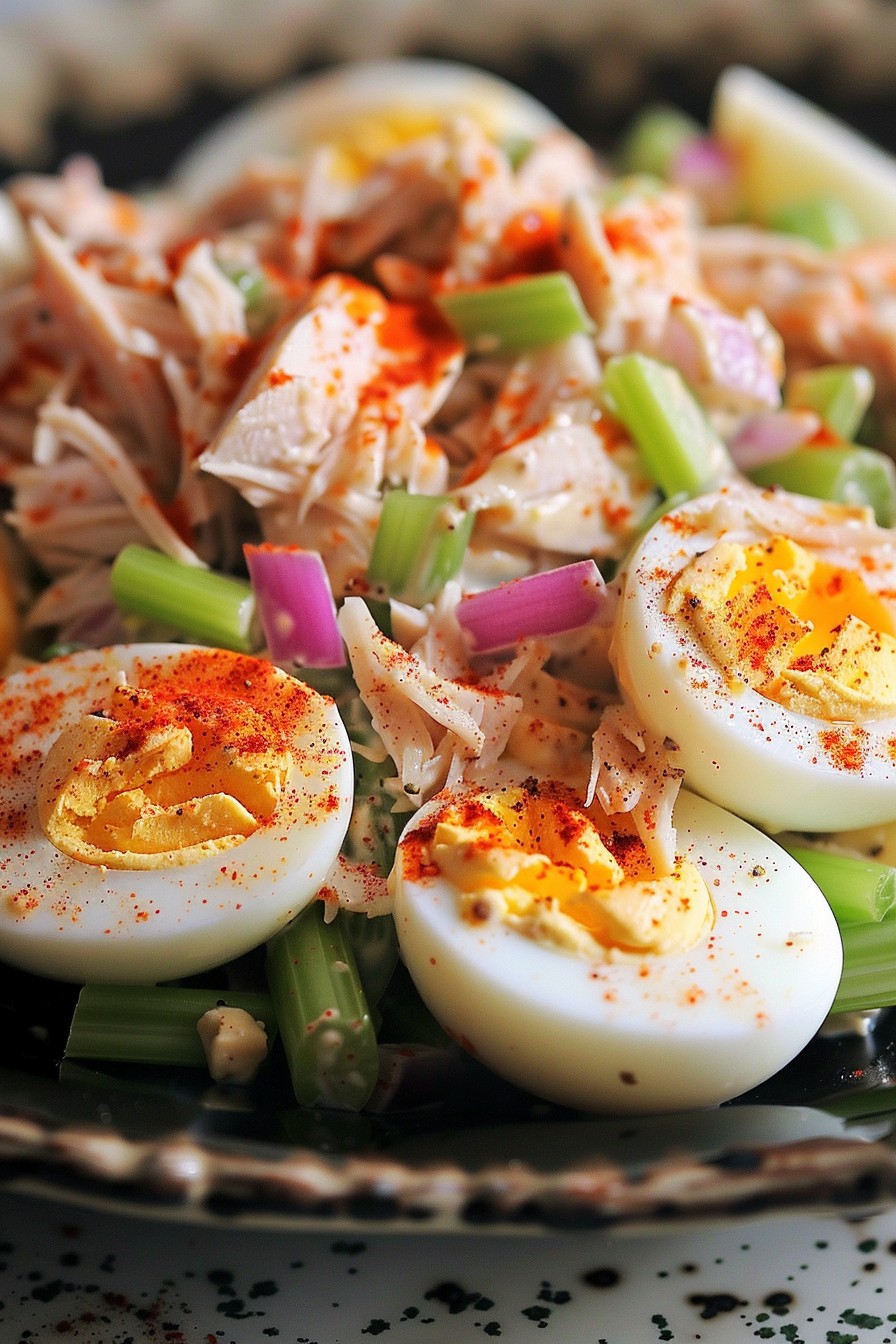
    Just when you thought your chicken salad couldn’t get any better, here comes this game-changing dressing. It’s creamy, it’s dreamy, and it’s about to make your chicken salad the talk of the town. Perfect for picnics, lunches, or just because you deserve it.

    Why This Recipe Works

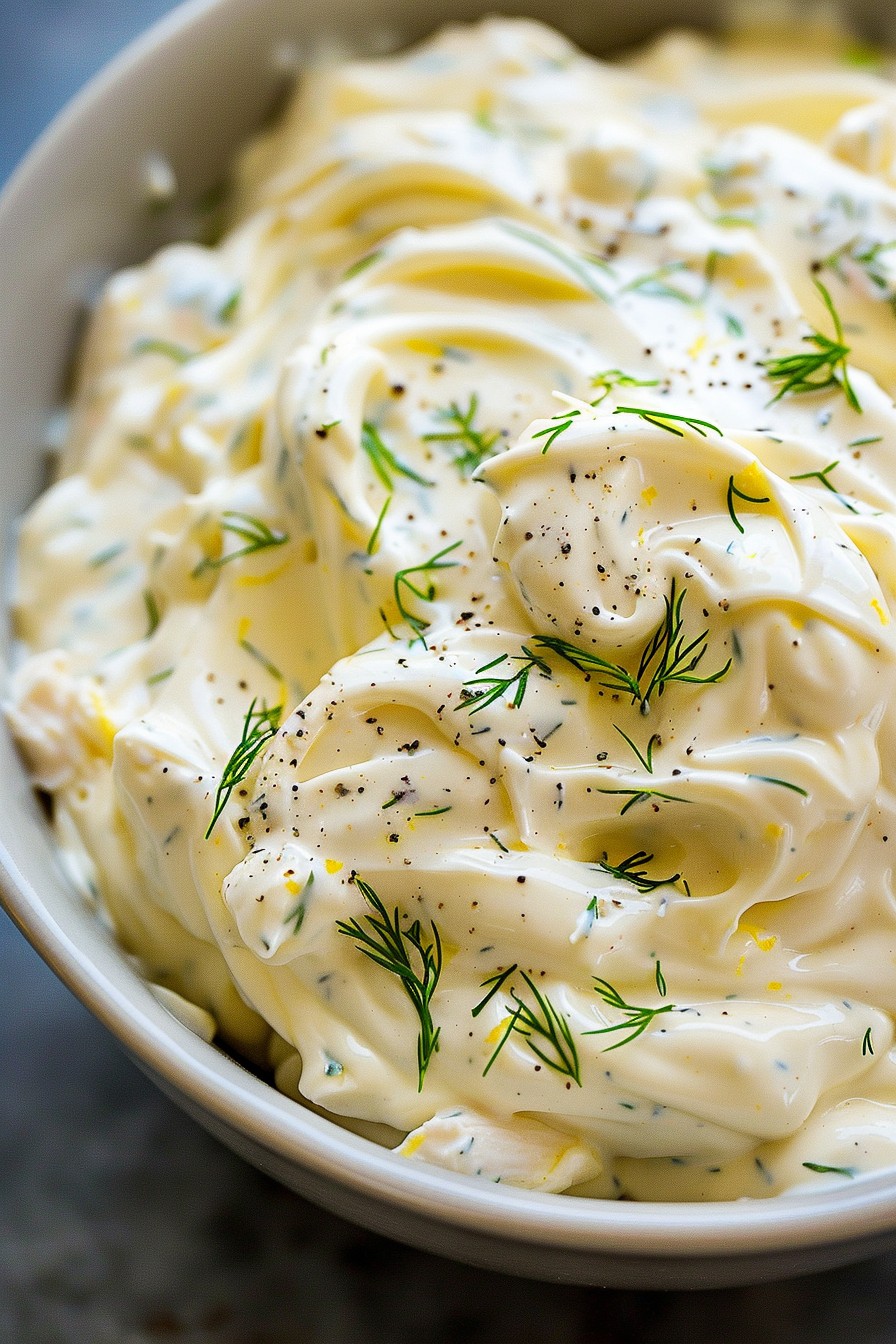
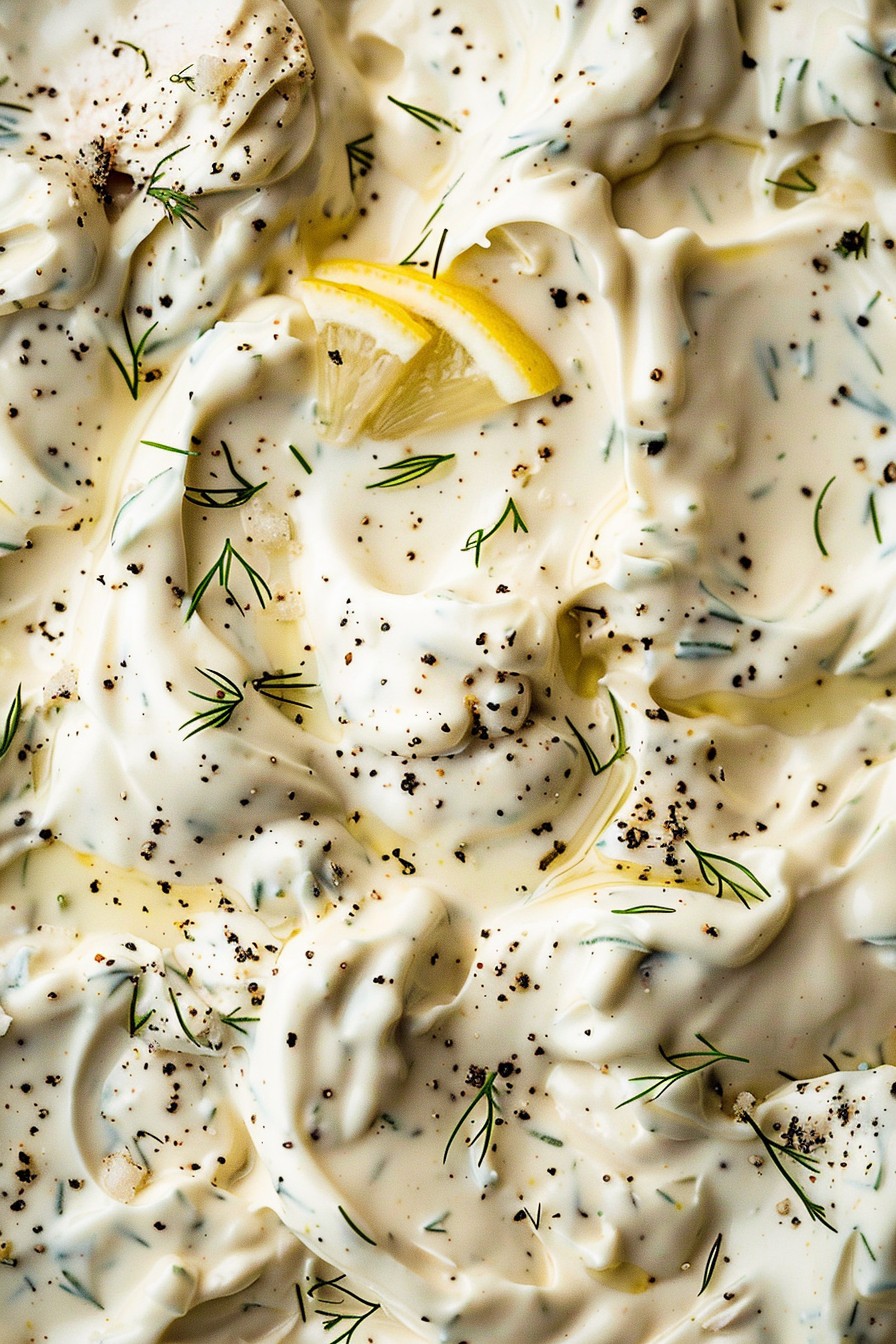
    • The combination of mayonnaise and Greek yogurt creates a creamy base with a tangy twist that’s lighter than traditional dressings.
    • Fresh lemon juice and a hint of mustard add a bright, zesty flavor that cuts through the richness.
    • A carefully balanced blend of herbs and spices ensures every bite is packed with flavor.
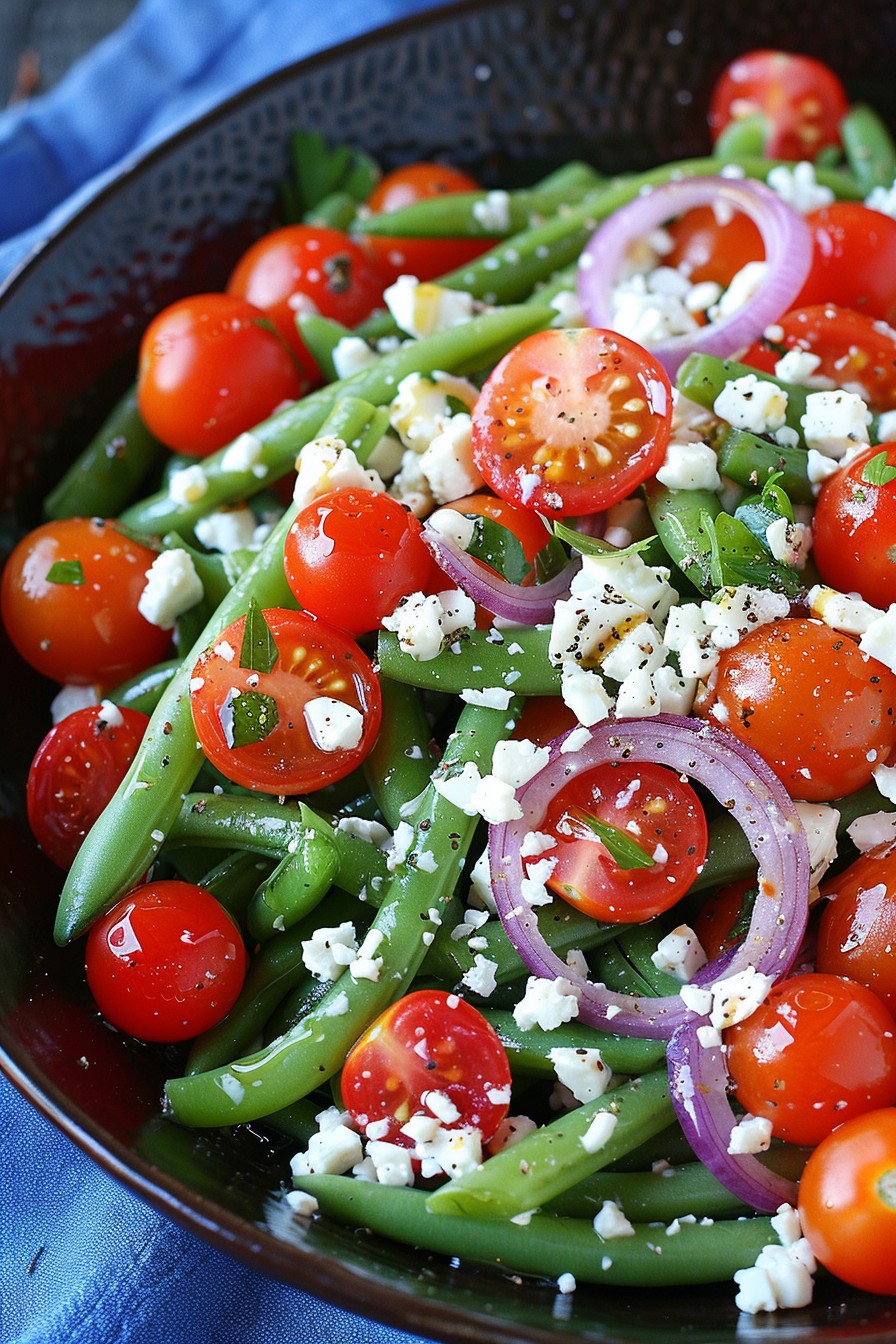
    • It’s versatile enough to pair with any chicken salad ingredients, from grapes and nuts to celery and onions.
    • Quick and easy to whip up, this dressing comes together in just minutes, making it perfect for last-minute meal prep.

    Ingredients

    • 1/2 cup mayonnaise
    • 1/2 cup Greek yogurt
    • 1 tablespoon fresh lemon juice
    • 1 teaspoon Dijon mustard
    • 1/2 teaspoon garlic powder
    • 1/2 teaspoon onion powder
    • 1/4 teaspoon salt
    • 1/4 teaspoon black pepper
    • 1 tablespoon chopped fresh dill

    Equipment Needed

    • Mixing bowl
    • Whisk
    • Measuring cups and spoons

    Instructions

    Dressing For Chicken Salad Recipe

    Step 1: Combine the Base Ingredients

    In a medium mixing bowl, whisk together the mayonnaise and Greek yogurt until smooth. This combination is the foundation of your dressing, providing a creamy texture with a slight tang. Tip: For an even smoother dressing, you can use a hand mixer on low speed for about 30 seconds.

    Step 2: Add the Flavor Enhancers

    Stir in the fresh lemon juice and Dijon mustard. These ingredients add a bright, zesty flavor that elevates the dressing from good to great. Make sure to whisk thoroughly to ensure the mustard is fully incorporated.

    Step 3: Season to Perfection

    Add the garlic powder, onion powder, salt, and black pepper to the bowl. These spices bring depth and warmth to the dressing. Tip: Taste as you go and adjust the seasoning to your preference, especially the salt and pepper.

    Step 4: Incorporate the Fresh Herbs

    Fold in the chopped fresh dill. The dill adds a fresh, slightly sweet flavor that complements the creamy base beautifully. If you’re not a fan of dill, you can substitute with parsley or chives.

    Step 5: Chill and Serve

    Cover the bowl with plastic wrap and refrigerate the dressing for at least 30 minutes before serving. This allows the flavors to meld together. Tip: For the best flavor, let the dressing chill for up to 2 hours.

    Tips and Tricks

    For a lighter version of this dressing, you can substitute the mayonnaise with avocado or use all Greek yogurt. If you prefer a sweeter dressing, a teaspoon of honey or maple syrup can be added. For those who enjoy a bit of heat, a pinch of cayenne pepper or a dash of hot sauce will do the trick. Always taste your dressing before serving and adjust the seasonings as needed. Remember, the dressing will thicken slightly upon chilling, so if it’s too thick for your liking, you can thin it out with a little milk or water.

    Recipe Variations

    • For a dairy-free version, replace the Greek yogurt with a dairy-free yogurt alternative.
    • Add a tablespoon of capers or chopped pickles for a briny twist.
    • Incorporate a teaspoon of curry powder for an exotic flavor profile.
    • Swap the dill for basil or cilantro to match the dressing with different cuisines.
    • For a nutty flavor, stir in a tablespoon of tahini or almond butter.

    Frequently Asked Questions

    Can I make this dressing ahead of time?

    Absolutely! This dressing can be made up to 3 days in advance and stored in an airtight container in the refrigerator. The flavors will continue to develop over time, making it even more delicious.

    Is there a substitute for Greek yogurt?

    Yes, sour cream or regular yogurt can be used in place of Greek yogurt. Just keep in mind that the texture and tanginess may vary slightly.

    How long will the dressing last in the fridge?

    When stored properly in an airtight container, the dressing will last for up to 5 days in the refrigerator. Always give it a good stir before using, as it may separate slightly over time.

    Summary

    This creamy, dreamy chicken salad dressing is a game-changer, blending tangy, zesty, and herby flavors into one irresistible mix. Perfect for elevating any chicken salad, it’s quick to make and customizable to suit your taste. Give it a try and watch your chicken salad transform into something extraordinary.

  • Salad Shrimp Recipe: A Quick & Flavorful Delight

    Salad Shrimp Recipe: A Quick & Flavorful Delight

    Kickstart your culinary adventure with this salad shrimp recipe that’s as easy to make as it is delicious. Perfect for a light lunch or a fancy dinner starter, this dish brings the ocean’s bounty right to your plate with minimal fuss and maximum flavor.

    Why This Recipe Works

    • Quick Prep: With pre-cooked shrimp, this recipe comes together in no time, making it perfect for busy weeknights.
    • Versatile: Easily adaptable to suit your taste preferences or whatever ingredients you have on hand.
    • Healthy: Packed with protein and veggies, it’s a nutritious option that doesn’t skimp on taste.

    Ingredients

    • 1 pound salad shrimp, pre-cooked and peeled
    • 2 cups mixed greens
    • 1 avocado, diced
    • 1/2 cup cherry tomatoes, halved
    • 1/4 cup red onion, thinly sliced
    • 2 tbsp olive oil
    • 1 tbsp lemon juice
    • Salt and pepper to taste

    Equipment Needed

    • Mixing bowl
    • Salad spinner
    • Chef’s knife
    • Cutting board

    Instructions

    Salad Shrimp Recipe

    Prepare Your Ingredients

    Start by ensuring your shrimp are thawed if frozen. Rinse them under cold water and pat dry with paper towels. This step is crucial for removing any excess moisture that could dilute your dressing. Meanwhile, wash your mixed greens and spin them dry to ensure your salad isn’t soggy. Dice the avocado, halve the cherry tomatoes, and thinly slice the red onion for a colorful and crunchy addition to your salad.

    Make the Dressing

    In a small bowl, whisk together the olive oil and lemon juice until well combined. Season with salt and pepper to taste. This simple dressing brings a bright and tangy flavor that complements the sweetness of the shrimp perfectly. For an extra kick, consider adding a pinch of garlic powder or a dash of hot sauce.

    Combine the Salad

    In a large mixing bowl, toss the mixed greens, avocado, cherry tomatoes, and red onion with half of the dressing. This ensures every bite is flavorful. Add the shrimp and gently toss again with the remaining dressing. Be careful not to overmix, as you want to keep the shrimp intact for a pleasing presentation.

    Serve Immediately

    This salad is best enjoyed fresh, so serve it right away. If you need to prepare it in advance, keep the dressing separate until just before serving to maintain the crispness of the greens and the texture of the shrimp.

    Tips and Tricks

    For the best texture, avoid overcooking the shrimp if you’re using raw shrimp instead of pre-cooked. They should be pink and opaque, which usually takes about 2-3 minutes per side over medium heat. To add more depth to your dressing, incorporate a teaspoon of Dijon mustard or honey for a sweet and tangy twist. Lastly, for a more substantial meal, consider adding quinoa or couscous to the salad for extra fiber and protein.

    Recipe Variations

    • Spicy Shrimp Salad: Add diced jalapeños or a sprinkle of chili flakes for a spicy kick.
    • Mediterranean Twist: Incorporate olives, feta cheese, and cucumber for a Mediterranean flair.
    • Asian-Inspired: Swap the olive oil and lemon juice for sesame oil and rice vinegar, and add some edamame and mandarin oranges.

    Frequently Asked Questions

    Can I use frozen shrimp for this recipe? Absolutely! Just make sure to thaw them completely and pat them dry before adding to the salad to prevent any wateriness.

    How long can I store this salad? It’s best enjoyed immediately, but you can store it in the refrigerator for up to a day. Keep the dressing separate until ready to serve.

    Can I add other proteins? Yes, this salad is versatile. Grilled chicken or tofu can be great alternatives or additions to the shrimp.

    Summary

    This salad shrimp recipe is a quick, healthy, and delicious option for any meal. With its simple preparation and versatile nature, it’s sure to become a go-to in your culinary repertoire.

  • Angel Pasta Salad Recipe: A Heavenly Dish for Any Occasion

    Angel Pasta Salad Recipe: A Heavenly Dish for Any Occasion

    Howdy, food lovers! Today, we’re diving into a dish that’s as light and delightful as its name suggests. This angel pasta salad is the perfect blend of flavors and textures, making it a hit for picnics, potlucks, or just a refreshing meal at home. Let’s get started!

    Why This Recipe Works

    • The combination of tender angel hair pasta and crisp vegetables creates a satisfying contrast in every bite.
    • A homemade dressing brings all the ingredients together with a zesty, flavorful punch.
    • It’s incredibly versatile, allowing you to customize it with your favorite add-ins.
    • Perfect for making ahead, as the flavors meld beautifully overnight.
    • Light yet filling, it’s a crowd-pleaser that won’t weigh you down.

    Ingredients

    • 8 oz angel hair pasta, broken into 2-inch pieces
    • 1 cup cherry tomatoes, halved
    • 1/2 cup cucumber, diced
    • 1/4 cup red onion, thinly sliced
    • 1/4 cup black olives, sliced
    • 1/4 cup feta cheese, crumbled
    • 2 tbsp olive oil
    • 1 tbsp lemon juice
    • 1 tsp dried oregano
    • Salt and pepper to taste

    Equipment Needed

    • Large pot
    • Colander
    • Large mixing bowl
    • Whisk
    • Measuring cups and spoons

    Instructions

    Angel Pasta Salad Recipe

    Step 1: Cook the Pasta to Perfection

    Bring a large pot of salted water to a rolling boil. Add the angel hair pasta and cook for 4-5 minutes, or until al dente. Drain in a colander and rinse under cold water to stop the cooking process. Tip: Rinsing the pasta with cold water prevents it from sticking together.

    Step 2: Prepare the Vegetables

    While the pasta cooks, halve the cherry tomatoes, dice the cucumber, and thinly slice the red onion. Combine these in a large mixing bowl with the sliced black olives. Tip: For an extra crunch, you can add bell peppers or celery.

    Step 3: Whisk Together the Dressing

    In a small bowl, whisk together the olive oil, lemon juice, dried oregano, salt, and pepper until well combined. This simple dressing will add a bright and herby flavor to the salad.

    Step 4: Combine All Ingredients

    Add the cooled pasta to the bowl with the vegetables. Pour the dressing over the top and toss gently to coat everything evenly. Sprinkle the crumbled feta cheese over the salad for a creamy, tangy finish. Tip: Let the salad sit for 10 minutes before serving to allow the flavors to meld.

    Step 5: Serve and Enjoy

    Transfer the salad to a serving dish and enjoy immediately, or cover and refrigerate for up to 24 hours for even more flavorful results. This dish is perfect for any occasion, from casual lunches to elegant dinners.

    Tips and Tricks

    For those looking to elevate their angel pasta salad, consider these advanced tips. First, toasting the pasta before boiling can add a nutty depth of flavor. Second, marinating the vegetables in the dressing for an hour before combining with the pasta can intensify the flavors. Lastly, adding a pinch of sugar to the dressing can balance the acidity of the lemon juice. These small tweaks can make a big difference in the final dish.

    Recipe Variations

    • For a protein-packed version, add grilled chicken or shrimp.
    • Swap the feta cheese for goat cheese or mozzarella pearls for a different flavor profile.
    • Incorporate sun-dried tomatoes and artichoke hearts for a Mediterranean twist.
    • Use whole wheat or gluten-free pasta to cater to dietary needs.
    • Add a handful of fresh basil or parsley for a herby freshness.

    Frequently Asked Questions

    Can I make this salad ahead of time?

    Absolutely! This salad actually tastes better after sitting for a few hours or overnight, as the flavors have time to meld together. Just be sure to give it a good stir before serving to redistribute the dressing.

    What other dressings can I use?

    While the homemade dressing in this recipe is delicious, you can also use store-bought Italian or Greek dressing for convenience. Alternatively, a balsamic vinaigrette or a creamy Caesar dressing would also work well.

    Can I add meat to this salad?

    Yes, adding grilled chicken, shrimp, or even salami can turn this salad into a hearty main dish. Just be sure to cook any meat thoroughly and add it just before serving to maintain its texture.

    Summary

    This angel pasta salad is a light, flavorful, and versatile dish that’s perfect for any occasion. With its combination of tender pasta, crisp vegetables, and zesty dressing, it’s sure to be a hit with everyone. Plus, it’s easy to customize with your favorite ingredients!

  • No Carb Chicken Salad Recipe: A Delicious Low-Carb Delight

    No Carb Chicken Salad Recipe: A Delicious Low-Carb Delight

    Ever craved something delicious yet guilt-free? This no carb chicken salad is your answer. Packed with flavor and zero carbs, it’s perfect for anyone looking to enjoy a healthy meal without sacrificing taste.

    Why This Recipe Works

    • It’s incredibly versatile, fitting into any meal plan, especially for those on a keto or low-carb diet.
    • The combination of juicy chicken and creamy dressing without any carbs makes it a unique dish.
    • It’s quick and easy to prepare, making it perfect for busy weekdays or last-minute meals.

    Ingredients

    • 2 cups cooked chicken, shredded
    • 1/2 cup mayonnaise
    • 1 tbsp mustard
    • 1/4 cup celery, finely chopped
    • Salt and pepper to taste

    Equipment Needed

    • Mixing bowl
    • Measuring cups and spoons
    • Knife and cutting board

    Instructions

    No Carb Chicken Salad Recipe

    Step 1: Prepare the Chicken

    Start by ensuring your chicken is cooked and shredded into bite-sized pieces. You can use leftover chicken or cook some specifically for this recipe. Tip: For extra flavor, consider grilling the chicken before shredding.

    Step 2: Mix the Dressing

    In a mixing bowl, combine the mayonnaise and mustard. Stir until the mixture is smooth and well incorporated. This will serve as the creamy base for your salad.

    Step 3: Combine Ingredients

    Add the shredded chicken and chopped celery to the dressing. Mix thoroughly to ensure every piece of chicken is coated with the dressing. Season with salt and pepper to taste. Tip: Let the salad chill in the fridge for an hour to enhance the flavors.

    Tips and Tricks

    For those looking to add a bit more crunch to their salad, consider adding chopped nuts like almonds or walnuts. They not only add texture but also healthy fats. Another tip is to use Greek yogurt instead of mayonnaise for a lighter version of the dressing. Lastly, for an extra kick, a dash of hot sauce or cayenne pepper can elevate the flavor profile of your salad.

    Recipe Variations

    • Add avocado for a creamy texture and healthy fats.
    • Incorporate crispy bacon bits for a smoky flavor.
    • Use turkey instead of chicken for a different taste.
    • Add hard-boiled eggs for extra protein.
    • Mix in some diced pickles for a tangy twist.

    Frequently Asked Questions

    Can I make this salad ahead of time?

    Absolutely! This salad can be prepared a day in advance and stored in the refrigerator. In fact, letting it sit allows the flavors to meld together beautifully, making it even more delicious.

    Is this recipe suitable for meal prep?

    Yes, this no carb chicken salad is perfect for meal prep. It can be divided into portions and stored in airtight containers for easy grab-and-go meals throughout the week.

    Can I freeze the chicken salad?

    Freezing is not recommended as the mayonnaise-based dressing may separate and change texture upon thawing, affecting the overall quality of the salad.

    Summary

    This no carb chicken salad is a quick, easy, and delicious option for anyone looking for a healthy, low-carb meal. With simple ingredients and endless variations, it’s sure to become a staple in your recipe collection.

  • Roasted Butternut Salad Recipe: A Fall Favorite That’s Easy to Love

    Roasted Butternut Salad Recipe: A Fall Favorite That’s Easy to Love

    Very few dishes capture the essence of fall quite like a roasted butternut salad. This recipe combines the sweet, nutty flavors of roasted butternut squash with fresh greens, creating a dish that’s as nutritious as it is delicious. Perfect for a cozy dinner or a festive gathering, this salad is sure to impress.

    Why This Recipe Works

    • The roasting process caramelizes the butternut squash, enhancing its natural sweetness and adding a depth of flavor that raw squash just can’t match.
    • Combining the warm squash with cool, crisp greens creates a delightful contrast in temperatures and textures.
    • The addition of a tangy vinaigrette balances the sweetness of the squash, tying all the elements together beautifully.
    • This salad is incredibly versatile, allowing for numerous variations to suit any taste or dietary preference.
    • It’s a great way to incorporate more vegetables into your diet in a delicious and satisfying way.

    Ingredients

    • 1 medium butternut squash, peeled, seeded, and cubed (about 4 cups)
    • 2 tablespoons olive oil
    • 1/2 teaspoon salt
    • 1/4 teaspoon black pepper
    • 4 cups mixed greens
    • 1/4 cup dried cranberries
    • 1/4 cup crumbled feta cheese
    • 1/4 cup chopped pecans
    • 2 tablespoons balsamic vinaigrette

    Equipment Needed

    • Baking sheet
    • Parchment paper
    • Large mixing bowl
    • Salad spinner
    • Chef’s knife
    • Cutting board

    Instructions

    Roasted Butternut Salad Recipe

    Preheat and Prepare

    Preheat your oven to 400°F (204°C). Line a baking sheet with parchment paper for easy cleanup. This step ensures your butternut squash roasts evenly without sticking to the pan.

    Roast the Butternut Squash

    Toss the cubed butternut squash with olive oil, salt, and pepper on the prepared baking sheet. Spread the squash in a single layer to ensure each piece roasts perfectly. Roast for 25-30 minutes, or until the squash is tender and caramelized around the edges.

    Prepare the Salad Base

    While the squash roasts, wash and dry the mixed greens using a salad spinner. This removes excess water, ensuring your salad dressing coats the greens evenly. Place the greens in a large mixing bowl.

    Assemble the Salad

    Once the squash is roasted, let it cool slightly before adding it to the greens. Top with dried cranberries, crumbled feta cheese, and chopped pecans. Drizzle with balsamic vinaigrette and toss gently to combine.

    Serve and Enjoy

    Divide the salad among plates and serve immediately. The warmth of the squash slightly wilts the greens, creating a perfect harmony of flavors and textures.

    Tips and Tricks

    For an extra flavor boost, try roasting the butternut squash with a sprinkle of cinnamon or nutmeg. These spices complement the squash’s natural sweetness beautifully. If you’re preparing this salad ahead of time, keep the roasted squash separate until just before serving to maintain the greens’ crispness. For a nuttier flavor, toast the pecans in a dry skillet over medium heat for a few minutes before adding them to the salad.

    Recipe Variations

    • Swap the feta cheese for goat cheese or blue cheese for a different flavor profile.
    • Add sliced apples or pears for extra crunch and sweetness.
    • Include quinoa or farro to make the salad more filling.
    • Use walnuts or almonds instead of pecans for a different nutty flavor.
    • Try a maple vinaigrette instead of balsamic for a sweeter dressing option.

    Frequently Asked Questions

    Can I make this salad ahead of time?

    Yes, you can prepare the components ahead of time, but it’s best to assemble the salad just before serving to keep the greens fresh and crisp. Store the roasted squash, greens, and toppings separately in the refrigerator.

    Is there a substitute for butternut squash?

    Acorn squash or sweet potatoes make great substitutes for butternut squash in this recipe. Both options roast well and offer a similar sweetness and texture.

    Can I make this salad vegan?

    Absolutely! Simply omit the feta cheese or use a vegan cheese alternative. Ensure your vinaigrette is vegan-friendly as well.

    Summary

    This roasted butternut salad is a delightful blend of sweet and savory flavors, perfect for any fall meal. With its easy preparation and versatile nature, it’s sure to become a seasonal favorite.

  • Tuna Salad Recipe for Diabetics: A Deliciously Healthy Twist

    Tuna Salad Recipe for Diabetics: A Deliciously Healthy Twist

    Tantalizing your taste buds while keeping your blood sugar in check is no small feat, but this tuna salad recipe is up to the challenge. Packed with flavor and nutrients, it’s a game-changer for anyone looking to enjoy a hearty meal without the guilt.

    Why This Recipe Works

    • Low in carbs and sugars, making it perfect for diabetics.
    • Rich in omega-3 fatty acids from tuna, promoting heart health.
    • Uses Greek yogurt instead of mayo for a healthier, protein-packed dressing.
    • Includes crunchy veggies for texture and fiber, aiding in digestion.
    • Quick and easy to prepare, perfect for a healthy lunch or snack.

    Ingredients

    • 2 cans (5 oz each) of tuna in water, drained
    • 1/2 cup plain Greek yogurt
    • 1/4 cup diced celery
    • 1/4 cup diced red onion
    • 1 tbsp lemon juice
    • 1 tsp Dijon mustard
    • Salt and pepper to taste

    Equipment Needed

    • Mixing bowl
    • Measuring cups and spoons
    • Knife and cutting board
    • Can opener

    Instructions

    Tuna Salad Recipe For Diabetics

    Step 1: Prepare Your Ingredients

    Start by draining the tuna thoroughly to avoid a watery salad. Dice the celery and red onion into small, uniform pieces to ensure every bite has a perfect crunch. Measuring out your Greek yogurt, lemon juice, and Dijon mustard beforehand will streamline the mixing process.

    Step 2: Mix the Dressing

    In your mixing bowl, combine the Greek yogurt, lemon juice, and Dijon mustard. Whisk them together until the mixture is smooth and homogenous. This creates a tangy and creamy base for your salad, minus the excess fats found in traditional mayo.

    Step 3: Combine All Ingredients

    Add the drained tuna, diced celery, and red onion to the bowl with your dressing. Gently fold everything together to coat the tuna and veggies evenly without breaking the tuna down too much. Season with salt and pepper to taste.

    Step 4: Chill Before Serving

    For the best flavor, cover the bowl and refrigerate your tuna salad for at least 30 minutes. This allows the flavors to meld together beautifully. Serving it chilled also enhances the refreshing quality of the dish.

    Step 5: Serve and Enjoy

    Once chilled, give your tuna salad a quick stir and serve it on a bed of greens, in a whole wheat wrap, or with whole grain crackers for added fiber. It’s a versatile dish that’s as nutritious as it is delicious.

    Tips and Tricks

    For an extra crunch, consider adding diced cucumbers or bell peppers. If you’re watching your sodium intake, opt for low-sodium tuna and skip adding extra salt. To boost the protein content even further, a handful of chopped nuts or seeds can be a great addition. Always taste your salad before serving to adjust the seasoning as needed. Remember, the key to a great tuna salad is balancing the flavors to suit your palate.

    Recipe Variations

    • Swap Greek yogurt with avocado for a creamy, healthy fat alternative.
    • Add a dash of curry powder for a spicy twist.
    • Include chopped apples or grapes for a sweet and savory version.
    • Use chickpeas instead of tuna for a vegetarian option.
    • Mix in some capers or olives for a briny flavor boost.

    Frequently Asked Questions

    Can I use canned salmon instead of tuna?

    Absolutely! Canned salmon is a great alternative to tuna and offers a similar texture and nutritional profile. Just make sure to remove any bones and skin before mixing it into your salad.

    How long can I store this tuna salad?

    This tuna salad can be stored in an airtight container in the refrigerator for up to 3 days. Make sure to give it a good stir before serving again.

    Is this recipe keto-friendly?

    Yes, with its low carb content, this tuna salad fits well within a keto diet. Just be mindful of the serving accompaniments to keep your carb intake in check.

    Summary

    This tuna salad recipe is a diabetic-friendly delight that doesn’t skimp on flavor or nutrition. Easy to make and versatile, it’s a perfect addition to your healthy eating plan.

  • Pulpo Salad Recipe: A Mediterranean Delight

    Pulpo Salad Recipe: A Mediterranean Delight

    Kickstart your culinary adventure with this vibrant Pulpo Salad, a dish that brings the essence of the Mediterranean to your table. Perfect for summer gatherings or a refreshing weeknight dinner, this recipe is as delightful to make as it is to eat.

    Why This Recipe Works

    • The combination of tender octopus and crisp vegetables offers a satisfying texture contrast.
    • A zesty lemon and olive oil dressing enhances the natural flavors without overpowering them.
    • Quick and easy to prepare, this salad is a testament to the beauty of simple, fresh ingredients.

    Ingredients

    • 1 lb octopus, cleaned and pre-cooked
    • 2 cups mixed greens
    • 1 cup cherry tomatoes, halved
    • 1/2 red onion, thinly sliced
    • 1/4 cup Kalamata olives, pitted
    • 2 tbsp extra virgin olive oil
    • 1 tbsp lemon juice
    • Salt and pepper to taste

    Equipment Needed

    • Large mixing bowl
    • Sharp knife
    • Cutting board
    • Measuring cups and spoons

    Instructions

    Pulpo Salad Recipe

    Prepare the Octopus

    Start by slicing the pre-cooked octopus into bite-sized pieces. If you’re starting with raw octopus, boil it in salted water for about 45 minutes until tender before slicing. Tip: For extra tenderness, freeze the octopus overnight before cooking.

    Chop the Vegetables

    Wash and dry the mixed greens, then halve the cherry tomatoes and thinly slice the red onion. The key here is uniformity for the perfect bite every time.

    Make the Dressing

    In a small bowl, whisk together the olive oil, lemon juice, salt, and pepper. Taste and adjust the seasoning as needed. Tip: Let the dressing sit for a few minutes to allow the flavors to meld.

    Combine the Salad

    In a large mixing bowl, combine the octopus, mixed greens, cherry tomatoes, red onion, and Kalamata olives. Drizzle with the dressing and toss gently to coat. Tip: Add the dressing just before serving to keep the greens crisp.

    Serve and Enjoy

    Divide the salad among plates and serve immediately. For an extra touch, garnish with a sprinkle of fresh parsley or a lemon wedge.

    Tips and Tricks

    For those looking to elevate their Pulpo Salad, consider these advanced tips. First, sourcing fresh octopus can make a world of difference in flavor and texture. If you’re up for the challenge, cooking it yourself allows for control over tenderness. Second, incorporating a mix of fresh herbs like dill or basil can add a new dimension of flavor. Lastly, for a smoky twist, grill the octopus before adding it to the salad. These small adjustments can transform your dish from good to unforgettable.

    Recipe Variations

    • Add avocado for a creamy texture and healthy fats.
    • Substitute the lemon juice with lime for a different citrus note.
    • Include cucumber for extra crunch and freshness.
    • Swap the olive oil dressing with a garlic aioli for a richer flavor.
    • Top with crumbled feta cheese for a salty, tangy finish.

    Frequently Asked Questions

    Can I use frozen octopus?

    Absolutely! Frozen octopus is a great option and can even be more tender than fresh if frozen before cooking. Just ensure it’s fully thawed before use.

    How long does the salad keep?

    This salad is best enjoyed fresh but can be stored in the refrigerator for up to a day. Keep the dressing separate until ready to serve to maintain texture.

    Can I make this salad vegan?

    While octopus is the star here, you can substitute it with hearty vegetables like mushrooms or artichokes for a vegan version. The dressing and other ingredients are already plant-based.

    Summary

    This Pulpo Salad is a refreshing, flavorful dish that’s perfect for any occasion. With simple ingredients and easy steps, it’s a must-try for seafood lovers.

  • Creamy Vegan Potato Salad: A Plant-Based Delight That Wins Hearts

    Creamy Vegan Potato Salad: A Plant-Based Delight That Wins Hearts

    Let’s dive into a dish that’s as comforting as it is cruelty-free. This vegan potato salad is the perfect side for any summer BBQ or a hearty meal on its own. Packed with flavor and texture, it’s a crowd-pleaser that even the most devout meat-eaters will love.

    Why This Recipe Works

    • Creamy without the cream: We use a clever combination of avocado and vegan mayo to achieve that rich, creamy texture without any dairy.
    • Flavor-packed: A mix of mustard, apple cider vinegar, and fresh herbs gives this salad a tangy and fresh taste profile.
    • Easy to make: With simple ingredients and straightforward steps, this recipe is accessible to cooks of all levels.
    • Versatile: Perfect for picnics, potlucks, or as a satisfying side dish.

    Ingredients

    • 2 lbs potatoes, cubed
    • 1 ripe avocado, mashed
    • 1/2 cup vegan mayonnaise
    • 2 tbsp apple cider vinegar
    • 1 tbsp Dijon mustard
    • 1/2 cup red onion, finely diced
    • 1/4 cup fresh dill, chopped
    • Salt and pepper to taste

    Equipment Needed

    • Large pot
    • Mixing bowl
    • Knife and cutting board
    • Measuring cups and spoons

    Instructions

    Potato Salad Vegan Recipe

    Step 1: Cook the Potatoes

    Start by placing your cubed potatoes in a large pot and cover them with cold water. Bring the water to a boil over high heat, then reduce to a simmer. Cook the potatoes for about 10-12 minutes, or until they’re tender but not mushy. Drain them well and let them cool slightly.

    Step 2: Prepare the Dressing

    In a mixing bowl, combine the mashed avocado, vegan mayonnaise, apple cider vinegar, and Dijon mustard. Whisk these ingredients together until smooth. This mixture will be the creamy base of your salad, so make sure it’s well blended.

    Step 3: Combine Ingredients

    Add the slightly cooled potatoes to the bowl with the dressing. Gently fold in the red onion and fresh dill, ensuring everything is evenly coated. Season with salt and pepper to taste. The key here is to mix gently to keep the potatoes from breaking apart.

    Step 4: Chill Before Serving

    For the best flavor, cover the salad and refrigerate it for at least an hour before serving. This allows the flavors to meld together beautifully.

    Step 5: Serve and Enjoy

    Once chilled, give the salad a quick stir and adjust the seasoning if necessary. Serve it cold as a refreshing side dish that’s sure to impress.

    Tips and Tricks

    For an extra crunch, consider adding some celery or pickles to the mix. If you’re not a fan of dill, parsley or cilantro can be great substitutes. To make the salad even creamier, you can add a tablespoon of tahini to the dressing. For those who like a bit of heat, a dash of cayenne pepper or some diced jalapenos can add a nice kick. Remember, the salad will thicken as it chills, so don’t worry if it seems a bit loose at first.

    Recipe Variations

    • Sweet Potato Version: Swap regular potatoes for sweet potatoes for a sweeter, nutrient-packed alternative.
    • Protein Boost: Add chickpeas or tofu cubes to turn this side into a hearty main dish.
    • Herb Variations: Experiment with different herbs like basil or tarragon for a unique flavor profile.
    • Spicy Twist: Incorporate some smoked paprika or chipotle powder for a smoky, spicy version.

    Frequently Asked Questions

    Can I make this salad ahead of time?

    Absolutely! This salad actually tastes better after it’s had time to chill and the flavors have melded together. You can make it up to two days in advance, just keep it covered in the refrigerator.

    How long does it last in the fridge?

    Stored properly in an airtight container, this vegan potato salad will stay fresh for up to 3-4 days. Just give it a good stir before serving again.

    Can I freeze this potato salad?

    Freezing is not recommended as the texture of the potatoes and avocado will change significantly upon thawing, resulting in a less appealing dish.

    Summary

    This creamy vegan potato salad is a delightful, plant-based alternative to the classic dish. Easy to make and packed with flavor, it’s perfect for any occasion. Whether you’re vegan or just looking to try something new, this recipe is sure to become a favorite.

  • Crunchy & Fresh: The Ultimate String Bean Salad Recipe

    Crunchy & Fresh: The Ultimate String Bean Salad Recipe

    A absolutely delightful dish that brings crunch and freshness to your table, this string bean salad is a must-try for anyone looking to add a vibrant, healthy side to their meal repertoire. Perfect for picnics, potlucks, or a simple family dinner, this recipe is as easy to make as it is delicious.

    Why This Recipe Works

    • The crisp texture of fresh string beans provides a satisfying crunch that contrasts beautifully with the softness of the other ingredients.
    • A simple yet flavorful dressing enhances the natural flavors of the beans without overpowering them.
    • This salad is incredibly versatile, allowing for numerous variations to suit any taste or dietary preference.
    • It’s a quick and easy recipe that doesn’t require any cooking, making it perfect for hot summer days when you don’t want to turn on the stove.
    • The combination of colors and textures makes this salad as visually appealing as it is tasty.

    Ingredients

    • 1 pound fresh string beans, trimmed and halved
    • 1/2 cup cherry tomatoes, halved
    • 1/4 cup red onion, thinly sliced
    • 1/4 cup feta cheese, crumbled
    • 2 tbsp olive oil
    • 1 tbsp lemon juice
    • 1 tsp honey
    • Salt and pepper to taste

    Equipment Needed

    • Large mixing bowl
    • Small whisk or fork
    • Measuring cups and spoons
    • Knife and cutting board

    Instructions

    String Bean Salad Recipe

    Prepare the Vegetables

    Start by washing all your vegetables thoroughly under cold water. Trim the ends off the string beans and cut them in half for bite-sized pieces. Halve the cherry tomatoes and thinly slice the red onion to ensure every bite has a bit of everything. Tip: For an extra crisp texture, you can soak the string beans in ice water for 10 minutes before preparing.

    Make the Dressing

    In a small bowl, whisk together the olive oil, lemon juice, honey, salt, and pepper until well combined. The honey will balance the acidity of the lemon juice, creating a perfectly balanced dressing. Tip: Adjust the sweetness or acidity to your liking by adding more honey or lemon juice as needed.

    Combine the Salad

    In a large mixing bowl, combine the prepared string beans, cherry tomatoes, and red onion. Drizzle the dressing over the top and toss gently to ensure all the vegetables are evenly coated. The key here is to be gentle to avoid bruising the beans or squishing the tomatoes.

    Add the Finishing Touches

    Sprinkle the crumbled feta cheese over the top of the salad for a creamy, salty contrast to the crisp vegetables. Tip: For a vegan version, simply omit the feta or substitute it with a plant-based alternative.

    Serve and Enjoy

    Let the salad sit for about 5 minutes before serving to allow the flavors to meld together. This salad is best enjoyed fresh but can be stored in the refrigerator for up to two days.

    Tips and Tricks

    For those looking to elevate their string bean salad, consider blanching the beans for about 2 minutes before adding them to the salad. This will soften them slightly while still maintaining a crunch. Another tip is to toast some nuts, like almonds or walnuts, and sprinkle them on top for added texture and flavor. If you’re making this salad ahead of time, wait to add the dressing until just before serving to keep the vegetables crisp. Experimenting with different types of vinegar in the dressing, such as balsamic or apple cider, can also add a unique twist to the flavor profile.

    Recipe Variations

    • Add grilled chicken or shrimp for a protein-packed meal.
    • Incorporate different vegetables like cucumbers or bell peppers for added color and crunch.
    • Swap the feta cheese for goat cheese or blue cheese for a different flavor profile.
    • Use a different dressing, such as a creamy avocado or tahini-based dressing, for a richer taste.
    • Add grains like quinoa or farro to make the salad more filling and nutritious.

    Frequently Asked Questions

    Can I use frozen string beans instead of fresh?

    While fresh string beans are recommended for the best texture and flavor, frozen string beans can be used in a pinch. Just be sure to thaw and drain them well before adding to the salad to prevent it from becoming watery.

    How long does this salad last in the fridge?

    This salad is best enjoyed within two days of making it. After that, the vegetables may start to lose their crunch, and the dressing can cause them to become soggy.

    Can I make this salad ahead of time?

    Yes, you can prepare the vegetables and dressing separately up to a day in advance. Just combine them right before serving to maintain the freshness and crunch of the salad.

    Summary

    This string bean salad is a crisp, refreshing, and versatile dish that’s perfect for any occasion. With its simple ingredients and easy preparation, it’s a healthy and delicious way to enjoy the bounty of the season.

  • Turkey Egg Salad Recipe: A Delightful Twist on a Classic

    Turkey Egg Salad Recipe: A Delightful Twist on a Classic

    Forget everything you thought you knew about egg salad. This turkey egg salad recipe is here to shake things up with its perfect blend of flavors and textures. It’s the ultimate sandwich filler, salad topper, or cracker companion that’ll have you coming back for more.

    Why This Recipe Works

    • The combination of turkey and eggs provides a protein-packed meal that keeps you full longer.
    • Greek yogurt adds a creamy texture without the heaviness of mayonnaise.
    • A dash of paprika gives it a subtle smokiness that elevates the entire dish.
    • It’s versatile enough to serve in multiple ways, making it a great meal prep option.
    • Quick and easy to make, it’s perfect for those busy days when you need something delicious in a hurry.

    Ingredients

    • 2 cups cooked turkey, diced
    • 4 hard-boiled eggs, chopped
    • 1/2 cup Greek yogurt
    • 1 tbsp Dijon mustard
    • 1/4 cup celery, finely chopped
    • 1/4 cup red onion, finely chopped
    • 1 tsp paprika
    • Salt and pepper to taste

    Equipment Needed

    • Mixing bowl
    • Knife
    • Cutting board
    • Measuring cups and spoons

    Instructions

    Turkey Egg Salad Recipe

    Step 1: Prepare Your Ingredients

    Start by dicing your cooked turkey into bite-sized pieces. Then, chop your hard-boiled eggs into similar-sized pieces for consistency. Finely chop the celery and red onion to ensure they distribute evenly throughout the salad. Tip: For extra flavor, let the chopped onion sit in cold water for 10 minutes to mellow its bite.

    Step 2: Mix the Dressing

    In a large mixing bowl, combine the Greek yogurt and Dijon mustard. Whisk them together until smooth. This mixture will serve as the creamy base of your salad, offering a healthier alternative to traditional mayonnaise.

    Step 3: Combine All Ingredients

    Add the diced turkey, chopped eggs, celery, and red onion to the bowl with the dressing. Gently fold everything together until well coated. Sprinkle in the paprika, and season with salt and pepper to taste. Tip: For best results, let the salad chill in the fridge for at least an hour before serving to allow the flavors to meld.

    Step 4: Serve and Enjoy

    Once chilled, your turkey egg salad is ready to enjoy. Serve it on whole-grain bread for a hearty sandwich, over a bed of greens for a light lunch, or with crackers for a quick snack. Tip: Garnish with a sprinkle of paprika or fresh herbs for an extra touch of color and flavor.

    Tips and Tricks

    For those looking to take their turkey egg salad to the next level, consider these advanced tips. First, roasting your turkey with herbs before dicing can add an extra layer of flavor. Second, using a mix of Greek yogurt and avocado can create an even creamier texture with healthy fats. Lastly, adding a squeeze of lemon juice can brighten up the flavors and add a refreshing zing.

    Recipe Variations

    • Swap turkey for chicken or ham for a different protein twist.
    • Add diced apples or grapes for a sweet crunch.
    • Mix in curry powder for an exotic flavor profile.
    • Use avocado instead of Greek yogurt for a dairy-free version.
    • Incorporate bacon bits for a smoky, savory addition.

    Frequently Asked Questions

    Can I make this recipe ahead of time?

    Absolutely! This turkey egg salad can be made up to two days in advance. Just store it in an airtight container in the refrigerator. The flavors will continue to develop, making it even more delicious over time.

    Is there a substitute for Greek yogurt?

    Yes, if you’re not a fan of Greek yogurt, you can use mayonnaise, sour cream, or even mashed avocado as a substitute. Each will give the salad a different texture and flavor profile, so choose based on your preferences.

    How can I make this recipe lower in carbs?

    To reduce the carb content, serve the salad over a bed of leafy greens instead of bread, or use lettuce wraps for a crunchy, low-carb alternative. You can also omit the red onion or use less if you’re watching your carb intake closely.

    Summary

    This turkey egg salad recipe is a game-changer, offering a delicious twist on the classic with its protein-packed ingredients and creamy, flavorful dressing. Perfect for meal prep, it’s versatile, easy to make, and sure to please any crowd.