Blog

  • Bologna Ham Salad Recipe: A Delightfully Easy Dish

    Bologna Ham Salad Recipe: A Delightfully Easy Dish

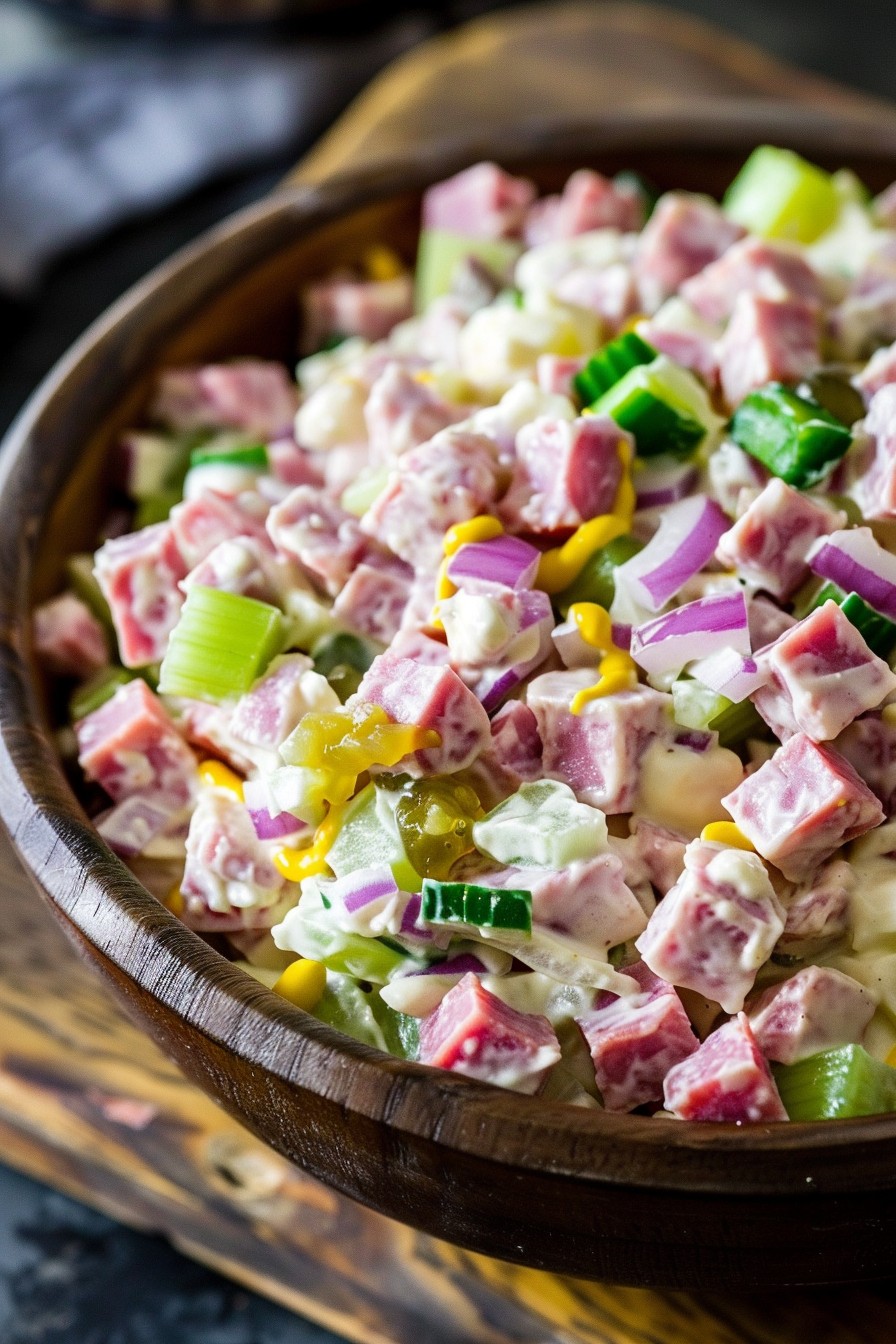
    Craving something quick, delicious, and a bit nostalgic? This bologna ham salad recipe is your ticket to a flavorful meal that’s as easy to make as it is to love. Perfect for sandwiches, crackers, or just by the spoonful, this dish is a crowd-pleaser.

    Why This Recipe Works

    • It’s incredibly versatile, serving as a perfect sandwich filler, salad topper, or standalone snack.
    • The combination of creamy and tangy ingredients creates a balanced flavor profile that’s hard to resist.
    • Prep time is minimal, making it ideal for last-minute meals or snacks.
    • It’s a great way to use up leftover bologna, reducing food waste.
    • Customizable to suit your taste preferences with various add-ins and spices.

    Ingredients

    • 1 pound bologna, finely diced
    • 1/2 cup mayonnaise
    • 2 tablespoons sweet pickle relish
    • 1 tablespoon yellow mustard
    • 1/4 cup finely diced onion
    • 1/4 cup finely diced celery
    • Salt and pepper to taste

    Equipment Needed

    • Large mixing bowl
    • Sharp knife
    • Cutting board
    • Measuring cups and spoons
    • Rubber spatula

    Instructions

    Bologna Ham Salad Recipe

    Step 1: Prepare Your Ingredients

    Start by finely dicing your bologna into small, bite-sized pieces. The smaller the pieces, the better the texture of your salad. Next, dice the onion and celery into equally small pieces to ensure every bite is packed with flavor. Tip: For an extra crunch, you can add a bit more celery than the recipe calls for.

    Step 2: Mix the Wet Ingredients

    In a large mixing bowl, combine the mayonnaise, sweet pickle relish, and yellow mustard. Stir these together until they’re fully blended. This mixture will serve as the creamy base of your salad, so make sure it’s well mixed. Tip: If you prefer a tangier taste, you can add a bit more mustard to the mix.

    Step 3: Combine All Ingredients

    Add the diced bologna, onion, and celery to the bowl with your wet ingredients. Gently fold everything together until the bologna and vegetables are evenly coated with the mayonnaise mixture. Be careful not to overmix, as this can make the salad too mushy. Tip: For best results, let the salad chill in the refrigerator for at least an hour before serving to allow the flavors to meld.

    Step 4: Season to Taste

    Once everything is combined, taste your salad and add salt and pepper as needed. Remember, the bologna and mayonnaise already contain salt, so you might not need much. Adjust the seasoning until it’s just right for your palate.

    Step 5: Serve and Enjoy

    Your bologna ham salad is now ready to enjoy! Serve it on bread for a sandwich, with crackers, or as a side dish. It’s delicious any way you choose to eat it.

    Tips and Tricks

    For those looking to elevate their bologna ham salad, consider these advanced tips. First, try using homemade mayonnaise for a richer flavor. Second, adding a dash of paprika or cayenne pepper can give the salad a nice kick. Third, for a healthier version, substitute Greek yogurt for half of the mayonnaise. Lastly, letting the salad sit overnight in the fridge will deepen the flavors, making it even more delicious the next day.

    Recipe Variations

    • Add hard-boiled eggs for extra protein and texture.
    • Mix in some diced apples or grapes for a sweet contrast.
    • For a spicy version, include diced jalapeños or a splash of hot sauce.
    • Swap out the bologna for ham or turkey for a different flavor profile.
    • Incorporate different herbs like dill or parsley for a fresh twist.

    Frequently Asked Questions

    Can I make this salad ahead of time?

    Absolutely! In fact, making it ahead allows the flavors to meld together beautifully. Just store it in an airtight container in the refrigerator for up to 3 days. Give it a quick stir before serving to refresh the texture.

    Is there a substitute for sweet pickle relish?

    Yes, if you’re not a fan of sweet pickle relish, you can use dill pickle relish instead for a tangier flavor. Alternatively, finely chopped pickles can also work in a pinch.

    Can I freeze bologna ham salad?

    Freezing is not recommended as the mayonnaise can separate when thawed, resulting in a watery texture. It’s best enjoyed fresh or stored in the fridge for a few days.

    Summary

    This bologna ham salad recipe is a quick, versatile, and delicious option for any meal. With simple ingredients and easy steps, it’s perfect for busy days or when you’re craving something comforting. Customize it to your liking and enjoy it in various ways!

  • Greek Salad Recipe with Chickpeas: A Fresh Twist on a Classic

    Greek Salad Recipe with Chickpeas: A Fresh Twist on a Classic

    Ready to shake up your salad game? This Greek Salad with Chickpeas is not just a feast for your eyes but a party in your mouth. Rich in flavors and packed with nutrients, it’s the perfect dish for those who love a little crunch in their lunch.

    Why This Recipe Works

    • The addition of chickpeas brings a protein-packed punch, making it more filling than your average salad.
    • Crisp cucumbers and juicy tomatoes offer a refreshing contrast to the creamy feta and hearty chickpeas.
    • A simple olive oil and lemon dressing enhances the flavors without overpowering them.
    • It’s versatile – serve as a side or a main, and it’s perfect for meal prep.
    • Quick and easy to make, with no cooking required, it’s a hassle-free dish for any day of the week.

    Ingredients

    • 1 can (15 oz) chickpeas, drained and rinsed
    • 2 cups cherry tomatoes, halved
    • 1 large cucumber, diced
    • 1/2 red onion, thinly sliced
    • 1 cup feta cheese, cubed
    • 1/4 cup Kalamata olives, pitted
    • 2 tbsp extra virgin olive oil
    • 1 tbsp lemon juice
    • 1 tsp dried oregano
    • Salt and pepper to taste

    Equipment Needed

    • Large mixing bowl
    • Small bowl for dressing
    • Knife and cutting board
    • Measuring cups and spoons

    Instructions

    Greek Salad Recipe Chickpeas

    Step 1: Prep Your Veggies

    Start by washing your cherry tomatoes and cucumber. Halve the tomatoes and dice the cucumber into bite-sized pieces. Thinly slice the red onion to ensure every bite has a little bit of everything. Tip: Soaking the sliced onion in cold water for 10 minutes can take the edge off if you’re sensitive to raw onion.

    Step 2: Combine the Base Ingredients

    In a large mixing bowl, combine the chickpeas, cherry tomatoes, cucumber, and red onion. Add the Kalamata olives and cubed feta cheese. The feta adds a creamy texture that contrasts beautifully with the crisp vegetables.

    Step 3: Whisk Together the Dressing

    In a small bowl, whisk together the extra virgin olive oil, lemon juice, dried oregano, and a pinch of salt and pepper. The simplicity of this dressing lets the fresh ingredients shine. Tip: For an extra flavor boost, let the dressing sit for a few minutes before adding it to the salad.

    Step 4: Dress the Salad

    Pour the dressing over the salad and gently toss to combine. Be careful not to overmix, as you don’t want to crush the chickpeas or make the feta fall apart. The goal is to evenly coat the ingredients without turning them into mush.

    Step 5: Serve and Enjoy

    Let the salad sit for about 5 minutes before serving to allow the flavors to meld together. This salad is best enjoyed fresh but can be stored in the refrigerator for up to two days. Tip: Adding a handful of fresh herbs like parsley or dill before serving can add a fresh pop of color and flavor.

    Tips and Tricks

    For those looking to elevate their Greek salad with chickpeas, consider roasting the chickpeas before adding them to the salad for an extra crunch. Simply toss them with a bit of olive oil, salt, and your favorite spices, then roast at 400°F for 20-25 minutes. Another tip is to use a mix of colorful heirloom tomatoes for a visually stunning dish. If you’re not a fan of feta, avocado makes a great creamy substitute. Lastly, for a more substantial meal, serve the salad over a bed of quinoa or mixed greens.

    Recipe Variations

    • Add grilled chicken or shrimp for a protein boost.
    • Swap chickpeas for cannellini beans for a different texture.
    • Include avocado for extra creaminess and healthy fats.
    • Use mint instead of oregano in the dressing for a refreshing twist.
    • Add roasted red peppers for a sweet and smoky flavor.

    Frequently Asked Questions

    Can I make this salad ahead of time? Yes, you can prepare the salad a day in advance, but wait to add the dressing until just before serving to keep the vegetables crisp. The chickpeas and veggies hold up well, but the salad is best enjoyed within 24 hours.

    Is there a substitute for feta cheese? Absolutely! If you’re not a fan of feta, try goat cheese for a similar tangy flavor or avocado for a dairy-free option that adds creaminess.

    How can I make this salad more filling? To turn this salad into a more substantial meal, consider adding a grain like quinoa or farro. You can also add more protein, such as grilled chicken, shrimp, or even hard-boiled eggs.

    Summary

    This Greek Salad with Chickpeas is a vibrant, nutritious, and delicious twist on the classic. Easy to make and packed with flavors, it’s perfect for any occasion, from a quick lunch to a potluck dinner. With endless variations, it’s a recipe you’ll come back to again and again.

  • Spicy Egg Salad Recipe: A Kick to Your Taste Buds

    Spicy Egg Salad Recipe: A Kick to Your Taste Buds

    Let’s face it, egg salad can be a bit bland, but not this one! Our spicy egg salad recipe is here to turn up the heat and bring some excitement to your lunch routine. Perfect for sandwiches, wraps, or just by itself, this recipe is a game-changer.

    Why This Recipe Works

    • The combination of creamy mayonnaise and tangy mustard creates a perfect base that balances the heat from the spices.
    • Adding fresh herbs like cilantro or parsley introduces a burst of freshness that complements the spiciness.
    • The use of both hot sauce and cayenne pepper allows you to customize the heat level to your liking.

    Ingredients

    • 6 large eggs, hard-boiled and chopped
    • 1/2 cup mayonnaise
    • 1 tbsp Dijon mustard
    • 1 tbsp hot sauce (adjust to taste)
    • 1/4 tsp cayenne pepper
    • 2 tbsp finely chopped cilantro or parsley
    • Salt and pepper to taste

    Equipment Needed

    • Mixing bowl
    • Whisk
    • Measuring cups and spoons
    • Knife and cutting board

    Instructions

    Egg Salad Recipe Spicy

    Step 1: Prepare the Eggs

    Start by hard-boiling your eggs. Place them in a pot, cover with water, and bring to a boil. Once boiling, remove from heat, cover, and let sit for 12 minutes. Then, transfer to an ice bath to cool before peeling and chopping.

    Step 2: Mix the Dressing

    In a mixing bowl, whisk together the mayonnaise, Dijon mustard, hot sauce, and cayenne pepper until smooth. This is your chance to adjust the heat level, so taste as you go!

    Step 3: Combine Ingredients

    Add the chopped eggs to the dressing and gently fold until the eggs are evenly coated. Be careful not to overmix, or the eggs will become mushy.

    Step 4: Add Freshness

    Stir in the chopped cilantro or parsley for a fresh contrast to the spicy flavors. Season with salt and pepper to taste.

    Step 5: Chill and Serve

    For the best flavor, cover and refrigerate the egg salad for at least 30 minutes before serving. This allows the flavors to meld together beautifully.

    Tips and Tricks

    For an extra crunch, consider adding diced celery or pickles to your egg salad. If you’re not a fan of cilantro, dill makes a great substitute. To make this recipe healthier, swap out the mayonnaise for Greek yogurt. Remember, the key to a great egg salad is balancing the flavors, so don’t shy away from adjusting the seasonings to your preference.

    Recipe Variations

    • For a smoky flavor, add a teaspoon of smoked paprika to the dressing.
    • Incorporate avocado for a creamy texture and a boost of healthy fats.
    • Try using sriracha instead of hot sauce for a different kind of heat.
    • Add crumbled bacon for a salty, crunchy twist.
    • For a vegetarian version, omit the eggs and use chickpeas instead.

    Frequently Asked Questions

    Can I make this egg salad ahead of time?

    Absolutely! This egg salad can be made up to two days in advance. Just keep it covered in the refrigerator until you’re ready to serve. The flavors will continue to develop, making it even more delicious.

    How can I reduce the spiciness?

    If you’re sensitive to heat, start with a smaller amount of hot sauce and cayenne pepper. You can always add more, but you can’t take it away once it’s in there. Adding more mayonnaise or a squeeze of lemon juice can also help balance the heat.

    What’s the best way to serve this egg salad?

    This spicy egg salad is incredibly versatile. Serve it on toasted bread for a sandwich, in a wrap with lettuce and tomato, or on a bed of greens for a low-carb option. It’s also great as a dip with crackers or veggies.

    Summary

    This spicy egg salad recipe is a flavorful twist on a classic, perfect for those who love a little heat. With customizable spice levels and endless serving options, it’s sure to become a favorite.

  • Pokemon Salad Recipe: A Fun and Healthy Adventure

    Pokemon Salad Recipe: A Fun and Healthy Adventure

    Venture into the world of Pokemon with this vibrant and nutritious salad that’s as fun to make as it is to eat. Perfect for Pokemon fans of all ages, this recipe brings a playful twist to your meal prep, ensuring a delightful dining experience.

    Why This Recipe Works

    • It’s a colorful mix of fruits and vegetables, making it as visually appealing as it is delicious.
    • The combination of sweet and savory flavors caters to all taste buds.
    • It’s packed with nutrients, offering a healthy meal option.
    • Easy to customize based on your favorite Pokemon colors or types.
    • Perfect for themed parties or a fun family meal.

    Ingredients

    • 2 cups mixed greens (spinach, arugula, and lettuce)
    • 1 cup cherry tomatoes, halved
    • 1/2 cup blueberries
    • 1/2 cup sliced strawberries
    • 1/4 cup sliced almonds
    • 1/4 cup feta cheese, crumbled
    • 2 tbsp olive oil
    • 1 tbsp balsamic vinegar
    • Salt and pepper to taste

    Equipment Needed

    • Large salad bowl
    • Small mixing bowl
    • Whisk
    • Knife
    • Cutting board

    Instructions

    Pokemon Salad Recipe

    Prepare Your Ingredients

    Start by washing all your fruits and vegetables thoroughly under cold water. Pat them dry with a clean towel to ensure your salad isn’t watery. Slice the cherry tomatoes in half, and slice the strawberries into thin pieces. Having all your ingredients prepped and ready will make assembling the salad a breeze.

    Mix the Dressing

    In a small mixing bowl, whisk together the olive oil and balsamic vinegar until well combined. Season with a pinch of salt and pepper to taste. This simple dressing will enhance the natural flavors of your salad ingredients without overpowering them.

    Assemble the Salad

    In a large salad bowl, layer the mixed greens as your base. Scatter the cherry tomatoes, blueberries, and sliced strawberries on top. Sprinkle the sliced almonds and crumbled feta cheese over the fruits and vegetables for added texture and flavor.

    Dress and Toss

    Drizzle the prepared dressing over the salad. Using salad tongs or two large spoons, gently toss the salad to ensure all ingredients are evenly coated with the dressing. Be careful not to overmix to keep the ingredients intact.

    Serve Immediately

    For the best taste and texture, serve the salad immediately after tossing. This ensures the greens stay crisp and the fruits retain their freshness. Enjoy your Pokemon-themed salad as a refreshing meal or a side dish.

    Tips and Tricks

    For an extra crunch, toast the sliced almonds in a dry pan over medium heat for 2-3 minutes before adding them to the salad. If you’re preparing the salad ahead of time, keep the dressing separate and add it just before serving to prevent the greens from wilting. To make the salad more filling, add grilled chicken or tofu for a protein boost. Experiment with different fruits and vegetables to match the colors of your favorite Pokemon. Lastly, involve kids in the preparation process for a fun and educational cooking experience.

    Recipe Variations

    • For a Pikachu-themed salad, use more yellow ingredients like yellow bell peppers and corn.
    • Incorporate avocado and cucumber for a Bulbasaur-inspired green salad.
    • Add black olives and purple cabbage for a darker, Umbreon-themed variation.
    • Use dragon fruit and raspberries for a Charizard-inspired fiery red salad.
    • For a Squirtle-themed salad, focus on blue and green ingredients like blueberries and green grapes.

    Frequently Asked Questions

    Can I make this salad ahead of time?

    Yes, you can prepare the ingredients ahead of time, but it’s best to assemble and dress the salad just before serving to maintain freshness and crispness. Store the prepped ingredients separately in airtight containers in the refrigerator.

    What other dressings can I use?

    While balsamic vinaigrette is recommended for its balance of sweetness and acidity, you can also use ranch, honey mustard, or a citrus-based dressing depending on your preference. The key is to choose a dressing that complements the fruits and vegetables in the salad.

    How can I make this salad more kid-friendly?

    To make the salad more appealing to kids, consider using cookie cutters to shape the fruits and vegetables into fun shapes or arranging the salad to resemble a Pokemon character. You can also let them choose their favorite ingredients to include, making the meal more interactive and enjoyable.

    Summary

    This Pokemon Salad Recipe is a fun, healthy, and customizable meal that brings the joy of Pokemon into your kitchen. With its vibrant colors and delicious flavors, it’s perfect for fans of all ages looking for a nutritious and playful dish.

  • Fruit Salad with Mayonnaise: A Creamy Twist on a Classic

    Fruit Salad with Mayonnaise: A Creamy Twist on a Classic

    Welcome to a delightful twist on the traditional fruit salad that will have your taste buds dancing! This recipe combines the sweetness of fresh fruits with the creamy richness of mayonnaise for a dish that’s both unexpected and irresistibly delicious.

    Why This Recipe Works

    • The combination of sweet fruits and creamy mayonnaise creates a unique flavor profile that’s both refreshing and indulgent.
    • It’s incredibly versatile, allowing you to use whatever fruits are in season or your personal favorites.
    • This recipe is a breeze to make, requiring no cooking and just a few minutes of prep time.
    • It’s a great way to get kids involved in the kitchen, as they can help mix and match the fruits.
    • The mayonnaise adds a smooth texture that binds the fruits together, making every bite perfectly balanced.

    Ingredients

    • 2 cups of mixed fresh fruits (such as apples, bananas, grapes, and oranges), diced
    • 1/2 cup mayonnaise
    • 1 tablespoon honey (optional, for extra sweetness)
    • 1 teaspoon lemon juice (to prevent browning)

    Equipment Needed

    • Large mixing bowl
    • Measuring cups and spoons
    • Knife and cutting board
    • Spatula or large spoon for mixing

    Instructions

    Fruit Salad With Mayonnaise Recipe

    Step 1: Prepare Your Fruits

    Start by washing all your fruits thoroughly under cold running water. Peel and dice them into bite-sized pieces, ensuring they’re all roughly the same size for a uniform salad. Tip: Adding a teaspoon of lemon juice to your diced apples and bananas will keep them from browning too quickly.

    Step 2: Mix the Dressing

    In a small bowl, whisk together the mayonnaise and honey until smooth. This will be the creamy dressing that coats your fruits. Tip: If you prefer a tangier taste, you can add a little more lemon juice to the dressing.

    Step 3: Combine Fruits and Dressing

    Transfer your prepared fruits into a large mixing bowl. Pour the dressing over the fruits and gently toss until everything is evenly coated. Be careful not to mash the softer fruits during this step.

    Step 4: Chill Before Serving

    Cover the bowl with plastic wrap and refrigerate for at least 30 minutes before serving. This allows the flavors to meld together beautifully. Tip: For the best texture, serve the salad within a few hours of making it.

    Tips and Tricks

    For an extra crunch, consider adding some chopped nuts or seeds to your fruit salad. If you’re serving this at a party, individual servings in small cups or glasses can make for a beautiful presentation. Experiment with different types of mayonnaise or even yogurt for a lighter version of the dressing. Remember, the key to a great fruit salad is using the freshest fruits you can find, so don’t be afraid to mix and match based on what’s in season.

    Recipe Variations

    • For a tropical twist, use fruits like mango, pineapple, and kiwi.
    • Add a sprinkle of cinnamon or nutmeg for a warm spice note.
    • Incorporate some shredded coconut for added texture and flavor.
    • For a more savory version, add a pinch of salt and some chopped herbs like mint or basil.
    • Swap out the mayonnaise for Greek yogurt for a healthier alternative.

    Frequently Asked Questions

    Can I use canned fruits instead of fresh? Yes, you can use canned fruits, but make sure to drain them well to avoid a watery salad. Fresh fruits are preferred for their texture and flavor, but canned can be a convenient alternative.

    How long can I store this fruit salad? This salad is best enjoyed the day it’s made, but it can be stored in the refrigerator for up to 24 hours. Keep in mind that some fruits may release more juice over time, making the salad a bit soggy.

    Is there a vegan alternative to mayonnaise? Absolutely! There are many vegan mayonnaise options available that would work perfectly in this recipe. You can also use avocado as a creamy, dairy-free binder.

    Summary

    This fruit salad with mayonnaise is a simple, delicious twist on a classic that’s sure to surprise and delight. With its creamy dressing and fresh, sweet fruits, it’s a perfect dish for any occasion.

  • Spring Salad Recipe: A Fresh Twist on Seasonal Greens

    Spring Salad Recipe: A Fresh Twist on Seasonal Greens

    Ah, spring! The season of renewal and, most importantly, fresh produce. This spring salad recipe is your ticket to a vibrant, crunchy, and utterly delicious dish that celebrates the best of the season. Perfect for picnics, brunches, or just because you deserve something green and gorgeous.

    Why This Recipe Works

    • It combines the crispness of spring greens with the sweetness of seasonal fruits for a balanced flavor profile.
    • The homemade dressing is light yet flavorful, enhancing the natural tastes of the ingredients without overpowering them.
    • It’s versatile, allowing for endless variations based on what’s fresh or what you have on hand.
    • Quick to prepare, making it perfect for last-minute gatherings or a healthy weeknight dinner side.
    • The colors and textures make it as visually appealing as it is tasty, guaranteed to impress your guests.

    Ingredients

    • 4 cups mixed spring greens (washed and dried)
    • 1 cup strawberries (sliced)
    • 1/2 cup feta cheese (crumbled)
    • 1/4 cup walnuts (toasted and chopped)
    • 2 tbsp olive oil
    • 1 tbsp balsamic vinegar
    • 1 tsp honey
    • Salt and pepper to taste

    Equipment Needed

    • Large salad bowl
    • Small mixing bowl
    • Whisk
    • Measuring cups and spoons
    • Knife and cutting board

    Instructions

    Spring Salad Recipe

    Step 1: Prepare Your Greens

    Start by ensuring your mixed spring greens are thoroughly washed and dried. This step is crucial for removing any grit and ensuring your salad isn’t watered down. A salad spinner works wonders here, but patting them dry with a clean towel does the trick too. Tip: For extra crispness, chill your greens in the fridge for about 30 minutes before assembling the salad.

    Step 2: Toast the Walnuts

    While your greens are chilling, toast the walnuts in a dry skillet over medium heat for about 5 minutes, stirring frequently until they’re fragrant and slightly golden. Let them cool before chopping. This enhances their flavor and adds a delightful crunch to your salad.

    Step 3: Slice the Strawberries

    Wash your strawberries under cold water, hull them, and slice into thin pieces. The sweetness of the strawberries pairs beautifully with the tangy feta and the nutty walnuts, creating a symphony of flavors in every bite.

    Step 4: Make the Dressing

    In a small bowl, whisk together the olive oil, balsamic vinegar, honey, and a pinch of salt and pepper until well combined. Taste and adjust the seasoning as needed. Tip: For a smoother dressing, you can emulsify it by whisking vigorously or shaking it in a small jar.

    Step 5: Assemble the Salad

    In your large salad bowl, combine the chilled greens, sliced strawberries, crumbled feta, and chopped walnuts. Drizzle the dressing over the top and toss gently to coat all the ingredients evenly. Serve immediately to enjoy the full spectrum of textures and flavors.

    Tips and Tricks

    For those looking to elevate their spring salad game, consider these advanced tips. First, if you’re not a fan of walnuts, pecans or almonds make excellent substitutes, offering a different but equally delicious crunch. Second, adding a handful of fresh herbs like mint or basil can introduce a refreshing twist to the flavor profile. Third, for a more substantial meal, grilled chicken or shrimp can turn this salad into a hearty main course. Lastly, if you’re preparing the salad ahead of time, keep the dressing separate and add it just before serving to prevent the greens from wilting.

    Recipe Variations

    • Swap strawberries for other seasonal fruits like peaches or pears for a different sweet note.
    • Use goat cheese instead of feta for a creamier texture and a slightly tangier taste.
    • Add avocado slices for a boost of healthy fats and a buttery texture.
    • Incorporate quinoa or farro to make the salad more filling and add a whole new layer of texture.
    • Try a different dressing, such as a lemon vinaigrette or a raspberry balsamic, to change up the flavor profile.

    Frequently Asked Questions

    Can I make this salad ahead of time?

    Yes, you can prepare the components of the salad ahead of time, but it’s best to assemble and dress it just before serving to maintain the freshness and crispness of the greens. Store the washed and dried greens, sliced strawberries, toasted nuts, and dressing separately in the fridge.

    What can I use instead of balsamic vinegar?

    If you’re not a fan of balsamic vinegar, apple cider vinegar or red wine vinegar are great alternatives. They’ll give the dressing a different but equally delicious tang. Just adjust the amount to taste, as the acidity levels can vary.

    Is there a vegan version of this salad?

    Absolutely! Simply omit the feta cheese or substitute it with a vegan cheese alternative. Also, ensure the honey in the dressing is replaced with maple syrup or agave nectar to keep it plant-based.

    Summary

    This spring salad is a celebration of seasonal produce, combining fresh greens, sweet strawberries, crunchy walnuts, and tangy feta with a simple homemade dressing. It’s quick, versatile, and sure to be a hit at any table.

  • Power-Packed Protein Salad: A Muscle-Building Marvel

    Power-Packed Protein Salad: A Muscle-Building Marvel

    Today’s the day to fuel your body with a salad that’s as nutritious as it is delicious. This protein-packed marvel is your ticket to a satisfying meal that keeps you full and energized.

    Why This Recipe Works

    • High-quality protein sources like chicken and quinoa keep you full and support muscle repair.
    • Fresh veggies add crunch and a rainbow of nutrients.
    • A homemade dressing brings it all together with zesty flavors without the added sugars of store-bought versions.

    Ingredients

    • 2 cups cooked quinoa, cooled
    • 1 lb grilled chicken breast, diced
    • 1 cup cherry tomatoes, halved
    • 1 cucumber, diced
    • 1/2 red onion, thinly sliced
    • 1/4 cup olive oil
    • 2 tbsp lemon juice
    • 1 tsp Dijon mustard
    • Salt and pepper to taste

    Equipment Needed

    • Large mixing bowl
    • Whisk
    • Measuring cups and spoons
    • Knife and cutting board

    Instructions

    Recipe Of Protein Salad

    Step 1: Prep Your Proteins

    Start by ensuring your quinoa and chicken are ready to go. If you’re cooking quinoa from scratch, let it cool to room temperature to avoid wilting the veggies. Dice your grilled chicken into bite-sized pieces for easy eating.

    Step 2: Chop Your Veggies

    Halve the cherry tomatoes, dice the cucumber, and thinly slice the red onion. Uniform pieces ensure every bite is packed with flavor and texture.

    Step 3: Whisk Together the Dressing

    In a small bowl, whisk together olive oil, lemon juice, Dijon mustard, salt, and pepper. Taste and adjust seasoning as needed. This dressing is simple but packs a punch.

    Step 4: Combine All Ingredients

    In a large mixing bowl, combine the quinoa, chicken, tomatoes, cucumber, and red onion. Drizzle the dressing over the top and toss gently to coat everything evenly.

    Step 5: Serve and Enjoy

    Divide the salad among plates or containers if meal prepping. This salad is best enjoyed fresh but can be stored in the fridge for up to 3 days.

    Tips and Tricks

    For an extra protein boost, add a handful of chickpeas or black beans. If you’re not a fan of quinoa, brown rice or farro make great substitutes. To save time, use rotisserie chicken instead of grilling your own. For a creamier dressing, add a tablespoon of Greek yogurt. Always taste your dressing before adding it to the salad to ensure the flavors are balanced.

    Recipe Variations

    • Swap chicken for grilled shrimp or tofu for a different protein source.
    • Add avocado for healthy fats and creaminess.
    • Include nuts or seeds for added crunch and nutrients.
    • Use different herbs like cilantro or basil to change up the flavor profile.
    • Try a different dressing, such as balsamic vinaigrette or tahini lemon.

    Frequently Asked Questions

    Can I make this salad ahead of time?

    Absolutely! This salad holds up well in the fridge for up to 3 days. Just wait to add the dressing until you’re ready to eat to keep the veggies crisp.

    Is this salad keto-friendly?

    While quinoa is not keto-friendly, you can substitute it with cauliflower rice to make this salad fit a keto diet.

    Can I use a different protein?

    Yes, feel free to use any protein you like. Grilled shrimp, tofu, or even hard-boiled eggs would work great in this salad.

    Summary

    This Power-Packed Protein Salad is a versatile, nutritious meal that’s perfect for lunch, dinner, or meal prep. With simple ingredients and easy steps, it’s a foolproof way to enjoy a healthy, protein-rich dish.

  • Creamy Macaroni and Cheese Salad Recipe: A Summer Picnic Must-Have

    Creamy Macaroni and Cheese Salad Recipe: A Summer Picnic Must-Have

    Now that summer is in full swing, it’s time to talk about the ultimate picnic side dish that combines the comfort of mac and cheese with the freshness of a salad. This macaroni and cheese salad is creamy, cheesy, and packed with flavors that will make it the star of any outdoor gathering.

    Why This Recipe Works

    • The combination of elbow macaroni and a rich, creamy cheese sauce creates the perfect base for a hearty salad.
    • Adding crisp vegetables like bell peppers and onions introduces a refreshing crunch that balances the creaminess.
    • The use of both cheddar and Parmesan cheeses ensures a deep, complex flavor profile that’s irresistibly delicious.
    • Chilling the salad before serving allows the flavors to meld together beautifully, making every bite better than the last.
    • It’s incredibly versatile, allowing for endless variations to suit any taste or dietary preference.

    Ingredients

    • 2 cups elbow macaroni, uncooked
    • 1 cup sharp cheddar cheese, shredded
    • 1/2 cup Parmesan cheese, grated
    • 1/2 cup mayonnaise
    • 1/4 cup sour cream
    • 1 tbsp Dijon mustard
    • 1/2 cup red bell pepper, diced
    • 1/4 cup red onion, finely chopped
    • Salt and pepper to taste

    Equipment Needed

    • Large pot
    • Colander
    • Mixing bowls
    • Whisk
    • Measuring cups and spoons

    Instructions

    Macaroni And Cheese Salad Recipe

    Step 1: Cook the Macaroni

    Bring a large pot of salted water to a boil over high heat. Add the elbow macaroni and cook according to package instructions until al dente, about 8 minutes. Drain the macaroni in a colander and rinse under cold water to stop the cooking process. Tip: Rinsing the macaroni with cold water prevents it from becoming mushy.

    Step 2: Prepare the Cheese Sauce

    In a large mixing bowl, whisk together the mayonnaise, sour cream, and Dijon mustard until smooth. Add the shredded cheddar and grated Parmesan cheeses, stirring until well combined. The mixture should be thick and creamy. Tip: For an extra smooth sauce, let the cheeses come to room temperature before mixing.

    Step 3: Combine the Ingredients

    Add the cooled macaroni to the cheese sauce, along with the diced red bell pepper and chopped red onion. Gently fold everything together until the macaroni is evenly coated with the sauce and the vegetables are well distributed. Season with salt and pepper to taste.

    Step 4: Chill the Salad

    Cover the bowl with plastic wrap and refrigerate the salad for at least 2 hours, or overnight if possible. This chilling time allows the flavors to meld together and the salad to reach the perfect consistency. Tip: Stir the salad once or twice during chilling to ensure even flavor distribution.

    Step 5: Serve and Enjoy

    Before serving, give the salad a good stir to refresh the creamy texture. Taste and adjust the seasoning if necessary. Serve chilled as a delightful side dish at your next picnic or barbecue.

    Tips and Tricks

    For those looking to elevate their macaroni and cheese salad, consider these advanced tips. First, toasting the macaroni lightly before boiling can add a nutty depth to the dish. Second, incorporating a splash of apple cider vinegar into the dressing can brighten the flavors. Lastly, for a smokier version, add a bit of smoked paprika or substitute some of the cheddar with smoked Gouda. These small tweaks can transform the salad into something truly special.

    Recipe Variations

    • For a protein-packed version, add diced cooked chicken or crispy bacon bits.
    • Vegetarians can enjoy a richer salad by adding avocado chunks or roasted vegetables.
    • Spice lovers might appreciate a dash of hot sauce or cayenne pepper for an extra kick.
    • For a healthier twist, substitute Greek yogurt for mayonnaise and use whole wheat pasta.
    • Those avoiding dairy can use vegan cheese alternatives and plant-based mayonnaise.

    Frequently Asked Questions

    Can I make this salad ahead of time? Absolutely! This salad actually tastes better after it’s been chilled for a few hours, making it the perfect make-ahead dish for busy hosts.

    How long will the salad keep in the fridge? Stored in an airtight container, the salad will stay fresh for up to 3 days. Just give it a good stir before serving again.

    Can I freeze macaroni and cheese salad? Freezing is not recommended as the mayonnaise-based dressing and pasta texture can become unpleasant upon thawing.

    Summary

    This creamy macaroni and cheese salad is a delightful twist on two classics, perfect for summer picnics and potlucks. With its rich cheese sauce, crisp vegetables, and versatile nature, it’s sure to be a crowd-pleaser.

  • Tuscan Pasta Salad Recipe: A Zesty Summer Delight

    Tuscan Pasta Salad Recipe: A Zesty Summer Delight

    Zipping straight into the heart of summer with this Tuscan Pasta Salad recipe that’s bursting with flavors. Perfect for picnics, potlucks, or just because you deserve a bowl of happiness. Let’s dive into the magic of combining simple ingredients for a dish that sings with every bite.

    Why This Recipe Works

    • The combination of fresh vegetables and herbs brings a crisp, refreshing taste that’s perfect for hot summer days.
    • Using high-quality olive oil and balsamic vinegar elevates the dish from good to unforgettable.
    • The pasta’s al dente texture ensures every forkful is satisfyingly chewy, not mushy.
    • It’s versatile; serve it as a main, side, or even a snack.
    • Prep ahead and the flavors meld beautifully, making it even better the next day.

    Ingredients

    • 1 lb penne pasta
    • 1/2 cup extra virgin olive oil
    • 1/4 cup balsamic vinegar
    • 1 pint cherry tomatoes, halved
    • 1 cucumber, diced
    • 1/2 red onion, thinly sliced
    • 1/2 cup kalamata olives, pitted and halved
    • 1/2 cup fresh basil leaves, chopped
    • 1/2 cup fresh parsley, chopped
    • Salt and pepper to taste

    Equipment Needed

    • Large pot
    • Colander
    • Large mixing bowl
    • Whisk
    • Measuring cups and spoons
    • Knife and cutting board

    Instructions

    Tuscan Pasta Salad Recipe

    Boil the Pasta to Perfection

    Fill a large pot with water and bring it to a rolling boil. Add a generous pinch of salt to the water. This is your only chance to season the pasta itself, so don’t skimp. Add the penne pasta and cook according to the package instructions until al dente, usually about 11 minutes. Tip: Stir the pasta occasionally to prevent sticking.

    Prepare the Dressing

    While the pasta cooks, whisk together the olive oil and balsamic vinegar in a large mixing bowl. Season with salt and pepper to taste. This simple dressing is the backbone of the salad’s flavor, so make sure it’s well balanced. Tip: For an extra flavor boost, let the dressing sit for a few minutes to meld.

    Chop and Add the Vegetables

    Dice the cucumber, halve the cherry tomatoes, thinly slice the red onion, and halve the kalamata olives. Add these to the bowl with the dressing. The vibrant colors and textures of these vegetables not only add nutrition but also make the salad visually appealing. Tip: If you’re sensitive to raw onion, soak the slices in cold water for 10 minutes to mellow their bite.

    Combine and Toss

    Once the pasta is done, drain it in a colander and rinse under cold water to stop the cooking process and cool it down. Add the pasta to the bowl with the vegetables and dressing. Toss everything together until well combined. The pasta should be evenly coated with the dressing, and the vegetables distributed throughout.

    Garnish and Serve

    Chop the fresh basil and parsley and sprinkle them over the salad. Give it one final gentle toss to distribute the herbs. Serve immediately, or cover and refrigerate to let the flavors meld even more. Tip: Adding the herbs last preserves their bright color and fresh flavor.

    Tips and Tricks

    For those looking to take their Tuscan Pasta Salad to the next level, consider these advanced tips. First, toasting the pasta in a dry pan before boiling can add a nutty depth of flavor. Second, incorporating a mix of fresh and sun-dried tomatoes can introduce a delightful contrast in textures and tastes. Third, for a creamier version, whisk a tablespoon of Dijon mustard into the dressing. Fourth, adding grilled chicken or shrimp can turn this side dish into a hearty main. Lastly, for a gluten-free version, substitute the penne with your favorite gluten-free pasta.

    Recipe Variations

    • Add grilled vegetables like zucchini and bell peppers for a smoky flavor.
    • Incorporate cheese such as feta or mozzarella for a creamy texture.
    • Swap the penne for farfalle or rotini for a different pasta experience.
    • Include protein like chickpeas or grilled chicken to make it more filling.
    • Use lemon juice instead of balsamic vinegar for a tangier dressing.

    Frequently Asked Questions

    Can I make this salad ahead of time?

    Absolutely! In fact, making it a few hours ahead allows the flavors to meld together beautifully. Just hold off on adding the fresh herbs until you’re ready to serve to keep them vibrant.

    How long does it last in the fridge?

    Stored in an airtight container, this pasta salad will keep for up to 3 days in the refrigerator. The vegetables may soften slightly over time, but the flavors will continue to develop.

    Can I use a different type of pasta?

    Yes, any short pasta with nooks and crannies to hold the dressing will work well. Just adjust the cooking time according to the package instructions.

    Summary

    This Tuscan Pasta Salad is a vibrant, flavorful dish that’s perfect for any summer occasion. Easy to make and customizable, it’s sure to be a hit with everyone who tries it.

  • Millionaire Salad Recipe: A Luxurious Twist on a Classic

    Millionaire Salad Recipe: A Luxurious Twist on a Classic

    Overtime, I’ve discovered that the secret to a memorable salad lies in its ability to surprise and delight. This Millionaire Salad does just that, combining unexpected ingredients for a dish that’s as rich in flavor as it is in name. Perfect for those who love to indulge in the finer things in life, without spending a fortune.

    Why This Recipe Works

    • The combination of sweet and savory elements creates a complex flavor profile that’s irresistibly delicious.
    • High-quality, simple ingredients ensure that each component shines, making the salad feel luxurious.
    • It’s versatile enough to serve as a main dish or a side, fitting perfectly into any meal plan.
    • The recipe is easy to customize, allowing you to adjust based on what’s in season or your personal preferences.
    • It’s a visually stunning dish that’s sure to impress guests at any gathering.

    Ingredients

    • 2 cups mixed greens (washed and dried)
    • 1/2 cup cherry tomatoes (halved)
    • 1/4 cup red onion (thinly sliced)
    • 1/2 avocado (sliced)
    • 1/4 cup crumbled blue cheese
    • 1/4 cup candied pecans
    • 2 tbsp balsamic glaze
    • 2 tbsp olive oil
    • Salt and pepper to taste

    Equipment Needed

    • Large salad bowl
    • Small mixing bowl
    • Whisk
    • Measuring cups and spoons
    • Knife and cutting board

    Instructions

    Millionaire Salad Recipe

    Prepare Your Ingredients

    Start by washing and drying your mixed greens to ensure they’re clean and crisp. Halve the cherry tomatoes, thinly slice the red onion, and slice the avocado. Having all your ingredients prepped and ready to go makes the assembly process a breeze. Tip: To prevent the avocado from browning, lightly drizzle it with lemon juice after slicing.

    Assemble the Salad

    In a large salad bowl, layer the mixed greens as the base. Arrange the cherry tomatoes, red onion slices, and avocado on top of the greens. Sprinkle the crumbled blue cheese and candied pecans evenly over the salad. This step is where your salad starts to look like a million bucks!

    Make the Dressing

    In a small mixing bowl, whisk together the olive oil and balsamic glaze until well combined. Season with salt and pepper to taste. The simplicity of this dressing allows the high-quality ingredients in the salad to stand out. Tip: For a creamier dressing, you can add a teaspoon of Dijon mustard to the mix.

    Dress the Salad

    Drizzle the dressing over the assembled salad just before serving. Toss gently to ensure all the ingredients are lightly coated with the dressing. This ensures every bite is as flavorful as the last. Tip: Add the dressing right before serving to keep the greens crisp and prevent them from wilting.

    Serve and Enjoy

    Transfer the salad to individual plates or serve it family-style in the large bowl. This Millionaire Salad is best enjoyed fresh, making it the perfect dish for impressing guests or treating yourself to a luxurious meal.

    Tips and Tricks

    For an extra touch of luxury, consider adding thinly sliced prosciutto or grilled shrimp to the salad. If you’re not a fan of blue cheese, feta or goat cheese make excellent substitutes. Toasting the pecans before candying them adds an extra layer of flavor and crunch. If you’re preparing this salad ahead of time, keep the dressing separate and add it just before serving to maintain the freshness and texture of the greens.

    Recipe Variations

    • For a sweeter version, add sliced strawberries or pears.
    • Substitute the candied pecans with walnuts or almonds for a different crunch.
    • Add grilled chicken or salmon to turn the salad into a hearty main course.
    • Use arugula instead of mixed greens for a peppery twist.
    • Experiment with different dressings, such as a honey mustard or raspberry vinaigrette, to change up the flavor profile.

    Frequently Asked Questions

    Can I make this salad ahead of time?

    Yes, you can prepare the ingredients ahead of time, but it’s best to assemble and dress the salad just before serving to keep the greens crisp and fresh. Store the prepped ingredients separately in the refrigerator until you’re ready to use them.

    What can I use instead of blue cheese?

    If blue cheese isn’t your favorite, you can easily substitute it with feta, goat cheese, or even shaved Parmesan for a different but equally delicious flavor profile.

    How can I make this salad vegan?

    To make a vegan version of this salad, omit the blue cheese or use a vegan cheese alternative. Ensure that the candied pecans are made without honey, using maple syrup or another vegan sweetener instead.

    Summary

    This Millionaire Salad is a luxurious take on a classic, combining sweet, savory, and crunchy elements for a dish that’s sure to impress. With simple, high-quality ingredients and easy customization options, it’s perfect for any occasion.