Blog

  • Goat Cheese Salad Recipe: A Tangy Twist on Greens

    Goat Cheese Salad Recipe: A Tangy Twist on Greens

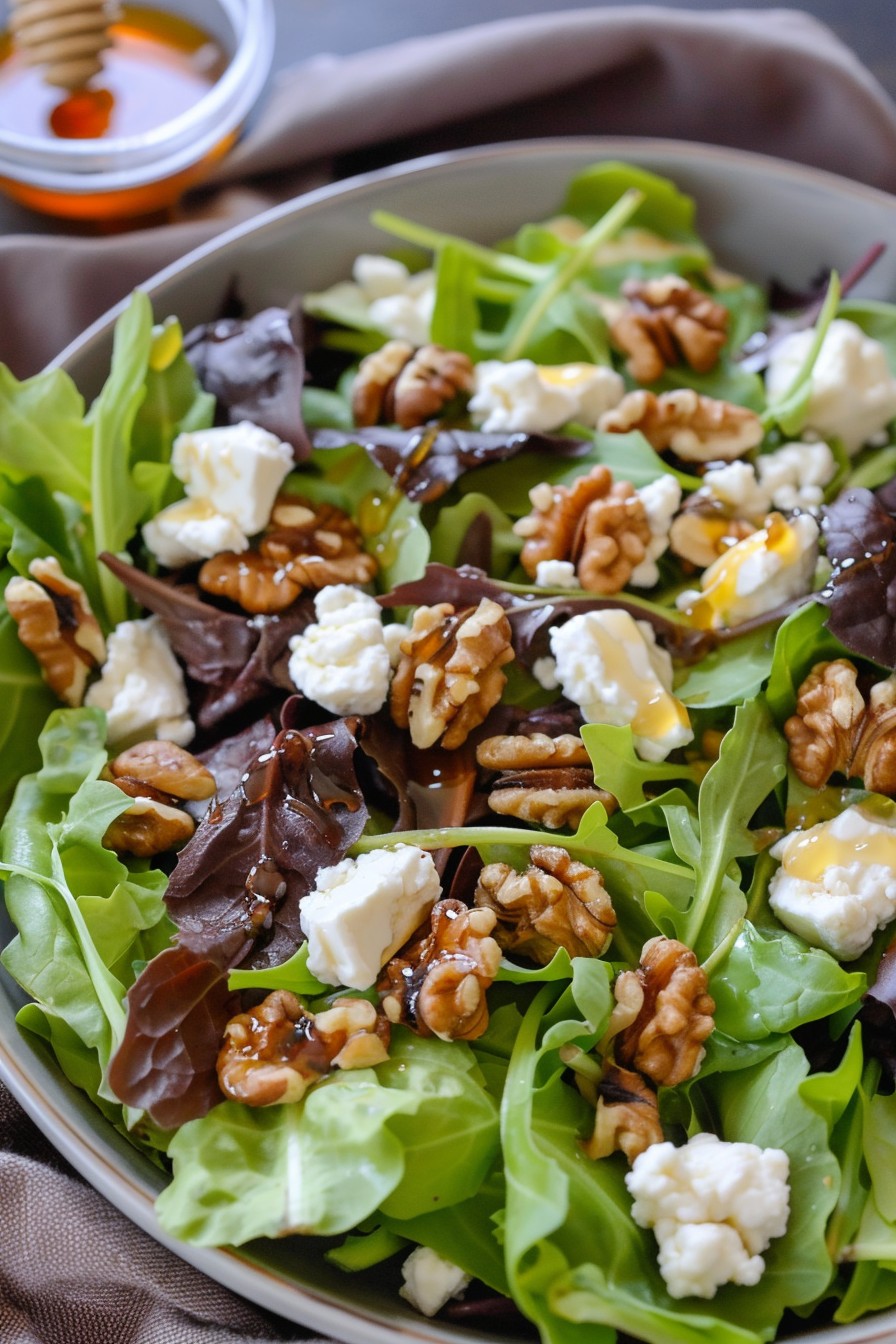
    Salads are the unsung heroes of the culinary world, and this goat cheese salad is no exception. Simple, yet sophisticated, it’s a dish that promises to elevate your salad game with its creamy, tangy goodness.

    Why This Recipe Works

    • The creamy texture of goat cheese pairs perfectly with the crispness of fresh greens, creating a delightful contrast in every bite.
    • Walnuts add a crunchy texture and a nutty flavor that complements the tanginess of the goat cheese.
    • A homemade honey mustard dressing ties all the flavors together with its sweet and tangy profile.
    • This salad is versatile and can be served as a light lunch or a sophisticated starter for dinner parties.
    • It’s quick and easy to prepare, making it perfect for busy weeknights or last-minute gatherings.

    Ingredients

    • 6 cups mixed greens (washed and dried)
    • 4 oz goat cheese (crumbled)
    • 1/2 cup walnuts (toasted and roughly chopped)
    • 1/4 cup olive oil
    • 2 tbsp honey
    • 1 tbsp Dijon mustard
    • 1 tbsp apple cider vinegar
    • Salt and pepper to taste

    Equipment Needed

    • Large salad bowl
    • Small mixing bowl
    • Whisk
    • Measuring cups and spoons
    • Knife and cutting board

    Instructions

    Goat Cheese Salad Recipe

    Step 1: Prepare the Dressing

    In a small mixing bowl, whisk together the olive oil, honey, Dijon mustard, and apple cider vinegar until well combined. Season with salt and pepper to taste. Tip: For a smoother dressing, you can blend all the ingredients in a blender for about 30 seconds.

    Step 2: Toast the Walnuts

    Place the walnuts in a dry skillet over medium heat. Toast them for about 5 minutes, stirring occasionally, until they’re fragrant and lightly browned. Remove from heat and let them cool before roughly chopping. Tip: Toasting the walnuts enhances their flavor and adds an extra crunch to the salad.

    Step 3: Assemble the Salad

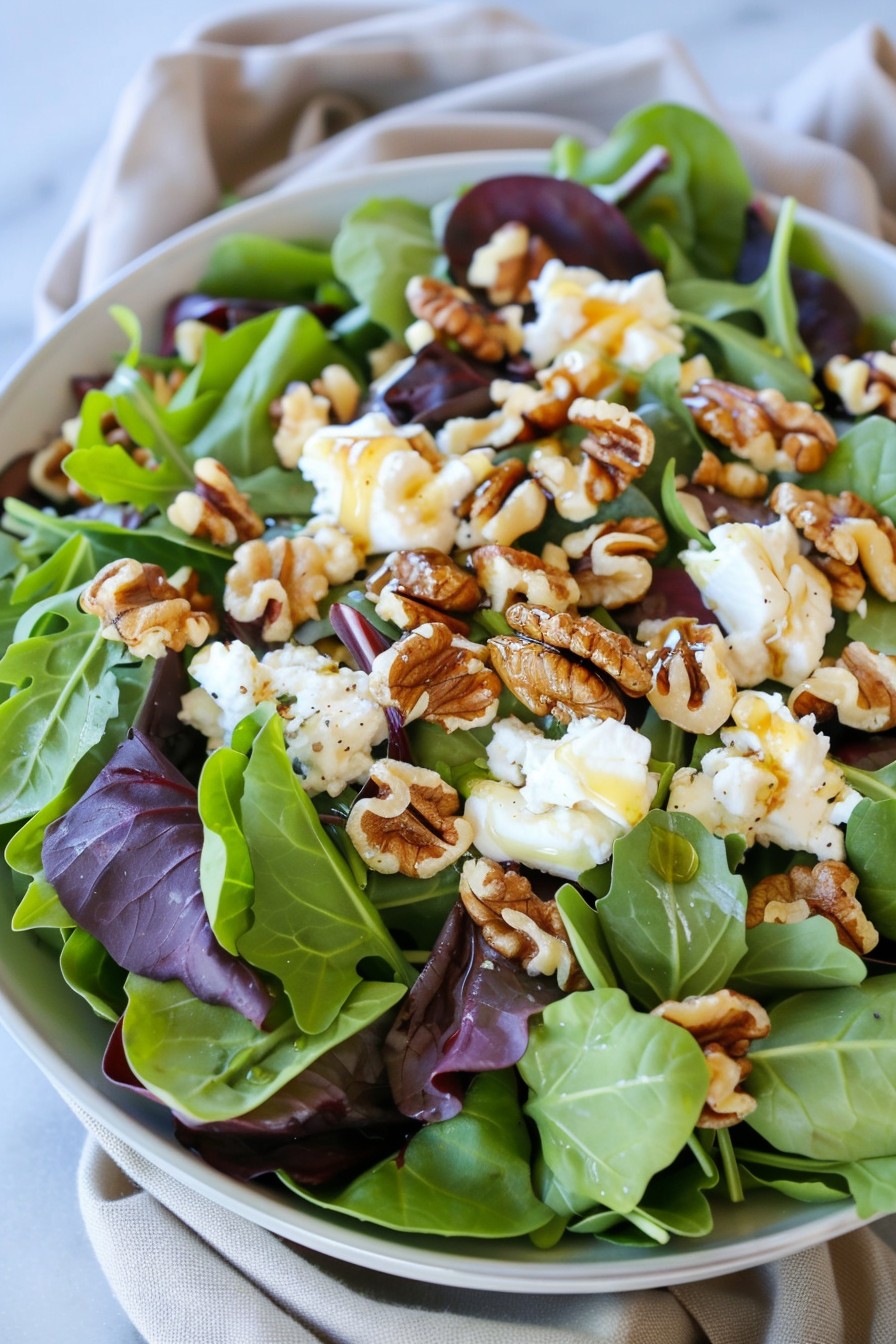
    In a large salad bowl, toss the mixed greens with the prepared dressing until evenly coated. Add the crumbled goat cheese and toasted walnuts, then gently toss to combine. Tip: For the best texture, add the goat cheese and walnuts just before serving to prevent them from getting soggy.

    Tips and Tricks

    For an extra layer of flavor, consider adding sliced apples or pears to the salad. The sweetness of the fruit pairs beautifully with the tangy goat cheese and the crunchy walnuts. If you’re not a fan of walnuts, pecans or almonds make great substitutes. To make this salad more substantial, add grilled chicken or shrimp. For a vegan version, substitute the goat cheese with a plant-based cheese alternative and use maple syrup instead of honey in the dressing.

    Recipe Variations

    • Add sliced strawberries or raspberries for a fruity twist.
    • Incorporate cooked quinoa or farro for added protein and fiber.
    • Swap the honey mustard dressing for a balsamic vinaigrette for a different flavor profile.
    • Use arugula or spinach instead of mixed greens for a peppery or earthy base.
    • Add avocado slices for creaminess and healthy fats.

    Frequently Asked Questions

    Can I make this salad ahead of time?

    Yes, you can prepare the dressing and toast the walnuts ahead of time. However, it’s best to assemble the salad just before serving to keep the greens crisp and the goat cheese from becoming too soft.

    What can I use instead of goat cheese?

    Feta cheese or blue cheese are great substitutes if you’re not a fan of goat cheese. Both offer a similar tangy flavor that works well in this salad.

    How can I store leftovers?

    Leftover salad can be stored in an airtight container in the refrigerator for up to a day. Keep in mind that the greens may wilt slightly, so it’s best enjoyed fresh.

    Summary

    This goat cheese salad is a perfect blend of creamy, crunchy, and tangy flavors, making it a standout dish for any occasion. Easy to prepare and endlessly customizable, it’s sure to become a favorite in your recipe collection.

  • Russian Potato Salad Recipe: A Creamy, Dreamy Side Dish

    Russian Potato Salad Recipe: A Creamy, Dreamy Side Dish

    Let’s dive into the world of Russian cuisine with this classic potato salad that’s bound to steal the show at any dinner table. Perfect for potlucks, picnics, or just because you deserve something delicious today.

    Why This Recipe Works

    • The combination of creamy potatoes, crisp vegetables, and a tangy dressing creates a perfect balance of textures and flavors.
    • It’s versatile enough to serve as a side dish or a hearty main for vegetarians.
    • Preparing it ahead of time allows the flavors to meld together beautifully, making it even more delicious the next day.

    Ingredients

    • 2 lbs potatoes, peeled and diced
    • 1 cup mayonnaise
    • 1 tbsp mustard
    • 1/2 cup pickles, chopped
    • 1/2 cup carrots, diced and cooked
    • 1/2 cup peas, cooked
    • Salt and pepper to taste

    Equipment Needed

    • Large pot
    • Mixing bowl
    • Knife
    • Cutting board

    Instructions

    Russian Potato Salad Recipe

    Step 1: Cook the Potatoes

    Bring a large pot of salted water to a boil. Add the diced potatoes and cook until they are tender but still firm, about 10 minutes. Drain and let them cool slightly. Tip: Cooking the potatoes with their skins on can add extra flavor and nutrients.

    Step 2: Prepare the Vegetables

    While the potatoes are cooking, dice the carrots and chop the pickles. If using fresh peas, cook them until tender. These vegetables add a delightful crunch and sweetness to the salad.

    Step 3: Mix the Dressing

    In a small bowl, whisk together the mayonnaise and mustard. This creamy dressing is the secret to the salad’s rich flavor. Tip: For a lighter version, you can substitute half of the mayonnaise with Greek yogurt.

    Step 4: Combine All Ingredients

    In a large mixing bowl, combine the cooled potatoes, carrots, peas, and pickles. Gently fold in the dressing until everything is evenly coated. Season with salt and pepper to taste.

    Step 5: Chill Before Serving

    Cover the salad and refrigerate for at least 1 hour before serving. This allows the flavors to meld together. Tip: For the best flavor, let the salad chill overnight.

    Tips and Tricks

    For an extra layer of flavor, consider adding a tablespoon of fresh dill or parsley to the dressing. If you’re short on time, using frozen peas and carrots can save you a step without sacrificing taste. Always taste your salad before serving and adjust the seasoning if necessary. Remember, the salad will taste even better the next day as the flavors continue to develop.

    Recipe Variations

    • Add diced boiled eggs for a protein boost.
    • Swap the peas and carrots for other vegetables like bell peppers or cucumbers for a different crunch.
    • Use a mix of mayonnaise and sour cream for a tangier dressing.
    • Incorporate a bit of horseradish into the dressing for a spicy kick.

    Frequently Asked Questions

    Can I make this salad vegan? Absolutely! Just substitute the mayonnaise with a vegan alternative and ensure all other ingredients meet your dietary preferences.

    How long can I store the salad? Properly stored in an airtight container, the salad can last in the refrigerator for up to 3 days.

    Can I freeze the salad? Freezing is not recommended as the mayonnaise can separate and the vegetables may become mushy upon thawing.

    Summary

    This Russian Potato Salad is a creamy, flavorful dish that’s perfect for any occasion. With its simple ingredients and easy preparation, it’s sure to become a favorite in your recipe collection.

  • Ranch Pasta Salad Recipe: A Creamy, Crunchy Delight

    Ranch Pasta Salad Recipe: A Creamy, Crunchy Delight

    Delight your taste buds with this irresistible ranch pasta salad that combines creamy dressing with crunchy veggies for the perfect side dish or light meal. It’s easy to make, packed with flavor, and sure to be a hit at any gathering.

    Why This Recipe Works

    • The creamy ranch dressing coats every piece of pasta perfectly, ensuring no bite is bland.
    • Crunchy vegetables add texture and freshness, making the salad more satisfying.
    • It’s versatile; serve it as a side or add protein to make it a main dish.
    • Prep is quick and easy, perfect for last-minute gatherings.
    • The flavors meld together beautifully when chilled, making it even better the next day.

    Ingredients

    • 1 lb pasta (rotini or penne works great)
    • 1 cup ranch dressing (homemade or store-bought)
    • 1 cup cherry tomatoes, halved
    • 1 cup cucumber, diced
    • 1/2 cup red onion, finely chopped
    • 1/2 cup shredded cheddar cheese
    • 1/4 cup bacon bits (optional)
    • Salt and pepper to taste

    Equipment Needed

    • Large pot
    • Colander
    • Large mixing bowl
    • Measuring cups and spoons
    • Knife and cutting board

    Instructions

    Ranch Pasta Salad Recipe

    Step 1: Cook the Pasta

    Bring a large pot of salted water to a boil. Add the pasta and cook according to package instructions until al dente, about 8-10 minutes. Drain the pasta in a colander and rinse under cold water to stop the cooking process. This ensures your pasta salad won’t be mushy.

    Step 2: Prepare the Vegetables

    While the pasta cooks, halve the cherry tomatoes, dice the cucumber, and finely chop the red onion. Uniform pieces ensure every forkful has a bit of everything. For less bite, soak the chopped onion in cold water for 10 minutes, then drain.

    Step 3: Mix the Salad

    In a large mixing bowl, combine the cooled pasta, prepared vegetables, cheddar cheese, and bacon bits if using. Pour the ranch dressing over the top and gently toss until everything is evenly coated. Season with salt and pepper to taste.

    Step 4: Chill Before Serving

    Cover the bowl with plastic wrap and refrigerate for at least 1 hour before serving. This chilling time allows the flavors to meld together beautifully. For best results, give it a gentle stir before serving.

    Tips and Tricks

    For an extra creamy texture, mix in a tablespoon of mayonnaise with the ranch dressing. If you’re making this salad ahead of time, hold off on adding the bacon bits until just before serving to keep them crispy. For a lighter version, substitute Greek yogurt for half of the ranch dressing. Always taste and adjust the seasoning after chilling, as flavors can mellow out in the fridge.

    Recipe Variations

    • Add grilled chicken or shrimp for a protein-packed main dish.
    • Swap out the cheddar cheese for feta or blue cheese for a different flavor profile.
    • Include black olives, bell peppers, or avocado for additional textures and flavors.
    • Use a spicy ranch dressing or add a dash of hot sauce for a kick.
    • For a healthier twist, use whole wheat or chickpea pasta.

    Frequently Asked Questions

    Can I make this pasta salad ahead of time?

    Absolutely! This pasta salad actually tastes better after it’s had time to chill in the fridge, making it a great make-ahead dish for parties or meal prep. Just be sure to add any crispy toppings like bacon bits right before serving to maintain their texture.

    How long will this pasta salad last in the fridge?

    Stored in an airtight container, this ranch pasta salad will stay fresh for up to 3 days in the refrigerator. After that, the vegetables may start to lose their crunch, and the dressing can become too absorbed by the pasta.

    Can I use a different type of pasta?

    Yes, you can use any short pasta shape you prefer or have on hand. Rotini, penne, farfalle, or shells all work well because their shapes hold onto the dressing and mix-ins beautifully.

    Summary

    This ranch pasta salad is a creamy, crunchy, and utterly delicious dish that’s perfect for any occasion. Easy to make and customizable, it’s sure to become a go-to recipe in your collection.

  • Thai Cucumber Salad Recipe: A Crunchy, Tangy Delight

    Thai Cucumber Salad Recipe: A Crunchy, Tangy Delight

    Gather around, food lovers! Today, we’re diving into the refreshing world of Thai cuisine with a cucumber salad that’s bursting with flavors. Perfect for those hot summer days or when you’re craving something light yet satisfying.

    Why This Recipe Works

    • The combination of crisp cucumbers and a tangy dressing creates a perfect balance of textures and flavors.
    • It’s incredibly versatile, serving as a side dish or a standalone snack.
    • Quick and easy to prepare, making it ideal for last-minute gatherings.
    • The use of fresh herbs elevates the dish, adding layers of aroma and taste.

    Ingredients

    • 2 large cucumbers, thinly sliced
    • 1/4 cup rice vinegar
    • 2 tbsp sugar
    • 1 tsp salt
    • 1/2 tsp crushed red pepper flakes
    • 1/4 cup chopped fresh cilantro
    • 2 tbsp chopped peanuts

    Equipment Needed

    • Mixing bowl
    • Whisk
    • Measuring cups and spoons
    • Knife and cutting board

    Instructions

    Cucumber Salad Recipe Thai

    Prepare the Cucumbers

    Start by washing and thinly slicing the cucumbers. For an extra crunch, leave the skin on. Place the slices in a large mixing bowl.

    Make the Dressing

    In a small bowl, whisk together rice vinegar, sugar, salt, and crushed red pepper flakes until the sugar is completely dissolved. This creates a sweet and tangy base for your salad.

    Combine and Toss

    Pour the dressing over the cucumbers and gently toss to ensure every slice is coated. Let it sit for about 10 minutes to allow the flavors to meld together.

    Add the Finishing Touches

    Right before serving, sprinkle the salad with chopped cilantro and peanuts for an added burst of flavor and crunch.

    Serve and Enjoy

    Serve the salad chilled for the best experience. It’s perfect as a side dish or a refreshing snack on its own.

    Tips and Tricks

    For an even more vibrant salad, consider adding thinly sliced red onions or bell peppers. If you’re not a fan of peanuts, toasted sesame seeds make a great alternative. To make the salad ahead of time, prepare the cucumbers and dressing separately and combine them just before serving to maintain the crunch.

    Recipe Variations

    • Add sliced mango for a sweet twist.
    • Incorporate cooked shrimp or chicken to turn it into a main dish.
    • Use lime juice instead of rice vinegar for a different tangy flavor.
    • Add avocado slices for creaminess.

    Frequently Asked Questions

    Can I make this salad ahead of time?

    Yes, but for the best texture, add the dressing just before serving. The cucumbers can become soggy if left in the dressing for too long.

    Is there a substitute for rice vinegar?

    Apple cider vinegar or white wine vinegar can be used as substitutes, though they will slightly alter the flavor profile.

    How long does this salad last in the fridge?

    When stored properly in an airtight container, it can last up to 2 days. However, it’s best enjoyed fresh.

    Summary

    This Thai Cucumber Salad is a delightful mix of crunchy cucumbers, tangy dressing, and fresh herbs, perfect for any occasion. Quick to prepare and versatile, it’s sure to become a favorite.

  • Moroccan Carrot Salad Recipe: A Zesty Twist on a Classic

    Moroccan Carrot Salad Recipe: A Zesty Twist on a Classic

    Welcome to a flavor-packed journey with this Moroccan Carrot Salad recipe. Whether you’re looking to spice up your side dish game or just love carrots, this recipe is a must-try. With its vibrant colors and bold flavors, it’s sure to be a hit at any table.

    Why This Recipe Works

    • The combination of sweet carrots and warm spices creates a perfect balance of flavors.
    • It’s incredibly versatile, serving as a great side dish or a standalone salad.
    • Prep is a breeze, making it ideal for busy weeknights or last-minute gatherings.
    • The use of fresh ingredients ensures a crisp, refreshing taste.
    • It’s a healthy option that doesn’t skimp on flavor.

    Ingredients

    • 4 cups carrots, peeled and grated
    • 2 tbsp olive oil
    • 1 tbsp lemon juice
    • 1 tsp ground cumin
    • 1/2 tsp ground cinnamon
    • 1/4 tsp cayenne pepper
    • Salt and pepper to taste
    • 2 tbsp chopped fresh parsley

    Equipment Needed

    • Large mixing bowl
    • Grater
    • Measuring spoons
    • Whisk

    Instructions

    Moroccan Carrot Salad Recipe

    Step 1: Prepare the Carrots

    Start by peeling and grating the carrots. You can use a box grater or a food processor with a grating attachment for quicker results. Aim for a uniform size to ensure even flavor distribution. Tip: For extra crispness, soak the grated carrots in ice water for 10 minutes, then drain well.

    Step 2: Mix the Dressing

    In a small bowl, whisk together the olive oil, lemon juice, cumin, cinnamon, cayenne pepper, salt, and pepper. The dressing should be well emulsified, with all the spices evenly distributed. This is where the magic happens, so don’t rush it!

    Step 3: Combine Carrots and Dressing

    Transfer the grated carrots to a large mixing bowl. Pour the dressing over the carrots and toss until every strand is beautifully coated. The carrots should glisten with the dressing, promising a burst of flavor in every bite.

    Step 4: Let It Marinate

    Cover the bowl with plastic wrap and let the salad marinate in the refrigerator for at least 30 minutes. This allows the flavors to meld together and the carrots to soften slightly, enhancing the overall texture and taste.

    Step 5: Garnish and Serve

    Before serving, give the salad a quick toss to redistribute the dressing. Sprinkle with chopped fresh parsley for a pop of color and freshness. Serve chilled for the best flavor experience.

    Tips and Tricks

    For an extra layer of flavor, consider toasting the cumin and cinnamon before adding them to the dressing. This simple step can deepen the spices’ flavors, adding a smoky note to the salad. If you’re serving this salad at a gathering, doubling the recipe is a good idea—it’s that good! For those who enjoy a bit of crunch, adding toasted almonds or walnuts can introduce a delightful texture contrast. Lastly, if you’re short on time, using pre-shredded carrots can save you a few minutes without sacrificing too much in terms of taste.

    Recipe Variations

    • Add chickpeas for a protein boost, turning the salad into a hearty main dish.
    • Incorporate raisins or chopped dates for a touch of sweetness that complements the spices.
    • Swap the parsley for cilantro or mint for a different herbal note.
    • For a creamier version, stir in a tablespoon of Greek yogurt or tahini to the dressing.
    • Spice lovers can increase the cayenne pepper or add a pinch of smoked paprika for extra heat.

    Frequently Asked Questions

    Can I make this salad ahead of time?

    Absolutely! This salad actually benefits from being made ahead, as the flavors have more time to meld together. Just keep it covered in the refrigerator, and it’ll be even more delicious the next day.

    How long does it last in the fridge?

    Stored properly in an airtight container, the salad can last up to 3 days in the refrigerator. The carrots may soften slightly over time, but the flavors will remain vibrant.

    Can I use baby carrots instead of regular carrots?

    Yes, baby carrots work just as well. Just make sure to grate them to a similar size for consistency in texture and flavor absorption.

    Summary

    This Moroccan Carrot Salad is a vibrant, flavorful dish that’s as easy to make as it is delicious. With its perfect blend of spices and freshness, it’s sure to become a favorite in your recipe collection.

  • Italian Grinder Salad Recipe: A Flavor Fiesta in Every Bite!

    Italian Grinder Salad Recipe: A Flavor Fiesta in Every Bite!

    Howdy, food lovers! Today, we’re diving into the world of Italian grinders, but with a twist. This salad version packs all the punch of the classic sandwich without the bread, making it a perfect light yet satisfying meal. Let’s get chopping!

    Why This Recipe Works

    • It’s a deconstructed version of the beloved Italian grinder, offering all the flavors without the carbs.
    • The combination of cured meats, cheeses, and crisp veggies creates a symphony of textures.
    • It’s customizable, allowing you to adjust the ingredients based on your preferences or dietary needs.
    • The dressing is a simple yet vibrant mix that ties all the components together beautifully.
    • It’s a make-ahead dream, tasting even better as the flavors meld overnight.

    Ingredients

    • 1 cup diced salami
    • 1 cup diced ham
    • 1 cup diced provolone cheese
    • 1 cup diced mozzarella cheese
    • 1/2 cup sliced black olives
    • 1/2 cup sliced pepperoncini
    • 1/2 cup diced red onion
    • 1/2 cup diced tomatoes
    • 1/4 cup chopped fresh basil
    • 1/4 cup olive oil
    • 2 tbsp red wine vinegar
    • 1 tsp dried oregano
    • Salt and pepper to taste

    Equipment Needed

    • Large mixing bowl
    • Cutting board
    • Sharp knife
    • Measuring cups and spoons
    • Whisk

    Instructions

    Italian Grinder Salad Recipe

    Step 1: Prep Your Ingredients

    Start by dicing all your meats and cheeses into bite-sized pieces. Slice the black olives, pepperoncini, and red onion. Dice the tomatoes and chop the fresh basil. Having everything prepped and ready to go makes the assembly process a breeze.

    Step 2: Make the Dressing

    In a small bowl, whisk together the olive oil, red wine vinegar, dried oregano, and a pinch of salt and pepper. Taste and adjust the seasoning as needed. This simple dressing is the secret to bringing all the flavors together.

    Step 3: Combine the Salad

    In a large mixing bowl, combine the diced salami, ham, provolone, mozzarella, black olives, pepperoncini, red onion, tomatoes, and basil. Pour the dressing over the top and gently toss to ensure everything is evenly coated.

    Step 4: Let It Marinate

    Cover the bowl with plastic wrap and let the salad marinate in the fridge for at least an hour. This step is crucial as it allows the flavors to meld together beautifully.

    Step 5: Serve and Enjoy

    Give the salad a final toss before serving. It’s perfect on its own, over a bed of greens, or even stuffed into a pita for a more traditional feel. Enjoy the burst of flavors in every bite!

    Tips and Tricks

    For an extra kick, add a pinch of red pepper flakes to the dressing. If you’re short on time, you can serve the salad immediately, but the flavors won’t be as developed. For a healthier version, opt for low-sodium meats and cheeses. The salad can be stored in the fridge for up to 3 days, making it a great option for meal prep. Don’t skip the fresh basil—it adds a bright, herby note that dried basil just can’t match.

    Recipe Variations

    • Swap out the meats for grilled chicken or turkey for a lighter version.
    • Add avocado for a creamy texture and healthy fats.
    • Include artichoke hearts for an extra layer of flavor.
    • Use different cheeses like feta or gouda to change up the taste profile.
    • For a vegetarian version, omit the meats and add more veggies like cucumbers and bell peppers.

    Frequently Asked Questions

    Can I make this salad ahead of time?

    Absolutely! In fact, this salad tastes even better after it’s had time to marinate in the fridge for a few hours or overnight. The flavors meld together, creating a more cohesive and delicious dish.

    What can I serve with this salad?

    This salad is versatile. Serve it over a bed of greens, with crusty bread on the side, or even stuffed into a pita or wrap. It’s also great as a side dish at BBQs or potlucks.

    Can I use different meats or cheeses?

    Definitely! The beauty of this recipe is its flexibility. Feel free to swap out the meats and cheeses based on your preferences or what you have on hand. Just keep the ratios roughly the same for the best results.

    Summary

    This Italian Grinder Salad is a deconstructed version of the classic sandwich, packed with all the flavors you love. It’s easy to make, customizable, and perfect for any occasion. Give it a try and enjoy a flavor fiesta in every bite!

  • Ham Pasta Salad Recipe: A Summer Picnic Must-Have

    Ham Pasta Salad Recipe: A Summer Picnic Must-Have

    Zesty, flavorful, and utterly refreshing, this ham pasta salad is your go-to dish for those sunny summer days. Packed with savory ham, crisp veggies, and a creamy dressing, it’s a crowd-pleaser that’s as easy to make as it is delicious.

    Why This Recipe Works

    • The combination of savory ham and fresh vegetables offers a perfect balance of flavors and textures.
    • Creamy dressing coats every piece of pasta and ingredient, ensuring every bite is flavorful.
    • It’s versatile; easily customizable with whatever veggies or proteins you have on hand.
    • Perfect for meal prep; tastes even better the next day as the flavors meld together.
    • Quick and easy to assemble, making it ideal for last-minute gatherings or potlucks.

    Ingredients

    • 8 oz elbow macaroni, cooked and cooled
    • 1 cup diced ham
    • 1/2 cup diced cheddar cheese
    • 1/4 cup diced red onion
    • 1/2 cup diced celery
    • 1/2 cup mayonnaise
    • 2 tbsp mustard
    • 1 tbsp apple cider vinegar
    • 1 tsp sugar
    • Salt and pepper to taste

    Equipment Needed

    • Large mixing bowl
    • Measuring cups and spoons
    • Pot for boiling pasta
    • Colander
    • Knife and cutting board

    Instructions

    Ham Pasta Salad Recipe

    Step 1: Cook the Pasta

    Bring a large pot of salted water to a boil. Add the elbow macaroni and cook according to package instructions until al dente, about 8 minutes. Drain and rinse under cold water to stop the cooking process. Tip: Adding salt to the water enhances the pasta’s flavor.

    Step 2: Prepare the Dressing

    In a small bowl, whisk together the mayonnaise, mustard, apple cider vinegar, and sugar until smooth. Season with salt and pepper to taste. This creamy dressing will be the glue that holds all the flavors together.

    Step 3: Combine Ingredients

    In a large mixing bowl, combine the cooled pasta, diced ham, cheddar cheese, red onion, and celery. Pour the dressing over the top and gently toss until everything is evenly coated. Tip: Letting the salad chill for an hour before serving allows the flavors to meld beautifully.

    Step 4: Chill and Serve

    Cover the bowl with plastic wrap and refrigerate for at least 1 hour before serving. This step is crucial for achieving the best flavor and texture. Serve cold and enjoy!

    Tips and Tricks

    For an extra crunch, add some diced bell peppers or cucumbers. If you’re looking for a lighter version, substitute Greek yogurt for half of the mayonnaise. To make it ahead, prepare the salad up to two days in advance, just hold off on adding the dressing until you’re ready to serve. For a smoky flavor, try using smoked ham or adding a dash of smoked paprika to the dressing.

    Recipe Variations

    • Swap the ham for cooked chicken or turkey for a different protein option.
    • Add peas or corn for extra sweetness and color.
    • Use whole wheat or gluten-free pasta to cater to dietary needs.
    • Incorporate different cheeses like mozzarella or pepper jack for a twist.
    • For a tangier salad, increase the amount of mustard or add a splash of pickle juice to the dressing.

    Frequently Asked Questions

    Can I make this salad vegetarian? Absolutely! Simply omit the ham and add more veggies or a vegetarian protein like chickpeas. The salad will still be packed with flavor and texture.

    How long does this salad last in the fridge? Stored in an airtight container, the salad will keep for up to 3 days. Just give it a good stir before serving to redistribute the dressing.

    Can I freeze this pasta salad? Freezing is not recommended as the mayonnaise-based dressing and pasta may separate and become watery upon thawing, affecting the texture.

    Summary

    This ham pasta salad is a versatile, flavorful dish perfect for any occasion. Easy to make and customizable, it’s sure to be a hit at your next gathering.

  • Ambrosia Salad: A Heavenly Delight for Your Taste Buds

    Ambrosia Salad: A Heavenly Delight for Your Taste Buds

    Zesty, sweet, and utterly divine, this Ambrosia Salad recipe is your ticket to a dessert that’s as fun to make as it is to eat. Perfect for potlucks, family gatherings, or when you’re just in the mood for something sweet and creamy, this dish is a crowd-pleaser that’s surprisingly easy to whip up.

    Why This Recipe Works

    • The combination of fresh fruits and creamy ingredients creates a perfect balance of flavors and textures.
    • It’s incredibly versatile, allowing you to customize it based on your preferences or what you have on hand.
    • This recipe is no-bake, making it a great option for hot summer days or when you’re short on time.
    • The addition of coconut adds a tropical twist that elevates the dish beyond your average fruit salad.
    • It’s a make-ahead dish, meaning the flavors have time to meld together beautifully in the fridge.

    Ingredients

    • 2 cups of mini marshmallows
    • 1 cup of sour cream
    • 1 cup of whipped topping
    • 1 can (20 oz) of pineapple chunks, drained
    • 1 can (11 oz) of mandarin oranges, drained
    • 1 cup of sweetened shredded coconut
    • 1/2 cup of maraschino cherries, halved
    • 1/2 cup of chopped pecans

    Equipment Needed

    • Large mixing bowl
    • Rubber spatula
    • Measuring cups and spoons
    • Serving dish

    Instructions

    Recipe Of Ambrosia Salad

    Step 1: Combine the Creamy Ingredients

    In a large mixing bowl, gently fold together the sour cream and whipped topping until well combined. This creates the creamy base of your Ambrosia Salad. For an extra fluffy texture, make sure your whipped topping is fully thawed before mixing.

    Step 2: Add the Fruits and Marshmallows

    Next, add the pineapple chunks, mandarin oranges, and mini marshmallows to the bowl. Fold them into the creamy mixture carefully to avoid crushing the fruits. This step is where the salad starts to come together, so take your time to ensure everything is evenly distributed.

    Step 3: Incorporate the Coconut and Cherries

    Now, sprinkle in the shredded coconut and halved maraschino cherries. The coconut adds a delightful texture and flavor, while the cherries provide a pop of color and sweetness. If you’re not a fan of cherries, you can easily omit them or substitute with another fruit.

    Step 4: Mix in the Pecans

    Finally, add the chopped pecans to the bowl and give everything one last gentle fold. The pecans add a nice crunch and nutty flavor that contrasts beautifully with the creamy and fruity elements of the salad.

    Step 5: Chill Before Serving

    Transfer the salad to a serving dish, cover, and refrigerate for at least 2 hours before serving. This chilling time allows the flavors to meld together and the marshmallows to soften slightly, making the salad even more delicious.

    Tips and Tricks

    For the best results, make sure all your canned fruits are well-drained to prevent the salad from becoming too watery. If you prefer a lighter version, you can substitute the sour cream with Greek yogurt. Toasting the coconut and pecans before adding them to the salad can enhance their flavors and add an extra layer of texture. If you’re making this salad ahead of time, consider adding the pecans just before serving to maintain their crunch. For a more colorful presentation, reserve a few cherries and some coconut to sprinkle on top before serving.

    Recipe Variations

    • For a tropical twist, add diced mango or banana slices to the salad.
    • Substitute the pecans with walnuts or almonds for a different nutty flavor.
    • Add a splash of citrus juice, like orange or pineapple, for a tangier taste.
    • For a richer salad, mix in a cup of vanilla pudding.
    • If you’re not a fan of coconut, you can leave it out or replace it with granola for crunch.

    Frequently Asked Questions

    Can I make Ambrosia Salad ahead of time?

    Absolutely! In fact, making it ahead of time allows the flavors to meld together beautifully. Just be sure to add any nuts or crunchy toppings right before serving to maintain their texture.

    How long does Ambrosia Salad last in the fridge?

    When stored properly in an airtight container, Ambrosia Salad can last up to 3 days in the refrigerator. However, it’s best enjoyed within the first 24 hours for optimal texture and flavor.

    Can I use fresh fruit instead of canned?

    Yes, you can definitely use fresh fruit. Just keep in mind that fresh fruit may release more juice, so you might need to adjust the amount of creamy ingredients to maintain the desired consistency.

    Summary

    This Ambrosia Salad recipe is a delightful mix of creamy, fruity, and crunchy textures that’s perfect for any occasion. Easy to make and customizable, it’s sure to become a favorite in your recipe collection.

  • Roast Beef Salad: A Juicy Twist on Your Greens

    Roast Beef Salad: A Juicy Twist on Your Greens

    Outrageously delicious and surprisingly simple, this roast beef salad is your ticket to a flavorful meal that’s both satisfying and easy to whip up. Perfect for those days when you crave something hearty yet fresh.

    Why This Recipe Works

    • The combination of tender roast beef and crisp greens offers a perfect balance of textures.
    • A homemade dressing elevates the dish with a tangy and sweet flavor profile.
    • It’s versatile, allowing for endless variations based on what you have in your fridge.
    • Quick to prepare, making it ideal for busy weeknights or last-minute gatherings.
    • Packed with protein, it’s a meal that will keep you full and energized.

    Ingredients

    • 1 lb roast beef, thinly sliced
    • 4 cups mixed greens
    • 1 cup cherry tomatoes, halved
    • 1/2 red onion, thinly sliced
    • 1/4 cup olive oil
    • 2 tbsp balsamic vinegar
    • 1 tbsp honey
    • Salt and pepper to taste

    Equipment Needed

    • Large salad bowl
    • Small whisk or fork
    • Measuring cups and spoons
    • Knife and cutting board

    Instructions

    Recipe For Roast Beef Salad

    Step 1: Prepare the Dressing

    In a small bowl, whisk together the olive oil, balsamic vinegar, honey, salt, and pepper until well combined. Taste and adjust the seasoning as needed. This dressing is the secret to bringing all the flavors together, so don’t skip it!

    Step 2: Assemble the Salad Base

    Place the mixed greens in a large salad bowl. Add the cherry tomatoes and red onion on top. The vibrant colors not only make the salad look appetizing but also add a variety of flavors and textures.

    Step 3: Add the Roast Beef

    Layer the thinly sliced roast beef over the salad greens. The roast beef should be at room temperature to ensure it’s tender and easy to eat. If it’s too cold, it might be tough.

    Step 4: Dress the Salad

    Drizzle the dressing over the salad just before serving. Toss gently to coat all the ingredients evenly. This ensures every bite is as flavorful as the last.

    Step 5: Serve Immediately

    Enjoy your roast beef salad right away to keep the greens crisp and the beef tender. It’s a dish that’s best served fresh.

    Tips and Tricks

    For an extra flavor boost, consider marinating the roast beef in the dressing for 30 minutes before assembling the salad. This allows the meat to absorb the dressing’s flavors, making it even more delicious. If you’re not a fan of balsamic vinegar, try substituting it with red wine vinegar or lemon juice for a different twist. Always slice the roast beef against the grain to ensure it’s tender. For added crunch, toss in some toasted nuts or croutons. And remember, the quality of your ingredients matters, especially the roast beef and olive oil, as they’re the stars of the show.

    Recipe Variations

    • Swap the roast beef for grilled chicken or shrimp for a different protein option.
    • Add avocado slices or blue cheese crumbles for extra creaminess and flavor.
    • Incorporate different greens like arugula or spinach for a peppery or mild taste.
    • Use a different dressing, such as a creamy ranch or a spicy mustard vinaigrette, to change the flavor profile.
    • Add fruits like sliced strawberries or apples for a sweet contrast to the savory beef.

    Frequently Asked Questions

    Can I make this salad ahead of time? Yes, but it’s best to add the dressing and roast beef just before serving to prevent the greens from wilting and the beef from drying out. You can prep all the ingredients separately and assemble them when ready to eat.

    What’s the best way to slice roast beef for salad? Always slice the roast beef against the grain into thin strips. This makes the beef more tender and easier to eat with the salad.

    Can I use a different type of vinegar for the dressing? Absolutely! While balsamic vinegar adds a rich, sweet flavor, red wine vinegar or apple cider vinegar can offer a lighter, tangier taste. Feel free to experiment to find your favorite combination.

    Summary

    This roast beef salad is a delightful mix of tender meat, crisp greens, and a homemade dressing that ties everything together. It’s quick, versatile, and packed with flavors that will make it a regular in your meal rotation.

  • Mandarin Orange Salad with Cool Whip: A Zesty, Creamy Delight

    Mandarin Orange Salad with Cool Whip: A Zesty, Creamy Delight

    A absolutely refreshing and easy-to-make dessert that combines the tangy sweetness of mandarin oranges with the creamy lightness of Cool Whip. Perfect for summer picnics or a quick family treat, this salad is a crowd-pleaser that requires minimal effort for maximum flavor.

    Why This Recipe Works

    • The combination of juicy mandarin oranges and fluffy Cool Whip creates a perfect balance of flavors and textures.
    • It’s incredibly easy to make, requiring no cooking and just a few minutes of prep time.
    • The salad is versatile, allowing for numerous variations to suit any taste or occasion.
    • It’s a great make-ahead dish, as the flavors meld together beautifully when chilled.
    • This recipe is a fantastic way to enjoy a light, fruity dessert without feeling guilty.

    Ingredients

    • 2 cans (15 oz each) mandarin oranges, drained
    • 1 tub (8 oz) Cool Whip, thawed
    • 1 cup mini marshmallows
    • 1/2 cup shredded coconut (optional)
    • 1/4 cup chopped pecans (optional)

    Equipment Needed

    • Large mixing bowl
    • Rubber spatula
    • Measuring cups

    Instructions

    Recipe For Mandarin Orange Salad With Cool Whip

    Step 1: Prepare Your Ingredients

    Start by draining the mandarin oranges thoroughly to prevent the salad from becoming too watery. If you’re using coconut or pecans, give them a quick chop to ensure they’re evenly distributed throughout the salad. This step is crucial for achieving the perfect texture in every bite.

    Step 2: Combine the Ingredients

    In a large mixing bowl, gently fold the drained mandarin oranges into the thawed Cool Whip using a rubber spatula. Be careful not to crush the oranges; you want to maintain their integrity for that burst of citrus flavor. If you’re adding marshmallows, coconut, or pecans, now’s the time to mix them in.

    Step 3: Chill the Salad

    Cover the bowl with plastic wrap and refrigerate the salad for at least 1 hour before serving. This chilling time allows the flavors to meld together and the salad to set slightly, making it easier to serve.

    Step 4: Serve and Enjoy

    Once chilled, give the salad a gentle stir to fluff it up before serving. Spoon it into individual bowls or onto a large serving platter. For an extra touch of elegance, garnish with a few whole mandarin orange segments or a sprinkle of coconut.

    Tips and Tricks

    For a lighter version of this salad, you can use Lite Cool Whip or even substitute half of the Cool Whip with Greek yogurt for a protein boost. If you’re serving this at a party, consider adding a splash of orange liqueur to the mix for an adult twist. Always taste as you go, especially if you’re adding optional ingredients, to ensure the balance of flavors is to your liking. Lastly, for the best texture, make sure the Cool Whip is fully thawed before mixing to avoid lumps.

    Recipe Variations

    • Add a can of drained pineapple chunks for a tropical twist.
    • Mix in a cup of fresh berries for a burst of color and antioxidants.
    • Swap the pecans for walnuts or almonds for a different crunch.
    • Incorporate a teaspoon of vanilla extract for added depth of flavor.
    • Use flavored marshmallows, like strawberry or coconut, for a fun variation.

    Frequently Asked Questions

    Can I make this salad ahead of time?

    Absolutely! This salad actually tastes better after it’s had time to chill and the flavors have melded together. You can make it up to 24 hours in advance, just keep it covered in the refrigerator until you’re ready to serve.

    Can I use fresh mandarin oranges instead of canned?

    Yes, you can use fresh mandarin oranges, but you’ll need to peel and segment them yourself, which adds to the prep time. Also, fresh oranges may not be as sweet as canned, so you might want to adjust the sweetness to your liking.

    Is there a dairy-free alternative to Cool Whip?

    Yes, there are several dairy-free whipped toppings available at most grocery stores. You can also make your own using coconut cream for a completely homemade version.

    Summary

    This Mandarin Orange Salad with Cool Whip is a simple, refreshing dessert that’s perfect for any occasion. With its creamy texture and sweet, tangy flavor, it’s sure to be a hit with both kids and adults alike. Plus, it’s incredibly versatile, allowing you to customize it to your heart’s content.