Blog

  • Zesty Rice Vinegar Salad Dressing Recipe: A Tangy Twist for Your Greens

    Zesty Rice Vinegar Salad Dressing Recipe: A Tangy Twist for Your Greens

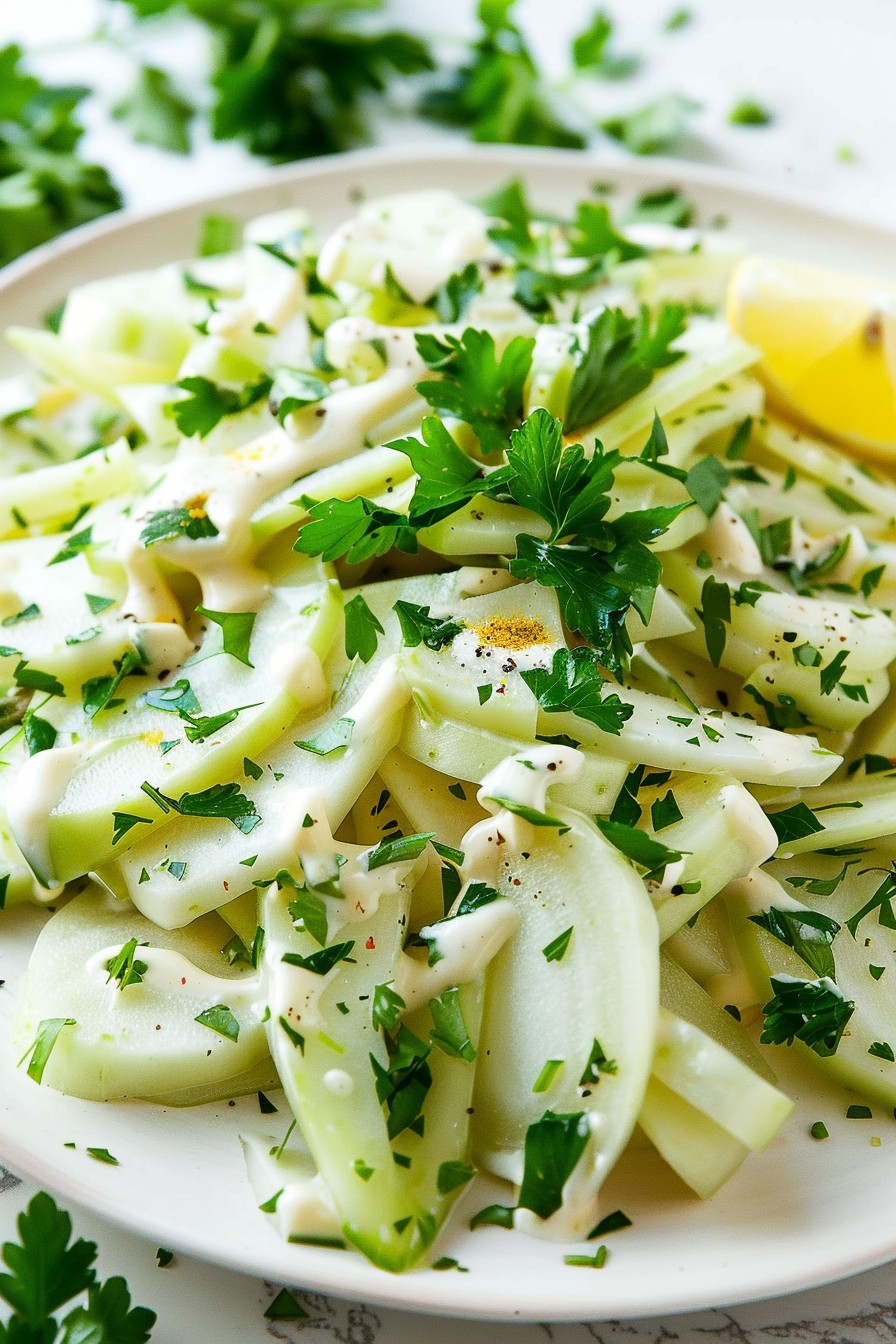
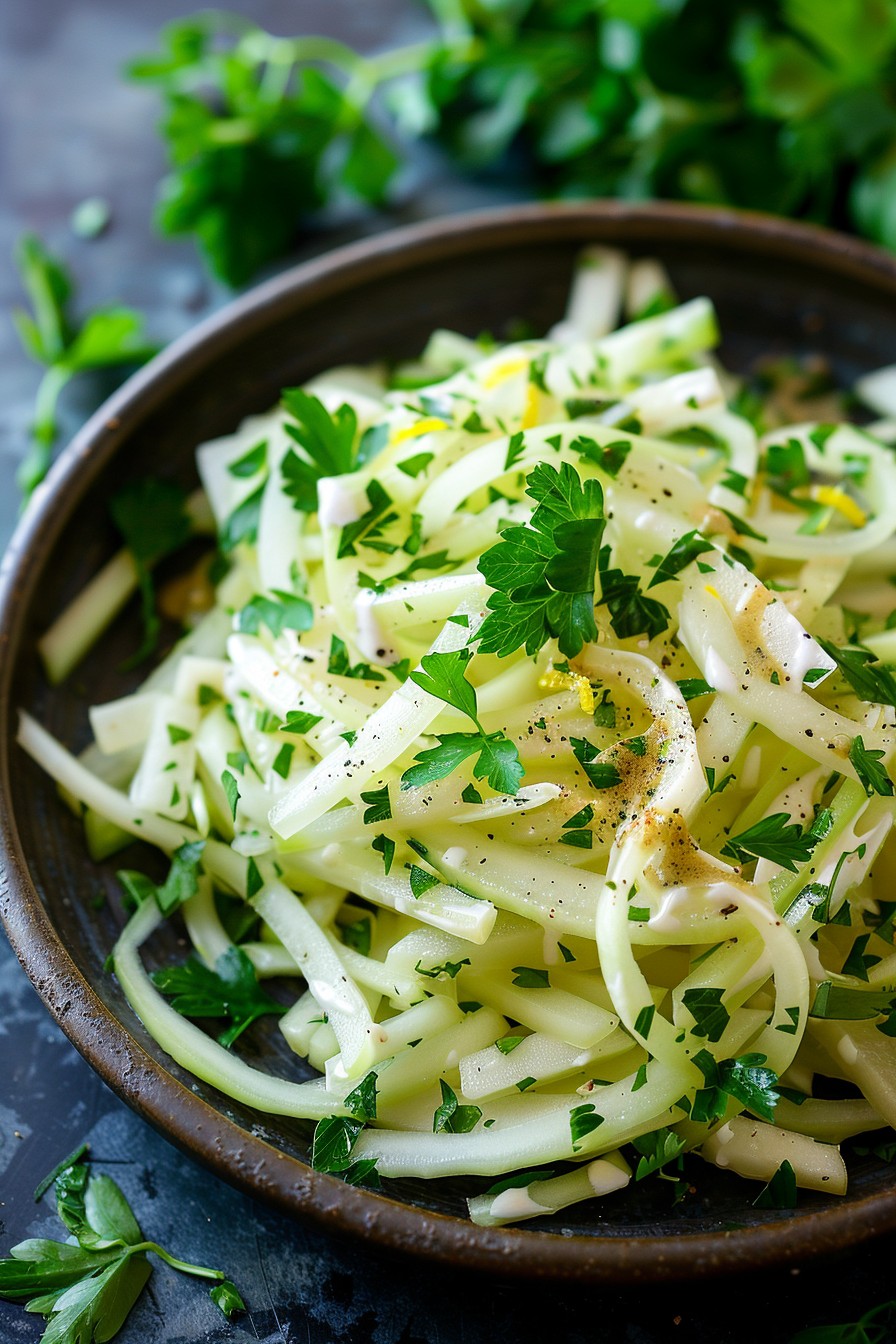
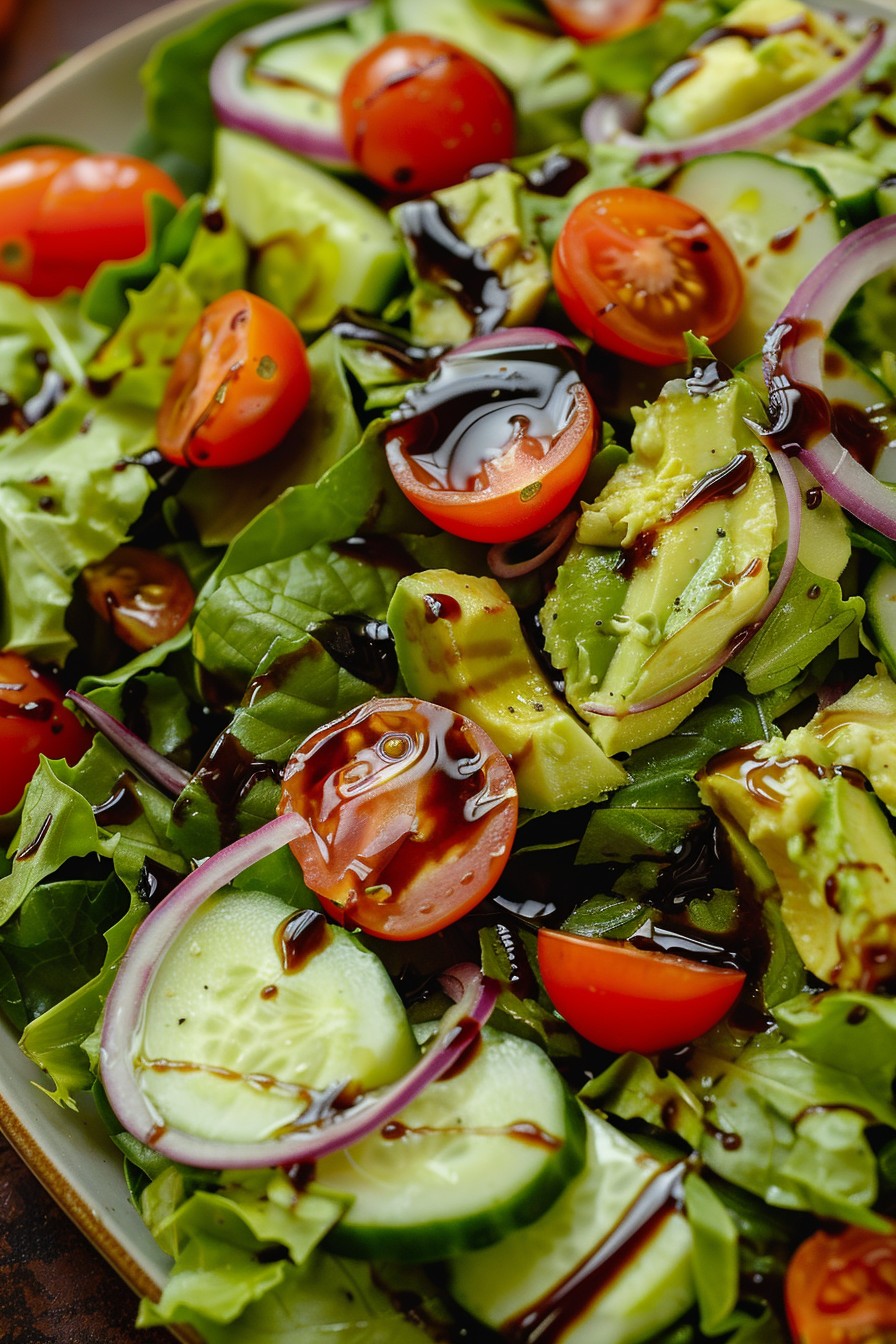
    Very few dressings can boast the perfect balance of tangy and sweet like this rice vinegar salad dressing. Versatile and vibrant, it’s the secret weapon your salad bowl has been missing. Let’s dive into making this simple yet sensational dressing that’ll elevate any leafy ensemble.

    Why This Recipe Works

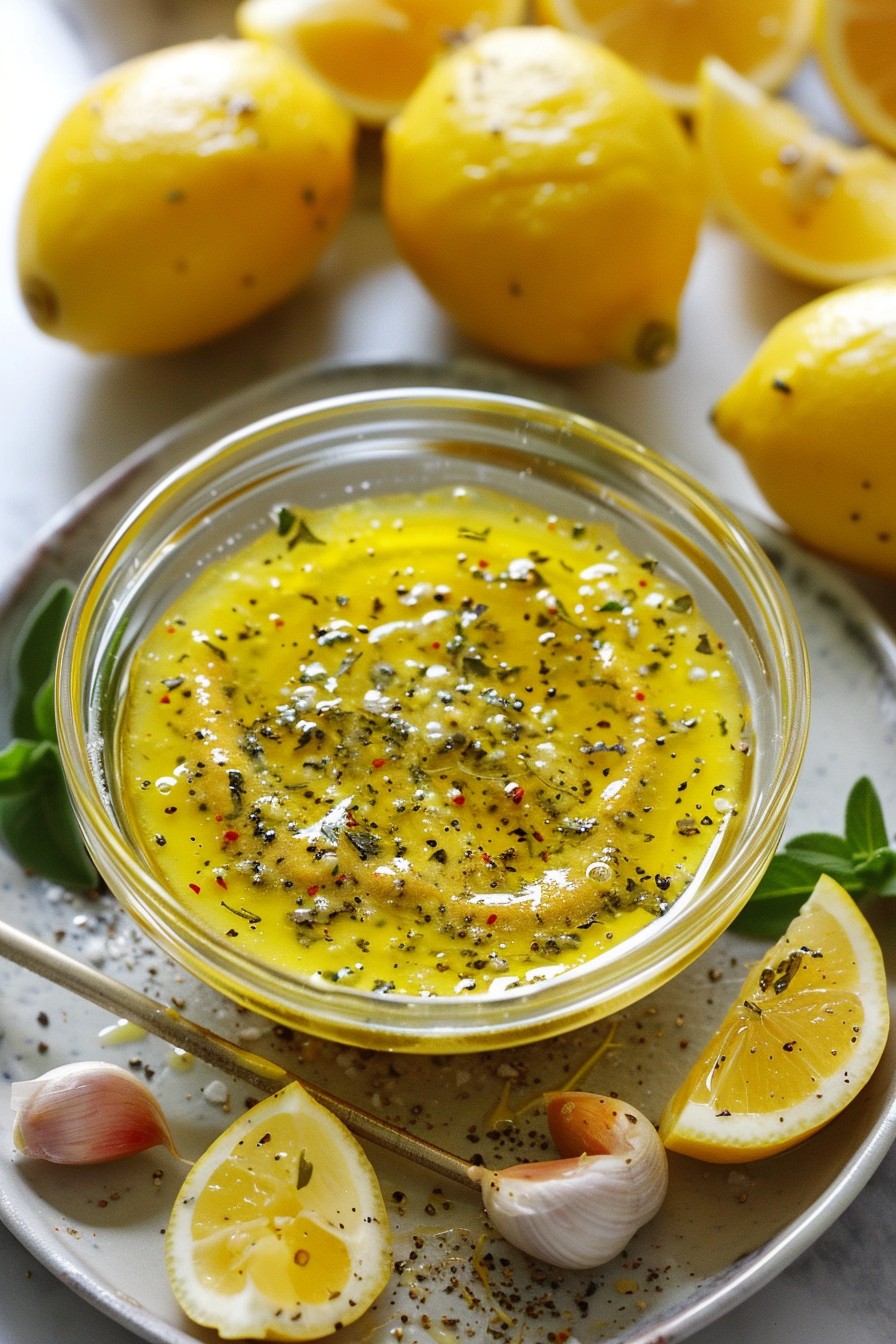
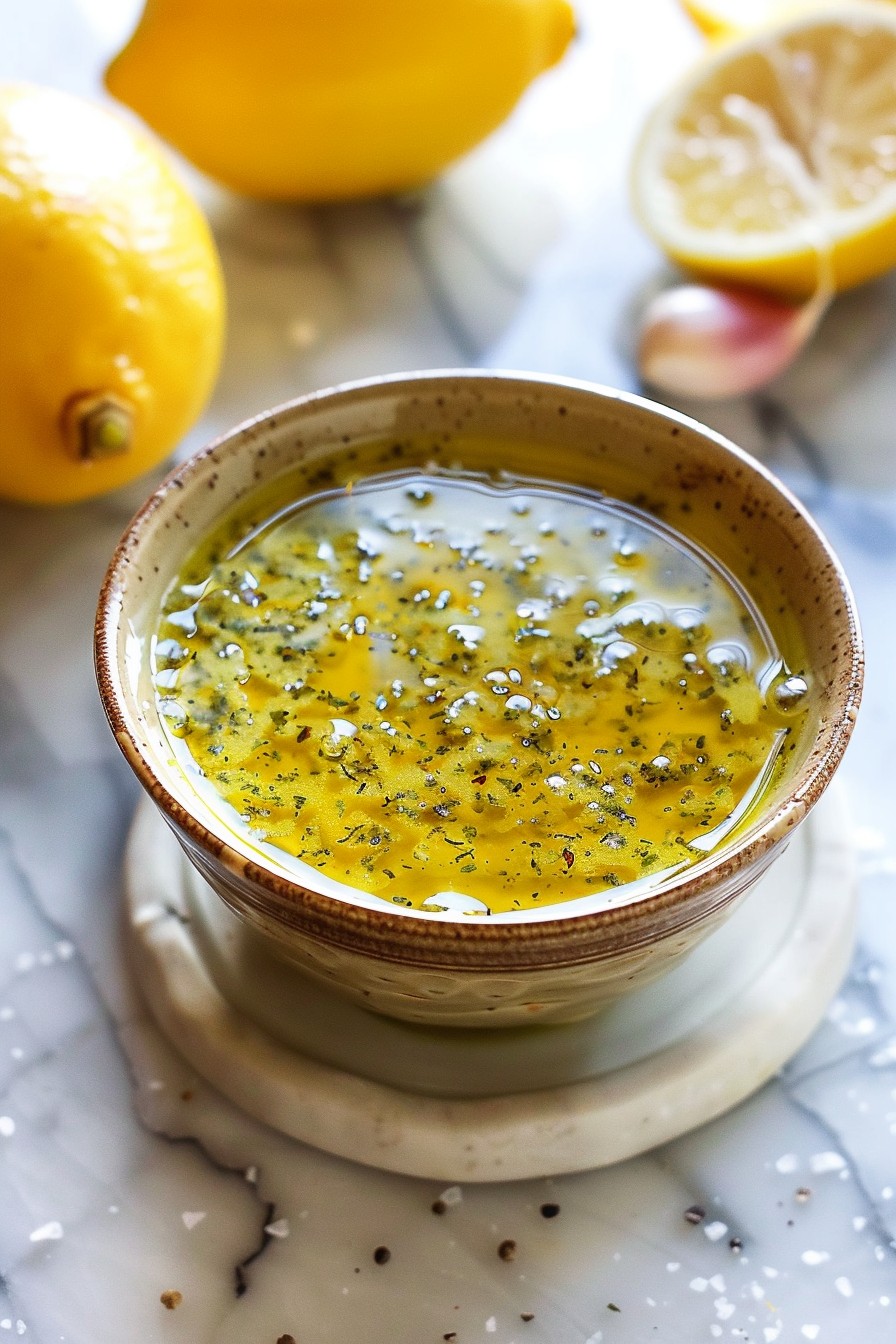
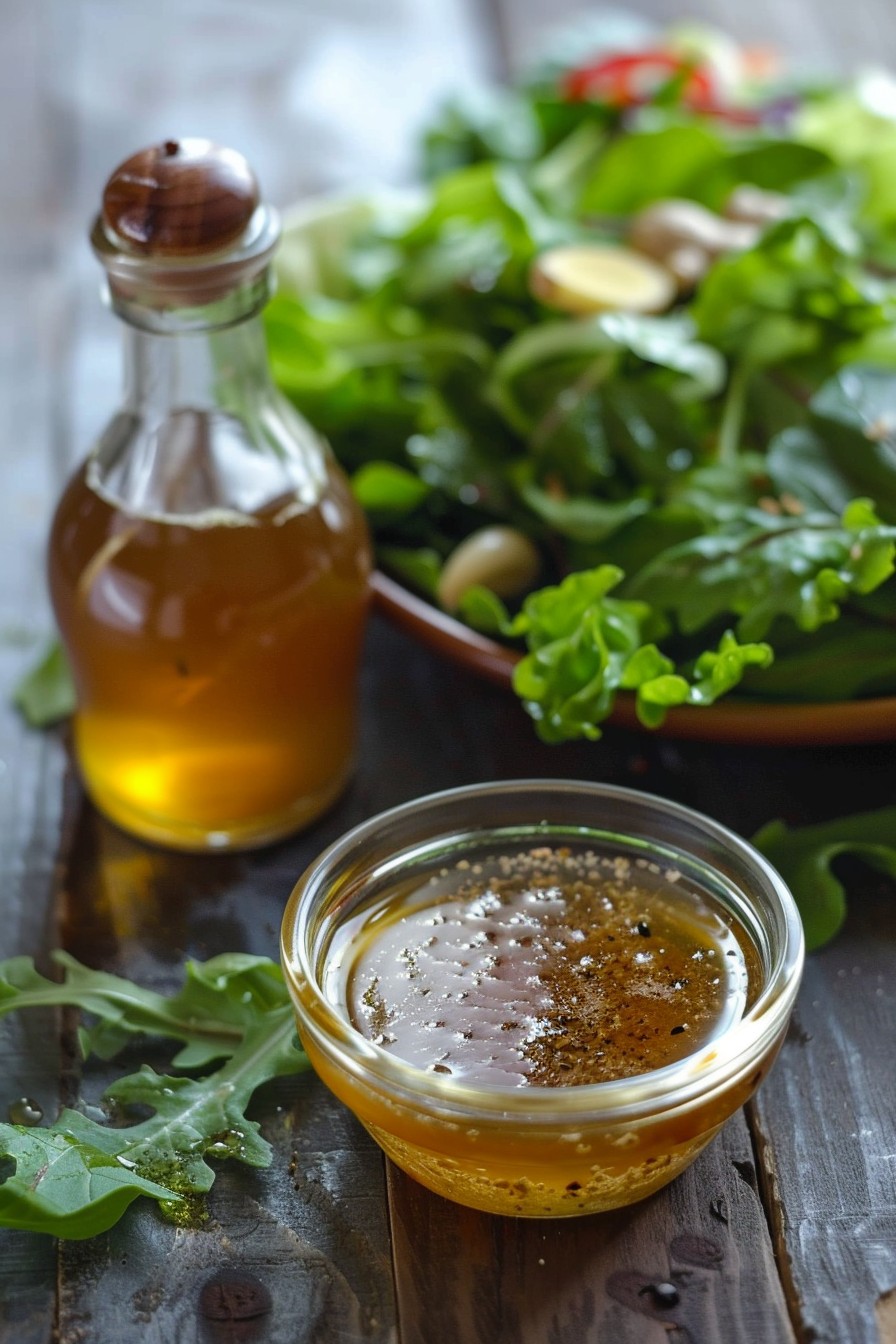
    • The combination of rice vinegar and olive oil creates a light yet flavorful base that doesn’t overpower your greens.
    • A hint of honey or maple syrup adds just the right amount of sweetness to balance the acidity.
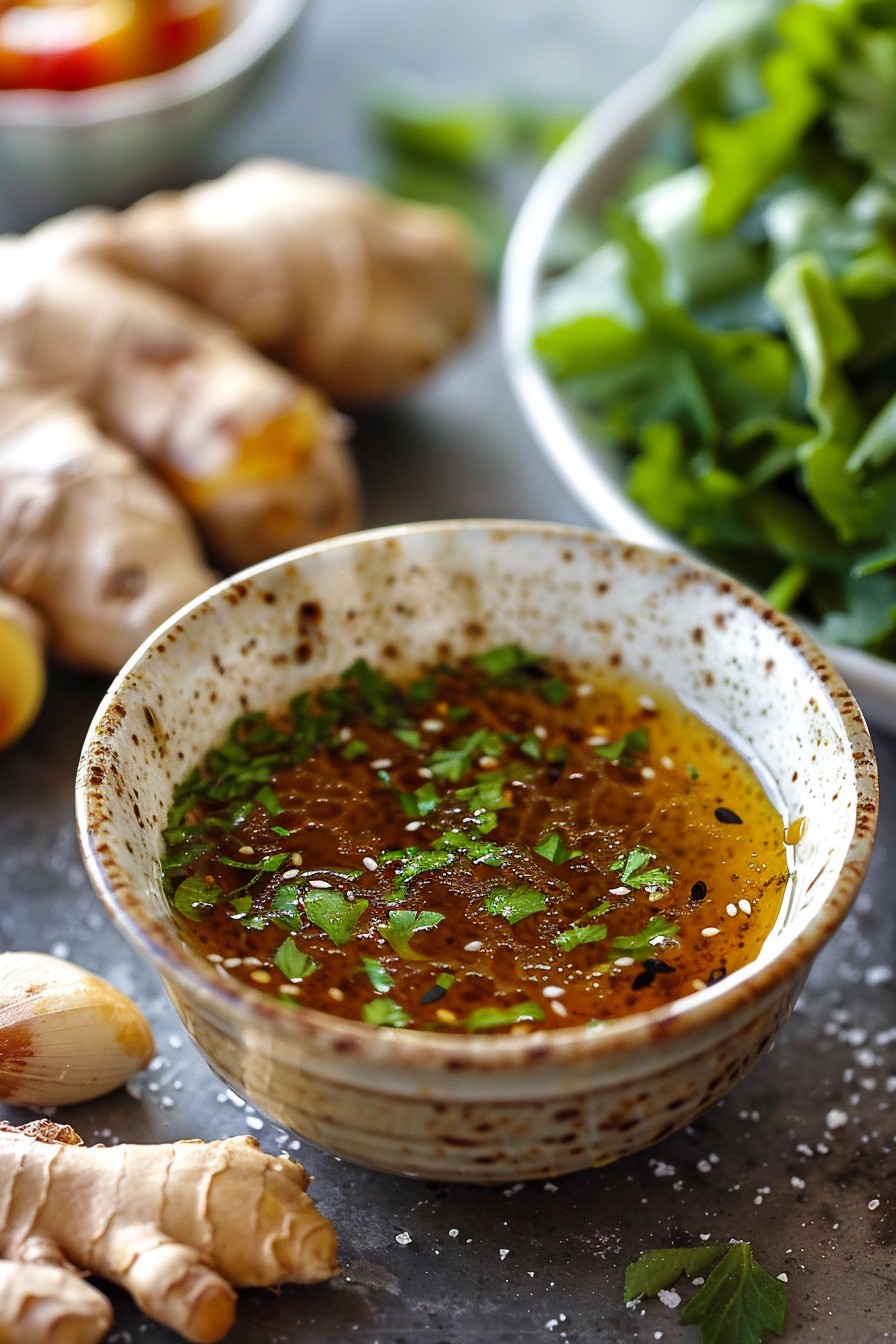
    • Garlic and ginger introduce a subtle kick, making each bite more interesting than the last.
    • It’s incredibly easy to whip up with ingredients you likely already have in your pantry.
    • This dressing keeps well in the fridge, so you can make it ahead for quick salad prep throughout the week.

    Ingredients

    • 1/2 cup rice vinegar
    • 1/4 cup olive oil
    • 2 tablespoons honey or maple syrup
    • 1 clove garlic, minced
    • 1 teaspoon fresh ginger, grated
    • Salt and pepper to taste

    Equipment Needed

    • Measuring cups and spoons
    • A small mixing bowl
    • A whisk or fork for mixing
    • A jar with a tight-fitting lid for storage

    Instructions

    Rice Vinegar Salad Dressing Recipe

    Step 1: Combine the Base Ingredients

    In your small mixing bowl, pour in the rice vinegar and olive oil. These two form the foundation of your dressing, so make sure they’re well combined. Whisk them together until the mixture looks slightly emulsified, which should take about a minute of vigorous whisking.

    Step 2: Sweeten the Deal

    Add the honey or maple syrup to the bowl. This is where you start to balance the tanginess of the vinegar with a touch of sweetness. Whisk until the sweetener is fully dissolved into the mixture, ensuring no sticky lumps remain.

    Step 3: Add the Aromatics

    Now, toss in the minced garlic and grated ginger. These ingredients are key to adding depth and a bit of heat to your dressing. Make sure they’re evenly distributed throughout the mixture for a consistent flavor in every drizzle.

    Step 4: Season to Perfection

    Finally, season your dressing with salt and pepper to taste. Start with a pinch of each, mix well, and then adjust according to your preference. Remember, you can always add more, but you can’t take it out, so go easy at first.

    Step 5: Store or Serve Immediately

    Your dressing is now ready to use! You can either drizzle it over your salad right away or store it in a jar in the fridge for up to a week. Just give it a good shake before using it again to recombine the ingredients.

    Tips and Tricks

    For an even smoother dressing, consider using a blender to combine all the ingredients. This method ensures the garlic and ginger are fully incorporated, offering a more uniform flavor. If you’re out of fresh ginger, a quarter teaspoon of ground ginger can work in a pinch, though the flavor will be slightly different. Lastly, for those who prefer a thicker dressing, adding a teaspoon of Dijon mustard not only thickens it but also adds a nice tangy depth.

    Recipe Variations

    • For a creamier version, blend in a tablespoon of mayonnaise or Greek yogurt.
    • Add a teaspoon of sesame oil and a sprinkle of sesame seeds for an Asian-inspired twist.
    • Incorporate fresh herbs like cilantro or basil for a fresh, herby flavor profile.
    • For a spicier kick, add a pinch of red pepper flakes or a dash of hot sauce.
    • Swap out the honey for agave syrup to make the recipe vegan-friendly.

    Frequently Asked Questions

    Can I use apple cider vinegar instead of rice vinegar?

    Yes, you can substitute apple cider vinegar for rice vinegar, but keep in mind that apple cider vinegar has a stronger, more robust flavor. This substitution will change the dressing’s taste profile, making it more tangy and less sweet. You might want to adjust the amount of sweetener to balance the acidity.

    How long can I store this dressing in the fridge?

    This dressing can be stored in an airtight container in the refrigerator for up to one week. Over time, the flavors will meld together, potentially enhancing the taste. Just remember to shake or stir it well before each use to recombine any separated ingredients.

    Is there a way to make this dressing oil-free?

    Absolutely! For an oil-free version, you can increase the amount of rice vinegar and add a bit of water to dilute the acidity. Alternatively, using a tablespoon of tahini or avocado can provide the creaminess that oil usually offers without the added fats.

    Summary

    This rice vinegar salad dressing is a quick, easy, and flavorful way to dress up any salad. With its perfect balance of tangy and sweet, plus the option to customize with various add-ins, it’s sure to become a staple in your kitchen. Whether you’re a salad lover or just looking for a healthy dressing option, this recipe won’t disappoint.

  • Mediterranean Salad Recipe: A Fresh Twist on a Classic

    Mediterranean Salad Recipe: A Fresh Twist on a Classic

    Luscious flavors and vibrant colors come together in this Mediterranean salad that’s perfect for any occasion. Let’s dive into a bowl full of freshness that’ll transport your taste buds straight to the sunny coasts of the Mediterranean.

    Why This Recipe Works

    • It’s a perfect balance of tangy, sweet, and savory flavors that complement each other beautifully.
    • The combination of fresh vegetables, creamy feta, and briny olives offers a variety of textures in every bite.
    • It’s incredibly versatile, allowing for numerous substitutions based on what you have on hand.
    • This salad is not only delicious but also packed with nutrients, making it a healthy choice for any meal.
    • It’s quick and easy to prepare, requiring no cooking, just chopping and mixing.

    Ingredients

    • 2 cups chopped romaine lettuce
    • 1 cup diced cucumber
    • 1 cup cherry tomatoes, halved
    • 1/2 cup red onion, thinly sliced
    • 1/2 cup Kalamata olives, pitted
    • 1/2 cup feta cheese, crumbled
    • 1/4 cup extra virgin olive oil
    • 2 tbsp lemon juice
    • 1 tsp dried oregano
    • Salt and pepper to taste

    Equipment Needed

    • Large mixing bowl
    • Salad spinner (optional, for drying lettuce)
    • Sharp knife
    • Cutting board
    • Measuring cups and spoons
    • Whisk or fork for dressing

    Instructions

    Mediterranean Salad Recipe

    Step 1: Prepare Your Vegetables

    Start by washing all your vegetables thoroughly under cold water. Use a salad spinner to dry the romaine lettuce if you have one, or pat it dry with a clean towel to ensure your salad isn’t watery. Chop the romaine into bite-sized pieces, dice the cucumber, halve the cherry tomatoes, and thinly slice the red onion. Tip: Soaking the sliced red onion in cold water for 10 minutes can mellow its sharpness.

    Step 2: Combine the Salad Ingredients

    In your large mixing bowl, add the chopped romaine, diced cucumber, halved cherry tomatoes, and sliced red onion. Gently toss these ingredients together to start building the base of your salad. Then, sprinkle the pitted Kalamata olives and crumbled feta cheese over the top. Tip: For an extra burst of flavor, consider adding a handful of chopped fresh parsley or mint.

    Step 3: Whisk Together the Dressing

    In a small bowl, whisk together the extra virgin olive oil, lemon juice, dried oregano, and a pinch of salt and pepper until well combined. The dressing should be emulsified and slightly thickened. Taste and adjust the seasoning as needed. Tip: If you prefer a creamier dressing, you can add a teaspoon of Dijon mustard to the mix.

    Step 4: Dress the Salad

    Drizzle the dressing over the salad ingredients in the large mixing bowl. Using salad tongs or two large spoons, gently toss the salad to ensure every piece is lightly coated with the dressing. Be careful not to overmix, as this can make the greens wilt and the feta cheese crumble too much.

    Step 5: Serve Immediately

    Once the salad is evenly dressed, it’s ready to be served. For the best texture and flavor, enjoy your Mediterranean salad immediately after preparation. If you need to wait, you can prepare the ingredients and dressing separately and combine them just before serving.

    Tips and Tricks

    For those looking to elevate their Mediterranean salad game, here are some advanced tips. First, consider roasting your cherry tomatoes at 400°F for about 15 minutes before adding them to the salad for a deeper flavor profile. Second, if you’re not a fan of feta, try substituting it with goat cheese or even avocado for a different twist. Third, adding a handful of toasted pine nuts or walnuts can introduce a delightful crunch and nutty flavor. Lastly, for an extra protein boost, grilled chicken or shrimp makes a fantastic addition to this salad.

    Recipe Variations

    • For a grain-based version, add 1 cup of cooked quinoa or farro to make the salad more filling.
    • Swap out the romaine lettuce for arugula or spinach for a different green base.
    • Include artichoke hearts or roasted red peppers for additional Mediterranean flavors.
    • For a vegan option, omit the feta cheese or use a vegan cheese alternative.
    • Add a tablespoon of capers for an extra briny kick.

    Frequently Asked Questions

    Can I make this salad ahead of time?

    Yes, you can prepare the ingredients ahead of time, but it’s best to dress the salad just before serving to prevent the greens from becoming soggy. Store the chopped vegetables and dressing separately in the refrigerator until you’re ready to assemble.

    How long will this salad keep in the fridge?

    Once dressed, the salad is best eaten immediately. However, undressed salad components can be stored in an airtight container in the refrigerator for up to 2 days. The dressing can be kept separately for up to a week.

    Can I use bottled lemon juice instead of fresh?

    While fresh lemon juice is preferred for its bright flavor, bottled lemon juice can be used in a pinch. Just be aware that it may have a slightly different taste and could contain preservatives.

    Summary

    This Mediterranean salad is a refreshing, nutritious, and versatile dish that’s perfect for any meal. With its combination of fresh vegetables, creamy feta, and a simple homemade dressing, it’s sure to become a favorite. Whether you’re looking for a light lunch or a side dish for dinner, this salad delivers on flavor and simplicity.

  • California Cobb Salad Recipe: A Fresh Twist on a Classic

    California Cobb Salad Recipe: A Fresh Twist on a Classic

    You’re in for a treat with this California Cobb Salad recipe. It’s a vibrant, hearty dish that’s perfect for any meal, combining fresh ingredients with a delicious homemade dressing. Let’s dive into making this salad that’s as pleasing to the eye as it is to the palate.

    Why This Recipe Works

    • Fresh Ingredients: We use the freshest avocados, tomatoes, and greens for a crisp, flavorful base.
    • Homemade Dressing: A tangy, creamy dressing made from scratch elevates the salad beyond the ordinary.
    • Perfect Balance: Every bite offers a mix of textures and flavors, from creamy avocado to crispy bacon.
    • Customizable: Easily adapt the recipe to suit your taste or dietary needs.

    Ingredients

    • 6 cups mixed greens (washed and dried)
    • 1 large avocado (diced)
    • 1 cup cherry tomatoes (halved)
    • 1/2 cup blue cheese (crumbled)
    • 4 slices bacon (cooked and crumbled)
    • 2 hard-boiled eggs (chopped)
    • 1/4 cup red onion (thinly sliced)
    • 1/4 cup olive oil
    • 2 tbsp red wine vinegar
    • 1 tsp Dijon mustard
    • Salt and pepper to taste

    Equipment Needed

    • Large salad bowl
    • Small mixing bowl
    • Whisk
    • Knife and cutting board

    Instructions

    California Cobb Salad Recipe

    Prepare the Dressing

    In a small mixing bowl, whisk together the olive oil, red wine vinegar, Dijon mustard, salt, and pepper until well combined. Set aside to let the flavors meld while you prepare the salad.

    Assemble the Salad Base

    In a large salad bowl, layer the mixed greens as the base. Then, artfully arrange the diced avocado, halved cherry tomatoes, crumbled blue cheese, crumbled bacon, chopped hard-boiled eggs, and thinly sliced red onion on top. The key is to distribute the ingredients evenly for a beautiful presentation and balanced flavors.

    Dress the Salad

    Drizzle the prepared dressing over the salad just before serving. Toss gently to ensure all ingredients are lightly coated with the dressing. This prevents the greens from wilting and keeps the salad fresh.

    Serve Immediately

    This salad is best enjoyed fresh. Serve immediately after dressing to enjoy the crisp texture of the greens and the creamy, tangy flavors at their peak.

    Tips and Tricks

    For an extra touch of flavor, consider grilling the chicken before adding it to the salad. If you’re preparing the salad ahead of time, keep the dressing separate and add it just before serving to maintain the freshness of the ingredients. For a healthier version, substitute the blue cheese with feta and the bacon with turkey bacon.

    Recipe Variations

    • Vegetarian Cobb Salad: Omit the bacon and add grilled portobello mushrooms for a hearty vegetarian option.
    • Southwest Cobb Salad: Add black beans, corn, and a chipotle lime dressing for a Tex-Mex twist.
    • Seafood Cobb Salad: Substitute the bacon and eggs with grilled shrimp or crab meat for a seafood variation.

    Frequently Asked Questions

    Can I make the dressing ahead of time?

    Absolutely! The dressing can be made up to 3 days in advance and stored in the refrigerator in an airtight container. Just give it a good shake or whisk before using to recombine the ingredients.

    How can I make this salad more protein-rich?

    Adding grilled chicken breast or turkey slices can boost the protein content, making the salad more filling and suitable as a main dish.

    What’s the best way to store leftovers?

    Store any undressed salad in an airtight container in the refrigerator for up to 2 days. Keep the dressing separate and add it only when you’re ready to eat to prevent the greens from becoming soggy.

    Summary

    This California Cobb Salad is a delightful mix of fresh ingredients and homemade dressing, offering a perfect balance of flavors and textures. It’s customizable, making it a versatile dish for any occasion.

  • Japanese Egg Salad Recipe: Creamy, Dreamy, and Oh-So-Easy

    Japanese Egg Salad Recipe: Creamy, Dreamy, and Oh-So-Easy

    Many of us have had egg salad, but the Japanese version takes it to a whole new level of creamy deliciousness. Perfect for sandwiches, wraps, or just eating by the spoonful, this recipe is a game-changer for egg salad lovers everywhere.

    Why This Recipe Works

    • The addition of Japanese mayonnaise brings a unique richness and tang that’s unlike any other egg salad.
    • Perfectly cooked eggs ensure a creamy texture without being dry or rubbery.
    • Simple ingredients come together to create a complex flavor profile that’s both comforting and sophisticated.

    Ingredients

    • 6 large eggs
    • 1/4 cup Japanese mayonnaise
    • 1 tsp Dijon mustard
    • Salt and pepper to taste
    • 1 tbsp finely chopped chives

    Equipment Needed

    • Medium saucepan
    • Slotted spoon
    • Mixing bowl
    • Fork or potato masher

    Instructions

    Japanese Egg Salad Recipe

    Step 1: Boil the Eggs

    Place the eggs in a medium saucepan and cover with cold water by about an inch. Bring to a boil over high heat, then cover and remove from heat. Let sit for 12 minutes for perfectly cooked yolks. Tip: Adding a pinch of salt to the water can make peeling easier.

    Step 2: Cool and Peel the Eggs

    Transfer the eggs to an ice bath for at least 5 minutes to stop the cooking process. Peel under cool running water to help remove the shells smoothly.

    Step 3: Mash the Eggs

    In a mixing bowl, use a fork or potato masher to coarsely mash the eggs. Leave some chunks for texture. Tip: For a smoother salad, you can chop the eggs finely with a knife.

    Step 4: Mix in the Flavors

    Add the Japanese mayonnaise, Dijon mustard, salt, and pepper to the mashed eggs. Stir until well combined. Adjust seasoning to taste. Tip: Japanese mayonnaise is sweeter and tangier than American mayo, so start with less and add more as needed.

    Step 5: Garnish and Serve

    Fold in the chopped chives for a fresh, oniony bite. Serve immediately or chill for an hour to let the flavors meld together.

    Tips and Tricks

    For the creamiest egg salad, consider using a food processor to blend the eggs and mayonnaise together until smooth. If you’re making this ahead of time, hold off on adding the chives until just before serving to keep them fresh and vibrant. Experiment with the ratio of mayonnaise to mustard to find your perfect balance of creaminess and tang. Remember, the quality of your eggs will greatly affect the final taste, so opt for the best you can find.

    Recipe Variations

    • Add a teaspoon of curry powder for a spicy twist.
    • Mix in some finely diced celery or cucumber for extra crunch.
    • Swap out the chives for green onions or dill for a different herbal note.
    • For a richer salad, stir in a tablespoon of cream cheese.
    • Make it a meal by serving the egg salad over a bed of greens or inside an avocado half.

    Frequently Asked Questions

    Can I use regular mayonnaise instead of Japanese mayonnaise? Yes, but the flavor will be different. Japanese mayonnaise has a distinct taste due to the use of apple cider or rice vinegar and a higher egg yolk content. You can try adding a bit of sugar and vinegar to regular mayo to mimic the taste.

    How long can I store the egg salad? Properly stored in an airtight container, the egg salad will last up to 3 days in the refrigerator. However, it’s best enjoyed fresh.

    Can I make this recipe vegan? Absolutely! Use firm tofu or chickpeas in place of the eggs and vegan mayonnaise. The texture and flavor will vary, but it can still be delicious.

    Summary

    This Japanese Egg Salad recipe is a creamy, flavorful twist on the classic, perfect for sandwiches, snacks, or a light meal. With simple ingredients and easy steps, it’s a must-try for any egg salad enthusiast.

  • Dill Pickle Salad Dressing Recipe: A Tangy Twist for Your Greens

    Dill Pickle Salad Dressing Recipe: A Tangy Twist for Your Greens

    Let’s face it, salads can be a bit boring without the right dressing. That’s where this dill pickle salad dressing comes in, adding a punch of flavor that’ll make your greens anything but bland.

    Why This Recipe Works

    • The combination of dill pickles and their brine adds a unique tanginess that’s hard to resist.
    • It’s incredibly versatile, perfect for more than just salads—think sandwiches or as a dip.
    • This recipe is quick and easy, requiring no cooking and just a few minutes to blend.

    Ingredients

    • 1 cup mayonnaise
    • 1/4 cup dill pickle juice
    • 1/2 cup finely chopped dill pickles
    • 1 teaspoon garlic powder
    • 1 teaspoon onion powder
    • 1/2 teaspoon salt
    • 1/4 teaspoon black pepper

    Equipment Needed

    • Mixing bowl
    • Whisk
    • Measuring cups and spoons

    Instructions

    Dill Pickle Salad Dressing Recipe

    Step 1: Combine the Base Ingredients

    In your mixing bowl, start by adding the mayonnaise and dill pickle juice. Whisk them together until the mixture is smooth and well combined. This creates the creamy base of your dressing.

    Step 2: Add the Flavor Boosters

    Next, stir in the finely chopped dill pickles, garlic powder, onion powder, salt, and black pepper. Make sure everything is evenly distributed for a consistent flavor in every bite.

    Step 3: Adjust to Taste

    Give your dressing a taste test. If you prefer it tangier, add a bit more pickle juice. For more spice, a dash of cayenne pepper can do the trick.

    Step 4: Let It Rest

    Cover the bowl and let the dressing sit in the refrigerator for at least 30 minutes. This allows the flavors to meld together beautifully.

    Step 5: Serve and Enjoy

    After resting, give your dressing a final stir and drizzle it over your favorite salad. It’s also great as a sandwich spread or veggie dip.

    Tips and Tricks

    For a smoother dressing, you can blend all the ingredients in a food processor. If you’re watching your calories, substituting Greek yogurt for mayonnaise is a great option. Always taste as you go to adjust the seasoning to your preference. For an extra crunch, consider adding a tablespoon of finely diced onions or celery. Storing the dressing in an airtight container in the fridge will keep it fresh for up to a week.

    Recipe Variations

    • Spicy Version: Add a teaspoon of hot sauce or a pinch of red pepper flakes for some heat.
    • Herbaceous Twist: Mix in fresh dill, parsley, or chives for a garden-fresh flavor.
    • Creamy Avocado: Blend in half an avocado for a richer, creamier texture.

    Frequently Asked Questions

    Can I use sweet pickles instead of dill pickles?

    While you can use sweet pickles, the dressing will have a completely different flavor profile—sweet rather than tangy. It’s best to stick with dill pickles for the intended taste.

    How long can I store this dressing?

    Stored properly in an airtight container in the refrigerator, this dressing can last up to a week. Always give it a good stir before using it again.

    Is there a vegan alternative to mayonnaise?

    Absolutely! There are many vegan mayonnaise options available that work just as well in this recipe. You can also use blended silken tofu for a healthier alternative.

    Summary

    This dill pickle salad dressing is a game-changer for any salad, sandwich, or dip. With its tangy flavor and creamy texture, it’s sure to become a staple in your kitchen.

  • Hawaiian Poke Salad Recipe: A Taste of the Islands in Your Kitchen

    Hawaiian Poke Salad Recipe: A Taste of the Islands in Your Kitchen

    How about bringing a slice of Hawaiian paradise to your dinner table tonight? This poke salad recipe is not just a meal; it’s a vibrant, flavorful journey to the islands, no plane ticket required. Perfect for a light lunch, dinner, or even as a show-stopping appetizer at your next gathering.

    Why This Recipe Works

    • Freshness First: Using sashimi-grade fish ensures your poke is safe to eat raw and packed with flavor.
    • Balance of Flavors: The combination of soy sauce, sesame oil, and a hint of spice creates a harmonious blend that dances on your palate.
    • Customizable: Easily adjust the ingredients to suit your taste preferences or dietary needs.
    • Quick and Easy: From prep to plate, this dish comes together in under 30 minutes, making it perfect for busy weeknights.

    Ingredients

    • 1 lb sashimi-grade ahi tuna, cubed
    • 1/4 cup soy sauce
    • 2 tbsp sesame oil
    • 1 tbsp rice vinegar
    • 1 tsp red pepper flakes
    • 1/2 cup green onions, thinly sliced
    • 1/2 cup cucumber, diced
    • 1 avocado, cubed
    • 1 tbsp sesame seeds

    Equipment Needed

    • Sharp knife
    • Cutting board
    • Mixing bowl
    • Measuring cups and spoons

    Instructions

    Poke Salad Recipe

    Step 1: Prepare the Fish

    Start by ensuring your ahi tuna is fully thawed if previously frozen. Using a sharp knife, cube the tuna into bite-sized pieces, about 1/2 inch thick. This size ensures each piece is hearty enough to stand up to the marinade but small enough to absorb all the delicious flavors.

    Step 2: Mix the Marinade

    In a mixing bowl, whisk together the soy sauce, sesame oil, rice vinegar, and red pepper flakes. This combination will give your poke that signature umami and slightly spicy kick. Tip: For a smoother marinade, you can warm the sesame oil slightly before mixing.

    Step 3: Combine Ingredients

    Add the cubed tuna to the marinade, gently tossing to ensure each piece is evenly coated. Then, fold in the green onions and cucumber. The key here is to mix gently to keep the tuna pieces intact. Let the mixture sit for about 10 minutes to allow the flavors to meld.

    Step 4: Add the Avocado

    Just before serving, add the cubed avocado to the bowl. Gently mix to incorporate the avocado without mashing it. The avocado adds a creamy texture that contrasts beautifully with the firmness of the tuna.

    Step 5: Garnish and Serve

    Sprinkle sesame seeds over the top for a nutty crunch and a touch of elegance. Serve your poke salad over a bed of rice or enjoy it as is for a low-carb option. Tip: For an extra burst of flavor, drizzle a little more sesame oil on top before serving.

    Tips and Tricks

    When selecting your ahi tuna, look for pieces that are bright red and have a firm texture. If you’re unable to find sashimi-grade tuna, you can use cooked shrimp or even tofu as a substitute. For those who love a bit of heat, increase the amount of red pepper flakes or add a dash of sriracha to the marinade. If you’re preparing this dish ahead of time, wait to add the avocado until just before serving to prevent it from browning. Lastly, for an authentic Hawaiian touch, serve your poke with a side of seaweed salad and a sprinkle of furikake seasoning.

    Recipe Variations

    • Spicy Mayo Poke: Mix in a tablespoon of mayonnaise and a teaspoon of sriracha to the marinade for a creamy, spicy version.
    • Vegetarian Poke: Replace the tuna with cubed tofu or a mix of hearty vegetables like mushrooms and zucchini.
    • Mango Poke: Add diced mango to the salad for a sweet and tangy twist that complements the savory flavors.
    • Wasabi Poke: Stir in a teaspoon of wasabi paste for an extra kick that sushi lovers will adore.

    Frequently Asked Questions

    Can I use frozen tuna for poke?

    Yes, you can use frozen tuna for poke, but it’s crucial to ensure it’s sashimi-grade and properly thawed in the refrigerator before use. Freezing can kill parasites, making the fish safer to eat raw, but always check the quality and source of your fish.

    How long can I store poke salad in the fridge?

    Poke salad is best enjoyed fresh but can be stored in an airtight container in the refrigerator for up to 24 hours. Keep in mind that the texture of the fish and avocado may change slightly upon sitting.

    What can I serve with poke salad?

    Poke salad is versatile and can be served over rice, with seaweed salad, or alongside crispy wonton chips for dipping. For a low-carb option, try serving it over a bed of greens or zucchini noodles.

    Summary

    This Hawaiian poke salad recipe is a quick, easy, and delicious way to bring the flavors of the islands into your home. With fresh ingredients and simple steps, you’ll have a vibrant, flavorful dish that’s perfect for any occasion.

  • Calamari Seafood Salad Recipe: A Zesty Summer Delight

    Calamari Seafood Salad Recipe: A Zesty Summer Delight

    A absolutely delightful calamari seafood salad that’s perfect for those warm summer days or when you’re craving something light yet flavorful. This recipe combines tender calamari with crisp vegetables and a tangy dressing for a dish that’s sure to impress.

    Why This Recipe Works

    • The calamari is cooked just right – tender, not rubbery, with a quick blanching method that locks in flavor.
    • A vibrant mix of vegetables adds crunch and color, making the salad as beautiful as it is tasty.
    • The homemade dressing is a simple yet powerful combination of lemon juice, olive oil, and herbs that elevates the seafood.
    • It’s versatile – serve as a main dish, side, or even as a fancy appetizer at your next gathering.
    • Prep and cook time is under 30 minutes, making it a quick option for busy weeknights.

    Ingredients

    • 1 lb calamari, cleaned and sliced into rings
    • 2 cups mixed salad greens
    • 1 cup cherry tomatoes, halved
    • 1/2 red onion, thinly sliced
    • 1/4 cup Kalamata olives, pitted and halved
    • 2 tbsp fresh parsley, chopped
    • 1/4 cup olive oil
    • 2 tbsp lemon juice
    • 1 garlic clove, minced
    • Salt and pepper to taste

    Equipment Needed

    • Large pot
    • Mixing bowls
    • Whisk
    • Colander
    • Knife and cutting board

    Instructions

    Calamari Seafood Salad Recipe

    Step 1: Prepare the Calamari

    Bring a large pot of salted water to a boil. Add the calamari rings and cook for exactly 1 minute – any longer and they’ll become tough. Immediately drain and rinse under cold water to stop the cooking process. Tip: For extra tender calamari, you can soak them in milk for 30 minutes before cooking.

    Step 2: Mix the Dressing

    In a small bowl, whisk together the olive oil, lemon juice, minced garlic, salt, and pepper until well combined. Taste and adjust the seasoning as needed. This dressing is key to the salad’s flavor, so don’t skimp on the quality of your olive oil and lemon juice.

    Step 3: Combine the Salad

    In a large mixing bowl, toss together the cooled calamari, salad greens, cherry tomatoes, red onion, and Kalamata olives. Drizzle the dressing over the top and gently toss to coat all the ingredients evenly. Tip: Let the salad sit for 5 minutes before serving to allow the flavors to meld together.

    Step 4: Garnish and Serve

    Sprinkle the chopped parsley over the top of the salad for a fresh, herby finish. Serve immediately for the best texture and flavor. This salad is best enjoyed fresh but can be refrigerated for up to 2 hours if needed.

    Tips and Tricks

    For those looking to take their calamari seafood salad to the next level, consider these advanced tips. First, if you’re able to source fresh calamari, it makes a world of difference in texture and taste. Second, adding a pinch of red pepper flakes to the dressing can give the salad a nice spicy kick. Third, for an extra layer of flavor, consider grilling the calamari instead of boiling it. Just be sure to keep a close eye on it, as it cooks quickly. Lastly, incorporating other seafood like shrimp or scallops can add variety and make the dish even more luxurious.

    Recipe Variations

    • Mediterranean Twist: Add feta cheese and cucumber for a Greek-inspired version.
    • Spicy Upgrade: Include diced jalapeños or a dash of hot sauce in the dressing for heat lovers.
    • Avocado Addition: Creamy avocado slices can add richness and balance the tanginess of the dressing.
    • Pasta Salad: Mix in cooked pasta shells or orzo to turn it into a hearty pasta salad.
    • Herb Varieties: Experiment with different herbs like dill or basil for a unique flavor profile.

    Frequently Asked Questions

    Can I use frozen calamari?

    Absolutely! Frozen calamari works well in this recipe. Just be sure to thaw it completely and pat it dry before cooking to prevent excess water from diluting the flavors of your salad.

    How long can I store the salad?

    This salad is best enjoyed the day it’s made, but you can store it in the refrigerator for up to 24 hours. Keep in mind that the vegetables may soften slightly over time.

    Can I make the dressing ahead of time?

    Yes, the dressing can be prepared up to 3 days in advance and stored in an airtight container in the refrigerator. Just give it a good shake or whisk before using to recombine the ingredients.

    Summary

    This calamari seafood salad is a light, flavorful dish perfect for summer gatherings or a quick weeknight meal. With tender calamari, crisp vegetables, and a zesty dressing, it’s sure to become a favorite.

  • Celeriac Salad French Recipe: A Crunchy, Creamy Delight

    Celeriac Salad French Recipe: A Crunchy, Creamy Delight

    How about we dive into the world of French cuisine with a twist? Today, we’re tackling the humble celeriac, transforming it into a salad that’s both crunchy and creamy, with a French flair that’ll have your taste buds dancing. Perfect for a light lunch or a sophisticated side, this recipe is a game-changer.

    Why This Recipe Works

    • Unique Texture: Celeriac offers a delightful crunch that contrasts beautifully with the creamy dressing.
    • Flavorful Dressing: A mustard and lemon juice combo brings a tangy kick that elevates the earthy tones of the celeriac.
    • Easy to Make: With no cooking required, this salad comes together in minutes, making it perfect for busy days.
    • Versatile: Serve it as a side, or bulk it up with proteins for a main dish.

    Ingredients

    • 1 medium celeriac, peeled and julienned
    • 1/2 cup mayonnaise
    • 2 tbsp Dijon mustard
    • 1 tbsp lemon juice
    • Salt and pepper to taste
    • 2 tbsp chopped parsley for garnish

    Equipment Needed

    • Vegetable peeler
    • Sharp knife or mandoline for julienning
    • Mixing bowl
    • Whisk

    Instructions

    Celeriac Salad French Recipe

    Prepare the Celeriac

    Start by peeling the celeriac to remove its tough outer skin. Then, using a sharp knife or a mandoline, julienne the celeriac into thin strips. This will ensure each bite is perfectly crunchy and easy to eat. Tip: Soak the julienned celeriac in cold water for 10 minutes to crisp it up even more.

    Make the Dressing

    In a mixing bowl, whisk together the mayonnaise, Dijon mustard, and lemon juice until smooth. Season with salt and pepper to taste. This creamy, tangy dressing is what gives the salad its French character. Tip: For a lighter version, you can substitute half of the mayonnaise with Greek yogurt.

    Combine and Toss

    Drain the celeriac well and pat dry with a clean kitchen towel. Add it to the bowl with the dressing and toss until every strand is evenly coated. The key here is to ensure the dressing is well distributed for maximum flavor in every bite.

    Garnish and Serve

    Transfer the salad to a serving dish and sprinkle with chopped parsley for a fresh, herby finish. Serve immediately or chill in the refrigerator for an hour to let the flavors meld together. Tip: Adding a handful of toasted walnuts can introduce a lovely crunch and nutty flavor.

    Tips and Tricks

    For those looking to take their celeriac salad to the next level, consider these advanced tips. First, if you’re not a fan of raw celeriac’s texture, you can blanch the julienned pieces in boiling water for 30 seconds, then plunge into ice water to stop the cooking process. This softens the celeriac slightly while retaining its crunch. Second, experimenting with different mustards can alter the flavor profile significantly—try a whole grain mustard for a more rustic taste. Lastly, for an extra layer of flavor, a sprinkle of finely grated Parmesan or a dash of truffle oil can elevate the dish to gourmet status.

    Recipe Variations

    • Apple Addition: Add julienned green apple for a sweet and tart contrast.
    • Protein Boost: Mix in shredded chicken or chickpeas to turn the salad into a hearty main dish.
    • Herb Twist: Swap parsley for dill or tarragon to introduce a different herbal note.
    • Spicy Kick: A pinch of cayenne pepper or a few drops of hot sauce can add warmth to the dish.

    Frequently Asked Questions

    Can I make this salad ahead of time?

    Absolutely! This salad actually benefits from sitting in the fridge for a few hours before serving, as it allows the flavors to meld together. Just be sure to give it a good stir before serving to redistribute the dressing.

    Is there a substitute for celeriac?

    If celeriac is hard to find, you can use kohlrabi or even jicama for a similar crunch. Keep in mind that the flavor profile will change slightly, so adjust the seasoning accordingly.

    How long does this salad keep?

    Stored in an airtight container in the refrigerator, the salad will keep for up to 3 days. However, it’s best enjoyed within the first 24 hours when the celeriac is at its crunchiest.

    Summary

    This celeriac salad French recipe is a testament to the beauty of simple ingredients coming together to create something truly special. With its crunchy texture, creamy dressing, and versatile nature, it’s sure to become a staple in your recipe repertoire.

  • Zesty Greek Lemon Salad Dressing Recipe: A Tangy Twist for Your Greens

    Zesty Greek Lemon Salad Dressing Recipe: A Tangy Twist for Your Greens

    Perfect for those who love a burst of flavor in their salads, this Greek lemon dressing is a game-changer. Packed with fresh ingredients and a tangy kick, it’s sure to elevate any salad from mundane to magnificent.

    Why This Recipe Works

    • The combination of fresh lemon juice and high-quality olive oil creates a perfectly balanced base.
    • Garlic and oregano add depth and authenticity to the flavor profile.
    • It’s versatile enough to dress any salad, from a simple Greek to a more elaborate creation.
    • Quick and easy to make, requiring no cooking and just a few minutes of your time.
    • Healthier than store-bought versions, with no preservatives or unnecessary additives.

    Ingredients

    • 1/2 cup extra virgin olive oil
    • 1/4 cup fresh lemon juice
    • 1 teaspoon Dijon mustard
    • 1 garlic clove, minced
    • 1 teaspoon dried oregano
    • 1/2 teaspoon salt
    • 1/4 teaspoon black pepper

    Equipment Needed

    • Measuring cups and spoons
    • Small mixing bowl
    • Whisk
    • Jar with lid (for storage)

    Instructions

    Greek Lemon Salad Dressing Recipe

    Step 1: Combine the Wet Ingredients

    In a small mixing bowl, whisk together the extra virgin olive oil and fresh lemon juice until well combined. The mixture should start to emulsify slightly, creating a smooth base for your dressing.

    Step 2: Add the Flavor Enhancers

    Stir in the Dijon mustard, minced garlic, and dried oregano. These ingredients will add a punch of flavor and authenticity to your dressing, making it irresistibly tasty.

    Step 3: Season to Perfection

    Finally, add the salt and black pepper, adjusting the amounts to suit your taste preferences. Remember, the key to a great dressing is balance, so taste as you go.

    Step 4: Whisk Until Smooth

    Continue whisking the dressing until all the ingredients are fully incorporated and the mixture is smooth. If you prefer a thicker consistency, you can let it sit for a few minutes to thicken slightly.

    Step 5: Store or Serve Immediately

    Transfer the dressing to a jar with a lid if you’re not using it right away. It can be stored in the refrigerator for up to a week. Shake well before each use to recombine the ingredients.

    Tips and Tricks

    For an even more vibrant flavor, consider using freshly squeezed lemon juice instead of bottled. The freshness makes a noticeable difference. If you’re a fan of creamy dressings, adding a tablespoon of Greek yogurt can give this dressing a delightful creaminess without overpowering the lemon. Lastly, for those who enjoy a bit of heat, a pinch of red pepper flakes can add a nice kick.

    Recipe Variations

    • Add a teaspoon of honey for a sweeter version that pairs beautifully with bitter greens.
    • Incorporate some chopped fresh herbs like dill or parsley for an herby twist.
    • For a creamier texture, blend in some avocado.
    • Swap the lemon juice for lime juice for a different citrus profile.
    • Add a tablespoon of tahini for a nutty, Middle Eastern-inspired flavor.

    Frequently Asked Questions

    Can I make this dressing ahead of time?

    Absolutely! This dressing can be made up to a week in advance and stored in the refrigerator. Just make sure to give it a good shake or stir before using to recombine the ingredients.

    Is there a substitute for Dijon mustard?

    If you don’t have Dijon mustard on hand, you can use a teaspoon of yellow mustard or even a pinch of mustard powder. The flavor will be slightly different but still delicious.

    Can I use bottled lemon juice instead of fresh?

    While fresh lemon juice is recommended for the best flavor, bottled lemon juice can be used in a pinch. Just be aware that the taste might not be as bright and vibrant.

    Summary

    This Greek lemon salad dressing is a simple, flavorful way to dress up any salad. With its perfect balance of tangy, herby, and savory notes, it’s sure to become a staple in your kitchen.

  • Casa Salad Recipe: A Fresh Twist on a Classic

    Casa Salad Recipe: A Fresh Twist on a Classic

    A absolutely delightful dish that brings a burst of freshness to your table, the Casa Salad is a vibrant mix of crisp greens, juicy tomatoes, and a tangy dressing that’ll have you coming back for seconds. Perfect for a light lunch or as a side, this recipe is a crowd-pleaser that’s as easy to make as it is delicious.

    Why This Recipe Works

    • The combination of fresh, crisp vegetables ensures a satisfying crunch in every bite.
    • A homemade dressing adds a personalized touch that elevates the salad beyond the ordinary.
    • Quick and easy to prepare, making it perfect for busy weeknights or last-minute gatherings.
    • Versatile ingredients allow for endless customization to suit any taste or dietary preference.
    • The balance of flavors and textures creates a harmonious dish that’s both refreshing and fulfilling.

    Ingredients

    • 2 cups mixed greens (washed and dried)
    • 1 cup cherry tomatoes (halved)
    • 1/2 cucumber (sliced)
    • 1/4 red onion (thinly sliced)
    • 1/2 avocado (diced)
    • 1/4 cup olive oil
    • 2 tbsp balsamic vinegar
    • 1 tsp honey
    • Salt and pepper to taste

    Equipment Needed

    • Large salad bowl
    • Small whisk or fork
    • Measuring cups and spoons
    • Knife and cutting board

    Instructions

    Casa Salad Recipe

    Step 1: Prepare Your Vegetables

    Start by washing all your vegetables thoroughly under cold water. Dry the mixed greens using a salad spinner or pat them dry with a clean towel to ensure the dressing sticks well. Slice the cherry tomatoes in half, dice the cucumber and avocado, and thinly slice the red onion. Tip: For a milder onion flavor, soak the sliced red onion in cold water for 10 minutes before adding to the salad.

    Step 2: Make the Dressing

    In a small bowl, whisk together the olive oil, balsamic vinegar, honey, and a pinch of salt and pepper until well combined. Taste and adjust the seasoning if necessary. Tip: For a creamier dressing, you can add a teaspoon of Dijon mustard to the mix.

    Step 3: Assemble the Salad

    In a large salad bowl, combine the mixed greens, cherry tomatoes, cucumber, red onion, and avocado. Drizzle the dressing over the salad and toss gently to coat all the ingredients evenly. Tip: Add the avocado last to prevent it from getting mushy during tossing.

    Step 4: Serve Immediately

    Once everything is well mixed, serve the salad immediately to enjoy the crispness of the vegetables at its best. If you’re preparing ahead, keep the dressing separate and add it just before serving.

    Tips and Tricks

    For an extra layer of flavor, consider adding toasted nuts or seeds like almonds or sunflower seeds to your Casa Salad. They add a delightful crunch and are packed with nutrients. If you’re not a fan of balsamic vinegar, try using lemon juice or apple cider vinegar for a different twist. Always taste your dressing before adding it to the salad to ensure it’s perfectly balanced. For a protein boost, grilled chicken or shrimp makes an excellent addition to this salad.

    Recipe Variations

    • Add grilled chicken or shrimp for a protein-packed meal.
    • Swap out the balsamic vinegar for lemon juice or apple cider vinegar for a different flavor profile.
    • Include fruits like strawberries or apples for a sweet and savory combination.
    • Use spinach or arugula instead of mixed greens for a different base.
    • Add cheese like feta or goat cheese for a creamy texture and rich flavor.

    Frequently Asked Questions

    Can I make this salad ahead of time?

    Yes, you can prepare the ingredients ahead of time, but it’s best to add the dressing just before serving to keep the greens crisp. Store the chopped vegetables and dressing separately in the refrigerator.

    What can I use instead of honey in the dressing?

    If you’re looking for a vegan alternative or just don’t have honey on hand, maple syrup or agave nectar are great substitutes that will still give you that desired sweetness.

    How can I make this salad more filling?

    Adding a protein like grilled chicken, shrimp, or even chickpeas can turn this salad into a more substantial meal. You can also add quinoa or farro for extra fiber and protein.

    Summary

    The Casa Salad is a versatile and refreshing dish that’s perfect for any occasion. With its crisp vegetables and tangy dressing, it’s a healthy option that doesn’t skimp on flavor. Easy to customize, it’s a recipe you’ll return to time and again.