Blog

  • 5-Star Potato Salad Recipe: The Ultimate Side Dish

    5-Star Potato Salad Recipe: The Ultimate Side Dish

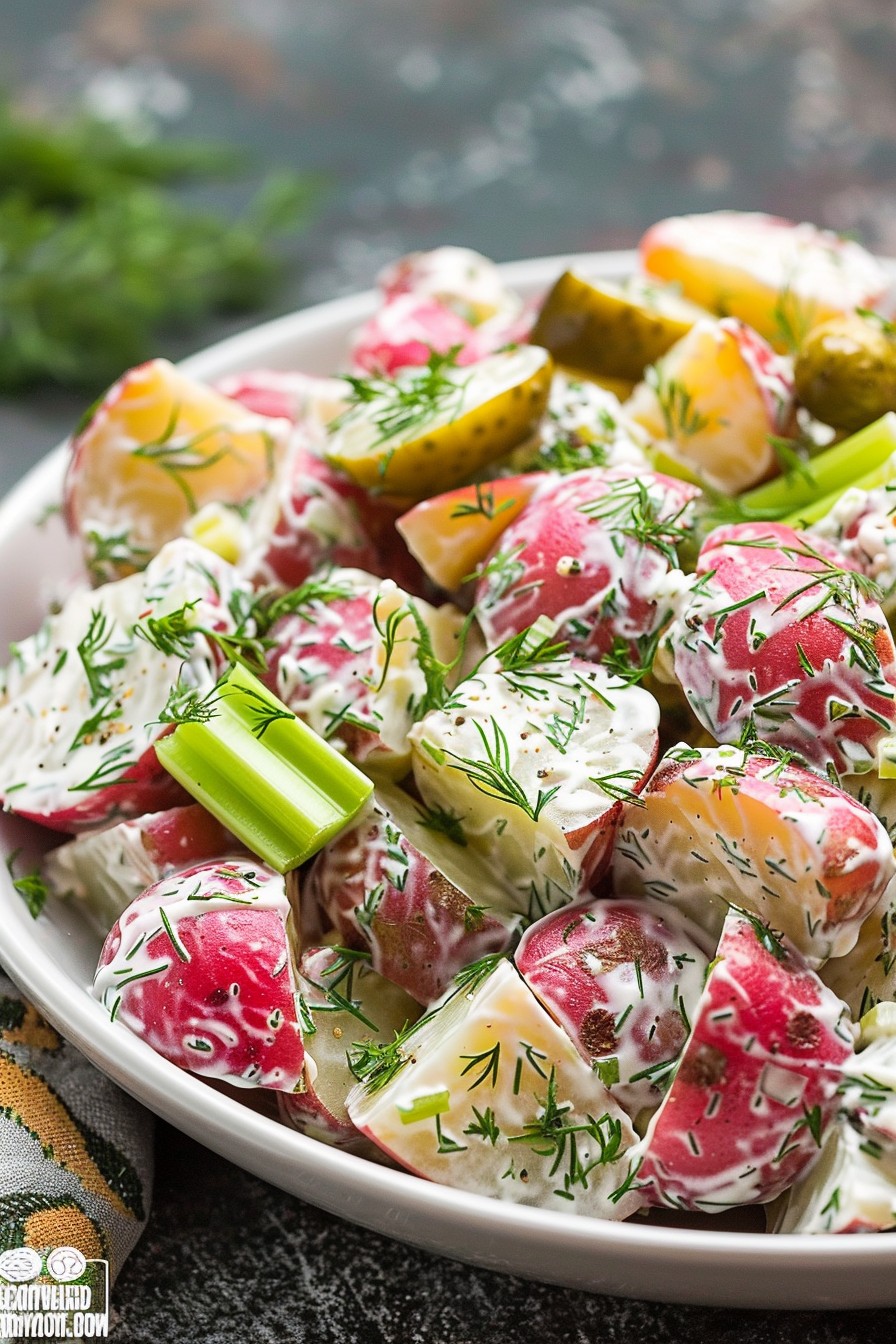
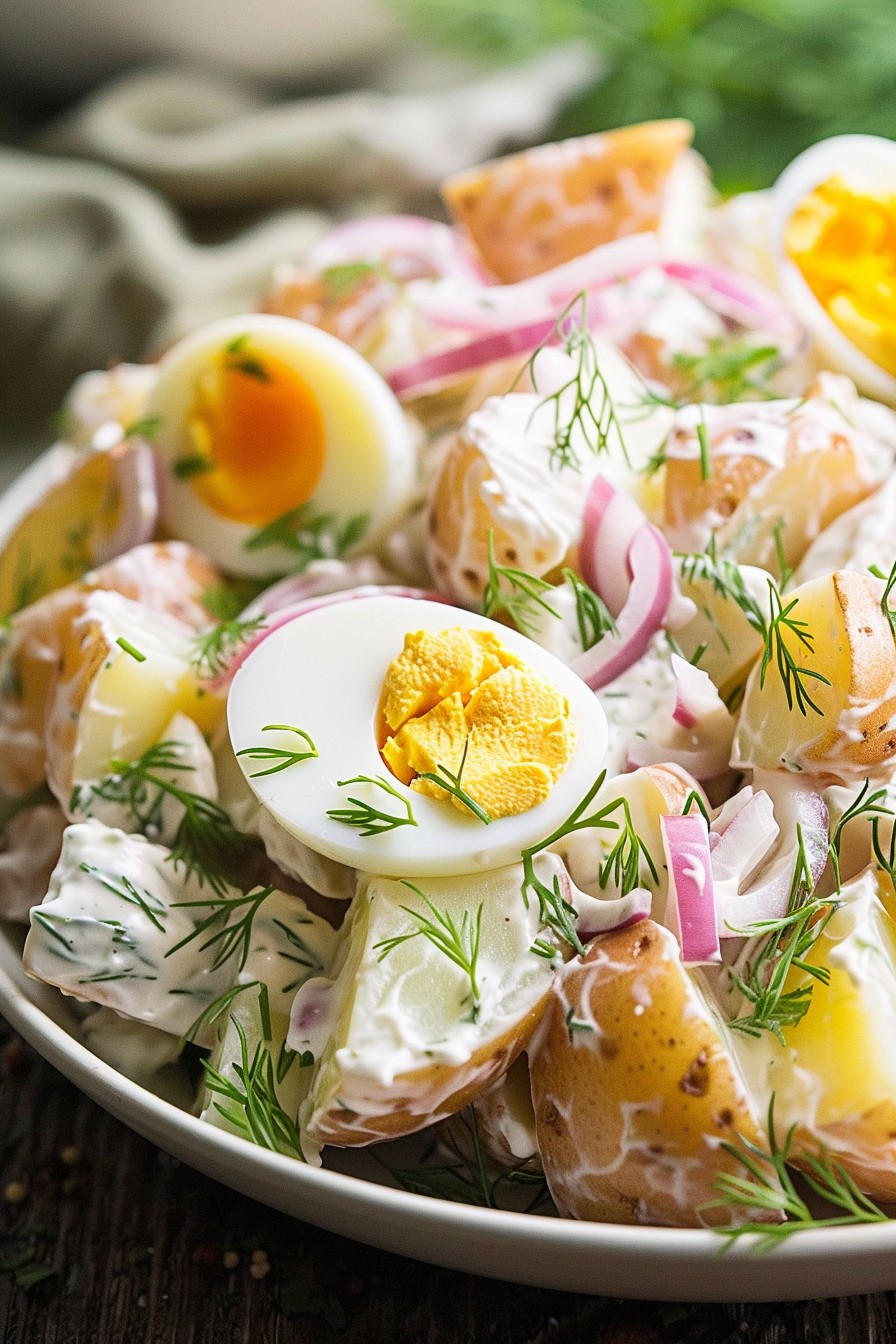
    A amazing potato salad can turn any meal into a celebration. This recipe is a game-changer, combining creamy textures with a tangy twist that’ll have everyone asking for seconds. Perfect for picnics, potlucks, or just because you deserve it.

    Why This Recipe Works

    • The secret blend of mayonnaise and mustard creates a creamy yet tangy dressing that coats every potato piece perfectly.
    • Using Yukon Gold potatoes ensures a buttery texture that holds up well, avoiding the mushiness of other varieties.
    • Fresh herbs and a splash of apple cider vinegar add layers of flavor that elevate this dish from good to unforgettable.

    Ingredients

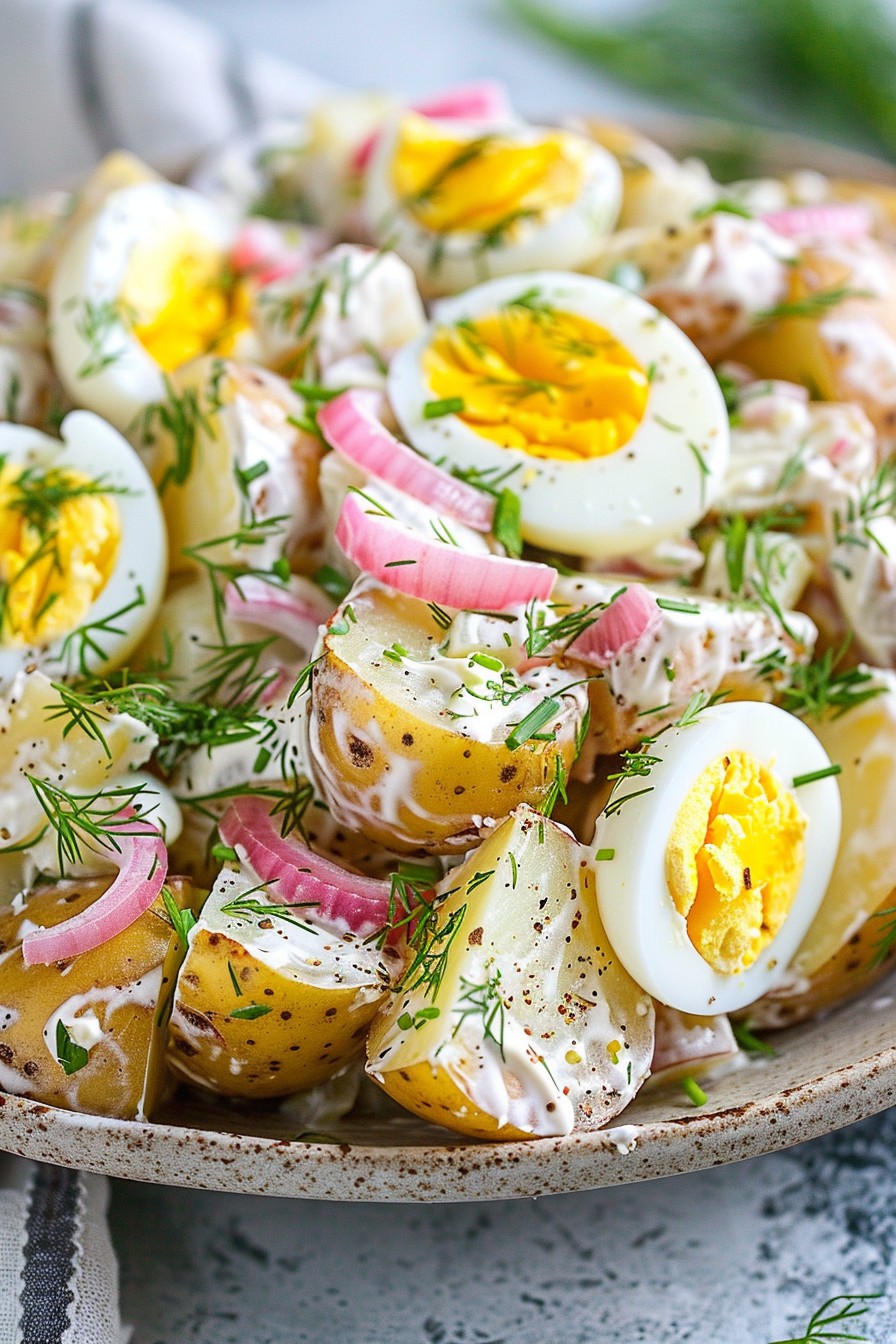
    • 2 pounds Yukon Gold potatoes, peeled and cut into 1-inch chunks
    • 1 cup mayonnaise
    • 2 tablespoons Dijon mustard
    • 1 tablespoon apple cider vinegar
    • 1/2 cup finely chopped red onion
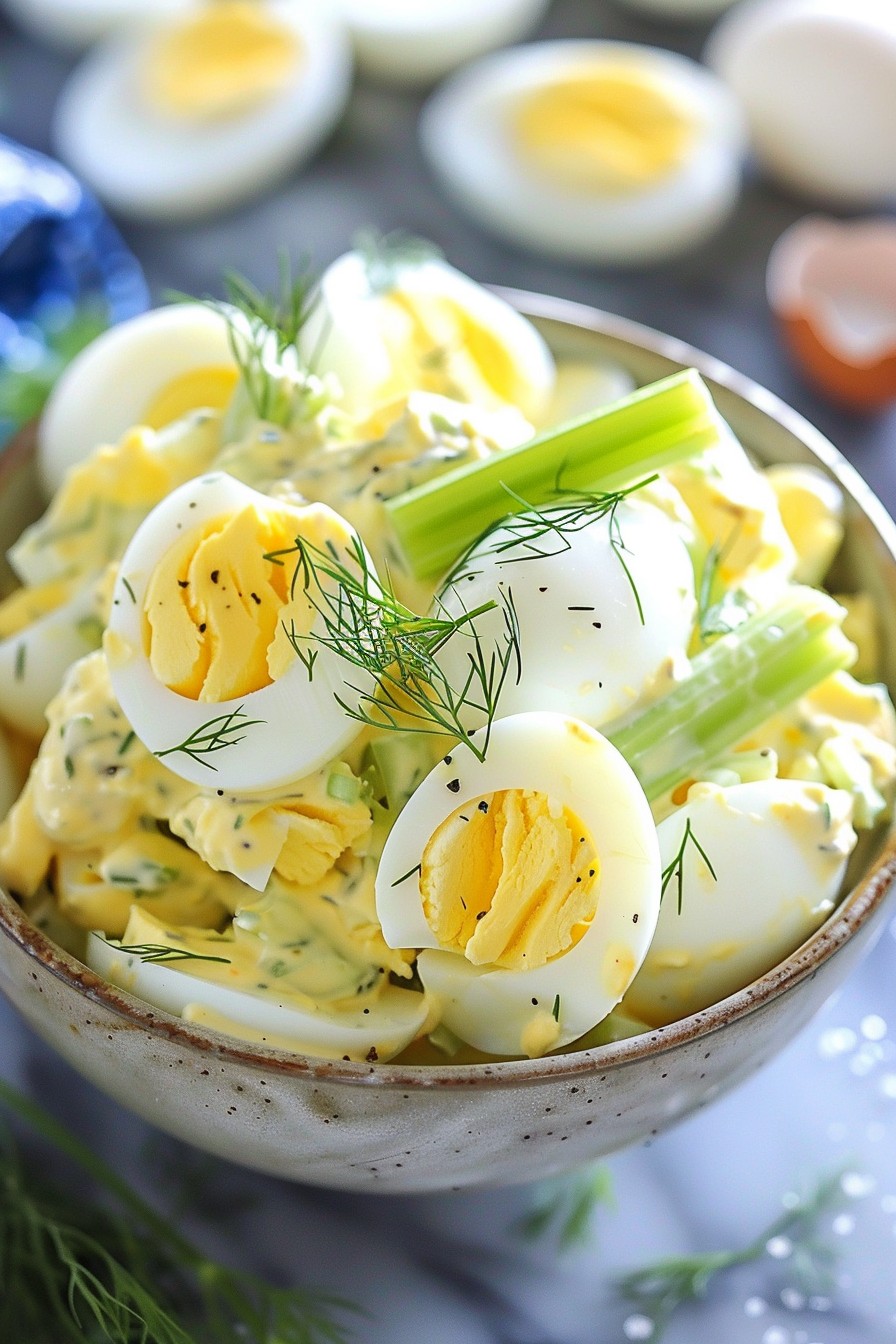
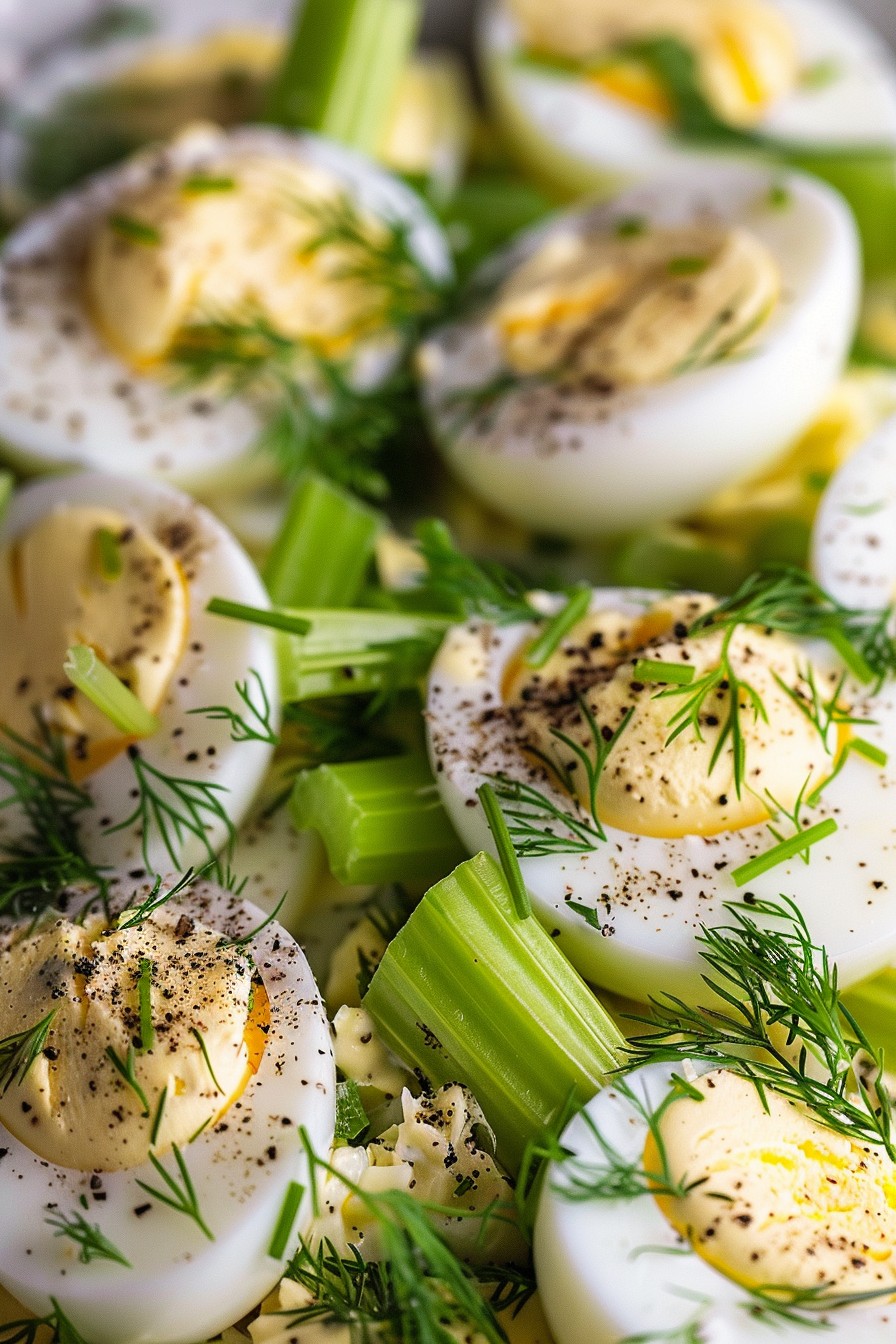
    • 2 hard-boiled eggs, chopped
    • 1/4 cup chopped fresh dill
    • Salt and pepper to taste

    Equipment Needed

    • Large pot
    • Mixing bowl
    • Knife and cutting board
    • Measuring cups and spoons

    Instructions

    5 Star Potato Salad Recipe

    Step 1: Cook the Potatoes

    Place the potato chunks in a large pot and cover with cold water by about an inch. Bring to a boil over high heat, then reduce to a simmer. Cook for 10-12 minutes, or until the potatoes are just tender when pierced with a fork. Tip: Start checking at 10 minutes to avoid overcooking.

    Step 2: Prepare the Dressing

    While the potatoes cook, whisk together the mayonnaise, Dijon mustard, and apple cider vinegar in a large mixing bowl. Stir in the red onion, chopped eggs, and dill. Season with salt and pepper to taste. Tip: Letting the dressing sit for a few minutes helps the flavors meld.

    Step 3: Combine and Chill

    Drain the potatoes well and let them cool slightly. Gently fold the warm potatoes into the dressing until evenly coated. Cover and refrigerate for at least 1 hour before serving to allow the flavors to develop. Tip: For best results, chill overnight.

    Tips and Tricks

    For an extra flavor boost, try adding crispy bacon bits or a sprinkle of smoked paprika on top before serving. If you’re short on time, you can serve the salad warm, but chilling it really brings out the flavors. Always taste and adjust the seasoning after chilling, as cold temperatures can dull flavors. For a lighter version, substitute half the mayonnaise with Greek yogurt. And remember, the key to a great potato salad is not overmixing—keep those potato chunks intact for the perfect texture.

    Recipe Variations

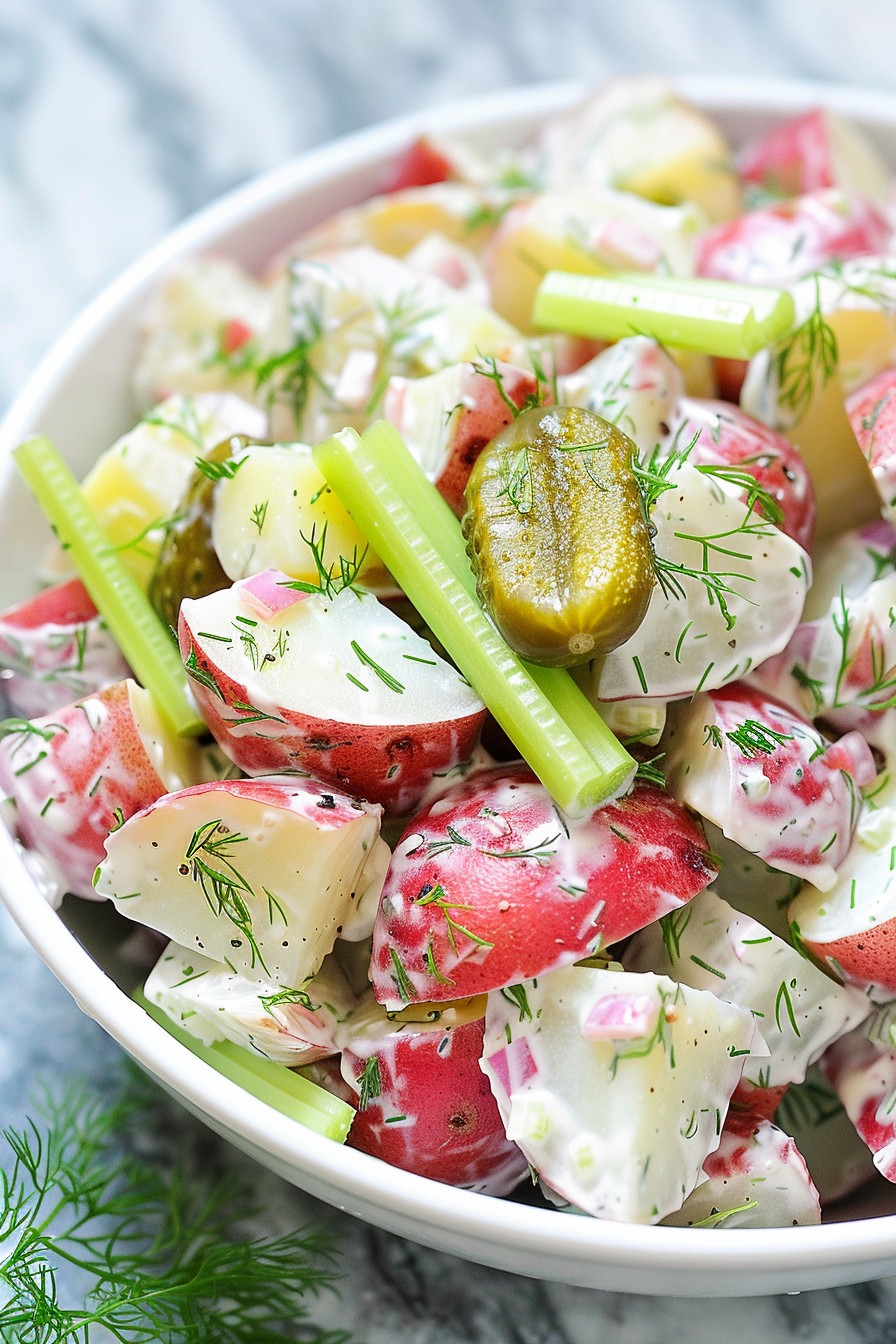
    • Add 1 cup of chopped celery for extra crunch.
    • Swap the dill for parsley or cilantro for a different herbal note.
    • Include 1/2 cup of sweet pickle relish for a sweet and tangy twist.
    • For a spicy kick, add a diced jalapeño or a dash of hot sauce.
    • Use smoked paprika instead of regular for a deeper flavor profile.

    Frequently Asked Questions

    Can I use a different type of potato?

    Yes, but Yukon Golds are recommended for their buttery texture and ability to hold shape. Russets can become too mushy, and red potatoes might not absorb the dressing as well.

    How long can I store the potato salad?

    Properly stored in an airtight container, it will last up to 3 days in the refrigerator. However, it’s best enjoyed within the first 48 hours for optimal texture and flavor.

    Can I make this recipe vegan?

    Absolutely! Substitute the mayonnaise with a vegan alternative and omit the eggs. You might want to add a bit more mustard or vinegar to compensate for the flavor.

    Summary

    This 5-star potato salad recipe is a crowd-pleaser, combining creamy, tangy, and herby flavors with the perfect potato texture. Whether for a special occasion or a simple family dinner, it’s sure to impress.

  • No Onion Potato Salad Recipe: A Flavorful Twist Without the Tears

    No Onion Potato Salad Recipe: A Flavorful Twist Without the Tears

    Perfect for those who love the classic potato salad but want to skip the onions. This recipe delivers all the creamy, tangy goodness without a single tear. Plus, it’s a hit at picnics and potlucks where onion breath might not be welcome.

    Why This Recipe Works

    • Uses celery and pickles for crunch and flavor, eliminating the need for onions.
    • Greek yogurt adds a tangy creaminess without the heaviness of mayo.
    • Mustard and apple cider vinegar give it a zesty kick that balances the potatoes’ earthiness.
    • Quick to prepare, making it perfect for last-minute gatherings.
    • Versatile base that can be customized with various add-ins.

    Ingredients

    • 2 pounds red potatoes, washed and cubed
    • 1 cup Greek yogurt
    • 2 tbsp Dijon mustard
    • 1 tbsp apple cider vinegar
    • 1/2 cup diced celery
    • 1/2 cup diced pickles
    • Salt and pepper to taste
    • 1/4 cup chopped fresh dill

    Equipment Needed

    • Large pot
    • Mixing bowl
    • Knife and cutting board
    • Measuring cups and spoons

    Instructions

    No Onion Potato Salad Recipe

    Step 1: Cook the Potatoes

    Start by placing the cubed potatoes in a large pot and cover them with cold water. Bring to a boil over high heat, then reduce to a simmer. Cook for about 10-12 minutes, or until the potatoes are tender but not mushy. Drain and let them cool slightly.

    Step 2: Prepare the Dressing

    In a mixing bowl, whisk together the Greek yogurt, Dijon mustard, and apple cider vinegar until smooth. Season with salt and pepper to taste. This dressing is the secret to the salad’s creamy texture and tangy flavor.

    Step 3: Combine Ingredients

    Add the slightly cooled potatoes to the dressing along with the diced celery and pickles. Gently fold everything together until the potatoes are evenly coated. Be careful not to overmix to keep the potatoes from breaking apart.

    Step 4: Add the Final Touches

    Sprinkle the chopped fresh dill over the salad and give it one final gentle mix. The dill adds a fresh, herby note that brightens up the whole dish.

    Step 5: Chill and Serve

    Cover the salad and refrigerate for at least an hour before serving. This chilling time allows the flavors to meld together beautifully. Serve cold for the best taste and texture.

    Tips and Tricks

    For an extra layer of flavor, consider adding a teaspoon of smoked paprika or a pinch of cayenne pepper to the dressing. If you’re not a fan of dill, parsley or chives make great substitutes. For a creamier salad, you can substitute half of the Greek yogurt with mayonnaise. Always taste and adjust the seasoning after chilling, as flavors can mellow out in the fridge.

    Recipe Variations

    • Add hard-boiled eggs for a protein boost.
    • Mix in some cooked bacon bits for a smoky flavor.
    • Use sweet potatoes instead of red potatoes for a sweeter twist.
    • Stir in some avocado for extra creaminess and healthy fats.
    • For a vegan version, use vegan yogurt and skip the eggs and bacon.

    Frequently Asked Questions

    Can I make this salad ahead of time?

    Absolutely! This salad actually tastes better after it’s had time to chill in the fridge for a few hours or even overnight. Just give it a good stir before serving to redistribute the dressing.

    Can I use another type of potato?

    Yes, while red potatoes are recommended for their firm texture and creamy interior, Yukon Golds or even russet potatoes can work. Just adjust the cooking time as needed since different potatoes have different textures.

    Is there a substitute for Greek yogurt?

    If you’re not a fan of Greek yogurt, sour cream or mayonnaise can be used as a substitute. Each will give the salad a slightly different flavor and texture, so choose based on your preference.

    Summary

    This no onion potato salad is a refreshing take on the classic, packed with flavor and texture without the need for onions. It’s easy to make, customizable, and perfect for any occasion.

  • Orzo Salad Recipe with Feta: A Summer Delight

    Orzo Salad Recipe with Feta: A Summer Delight

    Just when you thought pasta salads couldn’t get any better, along comes this orzo salad with feta that’s bound to be the star of your next picnic or potluck. It’s fresh, flavorful, and oh-so-easy to whip up!

    Why This Recipe Works

    • The combination of orzo and feta cheese offers a perfect balance of textures and flavors.
    • It’s incredibly versatile, allowing for numerous variations based on what you have in your fridge.
    • This salad is a make-ahead dream, tasting even better the next day as the flavors meld together.

    Ingredients

    • 1 cup orzo pasta
    • 1/2 cup crumbled feta cheese
    • 1/4 cup olive oil
    • 2 tbsp lemon juice
    • 1 cucumber, diced
    • 1/2 red onion, finely chopped
    • 1/4 cup fresh dill, chopped
    • Salt and pepper to taste

    Equipment Needed

    • Medium saucepan
    • Colander
    • Large mixing bowl
    • Whisk
    • Cutting board and knife

    Instructions

    Orzo Salad Recipe With Feta

    Step 1: Cook the Orzo

    Bring a medium saucepan of salted water to a boil. Add the orzo and cook according to package instructions, usually about 8-10 minutes, until al dente. Drain in a colander and rinse under cold water to stop the cooking process. Tip: Rinsing the orzo removes excess starch, preventing it from clumping together.

    Step 2: Prepare the Dressing

    In a large mixing bowl, whisk together the olive oil and lemon juice until well combined. Season with salt and pepper to taste. This simple dressing will bring all the flavors of the salad together beautifully.

    Step 3: Combine the Ingredients

    Add the cooled orzo, diced cucumber, chopped red onion, and fresh dill to the bowl with the dressing. Toss everything together until well coated. The freshness of the cucumber and dill will add a crisp contrast to the creamy feta.

    Step 4: Add the Feta

    Gently fold in the crumbled feta cheese, being careful not to break it up too much. The feta adds a salty, tangy flavor that’s irresistible. Tip: For an extra flavor boost, use a high-quality feta packed in brine.

    Step 5: Chill and Serve

    Cover the salad and refrigerate for at least 30 minutes to allow the flavors to meld. Serve chilled, garnished with additional dill if desired. This salad is perfect for making ahead, as it keeps well in the fridge for up to 3 days.

    Tips and Tricks

    For those looking to elevate their orzo salad game, consider toasting the orzo in a dry pan before boiling to add a nutty flavor. Another pro tip is to let the salad sit at room temperature for about 10 minutes before serving to enhance the flavors. If you’re not a fan of dill, basil or parsley make excellent substitutes. Lastly, for a creamier texture, add a tablespoon of Greek yogurt to the dressing.

    Recipe Variations

    • Add grilled chicken or shrimp for a protein-packed meal.
    • Swap out the cucumber for cherry tomatoes or roasted red peppers for a different flavor profile.
    • Incorporate olives or capers for a briny twist.
    • Use quinoa instead of orzo for a gluten-free version.
    • Add avocado for creaminess and healthy fats.

    Frequently Asked Questions

    Can I make this salad ahead of time?

    Absolutely! This salad actually tastes better after it’s had time to sit in the fridge, allowing the flavors to meld together. Just be sure to give it a good stir before serving to redistribute the dressing.

    Is there a substitute for feta cheese?

    If you’re not a fan of feta, goat cheese or cubed mozzarella would work well in this recipe. Each will bring a different texture and flavor to the salad, so choose based on your preference.

    Can I add other vegetables?

    Definitely! This recipe is very adaptable. Feel free to add any vegetables you have on hand. Just keep in mind that softer vegetables like tomatoes may release water, so you might want to add them just before serving.

    Summary

    This orzo salad with feta is a refreshing, easy-to-make dish that’s perfect for any occasion. With its simple ingredients and versatile nature, it’s sure to become a staple in your recipe collection.

  • Sweet & Simple Fruit Salad Recipe with Honey

    Sweet & Simple Fruit Salad Recipe with Honey

    Craving something sweet, healthy, and easy to whip up? This fruit salad with a drizzle of honey is your go-to recipe for a refreshing treat that’s bursting with flavors.

    Why This Recipe Works

    • The combination of fresh fruits provides a variety of textures and tastes, making every bite exciting.
    • Honey adds a natural sweetness that enhances the fruits’ flavors without overpowering them.
    • It’s incredibly versatile; you can use whatever fruits are in season or your favorites.
    • Prep time is minimal, making it perfect for last-minute gatherings or a quick healthy snack.
    • The recipe is adaptable for dietary restrictions, easily made vegan or adjusted for sugar content.

    Ingredients

    • 2 cups strawberries, hulled and quartered
    • 1 cup blueberries
    • 1 cup grapes, halved
    • 1 banana, sliced
    • 1 apple, diced
    • 2 tbsp honey
    • 1 tbsp lemon juice
    • 1/4 cup mint leaves, chopped (optional)

    Equipment Needed

    • Large mixing bowl
    • Measuring cups and spoons
    • Knife and cutting board
    • Mixing spoon

    Instructions

    Fruit Salad Recipe With Honey

    Step 1: Prepare Your Fruits

    Start by washing all your fruits thoroughly under cold water. Hull the strawberries and cut them into quarters. Halve the grapes, slice the banana, and dice the apple. Place all the prepared fruits into a large mixing bowl. Tip: To prevent the banana and apple from browning, toss them with a bit of lemon juice as you go.

    Step 2: Combine the Fruits

    Gently mix the fruits together in the bowl. Be careful not to mash the softer fruits like bananas and strawberries. The goal is to keep the textures distinct for a more enjoyable eating experience.

    Step 3: Add the Honey Drizzle

    Drizzle the honey over the mixed fruits. If your honey is too thick, you can warm it slightly to make it easier to drizzle. Use a spoon to gently toss the salad, ensuring all the fruits are lightly coated with honey. Tip: Adjust the amount of honey based on your sweetness preference.

    Step 4: Chill Before Serving

    Cover the bowl with plastic wrap and let the fruit salad chill in the refrigerator for at least 30 minutes. This step allows the flavors to meld together beautifully. Serving it chilled also enhances the refreshing quality of the salad.

    Step 5: Garnish and Serve

    Before serving, give the salad a final gentle toss. Garnish with chopped mint leaves for an extra pop of color and freshness. Serve in individual bowls or a large serving dish. Tip: For an elegant touch, serve the salad in hollowed-out fruit shells.

    Tips and Tricks

    For the best fruit salad, choose fruits that are ripe but still firm to avoid a mushy texture. If you’re preparing the salad ahead of time, add the bananas and apples last to prevent browning. Experiment with different types of honey for unique flavors; orange blossom honey adds a floral note, while buckwheat honey offers a deeper, molasses-like taste. To make the salad more filling, add a scoop of Greek yogurt or a handful of nuts for protein and crunch.

    Recipe Variations

    • Add a tropical twist by including mango, pineapple, and kiwi.
    • For a citrusy version, mix in segments of oranges and grapefruits, and use lime juice instead of lemon.
    • Make it a dessert by adding a sprinkle of cinnamon or a dash of vanilla extract to the honey.
    • Include pomegranate seeds and chopped nuts for a festive and crunchy variation.
    • For a savory edge, add a pinch of chili powder or cayenne pepper to the honey drizzle.

    Frequently Asked Questions

    Can I make this fruit salad ahead of time? Yes, you can prepare the salad a few hours in advance. However, for the best texture, add the bananas and apples just before serving to prevent them from becoming too soft or brown.

    What other sweeteners can I use instead of honey? If you prefer not to use honey, maple syrup or agave nectar are great alternatives. They provide a similar sweetness and consistency.

    How long will the fruit salad last in the fridge? The salad is best enjoyed within 24 hours. After that, the fruits may start to release too much juice and become soggy.

    Summary

    This fruit salad with honey is a delightful, easy-to-make dish that’s perfect for any occasion. With its vibrant colors and fresh flavors, it’s sure to be a hit. Plus, it’s customizable to suit your taste and dietary needs.

  • Green Salad with Chicken Recipe: A Fresh Take on a Classic

    Green Salad with Chicken Recipe: A Fresh Take on a Classic

    Ready to toss up something delicious? This green salad with chicken is not just a meal; it’s a vibrant journey of flavors and textures that will leave you craving more. Perfect for a quick lunch or a light dinner, this recipe is a game-changer for salad lovers.

    Why This Recipe Works

    • The combination of crisp greens and tender chicken offers a satisfying contrast in textures.
    • A homemade dressing elevates the dish with a burst of flavor that store-bought versions can’t match.
    • It’s versatile, allowing for endless variations based on what’s in your fridge or pantry.
    • Quick to prepare, making it ideal for busy weeknights.
    • Packed with nutrients, it’s a guilt-free option that doesn’t skimp on taste.

    Ingredients

    • 2 cups mixed greens (washed and dried)
    • 1 chicken breast (cooked and sliced)
    • 1/2 cup cherry tomatoes (halved)
    • 1/4 cup cucumber (sliced)
    • 1/4 cup red onion (thinly sliced)
    • 2 tbsp olive oil
    • 1 tbsp balsamic vinegar
    • Salt and pepper to taste

    Equipment Needed

    • Mixing bowl
    • Salad spinner
    • Sharp knife
    • Cutting board
    • Measuring spoons and cups

    Instructions

    Green Salad With Chicken Recipe

    Step 1: Prepare the Greens

    Start by ensuring your mixed greens are thoroughly washed and dried. A salad spinner works wonders here, removing excess water without bruising the leaves. Dry greens mean your dressing will cling better, ensuring every bite is flavorful.

    Step 2: Slice the Chicken

    Take your cooked chicken breast and slice it into thin strips. If you’re using leftover chicken, make sure it’s at room temperature to keep the salad from getting chilly. This step is all about making the chicken easy to eat and evenly distributed throughout the salad.

    Step 3: Chop the Vegetables

    Halve the cherry tomatoes, slice the cucumber into thin rounds, and thinly slice the red onion. These vegetables add crunch, color, and a bit of sweetness to balance the savory chicken.

    Step 4: Make the Dressing

    In a small bowl, whisk together the olive oil and balsamic vinegar. Season with salt and pepper to taste. This simple dressing brings all the components together without overpowering the fresh ingredients.

    Step 5: Assemble the Salad

    In a large mixing bowl, combine the greens, chicken, and vegetables. Drizzle with the dressing and toss gently to coat. Serve immediately for the best texture and flavor.

    Tips and Tricks

    For an extra flavor boost, try marinating the chicken in the dressing for 30 minutes before cooking. If you’re not a fan of raw onion, soak the slices in cold water for 10 minutes to mellow their bite. And for a more substantial meal, add a handful of nuts or seeds for crunch and protein.

    Recipe Variations

    • Swap the chicken for grilled shrimp or tofu for a different protein option.
    • Add fruits like sliced strawberries or apples for a sweet contrast.
    • Incorporate different cheeses, such as feta or goat cheese, for a creamy element.
    • Use a variety of greens, like spinach or arugula, to change the flavor profile.
    • Experiment with different dressings, such as a honey mustard or lemon vinaigrette.

    Frequently Asked Questions

    Can I make this salad ahead of time?

    Yes, but keep the dressing separate until you’re ready to serve to prevent the greens from wilting. You can prep all the components and store them in the fridge for up to a day in advance.

    What’s the best way to cook the chicken?

    Grilling or pan-searing the chicken breast with a bit of olive oil, salt, and pepper is ideal. Cook until the internal temperature reaches 165°F for safety and the best texture.

    Can I use bottled dressing?

    While you can, homemade dressing is fresher and allows you to control the ingredients and flavors. Plus, it’s surprisingly easy to make with just a few pantry staples.

    Summary

    This green salad with chicken is a testament to how simple ingredients can come together to create something truly special. Quick, nutritious, and endlessly customizable, it’s a recipe you’ll turn to again and again.

  • Black Rice Salad Recipe: A Nutritious & Flavorful Feast

    Black Rice Salad Recipe: A Nutritious & Flavorful Feast

    Every now and then, we stumble upon a recipe that’s not just a meal but a celebration on a plate. This black rice salad is exactly that—packed with nutrients, bursting with flavors, and incredibly versatile. Let’s dive into making this colorful dish that’s as pleasing to the eye as it is to the palate.

    Why This Recipe Works

    • Black rice, also known as forbidden rice, is rich in antioxidants and fiber, making this salad a powerhouse of nutrition.
    • The combination of crunchy vegetables and a tangy dressing brings a perfect balance of textures and flavors.
    • It’s a make-ahead dish that tastes even better the next day, making it ideal for meal prep or potlucks.

    Ingredients

    • 1 cup black rice, rinsed
    • 2 cups water
    • 1/2 cup cucumber, diced
    • 1/2 cup red bell pepper, diced
    • 1/4 cup red onion, finely chopped
    • 1/4 cup cilantro, chopped
    • 2 tbsp olive oil
    • 1 tbsp lime juice
    • 1 tsp honey
    • Salt and pepper to taste

    Equipment Needed

    • Medium saucepan with lid
    • Mixing bowls
    • Whisk
    • Cutting board and knife

    Instructions

    Black Rice Salad Recipe

    Step 1: Cook the Black Rice

    In a medium saucepan, combine the rinsed black rice and water. Bring to a boil over high heat, then reduce the heat to low, cover, and simmer for 30 minutes. The rice is done when it’s tender and has absorbed all the water. Let it cool to room temperature.

    Step 2: Prepare the Vegetables

    While the rice is cooling, dice the cucumber and red bell pepper, and finely chop the red onion. Chop the cilantro. These fresh ingredients will add crunch and color to your salad.

    Step 3: Make the Dressing

    In a small bowl, whisk together the olive oil, lime juice, honey, salt, and pepper. This simple dressing will bring all the flavors together with a perfect balance of tangy and sweet.

    Step 4: Combine Everything

    In a large mixing bowl, combine the cooled black rice, prepared vegetables, and cilantro. Drizzle the dressing over the top and toss gently to combine. Taste and adjust the seasoning if necessary.

    Step 5: Serve or Store

    This salad can be served immediately or stored in the refrigerator for up to 3 days. The flavors will meld together over time, making it even more delicious.

    Tips and Tricks

    For an extra burst of flavor, consider adding toasted nuts or seeds like almonds or sesame seeds. If you’re not a fan of cilantro, parsley or mint makes a great substitute. To make this salad a complete meal, add some grilled chicken or tofu for protein. Always taste your dressing before adding it to the salad to ensure the balance of flavors is to your liking.

    Recipe Variations

    • Add avocado for creaminess and healthy fats.
    • Include mango or pineapple for a sweet and tangy twist.
    • Swap the black rice for quinoa or brown rice for a different texture.
    • Add a spicy kick with some chopped jalapeño or a dash of chili flakes.
    • Use a different dressing, like a peanut or tahini-based one, for a completely new flavor profile.

    Frequently Asked Questions

    Can I use another type of rice?

    Absolutely! While black rice has a unique texture and nutritional profile, you can substitute it with brown rice, quinoa, or even white rice if you’re in a pinch. Just adjust the cooking time according to the package instructions.

    How long does this salad keep?

    This salad will stay fresh in the refrigerator for up to 3 days. The vegetables may soften slightly over time, but the flavors will continue to develop, making it even tastier.

    Can I make this salad ahead of time?

    Yes, this salad is perfect for making ahead. In fact, it’s recommended to let it sit for at least an hour before serving to allow the flavors to meld together. Just hold off on adding any avocado or fresh herbs until you’re ready to serve.

    Summary

    This black rice salad is a nutritious, flavorful, and versatile dish that’s perfect for any occasion. With its rich colors and textures, it’s sure to be a hit at your next gathering or as a healthy meal prep option.

  • Salad Fattoush Recipe: A Crispy, Fresh Middle Eastern Delight

    Salad Fattoush Recipe: A Crispy, Fresh Middle Eastern Delight

    Bold flavors and crispy textures make this Salad Fattoush a must-try for anyone looking to spice up their salad game. This Middle Eastern classic is not only refreshing but also packed with nutrients, making it a perfect dish for any season.

    Why This Recipe Works

    • The combination of fresh vegetables and crispy pita bread offers a delightful contrast in textures.
    • A tangy sumac and lemon dressing brings all the flavors together beautifully.
    • It’s a versatile dish that can be customized with your favorite veggies or proteins.
    • Perfect for meal prep, as the flavors meld and improve over time.
    • Quick and easy to make, requiring no fancy equipment or techniques.

    Ingredients

    • 2 cups romaine lettuce, chopped
    • 1 cup cucumber, diced
    • 1 cup tomatoes, diced
    • 1/2 cup radishes, thinly sliced
    • 1/4 cup green onions, chopped
    • 1/4 cup fresh parsley, chopped
    • 1/4 cup fresh mint, chopped
    • 2 pita breads, toasted and broken into pieces
    • 1/4 cup olive oil
    • 2 tbsp lemon juice
    • 1 tsp sumac
    • 1/2 tsp salt
    • 1/4 tsp black pepper

    Equipment Needed

    • Large mixing bowl
    • Small bowl for dressing
    • Knife and cutting board
    • Toaster or oven for pita bread

    Instructions

    Salad Fattoush Recipe

    Step 1: Prepare the Vegetables

    Start by washing all your vegetables thoroughly. Chop the romaine lettuce into bite-sized pieces, dice the cucumber and tomatoes, thinly slice the radishes, and chop the green onions, parsley, and mint. Combine all these in a large mixing bowl. Tip: For extra crispness, you can chill the chopped vegetables in the fridge for about 10 minutes before assembling the salad.

    Step 2: Toast the Pita Bread

    Preheat your toaster or oven to 350°F. Cut the pita bread into small pieces and toast until golden and crispy, about 5-7 minutes. Keep an eye on them to prevent burning. Once toasted, let them cool slightly before adding to the salad. Tip: For an even crispier texture, you can brush the pita pieces with a little olive oil before toasting.

    Step 3: Make the Dressing

    In a small bowl, whisk together the olive oil, lemon juice, sumac, salt, and black pepper until well combined. Taste and adjust the seasoning if necessary. Tip: Let the dressing sit for a few minutes to allow the flavors to meld together before dressing the salad.

    Step 4: Assemble the Salad

    Add the toasted pita pieces to the bowl with the vegetables. Drizzle the dressing over the top and gently toss everything together until well coated. Serve immediately to enjoy the contrast between the crispy pita and fresh vegetables.

    Tips and Tricks

    For those looking to elevate their Salad Fattoush, consider these advanced tips. First, if sumac is hard to find, you can substitute it with a mix of lemon zest and a pinch of paprika for a similar tangy flavor. Second, adding grilled chicken or shrimp can turn this salad into a hearty main dish. Third, for a vegan version, ensure your pita bread doesn’t contain any dairy products. Lastly, if you’re preparing this salad ahead of time, keep the dressing and pita bread separate until just before serving to maintain the best texture.

    Recipe Variations

    • Add feta cheese or olives for a Mediterranean twist.
    • Incorporate grilled vegetables like zucchini or eggplant for added depth.
    • Use quinoa or bulgur instead of pita bread for a gluten-free option.
    • Top with a dollop of yogurt or tahini sauce for extra creaminess.
    • Experiment with different herbs like cilantro or dill for unique flavors.

    Frequently Asked Questions

    Can I make Salad Fattoush ahead of time?

    Yes, you can prepare the vegetables and dressing ahead of time, but it’s best to add the pita bread and dressing just before serving to keep everything crispy. The vegetables can be chopped and stored in the fridge, and the dressing can be kept in a separate container.

    What can I use instead of sumac?

    If you can’t find sumac, a combination of lemon zest and a pinch of paprika can mimic its tangy, slightly fruity flavor. Alternatively, a little vinegar can add the necessary acidity, though the flavor profile will be slightly different.

    Is Salad Fattoush gluten-free?

    Traditional Salad Fattoush is not gluten-free due to the pita bread. However, you can easily make it gluten-free by omitting the pita or substituting it with a gluten-free alternative like toasted gluten-free bread or crackers.

    Summary

    Salad Fattoush is a vibrant, flavorful dish that combines fresh vegetables with crispy pita bread and a tangy dressing. It’s versatile, easy to make, and perfect for any occasion. Whether you stick to the traditional recipe or experiment with variations, it’s sure to be a hit.

  • Chinese Crab Salad Recipe: A Delightful Twist on a Classic

    Chinese Crab Salad Recipe: A Delightful Twist on a Classic

    So, you’re craving something light, refreshing, and packed with flavor? Look no further than this Chinese Crab Salad recipe. It’s the perfect blend of sweet, savory, and a hint of spice, making it an ideal dish for any occasion.

    Why This Recipe Works

    • The combination of fresh crab meat with crisp vegetables offers a satisfying crunch in every bite.
    • A homemade dressing with soy sauce, sesame oil, and a touch of honey brings the salad together with a perfect balance of flavors.
    • It’s incredibly versatile, allowing for numerous variations to suit any taste or dietary preference.
    • Quick and easy to prepare, this salad is perfect for busy weeknights or last-minute gatherings.

    Ingredients

    • 1 lb fresh crab meat, shredded
    • 2 cups shredded cabbage
    • 1 cup shredded carrots
    • 1/2 cup sliced cucumbers
    • 1/4 cup chopped green onions
    • 2 tbsp soy sauce
    • 1 tbsp sesame oil
    • 1 tbsp honey
    • 1 tsp grated ginger
    • 1 clove garlic, minced
    • 1/2 tsp red pepper flakes (optional)

    Equipment Needed

    • Large mixing bowl
    • Whisk
    • Measuring cups and spoons
    • Salad spinner (optional, for drying vegetables)

    Instructions

    Chinese Crab Salad Recipe

    Step 1: Prepare the Vegetables

    Start by washing all your vegetables thoroughly. Shred the cabbage and carrots using a grater or a food processor for uniformity. Slice the cucumbers thinly and chop the green onions. If you’re using a salad spinner, now’s the time to dry those veggies to prevent a soggy salad.

    Step 2: Make the Dressing

    In a small bowl, whisk together the soy sauce, sesame oil, honey, grated ginger, minced garlic, and red pepper flakes if you’re using them. Taste and adjust the seasoning as needed. Remember, the dressing should be a balance of sweet, salty, and a bit tangy.

    Step 3: Combine Crab and Vegetables

    In your large mixing bowl, gently toss the shredded crab meat with the prepared vegetables. Be careful not to break up the crab meat too much; you want to keep those lovely chunks intact for texture.

    Step 4: Dress the Salad

    Pour the dressing over the crab and vegetable mixture. Using a large spoon or your hands (clean, of course), gently toss everything together until evenly coated. Let the salad sit for about 10 minutes to allow the flavors to meld together beautifully.

    Step 5: Serve and Enjoy

    Transfer the salad to a serving dish or individual plates. Garnish with extra green onions or a sprinkle of sesame seeds for an extra touch of elegance. Serve immediately for the best texture and flavor.

    Tips and Tricks

    For the best results, use the freshest crab meat you can find. If fresh isn’t an option, high-quality canned crab meat can work in a pinch, but be sure to drain it well. To add more crunch, consider tossing in some toasted almonds or sesame seeds. If you’re serving this salad ahead of time, keep the dressing separate until just before serving to maintain the vegetables’ crispness. For a spicier kick, increase the amount of red pepper flakes or add a dash of sriracha to the dressing.

    Recipe Variations

    • For a vegetarian version, substitute the crab meat with shredded tofu or chickpeas.
    • Add some fruit like mango or pineapple for a sweet contrast to the savory flavors.
    • Incorporate different vegetables such as bell peppers or snap peas for added color and crunch.
    • Swap the honey in the dressing for maple syrup or agave for a vegan alternative.
    • For a more substantial meal, serve the salad over a bed of rice or noodles.

    Frequently Asked Questions

    Can I use imitation crab meat for this recipe?

    Absolutely! While fresh crab meat offers the best flavor and texture, imitation crab is a more affordable and readily available option. Just be mindful that imitation crab is already seasoned, so you may want to adjust the amount of soy sauce in the dressing accordingly.

    How long can I store this salad in the fridge?

    This salad is best enjoyed fresh but can be stored in an airtight container in the refrigerator for up to two days. Keep in mind that the vegetables may lose some of their crispness over time, so it’s ideal to consume it within the first day.

    Is there a way to make this salad less spicy?

    Of course! Simply omit the red pepper flakes from the dressing. The salad will still be packed with flavor from the soy sauce, sesame oil, and other ingredients without the heat.

    Summary

    This Chinese Crab Salad is a refreshing, flavorful dish that’s perfect for any occasion. With its combination of fresh ingredients and a homemade dressing, it’s sure to be a hit. Plus, it’s versatile enough to customize to your liking. Give it a try and enjoy a taste of something truly special.

  • Egg Salad Celery Recipe: A Crunchy Twist on a Classic

    Egg Salad Celery Recipe: A Crunchy Twist on a Classic

    Every now and then, a recipe comes along that shakes up the status quo, and this egg salad celery recipe does just that. It’s a delightful mix of creamy and crunchy, perfect for those who love texture in their dishes. Let’s dive into making this simple yet satisfying dish.

    Why This Recipe Works

    • The combination of creamy egg salad with the crisp freshness of celery creates a perfect balance of textures.
    • It’s incredibly versatile, serving as a great sandwich filler, a dip, or a standalone salad.
    • This recipe is quick to prepare, making it ideal for busy weekdays or last-minute gatherings.
    • It’s a healthier twist on traditional egg salad, thanks to the added veggies.
    • The flavors meld beautifully when allowed to chill, making it a great make-ahead option.

    Ingredients

    • 6 large eggs, hard-boiled and peeled
    • 1/2 cup mayonnaise
    • 1 tablespoon mustard
    • 1/4 teaspoon salt
    • 1/4 teaspoon black pepper
    • 2 celery stalks, finely chopped
    • 1 tablespoon fresh dill, chopped

    Equipment Needed

    • Medium mixing bowl
    • Knife and cutting board
    • Measuring cups and spoons
    • Fork or potato masher

    Instructions

    Egg Salad Celery Recipe

    Step 1: Prepare the Eggs

    Start by placing your hard-boiled eggs in a medium mixing bowl. Using a fork or potato masher, gently mash the eggs to your desired consistency. Some prefer a chunkier texture, while others like it smoother. The key is to ensure all the eggs are evenly mashed for a uniform salad.

    Step 2: Mix in the Wet Ingredients

    Add the mayonnaise and mustard to the mashed eggs. Stir until the mixture is creamy and well combined. This is where the base of your egg salad gets its rich and tangy flavor profile. Adjust the amount of mayonnaise based on how creamy you like your salad.

    Step 3: Season to Taste

    Season your mixture with salt and black pepper. Remember, you can always add more seasoning later, so start with a little and adjust as needed. This step is crucial for bringing all the flavors together.

    Step 4: Add the Crunch

    Fold in the finely chopped celery and fresh dill. The celery adds a refreshing crunch, while the dill brings a slight herby freshness to the dish. Make sure the ingredients are evenly distributed throughout the salad.

    Step 5: Chill and Serve

    Cover the bowl with plastic wrap and refrigerate for at least 30 minutes before serving. This allows the flavors to meld together beautifully. Serve chilled as a sandwich, with crackers, or on a bed of greens.

    Tips and Tricks

    For an even creamier texture, you can blend half of the egg mixture until smooth before mixing it back with the rest. If you’re not a fan of dill, parsley or chives make great substitutes. To make this recipe even healthier, consider using Greek yogurt in place of some or all of the mayonnaise. Always taste your salad before serving and adjust the seasoning if necessary. For a bit of extra crunch, try adding some chopped walnuts or almonds.

    Recipe Variations

    • Spicy Egg Salad: Add a dash of cayenne pepper or some chopped jalapenos for a kick.
    • Avocado Egg Salad: Mash in a ripe avocado for extra creaminess and a boost of healthy fats.
    • Bacon and Egg Salad: Crumble some cooked bacon into the mix for a smoky flavor.
    • Curried Egg Salad: Stir in a teaspoon of curry powder for an exotic twist.
    • Veggie-Packed Egg Salad: Add more vegetables like diced bell peppers or shredded carrots for extra nutrition and color.

    Frequently Asked Questions

    Can I make this recipe ahead of time?

    Absolutely! This egg salad celery recipe actually tastes better after it’s been chilled for a few hours, making it a perfect make-ahead dish. Just be sure to store it in an airtight container in the refrigerator.

    How long will the egg salad last in the fridge?

    When stored properly in an airtight container, the egg salad will last for up to 3 days in the refrigerator. Always give it a quick stir before serving if it’s been sitting for a while.

    Can I use something other than celery for crunch?

    Yes, if you’re not a fan of celery, try using diced cucumbers, apples, or even jicama for that desired crunch. Just keep in mind that the flavor profile will change slightly depending on what you choose.

    Summary

    This egg salad celery recipe is a delightful twist on the classic, offering a perfect balance of creamy and crunchy. It’s versatile, easy to make, and can be customized to suit your taste preferences. Whether you’re looking for a quick lunch or a dish to impress at your next gathering, this recipe is sure to please.

  • Creamy Macaroni Salad Recipe: The Ultimate Summer Side Dish

    Creamy Macaroni Salad Recipe: The Ultimate Summer Side Dish

    Get ready to dive into the creamiest, dreamiest macaroni salad you’ve ever tasted. Perfect for picnics, potlucks, or just because you deserve it.

    Why This Recipe Works

    • The combination of creamy mayonnaise and tangy mustard creates a dressing that’s rich yet balanced.
    • Adding crisp vegetables provides a refreshing crunch that contrasts beautifully with the soft pasta.
    • A hint of sweetness from the relish and a dash of paprika for smokiness elevate the flavor profile.
    • It’s make-ahead friendly, allowing the flavors to meld together beautifully in the fridge.
    • Customizable to your taste, you can easily add or substitute ingredients based on what you have on hand.

    Ingredients

    • 2 cups elbow macaroni, uncooked
    • 1 cup mayonnaise
    • 2 tablespoons mustard
    • 1 tablespoon apple cider vinegar
    • 1 teaspoon sugar
    • 1/2 teaspoon salt
    • 1/4 teaspoon black pepper
    • 1/2 cup diced celery
    • 1/2 cup diced red bell pepper
    • 1/4 cup diced red onion
    • 2 tablespoons sweet pickle relish
    • 1/2 teaspoon paprika

    Equipment Needed

    • Large pot
    • Colander
    • Large mixing bowl
    • Whisk
    • Measuring cups and spoons
    • Knife and cutting board

    Instructions

    Creamy Macaroni Salad Recipe

    Step 1: Cook the Macaroni

    Bring a large pot of salted water to a boil. Add the elbow macaroni and cook according to package instructions until al dente, about 8 minutes. Drain in a colander and rinse under cold water to stop the cooking process. Let it cool completely. Tip: For extra flavor, cook the macaroni in chicken or vegetable broth instead of water.

    Step 2: Prepare the Dressing

    In a large mixing bowl, whisk together the mayonnaise, mustard, apple cider vinegar, sugar, salt, and black pepper until smooth. This creamy dressing is the heart of the salad, so make sure it’s well combined. Tip: For a lighter version, you can substitute half of the mayonnaise with Greek yogurt.

    Step 3: Combine the Ingredients

    Add the cooled macaroni, diced celery, red bell pepper, red onion, and sweet pickle relish to the bowl with the dressing. Gently toss until everything is evenly coated. The vibrant colors of the vegetables make this dish as beautiful as it is delicious.

    Step 4: Chill and Serve

    Cover the bowl with plastic wrap and refrigerate for at least 2 hours, or overnight, to allow the flavors to meld. Before serving, give the salad a good stir and sprinkle with paprika for a smoky finish. Tip: If the salad seems a bit dry after chilling, stir in a little extra mayonnaise to bring back the creaminess.

    Tips and Tricks

    For the best texture, make sure to rinse the cooked macaroni under cold water to stop the cooking process and prevent it from becoming mushy. If you’re short on time, you can spread the macaroni on a baking sheet and place it in the freezer for about 15 minutes to cool it quickly. To add more protein, consider mixing in diced hard-boiled eggs or shredded chicken. For a spicy kick, add a dash of hot sauce or a pinch of cayenne pepper to the dressing. Always taste and adjust the seasoning before serving, as chilling can mute flavors.

    Recipe Variations

    • For a healthier twist, use whole wheat or gluten-free pasta and swap half the mayonnaise with Greek yogurt.
    • Add crunch with extras like diced cucumbers, shredded carrots, or even apple slices for a sweet contrast.
    • Make it a protein-packed meal by stirring in chunks of tuna, chicken, or hard-boiled eggs.
    • For a different flavor profile, try using dill pickle relish instead of sweet, or add fresh herbs like dill or parsley.
    • Spice it up with jalapeños, a dash of hot sauce, or a sprinkle of chili flakes for those who like it hot.

    Frequently Asked Questions

    Can I make this salad ahead of time?

    Absolutely! In fact, making it ahead allows the flavors to meld together beautifully. Just store it in an airtight container in the refrigerator for up to 3 days. Give it a good stir before serving to redistribute the dressing.

    Can I use a different type of pasta?

    Yes, you can use any small pasta shape you like, such as shells, rotini, or penne. Just keep in mind that cooking times may vary, so adjust accordingly to achieve that perfect al dente texture.

    How can I make this salad healthier?

    There are several ways to lighten up this dish. Use whole wheat or gluten-free pasta, swap half the mayonnaise with Greek yogurt, and load up on extra veggies. You can also reduce the amount of sugar or omit it altogether if you prefer a less sweet taste.

    Summary

    This creamy macaroni salad is a crowd-pleaser that’s perfect for any occasion. With its rich dressing, crisp vegetables, and customizable options, it’s sure to become a staple in your recipe collection. Easy to make and even easier to love, it’s the ultimate side dish for summer gatherings or a comforting meal any day of the week.