Blog

  • Tomato Salad Dressing: A Zesty Twist to Your Greens

    Tomato Salad Dressing: A Zesty Twist to Your Greens

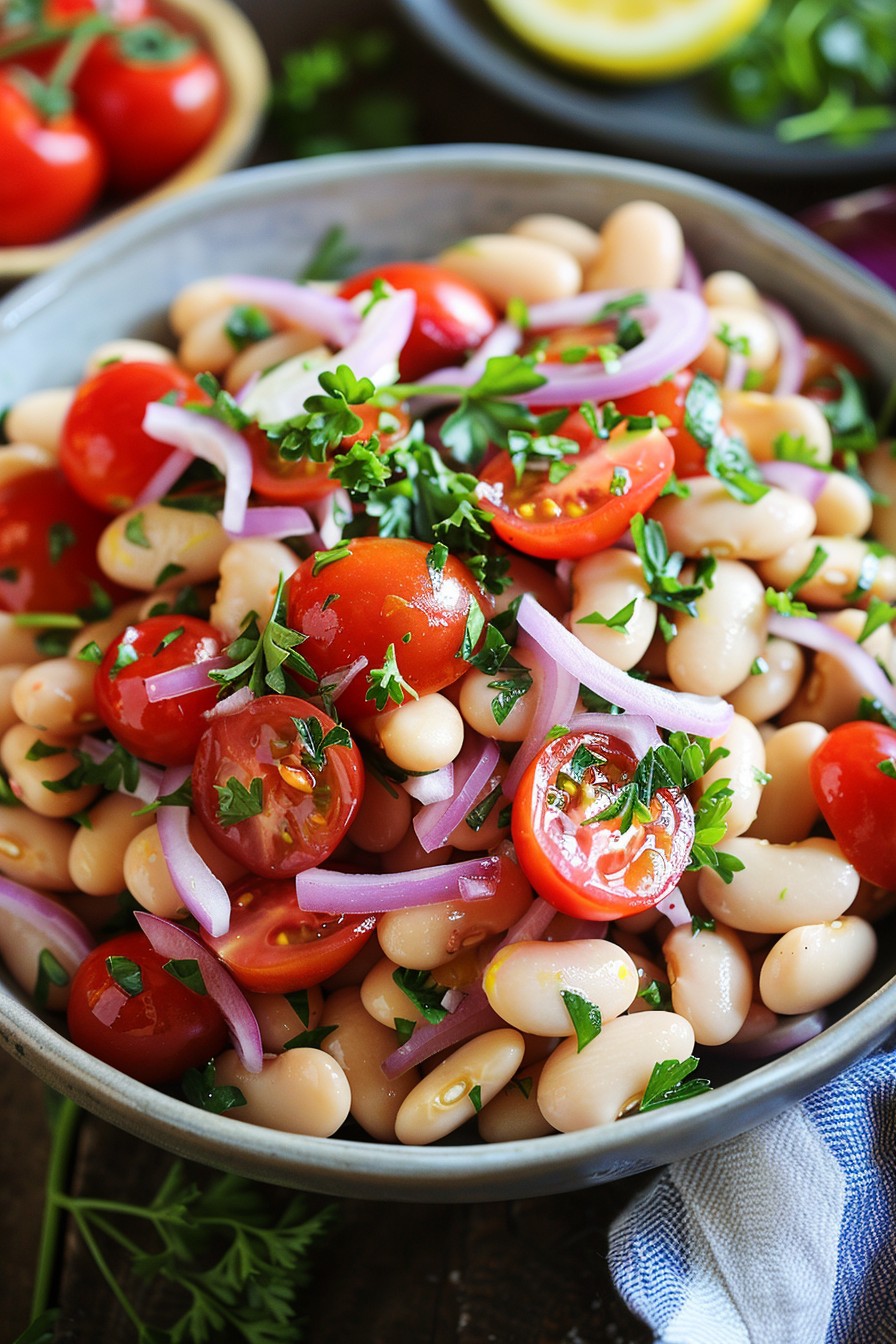
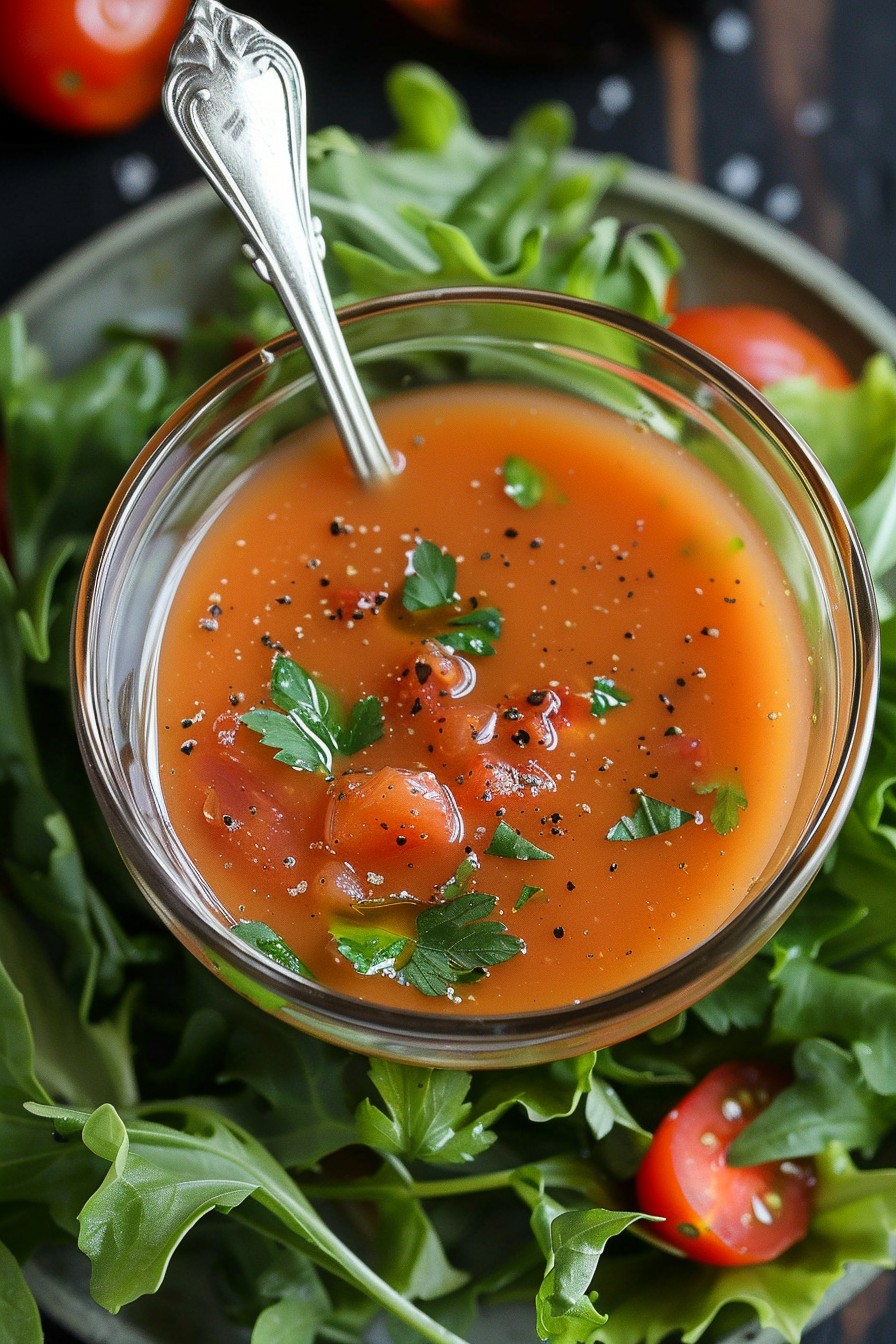
    Ready to elevate your salad game? This tomato salad dressing is a vibrant, flavorful concoction that will make your greens sing with joy. Perfect for those who love a little zest in their life.

    Why This Recipe Works

    • It’s a perfect balance of tangy and sweet, thanks to the fresh tomatoes and a hint of honey.
    • Easy to whip up with ingredients you likely already have in your pantry.
    • Versatile enough to dress up any salad, from a simple green salad to a more elaborate grain bowl.

    Ingredients

    • 1 cup ripe tomatoes, diced
    • 1/4 cup olive oil
    • 2 tbsp apple cider vinegar
    • 1 tbsp honey
    • 1 clove garlic, minced
    • Salt and pepper to taste

    Equipment Needed

    • Blender or food processor
    • Measuring cups and spoons
    • Knife and cutting board

    Instructions

    Recipe For Tomato Salad Dressing

    Step 1: Prep Your Tomatoes

    Start by washing and dicing your tomatoes into small pieces. The riper the tomatoes, the more flavorful your dressing will be. Tip: If you’re short on time, you can use canned diced tomatoes, but fresh is always best for that bright, summery flavor.

    Step 2: Blend the Base

    In your blender or food processor, combine the diced tomatoes, olive oil, apple cider vinegar, honey, and minced garlic. Blend until smooth. Tip: For a chunkier dressing, pulse the ingredients a few times instead of blending until smooth.

    Step 3: Season to Perfection

    Once blended, taste your dressing and season with salt and pepper as needed. Remember, you can always add more, but you can’t take it away, so start with a little and adjust to your liking.

    Step 4: Let It Marry

    Transfer your dressing to a jar or container and let it sit in the fridge for at least 30 minutes. This allows the flavors to meld together beautifully. Tip: The dressing will keep in the fridge for up to a week, so feel free to make a big batch!

    Step 5: Dress and Enjoy

    When you’re ready to serve, give your dressing a good shake or stir, then drizzle it over your favorite salad. The vibrant color and fresh taste will make any salad a showstopper.

    Tips and Tricks

    For an even smoother dressing, you can strain the blended mixture through a fine mesh sieve to remove any tomato skins or seeds. If you’re looking for a creamier texture, add a tablespoon of Greek yogurt or mayonnaise to the blender. And for those who like a bit of heat, a dash of cayenne pepper or a few drops of hot sauce can add a nice kick.

    Recipe Variations

    • For a Mediterranean twist, add a teaspoon of dried oregano and a handful of chopped Kalamata olives.
    • To make it more herbaceous, blend in fresh basil, parsley, or cilantro.
    • For a sweeter version, increase the honey to 2 tablespoons and add a pinch of cinnamon.
    • If you’re avoiding honey, maple syrup or agave nectar are great substitutes.

    Frequently Asked Questions

    Can I use cherry tomatoes instead of regular tomatoes?

    Absolutely! Cherry tomatoes are sweeter and can make your dressing even more flavorful. Just make sure to use about the same volume as the recipe calls for.

    How long can I store this dressing?

    Stored in an airtight container in the refrigerator, your tomato salad dressing should stay fresh for up to a week. Just give it a good shake or stir before using.

    Can I freeze this dressing?

    While you can freeze it, the texture may change slightly upon thawing. It’s best enjoyed fresh or stored in the fridge for short-term use.

    Summary

    This tomato salad dressing is a quick, easy, and delicious way to add some zest to your salads. With its perfect balance of flavors and versatility, it’s sure to become a staple in your kitchen.

  • Cannellini Bean Salad: A Refreshing Twist on a Classic

    Cannellini Bean Salad: A Refreshing Twist on a Classic

    Summer is here, and what better way to celebrate than with a light, refreshing cannellini bean salad that’s as nutritious as it is delicious. This recipe is a breeze to whip up, packed with flavors, and perfect for those hot days when you want something satisfying without the heaviness.

    Why This Recipe Works

    • It’s a protein-packed meal that keeps you full and energized.
    • The combination of fresh herbs and a zesty dressing brings out the best in the creamy cannellini beans.
    • It’s versatile enough to serve as a side dish or a main course, making it a great option for any meal.
    • Prep time is minimal, and no cooking is required, making it a perfect last-minute dish.
    • The salad gets better as it sits, allowing the flavors to meld together beautifully.

    Ingredients

    • 2 cups canned cannellini beans, drained and rinsed
    • 1/4 cup red onion, finely diced
    • 1/2 cup cherry tomatoes, halved
    • 1/4 cup fresh parsley, chopped
    • 2 tbsp fresh lemon juice
    • 1/4 cup olive oil
    • Salt and pepper to taste

    Equipment Needed

    • Mixing bowl
    • Whisk
    • Measuring cups and spoons
    • Knife and cutting board

    Instructions

    Recipe For Cannellini Bean Salad

    Step 1: Prep Your Ingredients

    Start by draining and rinsing your cannellini beans to remove any excess sodium. Finely dice the red onion and halve the cherry tomatoes. Chop the fresh parsley. Having all your ingredients prepped and ready to go makes the assembly process a breeze.

    Step 2: Make the Dressing

    In a small bowl, whisk together the fresh lemon juice and olive oil until well combined. Season with salt and pepper to taste. This simple dressing brings a bright and zesty flavor to the salad that complements the creamy beans perfectly.

    Step 3: Combine the Salad

    In a large mixing bowl, combine the cannellini beans, diced red onion, halved cherry tomatoes, and chopped parsley. Pour the dressing over the salad and toss gently to ensure everything is evenly coated. Be careful not to mash the beans as you mix.

    Step 4: Let It Marinate

    Allow the salad to sit for at least 30 minutes before serving. This resting period lets the flavors meld together and the beans to absorb the dressing, making every bite more flavorful.

    Step 5: Serve and Enjoy

    Give the salad a final toss before serving. It’s perfect on its own, as a side dish, or even atop a bed of greens for an extra nutrient boost. Enjoy the fresh, vibrant flavors of your cannellini bean salad!

    Tips and Tricks

    For an extra flavor boost, consider adding a pinch of red pepper flakes or a teaspoon of dried oregano to the dressing. If you’re planning ahead, this salad can be made a day in advance; just hold off on adding the fresh herbs until you’re ready to serve to keep them vibrant. For a creamier texture, mash a small portion of the beans before mixing them in with the rest of the salad. This adds a delightful texture contrast.

    Recipe Variations

    • Add diced cucumbers or bell peppers for extra crunch and color.
    • Swap out the cannellini beans for chickpeas or black beans for a different protein profile.
    • Incorporate feta cheese or olives for a Mediterranean twist.
    • Use lime juice instead of lemon for a slightly different citrus note.
    • Add avocado for creaminess and healthy fats.

    Frequently Asked Questions

    Can I use dried beans instead of canned?

    Absolutely! If you prefer using dried cannellini beans, you’ll need to soak them overnight and then cook them until tender before using them in the salad. This might add some prep time, but it’s a great way to control the sodium content and texture of your beans.

    How long does this salad keep?

    This salad can be stored in an airtight container in the refrigerator for up to 3 days. The flavors will continue to develop, making it even more delicious over time. Just give it a good stir before serving again.

    Can I make this salad vegan?

    This recipe is naturally vegan as written, making it a great option for those following a plant-based diet. Just be sure to check the labels on your canned beans to ensure there are no animal-derived additives.

    Summary

    This cannellini bean salad is a simple, flavorful, and versatile dish that’s perfect for any occasion. With minimal prep and maximum flavor, it’s sure to become a staple in your recipe rotation.

  • Little Gem Salad Recipe: A Crispy, Fresh Delight

    Little Gem Salad Recipe: A Crispy, Fresh Delight

    Perfect for those who crave something light yet satisfying, this Little Gem Salad is a game-changer. Packed with crisp greens, a tangy dressing, and a sprinkle of crunch, it’s the ultimate side or main for any meal.

    Why This Recipe Works

    • The combination of Little Gem lettuce’s crisp texture and buttery flavor makes it the star of the show.
    • A homemade dressing with just the right balance of acidity and sweetness elevates the simple ingredients.
    • Adding nuts or seeds introduces a delightful crunch that contrasts beautifully with the soft greens.
    • It’s incredibly versatile, allowing for endless variations to suit any taste or dietary preference.
    • Quick and easy to prepare, making it perfect for weeknight dinners or last-minute gatherings.

    Ingredients

    • 2 heads of Little Gem lettuce, washed and leaves separated
    • 1/4 cup extra virgin olive oil
    • 2 tbsp lemon juice, freshly squeezed
    • 1 tsp honey
    • 1/2 tsp Dijon mustard
    • Salt and pepper to taste
    • 1/4 cup toasted almonds, roughly chopped
    • 1/4 cup shaved Parmesan cheese

    Equipment Needed

    • Large salad bowl
    • Small whisk or fork
    • Measuring cups and spoons
    • Knife and cutting board

    Instructions

    Little Gem Salad Recipe

    Prepare the Dressing

    In a small bowl, whisk together the olive oil, lemon juice, honey, and Dijon mustard until well combined. Season with salt and pepper to taste. This dressing is the secret to the salad’s vibrant flavor, so don’t skip the whisking!

    Assemble the Salad

    Place the Little Gem lettuce leaves in a large salad bowl. Drizzle the dressing over the greens and toss gently to coat each leaf evenly. The key here is to be gentle to avoid bruising the delicate leaves.

    Add the Crunch

    Sprinkle the toasted almonds and shaved Parmesan cheese over the dressed greens. These additions not only add texture but also a nutty and savory depth to the salad.

    Serve Immediately

    This salad is best enjoyed right after assembling to maintain the crispness of the lettuce and the crunch of the almonds. Serve as a refreshing side or add some grilled chicken to make it a hearty main dish.

    Tips and Tricks

    For an extra flavor boost, toast the almonds in a dry skillet over medium heat until fragrant, about 3-5 minutes. Always let them cool before adding to the salad to prevent wilting the greens. If you’re not a fan of almonds, try substituting with walnuts or pecans for a different taste and texture. To make the salad ahead, keep the dressing and greens separate until ready to serve. This prevents the lettuce from becoming soggy. For a dairy-free version, omit the Parmesan or use a nutritional yeast substitute for a cheesy flavor without the dairy.

    Recipe Variations

    • Add sliced avocado for a creamy texture and healthy fats.
    • Include cherry tomatoes or cucumber for extra freshness and color.
    • Swap the almonds for sunflower seeds or pepitas for a nut-free option.
    • Use a balsamic vinaigrette instead of lemon dressing for a deeper flavor profile.
    • Add grilled shrimp or salmon to turn the salad into a protein-packed meal.

    Frequently Asked Questions

    Can I use a different type of lettuce? Absolutely! While Little Gem lettuce is ideal for its texture and flavor, romaine or butter lettuce can be great substitutes. Just keep in mind that the salad’s character will change slightly with different greens.

    How long does the dressing last? The dressing can be stored in an airtight container in the refrigerator for up to a week. Just give it a good shake or whisk before using again.

    Can I make this salad vegan? Yes! Simply omit the Parmesan cheese or use a vegan alternative. Ensure the honey is replaced with maple syrup or agave to keep it plant-based.

    Summary

    This Little Gem Salad is a testament to how simple ingredients can come together to create something truly special. With its crisp greens, tangy dressing, and satisfying crunch, it’s a versatile dish that’s as easy to make as it is delicious.

  • Asian Pasta Salad Recipe: A Flavor Fiesta in Every Bite

    Asian Pasta Salad Recipe: A Flavor Fiesta in Every Bite

    Unleash your taste buds with this vibrant Asian Pasta Salad that’s bursting with flavors and textures. Perfect for picnics, potlucks, or a refreshing weeknight dinner, this dish is a guaranteed crowd-pleaser.

    Why This Recipe Works

    • The combination of cold pasta with crisp vegetables and a tangy dressing creates a refreshing and satisfying meal.
    • It’s incredibly versatile, allowing you to swap ingredients based on what’s in your fridge.
    • The dressing, a mix of soy sauce, sesame oil, and a hint of sweetness, ties all the components together beautifully.
    • It’s a make-ahead dish, meaning the flavors meld and intensify over time.
    • This recipe is a great way to introduce Asian flavors to those who might be new to them.

    Ingredients

    • 8 oz pasta (like fusilli or penne), cooked and cooled
    • 1 cup shredded carrots
    • 1 cup sliced cucumbers
    • 1/2 cup chopped green onions
    • 1/4 cup chopped cilantro
    • 1/4 cup soy sauce
    • 2 tbsp sesame oil
    • 1 tbsp honey
    • 1 tbsp rice vinegar
    • 1 tsp grated ginger
    • 1 clove garlic, minced
    • 1/2 tsp red pepper flakes (optional)

    Equipment Needed

    • Large mixing bowl
    • Whisk
    • Measuring cups and spoons
    • Pot for boiling pasta
    • Colander

    Instructions

    Asian Pasta Salad Recipe

    Step 1: Cook the Pasta

    Bring a large pot of salted water to a boil. Add the pasta and cook according to package instructions until al dente, about 8-10 minutes. Drain and rinse under cold water to stop the cooking process. Tip: Adding a splash of oil to the boiling water can prevent the pasta from sticking together.

    Step 2: Prepare the Vegetables

    While the pasta cooks, shred the carrots, slice the cucumbers, and chop the green onions and cilantro. Having all your veggies prepped and ready to go makes assembling the salad a breeze.

    Step 3: Make the Dressing

    In a small bowl, whisk together the soy sauce, sesame oil, honey, rice vinegar, grated ginger, minced garlic, and red pepper flakes if using. Taste and adjust the seasoning as needed. Tip: For a smoother dressing, you can blend all the ingredients in a blender.

    Step 4: Combine Everything

    In a large mixing bowl, combine the cooled pasta, prepared vegetables, and dressing. Toss everything together until well coated. Tip: Letting the salad sit for at least 30 minutes before serving allows the flavors to meld together.

    Step 5: Serve and Enjoy

    Give the salad a final toss and serve chilled. This dish is perfect on its own or as a side to grilled meats or fish.

    Tips and Tricks

    For an extra crunch, add some toasted sesame seeds or chopped peanuts right before serving. If you’re not a fan of cilantro, parsley or basil makes a great substitute. To make this dish vegan, simply swap the honey for maple syrup or agave nectar. For a protein boost, toss in some cooked shrimp, chicken, or tofu. Always taste your dressing before adding it to the salad; you might want to adjust the sweetness or acidity to your liking.

    Recipe Variations

    • Swap the pasta for soba noodles for an authentic Asian twist.
    • Add some heat with a drizzle of sriracha or more red pepper flakes.
    • Include some avocado for creaminess and healthy fats.
    • Try adding some mango or pineapple for a sweet and tangy flavor.
    • Use different vegetables like bell peppers or snap peas for added crunch and color.

    Frequently Asked Questions

    Can I make this salad ahead of time? Absolutely! In fact, it tastes better the next day as the flavors have more time to meld. Just keep it refrigerated in an airtight container.

    How long does this salad last in the fridge? It will keep well for up to 3 days. Just give it a good stir before serving to redistribute the dressing.

    Can I use a different type of pasta? Yes, any short pasta will work, but I recommend something with nooks and crannies to hold the dressing, like rotini or farfalle.

    Summary

    This Asian Pasta Salad is a delightful mix of flavors and textures, perfect for any occasion. Easy to make and customizable, it’s sure to become a staple in your recipe collection.

  • Crunchy & Fresh Romaine Salad Recipe: A Summer Delight

    Crunchy & Fresh Romaine Salad Recipe: A Summer Delight

    Zesty, fresh, and utterly delicious, this romaine salad is your go-to for a quick, healthy meal. Perfect for those hot summer days when you crave something light yet satisfying.

    Why This Recipe Works

    • The crispness of romaine lettuce provides a perfect base for a variety of toppings.
    • A homemade dressing adds a personalized touch that store-bought versions can’t match.
    • Quick and easy to prepare, making it ideal for busy weeknights or last-minute gatherings.

    Ingredients

    • 1 large head of romaine lettuce, chopped
    • 1 cup cherry tomatoes, halved
    • 1/2 cucumber, sliced
    • 1/4 red onion, thinly sliced
    • 1/2 cup croutons
    • 1/4 cup grated Parmesan cheese
    • 1/4 cup olive oil
    • 2 tbsp lemon juice
    • 1 tsp Dijon mustard
    • 1 garlic clove, minced
    • Salt and pepper to taste

    Equipment Needed

    • Large salad bowl
    • Small mixing bowl
    • Whisk
    • Knife
    • Cutting board

    Instructions

    Romaine Salad Recipe

    Step 1: Prepare the Vegetables

    Start by washing the romaine lettuce under cold water. Shake off the excess water and chop it into bite-sized pieces. Halve the cherry tomatoes, slice the cucumber, and thinly slice the red onion. Place all the vegetables in a large salad bowl.

    Step 2: Make the Dressing

    In a small mixing bowl, whisk together the olive oil, lemon juice, Dijon mustard, minced garlic, salt, and pepper until well combined. Taste and adjust the seasoning as needed.

    Step 3: Combine and Toss

    Pour the dressing over the salad ingredients in the large bowl. Gently toss the salad to ensure all the ingredients are evenly coated with the dressing. Add the croutons and grated Parmesan cheese, then give it one final toss.

    Step 4: Serve Immediately

    For the best texture and flavor, serve the salad immediately after tossing. If you need to prepare it ahead of time, keep the dressing separate and add it just before serving.

    Tips and Tricks

    For an extra crunch, toast the croutons in a dry pan over medium heat for a few minutes before adding them to the salad. If you’re not a fan of raw onion, soak the sliced red onion in cold water for 10 minutes to mellow its flavor. To make this salad a complete meal, add grilled chicken or shrimp for some protein.

    Recipe Variations

    • Add avocado slices for a creamy texture and healthy fats.
    • Swap the Parmesan cheese for feta or goat cheese for a different flavor profile.
    • Include nuts like walnuts or almonds for added crunch and nutrition.
    • Use a balsamic vinaigrette instead of the lemon dressing for a sweeter taste.
    • Incorporate fruits like strawberries or apples for a sweet and savory combination.

    Frequently Asked Questions

    Can I make this salad ahead of time?

    Yes, you can prepare the ingredients ahead of time, but it’s best to add the dressing and croutons just before serving to maintain the salad’s crispness.

    How long does the dressing last in the fridge?

    The homemade dressing can be stored in an airtight container in the refrigerator for up to a week. Just give it a good shake before using.

    Can I use a different type of lettuce?

    Absolutely! While romaine is great for its crunch, feel free to use spinach, arugula, or mixed greens based on your preference.

    Summary

    This romaine salad is a versatile, refreshing dish that’s perfect for any occasion. With its crisp vegetables, homemade dressing, and endless customization options, it’s sure to become a staple in your recipe collection.

  • Crunchy Cabbage Salad with Ramen Noodles: A Quick & Tasty Delight

    Crunchy Cabbage Salad with Ramen Noodles: A Quick & Tasty Delight

    Kickstart your meal prep with this crunchy cabbage salad that’s not only a breeze to make but also packs a punch of flavors. Perfect for those who love a quick, nutritious, and delicious meal that doesn’t compromise on taste or texture.

    Why This Recipe Works

    • The combination of crunchy cabbage and crispy ramen noodles offers a delightful texture contrast.
    • It’s a versatile recipe that allows for endless variations to suit your taste buds.
    • Quick to prepare, making it perfect for busy weeknights or last-minute gatherings.
    • The dressing is a simple yet flavorful mix that ties all the ingredients together beautifully.
    • It’s a great way to sneak in some veggies without feeling like you’re eating a salad.

    Ingredients

    • 1 small head of cabbage, thinly sliced (about 4 cups)
    • 2 packages of ramen noodles, crushed (discard the seasoning packets)
    • 1/2 cup sliced almonds
    • 1/4 cup sunflower seeds
    • 1/4 cup olive oil
    • 2 tbsp apple cider vinegar
    • 1 tbsp honey
    • 1 tsp salt
    • 1/2 tsp black pepper

    Equipment Needed

    • Large mixing bowl
    • Small mixing bowl
    • Whisk
    • Measuring cups and spoons
    • Knife and cutting board

    Instructions

    Cabbage Salad With Ramen Noodles Recipe

    Step 1: Prepare the Cabbage

    Start by thinly slicing the cabbage into shreds. The thinner the shreds, the better they’ll absorb the dressing and the more enjoyable the texture will be. Place the shredded cabbage in a large mixing bowl. Tip: For an extra crunch, you can chill the cabbage in the fridge for about 30 minutes before assembling the salad.

    Step 2: Toast the Almonds and Sunflower Seeds

    In a dry skillet over medium heat, toast the sliced almonds and sunflower seeds until they’re golden brown and fragrant, about 3-5 minutes. Keep an eye on them to prevent burning. Once toasted, let them cool slightly before adding to the cabbage. Tip: Toasting nuts and seeds enhances their flavor and adds an extra layer of crunch to your salad.

    Step 3: Make the Dressing

    In a small bowl, whisk together the olive oil, apple cider vinegar, honey, salt, and black pepper until well combined. The honey helps to balance the acidity of the vinegar, creating a perfectly balanced dressing. Tip: If you prefer a sweeter dressing, you can adjust the amount of honey to your liking.

    Step 4: Combine All Ingredients

    Add the crushed ramen noodles and the toasted almonds and sunflower seeds to the bowl with the cabbage. Pour the dressing over the top and toss everything together until well coated. The salad is best served immediately, but you can also let it sit for a few minutes to allow the flavors to meld.

    Step 5: Serve and Enjoy

    Divide the salad among serving plates and enjoy the crunchy, flavorful goodness. This salad pairs wonderfully with grilled chicken or fish for a more substantial meal.

    Tips and Tricks

    For those looking to elevate their cabbage salad game, consider these advanced tips. First, try adding a sprinkle of sesame seeds or a dash of sesame oil for an Asian-inspired twist. Second, if you’re not a fan of almonds, pecans or walnuts make great substitutes. Third, for a creamier dressing, mix in a tablespoon of mayonnaise or Greek yogurt. Lastly, if you’re preparing this salad ahead of time, keep the dressing separate until just before serving to maintain the crunchiness of the noodles and cabbage.

    Recipe Variations

    • Add diced chicken or shrimp for a protein-packed meal.
    • Incorporate other veggies like shredded carrots or bell peppers for added color and nutrition.
    • Swap the apple cider vinegar for rice vinegar and add a teaspoon of soy sauce for an Asian flair.
    • Use different nuts like cashews or peanuts for a change in texture and flavor.
    • For a sweeter version, add dried cranberries or raisins.

    Frequently Asked Questions

    Can I make this salad ahead of time?

    Yes, you can prepare the components ahead of time, but for the best texture, combine the dressing with the salad just before serving. The cabbage and noodles can become soggy if left to sit in the dressing for too long.

    Can I use a different type of vinegar?

    Absolutely! While apple cider vinegar adds a nice tanginess, feel free to experiment with balsamic, red wine, or even lemon juice for a different flavor profile.

    Is there a way to make this recipe gluten-free?

    Yes, simply use gluten-free ramen noodles and ensure all other ingredients, like the soy sauce in variations, are gluten-free. There are many gluten-free ramen options available in stores today.

    Summary

    This crunchy cabbage salad with ramen noodles is a quick, versatile, and delicious dish that’s perfect for any occasion. With its simple ingredients and easy preparation, it’s sure to become a favorite in your recipe collection.

  • Creamy Classic Potato Salad Recipe: A Picnic Must-Have

    Creamy Classic Potato Salad Recipe: A Picnic Must-Have

    Very few dishes scream summer quite like a creamy, tangy potato salad. Whether you’re hosting a backyard BBQ or packing for a picnic, this potato salad recipe is your ticket to compliments. It’s the perfect blend of creamy, crunchy, and tangy, with a hint of sweetness that’ll have everyone asking for seconds.

    Why This Recipe Works

    • The combination of mayo and mustard creates a creamy yet tangy dressing that coats every potato piece perfectly.
    • Using Yukon Gold potatoes ensures a buttery texture that holds up well in the salad.
    • Adding celery and onions introduces a delightful crunch and freshness to each bite.
    • The inclusion of sweet pickle relish adds a subtle sweetness that balances the tanginess of the dressing.
    • Chilling the salad before serving allows the flavors to meld together beautifully.

    Ingredients

    • 2 pounds Yukon Gold potatoes, peeled and cut into 1-inch cubes
    • 1 cup mayonnaise
    • 2 tablespoons yellow mustard
    • 1/4 cup sweet pickle relish
    • 1/2 cup finely chopped celery
    • 1/4 cup finely chopped red onion
    • 2 hard-boiled eggs, chopped
    • 1 teaspoon salt
    • 1/2 teaspoon black pepper
    • 1/4 teaspoon paprika

    Equipment Needed

    • Large pot
    • Mixing bowl
    • Knife and cutting board
    • Measuring cups and spoons
    • Colander

    Instructions

    Potato Salad Recipe

    Step 1: Cook the Potatoes

    Fill a large pot with water and bring it to a boil over high heat. Add the cubed potatoes and cook for 10-12 minutes, or until they are fork-tender but not mushy. Drain the potatoes in a colander and let them cool slightly.

    Step 2: Prepare the Dressing

    In a large mixing bowl, whisk together the mayonnaise, mustard, sweet pickle relish, salt, and black pepper until well combined. This creamy dressing is the heart of the salad, so make sure it’s mixed thoroughly.

    Step 3: Combine the Ingredients

    Add the slightly cooled potatoes, chopped celery, red onion, and hard-boiled eggs to the bowl with the dressing. Gently fold everything together until the potatoes are evenly coated with the dressing. Be careful not to overmix to keep the potatoes from breaking apart.

    Step 4: Chill the Salad

    Cover the bowl with plastic wrap and refrigerate the potato salad for at least 2 hours before serving. This chilling time allows the flavors to meld together and the salad to reach the perfect temperature.

    Step 5: Serve and Enjoy

    Before serving, give the salad a gentle stir and sprinkle the top with paprika for a pop of color. Serve chilled and enjoy the creamy, tangy, and crunchy delight that is this classic potato salad.

    Tips and Tricks

    For an extra flavor boost, consider adding a tablespoon of apple cider vinegar to the dressing. If you’re short on time, you can serve the salad immediately, but it’s best when chilled. For a healthier version, substitute half of the mayonnaise with Greek yogurt. Always taste and adjust the seasoning before serving, as potatoes can absorb a lot of salt. Lastly, for a smoother texture, you can mash some of the potatoes before adding them to the salad.

    Recipe Variations

    • Bacon Lover’s Delight: Add crispy bacon bits for a smoky flavor.
    • Herb Garden: Mix in fresh dill, parsley, or chives for a herby twist.
    • Spicy Kick: Include a dash of hot sauce or chopped jalapeños for some heat.
    • Vegan Version: Use vegan mayonnaise and omit the eggs.
    • Extra Crunch: Add diced pickles or bell peppers for additional texture.

    Frequently Asked Questions

    Can I use a different type of potato?

    Yes, you can use russet or red potatoes, but Yukon Golds are recommended for their buttery texture and ability to hold shape. Russets may become too soft, and red potatoes have a firmer texture.

    How long can I store the potato salad?

    The potato salad can be stored in an airtight container in the refrigerator for up to 3 days. Make sure to give it a good stir before serving again.

    Can I make this recipe ahead of time?

    Absolutely! In fact, making it a day ahead allows the flavors to meld together even more. Just keep it refrigerated until you’re ready to serve.

    Summary

    This creamy classic potato salad is a must-have for any summer gathering. With its perfect balance of flavors and textures, it’s sure to be a hit. Follow the simple steps, don’t skip the chilling time, and feel free to customize it to your liking. Enjoy!

  • Zesty Bean Salad Dressing: A Flavor Fiesta in Every Drop

    Zesty Bean Salad Dressing: A Flavor Fiesta in Every Drop

    Very few dressings can claim to be as versatile and vibrant as this bean salad dressing. Whether you’re drizzling it over a crisp green salad or using it as a marinade, its zesty flavors will elevate any dish. Let’s dive into making this culinary masterpiece that’s as easy to whip up as it is delicious.

    Why This Recipe Works

    • The combination of tangy lime juice and smooth olive oil creates a perfect balance of flavors.
    • Fresh cilantro and garlic add a punch of freshness and depth that pre-made dressings can’t match.
    • It’s incredibly versatile, working well with any type of bean or salad mix.
    • This dressing is quick to make, requiring just a few minutes and simple ingredients.
    • It’s a healthier alternative to store-bought dressings, free from preservatives and unnecessary additives.

    Ingredients

    • 1/2 cup olive oil
    • 1/4 cup fresh lime juice
    • 2 cloves garlic, minced
    • 1/4 cup chopped fresh cilantro
    • 1 teaspoon ground cumin
    • 1/2 teaspoon salt
    • 1/4 teaspoon black pepper

    Equipment Needed

    • Mixing bowl
    • Whisk
    • Measuring cups and spoons
    • Knife and cutting board

    Instructions

    Recipe For Bean Salad Dressing

    Step 1: Combine the Wet Ingredients

    In a medium mixing bowl, whisk together the olive oil and lime juice until well combined. This forms the base of your dressing, so make sure it’s thoroughly mixed to ensure a smooth consistency. Tip: For an extra zesty kick, you can add a teaspoon of lime zest to the mix.

    Step 2: Add the Aromatics

    Stir in the minced garlic and chopped cilantro. These ingredients are key to adding depth and freshness to the dressing. Make sure the garlic is finely minced to distribute its flavor evenly throughout the dressing.

    Step 3: Season to Perfection

    Add the ground cumin, salt, and black pepper to the bowl. Whisk everything together until all the ingredients are well incorporated. Taste and adjust the seasoning if necessary. Tip: If you prefer a spicier dressing, a pinch of cayenne pepper can add a nice heat.

    Step 4: Let It Marinate

    Allow the dressing to sit for at least 10 minutes before using. This resting period lets the flavors meld together beautifully. For the best results, you can even refrigerate it for an hour.

    Step 5: Serve and Enjoy

    Drizzle your freshly made bean salad dressing over your favorite salad or use it as a marinade. Its vibrant flavors will surely impress. Tip: Store any leftover dressing in an airtight container in the fridge for up to a week.

    Tips and Tricks

    For those looking to take their bean salad dressing to the next level, consider these advanced tips. First, using a high-quality extra virgin olive oil can significantly enhance the flavor profile of your dressing. Second, if you’re not a fan of cilantro, parsley makes a great substitute without compromising the freshness. Lastly, for a creamier texture, blending the dressing with a tablespoon of Greek yogurt or avocado can add a delightful richness.

    Recipe Variations

    • For a sweeter version, add a tablespoon of honey or maple syrup to balance the acidity.
    • Swap lime juice for lemon juice or apple cider vinegar for a different tangy flavor.
    • Incorporate a teaspoon of Dijon mustard for an extra layer of complexity.
    • Add diced jalapeños or a dash of hot sauce for a spicy twist.
    • For a nuttier flavor, toast the cumin before adding it to the dressing.

    Frequently Asked Questions

    Can I make this dressing ahead of time?

    Absolutely! This dressing can be made up to a week in advance and stored in the refrigerator. Just give it a good shake or stir before using to recombine the ingredients.

    Is there a substitute for olive oil?

    Yes, avocado oil or grapeseed oil are great alternatives if you’re looking for a different flavor profile or a higher smoke point option.

    How can I make this dressing creamier?

    Blending in a tablespoon of Greek yogurt, sour cream, or even avocado can give your dressing a creamy texture while adding a rich flavor.

    Summary

    This zesty bean salad dressing is a quick, flavorful, and versatile addition to any meal. With simple ingredients and easy steps, it’s a must-try for anyone looking to spice up their salads or marinades.

  • Ina Garten’s Chicken Salad Recipe: A Delightful Twist on a Classic

    Ina Garten’s Chicken Salad Recipe: A Delightful Twist on a Classic

    Make your next meal unforgettable with this Ina Garten-inspired chicken salad recipe. Perfect for picnics, lunches, or a light dinner, this dish combines simplicity with elegance.

    Why This Recipe Works

    • The combination of tender chicken and crisp vegetables offers a perfect texture contrast.
    • A creamy, yet light dressing enhances the flavors without overpowering them.
    • It’s versatile enough to serve on a bed of greens, in a sandwich, or as is.
    • Prep ahead friendly, making it ideal for busy schedules.
    • Uses simple, wholesome ingredients for a healthy meal option.

    Ingredients

    • 2 cups cooked chicken, shredded
    • 1/2 cup mayonnaise
    • 1/4 cup sour cream
    • 1 tbsp Dijon mustard
    • 1 celery stalk, finely chopped
    • 1/4 cup red onion, finely diced
    • 1/2 cup grapes, halved
    • Salt and pepper to taste

    Equipment Needed

    • Mixing bowl
    • Whisk
    • Chef’s knife
    • Cutting board
    • Measuring cups and spoons

    Instructions

    Chicken Salad Ina Garten Recipe

    Step 1: Prepare the Dressing

    In a large mixing bowl, whisk together the mayonnaise, sour cream, and Dijon mustard until smooth. This creamy base will coat every ingredient evenly, ensuring each bite is flavorful. Tip: For a lighter version, you can substitute Greek yogurt for the sour cream.

    Step 2: Combine the Ingredients

    Add the shredded chicken, chopped celery, diced red onion, and halved grapes to the bowl with the dressing. Gently fold everything together until well combined. The grapes add a sweet burst that contrasts beautifully with the savory elements.

    Step 3: Season to Perfection

    Season the salad with salt and pepper to taste. Remember, it’s easier to add more seasoning later than to fix an over-seasoned dish, so start with a little and adjust as needed.

    Step 4: Chill Before Serving

    Cover the bowl with plastic wrap and refrigerate for at least 30 minutes. This resting time allows the flavors to meld together beautifully. Tip: For the best flavor, let it chill for up to 2 hours.

    Step 5: Serve and Enjoy

    Once chilled, give the salad a quick stir and serve on a bed of greens, between slices of your favorite bread, or as is. It’s a versatile dish that’s sure to please any crowd.

    Tips and Tricks

    For an extra crunch, consider adding a handful of toasted almonds or walnuts. If you’re preparing this salad ahead of time, wait to add the grapes until just before serving to maintain their texture. For a more vibrant color and added nutrition, toss in some chopped parsley or dill. Experiment with the dressing ingredients to find your perfect balance of creaminess and tanginess.

    Recipe Variations

    • Swap the grapes for diced apples or pears for a different kind of sweetness.
    • Add curry powder to the dressing for a warm, spicy twist.
    • Include avocado chunks for creaminess and healthy fats.
    • Use Greek yogurt instead of sour cream for a tangier, lighter version.
    • Mix in some cooked pasta or quinoa to turn it into a more substantial meal.

    Frequently Asked Questions

    Can I use canned chicken for this recipe? While you can use canned chicken in a pinch, for the best texture and flavor, we recommend using freshly cooked and shredded chicken breast or thigh meat.

    How long can I store this chicken salad? Properly stored in an airtight container, this chicken salad will last in the refrigerator for up to 3 days. Just give it a good stir before serving again.

    Can I make this recipe dairy-free? Absolutely! Substitute the mayonnaise and sour cream with dairy-free alternatives. There are many options available that work well in this recipe.

    Summary

    This Ina Garten-inspired chicken salad is a perfect blend of flavors and textures, ideal for any occasion. Easy to make and versatile, it’s sure to become a staple in your recipe collection.

  • Outback Caesar Salad Recipe – A Crispy, Creamy Delight

    Outback Caesar Salad Recipe – A Crispy, Creamy Delight

    Bold flavors and crunchy textures make this Outback Caesar Salad a must-try for any salad lover. Perfect for a quick lunch or a side dish at dinner, this recipe brings the restaurant experience right to your kitchen.

    Why This Recipe Works

    • The homemade Caesar dressing is rich and creamy, with just the right amount of tanginess.
    • Fresh romaine lettuce provides the perfect crisp base for the salad.
    • Croutons add a delightful crunch, making every bite interesting.
    • Parmesan cheese offers a salty, umami flavor that complements the dressing beautifully.
    • It’s quick and easy to prepare, making it perfect for busy weeknights.

    Ingredients

    • 1 large head of romaine lettuce, chopped
    • 1/2 cup grated Parmesan cheese
    • 1 cup croutons
    • 1/2 cup mayonnaise
    • 2 tbsp lemon juice
    • 1 tsp Worcestershire sauce
    • 1 clove garlic, minced
    • 1/2 tsp salt
    • 1/4 tsp black pepper
    • 2 tbsp olive oil

    Equipment Needed

    • Large salad bowl
    • Small mixing bowl
    • Whisk
    • Measuring cups and spoons
    • Knife and cutting board

    Instructions

    Outback Caesar Salad Recipe

    Step 1: Prepare the Dressing

    In a small mixing bowl, whisk together the mayonnaise, lemon juice, Worcestershire sauce, minced garlic, salt, and pepper until smooth. Slowly drizzle in the olive oil while continuing to whisk, creating an emulsion. This will ensure your dressing is creamy and well combined. Tip: For an extra tangy kick, add a little more lemon juice to taste.

    Step 2: Chop the Lettuce

    Wash the romaine lettuce thoroughly under cold water and pat dry with a clean towel or use a salad spinner. Chop the lettuce into bite-sized pieces and place them in a large salad bowl. Ensuring your lettuce is dry will prevent the dressing from becoming watery.

    Step 3: Add the Croutons and Cheese

    Sprinkle the croutons and grated Parmesan cheese over the chopped lettuce. The croutons add a necessary crunch, while the Parmesan brings a depth of flavor that’s essential for a classic Caesar salad.

    Step 4: Dress the Salad

    Pour the prepared dressing over the salad ingredients. Using salad tongs or two large spoons, gently toss the salad until all the leaves are evenly coated with the dressing. Be careful not to overmix, as this can bruise the lettuce and make the salad soggy.

    Step 5: Serve Immediately

    For the best texture and flavor, serve the salad right after dressing it. This prevents the croutons from becoming soggy and keeps the lettuce crisp. Tip: For an extra touch of elegance, shave some additional Parmesan cheese on top before serving.

    Tips and Tricks

    To elevate your Outback Caesar Salad, consider these advanced tips. First, make your own croutons by cubing day-old bread, tossing it with olive oil, salt, and garlic powder, then baking at 375°F until golden. Second, anchovy paste can be added to the dressing for an authentic Caesar flavor. Third, for a lighter version, substitute Greek yogurt for half of the mayonnaise. Always taste your dressing before adding it to the salad, adjusting seasonings as needed. Remember, the key to a great salad is balance—between creamy, crunchy, salty, and tangy elements.

    Recipe Variations

    • Add grilled chicken or shrimp for a protein-packed meal.
    • Incorporate avocado slices for a creamy texture and healthy fats.
    • Swap romaine for kale or spinach for a different green base.
    • Use gluten-free croutons to make this recipe gluten-free.
    • Add sun-dried tomatoes or roasted red peppers for a sweet and tangy twist.

    Frequently Asked Questions

    Can I make the dressing ahead of time?

    Absolutely! The dressing can be prepared up to 3 days in advance and stored in an airtight container in the refrigerator. Just give it a good stir or shake before using to recombine any separated ingredients.

    How can I prevent my salad from getting soggy?

    The key is to dress the salad right before serving. Also, ensure your lettuce is thoroughly dried after washing, as excess water can dilute the dressing and make the salad soggy.

    Can I use bottled Caesar dressing instead?

    While homemade dressing is recommended for the best flavor, a high-quality bottled Caesar dressing can be used in a pinch. Look for one with simple, natural ingredients for the closest match to homemade.

    Summary

    This Outback Caesar Salad recipe is a delightful mix of crisp romaine, creamy dressing, crunchy croutons, and salty Parmesan. Easy to make and customizable, it’s perfect for any occasion. Follow our tips for the best results, and don’t be afraid to experiment with variations to make it your own.